

DIY Cotton Cord Mug Rug & Bowl
28th May 2020
Hello! It’s Joanne again. Today I’m sharing how to make cord mug rugs and bowls.
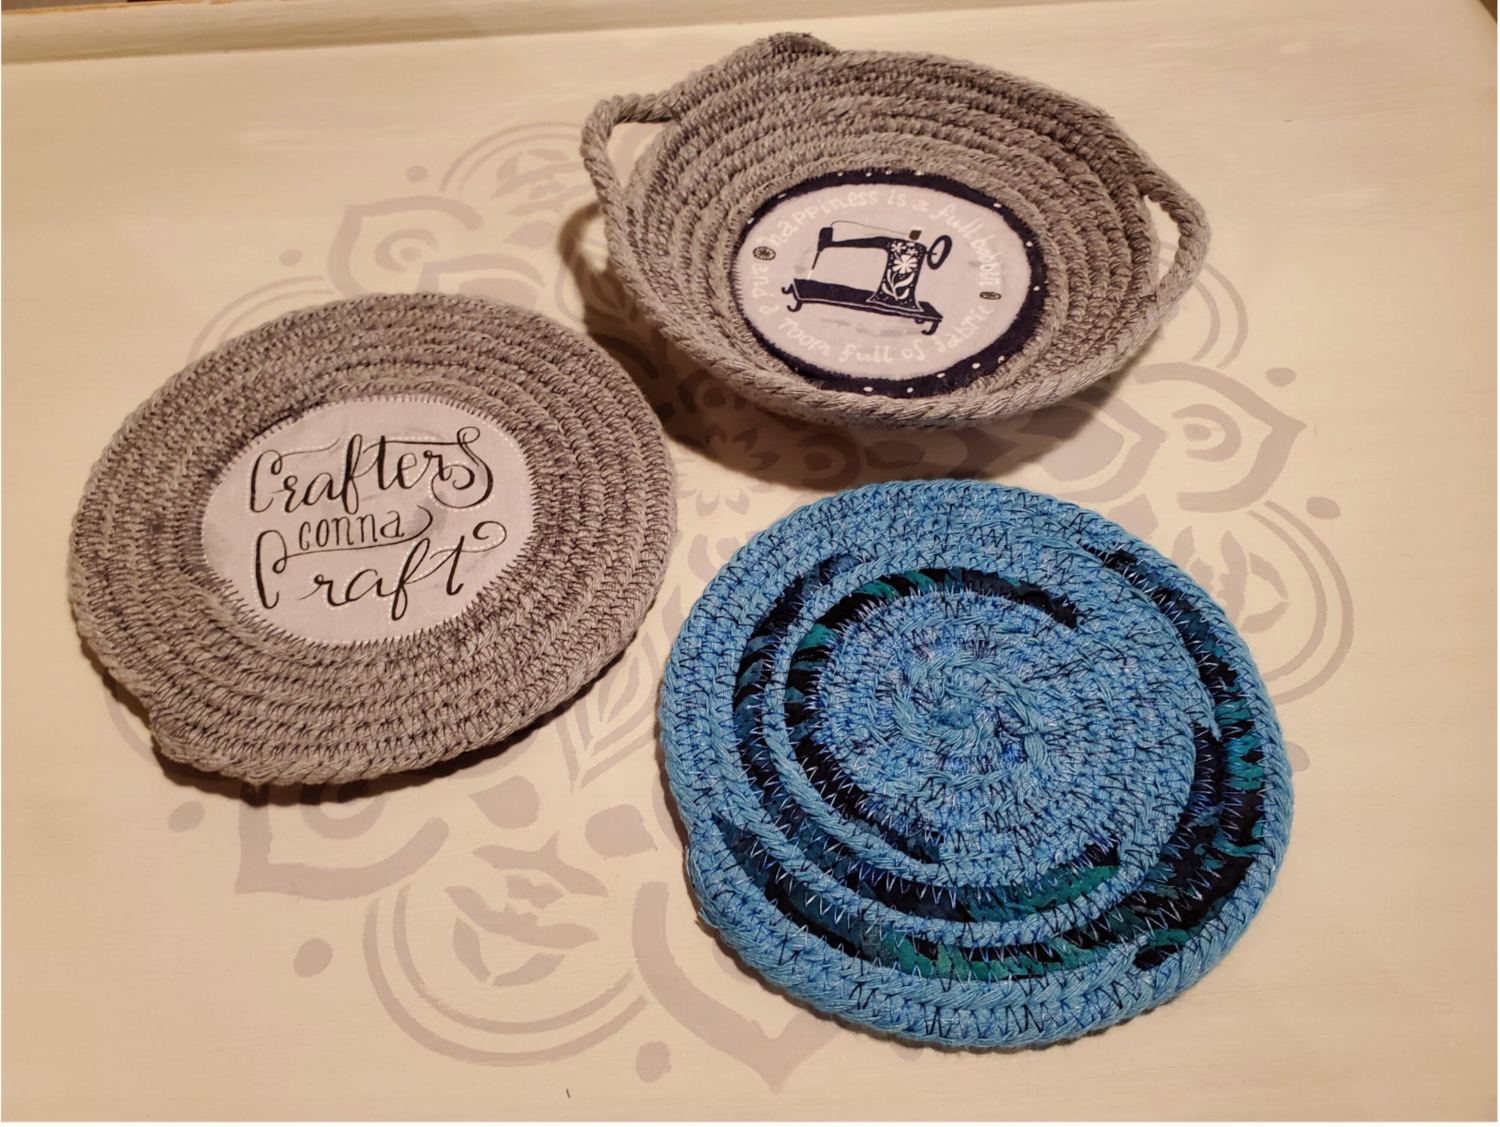
I started making these about 8 years ago after I saw a demo at the quilt show in Paducah. I was drawn to the idea of using scraps of fabric to create colorful bowls. I have made quite a few as gifts and pleased to see that they are still being used due to the fact they are 100% cotton and machine washable on delicate cycle. Once you get the hang of it the possibilities are endless for creating truly unique bowls, coasters and hot pads.
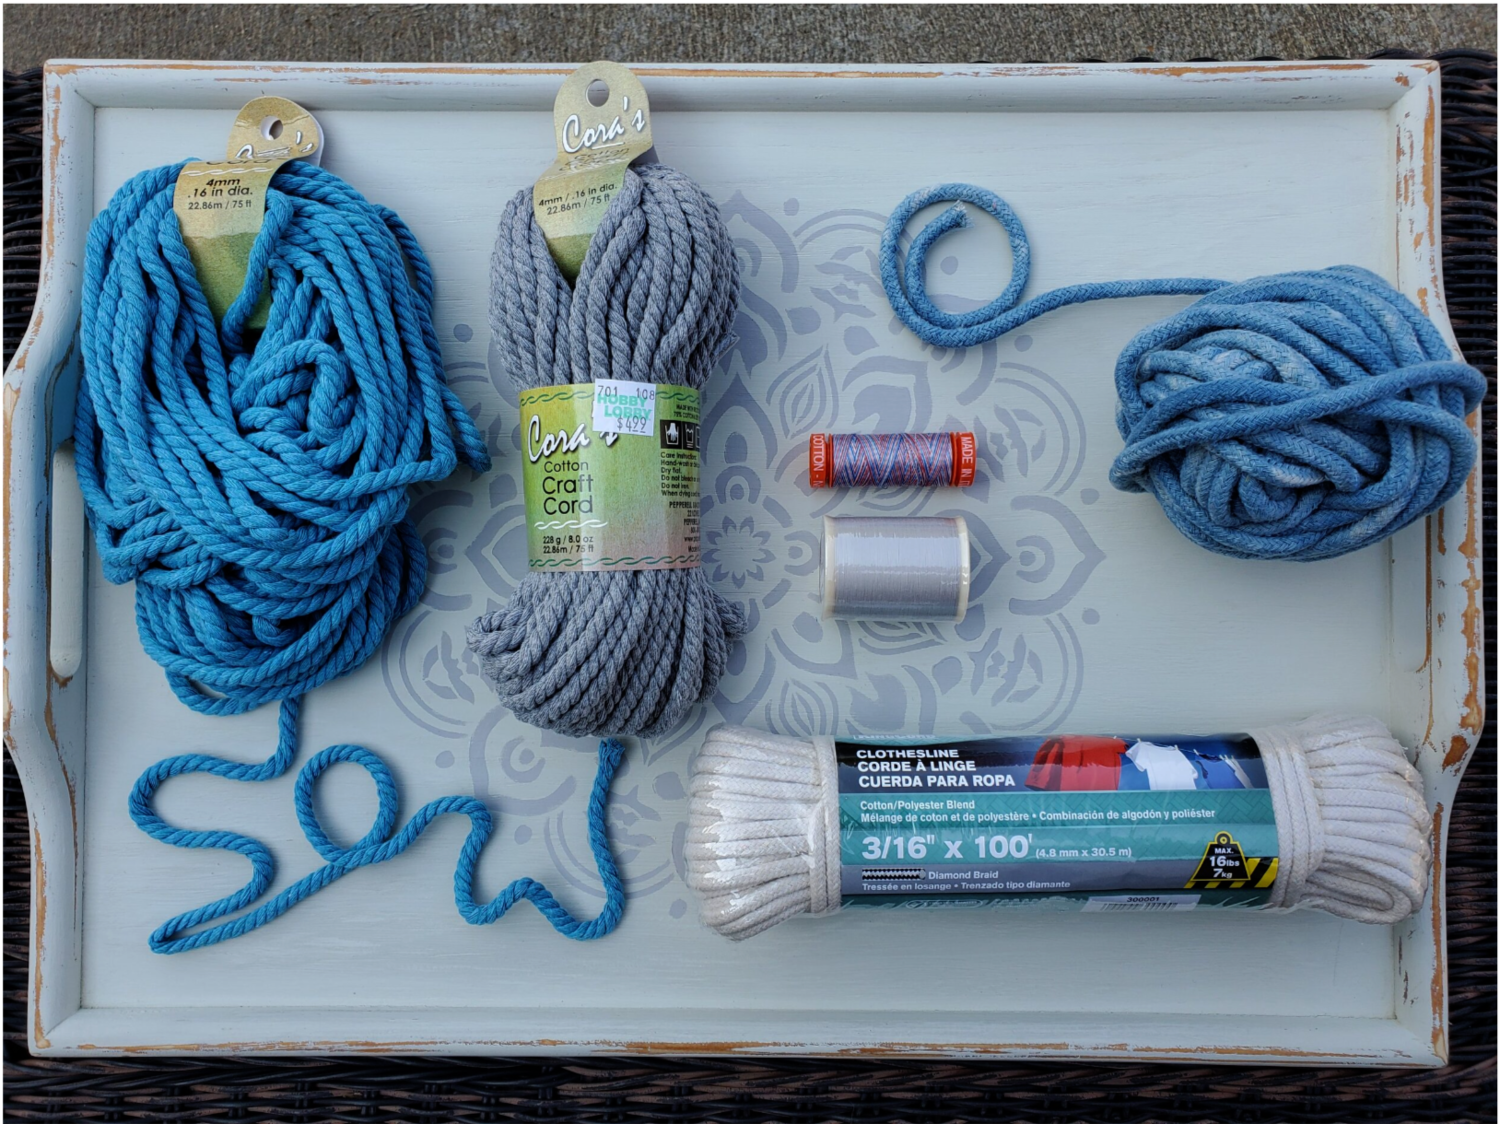
What you will need:
Cora’s Cotton cord in your color choice or 3/16th inch clothesline in natural color
All purpose thread in a coordinating color
Scissors
Washable glue
Scraps of Batik fabric or decorative motif cut from fabric
Fabric clips or straight pins
Fray check
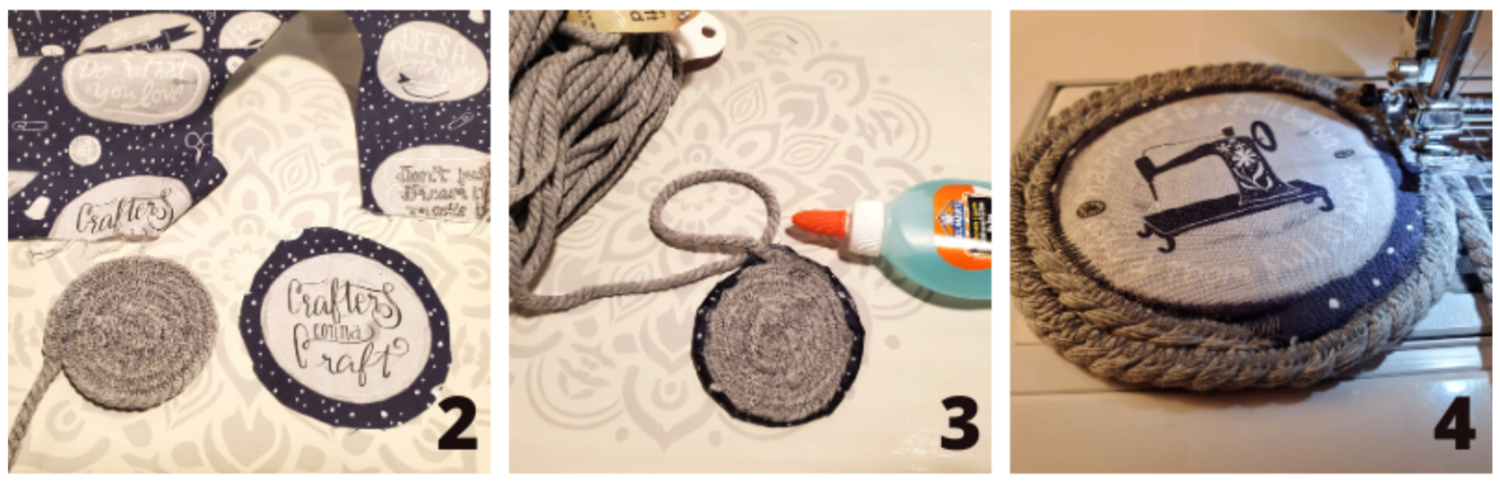
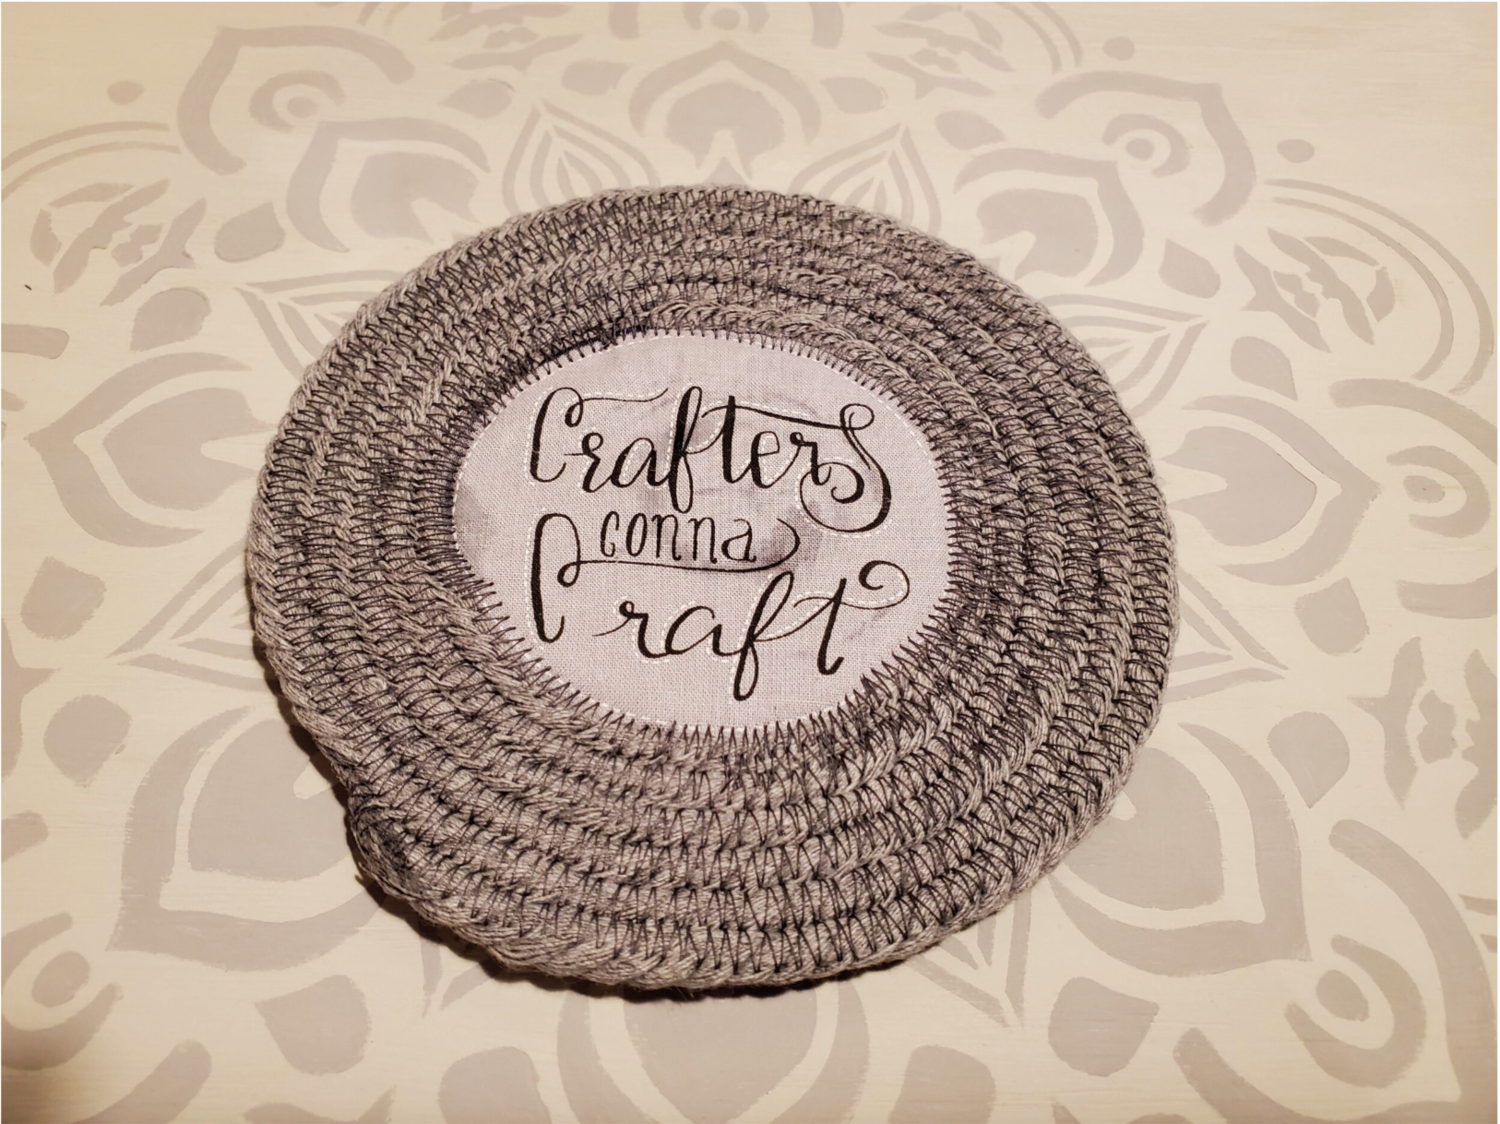
Step 1: Start by creating a circle of cotton cord about the size of quarter. Holding the shape place it under your presser foot set on a wide zig zag stitch. Stitch an “X” shape in the middle to hold the center. Once the center is set slowly turn and continue to sew. Be sure to keep the cording close to the previous row so that the zig zag stitching is catching a little of each piece securing it together.
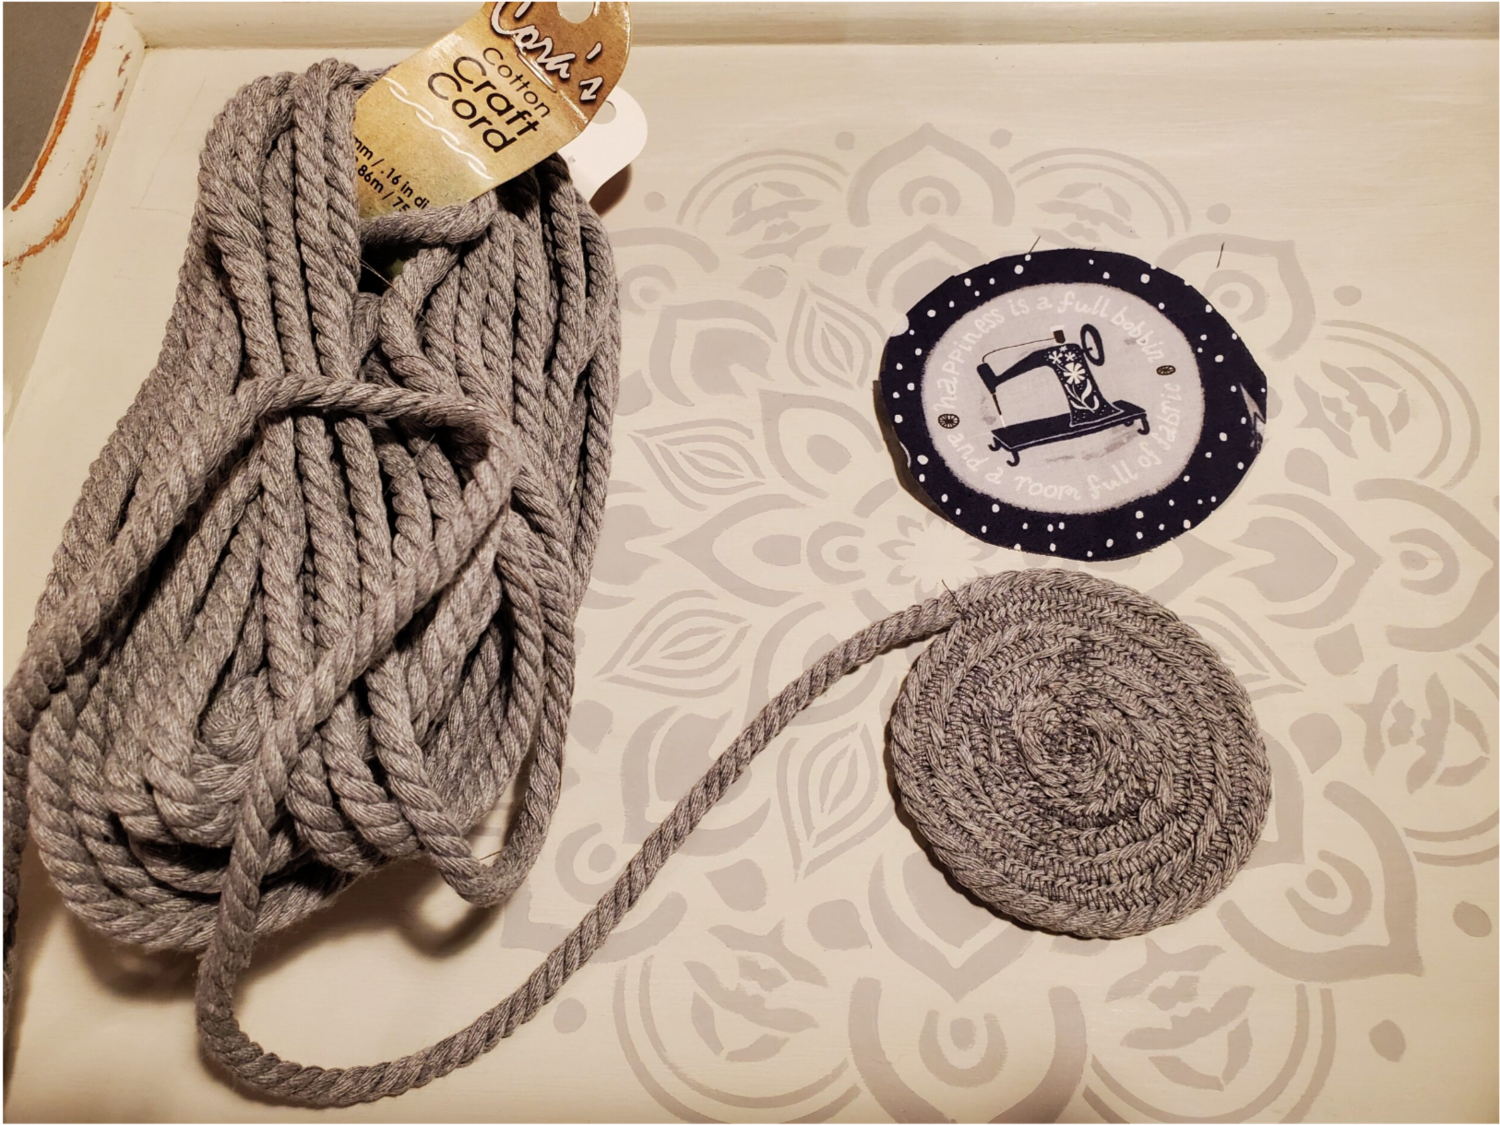
Step 2: Next prepare the decorative motif cut from the fabric allowing about 1/4th of an inch extra all around to tuck between the cotton cord so the edges of the fabric are covered and secured in the stitching.
Step 3: I then put a bead of washable glue on the outer edge of the cotton cord and placed the circle of fabric centered in place.
Step 4: Take this back to the machine and continue to zig zag stitch around the circle to be careful to catch the raw edges of the fabric between the rows of cotton cord as you sew.
For a different look you can take scraps of batik fabric about 6 inches long wrapping the cording and using a fabric clip to hold in place as you sew the rows of cord together. You can use different colors and spacing to create a unique look to your piece.
Step 5: Keep wrapping and sewing till you are happy with the size of the mug rug.
If you want to create a bowl at this point start to tip the bottom to start the curve for the sides of the bowl. On my small sewing machine bowl, I did five additional rows before adding the small handles. To make the handles use two straight pins to hold some of the cording loose stopping the sewing at that point and leave a space before starting to sew at the second pin. I planned out the two handles so that it was somewhat symmetrical.
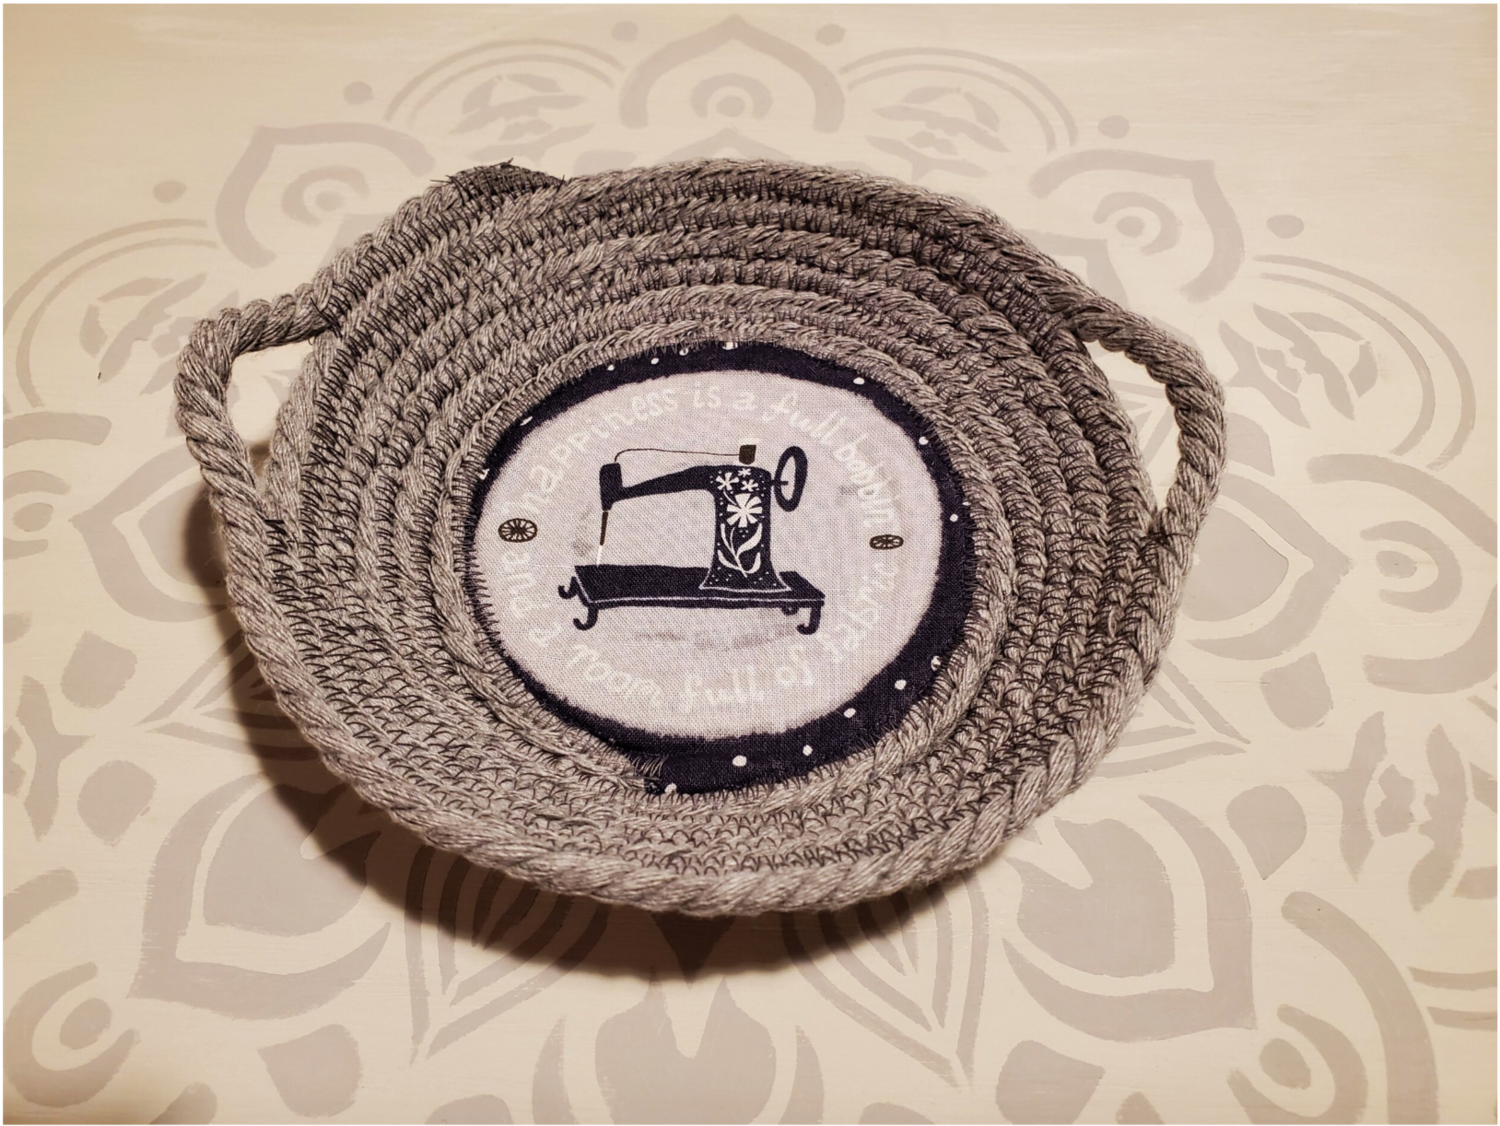
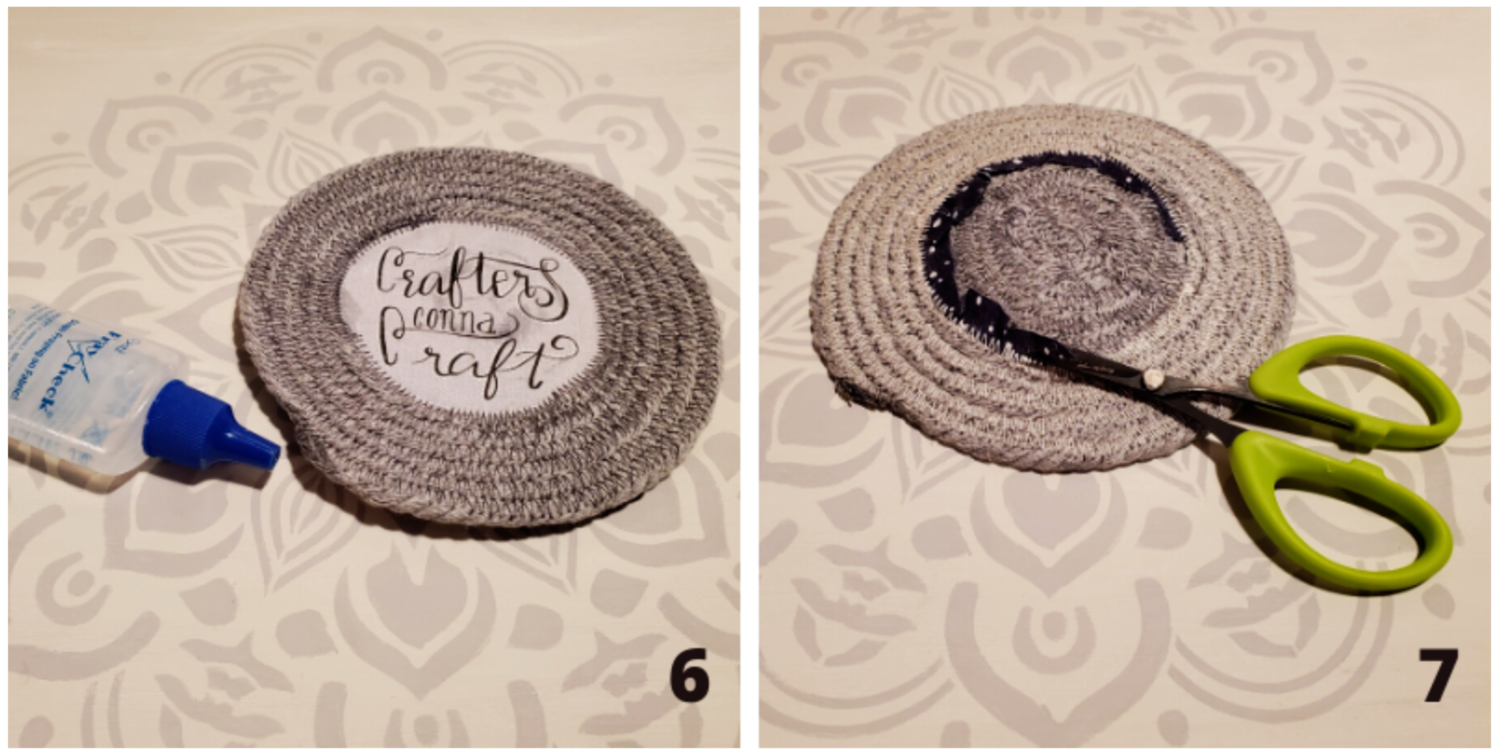
Step 6: To finish off the piece I cut the cotton cord at an angle sewing to the edge and sealing it with fray check.
Step 7: On the piece that I added a circle fabric center I used a small sharp pair of scissors and neatly and carefully trimmed the excess fabric.
These projects are very quick, easy and inexpensive to make. The possibilities are endless with all kinds of color combinations using up scrap fabric along the way. I have made many different sizes and shapes over the years and since they are made of cotton they are washable.