

Learn a New Skill - Fabric Postcard Tutorial
18th Apr 2020
Hi there, I’m Joanne! I joined Cotton Cuts last summer in July. I am a fabric enthusiast who die cuts and packages the beautiful fabrics for the monthly Mystery Quilt program.
I love to create and sew projects almost every day. I love the challenge of making a project using scrap fabrics from the die cutting process.
I started sewing as a little girl making Barbie doll clothes from scraps of fabric. My mom taught my sister and I to sew following in the footsteps of her mother who was an avid quilter. To this day we are all still doing projects together enjoying the process of making and giving thoughtful handmade gifts. When I am not sewing, I also love photography and anything to do with home décor. I am a collector of many things that I keep in my “closet of possibility”(very well organized of coarse) ready for a new idea.
Today I will be showing you how to make a fabric postcard, which I think is as fun to make as it is to receive!
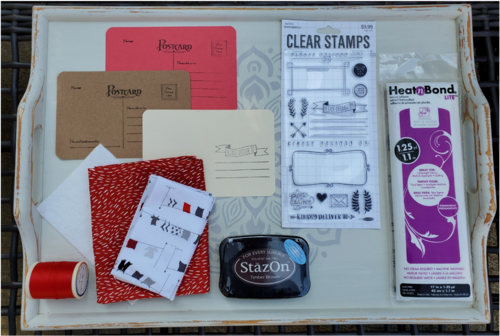
This is a simple and quick project that you can even get your kids involved. To make a postcard you’ll need:
- Ink pad and stamp optional
- 4” x 6” piece of postcard thick card stock (any color works)
- 4” x 6” piece of fusible or regular batting
- 5” x 7” piece of background fabric
- Assorted scrap fabric for design or words on the front
- All-purpose thread in coordinating color
- Scissors
- Straight pins or fabric clips
- Iron
- HeatnBond
- Pencil to draw or trace a design
- 2 first class postage stamps
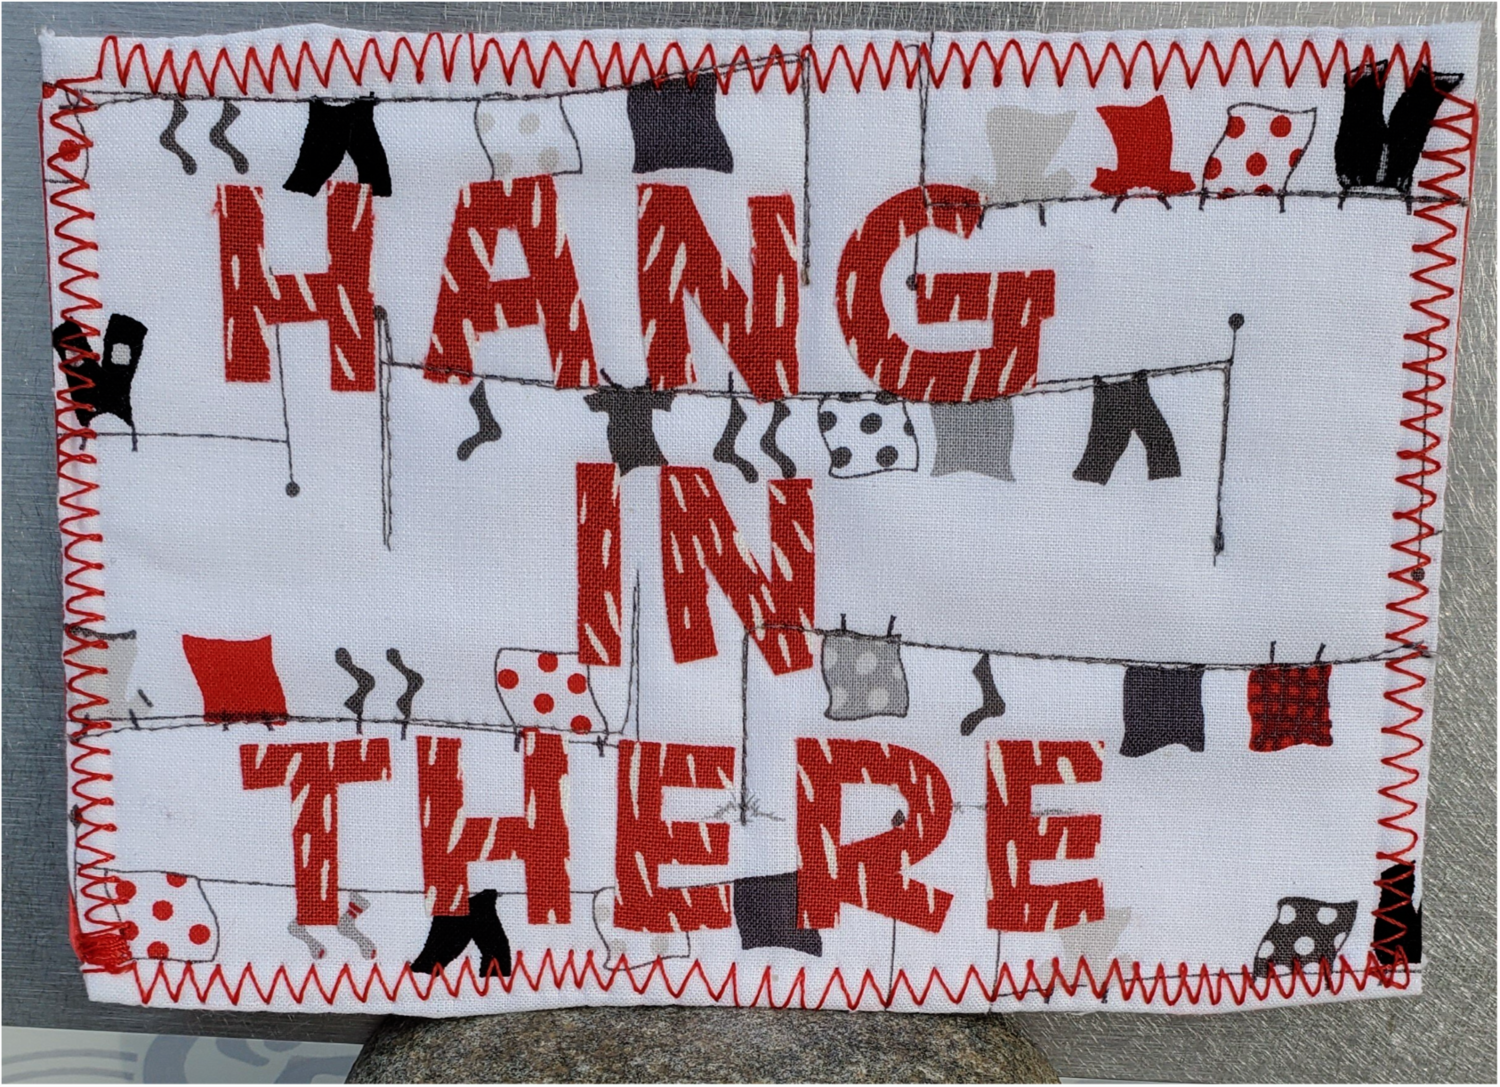
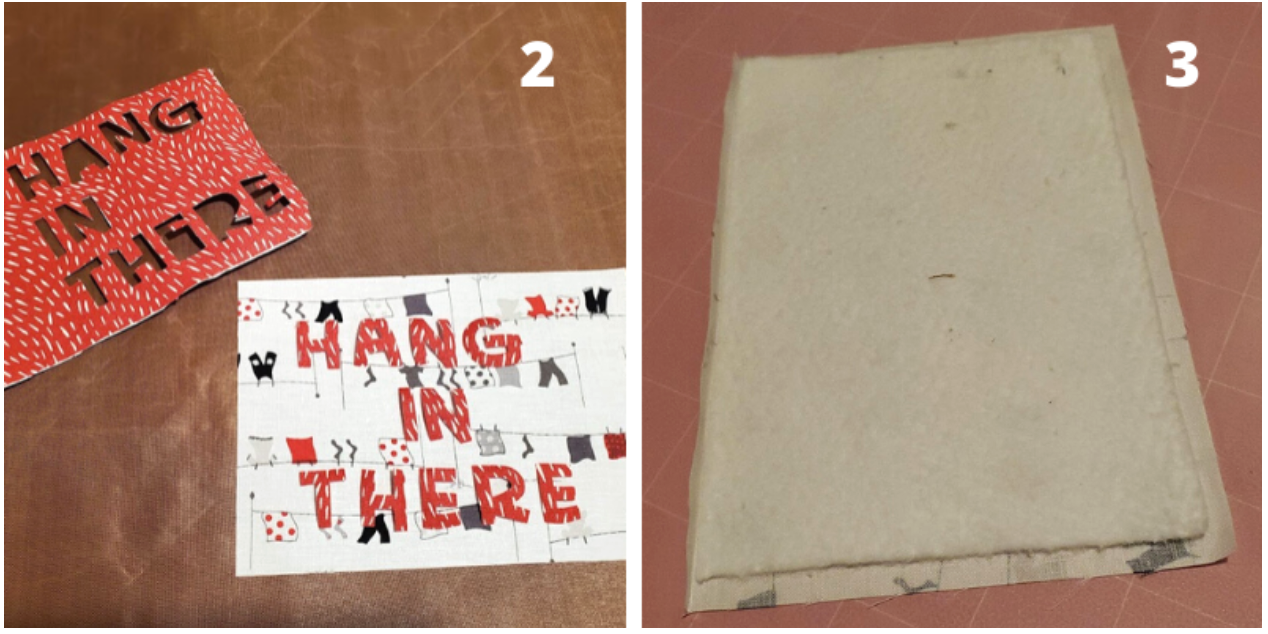
Step 1: Iron on the HeatnBond to the back (wrong side) of the red fabric. You can draw your design on the paper side and then cut out the design. Remember if you are using words to do a mirror image. I used a Cricut machine to cut out my letters from the red fabric but you can also use stencils or hold your fabric up to a window for tracing a printout.
Step 2: Remove the backing paper from letters and arrange the placement on the 5” x 7” background fabric. I am using the hanging laundry fabric from a recent Cotton Cuts classic box. When you are pleased with how your design looks, press in place with a hot iron for 5-10 seconds in and up and down motion - if in doubt, please follow the instructions with your fusible material.
Step 3: Place a 4” x 6” piece of batting under the 5” x 7” piece of fabric you just finished ironing. Center on the batting and fold top design over the batting 1/2 inch on all four sides pressing in place.
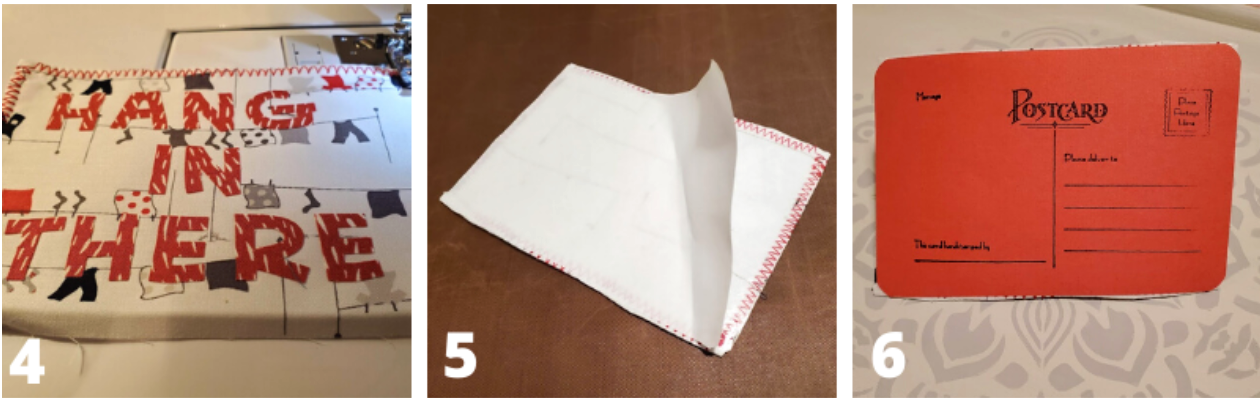
Step 4: Set your sewing machine to do a zigzag stitch in a coordinating color of thread. Practice on a scrap fabric to get the width and length of the stitch to the way you like it to look. Zigzag around the edge of the design and batting keeping the folded edge in place as you sew. The finished piece should end up 4” x 6”.
If you would like to add some dimension and texture, quilt around your design or add some decorative stitching into the design.
Step 5: Cut a piece of 4” x 6” card stock, adhere to HeatnBond and iron on the back of the batting to adhere the batting to the card stock.
Step 6: If you have a postcard outline stamp, now is a good time to stamp the card stock and write your message. See picture in Step 6 as an example. As long as the thickness does not exceed ¼ inch you can place two US first class stamps on the card and put it in the mail.
I am sure anyone would love to get this creative postcard in the mail and it will be a special keepsake. Thank you for joining me today for this quick and easy project with endless possibilities!