

Kool Kaleidoscope Quilt
6th Oct 2022
I finally finished the Ricky Tim’s Kool Kaleidoscope quilt I started a few months ago! I think a lot of people can relate to the fact that you are so excited to finish piecing a quilt top and then the daunting task of actually quilting it stops you in your tracks. I had put so much time and effort into piecing this project that I was really afraid I would ruin it with my quilting abilities. I will share with you the details of how I quilted and finished this quilt.
I added a 4” border to give me some space around the really busy center of the quilt.
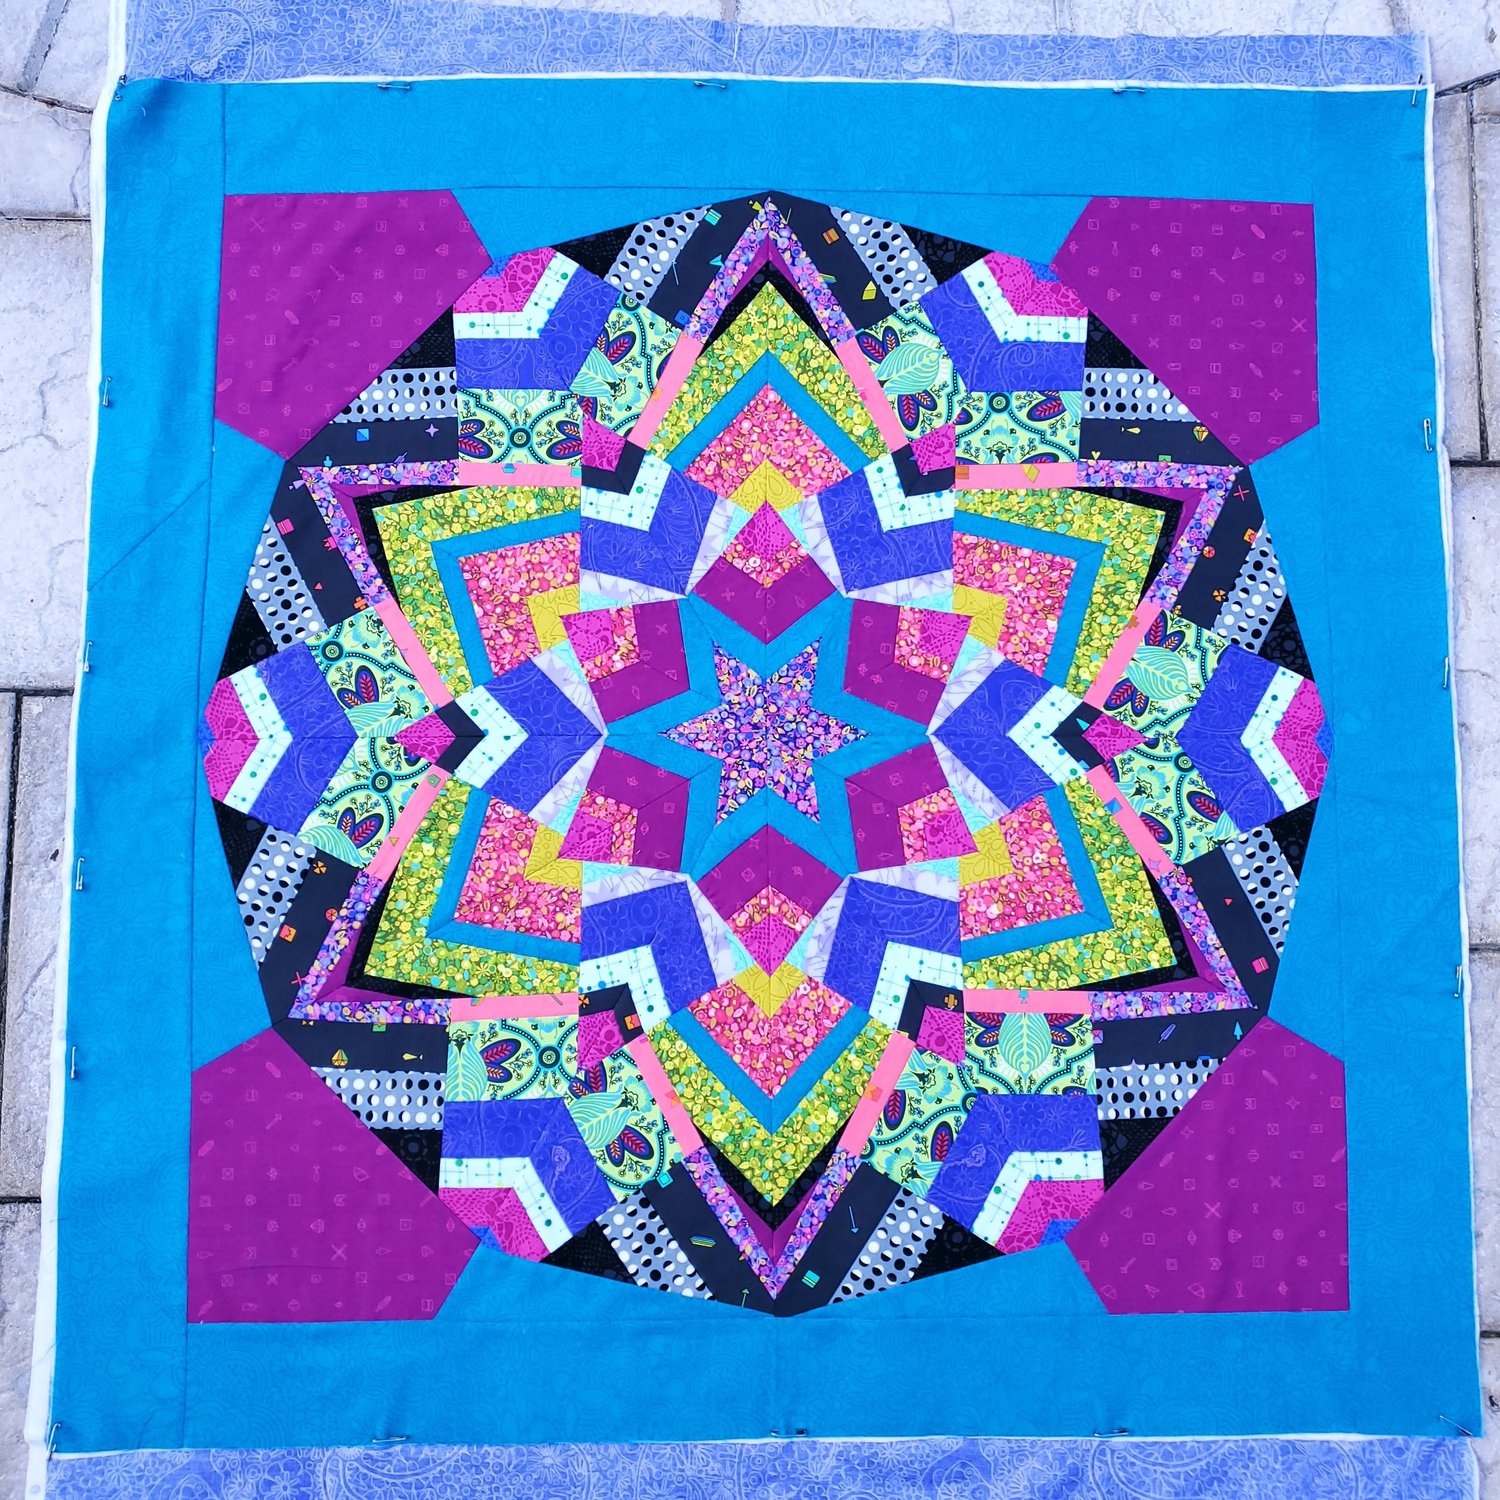
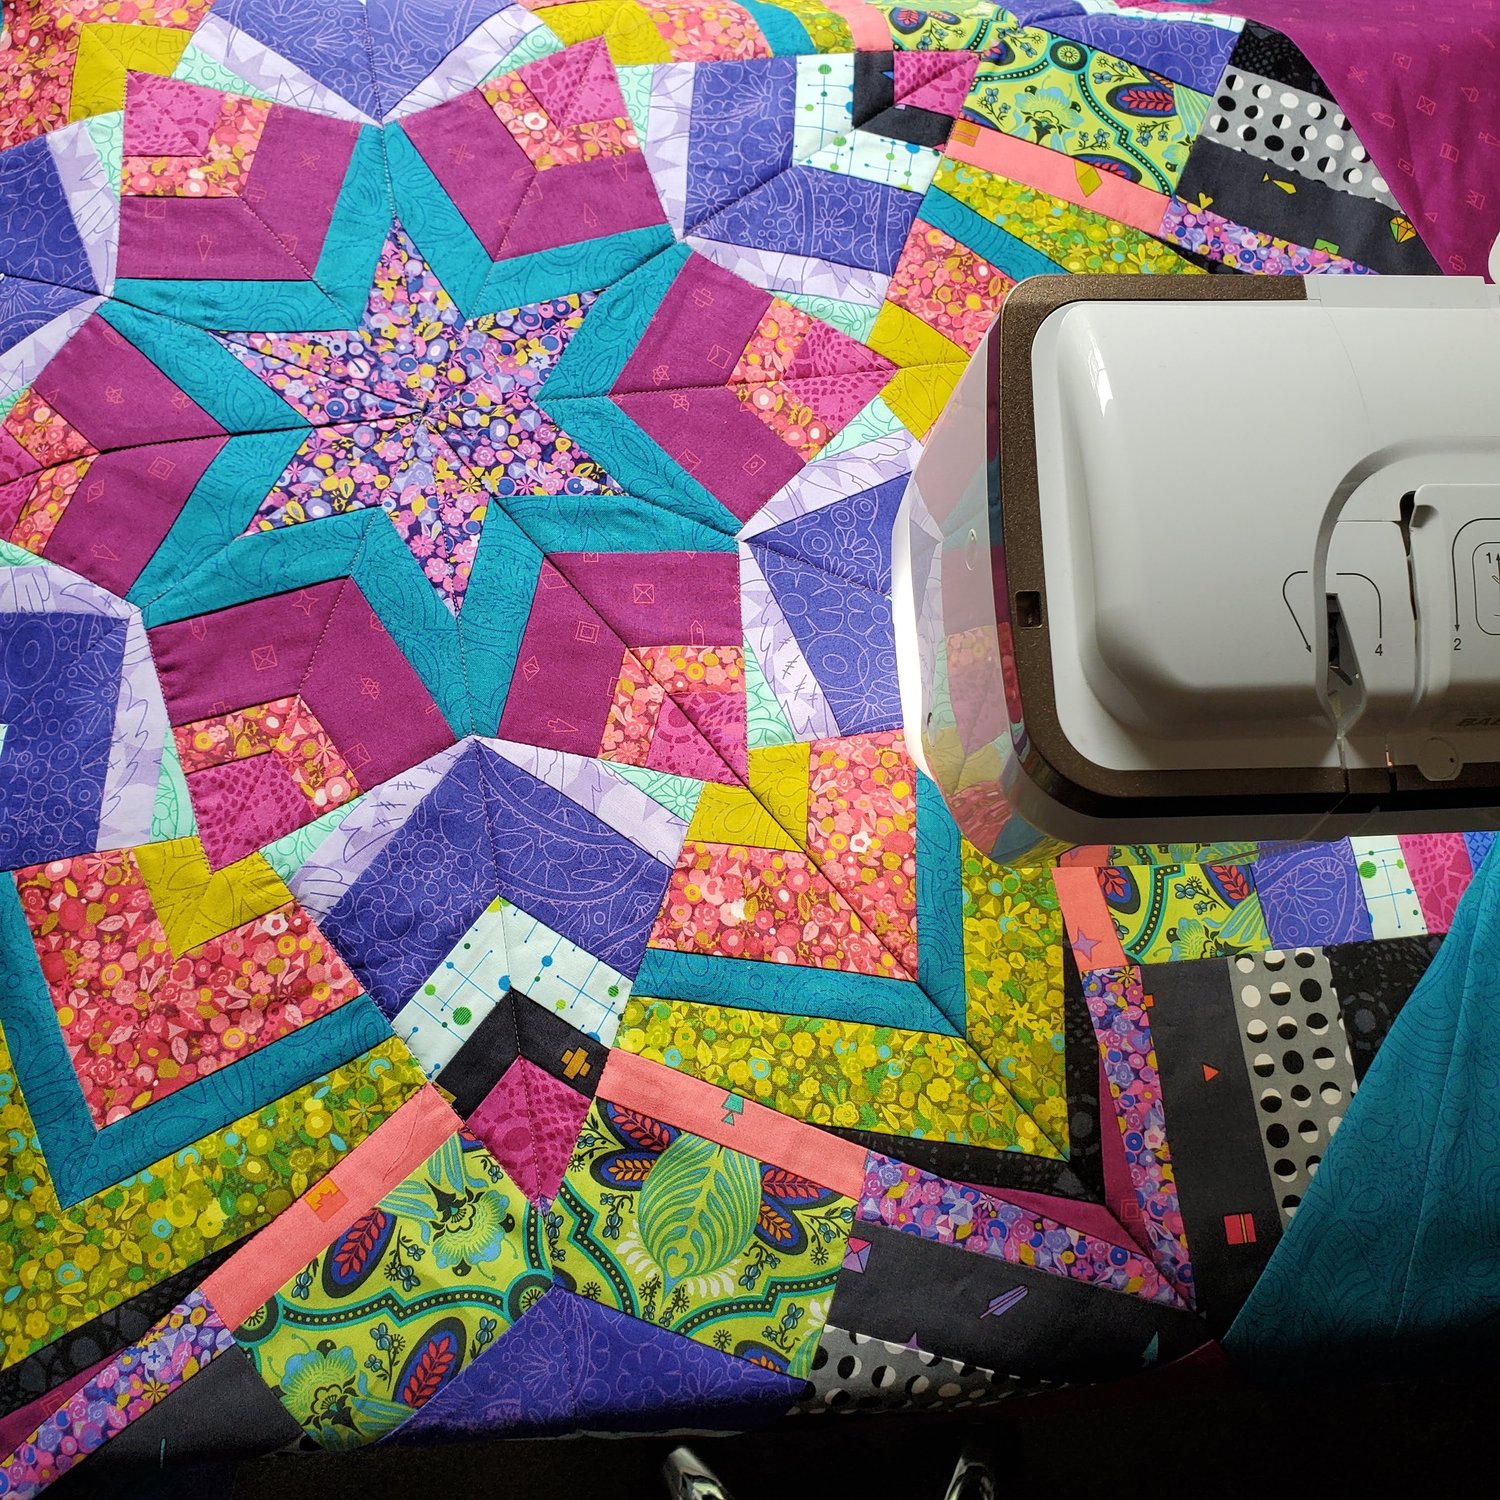
For the backing I chose a coordinating Alison Glass Sunprint fabric. I like to spray baste my quilt sandwich and add some safety pins along the edge and corners. All that blank space to fill with quilting was so intimidating that every time I got it out to work on it I could not actually make myself sit down to sew. With some encouragement from my quilty friends I decided to break it down into sections. The first thing I did was select a thread that blended in with most of the colors to stitch in the ditch around the five triangle shapes in each wedge to secure it in place.
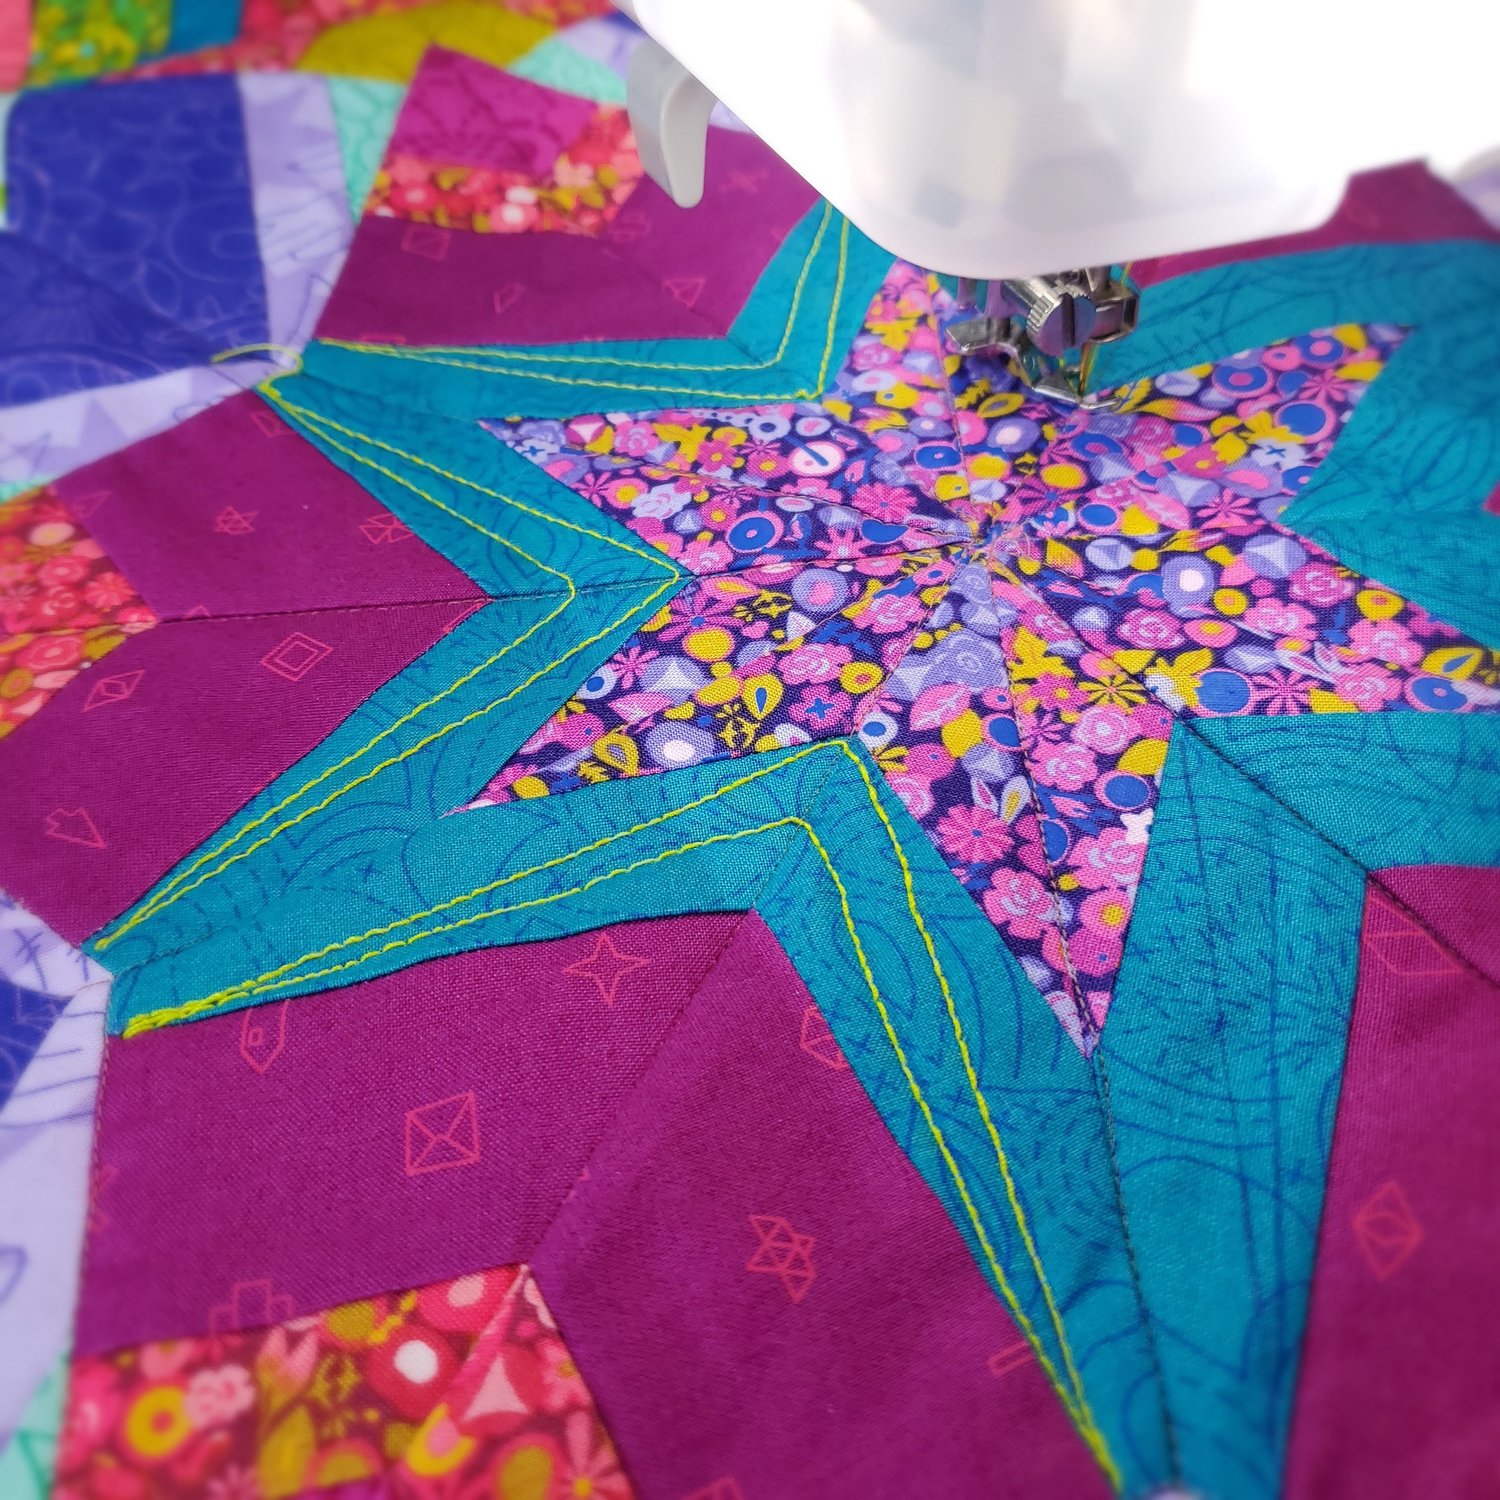
I started with the bold lime green stitching in the center star with a 12 wt. thread. It was challenging to work with the heavier thread in my machine. I did some practice pieces to figure out the appropriate tension settings. I liked the bold statement of the heavier thread in the middle of the star.
Next I did some designs in the triangles using a Aurifil 50 wt thread that blended nicely providing texture within the shapes.
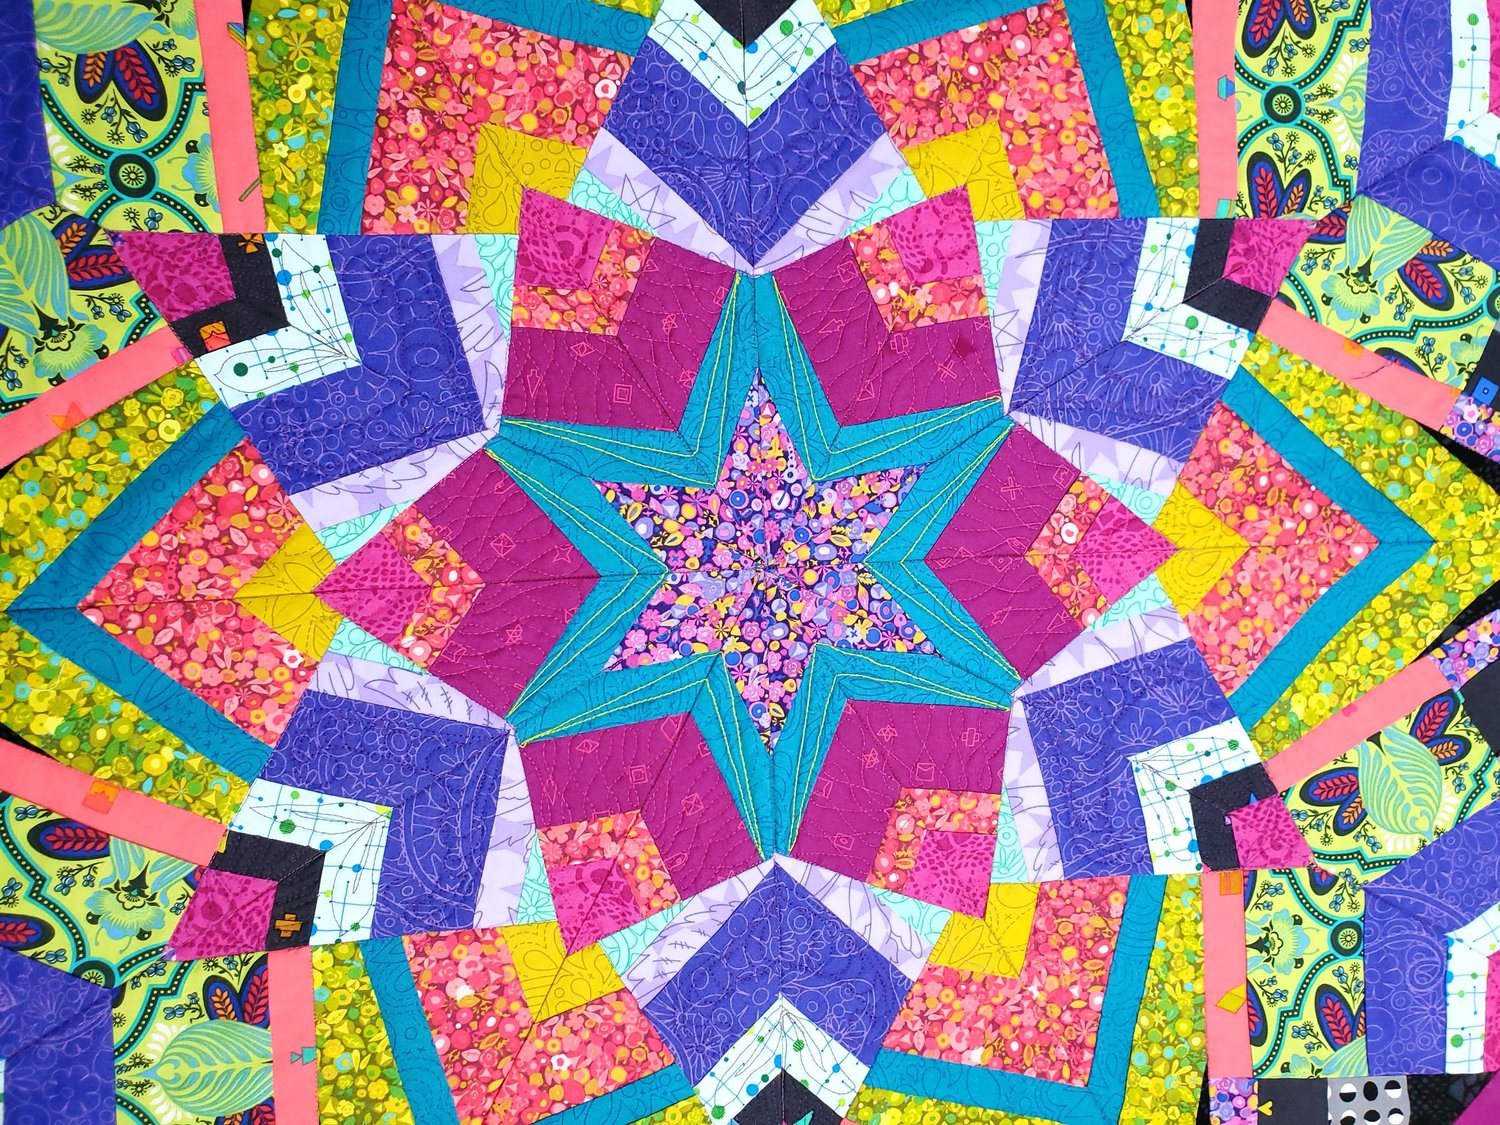
As I worked on other projects using the monthly Java Membership batik fabrics I discovered some new designs that I could successfully free motion quilt and added those to the wedges using a variety of threads from the Chroma Membership. Having that selection of Aurifil thread available really helped me branch out using a variety of colors within the quilt top. I recently purchased a Baby Lock Sashiko sewing machine and it was fun to add the look of hand stitching with the ease of the machine. I decided to continue quilting with the lime green thread and extended the angles of the star into the borders. After looking at all my free motion idea books I decided that I would finish quilting with a free motion meander design.
After the quilting was complete I squared up the quilt using a metal “L” shaped ruler. I prepared the binding and sewed it in place. I found pressing the binding and using a bit of fabric glue stick held the binding in place so I could machine stitch the binding. I feel such a sense of accomplishment having completed this challenge!
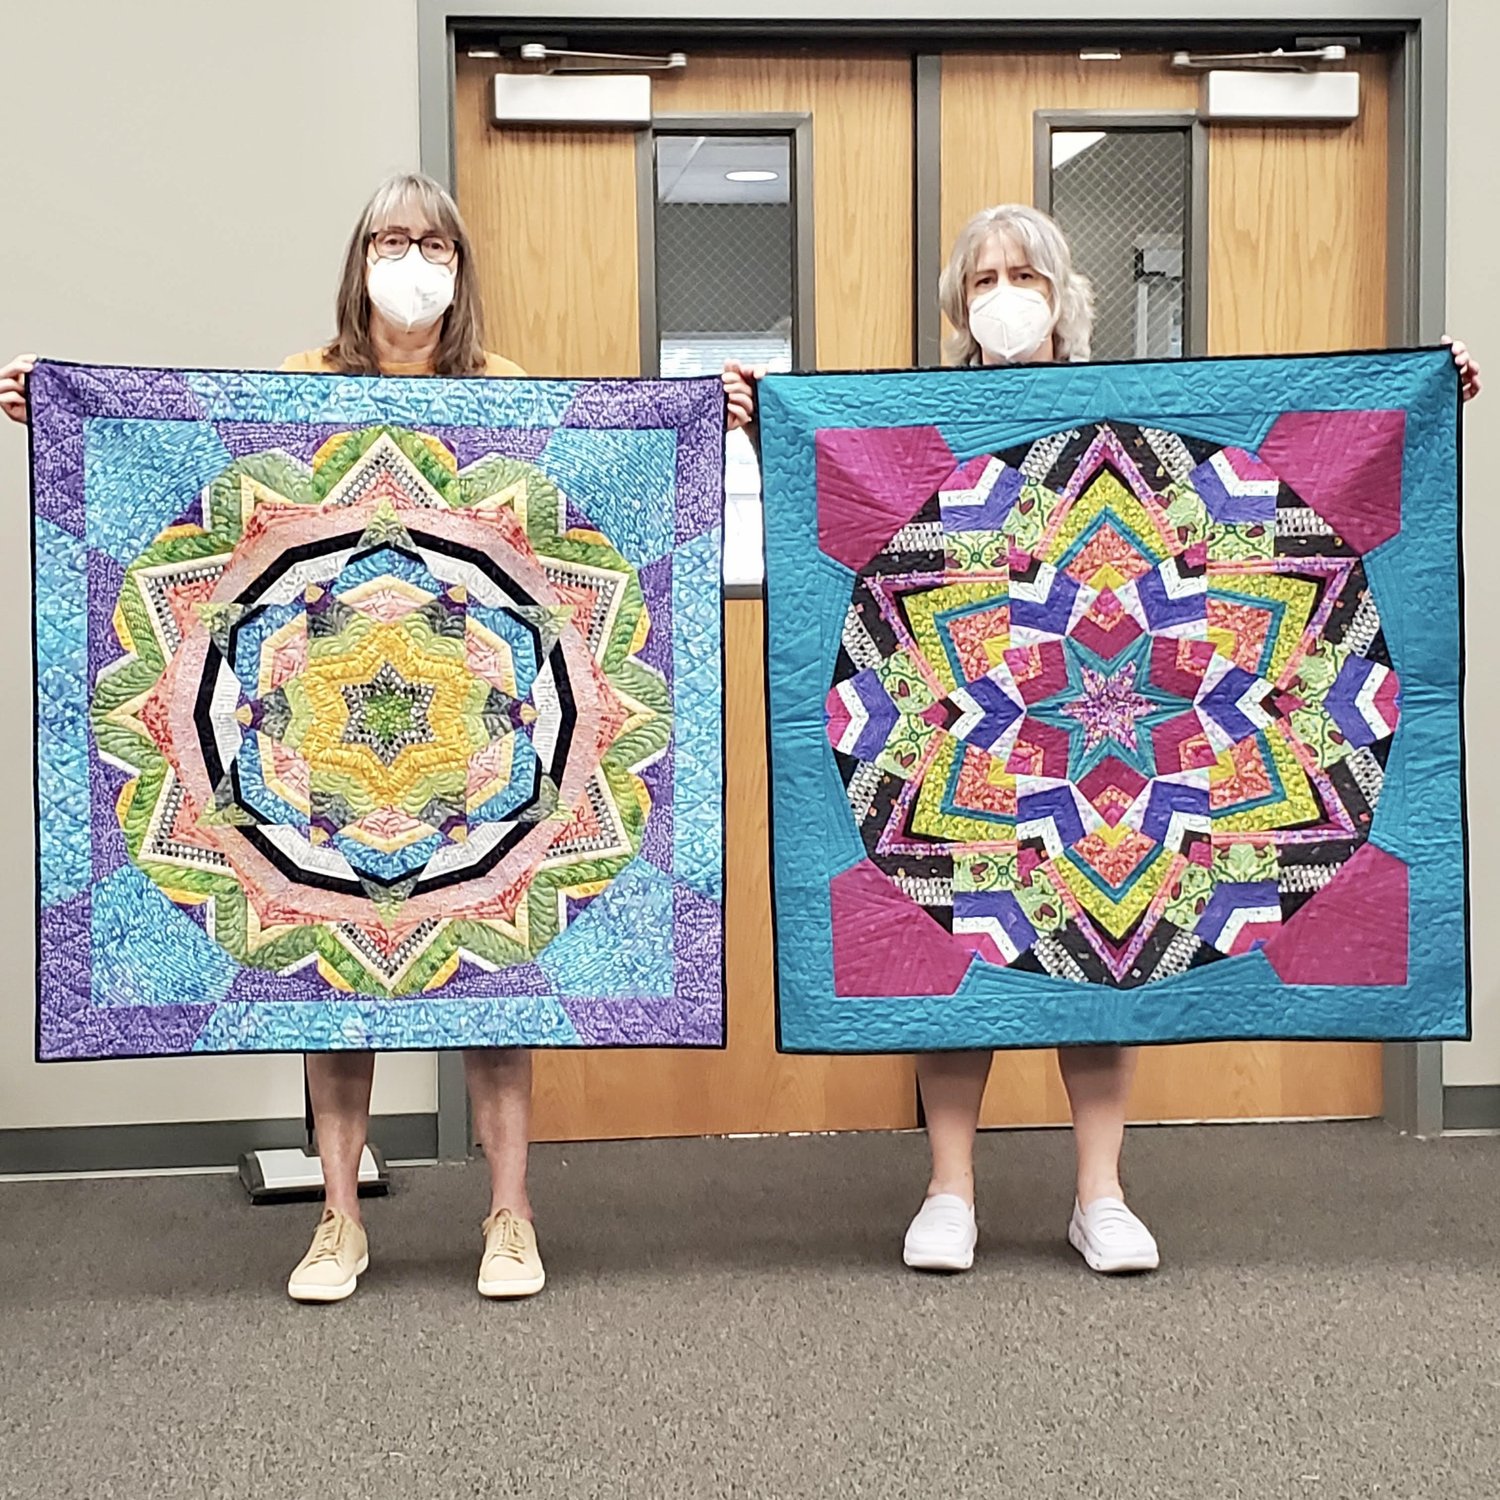
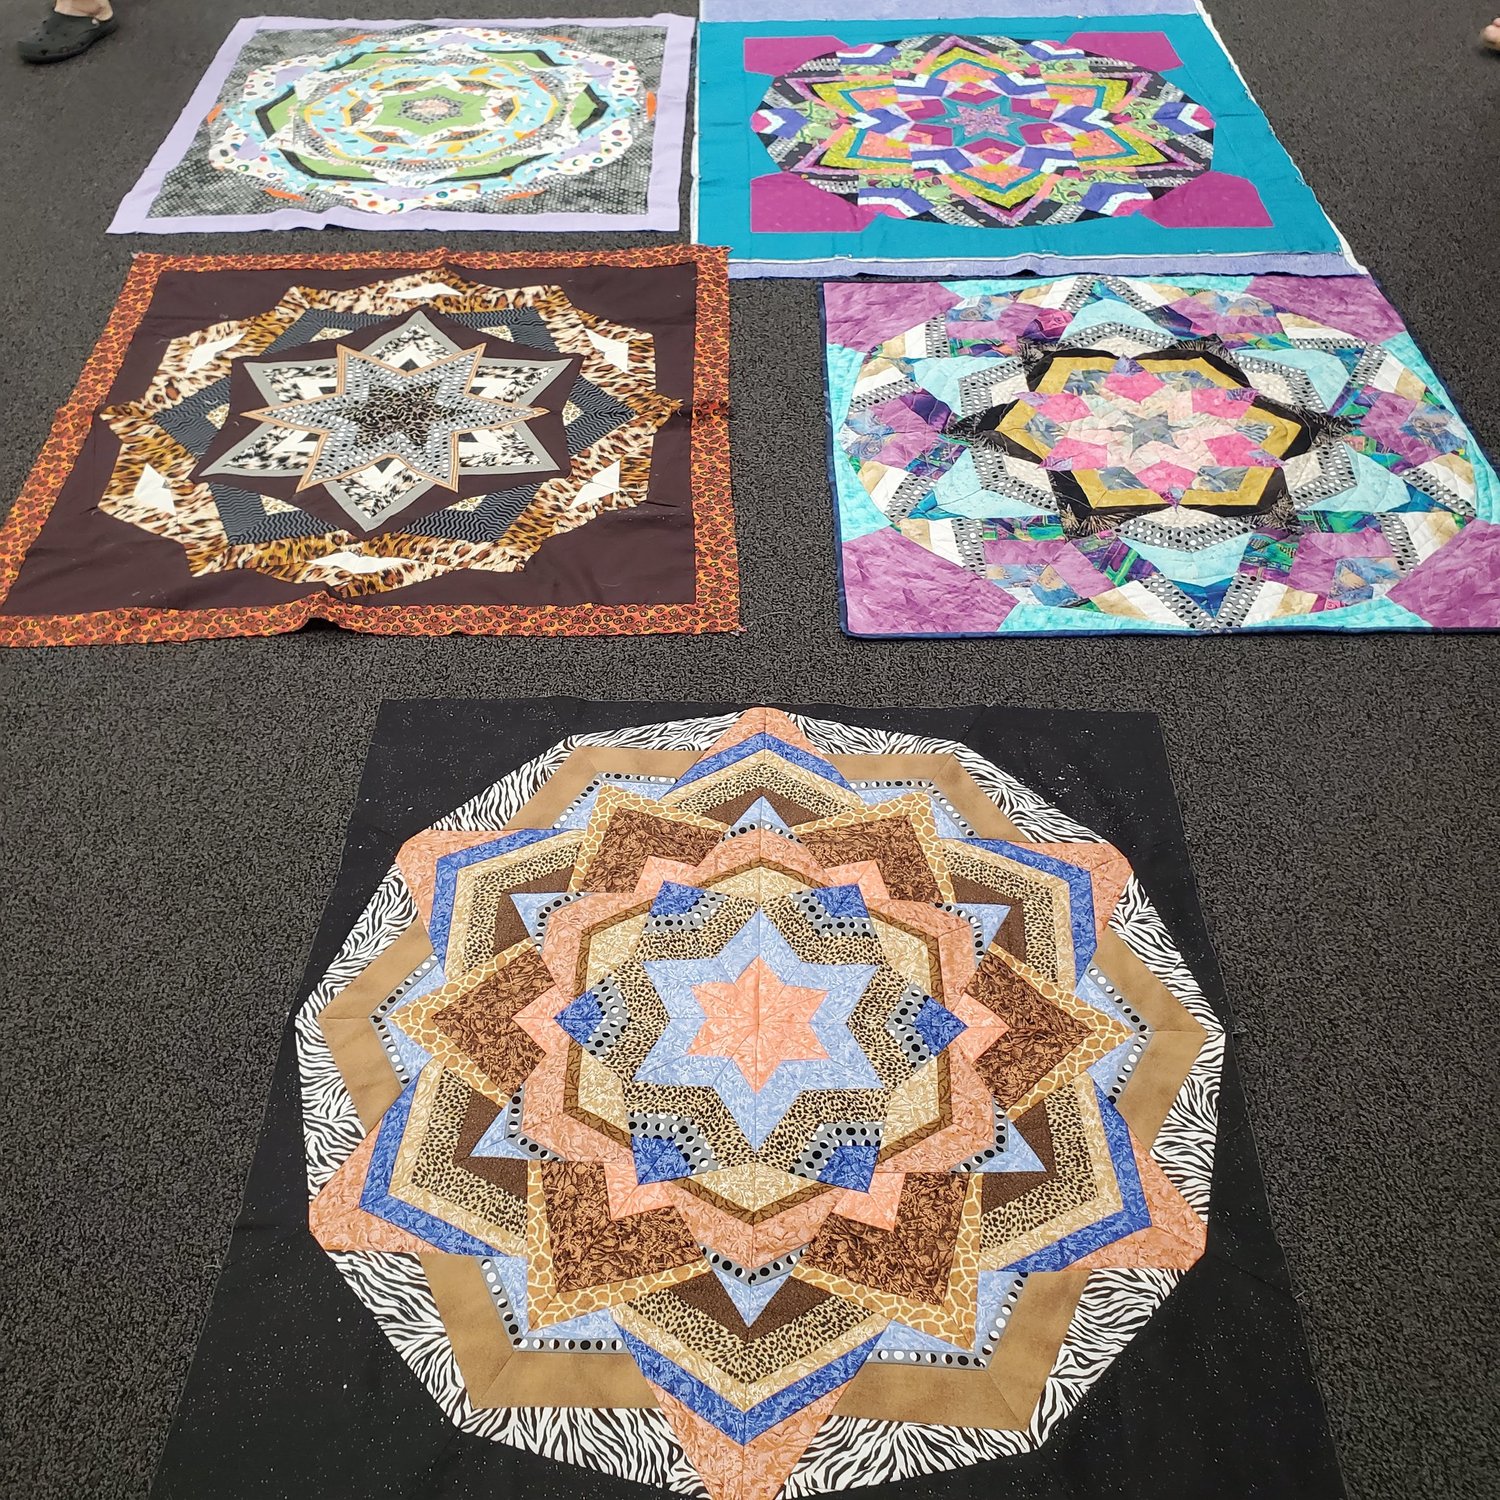
Breaking it down into smaller steps and working with my sister and my art guild along the way really kept me on track. It is amazing to see how different each person's quilt turned out using the same instructions and one common fabric. Several will be on display at our Bits and Pieces Guild Quilt show in March of 2023 here in St. Louis.
If you would like to learn about the entire procedure check out these blogs, Kool Kaleidoscope Adventure , Kool Kaleidoscope Part 2,and Kool Kaleidoscope Part 3.