

Kool Kaleidoscope Adventure
21st Apr 2022
Come along with me on my latest quilting adventure as I create the Kool Kaleidoscope quilt by Ricky Tims! I am still very much a beginner in terms of trying new techniques in quilting. My local guild, Art Bits, is doing the free Kool Kaleidoscope pattern as a challenge for our group of 25 quilters in preparation for our quilt show next March. I will share with you my progress and maybe even some sneak peek pictures from the group in upcoming blogs over the next several weeks.
The “Ricky Tim’s Kool Kaleidoscope” book is available for purchase from C&T Publishing. This technique is interesting because each quilt is completely different and unique due to the fact that you draft your own pattern and decisions you make as you go along change the look of the finished quilt. It reminds me of the “Choose your Own Adventure” book series from a few years ago. Most surprising is that it all starts with simply sewing WOF strips together.
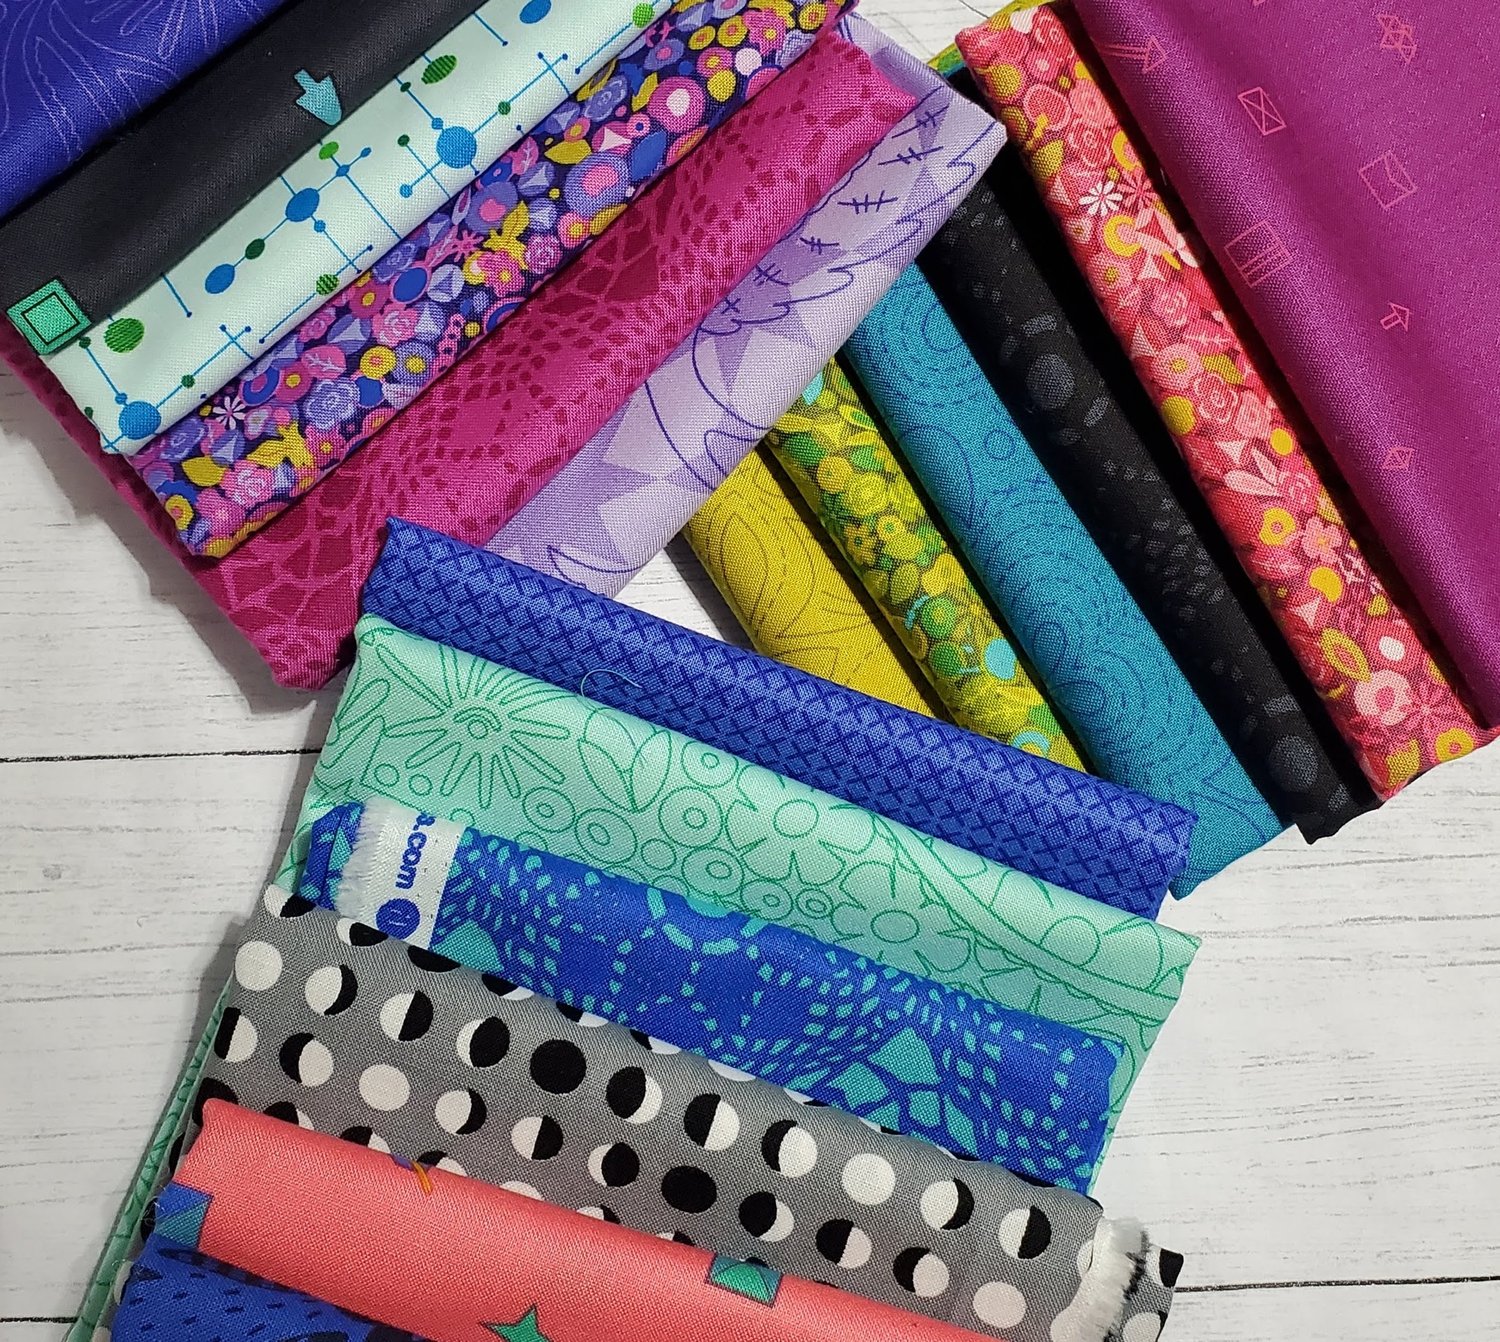
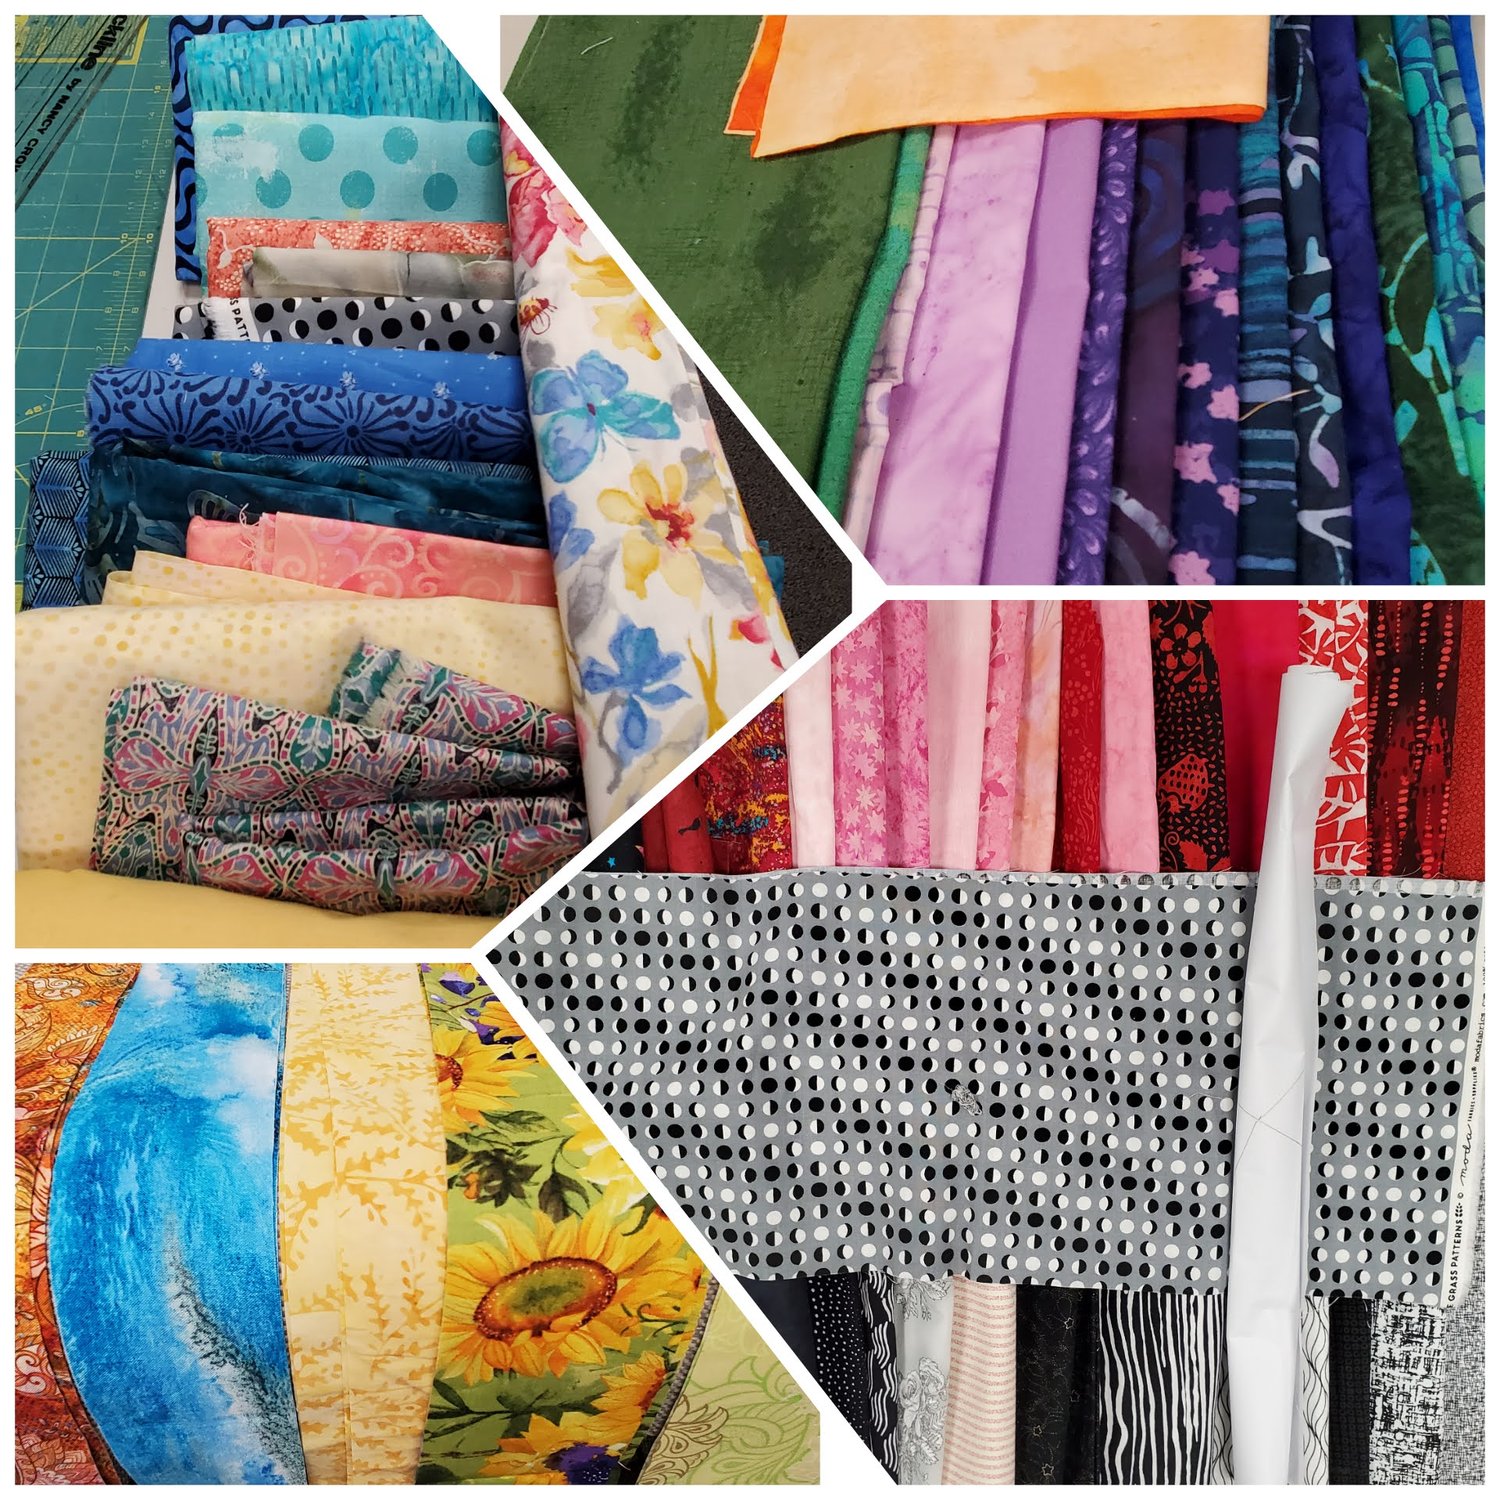
For my quilt I chose to mainly use the Alison Glass fabric bundle with a few fabrics from my stash in the mix. Cotton Cuts offers several great options to deliver fabulous fabric right to your door that would be perfect for this project. Ricky recommends using ⅓ yard of about 20 different fabrics. You will want 1- 2 dark fabrics and one very light fabric. To give it some interest choose a “zinger” fabric that will really pop against the rest of the fabrics. For our group challenge we are all including the black and white polka dot on grey background Moda fabric in our quilt. I recommend taking the time to press and starch the fabrics to aid in the accuracy of cutting and sewing the quilt.
Once I had my fabric pull, I arranged the fabric in sets consisting of 5-7 different fabrics. You will be using some fabrics more than once. I found it helpful to snap a picture of my fabric sets to audition the fabrics together and to keep track of the order to sew the strips together.
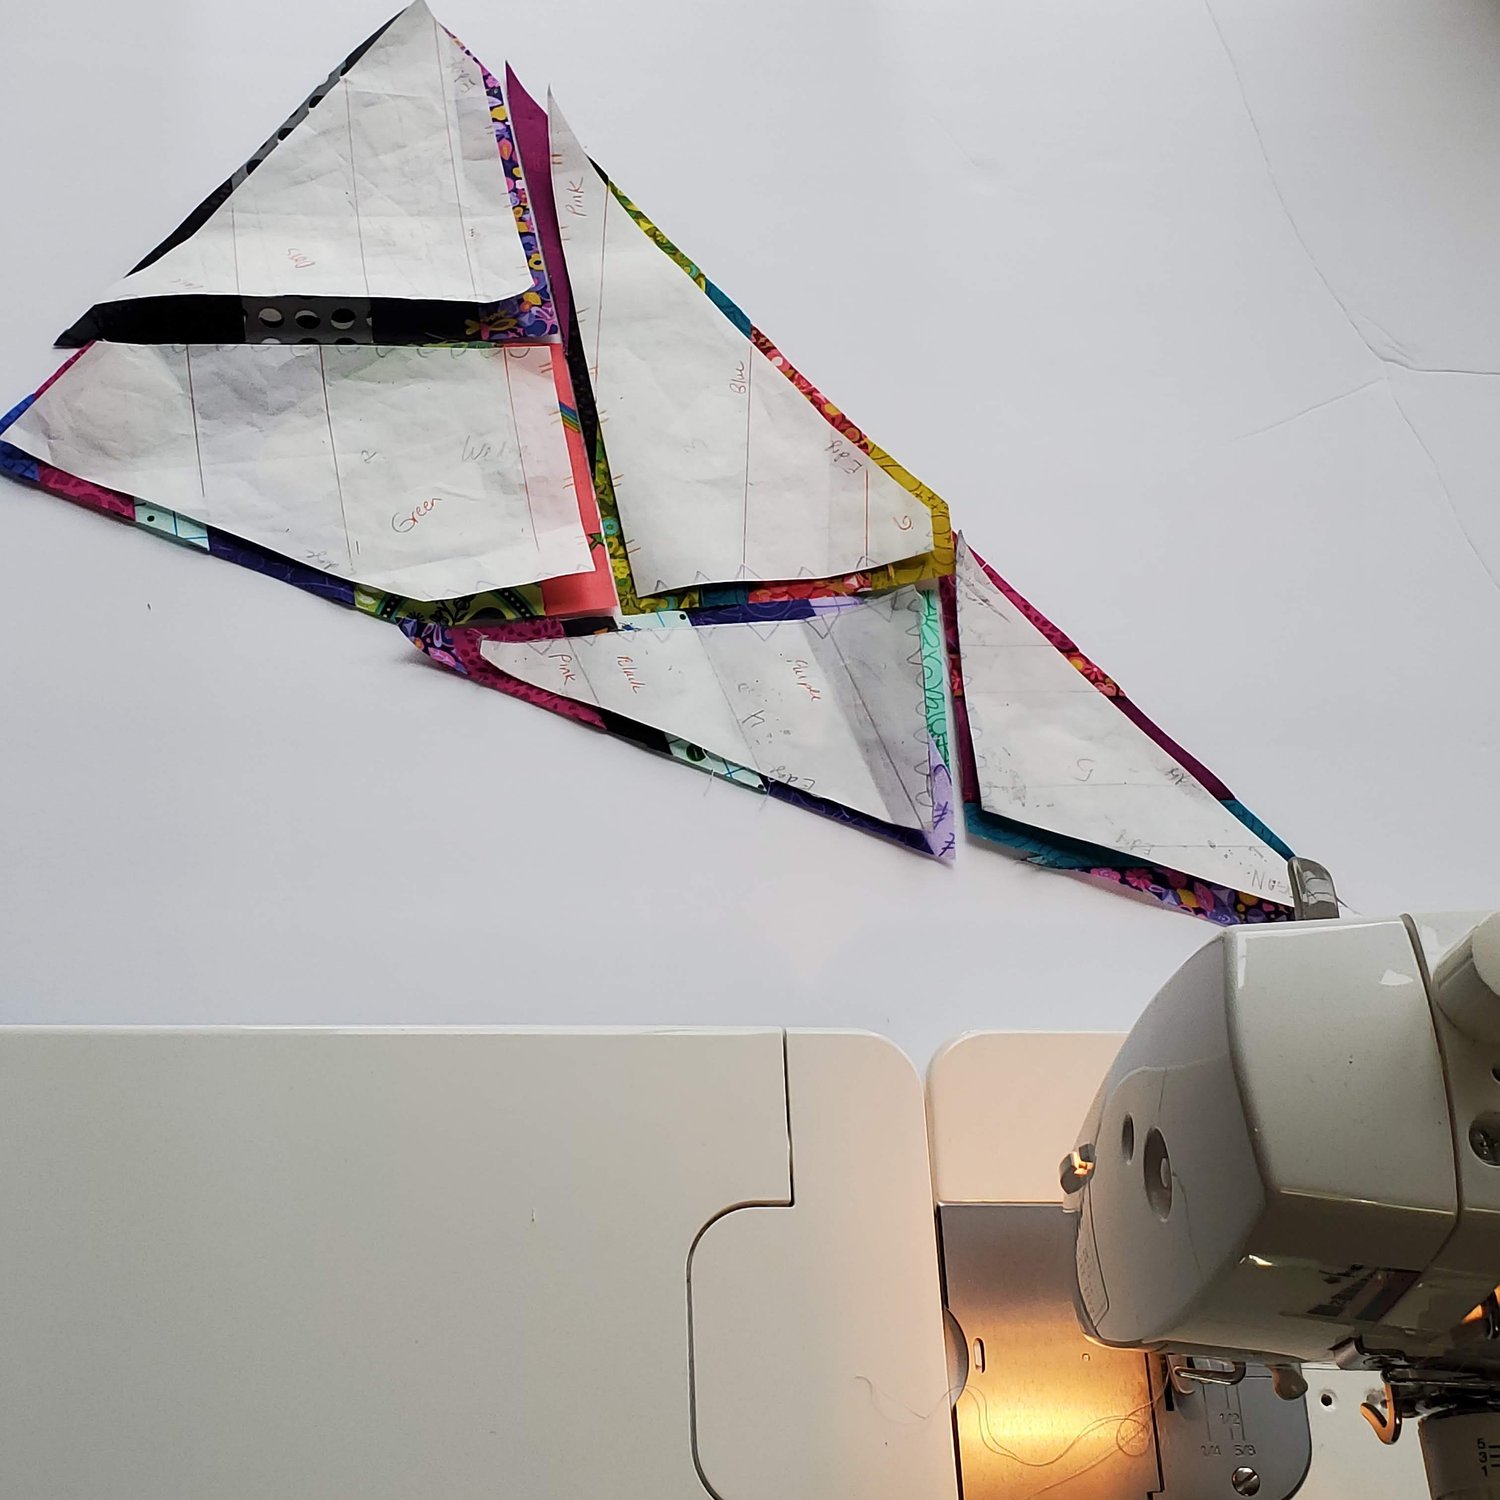
You will make 5 identical pairs of strips in preparation for cutting the pattern pieces. You choose the width of each strip with the recommendation to use the darker fabrics in the center and to make those strips 1- 1.5” wide. Ricky suggests making the outermost strips the widest. The finished strip sets will need to be at least 9” wide. To make sure the pairs are cut exactly the same, fold the fabric so that you can cut two WOF strips at the same time. Be sure to square up the edges before you cut the strip.
After you cut each set it is a good idea to mark the top and bottom of each strip, I used an “X” and “O”. This is to help keep track of which end you started sewing on as you sew the pairs together. I always started with sewing a pair together on the “X” end and then when I was ready to sew a pair to a pair started on the “O” side.
This technique will help even out the tension so that the strips stay straighter. They have a tendency to get a curved shape if you sew all the strips from the same end each time. Handle the strips with a light touch and try to carefully lay one strip on top of the other without pulling or tugging to avoid stretching. Take care to keep your seams consistent at ¼” as you sew the strips together. If you are new to quilting, this blog outlines some helpful Sewing Tips and provides some additional resources.
Another important thing to remember as you construct the identical sets is that you will need to press the seams in opposite directions. On one set of strips press the seams all away from you and on the matching pair press the seams toward you. This is done so that when you lay the strips sets, with right sides together, the seams will nest easily in the next step when you cut the pattern pieces.
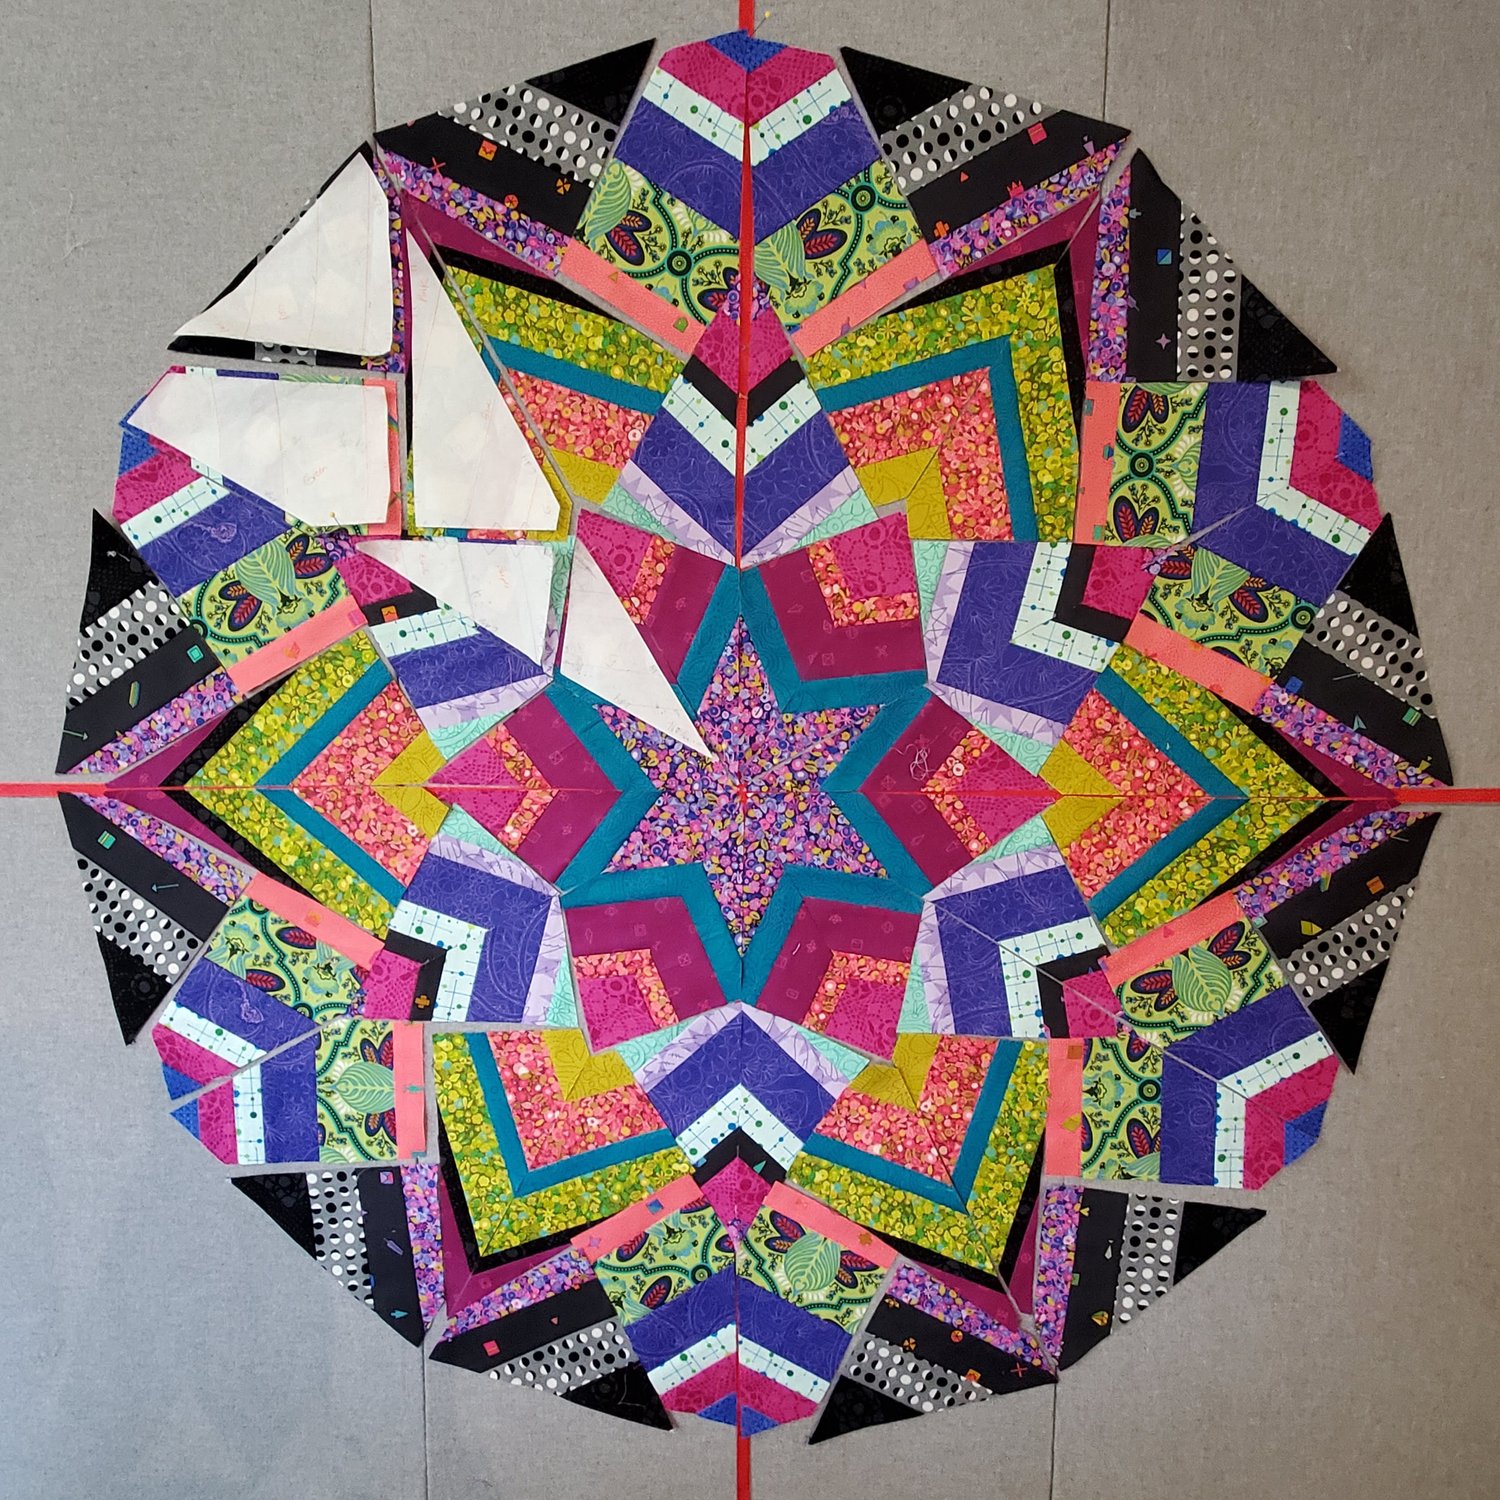
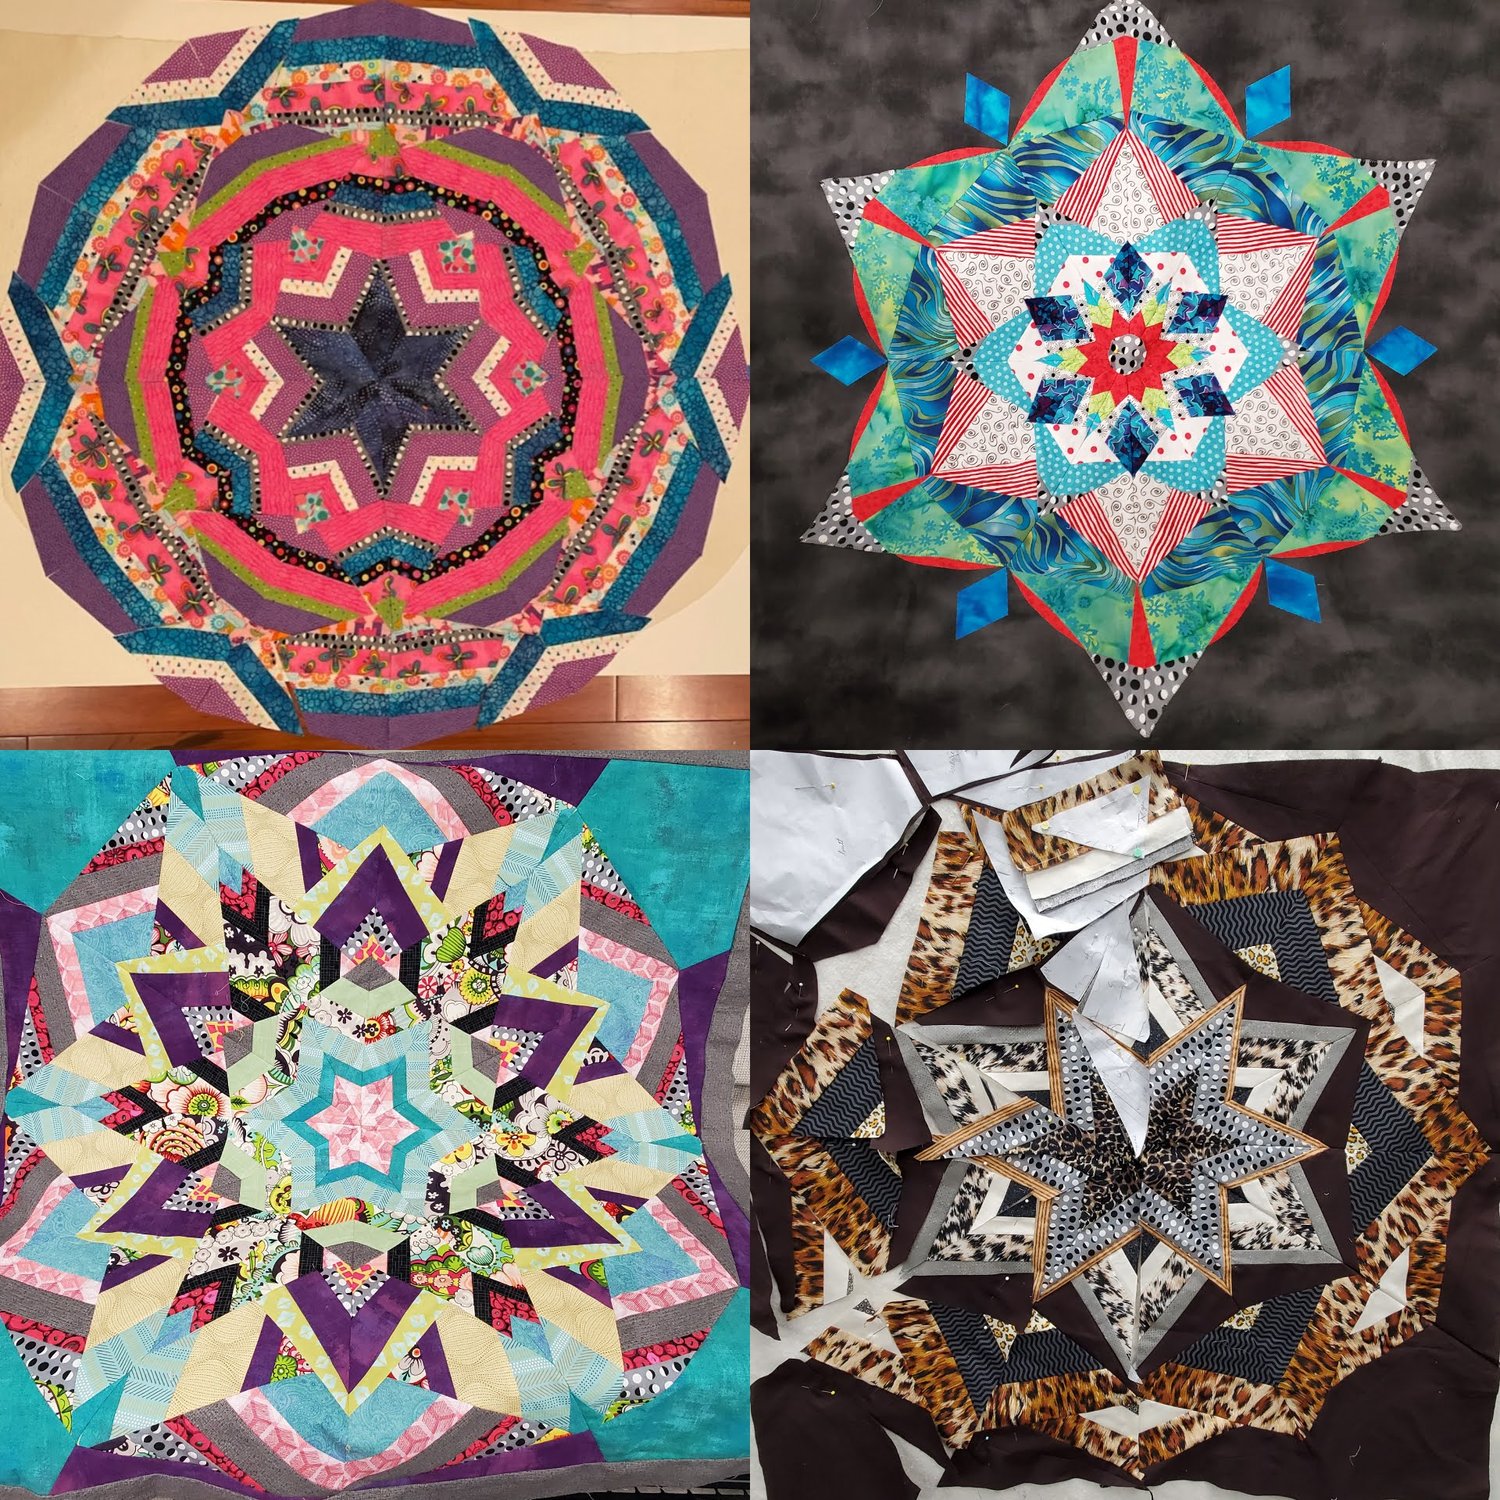
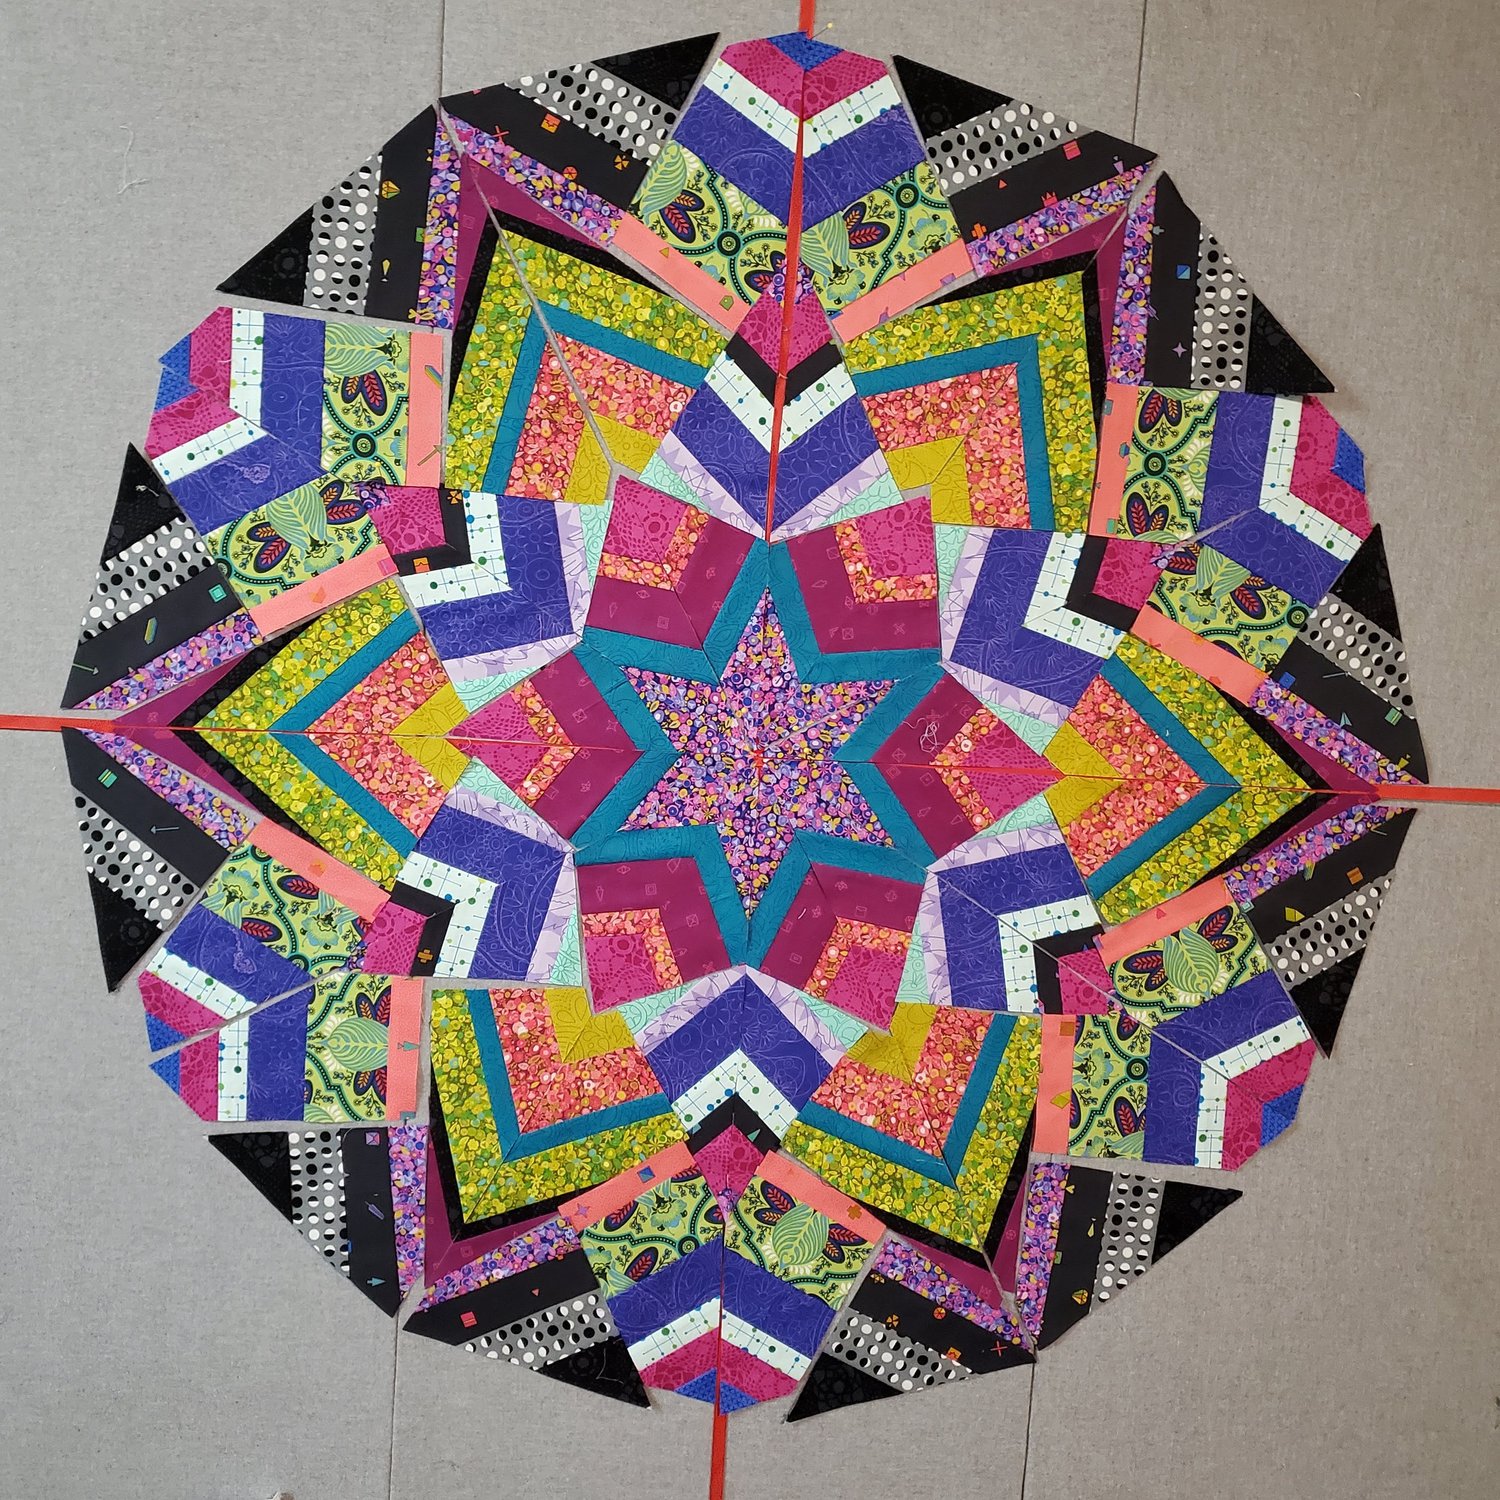
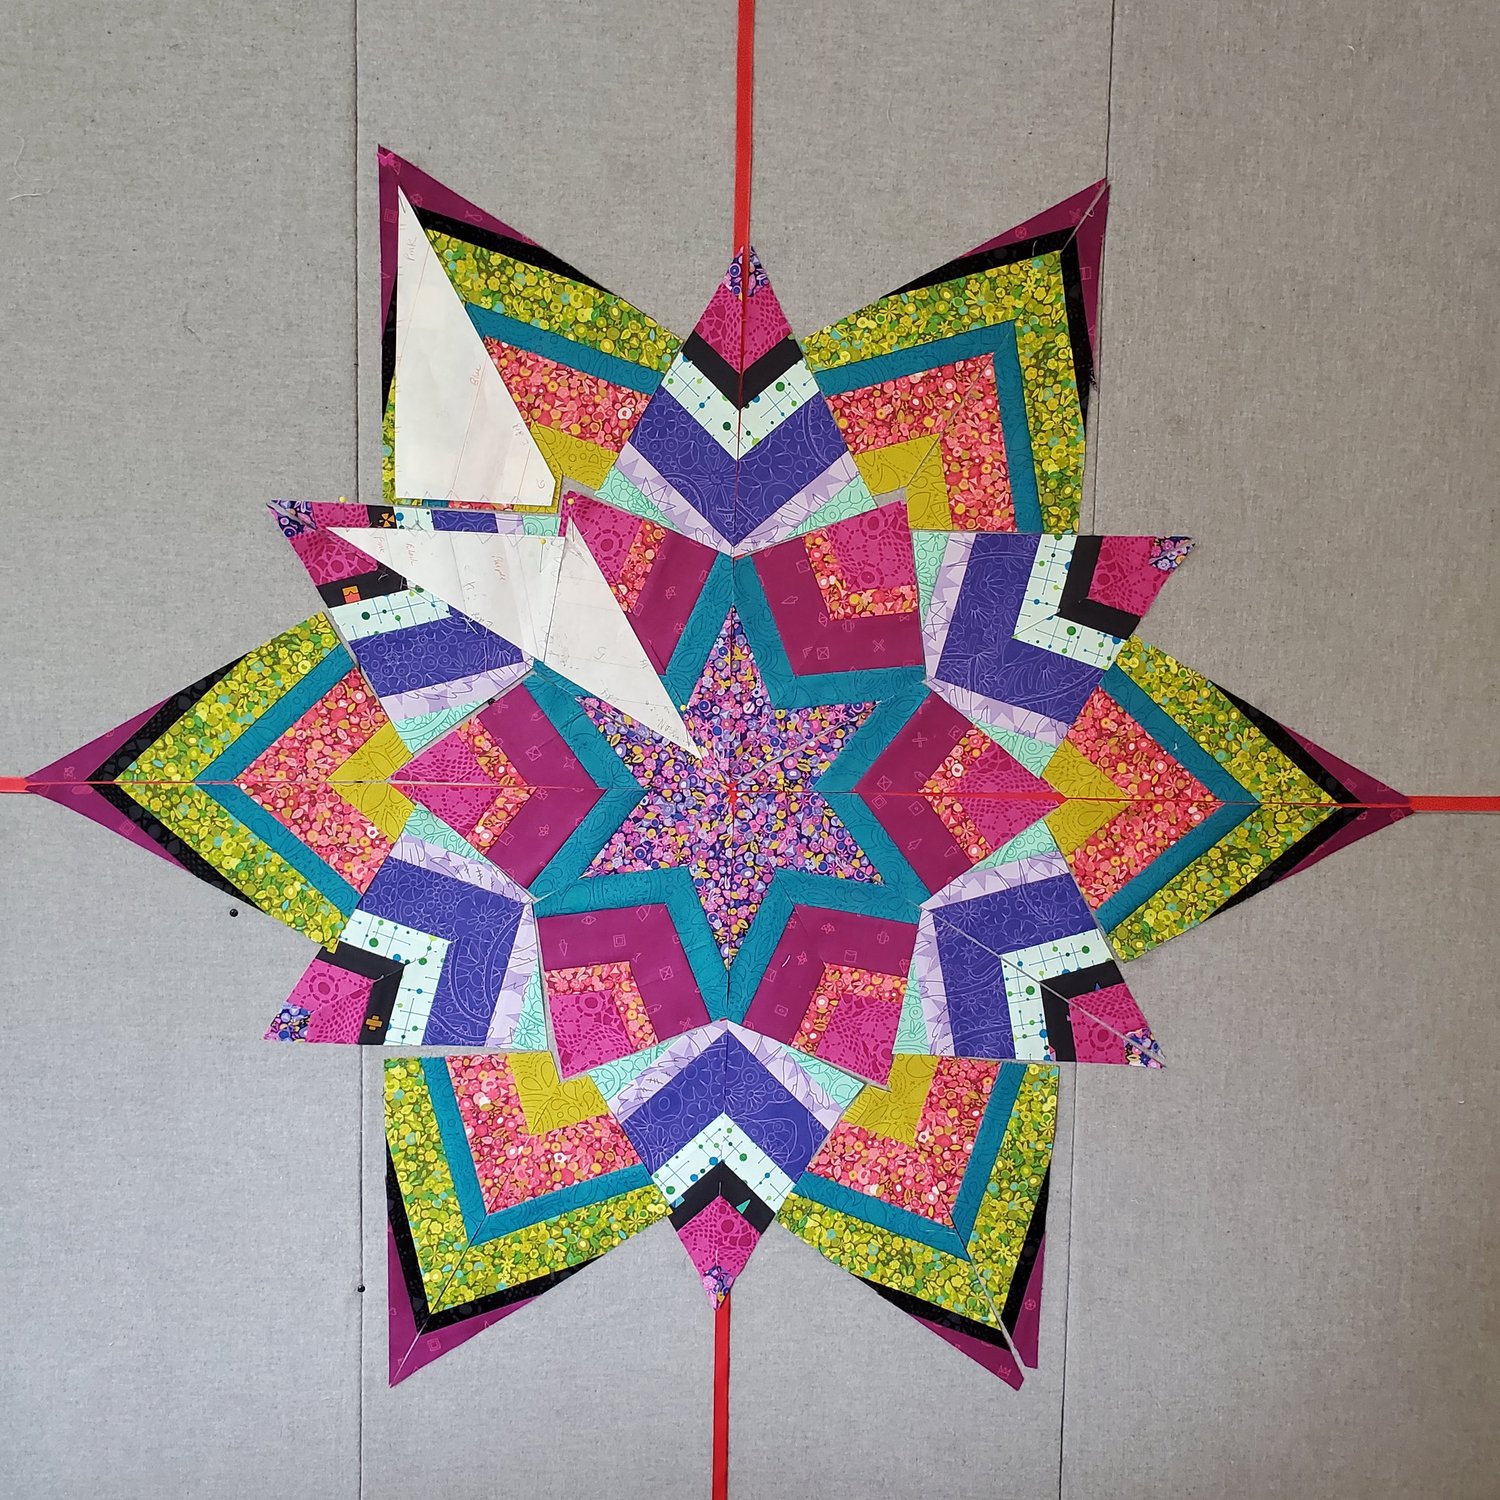
Ricky has recorded four YouTube lessons to walk you through the process of creating your one of a kind kaleidoscope quilt. This was the first lesson and it was fairly easy but took some time to cut and sew the final five identical pairs of strips. Here is a sneak peek picture of my sister’s quilt. She has cut her first pattern piece to make the very center of the quilt. She used Batiks and I love how it looks!
You will need to have about a 48” square area for a design board to lay all the fabric pieces in place till it is ready to be sewn together. The finished sewn circle before borders is approximately 36”. Ricky suggested using a printed center fabric with some movement instead of a solid fabric to camouflage all the seams coming together in the center. Keep this in mind as you sew the strip sets together placing about a 3” strip on the outermost edge to become the center of the Kaleidoscope. In the next blog I will talk about drafting the pattern and cutting the pieces for this unique quilt.