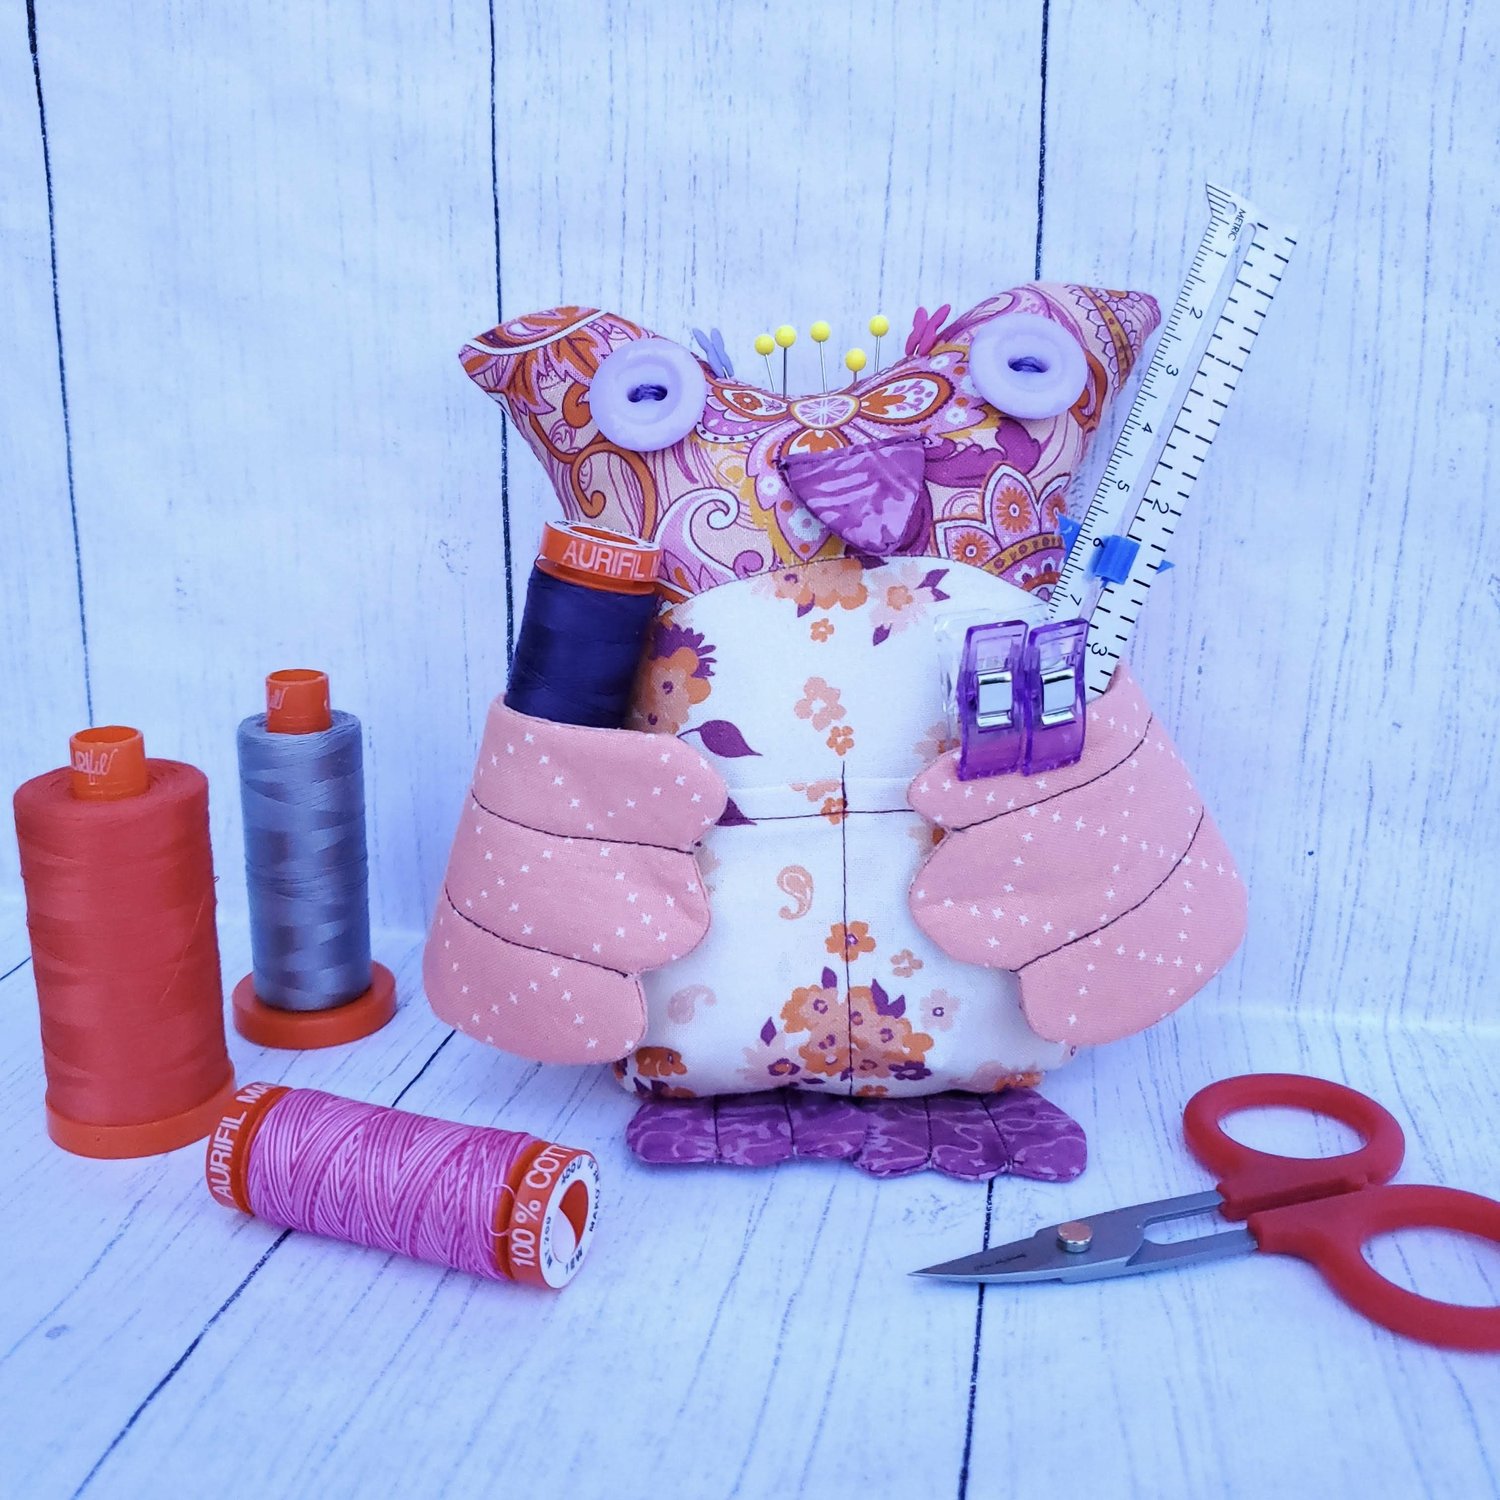
Owl You Need Pincushion
19th Mar 2022
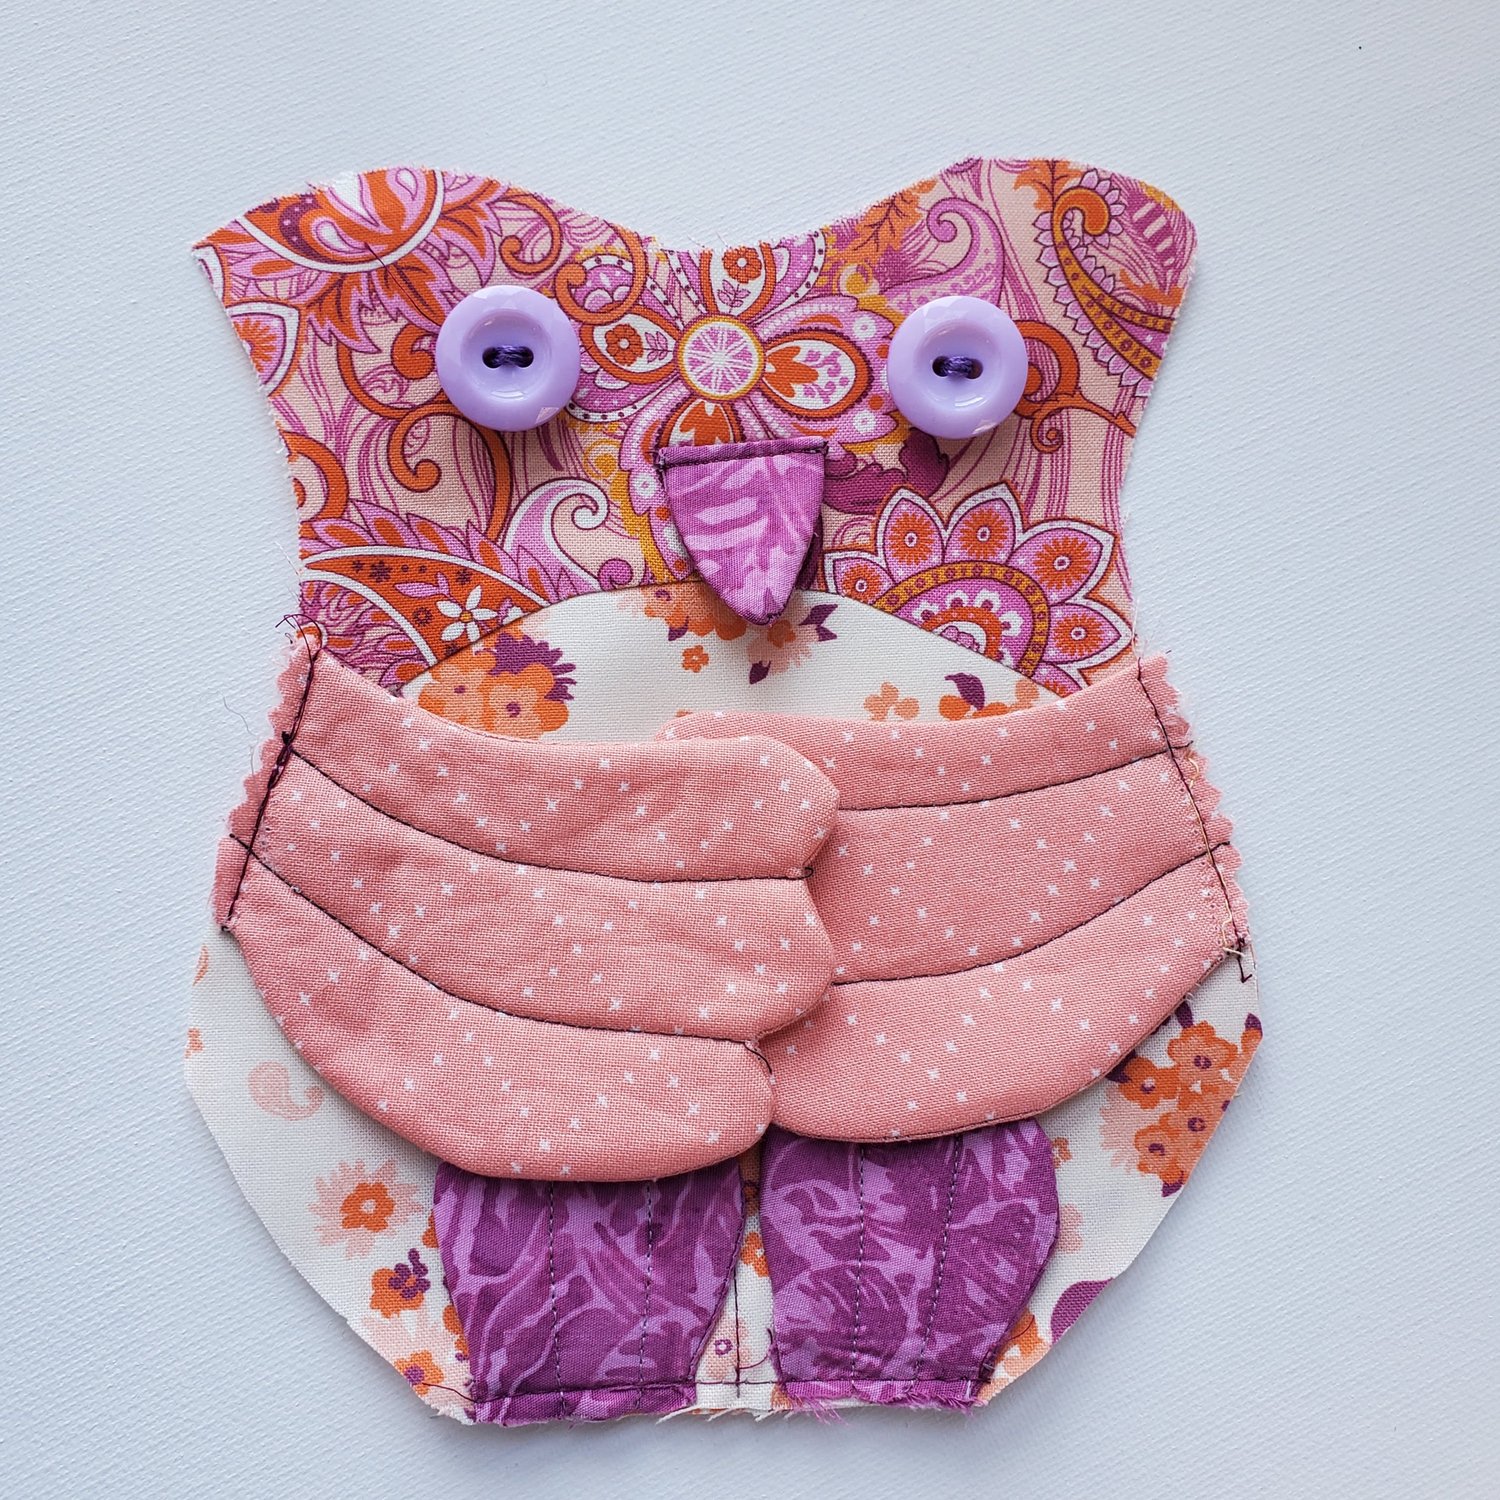
This adorable owl will keep your essential tools handy as you work on your sewing projects. His pockets can hold your embroidery scissors and thread perfect for working on your hand stitching. I found this free pattern from Shannon at The Modern Tomato featuring Crystal Manning’s Paisley Rose by Moda. The Cotton Cuts Mini Modern Maker membership provides a great assortment of fabrics perfect for this project.
Materials Needed
Assorted fat quarters (or scraps at least 6”x9”)
Coordinating Aurifil Thread from the Chroma Membership
Poly-Fil stuffing
Rice
Two buttons for eyes
Fusible fleece
To get started download and print the Pattern. You have the option to make the front of the owl all one fabric or contrasting fabrics. I did not do the fabric circles behind the button eyes. Cut out the fabric pieces according to the pattern. I found it helpful to backstitch at the start and end of all the seams to secure the stitching.
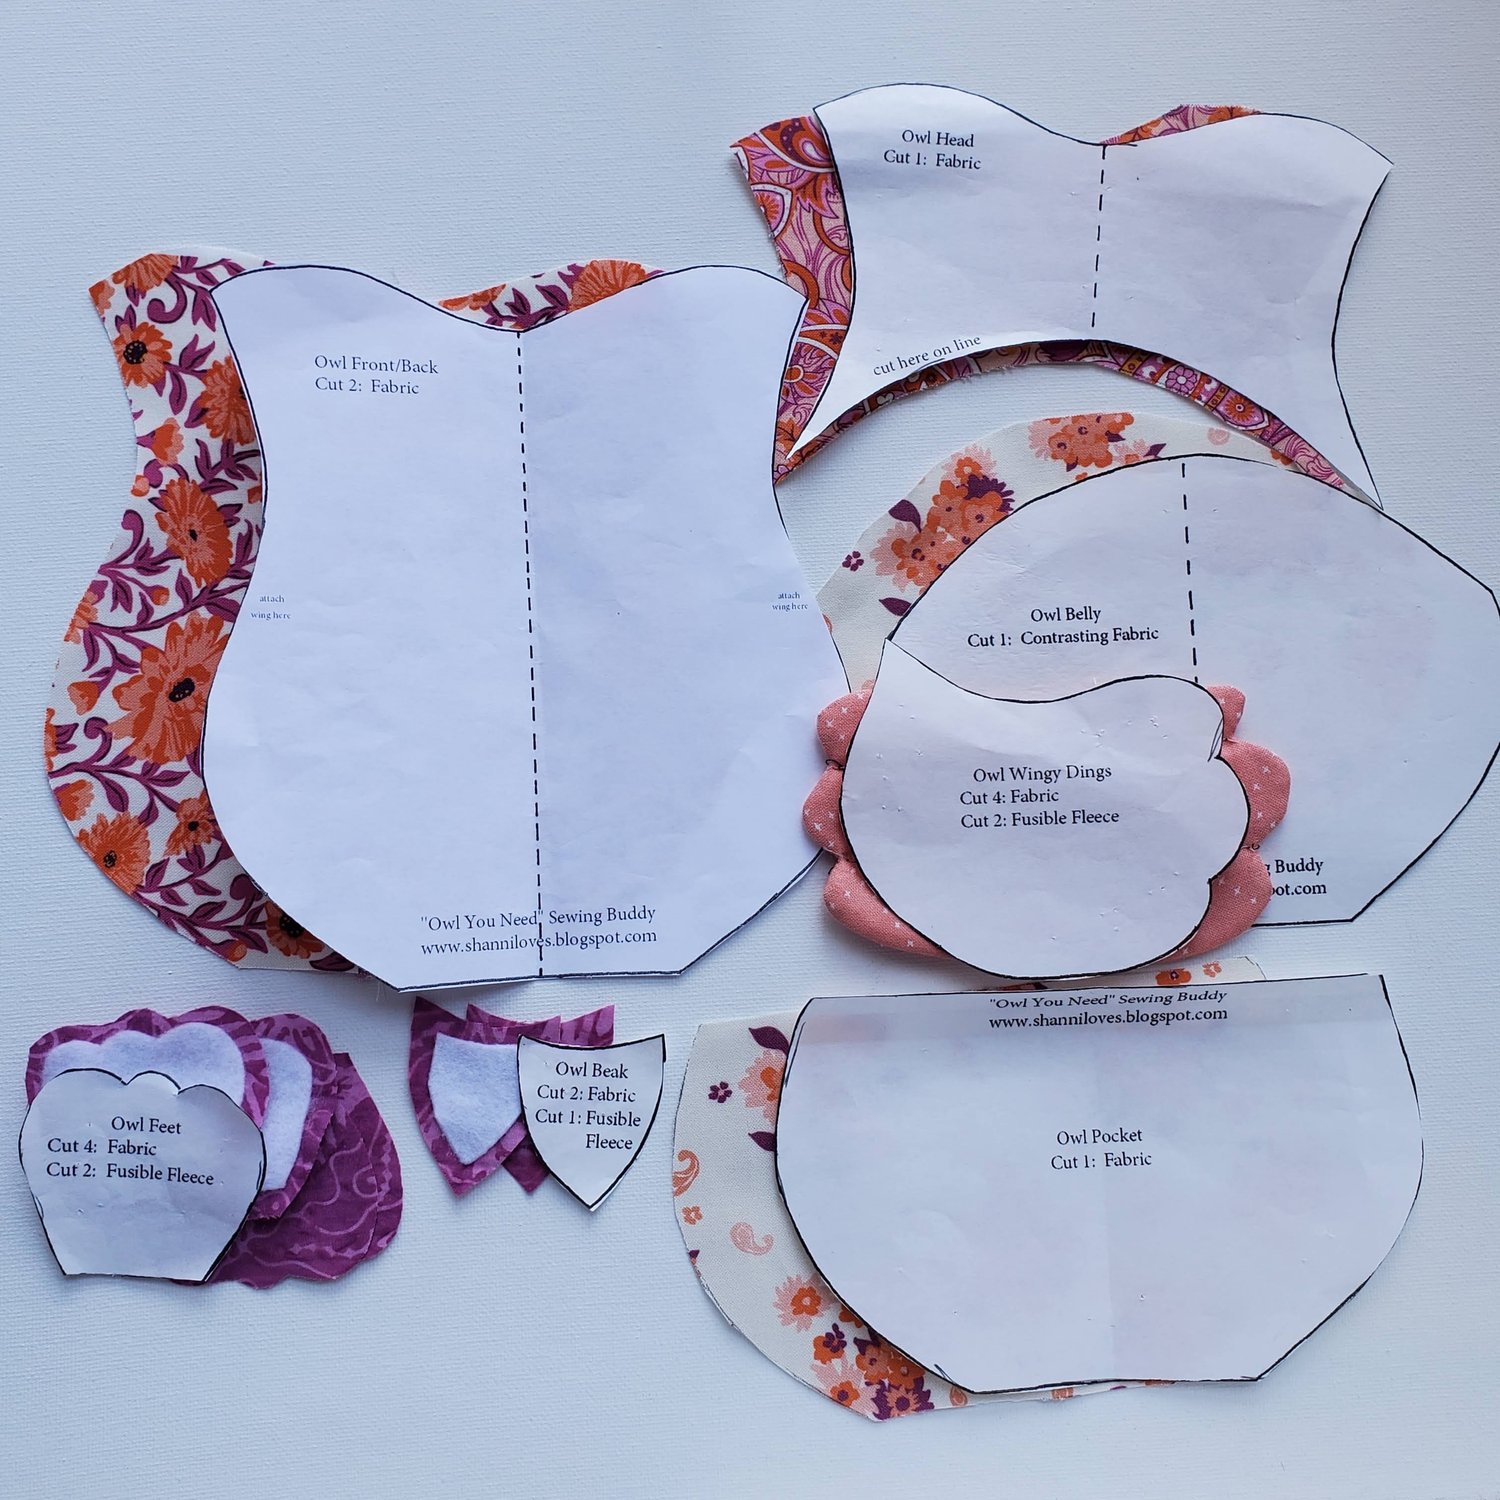
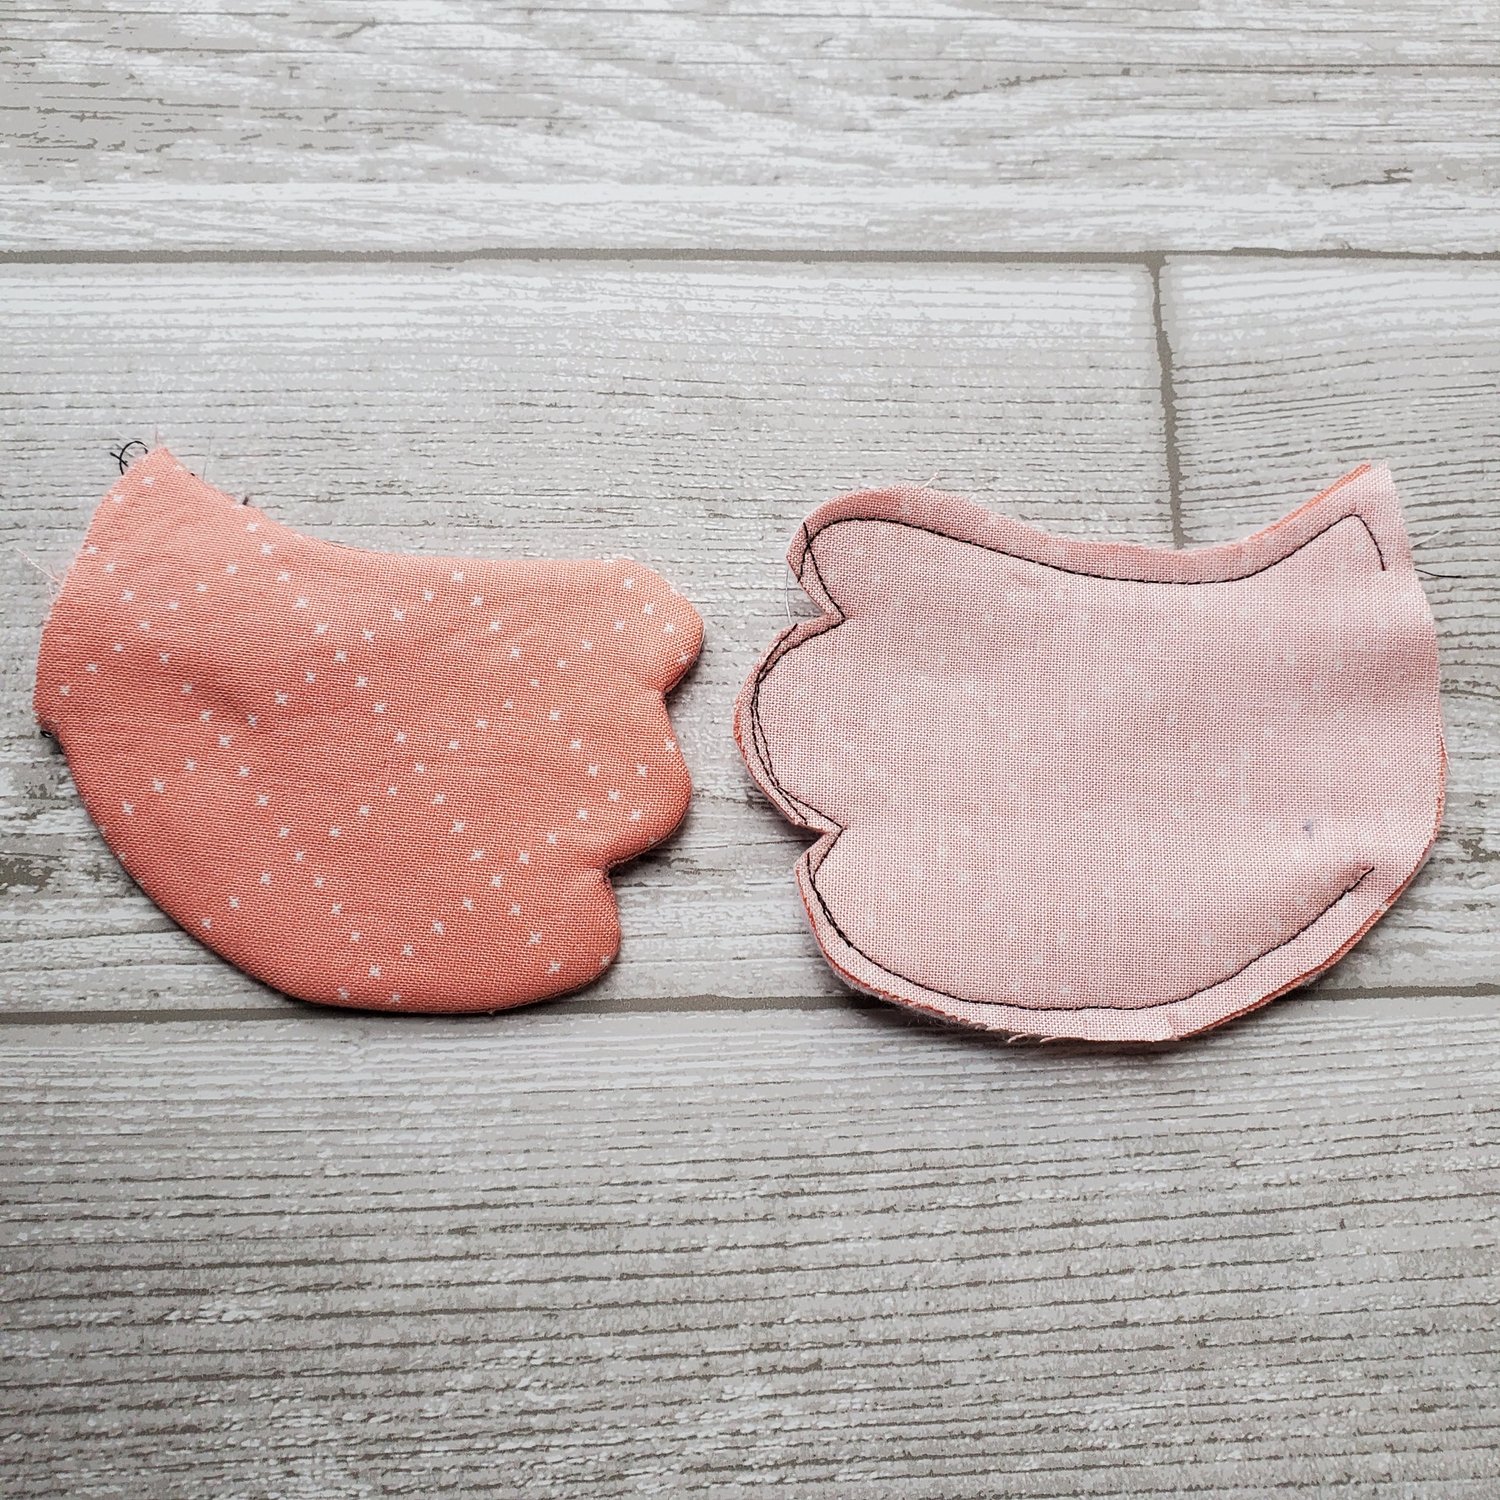
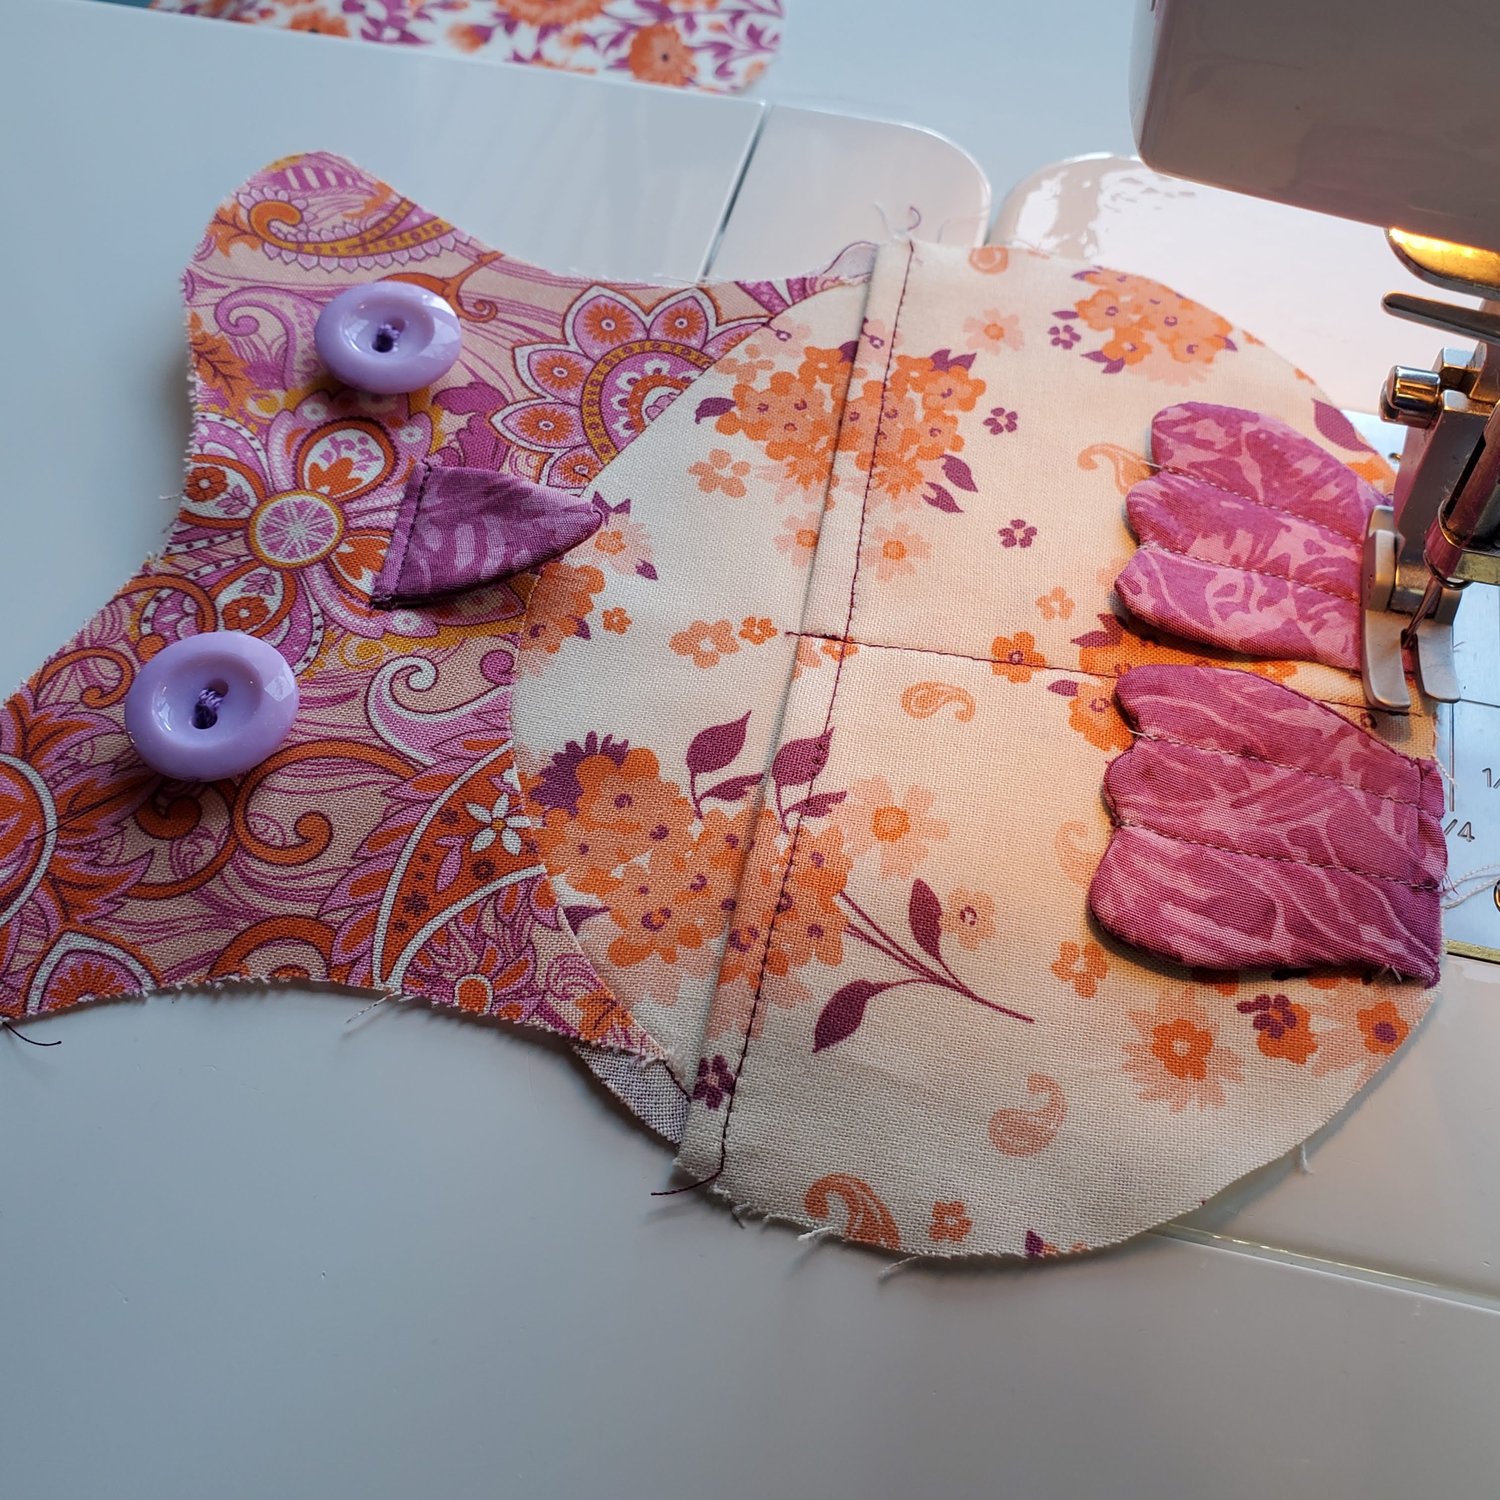
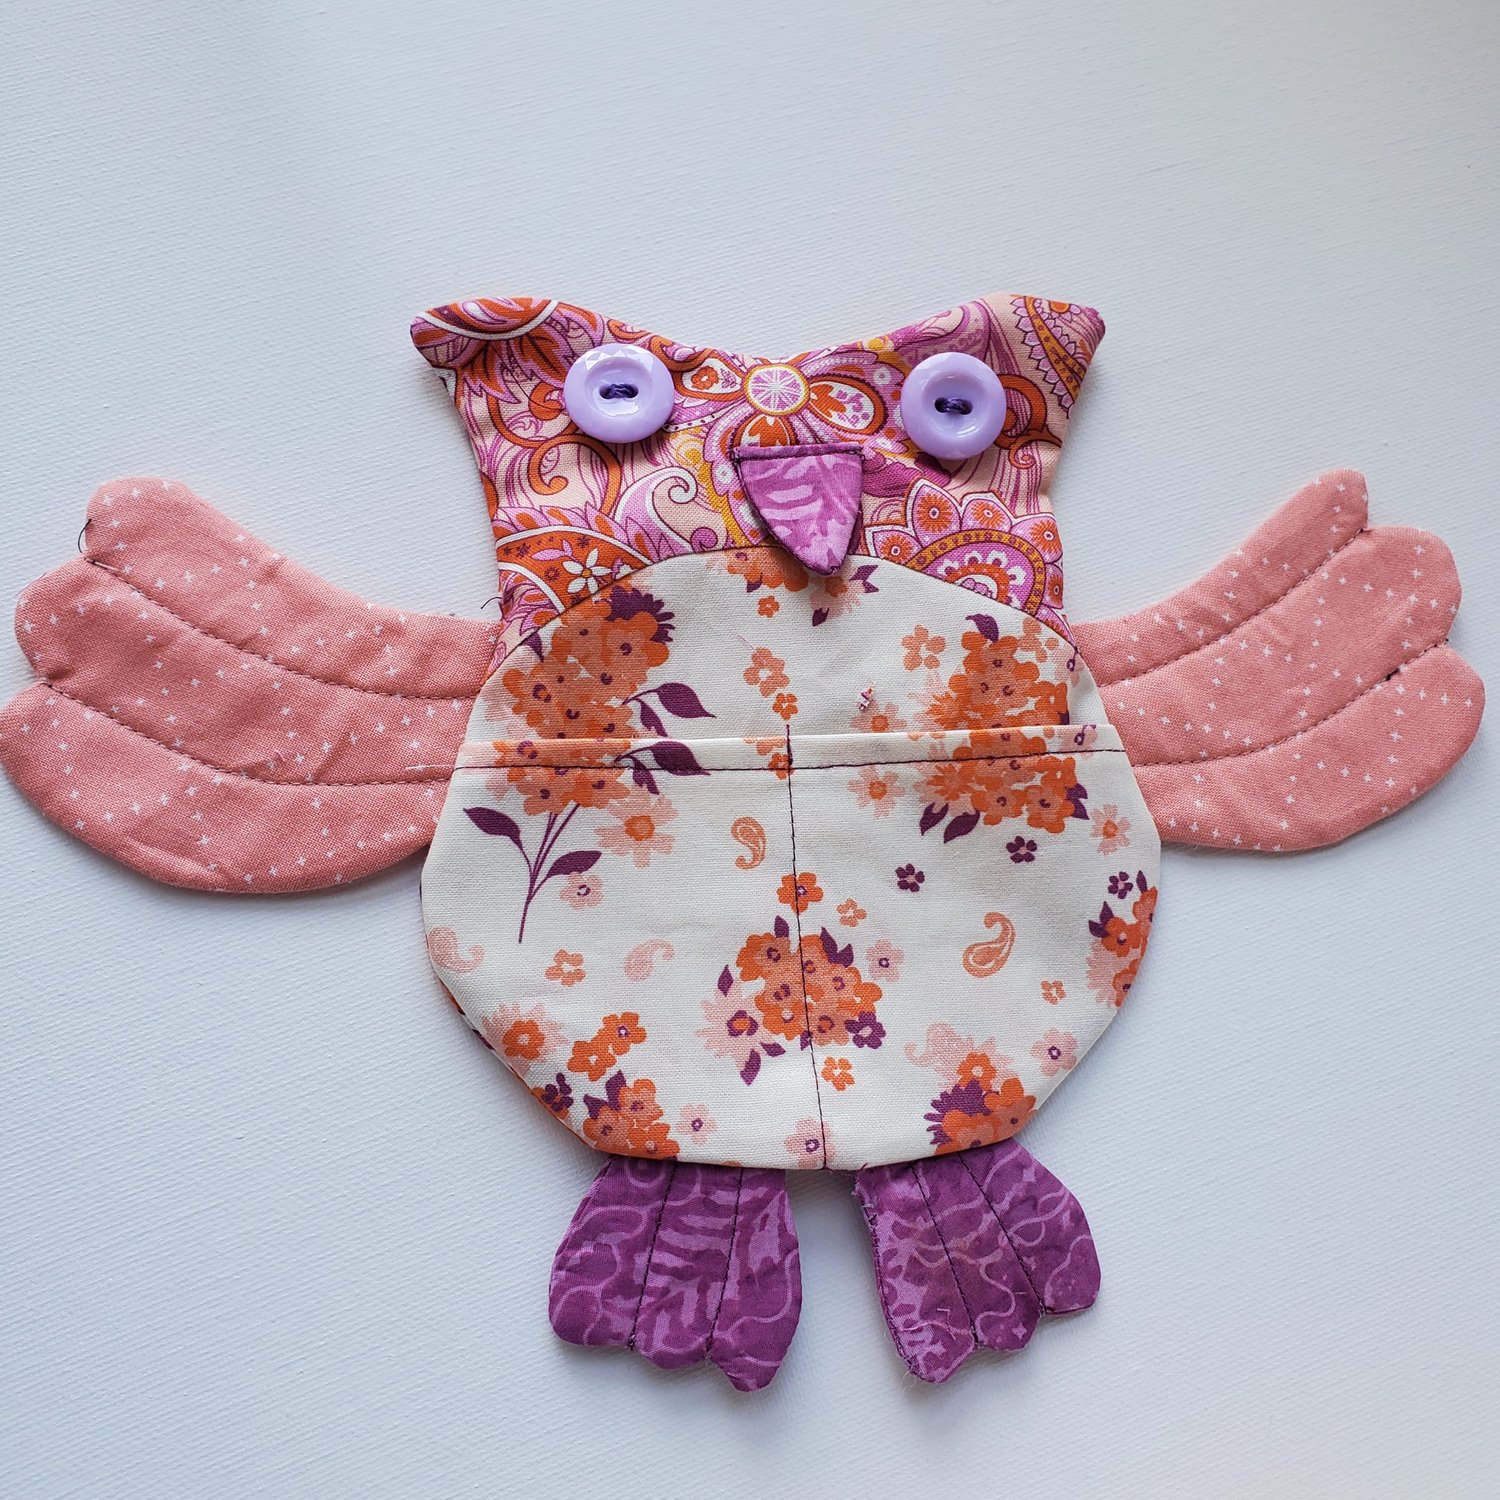
Cut the fusible fleece pieces about ¼” smaller to reduce the bulk in the seams. Fuse fleece in place on the feet, wings and beak. Sew the feet together with the right sides together leaving the straight edge open for turning. Be sure to sew the curves deep enough to create the toes for the owl. Clip the inward curve at each toe to help the seam lay flat. Turn right sides out and press. Topstitch two lines with a coordinating thread to create the toes. Do the same for the wings.
Take the owl head and the contrasting belly and pin the pieces aligning the edges. Sew a ¼” seam using a smaller 2mm stitch length. Press. (You may notice a seam close to the bottom edge in the picture. I was using scraps and since the owl belly was going to be covered with the pocket I was able to add the seam that will not be visible once completed.)
Next take the owl pocket and press the long straight edge under ¼” and press. Turn another ¼” and press. Topstitch along this edge to finish the top of the pocket. Fold the pocket in half and finger press to mark the middle line. Align the bottom edge with the front of the owl and topstitch down the middle to create two openings in the pocket while attaching it to the front of the owl.
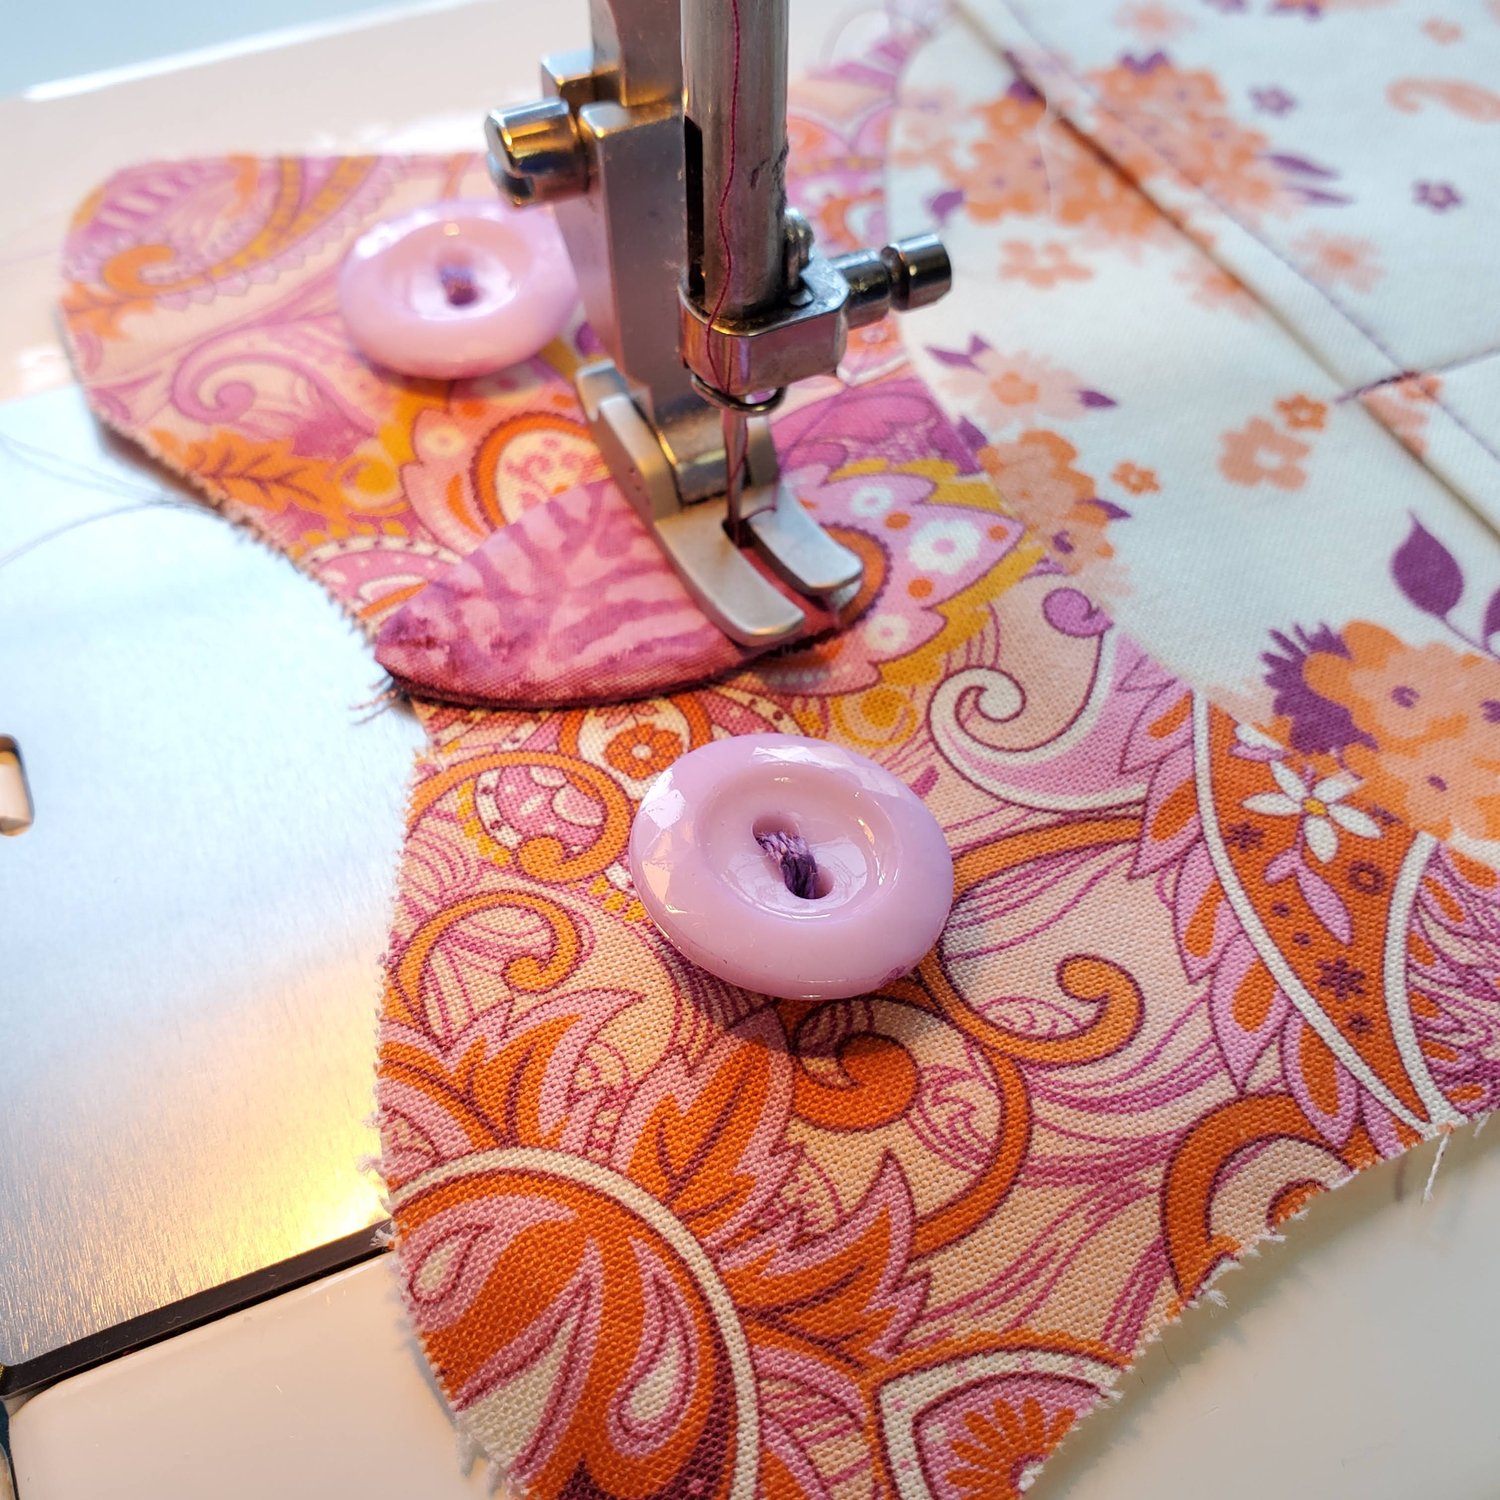
Mark the placement for the eyes and hand stitch in place. I like to use the 12wt Aurifil thread to hold them securely in place.

Sew the beak pieces right sides together and turn right sides out. Press. Center the beak between the eyes and sew the first seam with the beak pointing upwards.
Be sure to stitch close to the edge with a smaller 2mm stitch length. Next fold the beak pointing downwards in the proper position and topstitch in place. Align the feet along the bottom edge pointing upwards and baste in place about ⅛” from the edge.
Place the wings on the sides according to marking on pattern and baste in place.
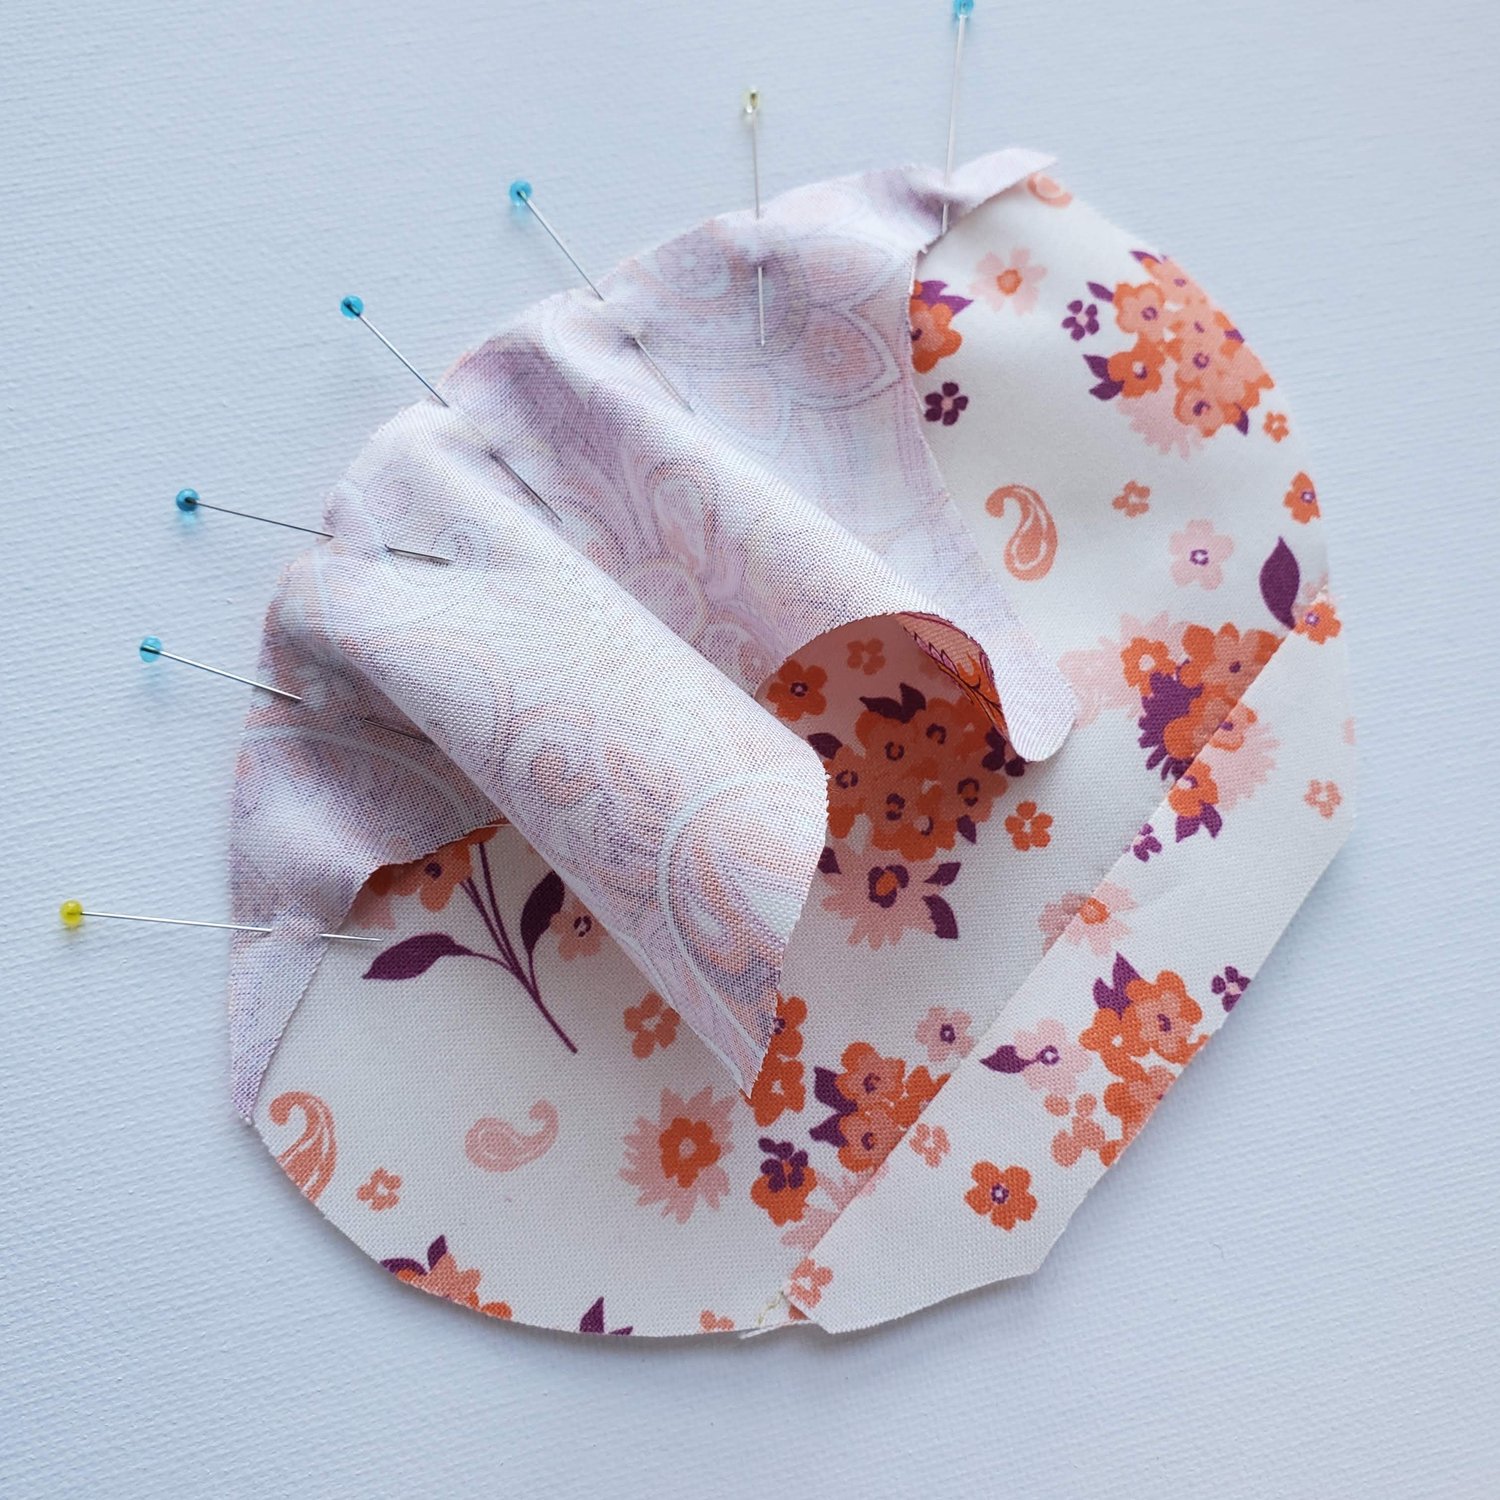
Next take the back of the owl and with the right sides together pin or clip to the front piece. I decided to leave the opening for turning along the flat edge at the bottom. Sew with a ¼” seam. Clip the curves or use pinking shears to help the seams lay flat. Turn right sides out.
I like to firmly stuff a pincushion. I use a dowel rod to push small clumps of stuffing into the top of the head.

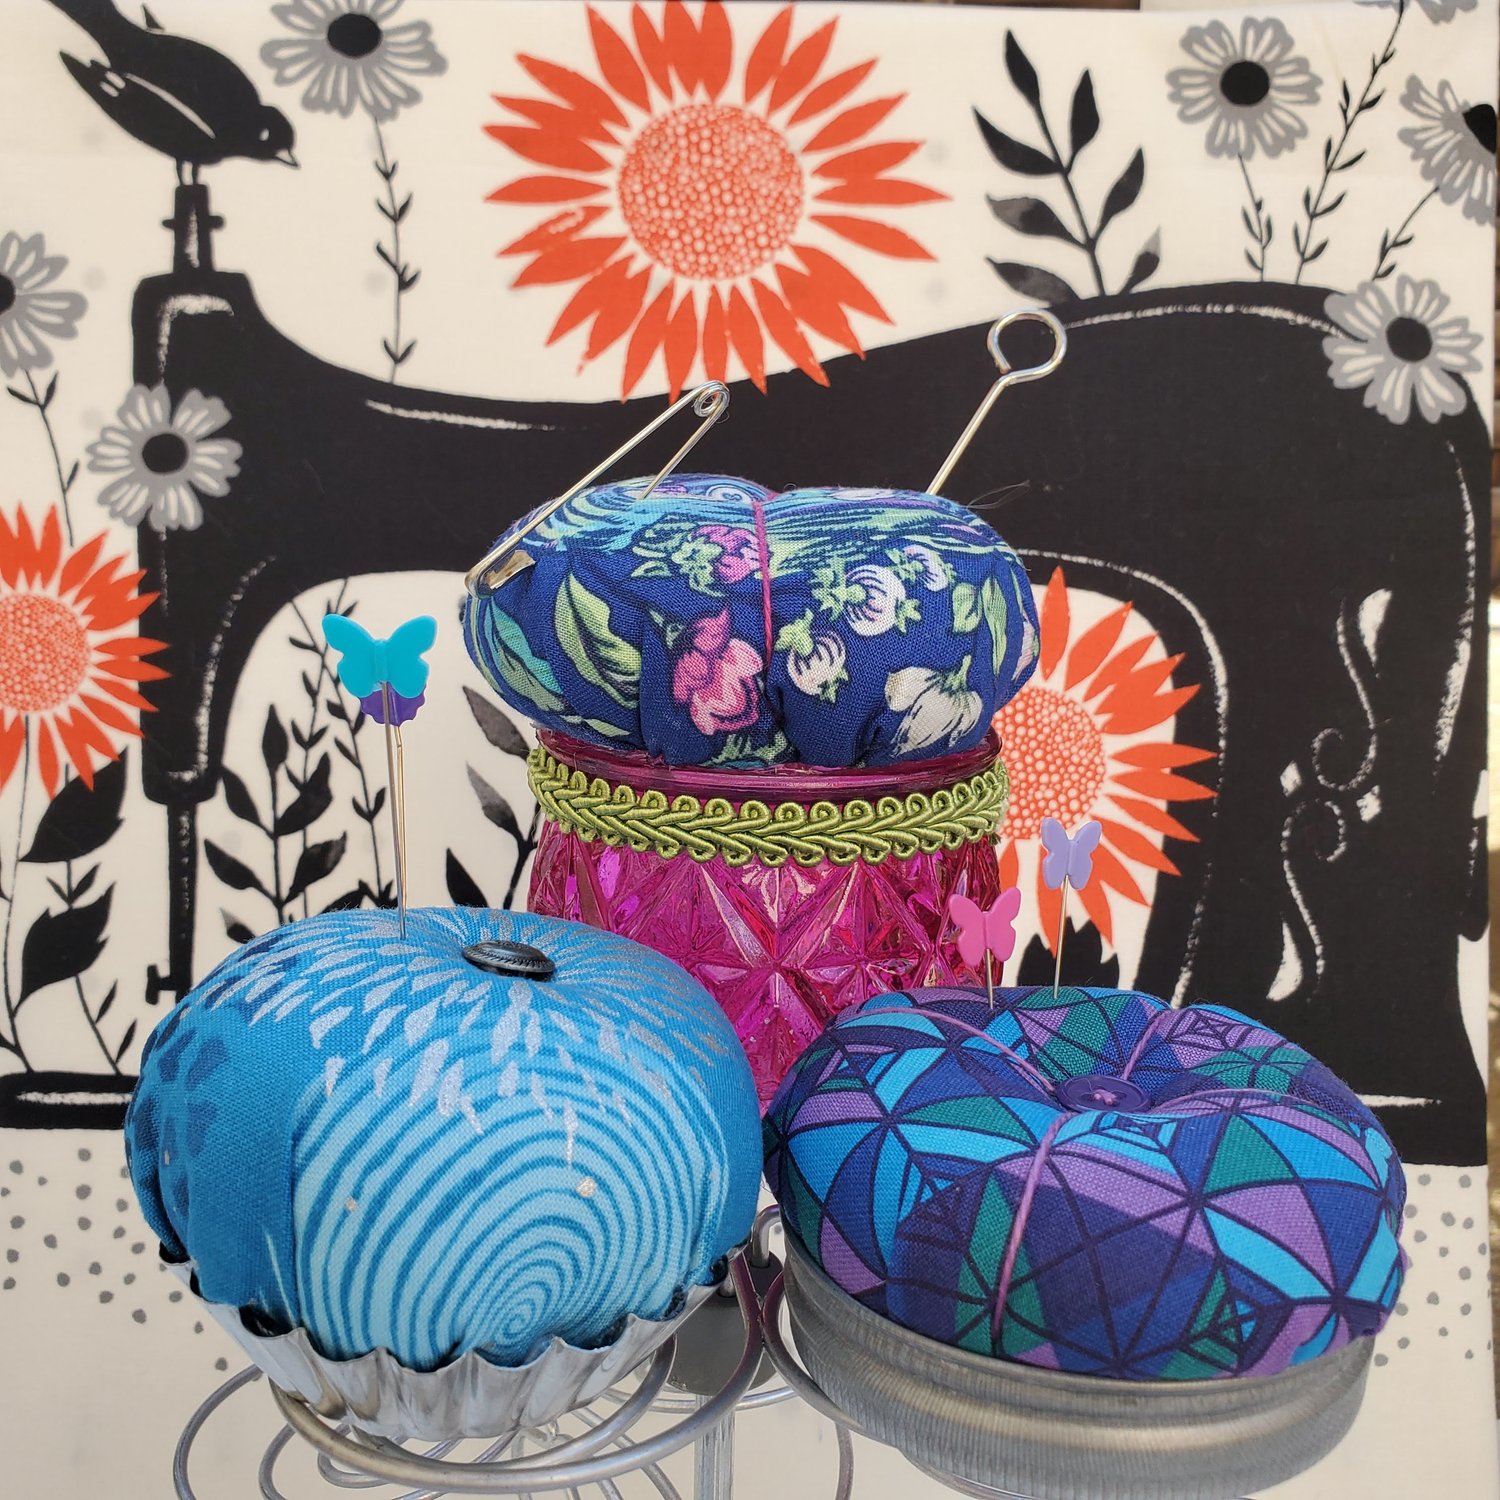
Continue to add stuffing leaving space in the bottom to add about a cup of rice. You could also use a flat rock in place of the rice to help the owl stay upright. Then cover the rice with a few fluffs of stuffing and fold the raw edges towards the inside and hand sew the opening closed. Hand stitch the wings in place leaving some space to hold your favorite notions. Here is my owl along with the one my sister made in some fun aqua blue fabrics.

If you want more ideas for pincushions check out this DIY Pincushion Bag using assorted bases to brighten your sewing space.