

DIY Drawstring Backpack
12th Aug 2021
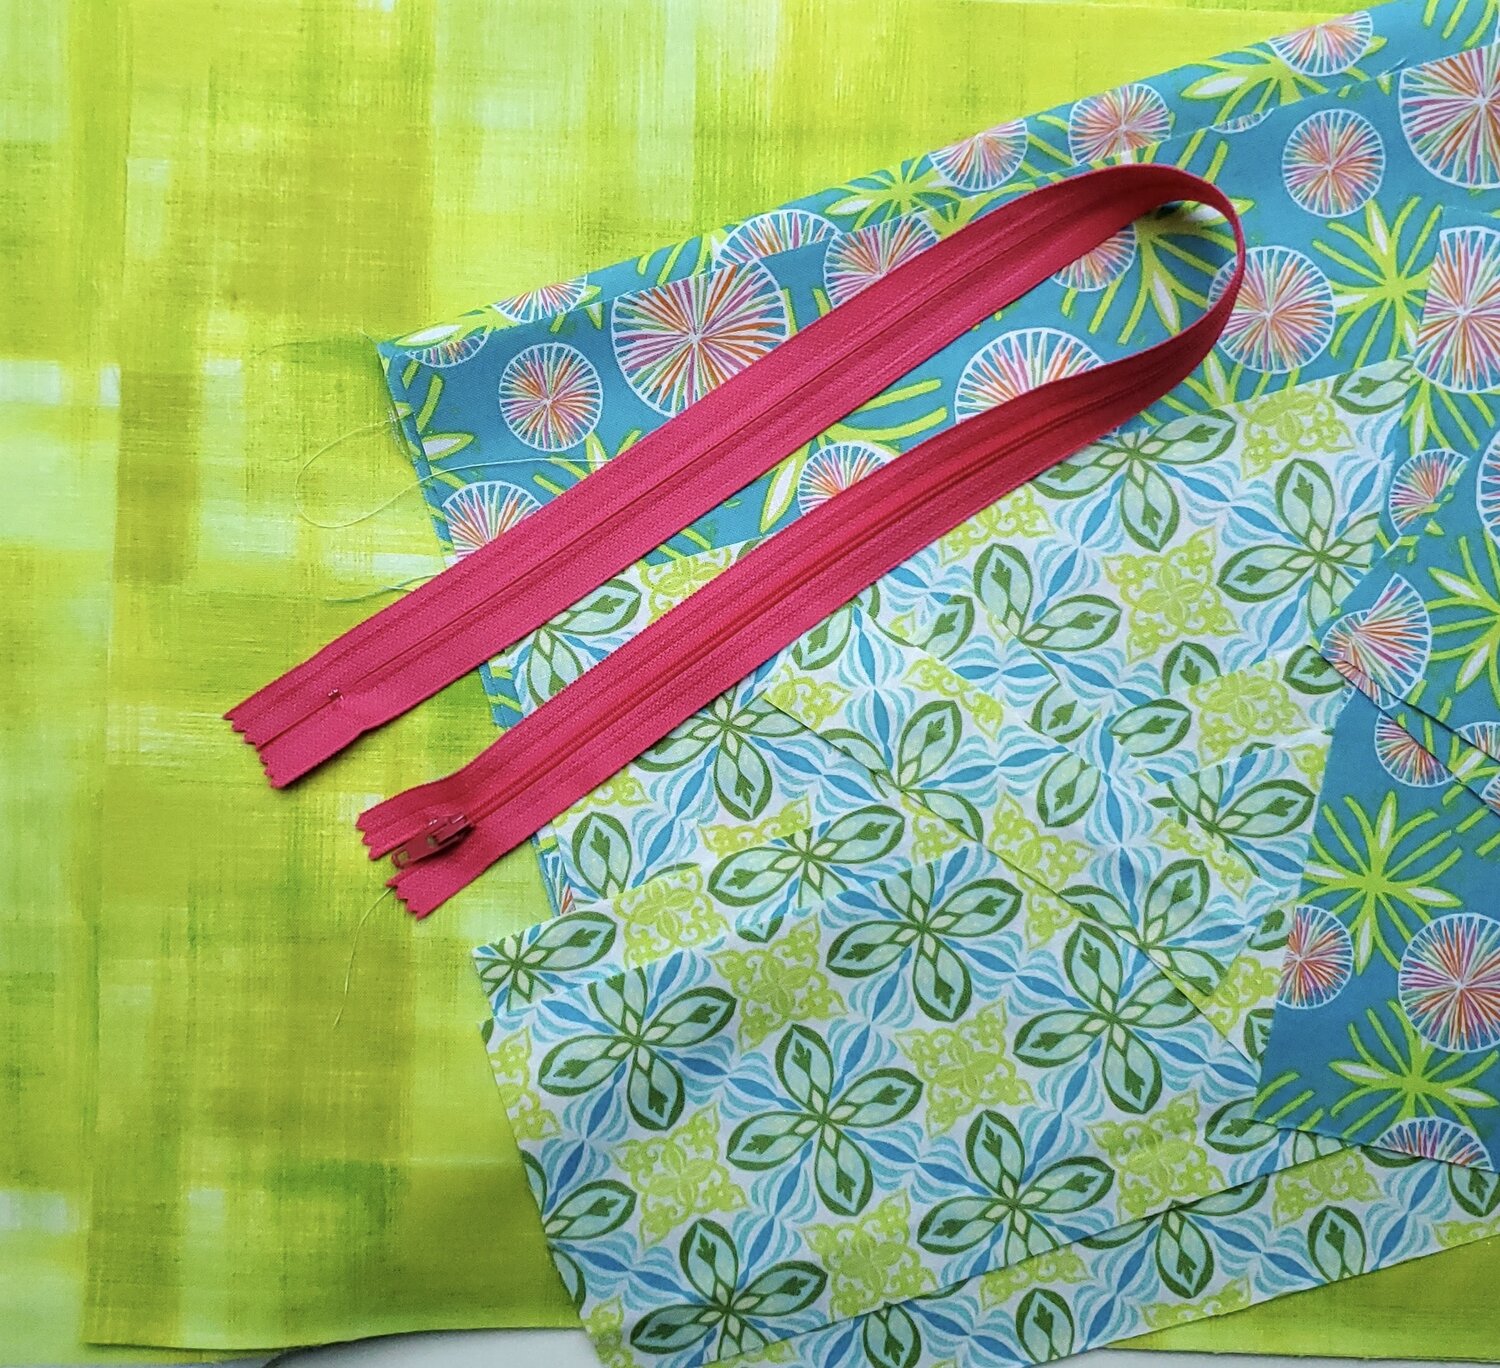
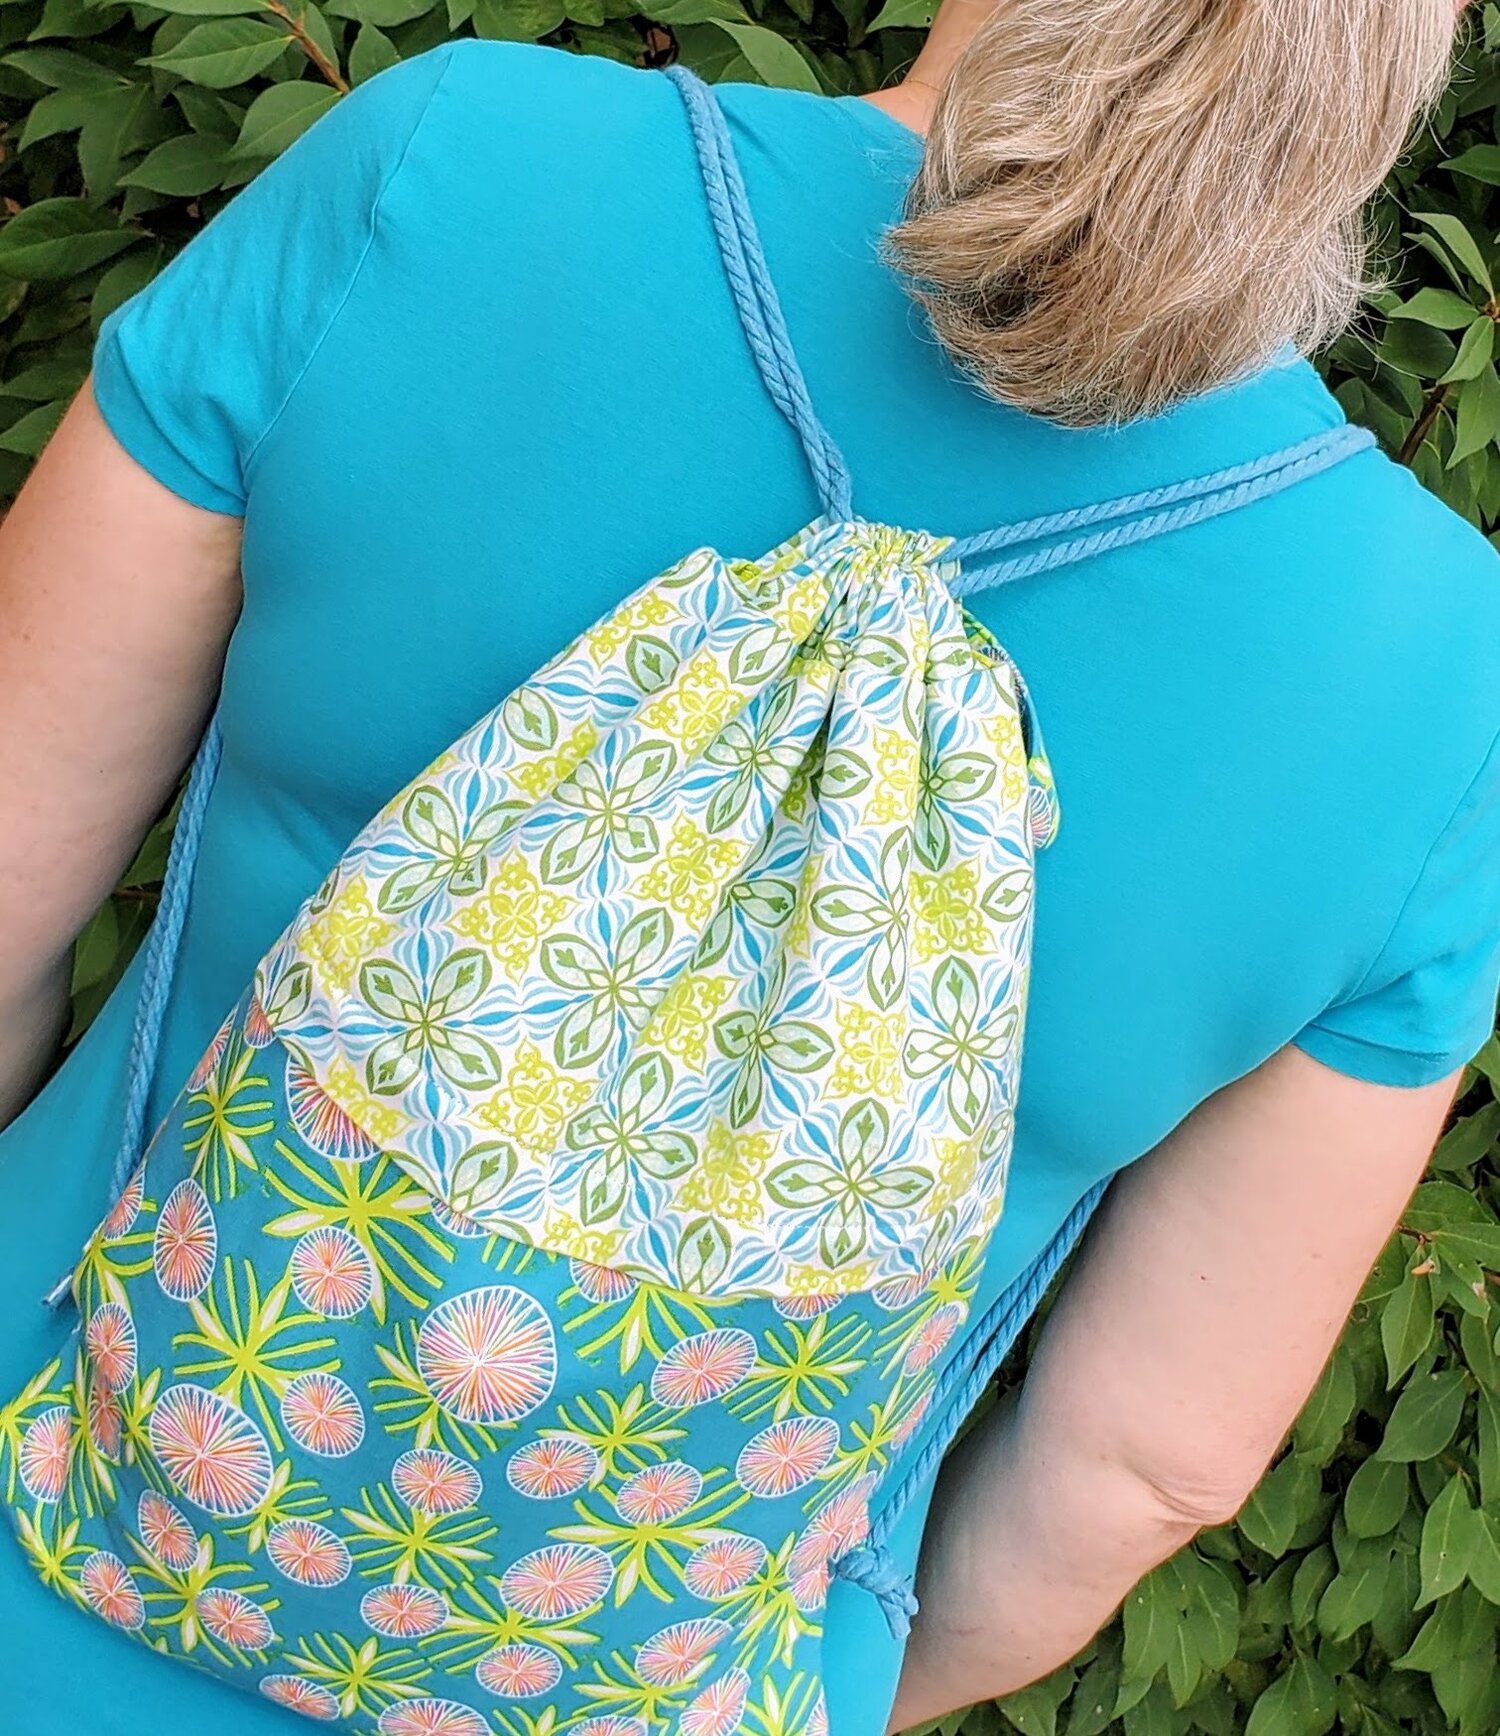
Drawstring backpacks are the perfect accessory to pack for travel as they are so versatile and handy for everyday use. Apple Green Cottage has a wonderful pattern and tutorial to make a small or large size bag. I made the small bag using two fat quarters from the August Classic Membership featuring the Enchanted collection by Valori Wells for Free Spirit. This would be a great first backpack for the little ones or for a hands free way to carry everyday essentials in style.

Materials Needed
Two fat quarters of coordinating fabric
½ yard of lining fabric from Cotton Cuts Fabric Shop
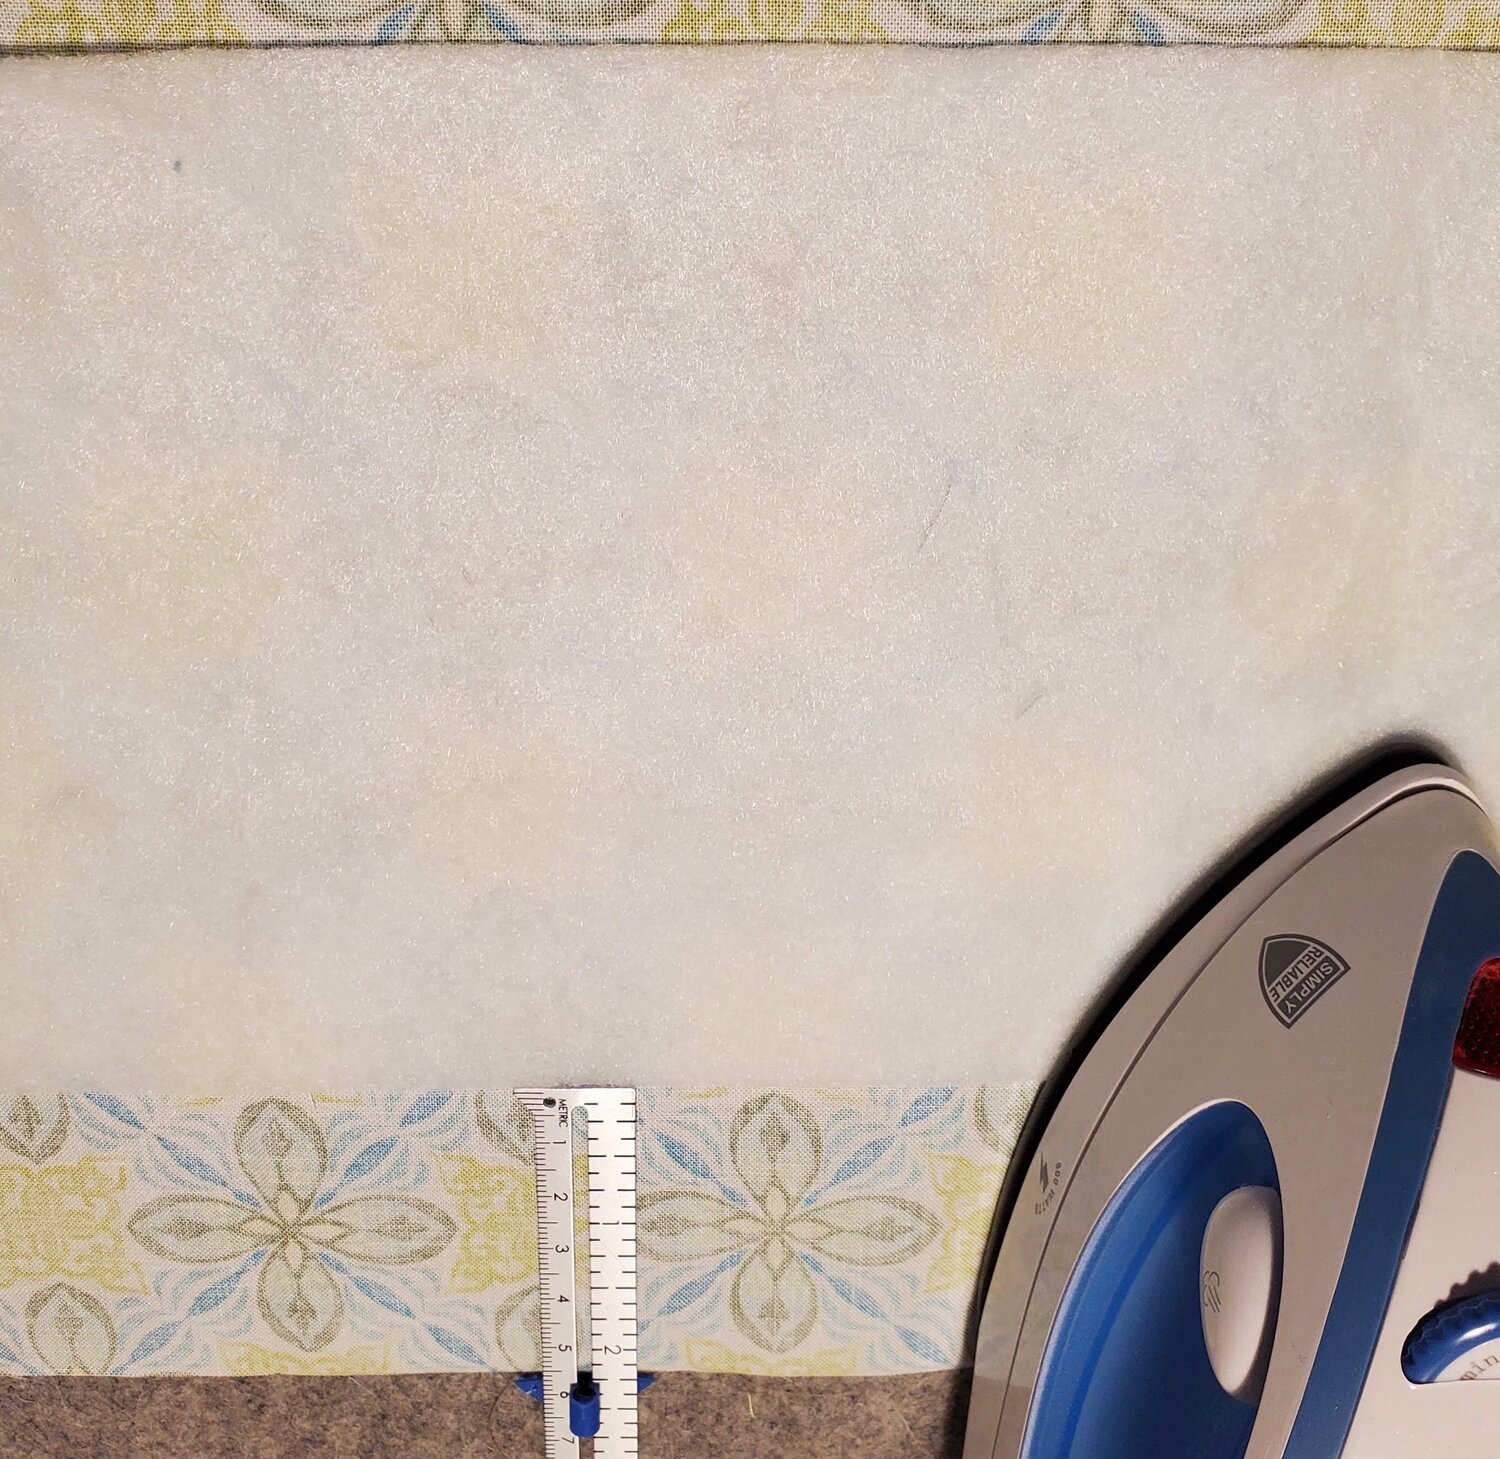
½ yard 45” fusible fleece interfacing
9” or larger zipper
Two pieces of 55” long ¼” braided cotton cord from Hobby Lobby
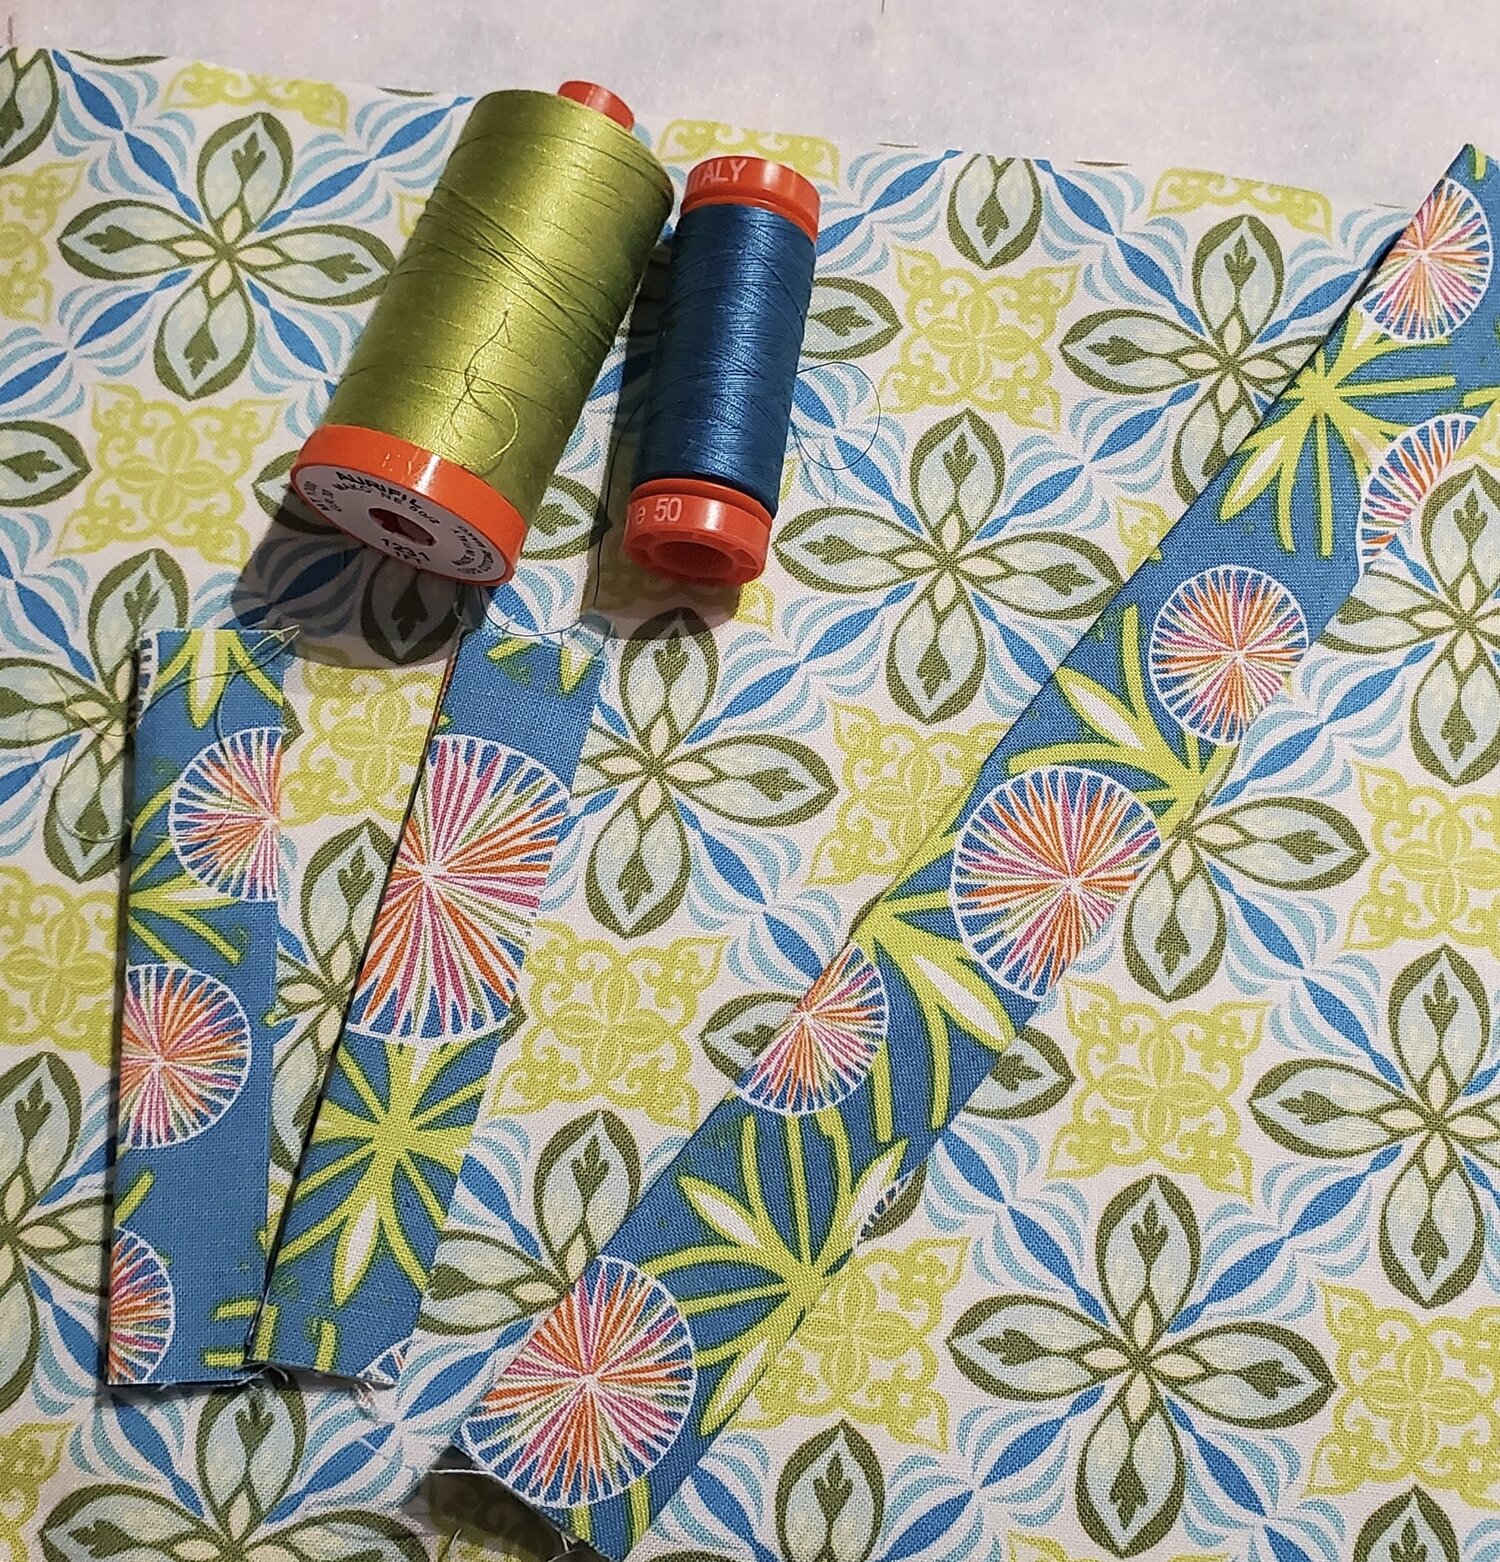
Coordinating Aurifil Thread from Chroma Membership
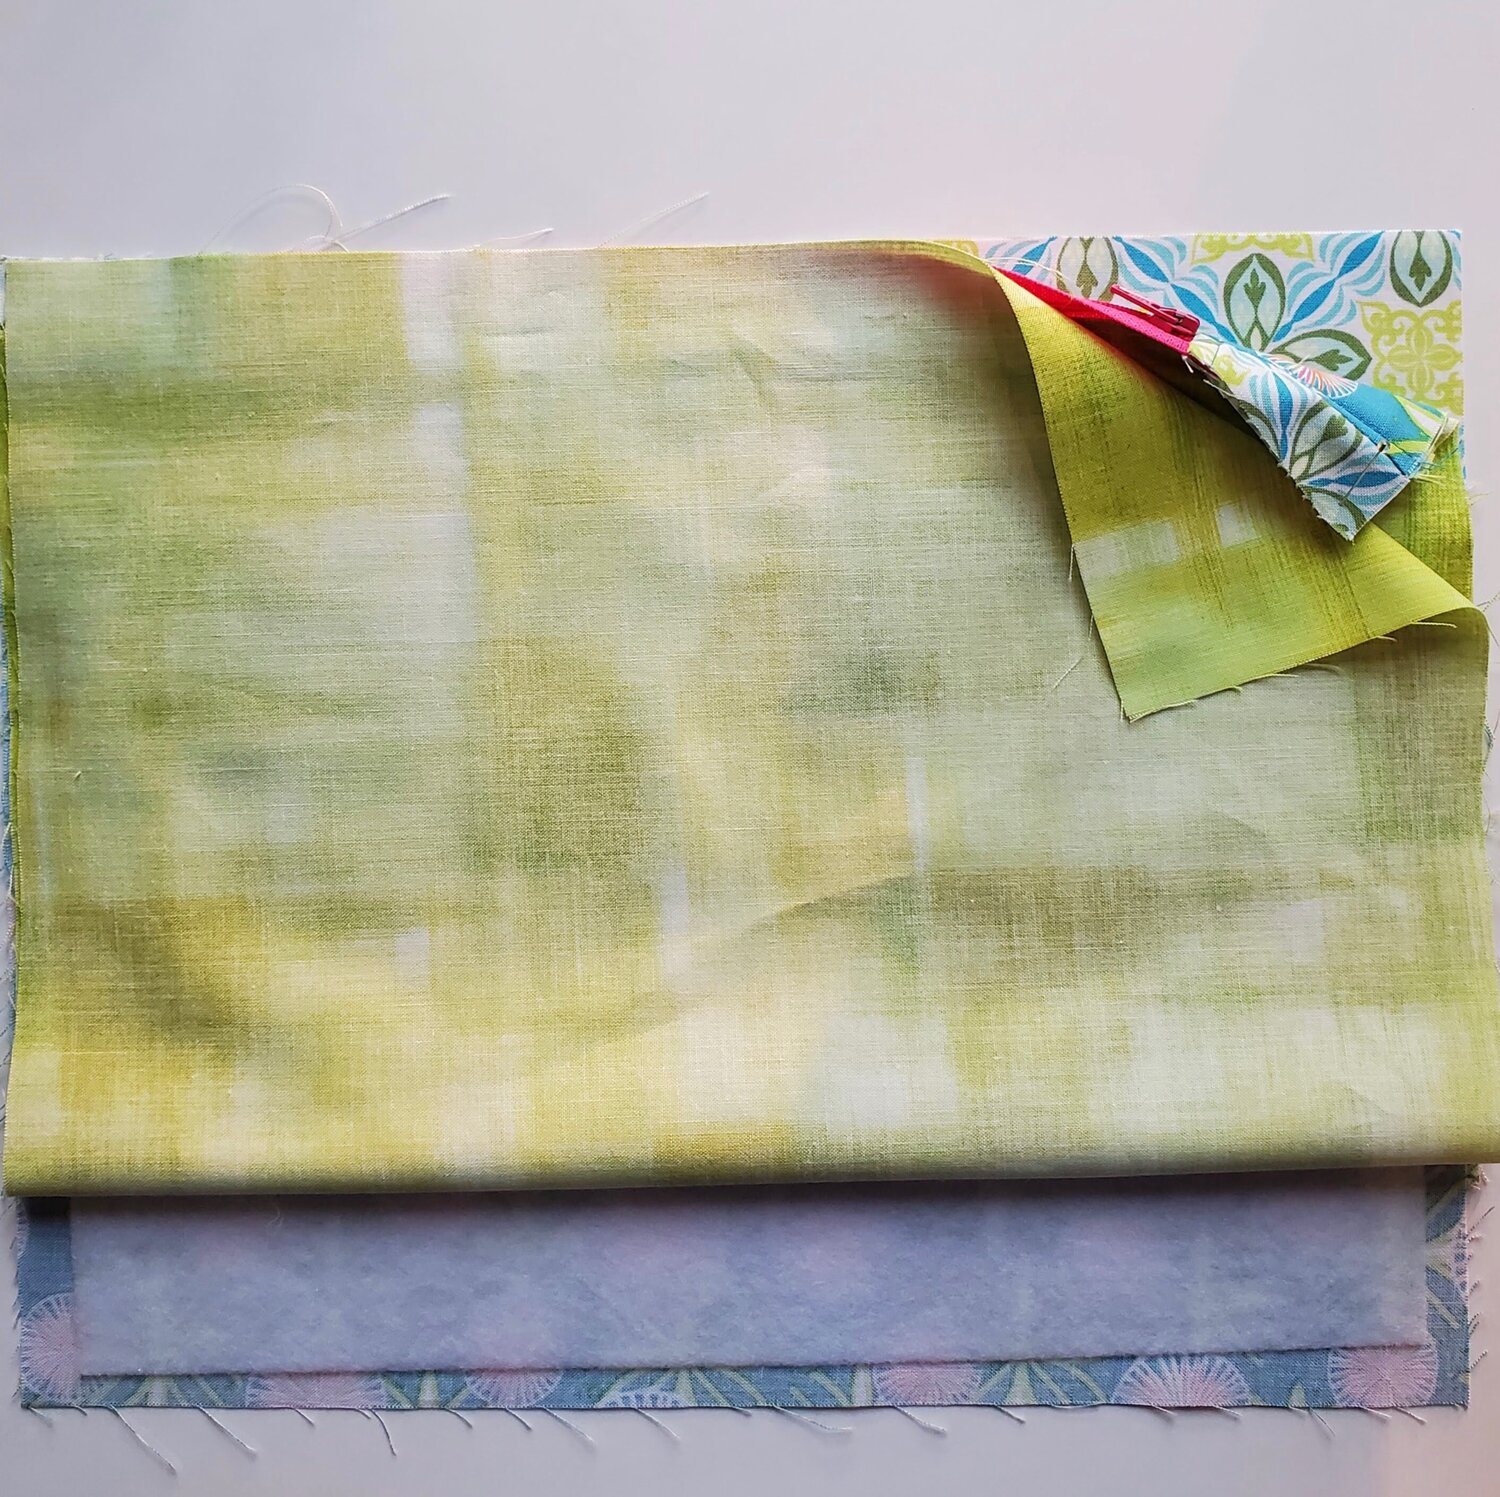
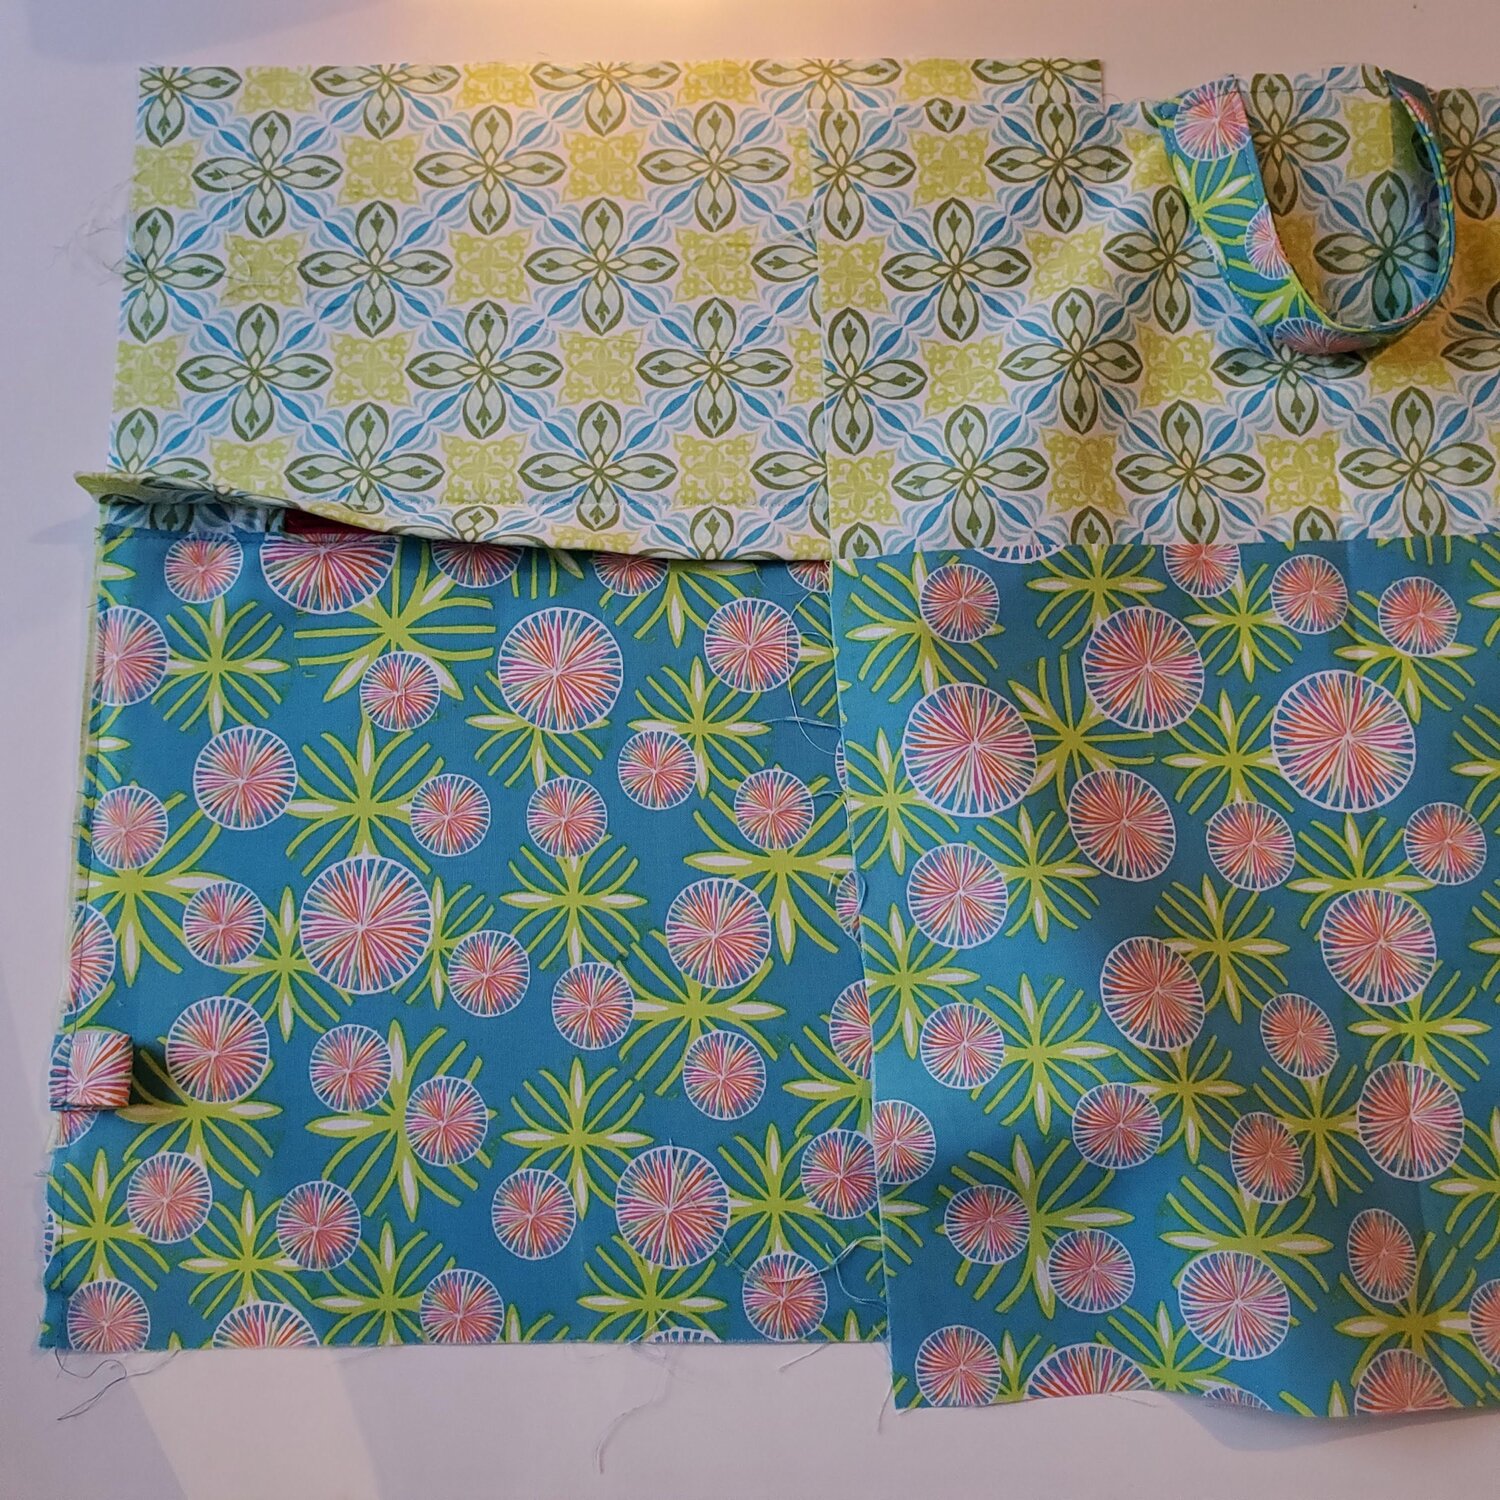
To get started, print out the List of pieces to check off as you cut. I wanted to use these two fabulous coordinating fabrics for the outside and needed to be creative to fit the pieces from the fat quarters. Instead of making the back one solid piece, I cut it into two pieces to match the front. This small change allowed me to use the fat quarters with very little leftover.
Follow the cut instructions from the pattern, except substitute the 13x16” piece with a 10 ½” x 13” from the main fabric. From the accent fabric cut list add a back top piece cut at 6”x13”. Sew the two pieces together with a ¼” seam allowance to create one back piece measuring 13x16”. Cut all the remaining pieces and the fusible fleece interfacing. I found it helpful to label the pieces with a Frixion pen to keep it organized.
Iron all the fusible fleece to the wrong side of the matching pieces. The fleece is cut smaller so you will want to center it on the fabric to allow for the ½” seam allowance. Give special attention to the front outer piece for proper alignment to allow for the zipper. The bottom fleece edge is 2 ¼” from the outer fabric edge and the top is ½”.
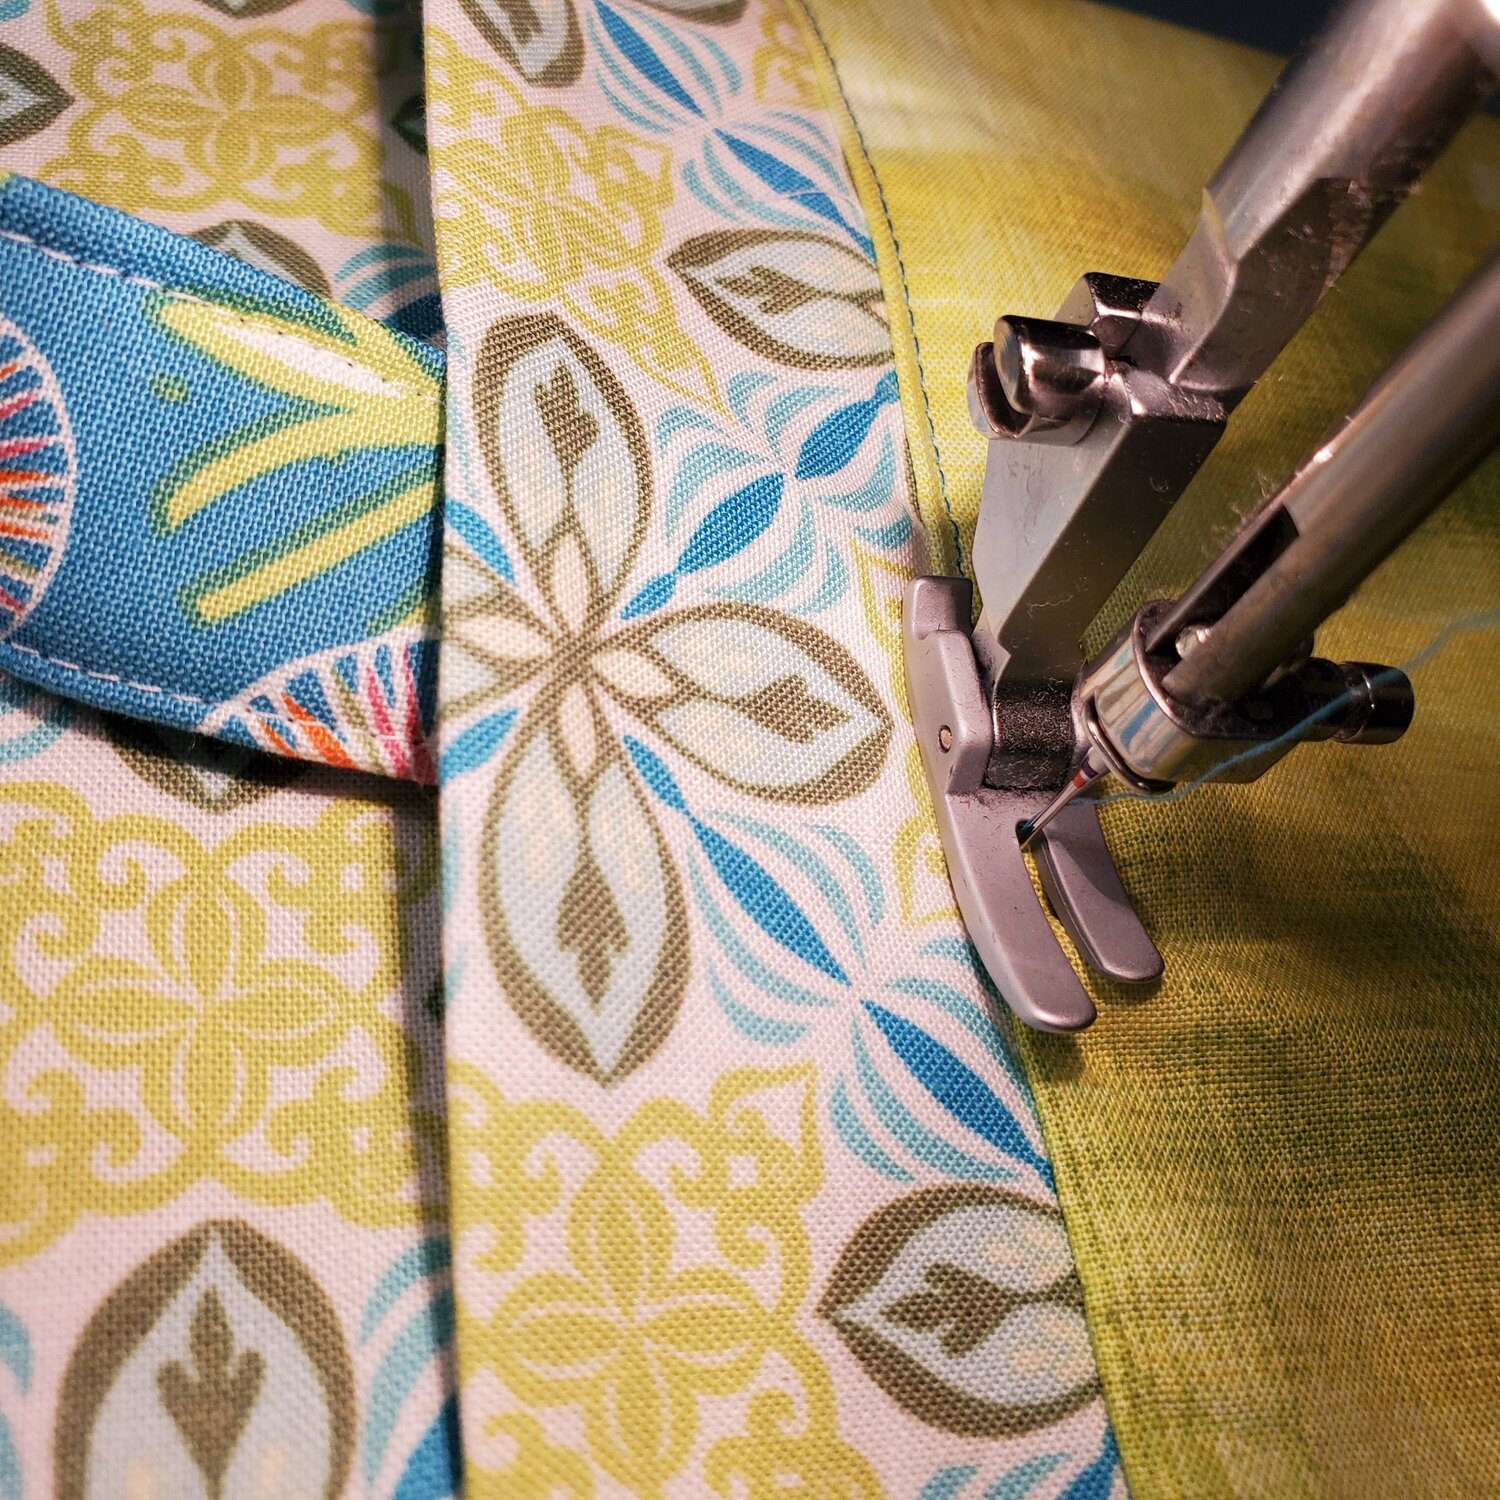
To get started, you will make the top handle and the two anchor tabs from the labeled pieces. Fold in half lengthwise and press; open folding raw edges to the center crease and press. Fold on the original crease creating the handle. Sew ⅛” from the edge lengthwise using a longer stitch length. You can use a matching thread or a contrasting thread to give it a little pop of color. Set aside.
Next you will sew the two casing pieces. For these pieces, you will fold the short ends ¼” and press, and fold ¼” again and press. Topstitch ⅛” from the pressed edges. Fold in half lengthwise and press. Set aside.
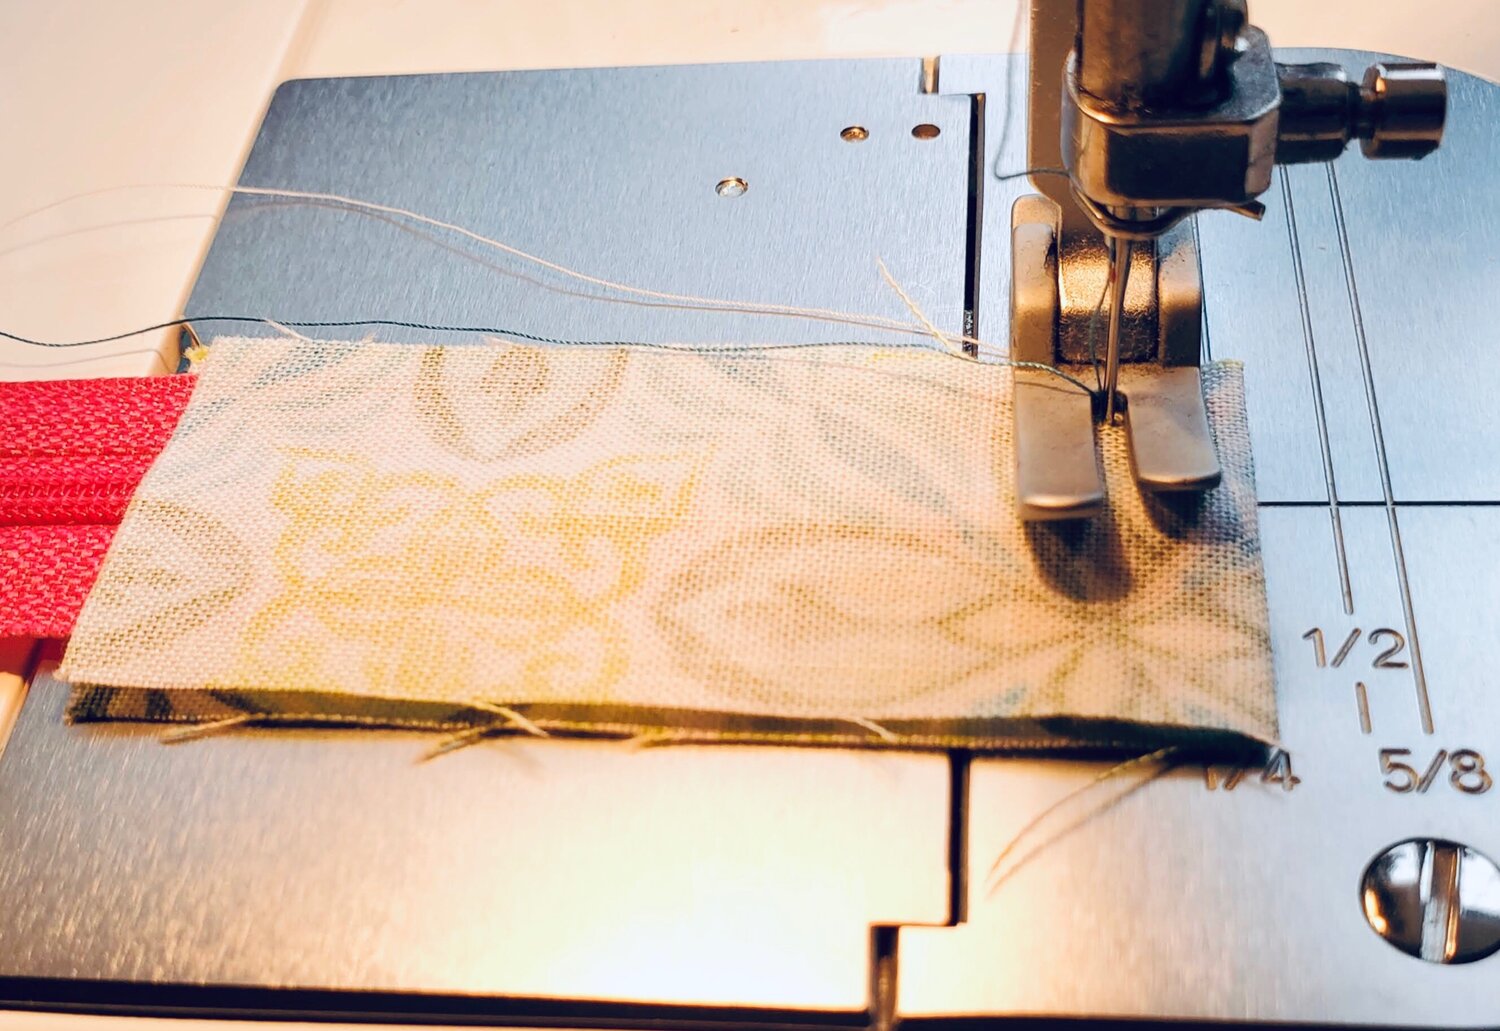
Now it is time to prepare the zipper. You can use a 9” zipper or as I have used for many projects Zipper by the yard that you can cut to size and add your zipper pull. For this bag, I had a longer pink zipper that I stitched ⅛” from the line of where to cut on both ends with the pull in the middle. I had the zipper tabs folded in half with right sides together ready to pin in place.
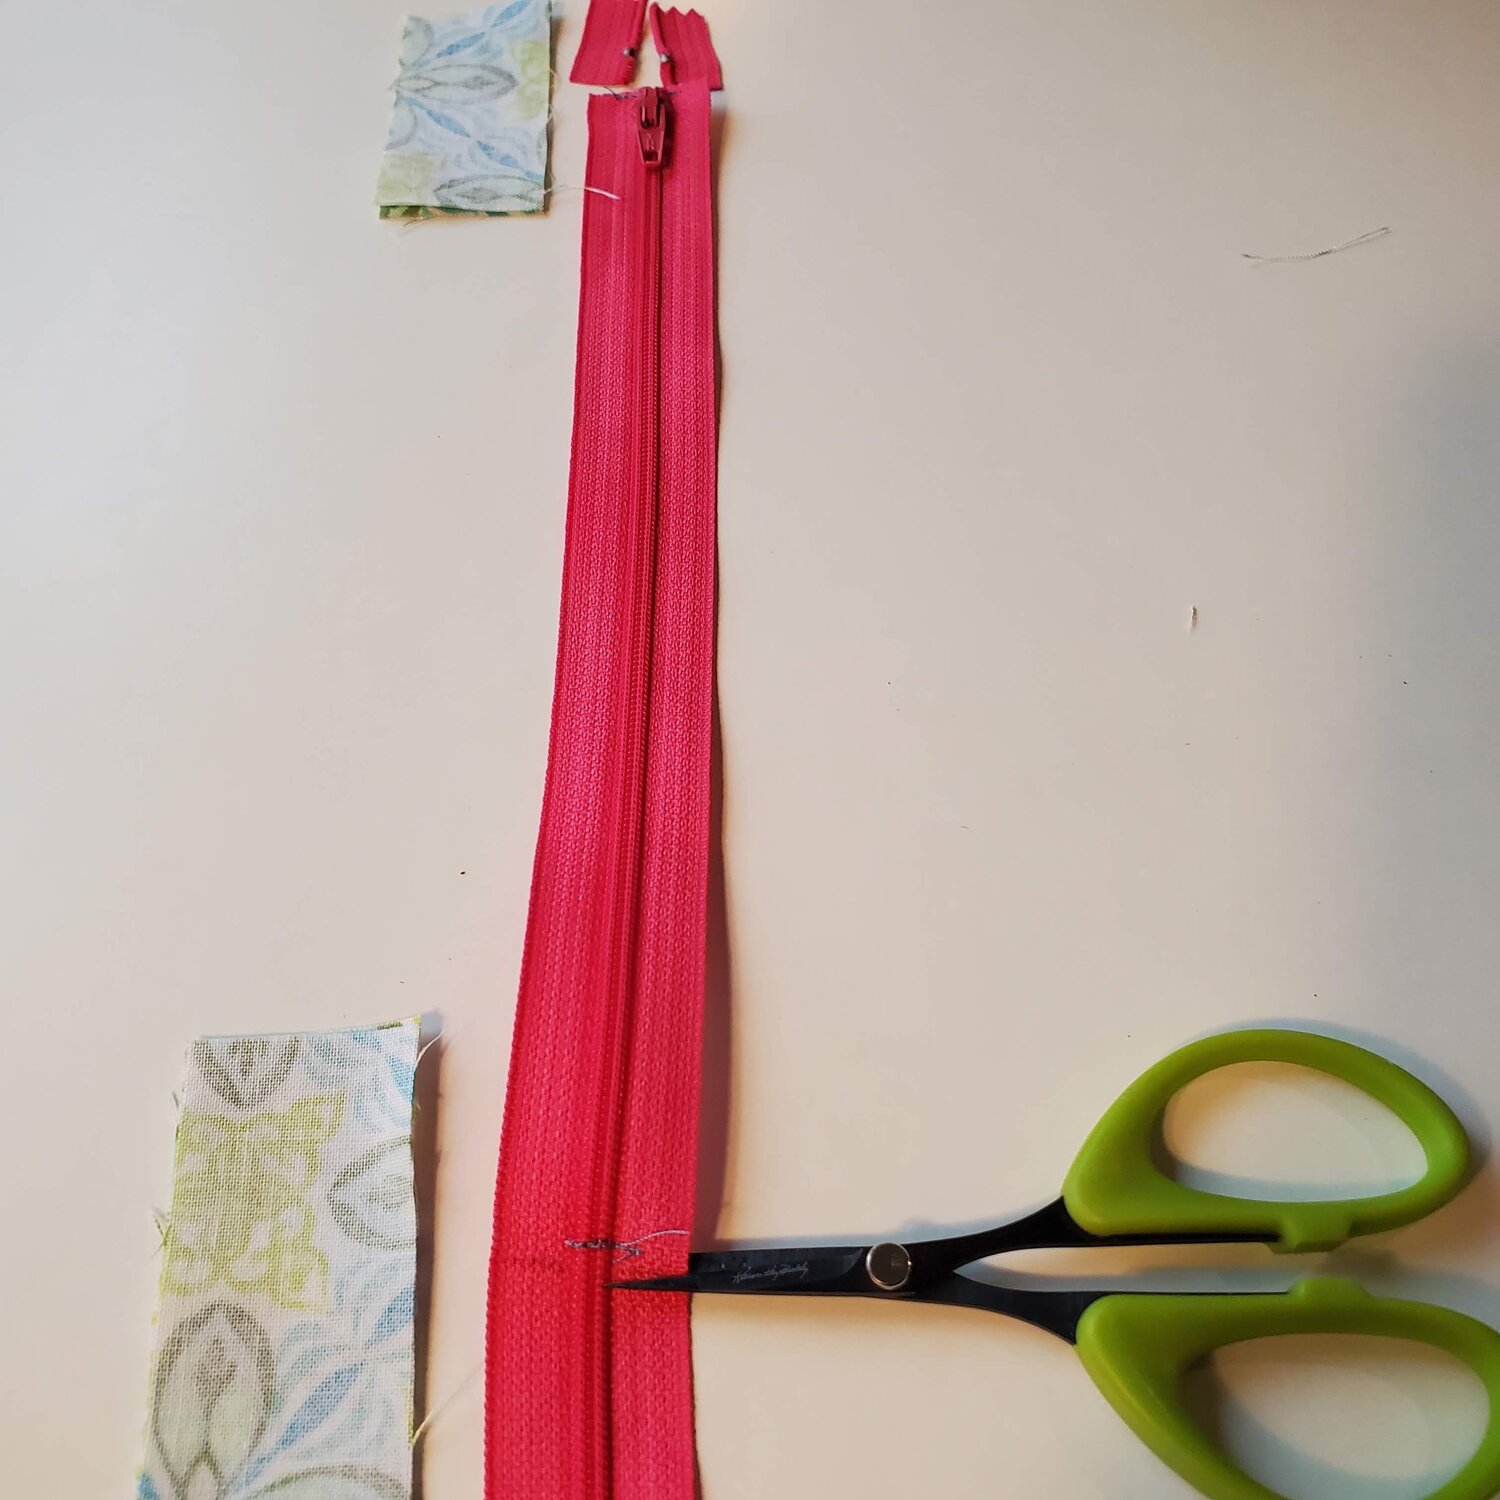
Slide the tabs in place on each end of the zipper with the fold on the end and sew ⅜” across the zipper at each end.
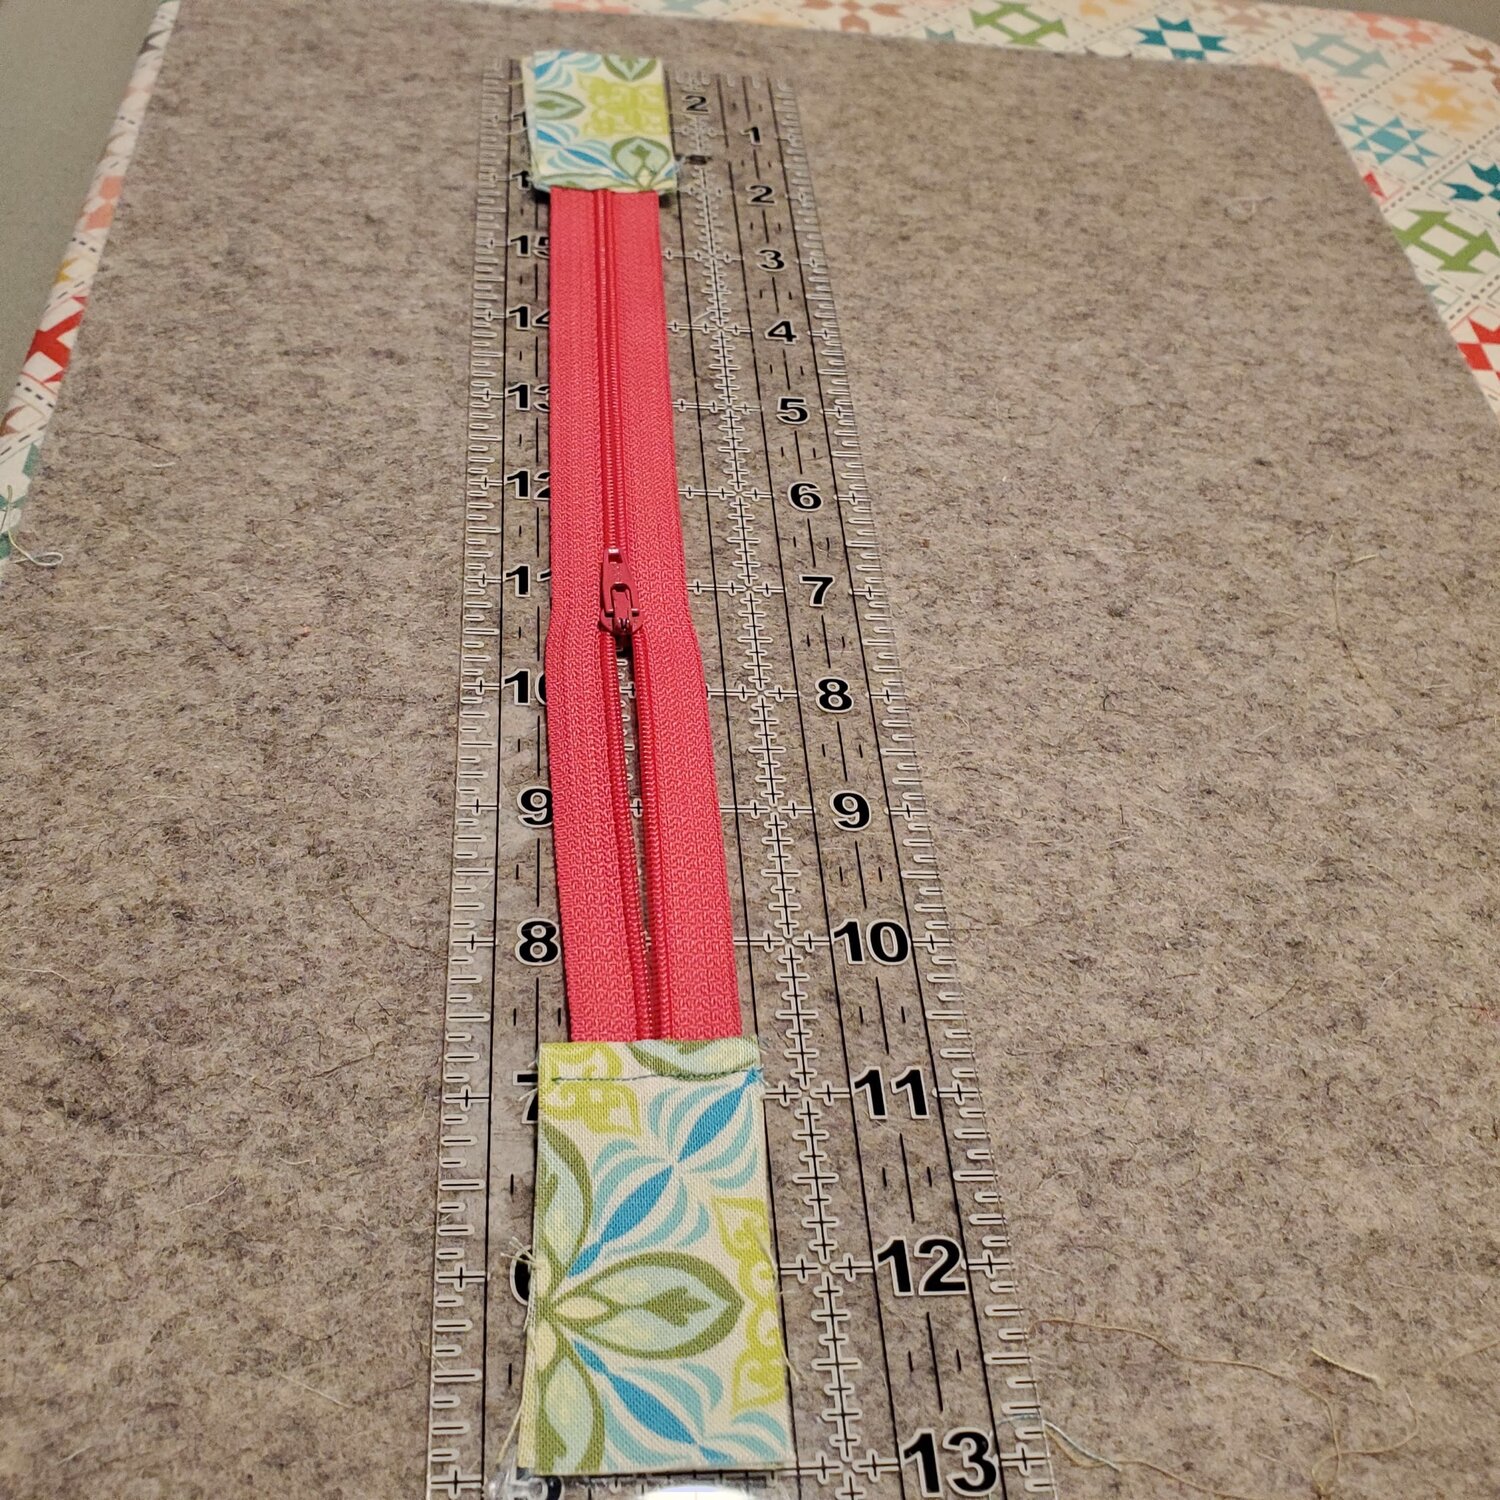
Then finger press the pieces with wrong sides together and sew ⅛” from the edge you just folded back. Repeat on the other side and the tabbed zipper should measure 13” equal to the width of the backpack.
You can use this technique when making any zipper pouch to eliminate the bulk on the top corners for a smooth professional look.
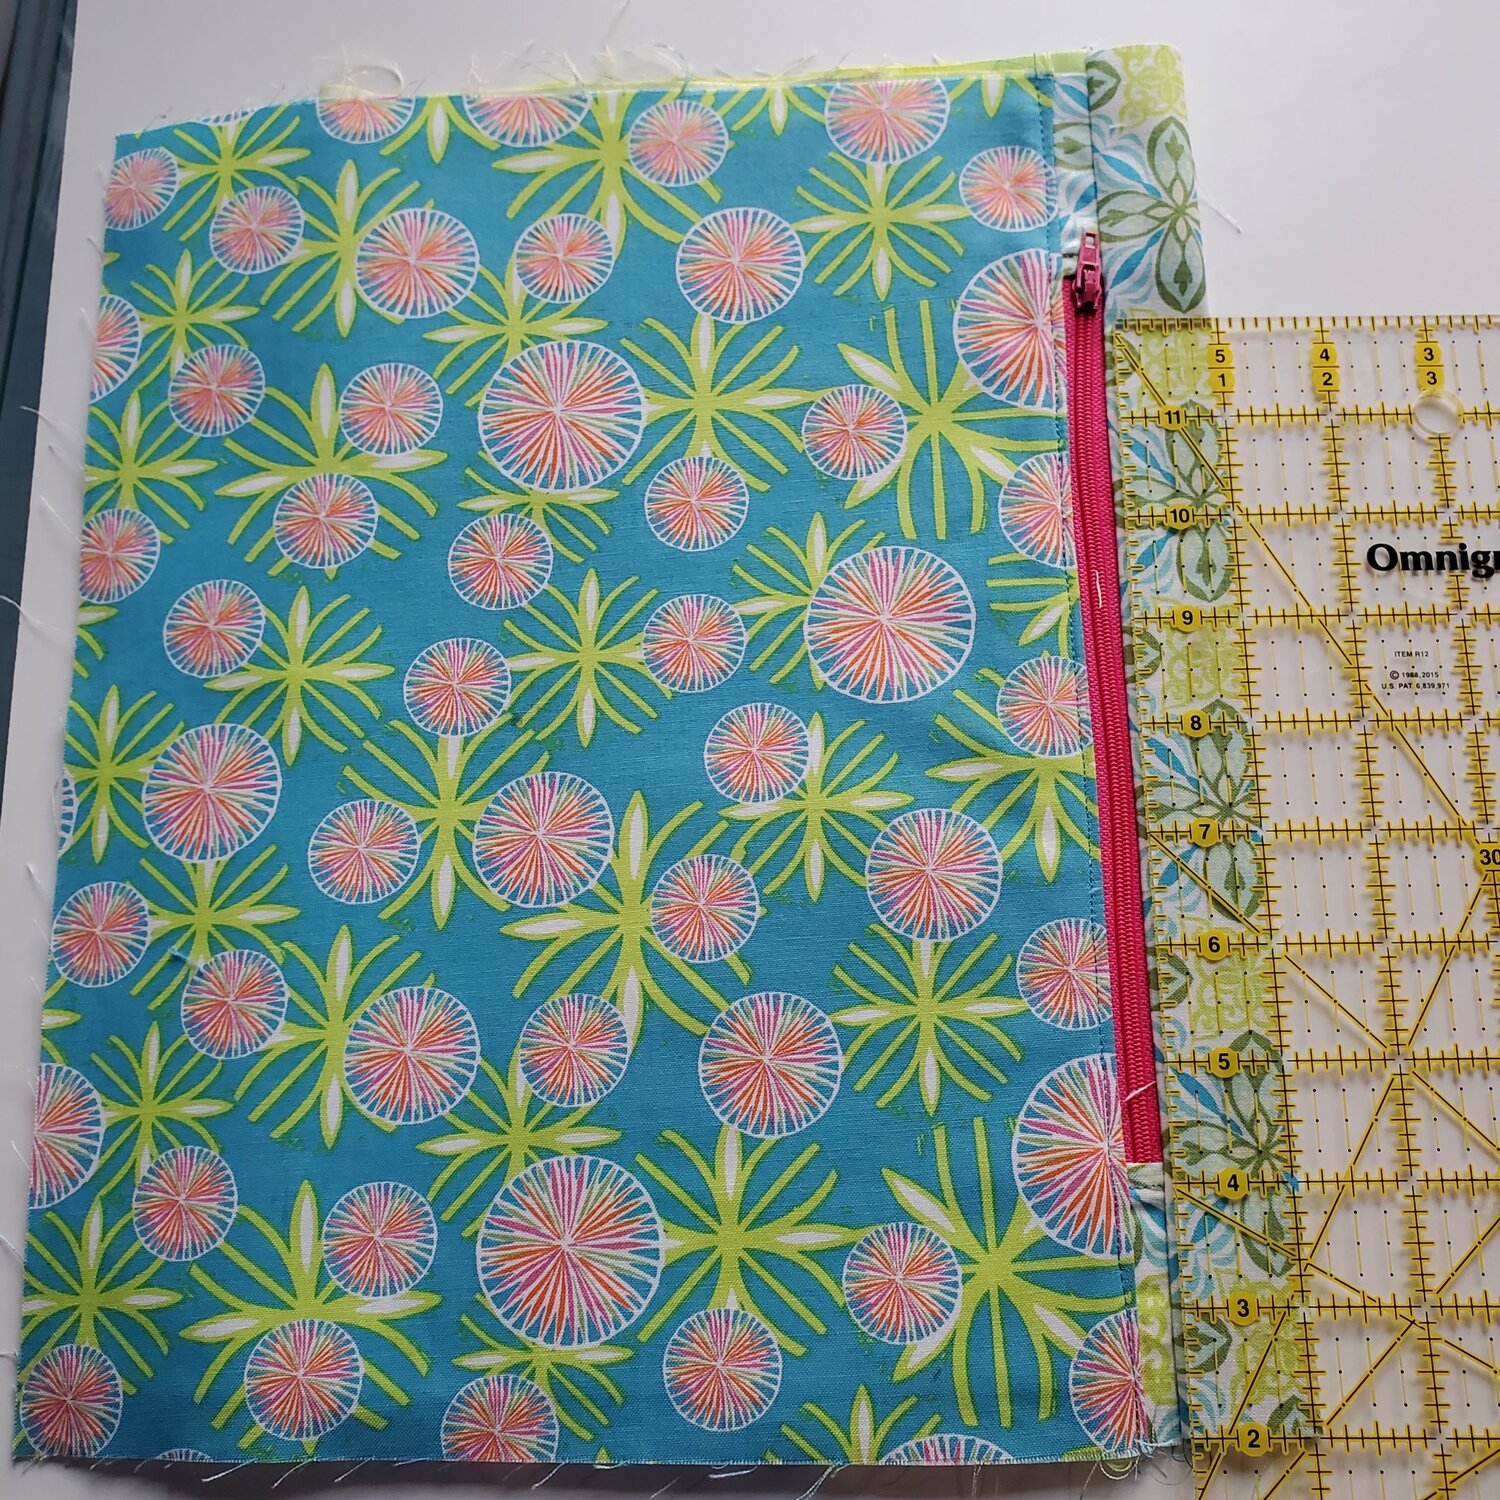
Next, line up the back outer bottom piece right side up with the zipper (pull on the left) right side down and the zipper pocket lining right side down align the edges on the top and clip in place.
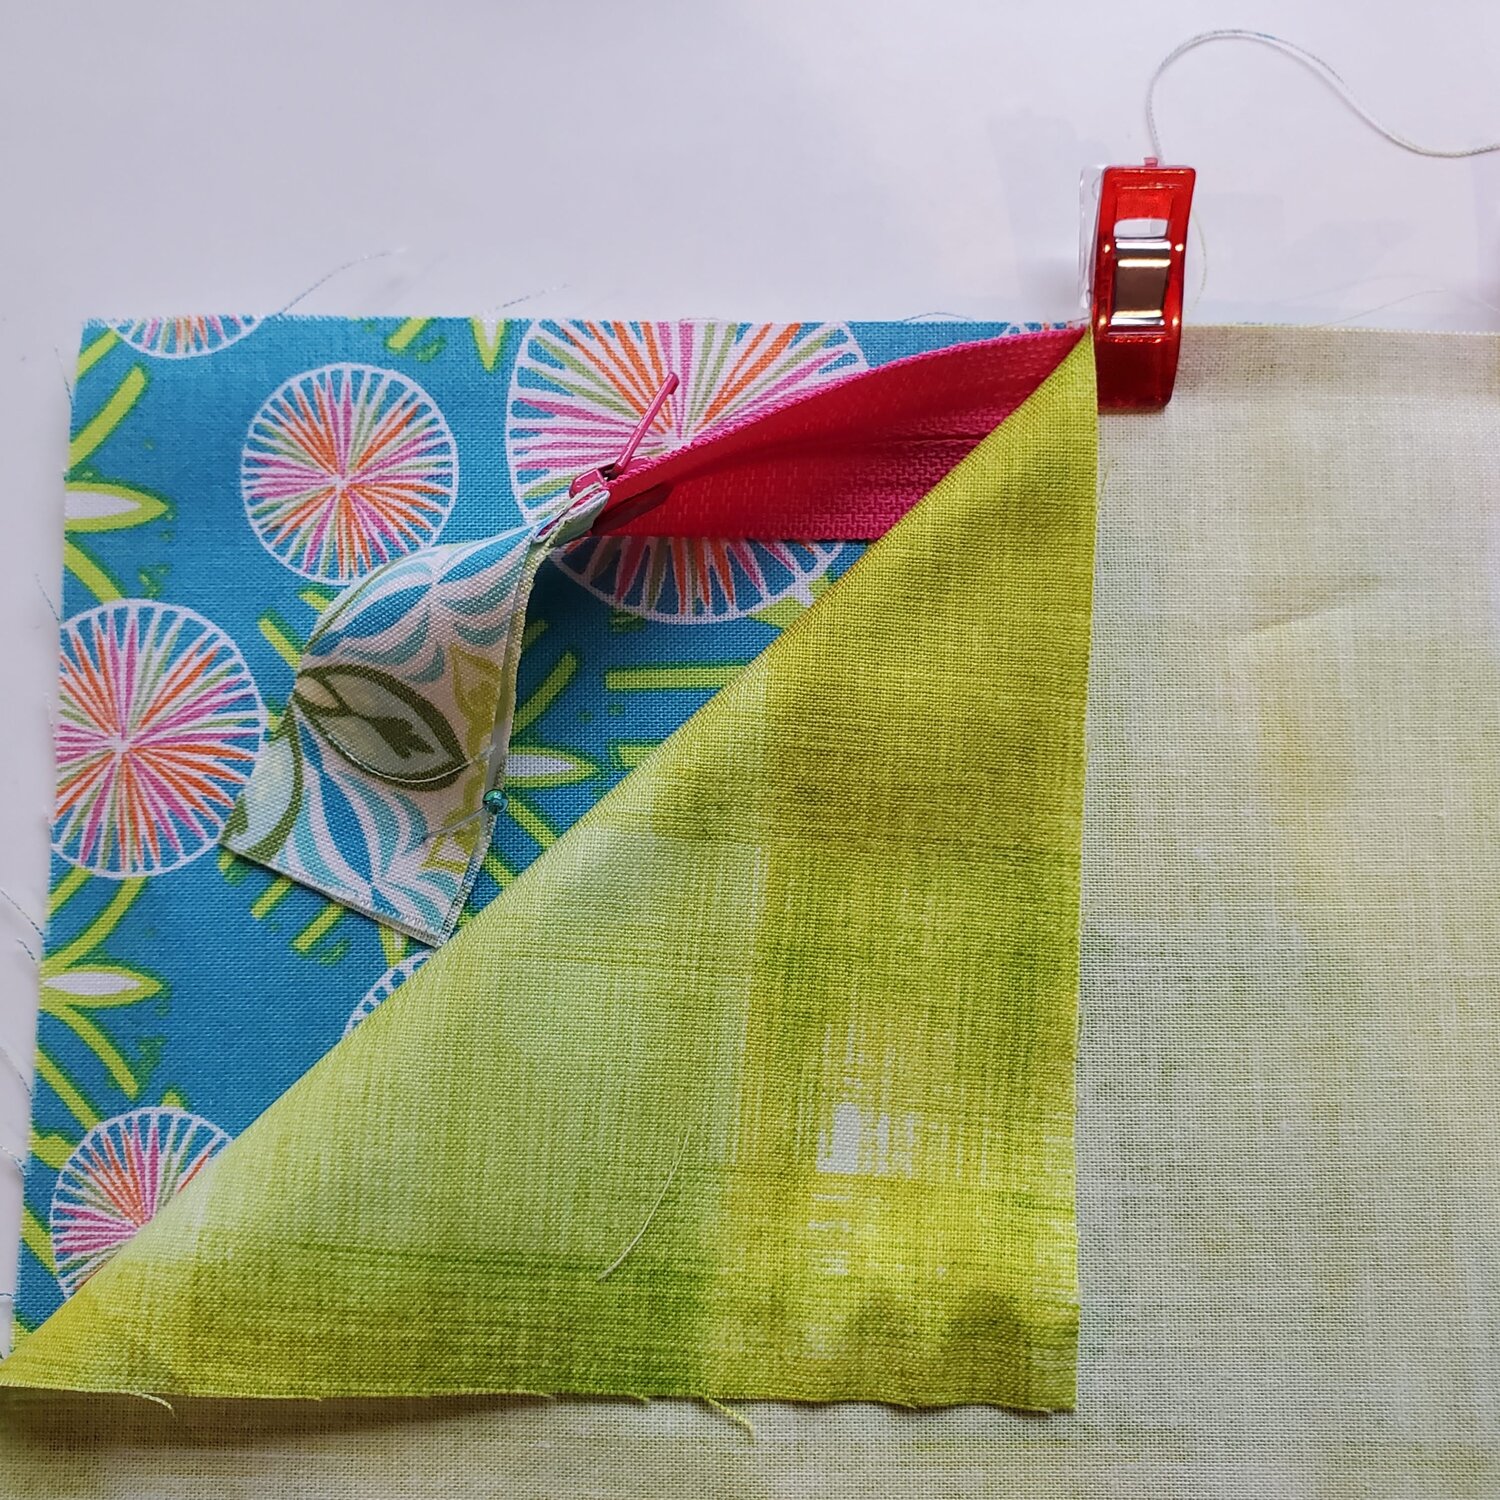
Sew with a ¼” seam allowance and a zipper foot. It is helpful to move the zipper pull out of the way by lifting the foot with the needle down and carefully slide the pull to the place you just stitched. Mark this seam with a fabric marker on the wrong side. You will sew along the same line in a few steps to create the zipper flap on the front of the bag. Turn the fabric to the right side and topstitch ⅛” from the edge of the fabric.
Now to sew the other side of the zipper in place, line up the top front piece right side facing up, then the zipper right side down (pull in on the right), fold the lining pocket in half, right side down and align the top edge with the first two pieces and clip in place.
Sew ¼” seam with a zipper foot to complete the zipper pocket. Turn right sides out and press.
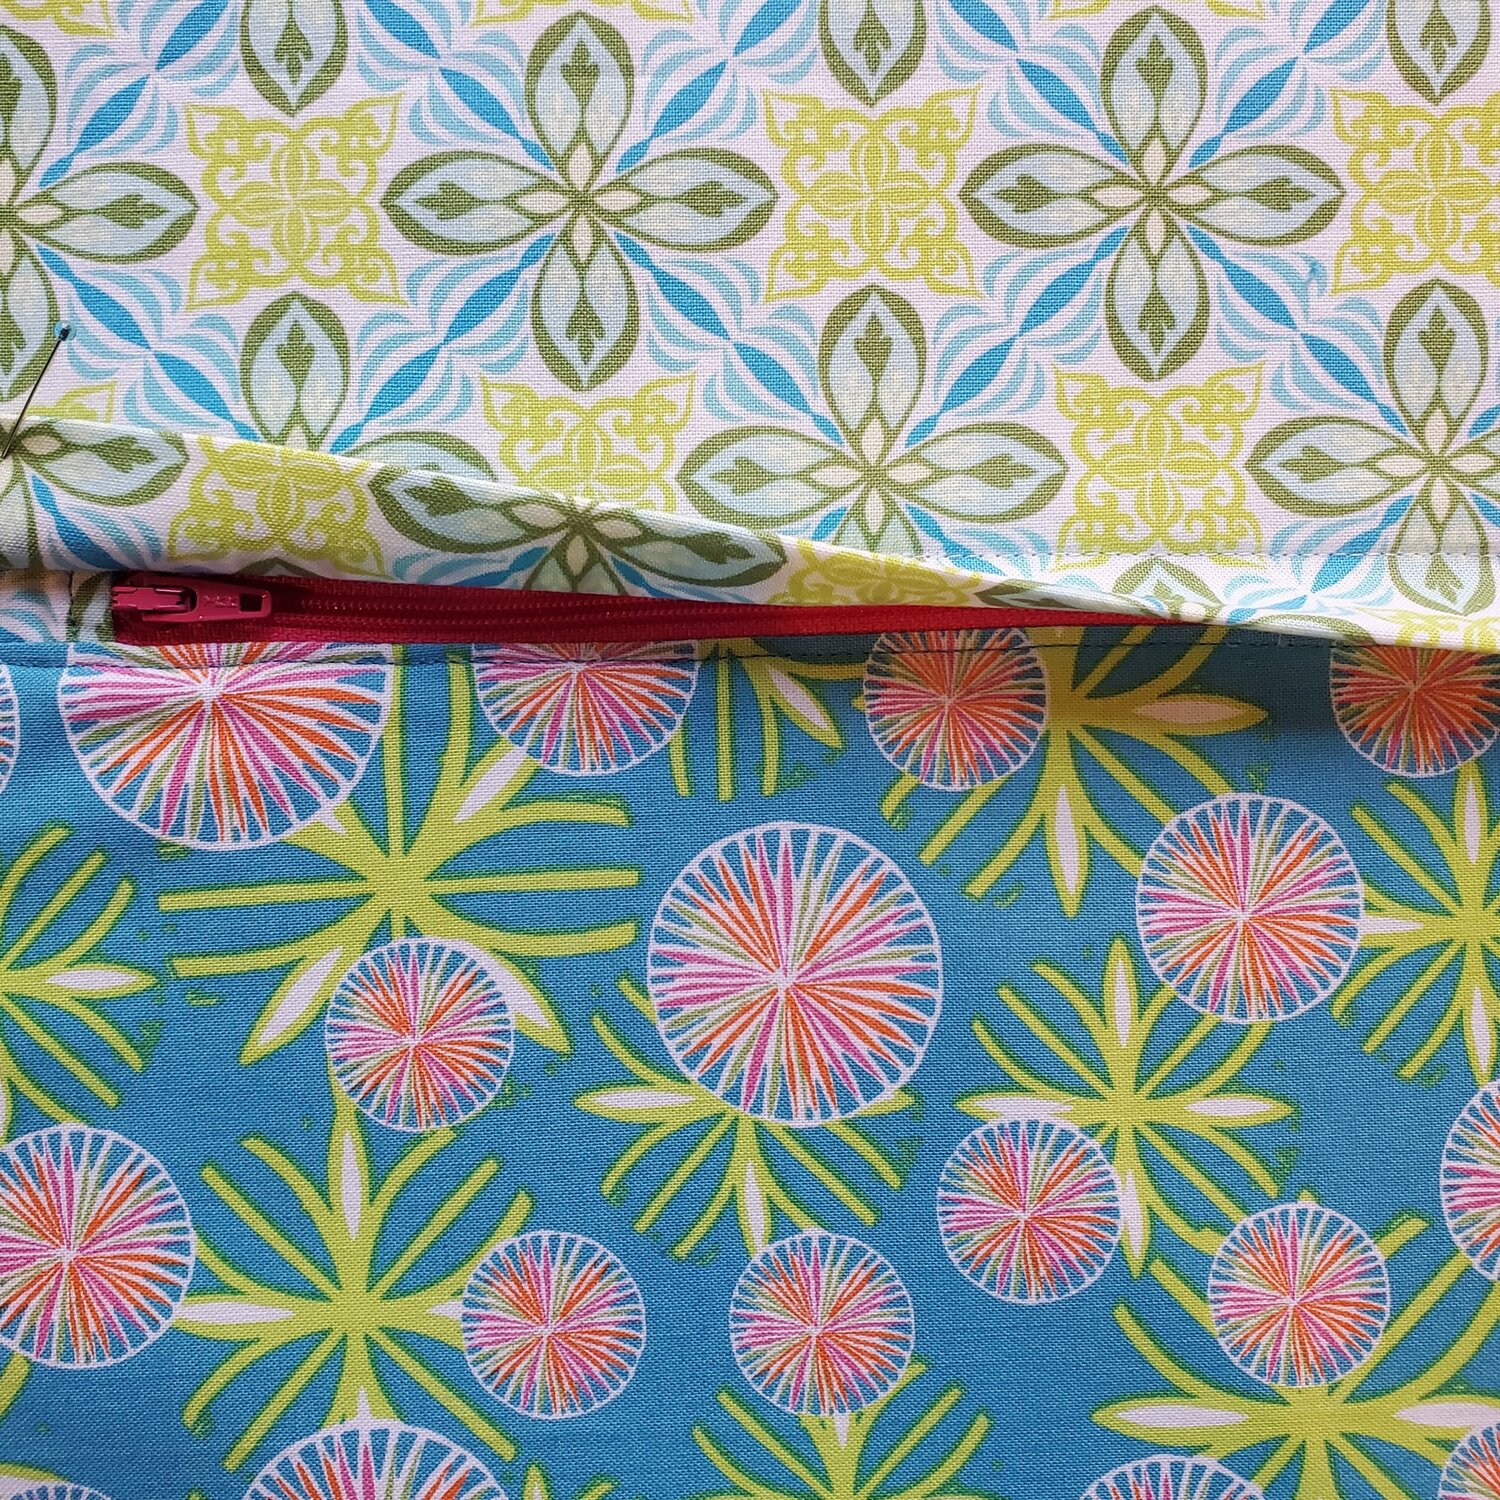
In this step you will create the zipper flap on the front of the bag. With the top front piece folding about 1” along the top edge of the zipper, press and pin in place.
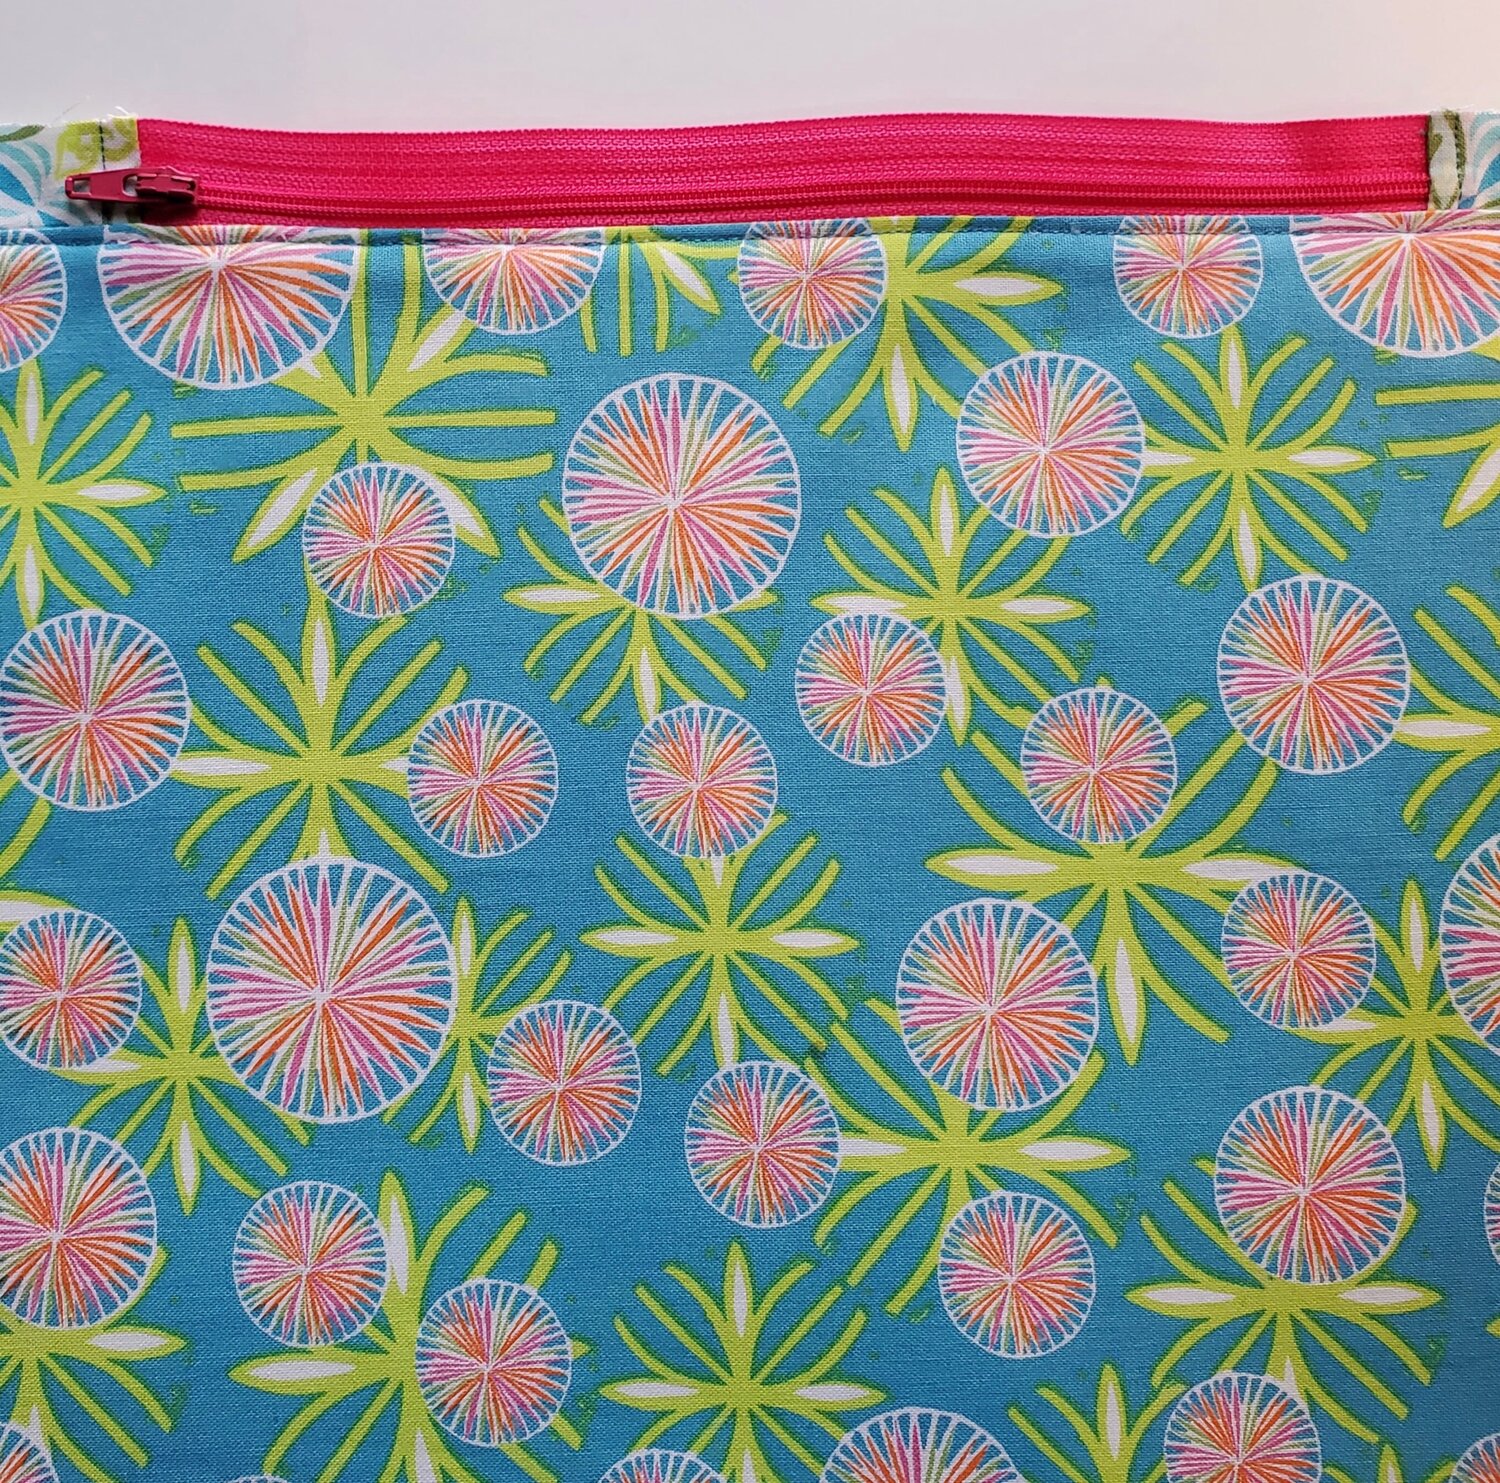
Remember the zipper seam you marked a few steps back? This is the time to sew along the same seam from the wrong side. This seam will catch the flap and hold it in place. Here is how it will look; be sure the bobbin thread matches because it will be visible on the front of the bag.
Fold the anchor tabs in half and place them 2 ½” from the bottom of the bag. The tabs overhang the outer edge by about ½”. Pin and baste in place. Continue sewing up the side basting the pocket in place with a ¼” seam along the edge. Trim the excess anchor tab.
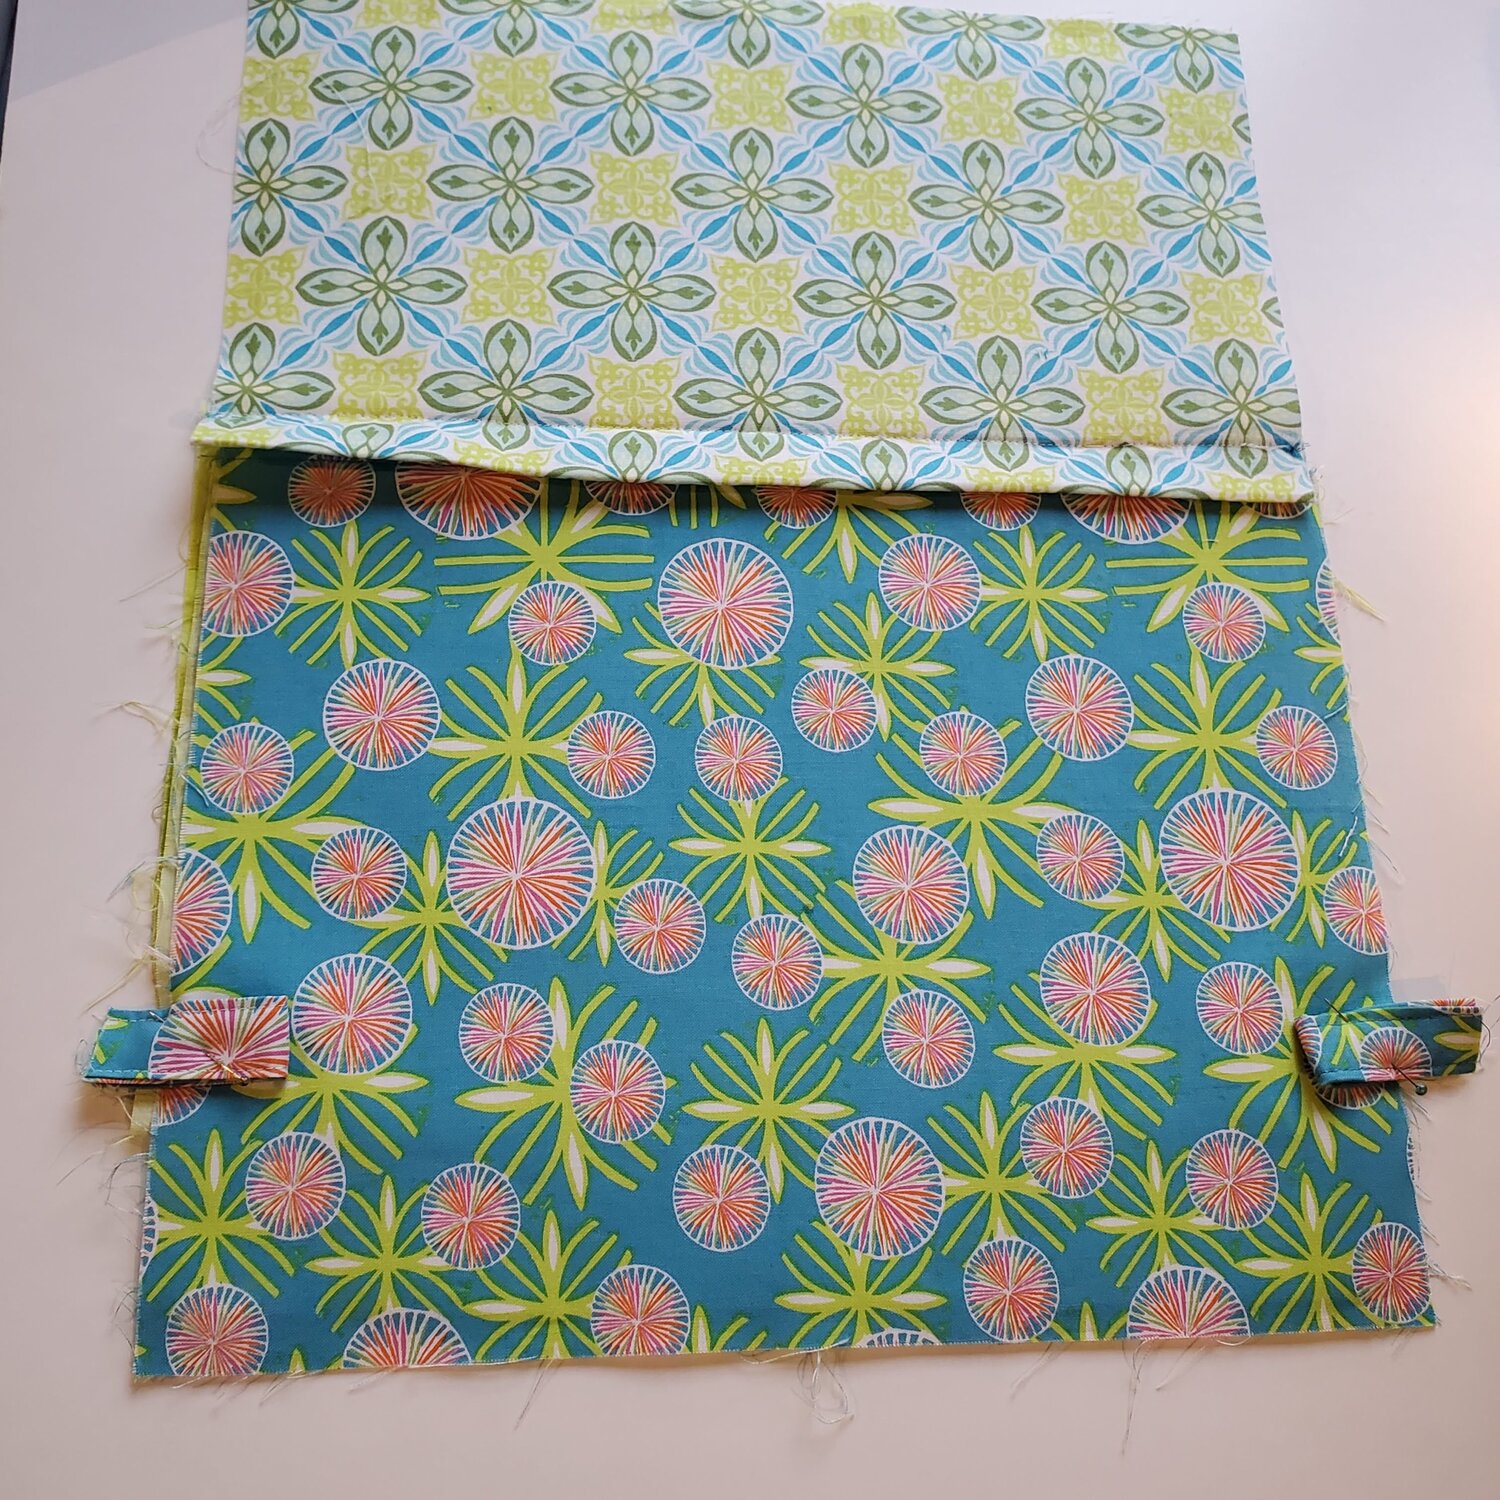
Take the outer back piece and mark the center top for placement of the handle. The distance between the handle ends should be 2”. Pin and baste in place with ¼” seam.
Now it is time to add the casing for the rope on the top of the bag. Lay the front piece right side up with the casing piece centered align the raw edges, then lay the lining right side down. Clip in place, and sew ½” seam keeping the edges even. Repeat the process with the back piece. Press the seam allowance towards the lining and topstitch ⅛” from the edge on the lining along the top edge. This will hold the lining in place, keeping it from peeking out along the edge.
You are now ready for the final assembly of the backpack. Lay the front and back of the bag flat with right sides together aligning all the edges and clip in place. Be sure to leave about a 4” opening in the center of the bottom edge of the lining to turn the bag.
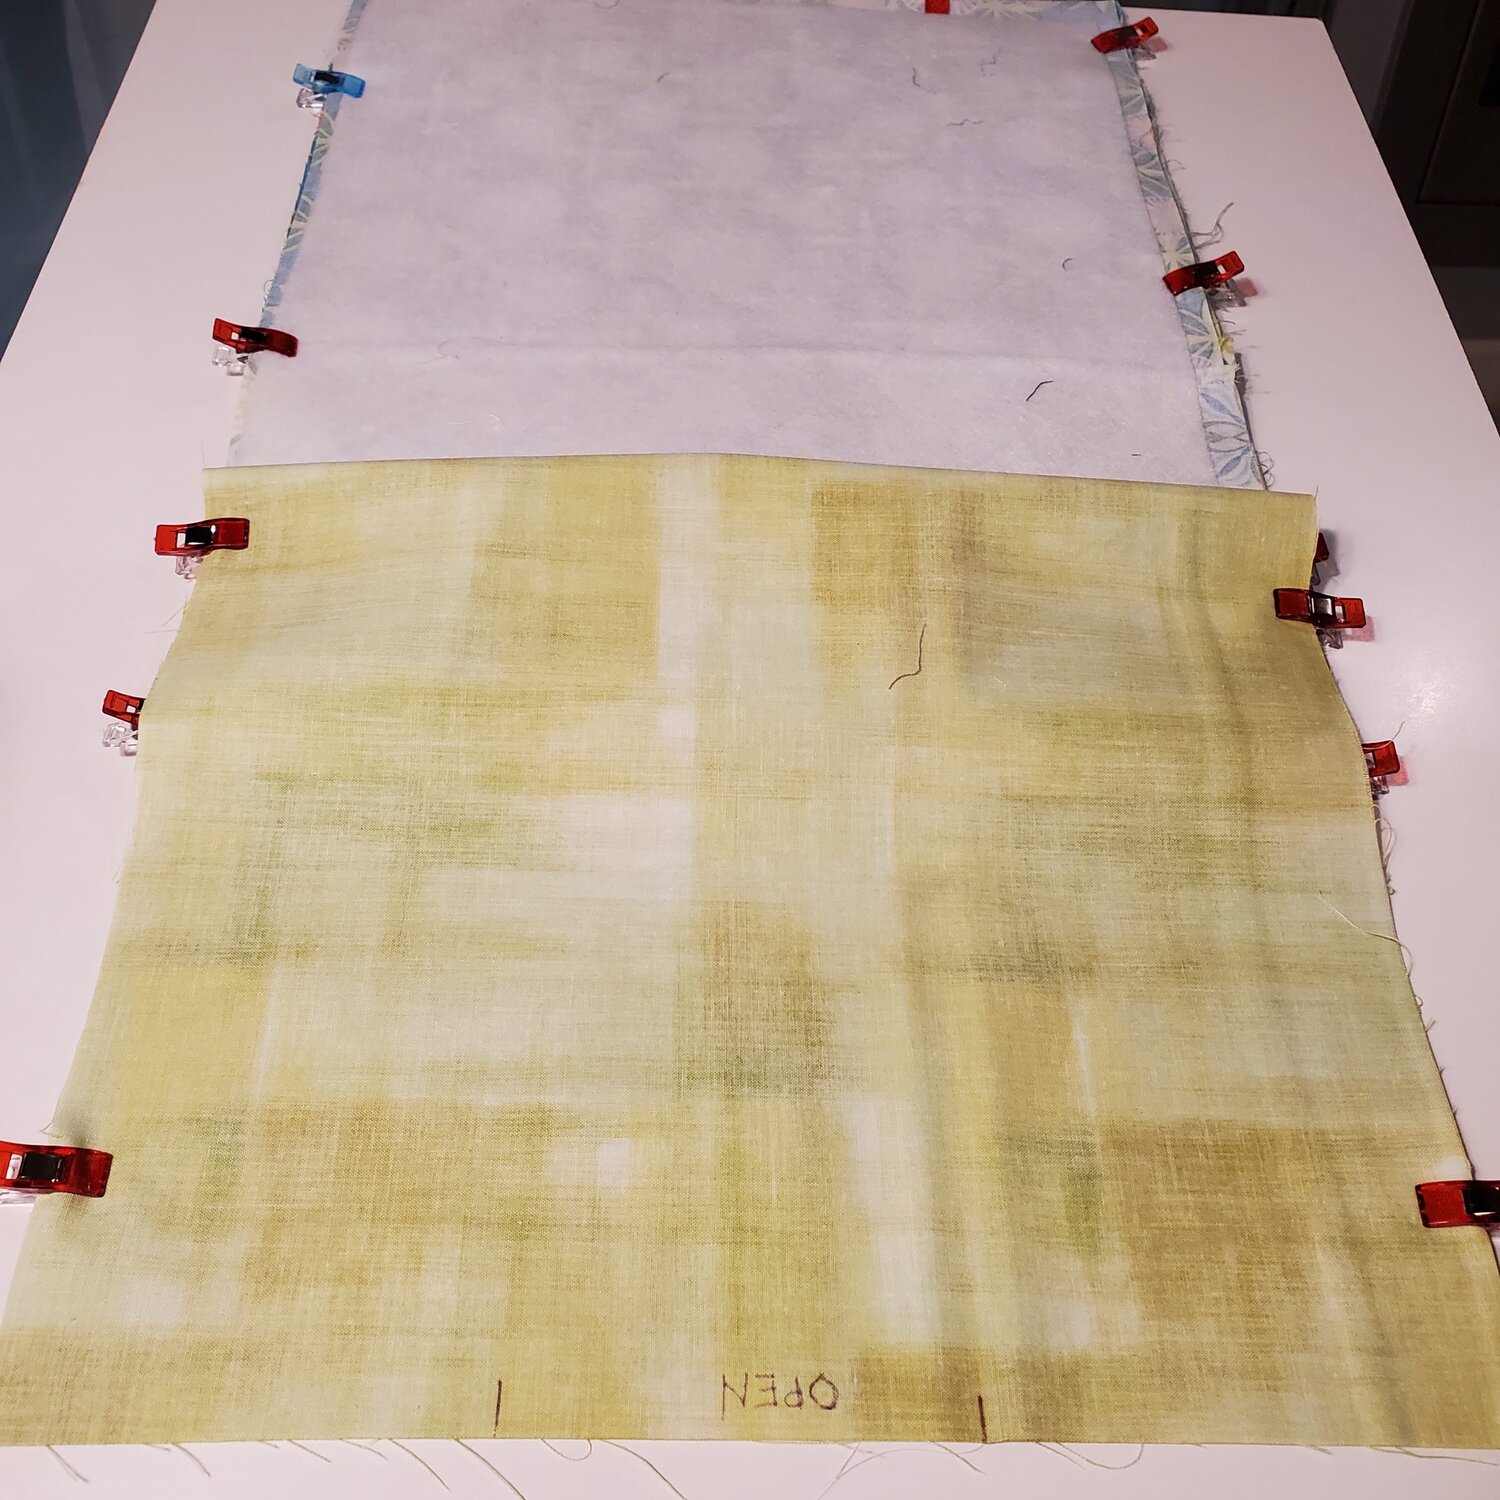
Start at the bottom edge of the lining sewing with a ½” seam all the way around stopping at the line marked for the opening. Trim the corners and turn the right side out and press. Fold under the edges of the lining opening and topstitch closed. Push the lining inside the bag and press all the edges and seams for a nice finish.
For the final step you will cut two 55” pieces of cotton cord. If you wrap a piece of tape around the cord where you cut it will keep it from frying making it easier to pass through the casing and anchor tabs. Use a bobkin or a safety pin to guide the cord through the opening.
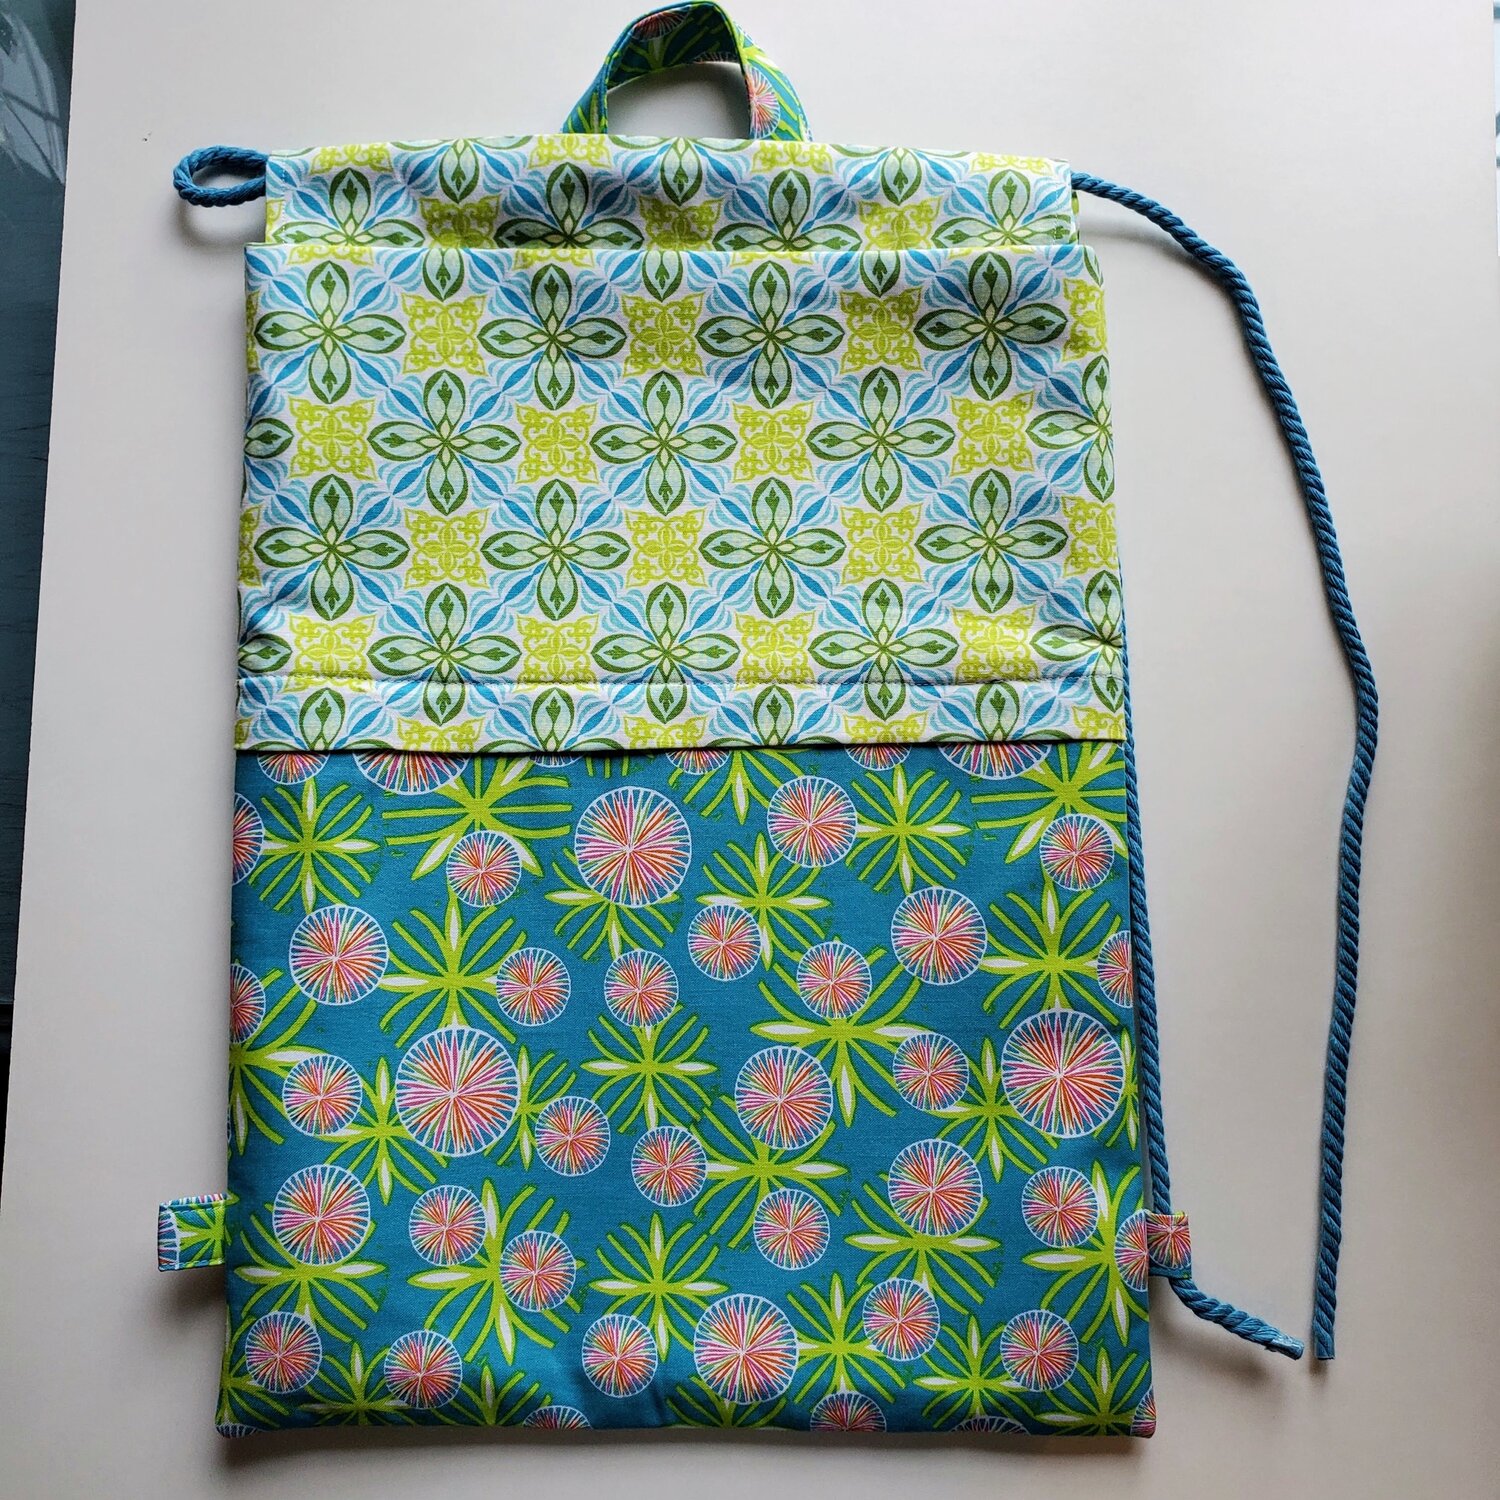
Repeat on the other side going in the opposite direction. Tie a knot securing the ends near the anchor tab. You can add a fun zipper pull as an accessory on the bag.
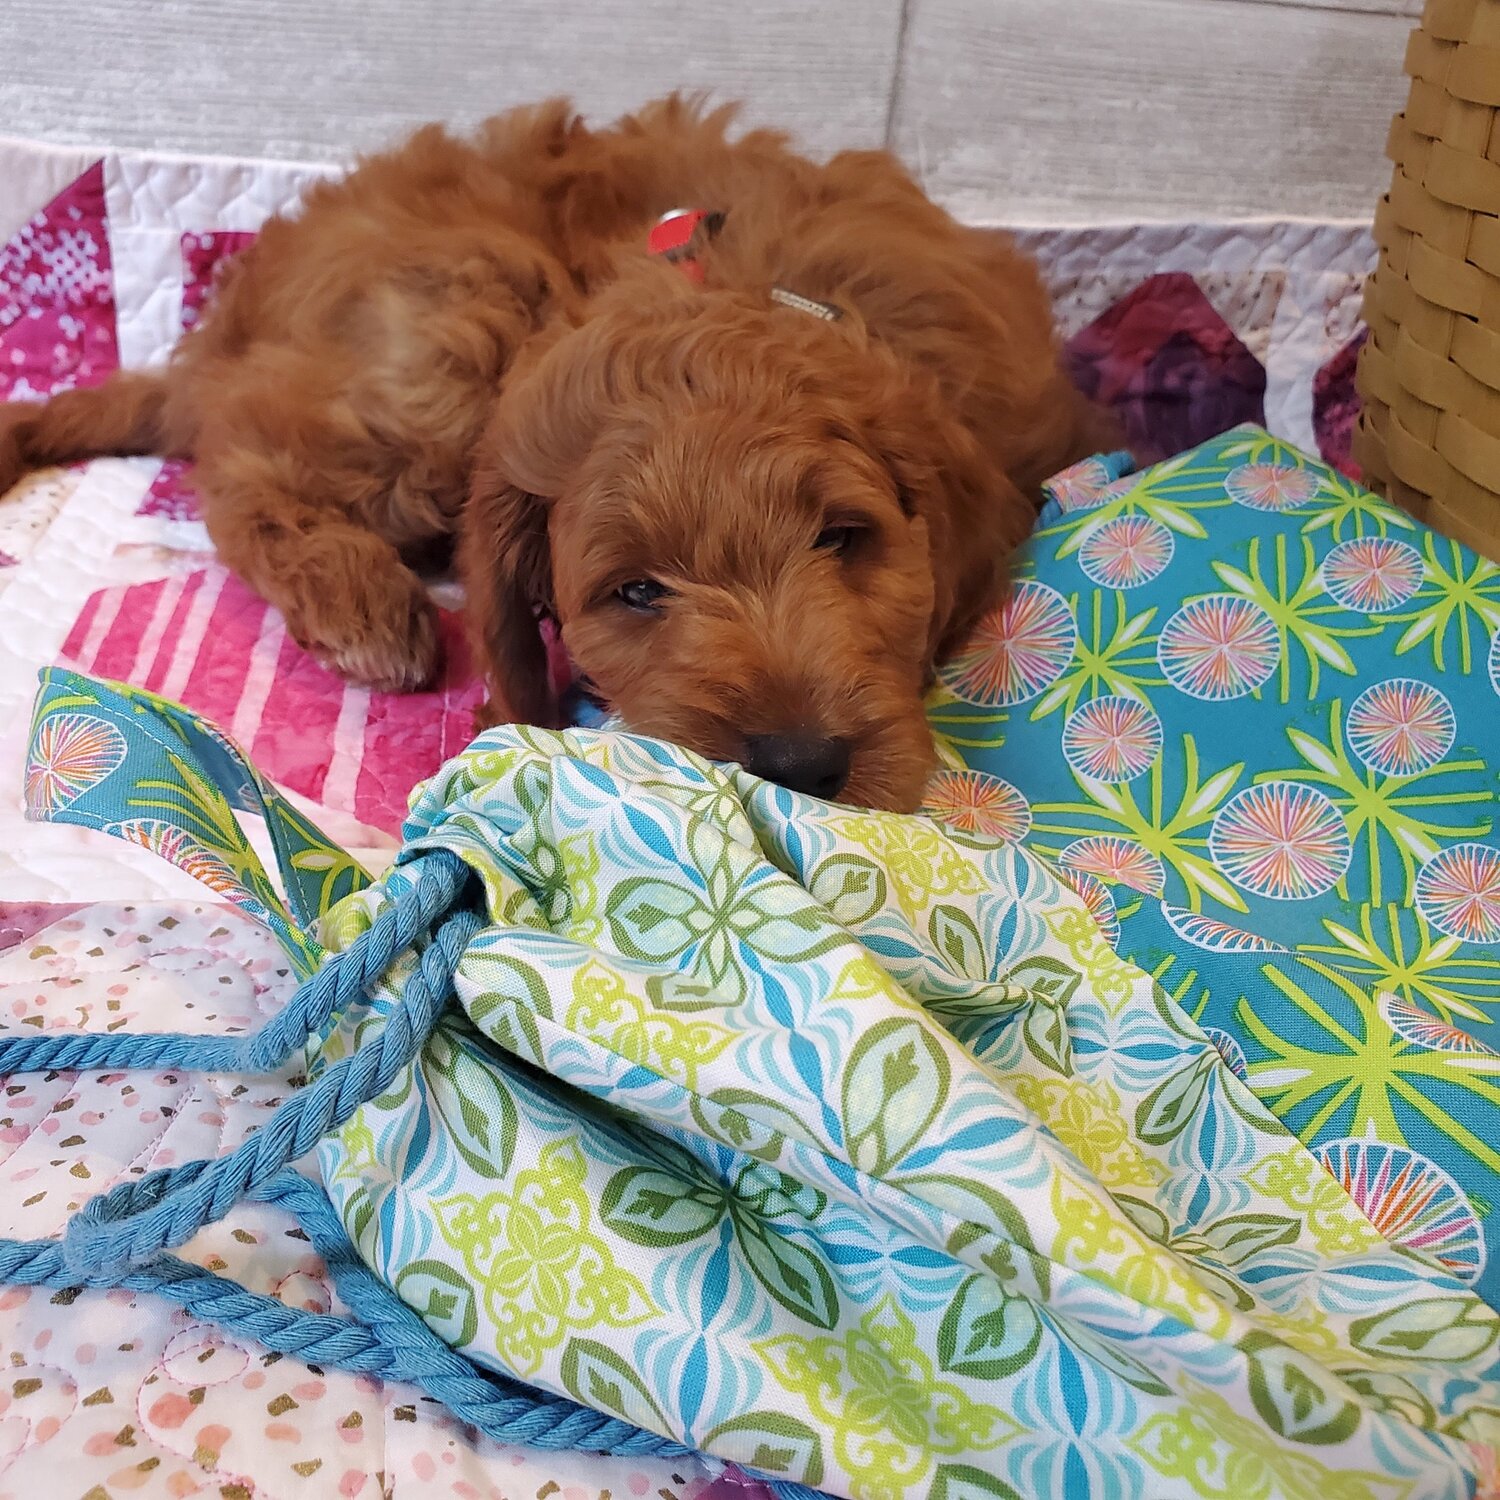
Rudy gave his stamp of approval! I think he would fit just perfectly in the backpack! We are off for a fun day of exploring, keeping my hands free to attend to this exuberant puppy learning about the world.
Thanks for reading! Also: this tutorial is written by our amazing blogger, Joanne. In case you missed it, click here to read more about her and her inspiring story.