Father’s Day Mug Rug
2nd Jun 2022
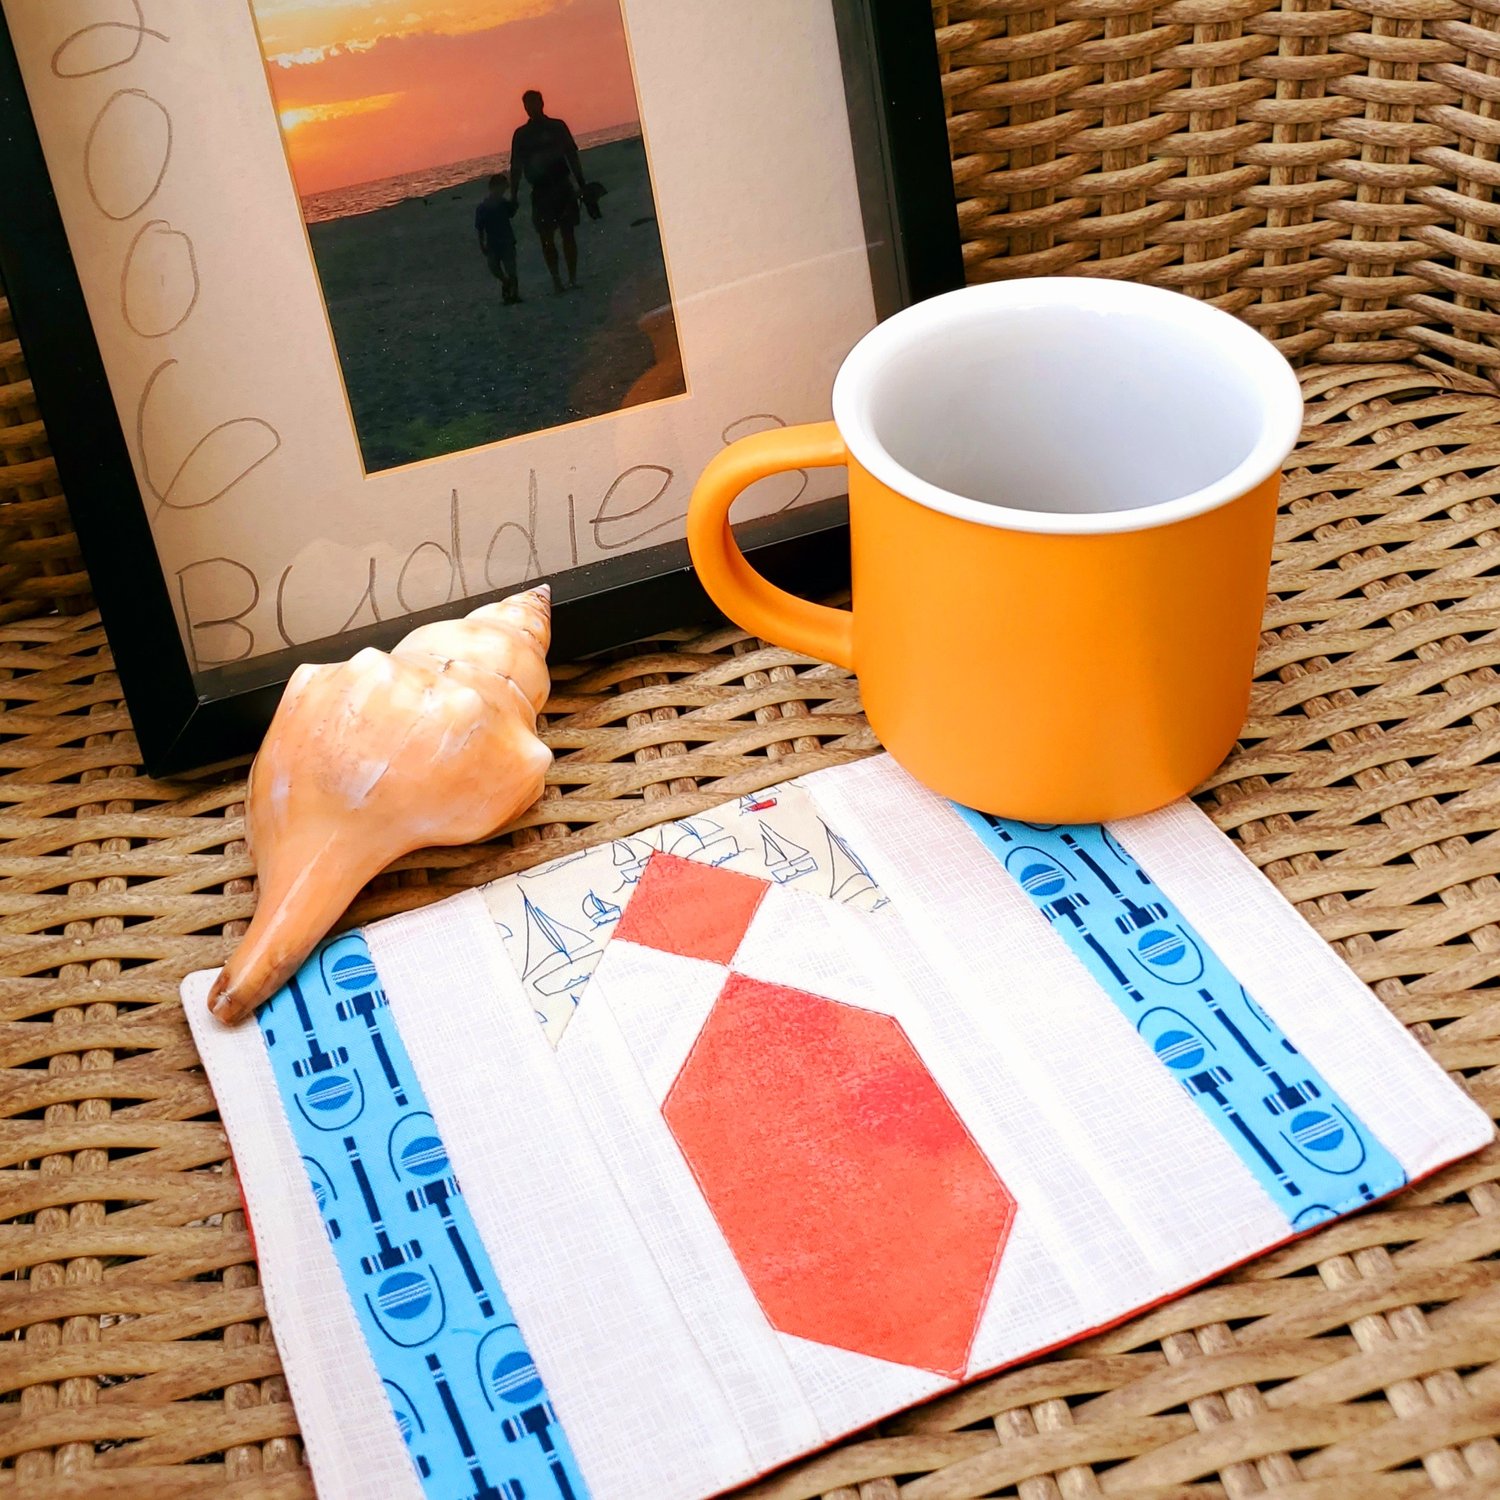
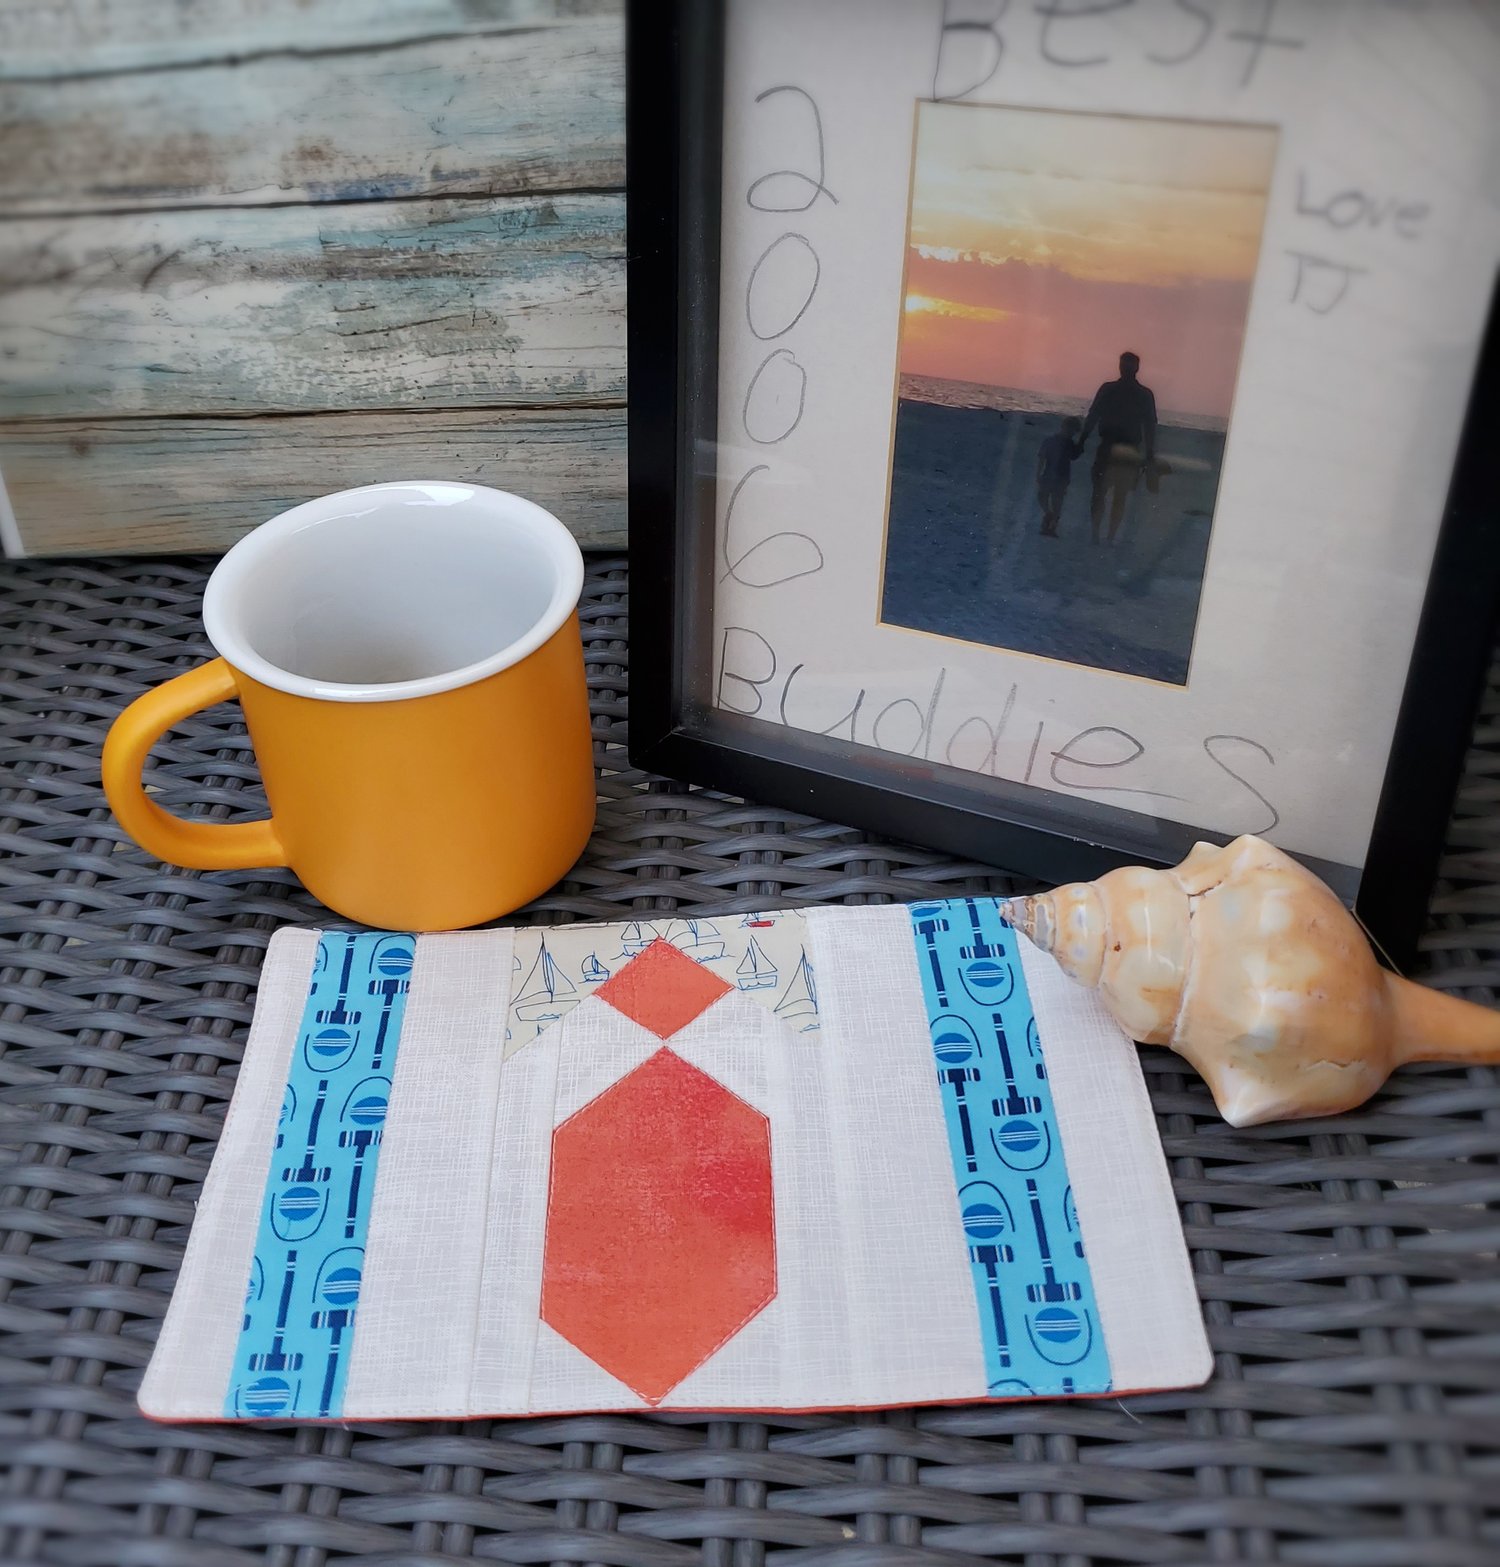
June has arrived and our focus shifts to honoring the special men in our lives on Father’s Day. When I came across this free mug rug pattern from the We all Sew Bernina website it brought back memories seeing my dad and grandpa wearing a white shirt and tie to work each day. With Father’s Day celebrated on June 19th here in the US you will have plenty of time to make this beginner friendly mug rug using the Sailboats and Croquet design by Sandy Gervias for Riley Blake fabrics.
Materials Needed
4 fat quarters I used Sailboats and Croquet with some Moda Grunge
Coordinating Aurifil Thread Chroma Membership
Pellon fusible fleece
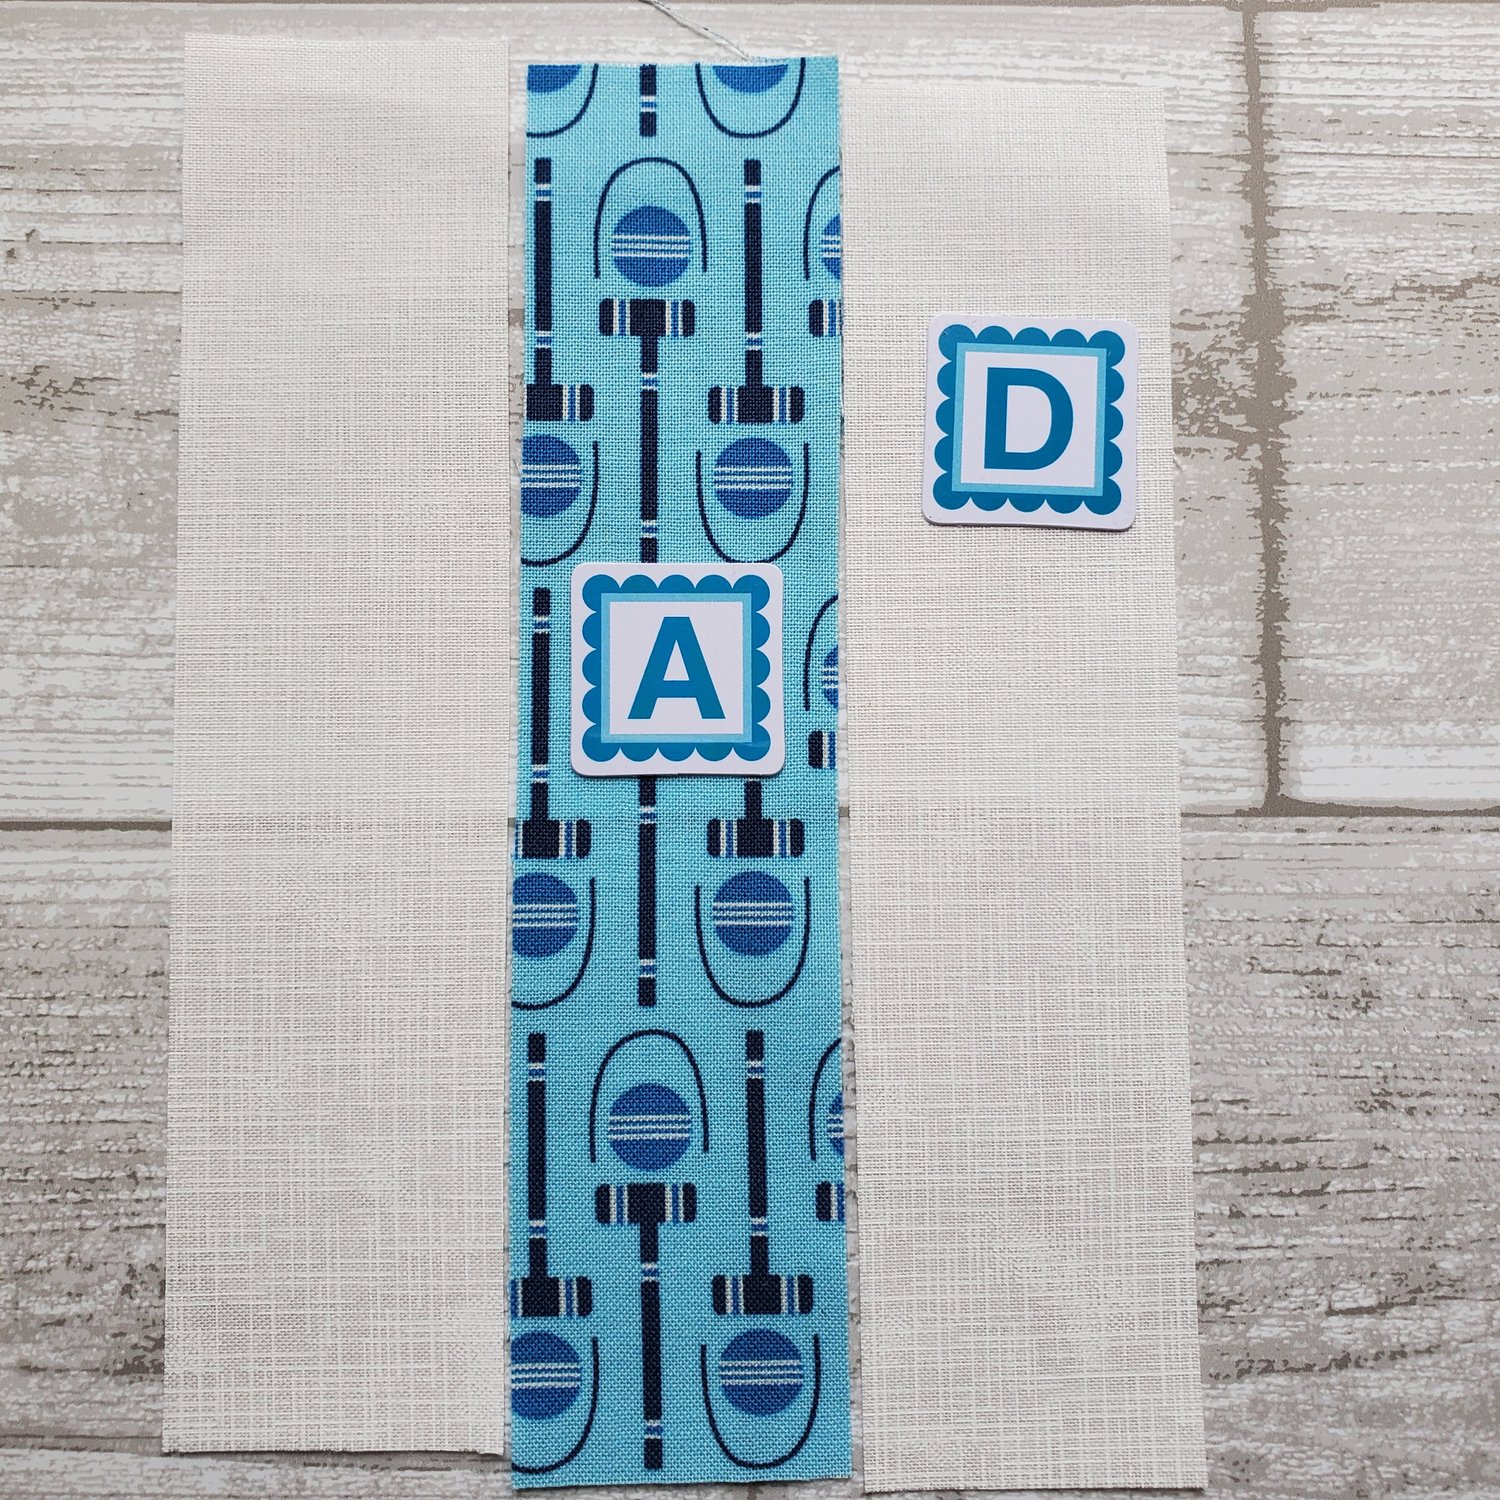
To get started you will need to decide your fabric for the background, shirt collar, tie and suspenders. I find it helpful to use these Alphabitties from the Boost my delivery shop to mark my cut pieces to keep everything organized as I sew.
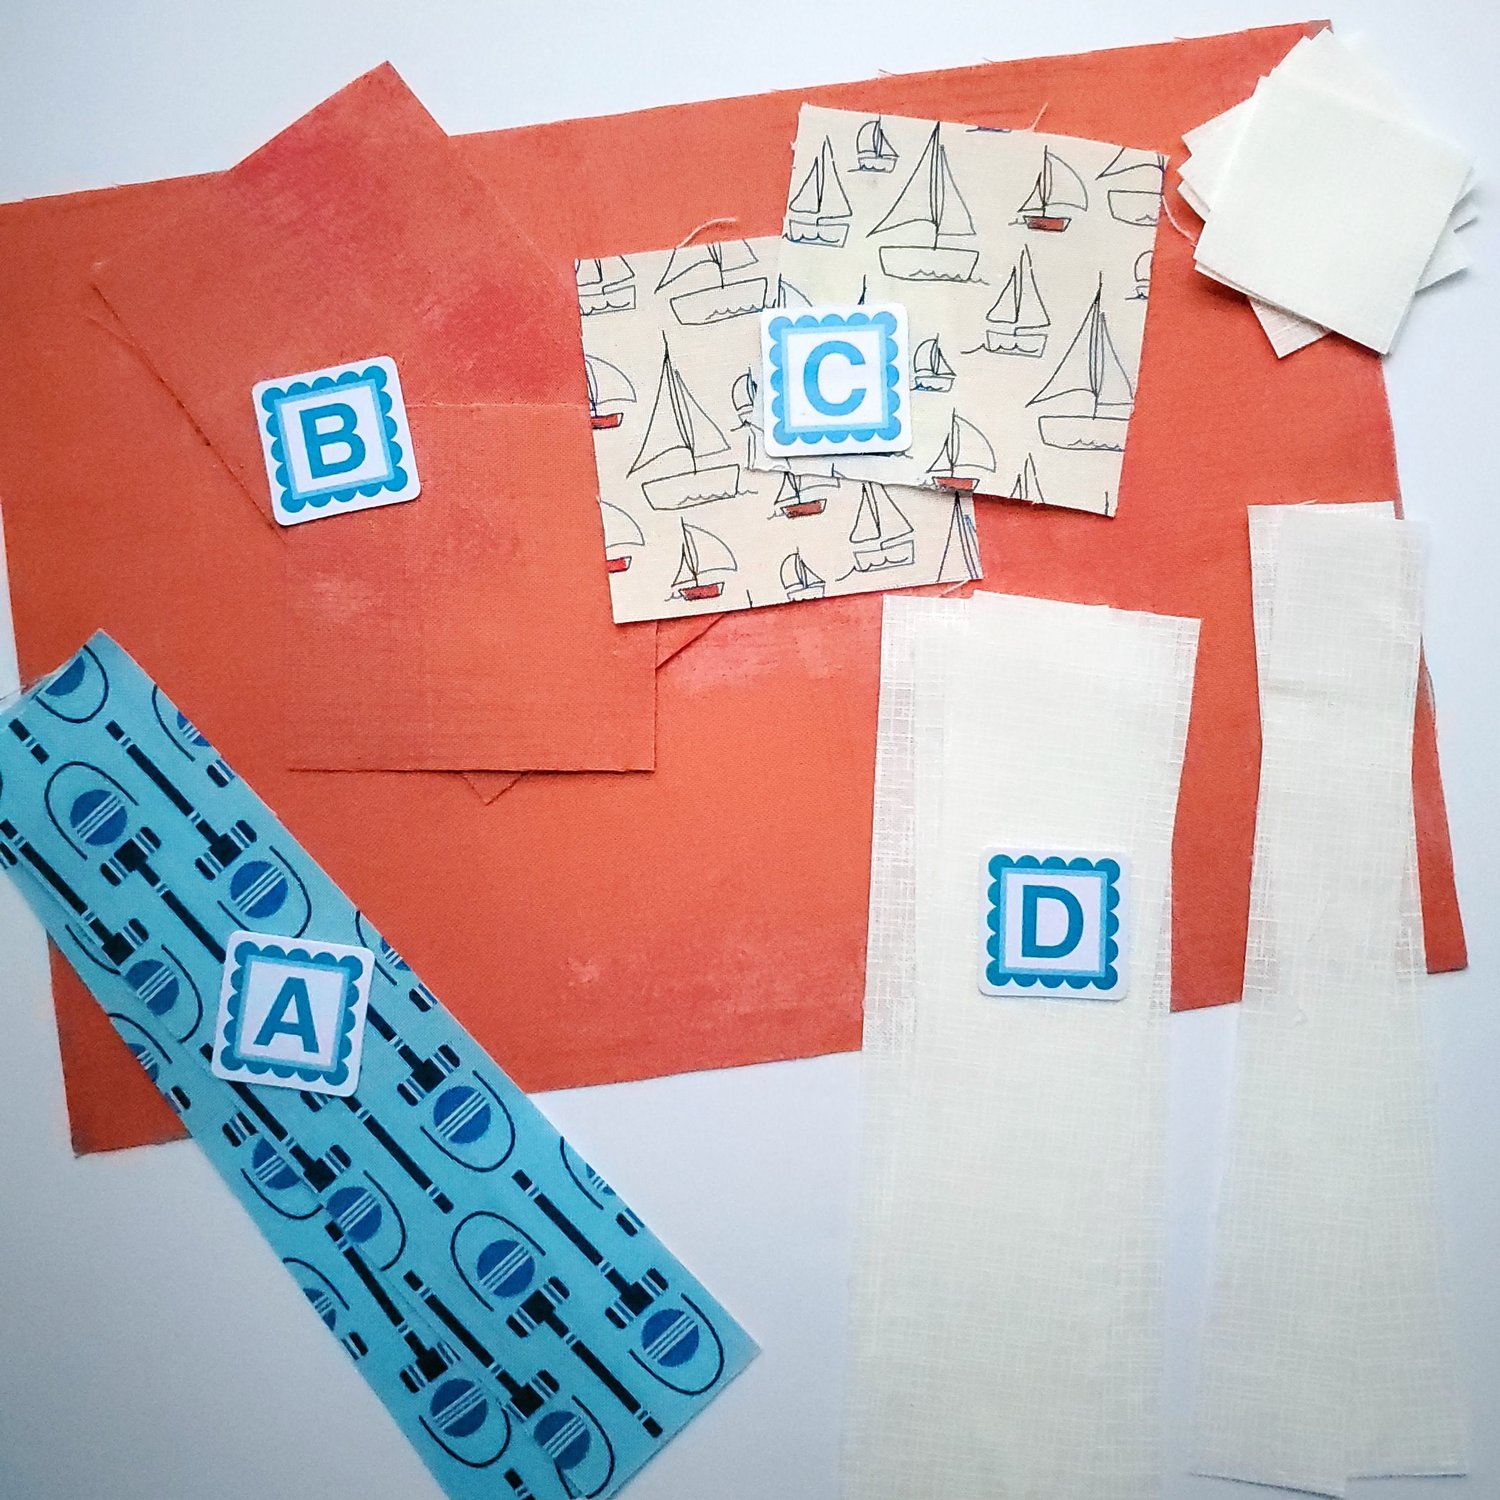
You will need to cut the following pieces:
Two (2) 6 1/2’’ x 1 1/2’’ strips from fabric A for the suspenders
One (1) 9 1/2’’ x 6 1/2’’ rectangle from fabric B (back side of the mug rug)
One (1) 2 1/2’’ x 4 1/2’’ rectangle from fabric B for the tie
One (1) 2 1/2’’ square from fabric B for the tie
Two (2) 2 1/2’’ squares from fabric C for the shirt collar
Four (4) 6 1/2’’ x 1 1/2’’ strips from fabric D background fabric
Two (2) 6 1/2’’ x 1’’ strips from fabric D background fabric
Six (6) 1 1/2’’ squares from fabric D background fabric
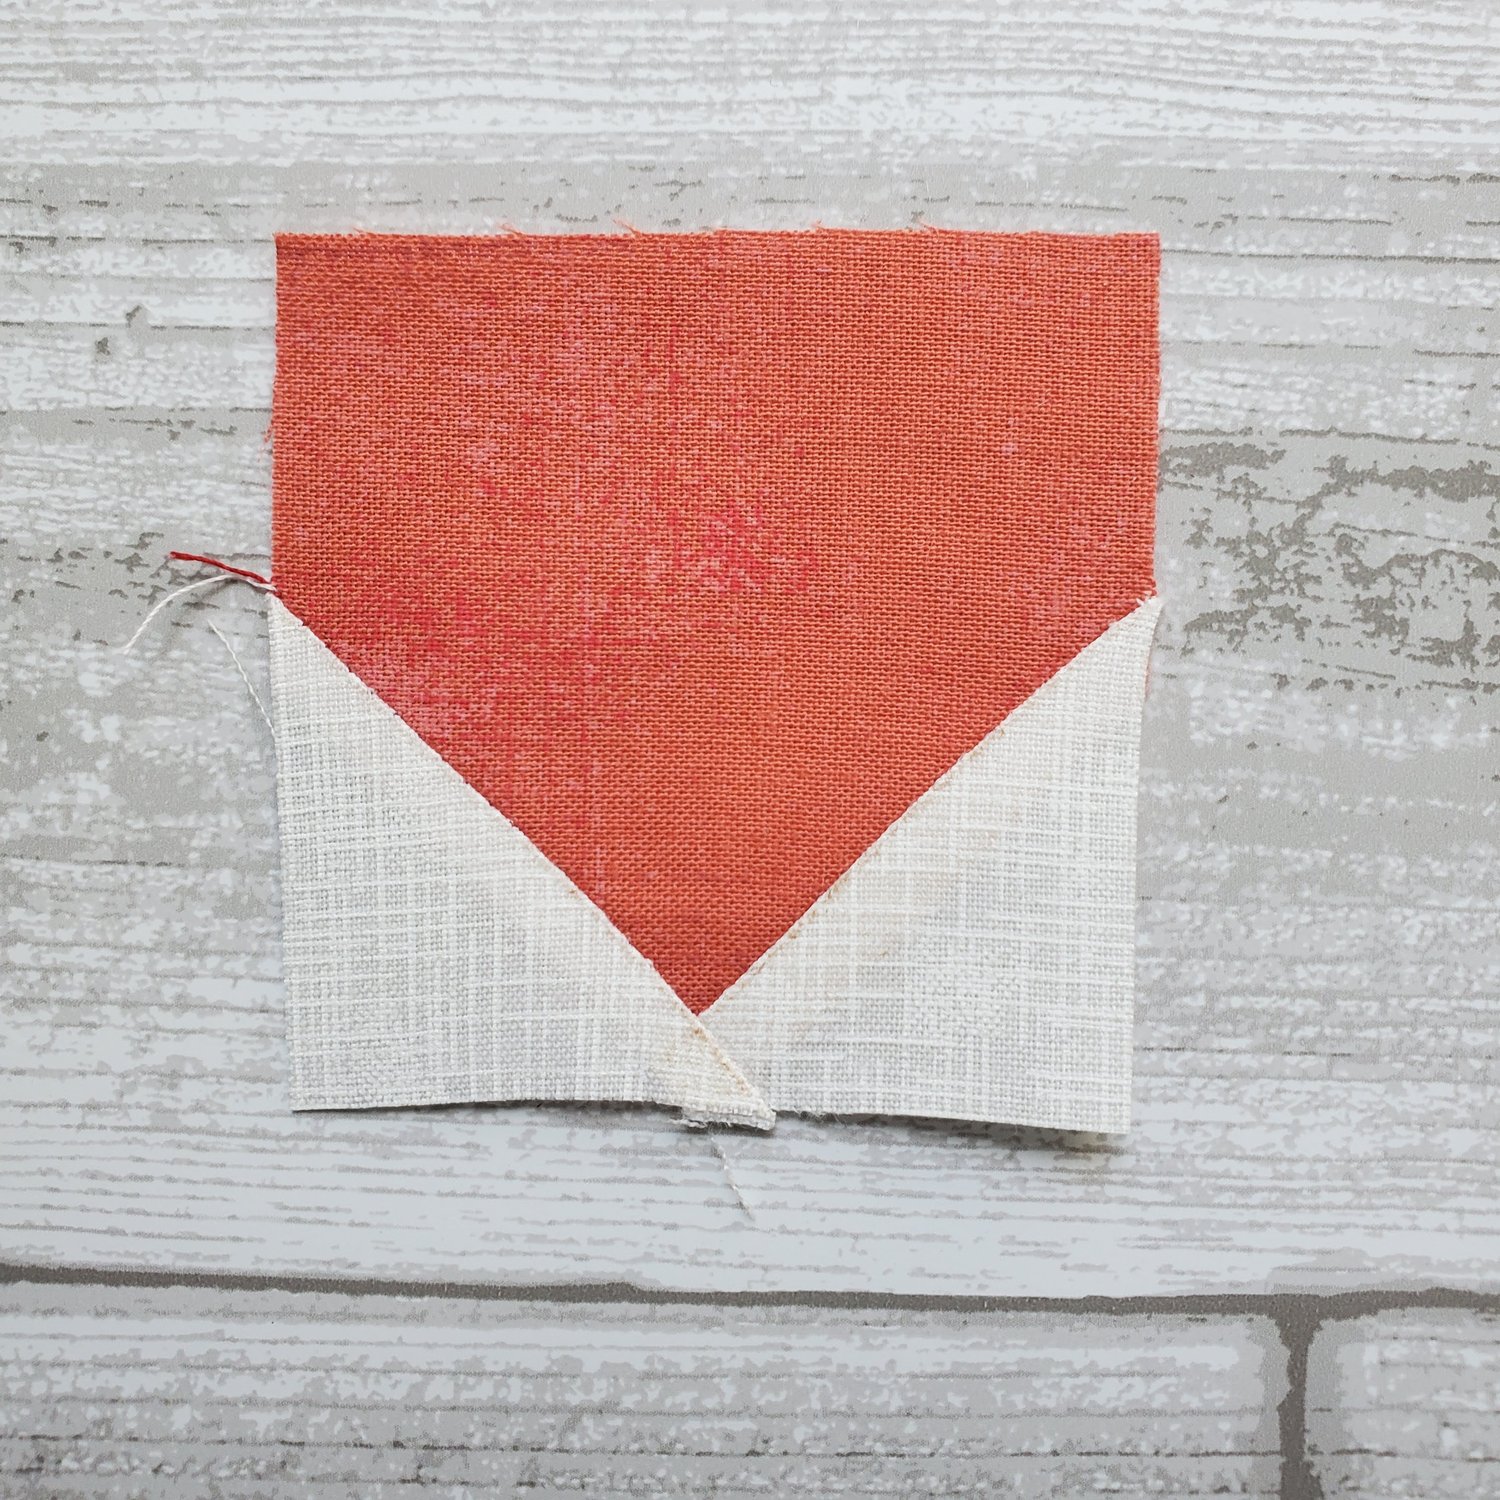
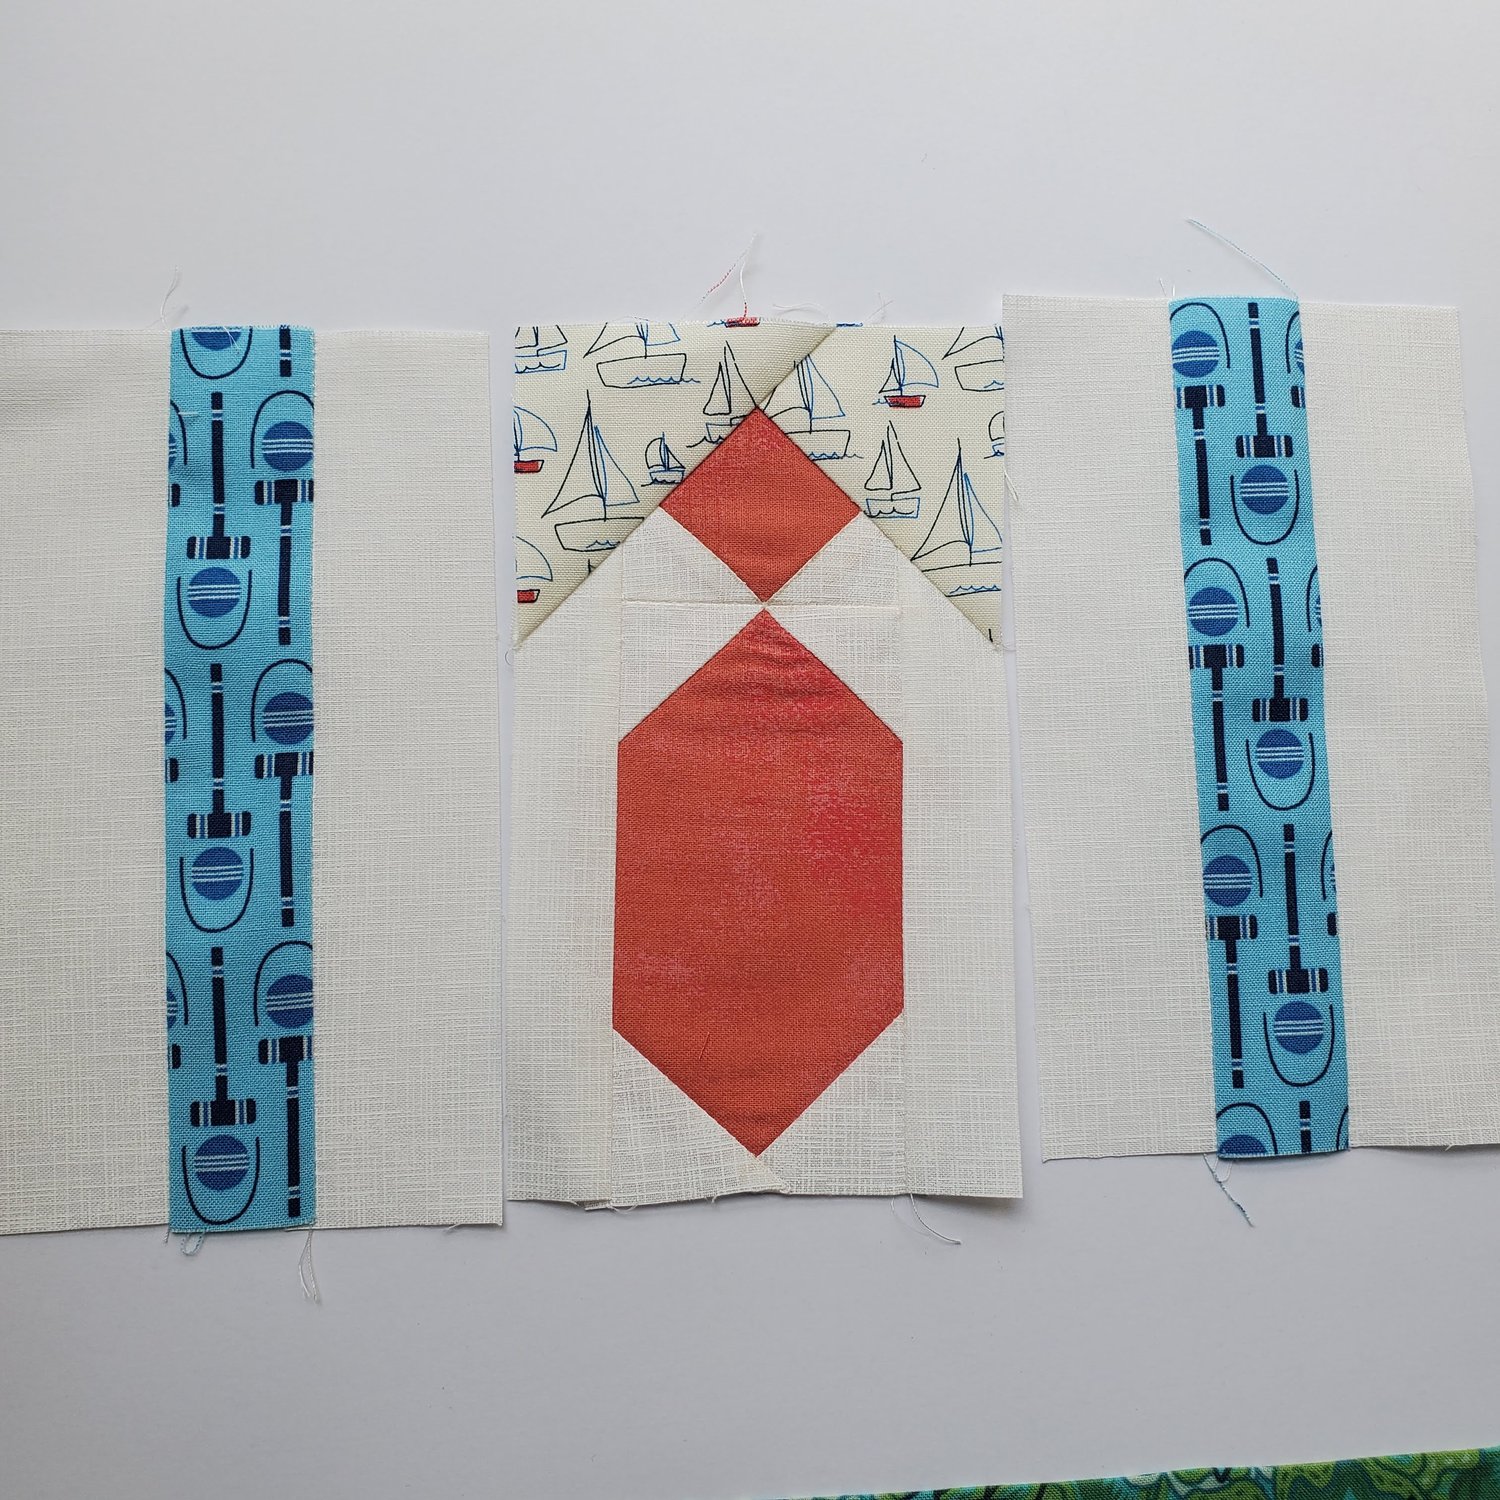
We will start with sewing the red tie with the collar for the center section of the mug rug. Take the 2 ½” red square with two of the 1 ½” white squares. You will need to draw a sewing line diagonal across the two white squares and place it on the corner of the red square.
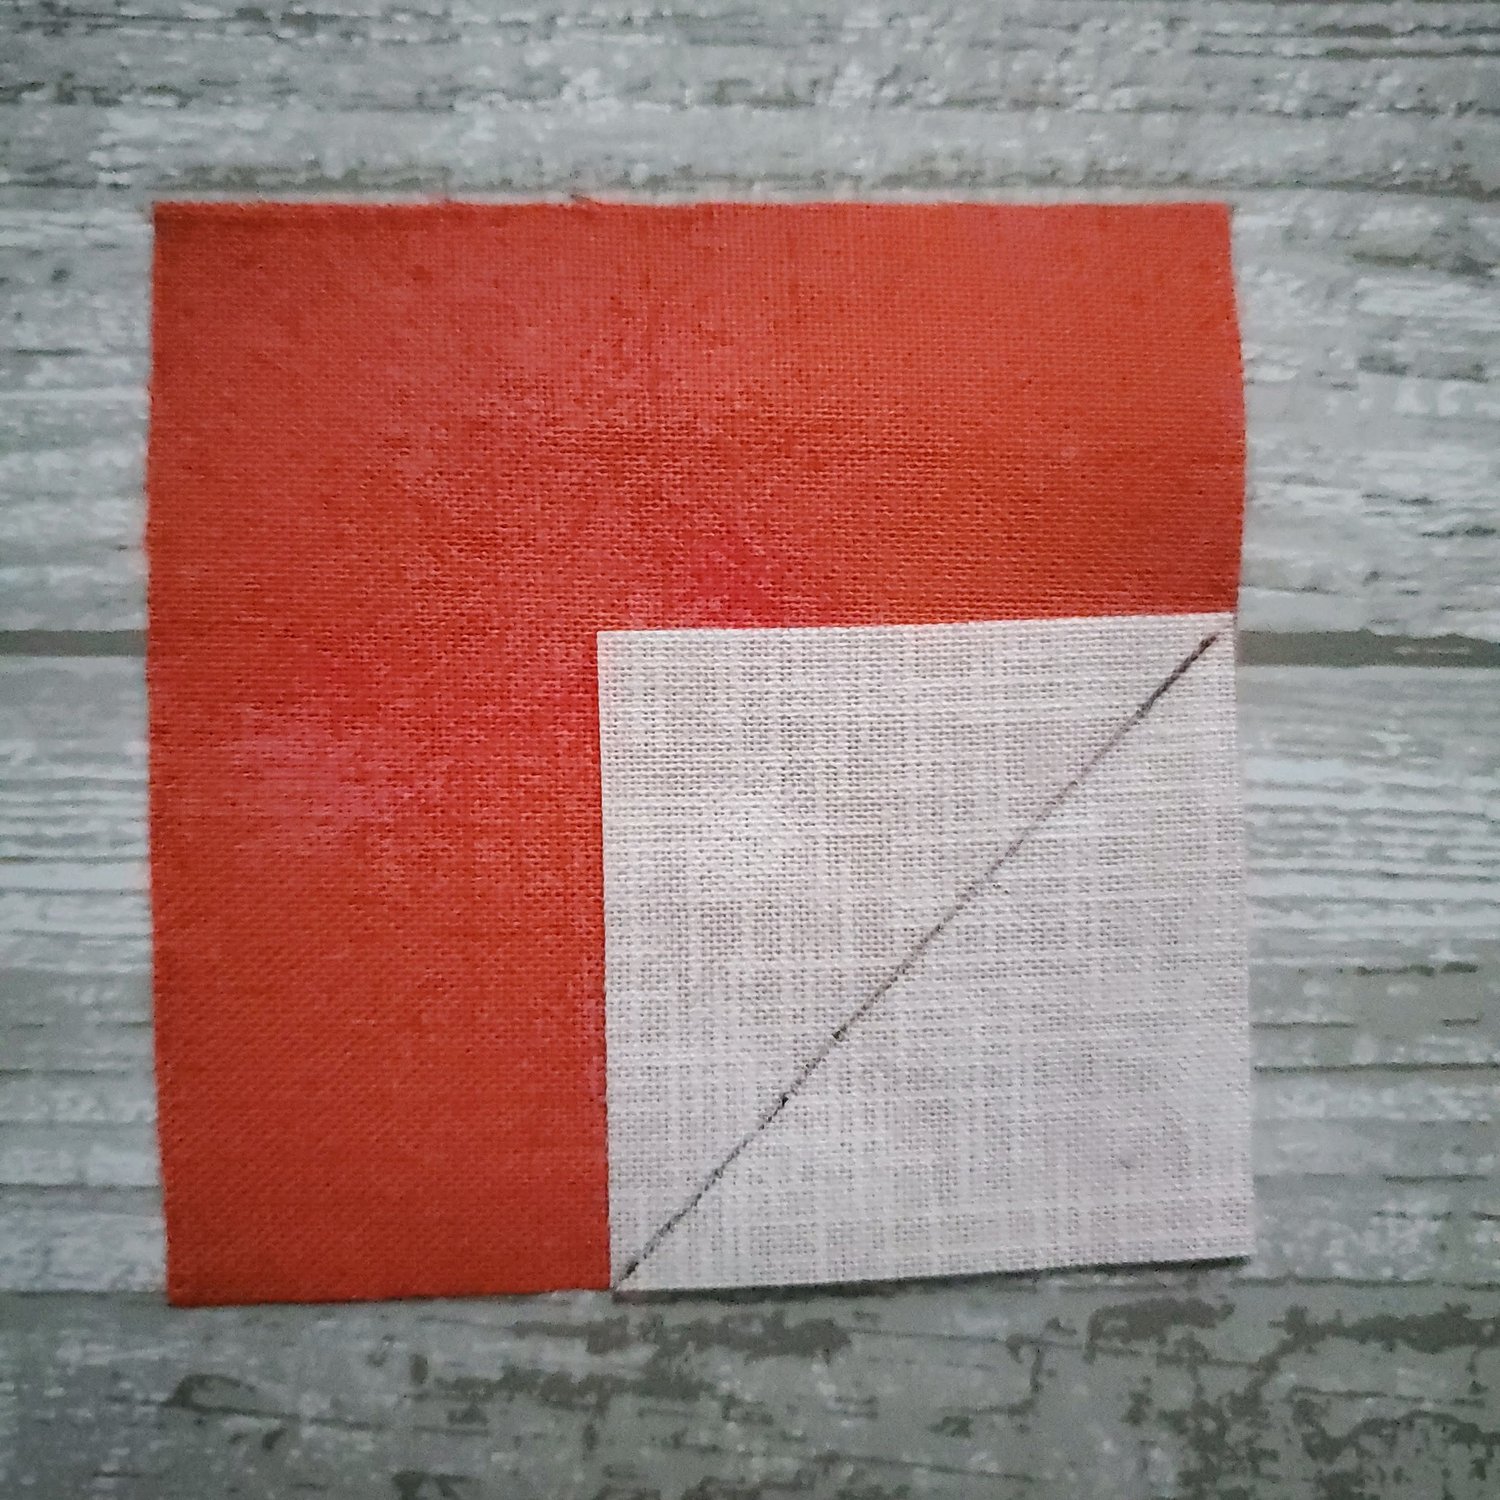
Sew on the drawn line and trim the excess to ¼” seam allowance. Press.
Do the same on the other corner.
Take the 2 ½” x 4 ½” red rectangle and sew four 1 ½” squares to each corner using the same method as before.
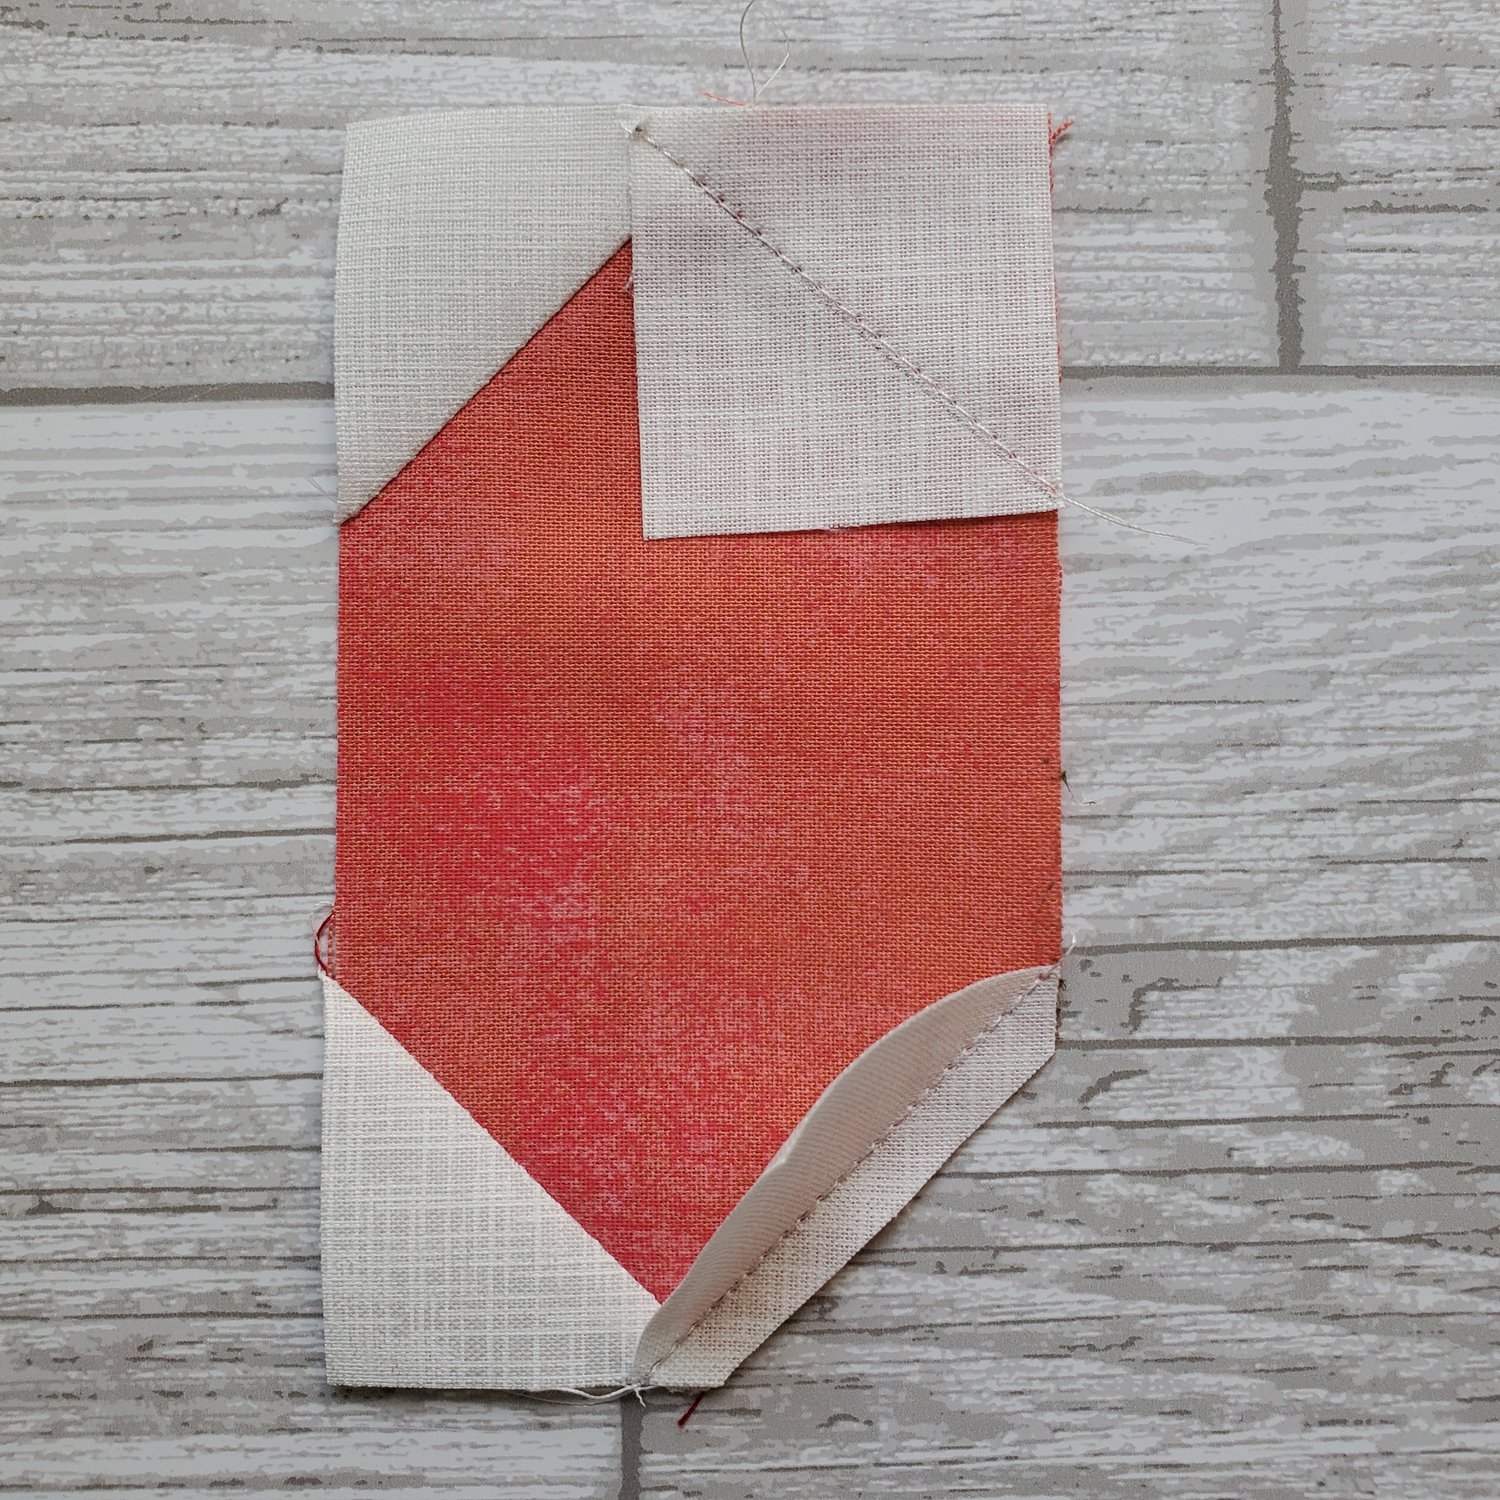
Now sew these two pieces of the tie together. It is helpful to pin before sewing to match the points. Sew the 6 ½” x 1” white strips to each side and press.
The shirt collar is created using the two 2 ½” squares of sailboat fabric using the same method of drawing the sewing line and placing on each of the corners. Sew, trim and press.
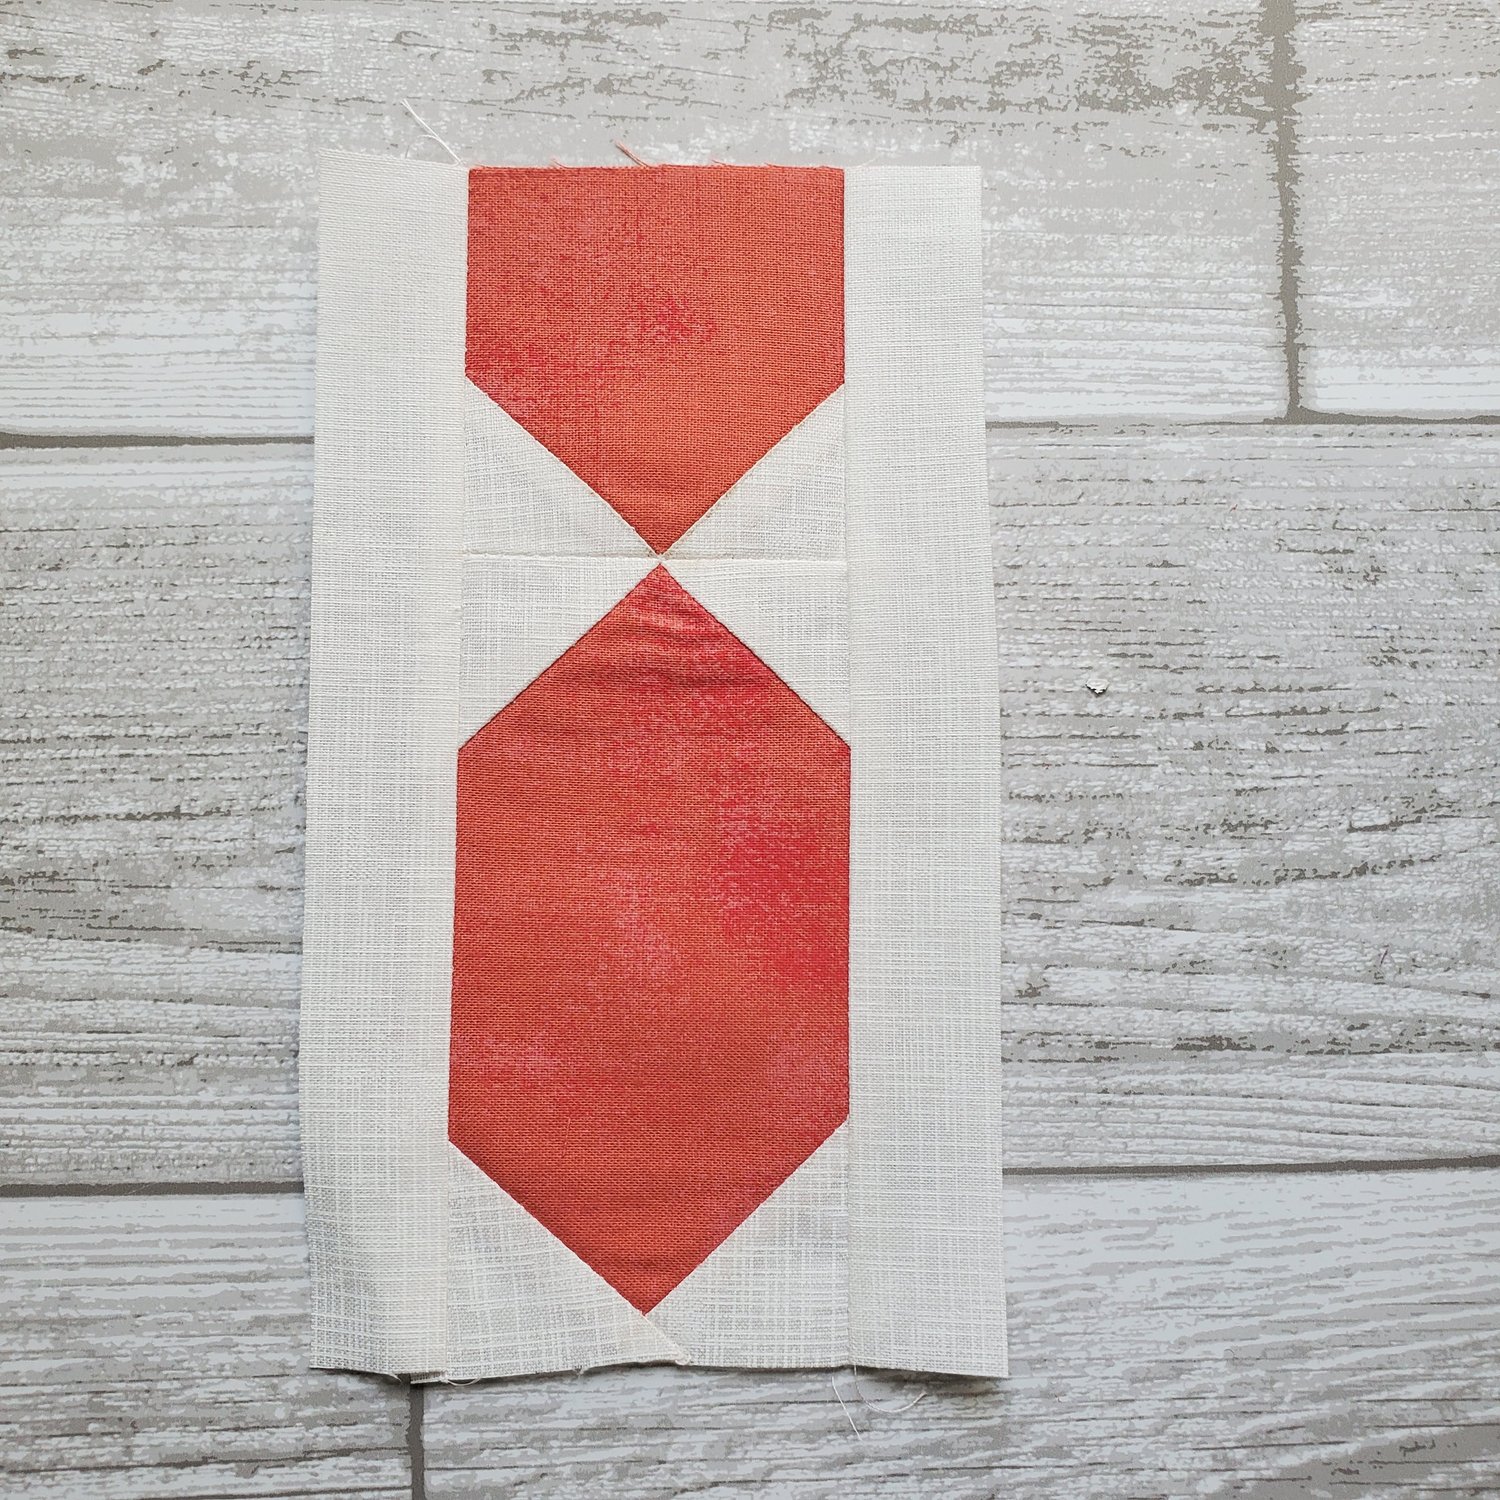
The suspenders are the final section using the blue and white Croquet fabric pieces 1 ½”x 6 ½” sewn to the 1” x 6 ½” white strips. Press.
You should have 3 sections ready to sew together.
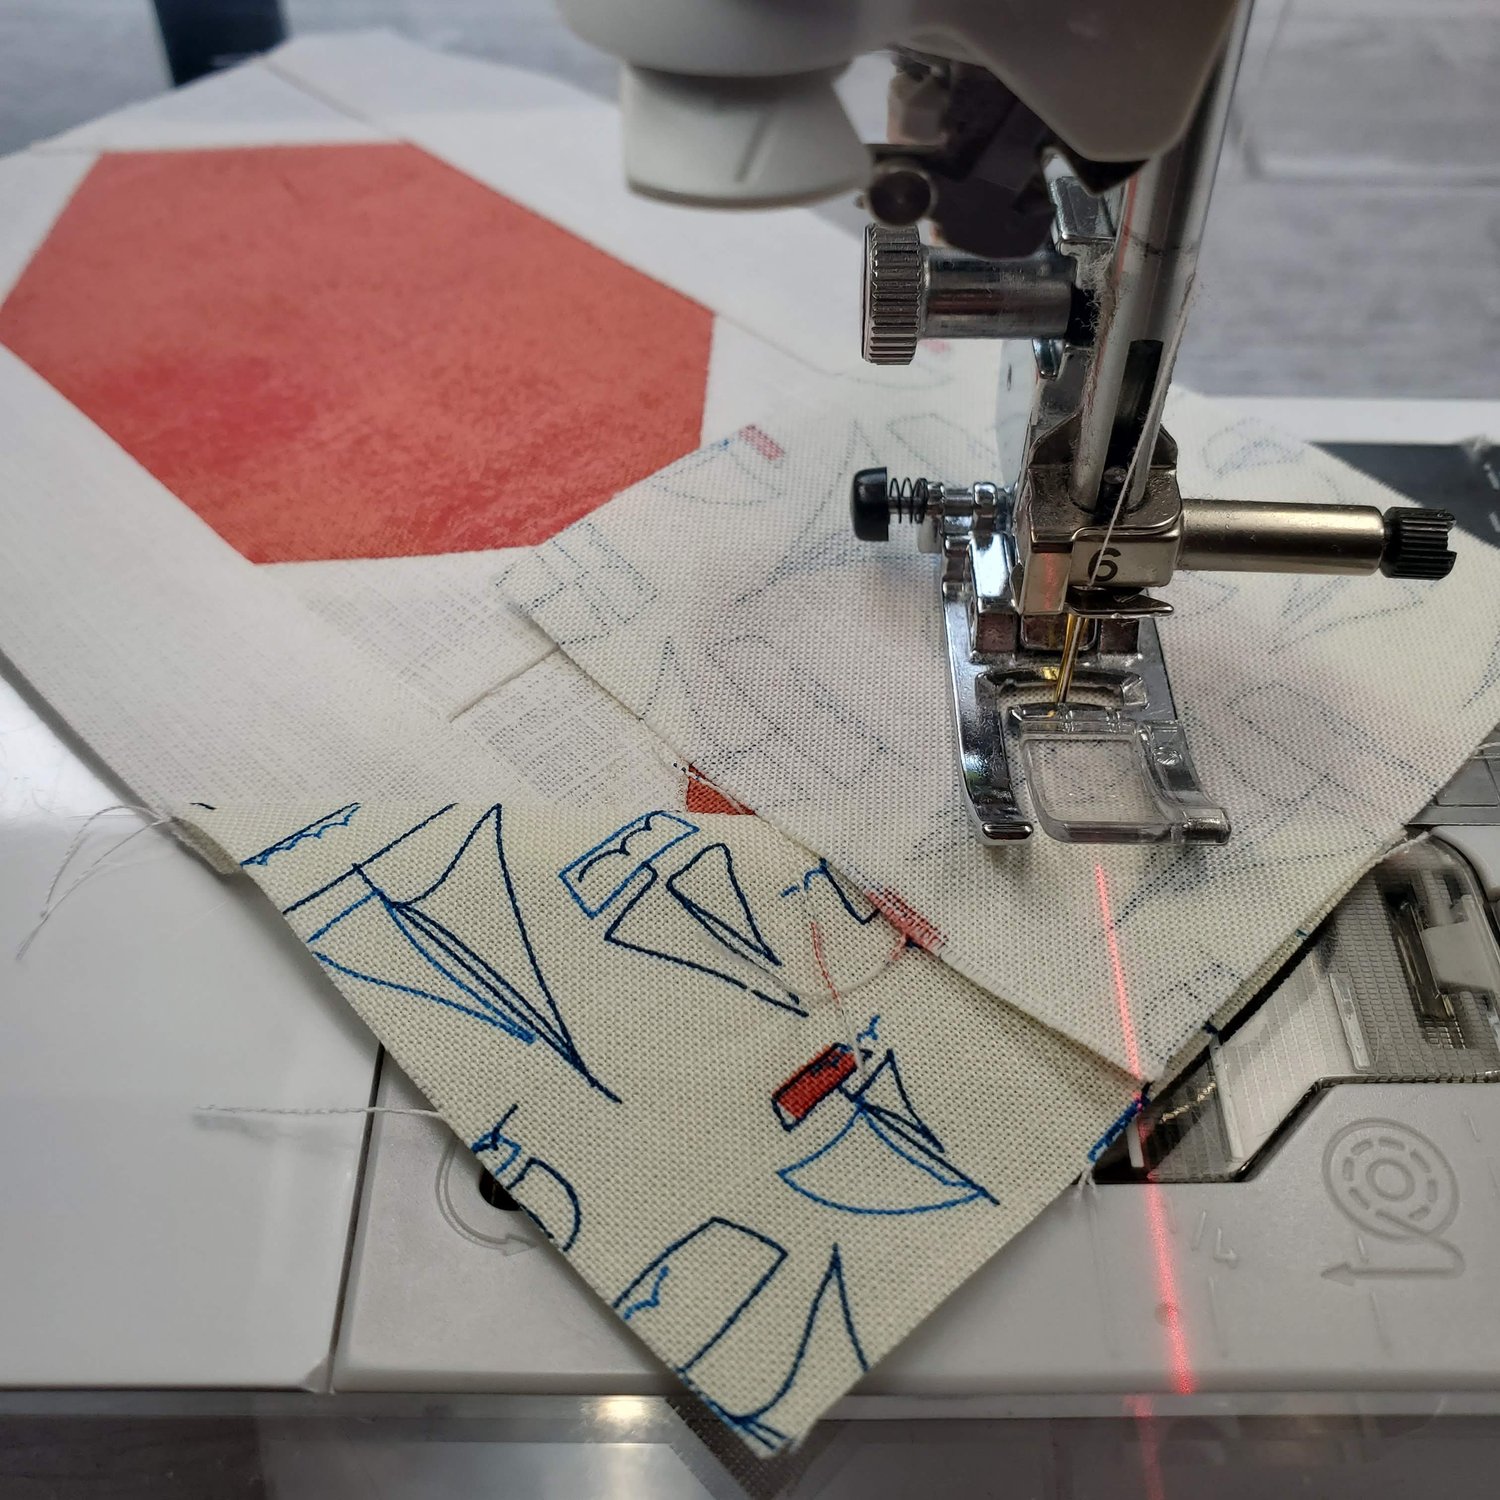
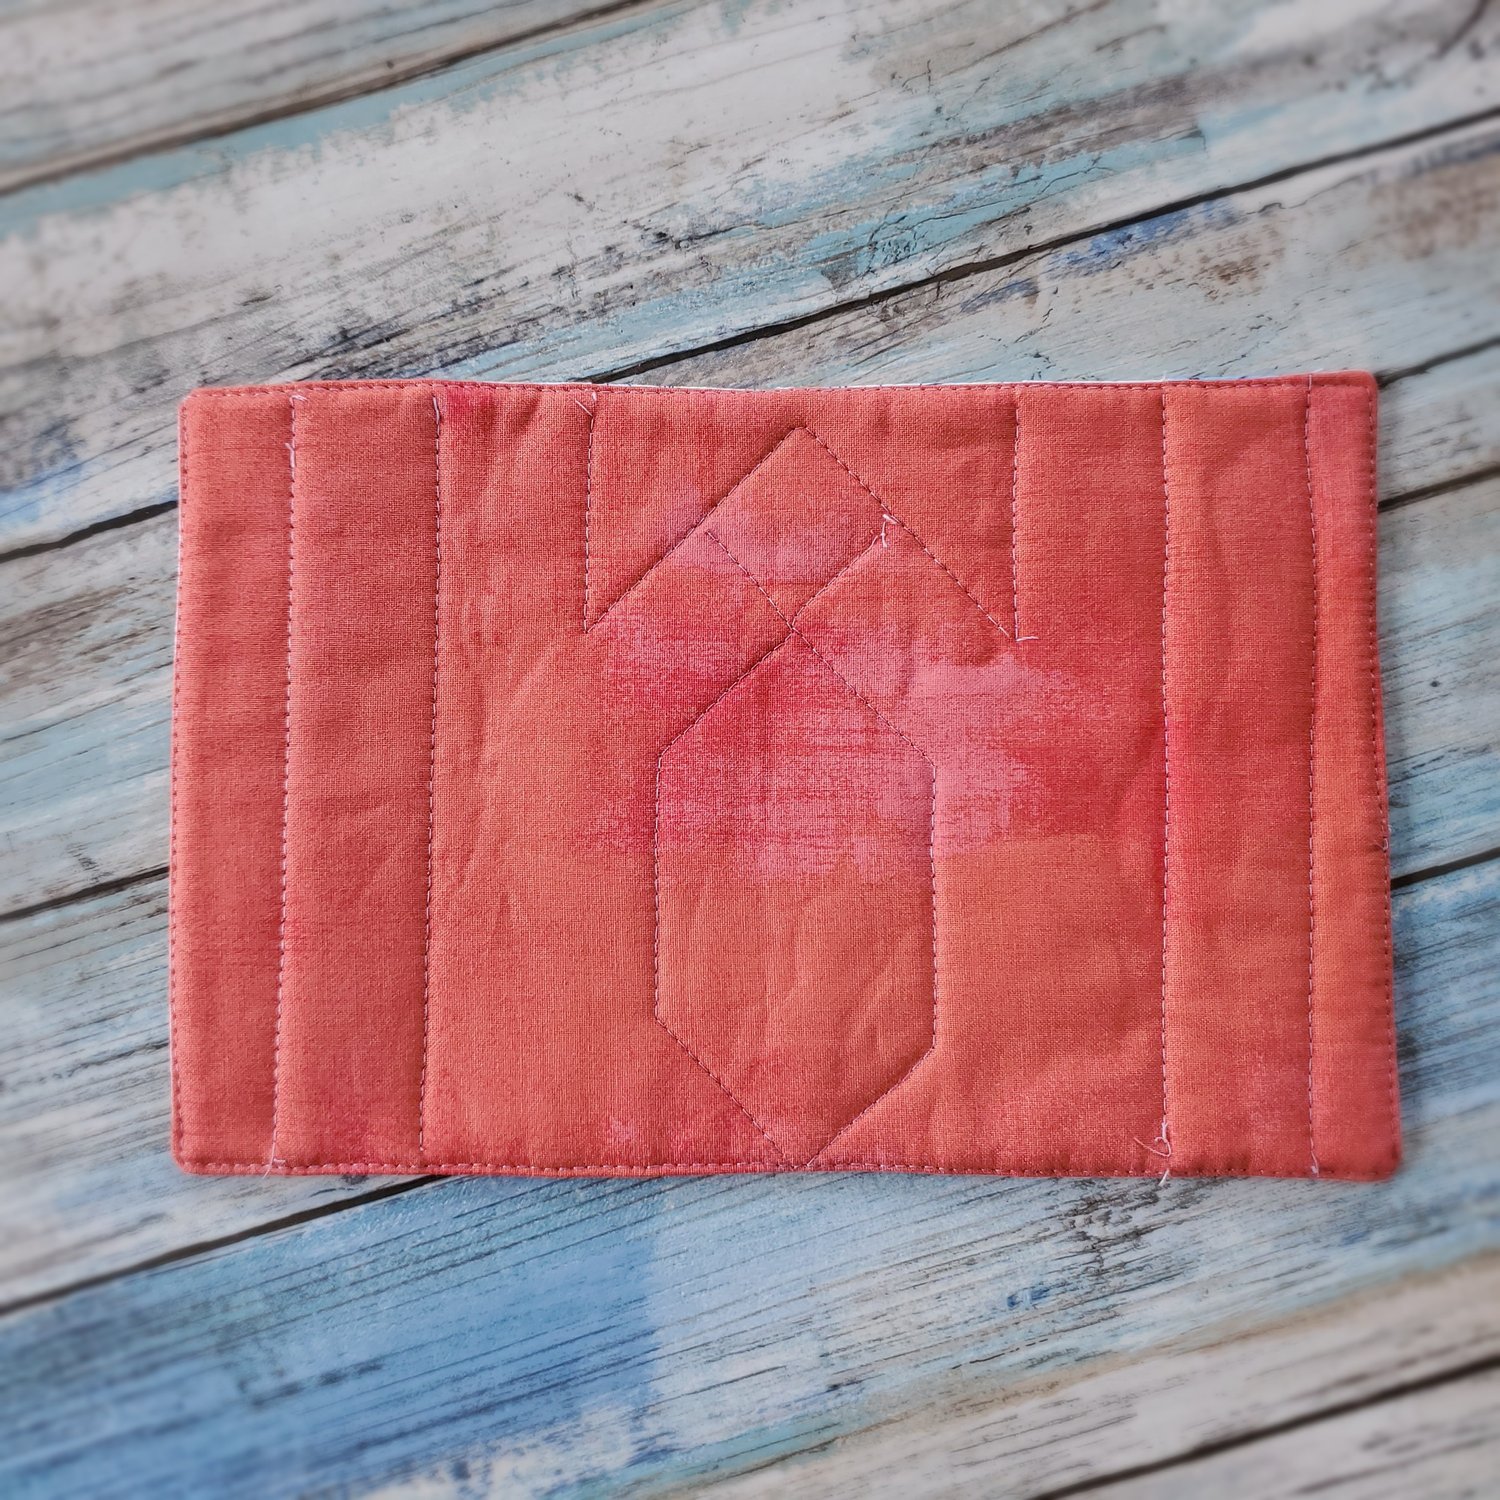
Sew these together and press. You may want to trim the outside edges a bit to straighten up the rectangle. I laid the backing piece of fabric with the block to trim together to be sure they were the same size. I like to use a piece of Pellon fusible fleece for these small projects. It makes it much easier to just fuse the fleece to the backing fabric and then place the right sides together. You will sew around all the sides leaving about a 2 -3” opening to turn the project. Trim the corners to help it lay flat.

Turn right sides out and press carefully aligning the edges and turning under the edges of the opening. Topstitch using a coordinating thread about ⅛” from the edge on all four sides closing up the opening as you sew. To hold the layers together you can sew in the ditch along all the seams.
You could also plan for some personalization using Cricut iron on or embroidery. This would also be a great project to practice some free motion quilting. No matter what method you choose you know Dad or Grandpa will love that you made this special for them.