DIY Play Mat
22nd Oct 2020
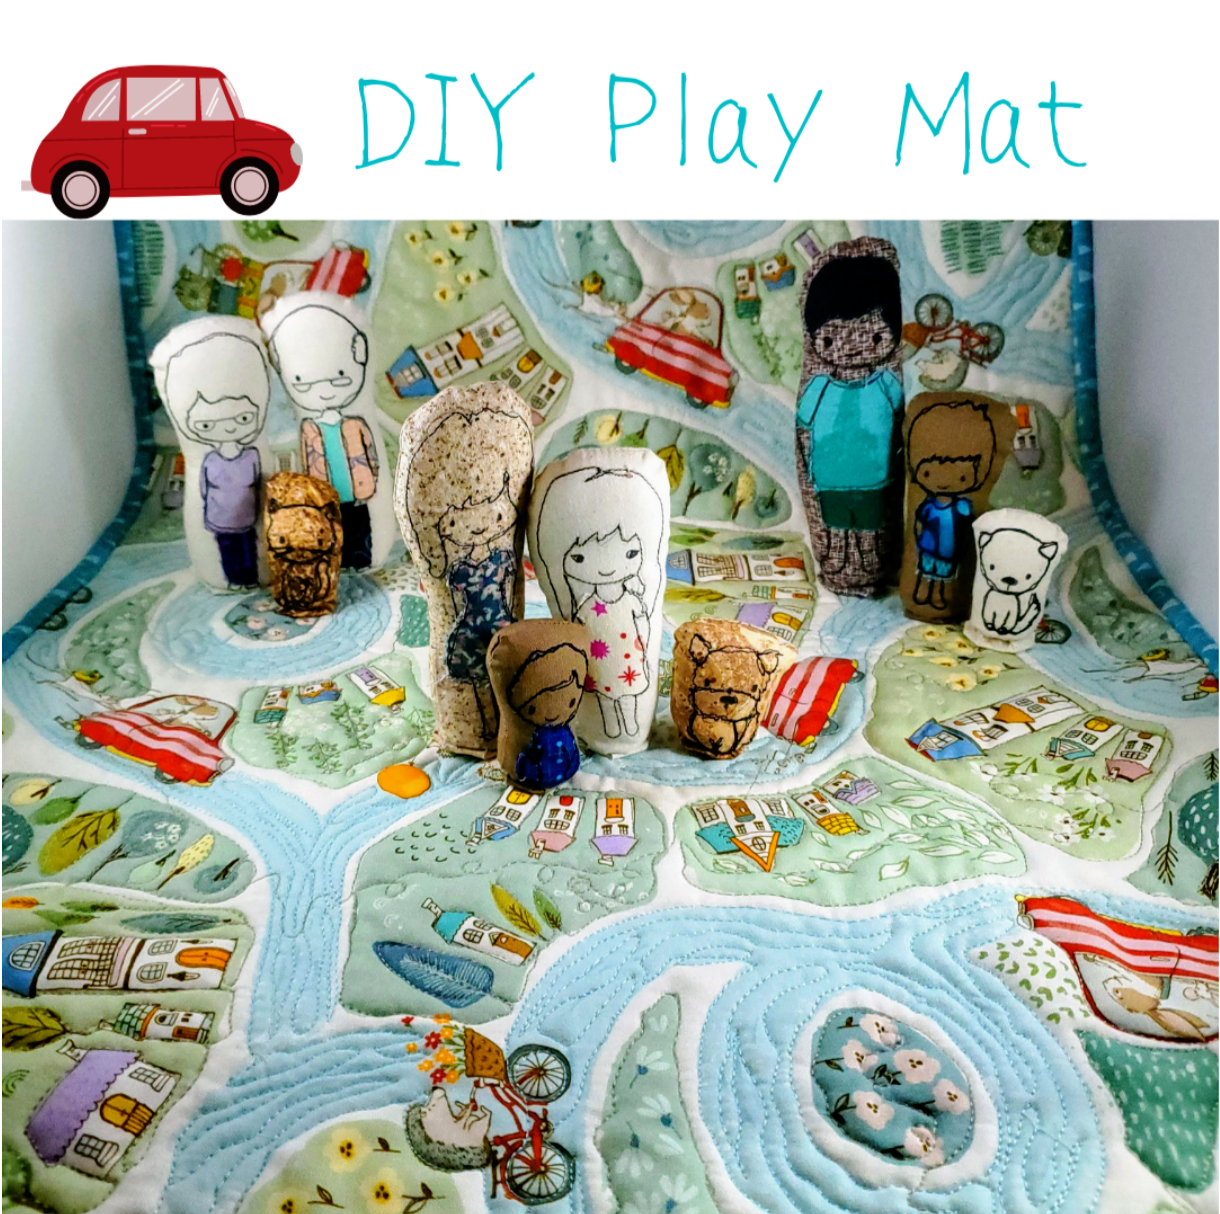
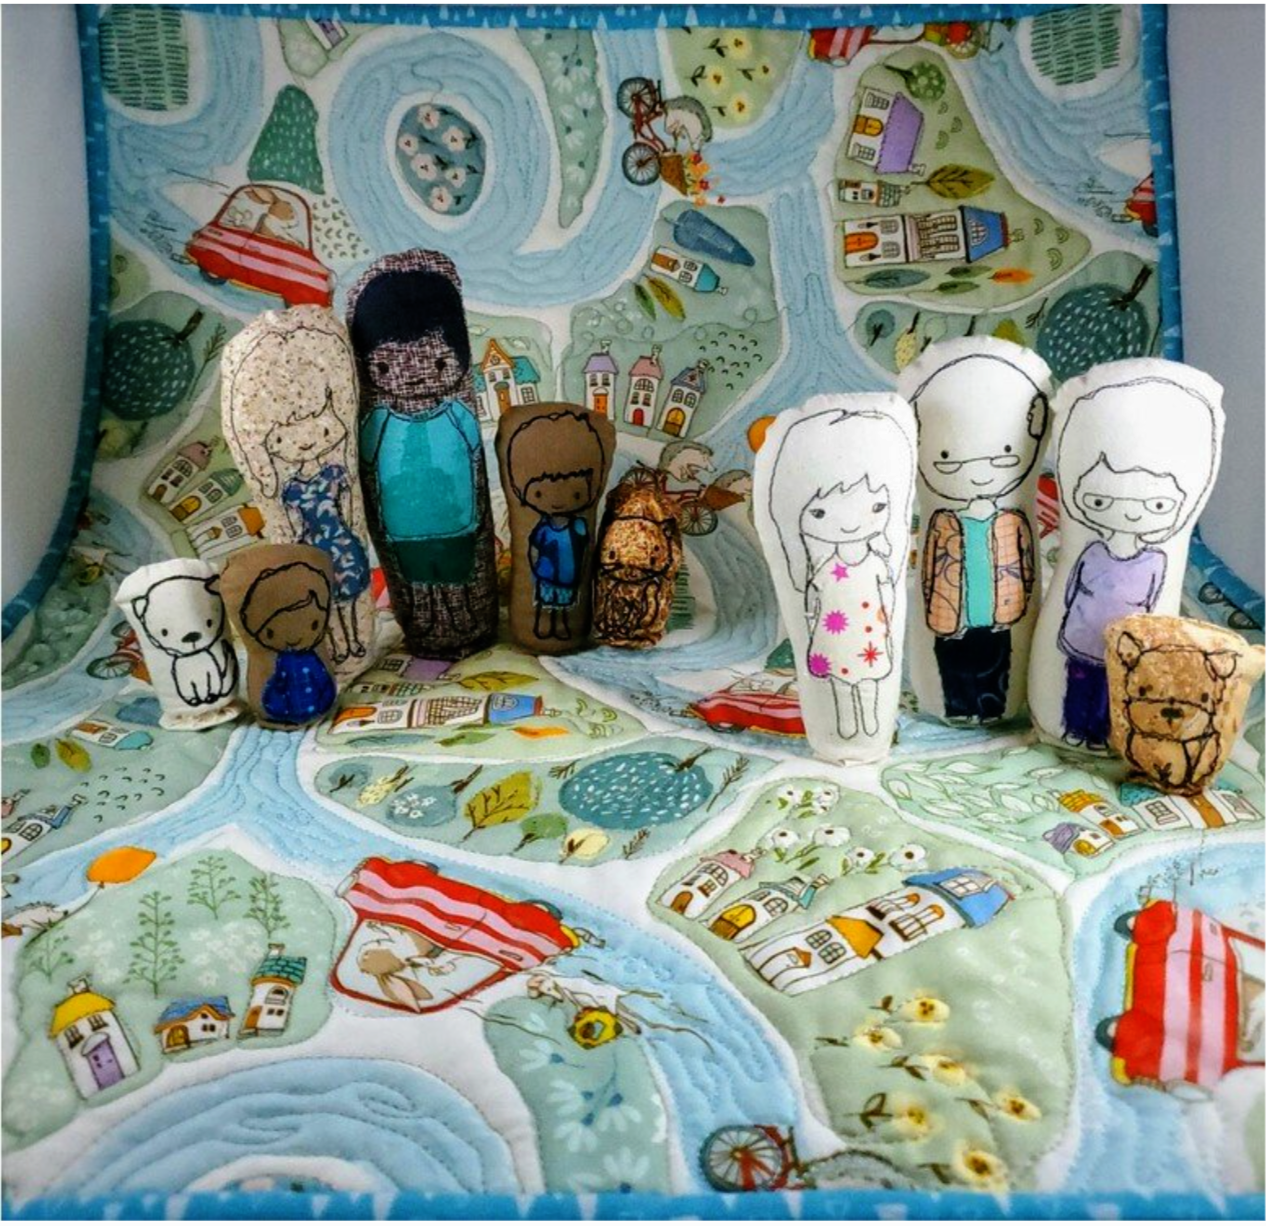
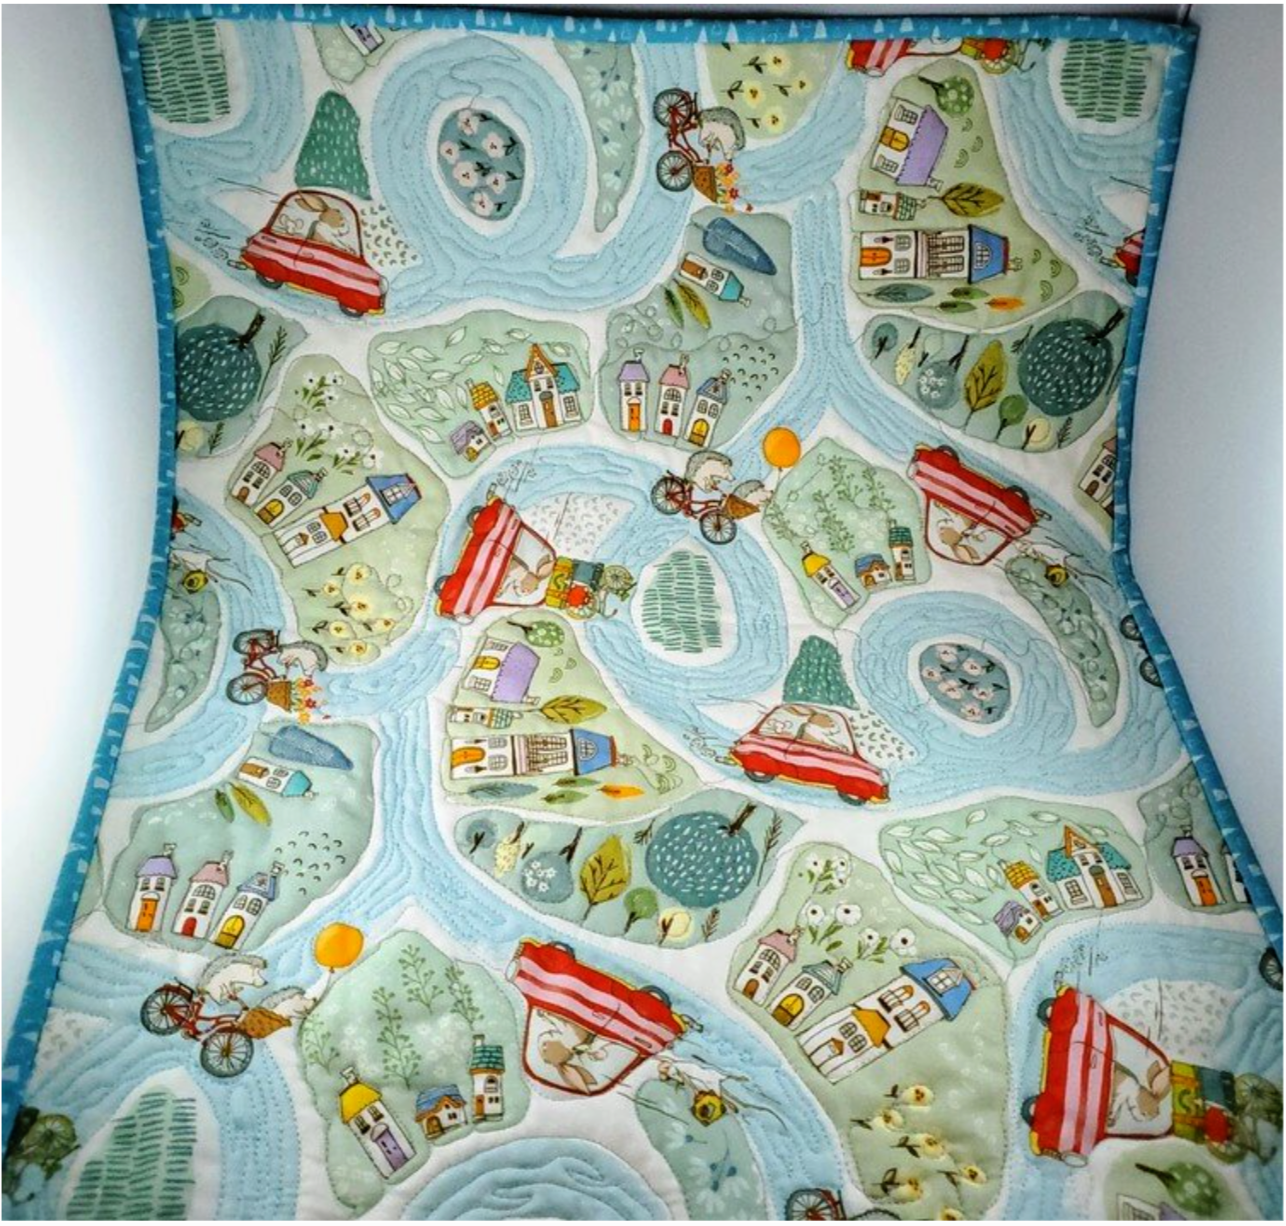
When I saw this adorable City Hoppers fabric in the October Classic and Mini Pop boxes, I knew it would be a wonderful gift for a young child this holiday season.
I combined it with this pattern from Sweet Calico to add a family of dolls to encourage imaginative play in Happy Town. The drawstring bag I featured in this would pair perfectly to complete the gift set.
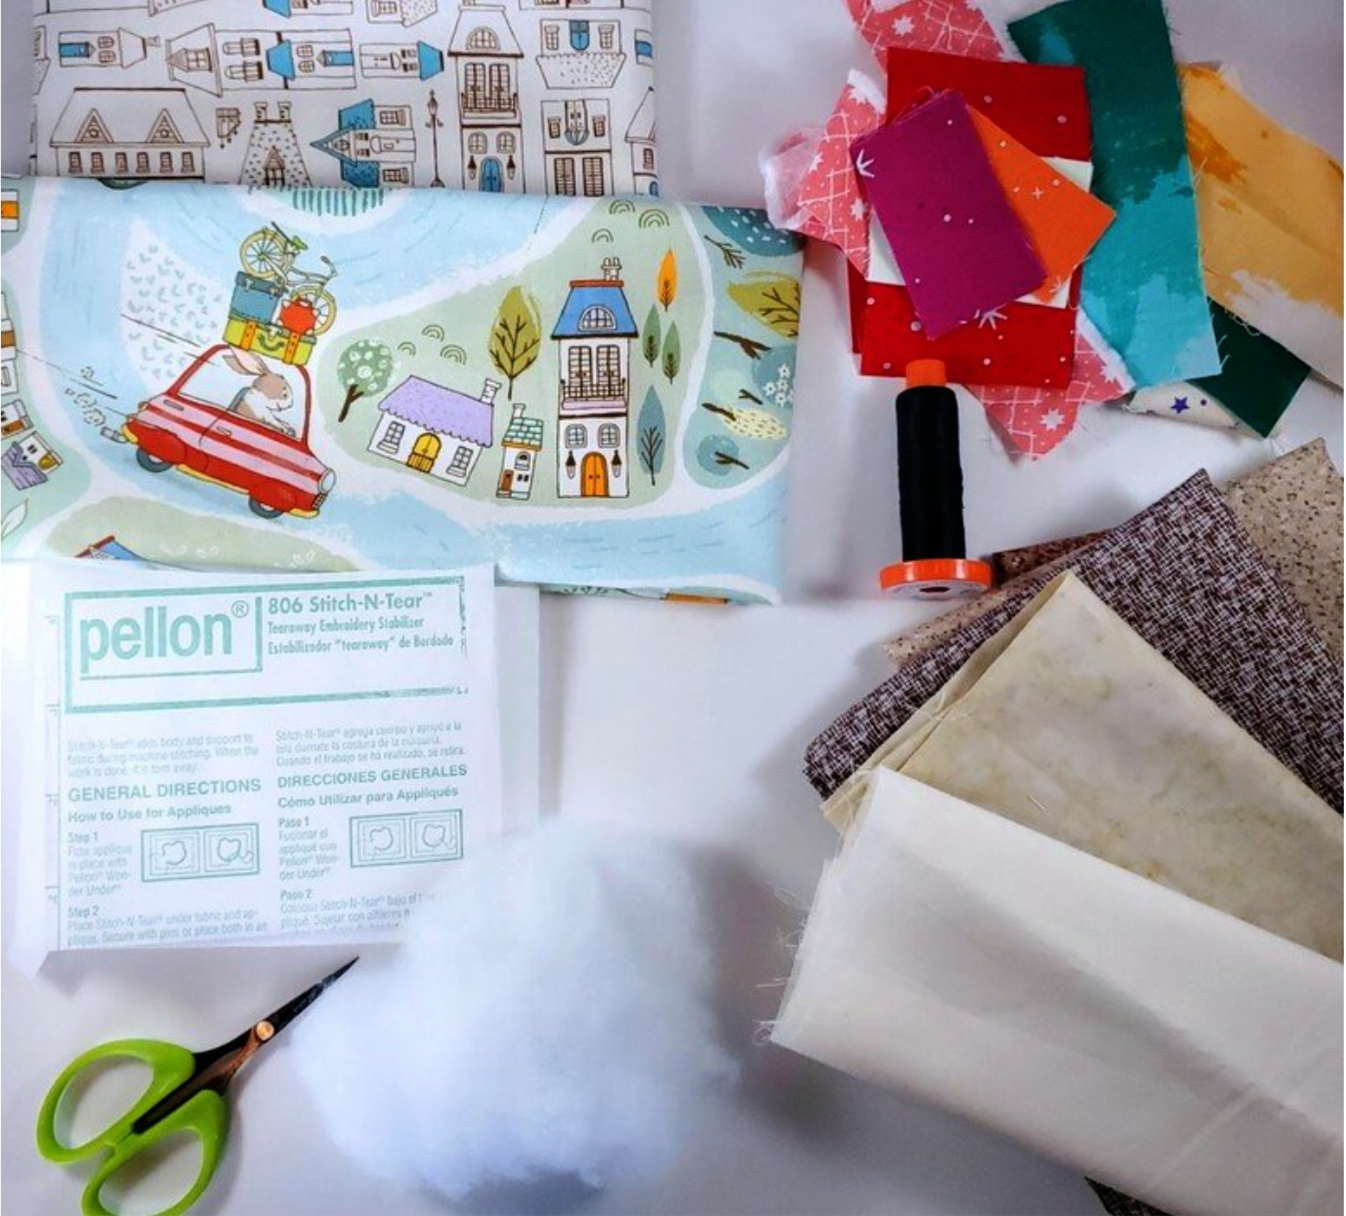
Materials needed:
Fat quarter of Michael Miller City Hopper fabric
Fat quarter of backing fabric
Fat quarter for binding
Batting piece
Skin color fabric Riley Blake Trento
Fabric scraps for clothing
Aurifil quilting thread for play mat
30 wt black thread
Poly-fil
Tear away stabilizer
Heat n bond or fabric glue
The first step is to prepare the play mat for quilting. I pressed the fabric and cotton batting pieces then made a quilt sandwich using a basting spray to hold the layers together.
Set up your sewing machine for free motion quilting. I started with light blue thread and made some wavy lines on the road. This is a great project to practice free motion quilting to get a feel for the process!
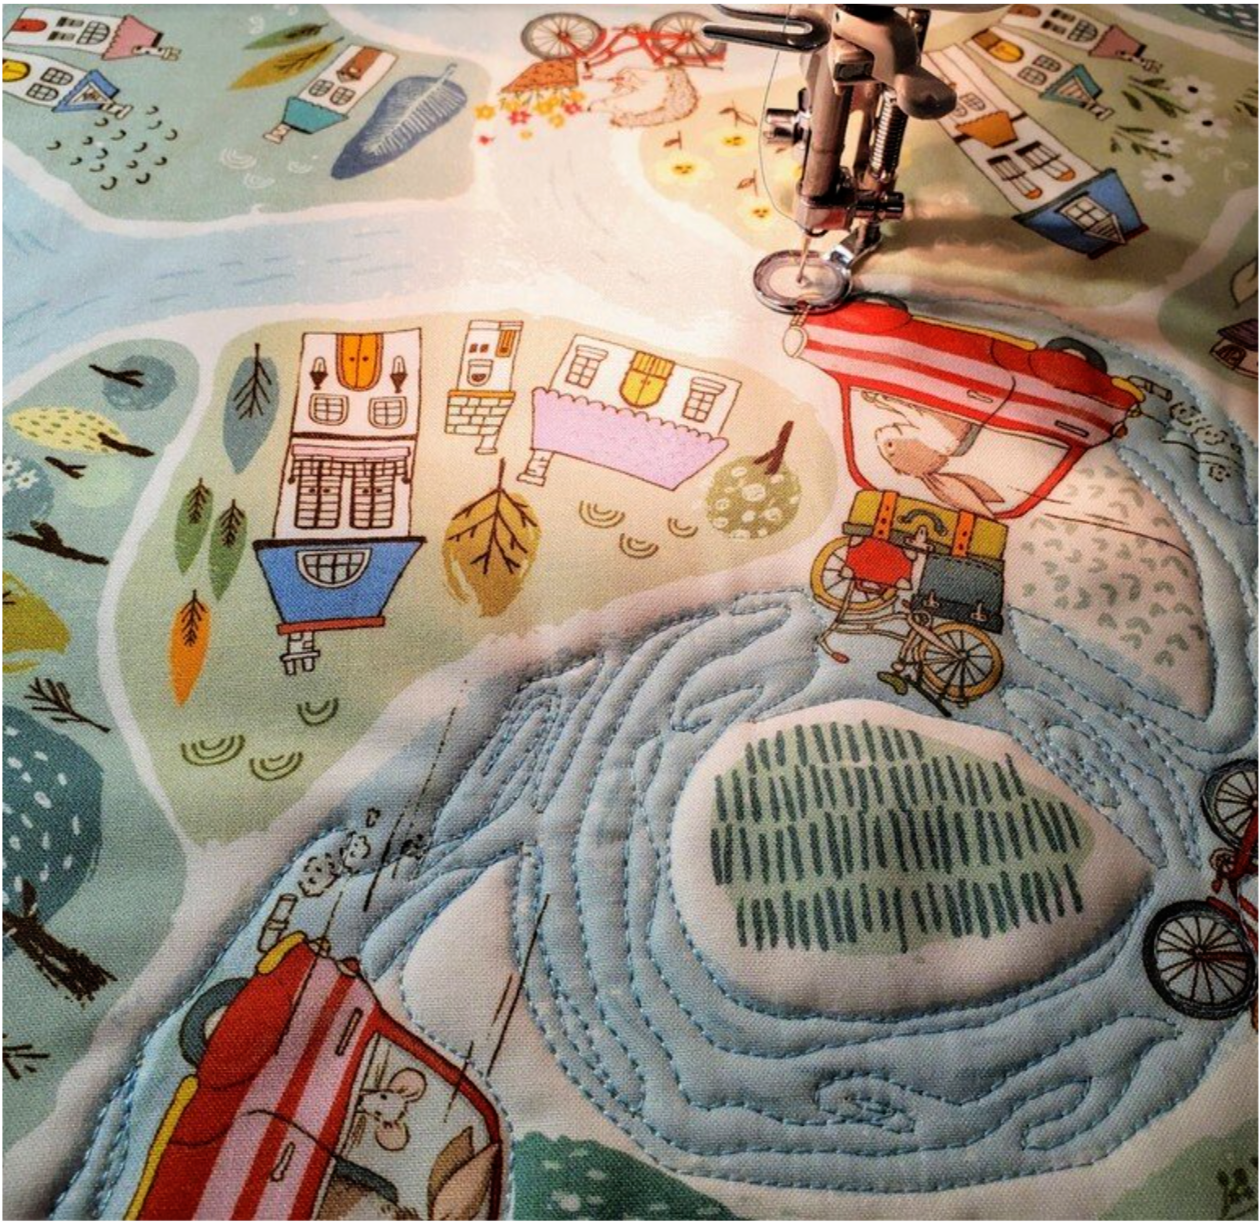
I then changed to a grey thread and outlined the trees and houses to give some texture and dimension to the fabric. I found the parts that were not quilted puffed up and were more defined giving added interest to the piece.
After quilting, I squared up the play mat and cut binding in a coordinating fabric. I cut the binding at 2 inches for a narrow edge.
Sew it to the front and wrap around to the back securing it with hand stitching in a matching thread color.
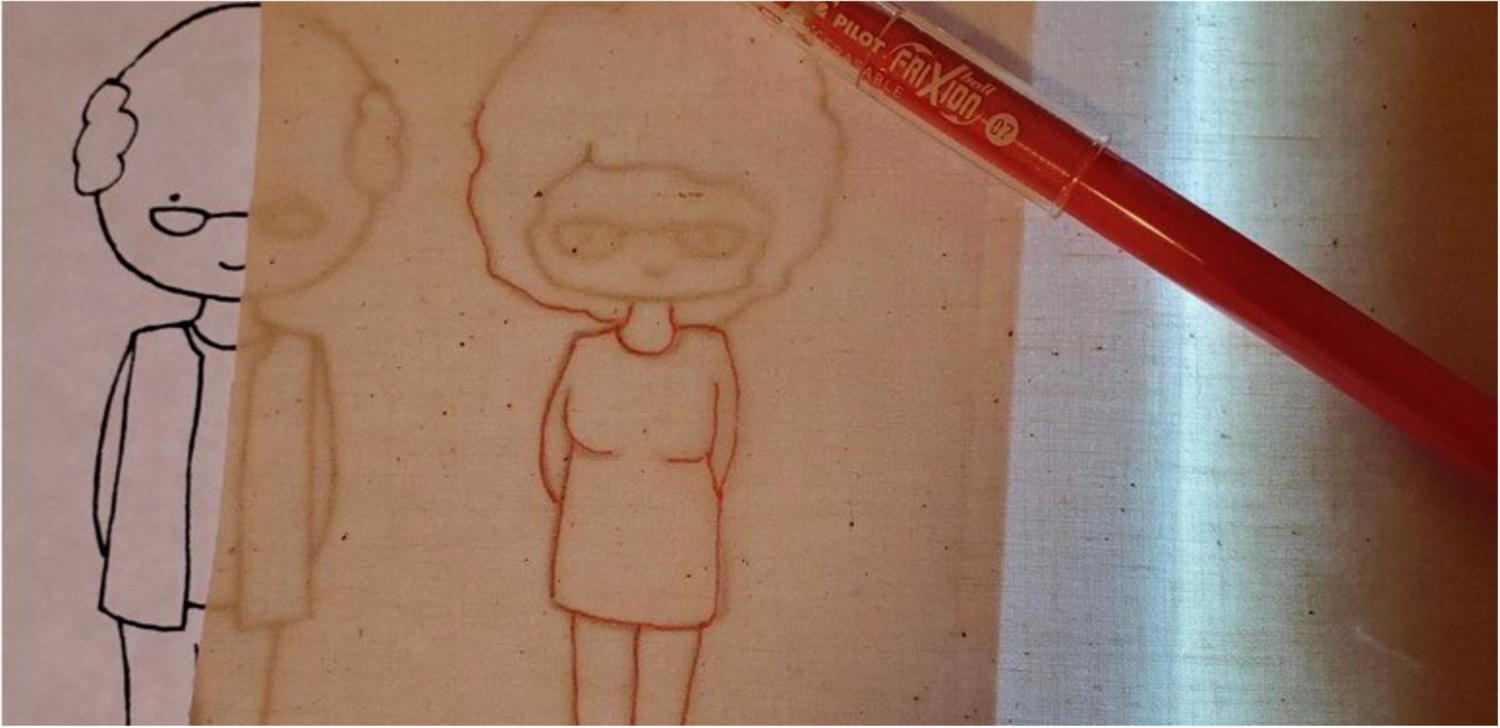
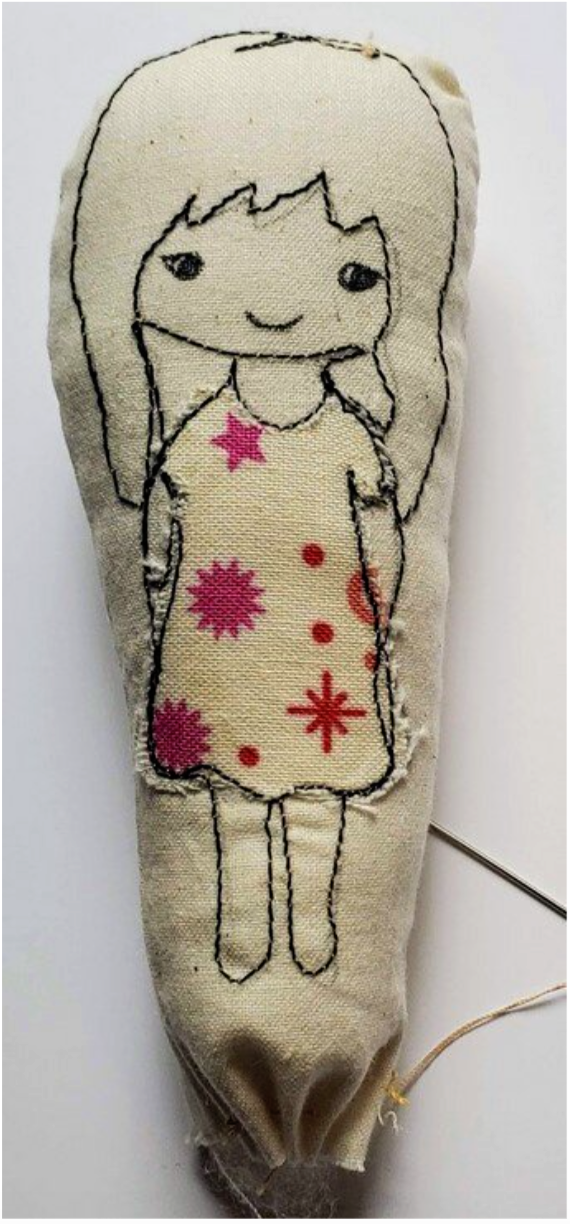
After completing the play mat. it was time to create the fun doll families dressed and ready for an adventure.
I printed the pattern and used a light box and fabric marker to trace the people onto the fabric. For my dolls, I used a Micron black marker to draw the eyes and mouth.
Pick some fabric scraps to cut out for the doll clothes and trace from the pattern in the same way. You can use heat n bond or fabric glue to temporarily hold clothes in place. I used a fabric glue stick. Cut a piece of tear away stabilizer and place it on the back of the fabric lined up with the doll outline, pin if needed.
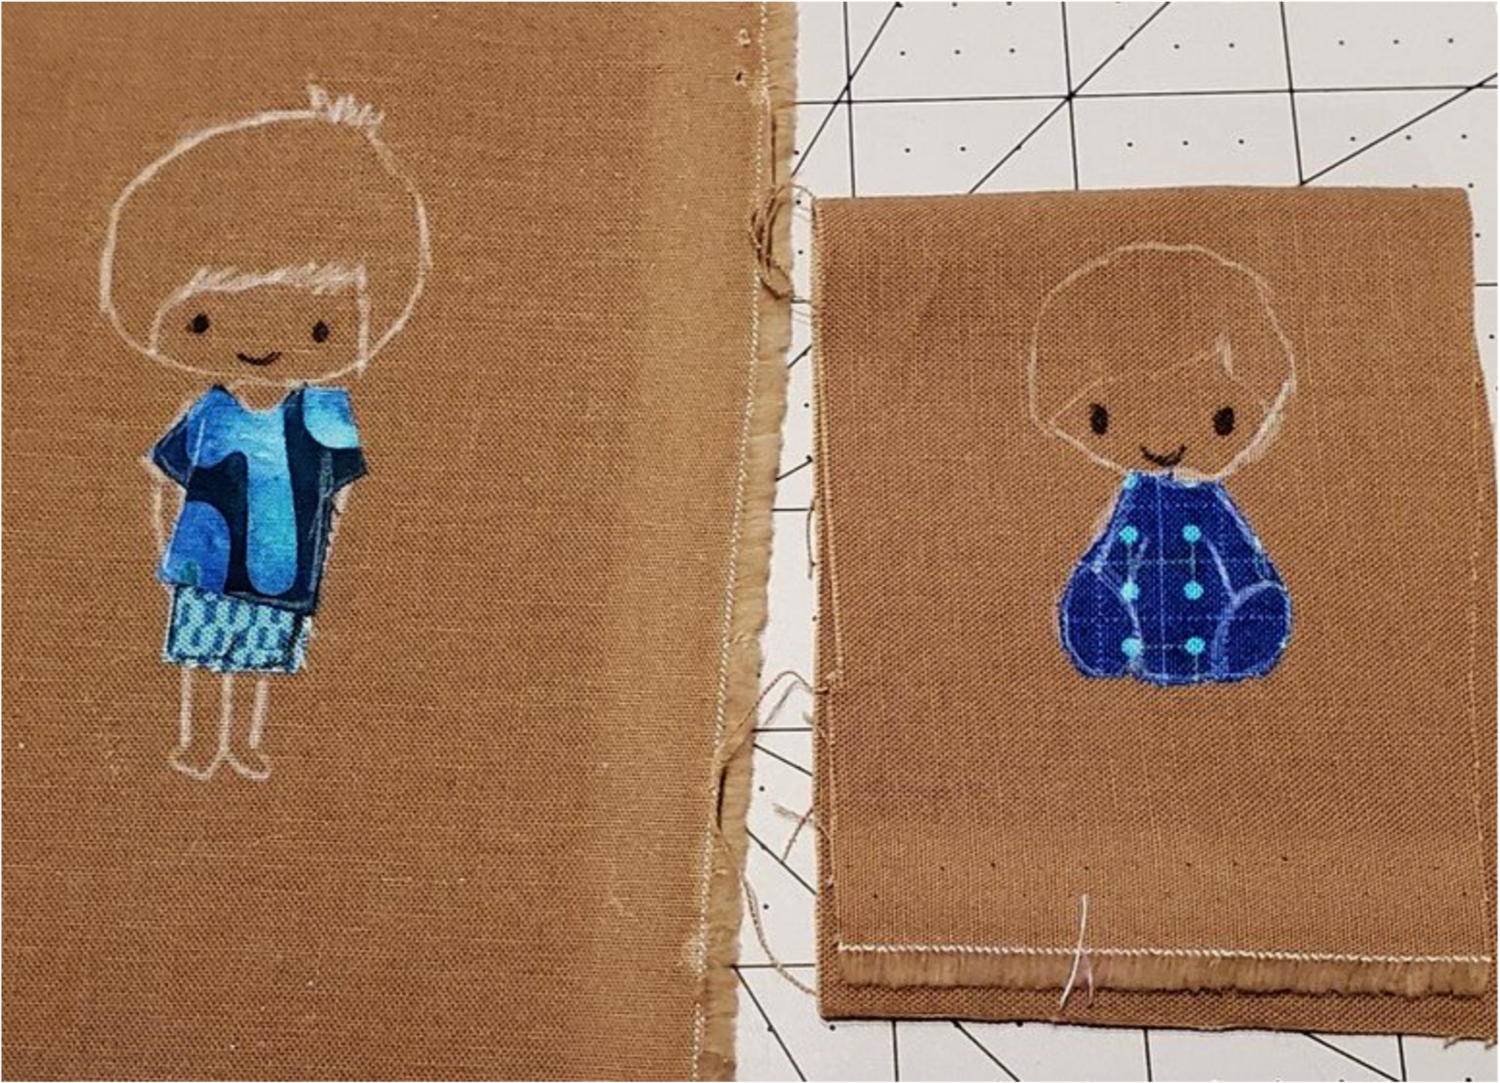
Now you are ready to free motion stitch following the outline using a black 30 wt thread. It is recommended to go around twice to give it a sketchy hand drawn look. I had started with a 50 wt thread, sewing around once and found it was too thin for the outline.
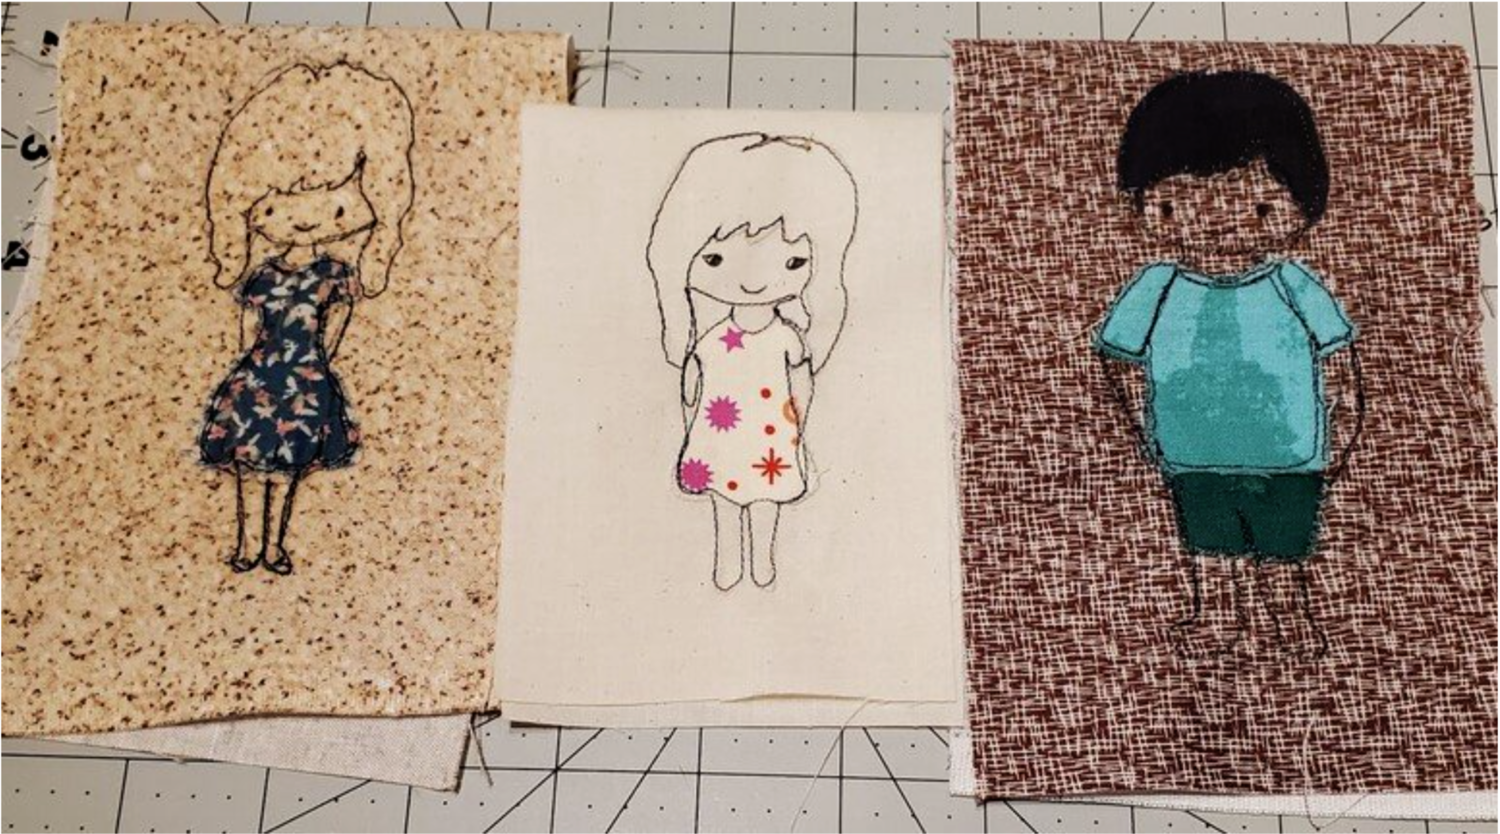
With right sides together, fold fabric in half and stitch around the figure about ½” from the black stitching.
Trim excess fabric to about ¼” from the seam and then turn right side out. Firmly stuff the figure all the way to the feet and hand stitch to close the bottom.
The final step was to cut a circle of thick interfacing like Pellon Peltex or cardboard and cover it in matching fabric. Hand stitch to the base of the doll.
Now the families are ready for an adventure with Bunny in Happy town!