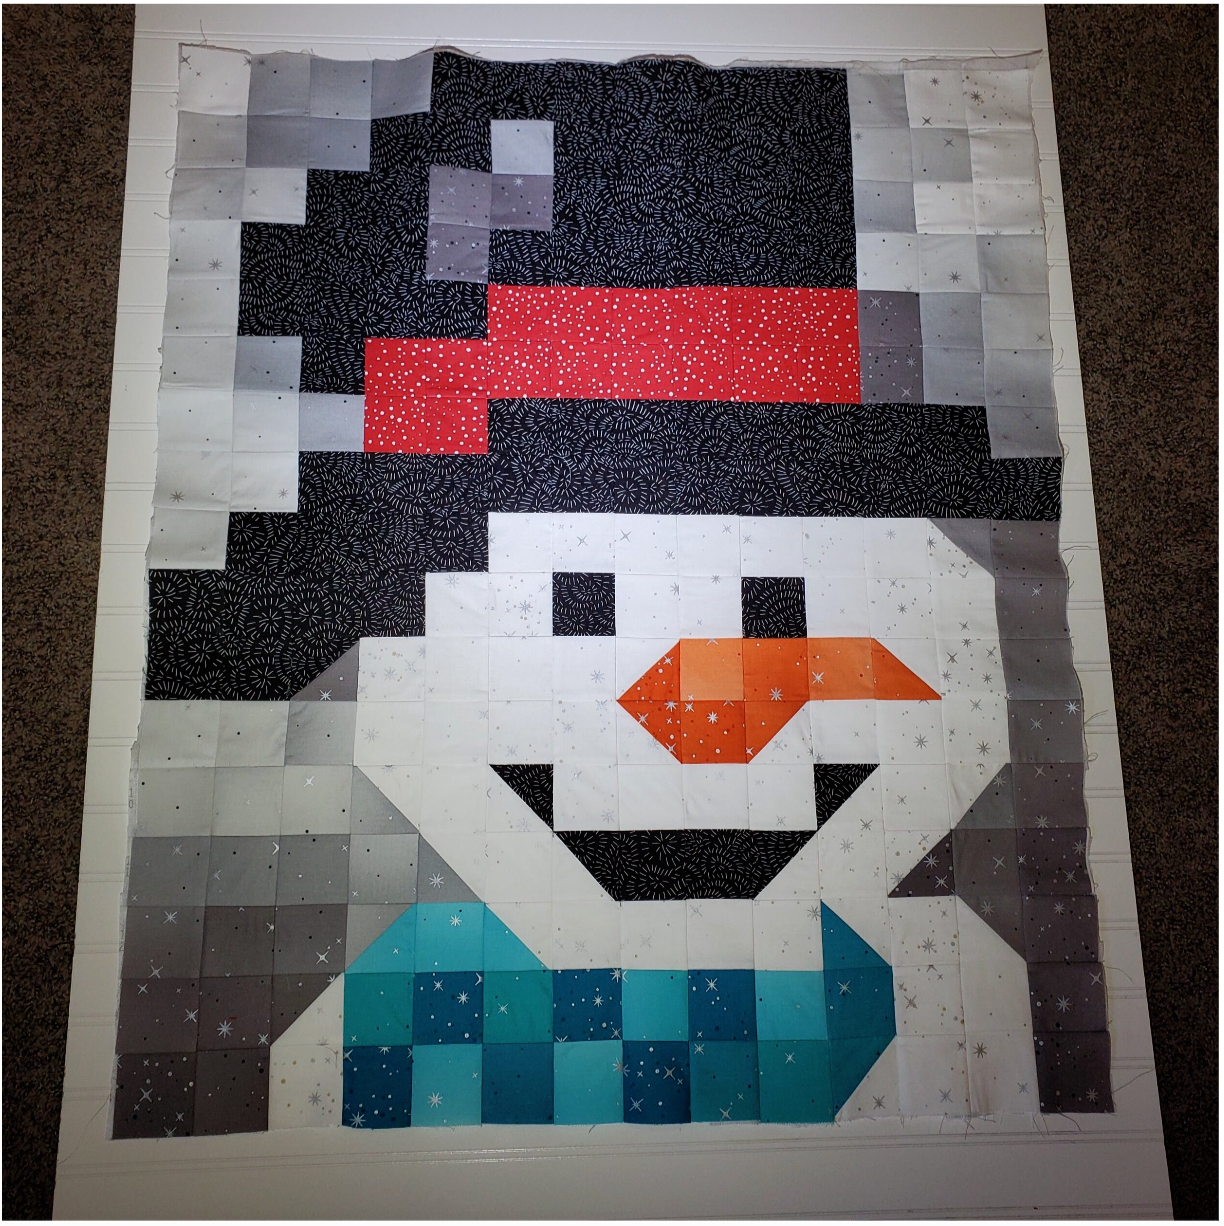
DIY Jolly Snowman Wall Hanging
19th Nov 2020
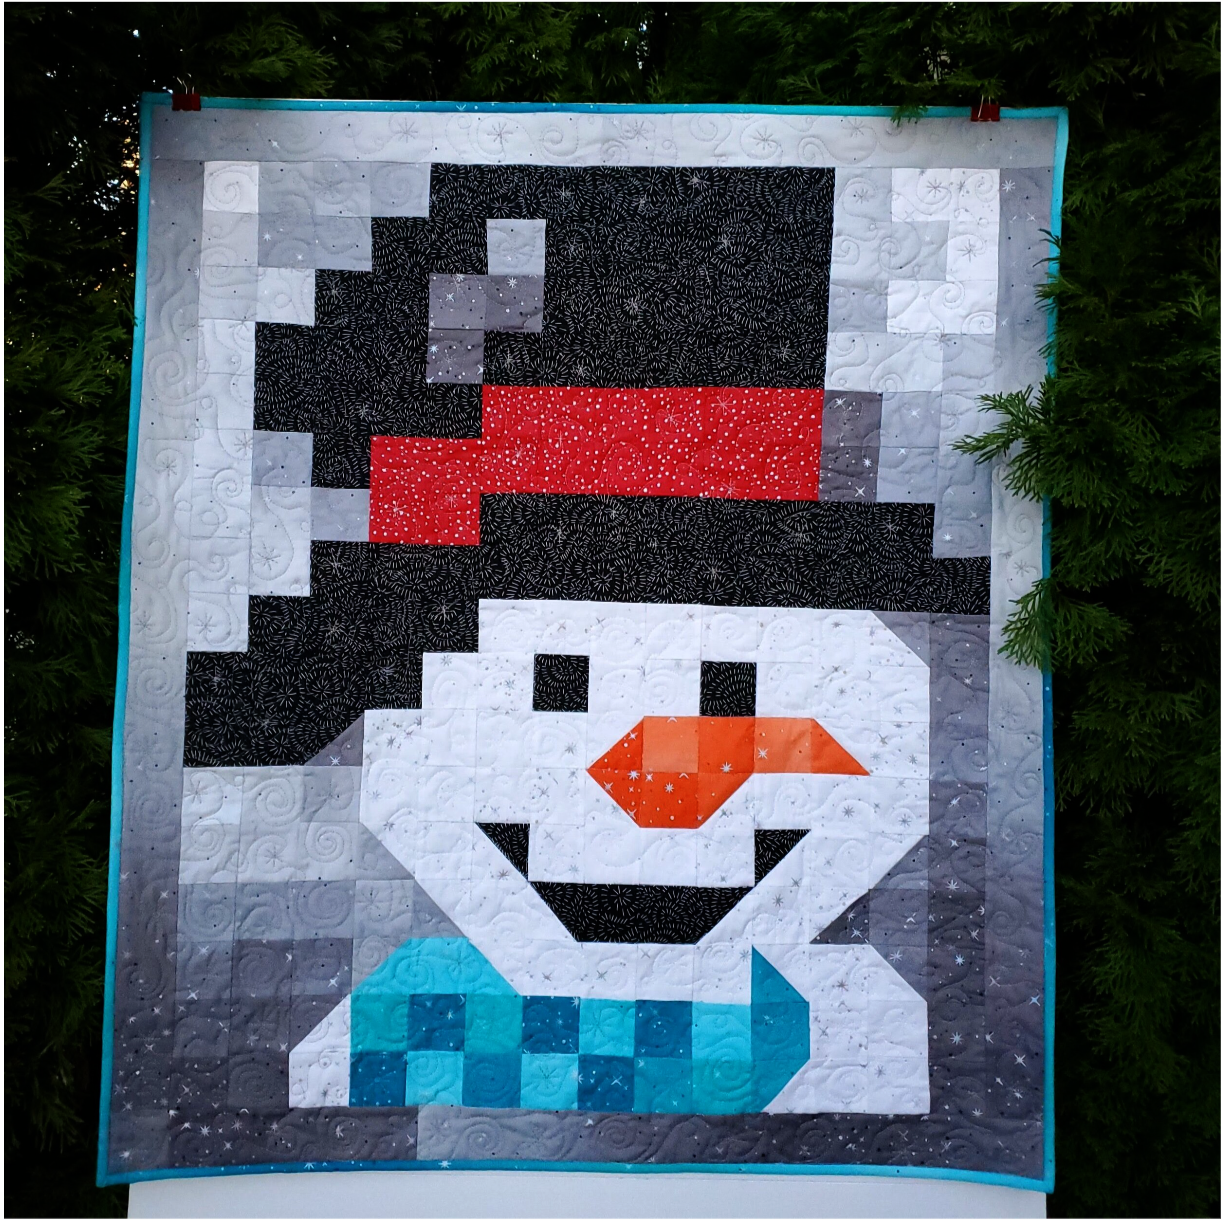
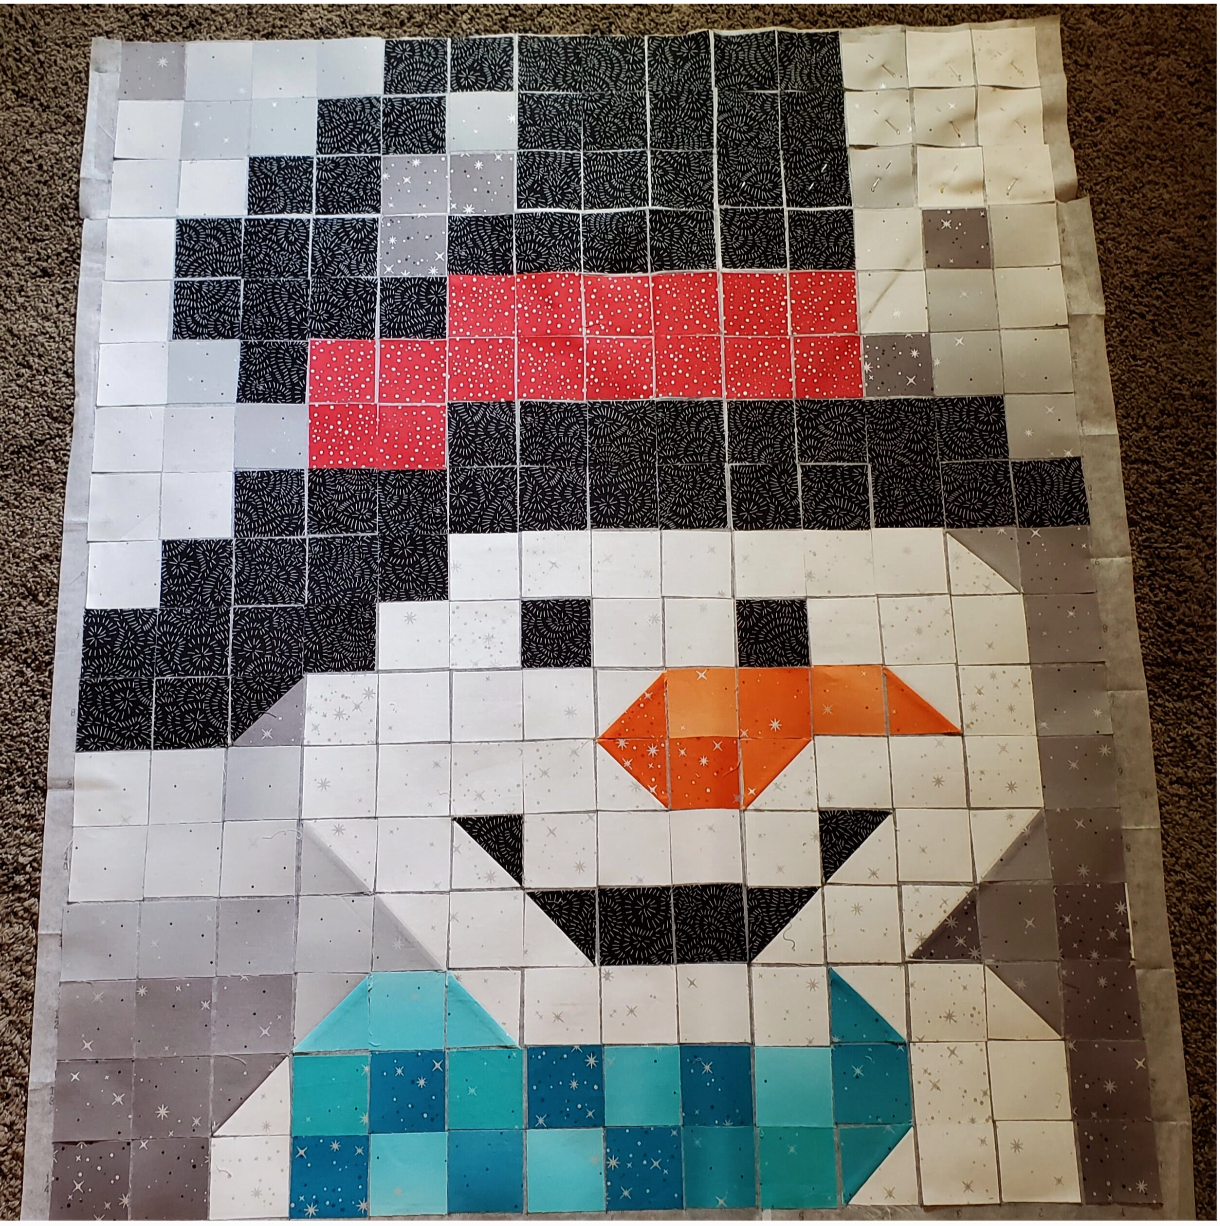
Heading into winter we can all use a jolly snowman to cheer us up on a cold day. I spotted this on Pinterest and knew the Ombre fairy dust would be the perfect fabric for this pattern from Pumpkin Patch. His magic hat is made from Gingiber by Moda fabric. These fabrics were featured in a previous months Cotton Cuts Classic Subscription.
I made mine a little bigger because I was using a fusible grid from Ten Sisters Handicraft. This fusible grid gives you perfectly lined up two inch squares every time.
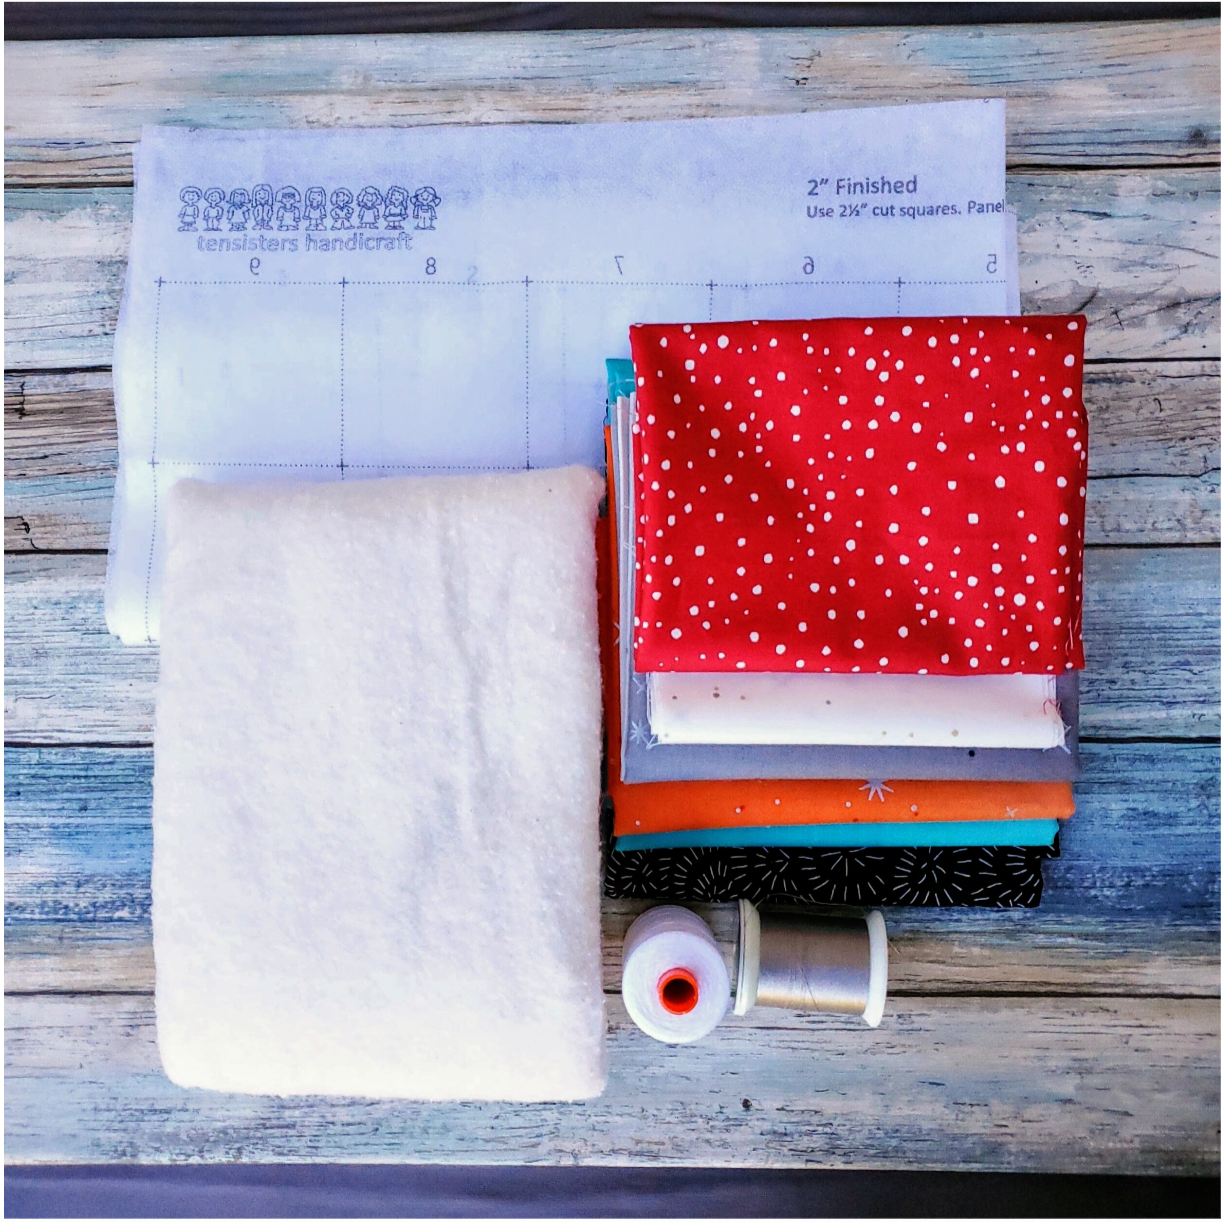
Materials needed
Graphite grey fabric ⅔ yard
Turquoise fabric ½ yard
White fabric ½ yard
Black fabric ½ yard
Orange fat quarter
Red fat quarter
Coordinating thread
Cotton batting 35” x 39” piece
Fusible grid 29” x 34” piece
Backing fabric 1 ¼ yard
To get started I cut the 2 ½” strips of each fabric and subcut into 2 ½ “ squares. The pattern indicates the half square triangles needed to make the design. I made mine by taking two squares, marking a line down the middle corner to corner with a Hera marker. Sew along the line and trim the seam to ¼”. I find using a tray helps to keep the squares organized and handy when you are laying the squares on fusible as you create the design.
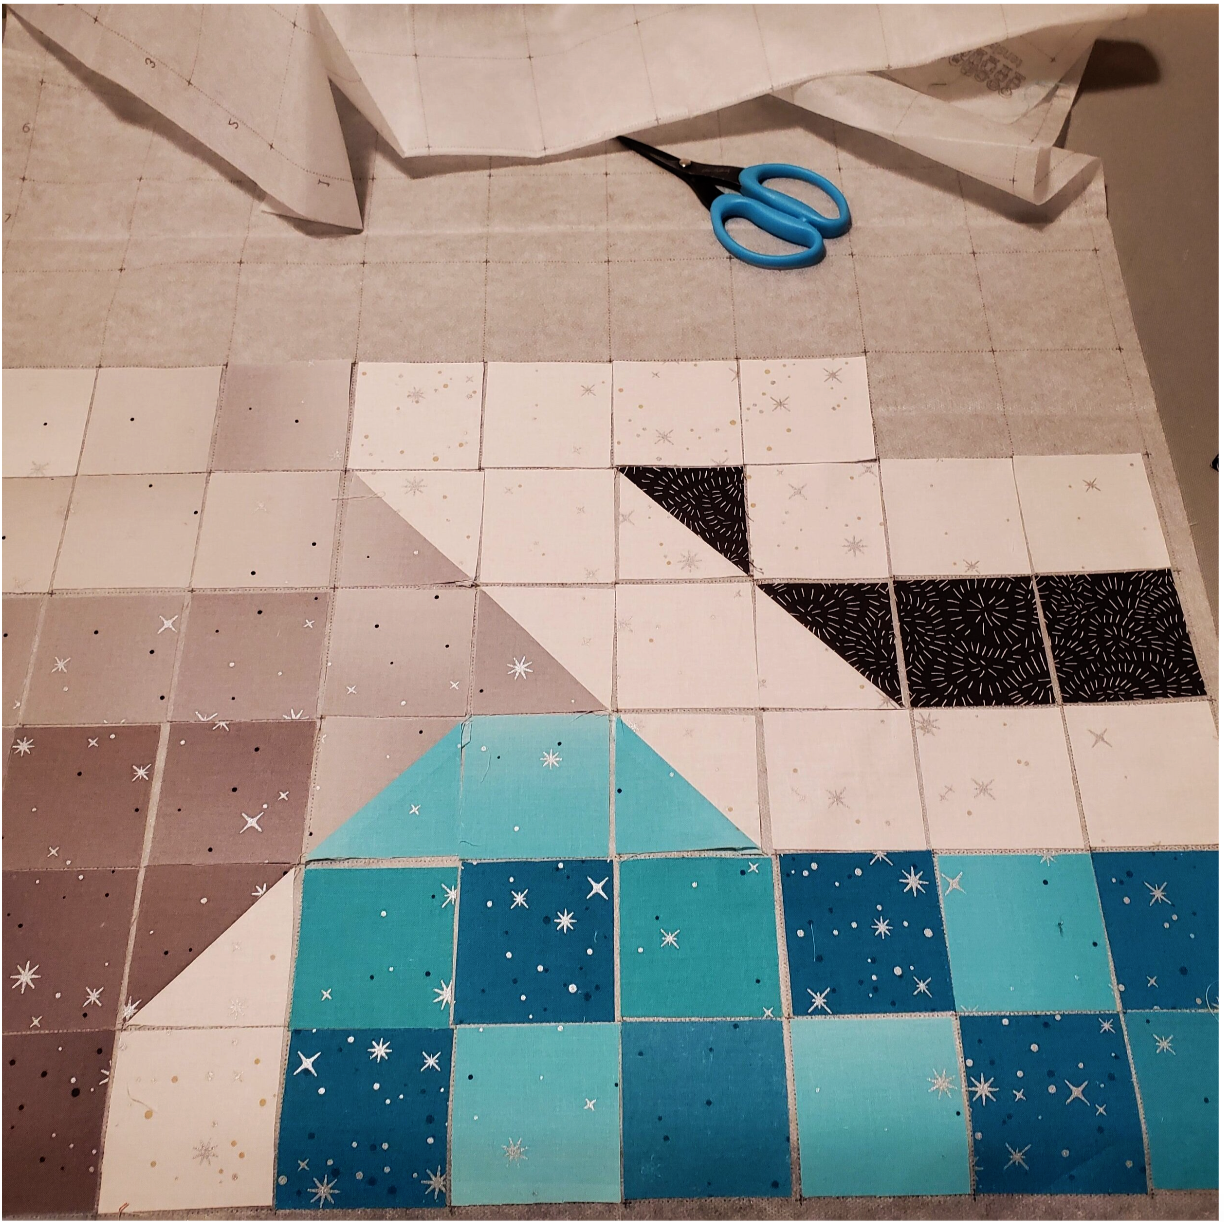
Use a pressing cloth so the glue from the fusible does not melt on the bottom of the iron. Press as you go every few rows to keep it in place. The steam setting helps to adhere the squares in place. Ten Sisters has a great You tube explaining how to use the fusible grid.
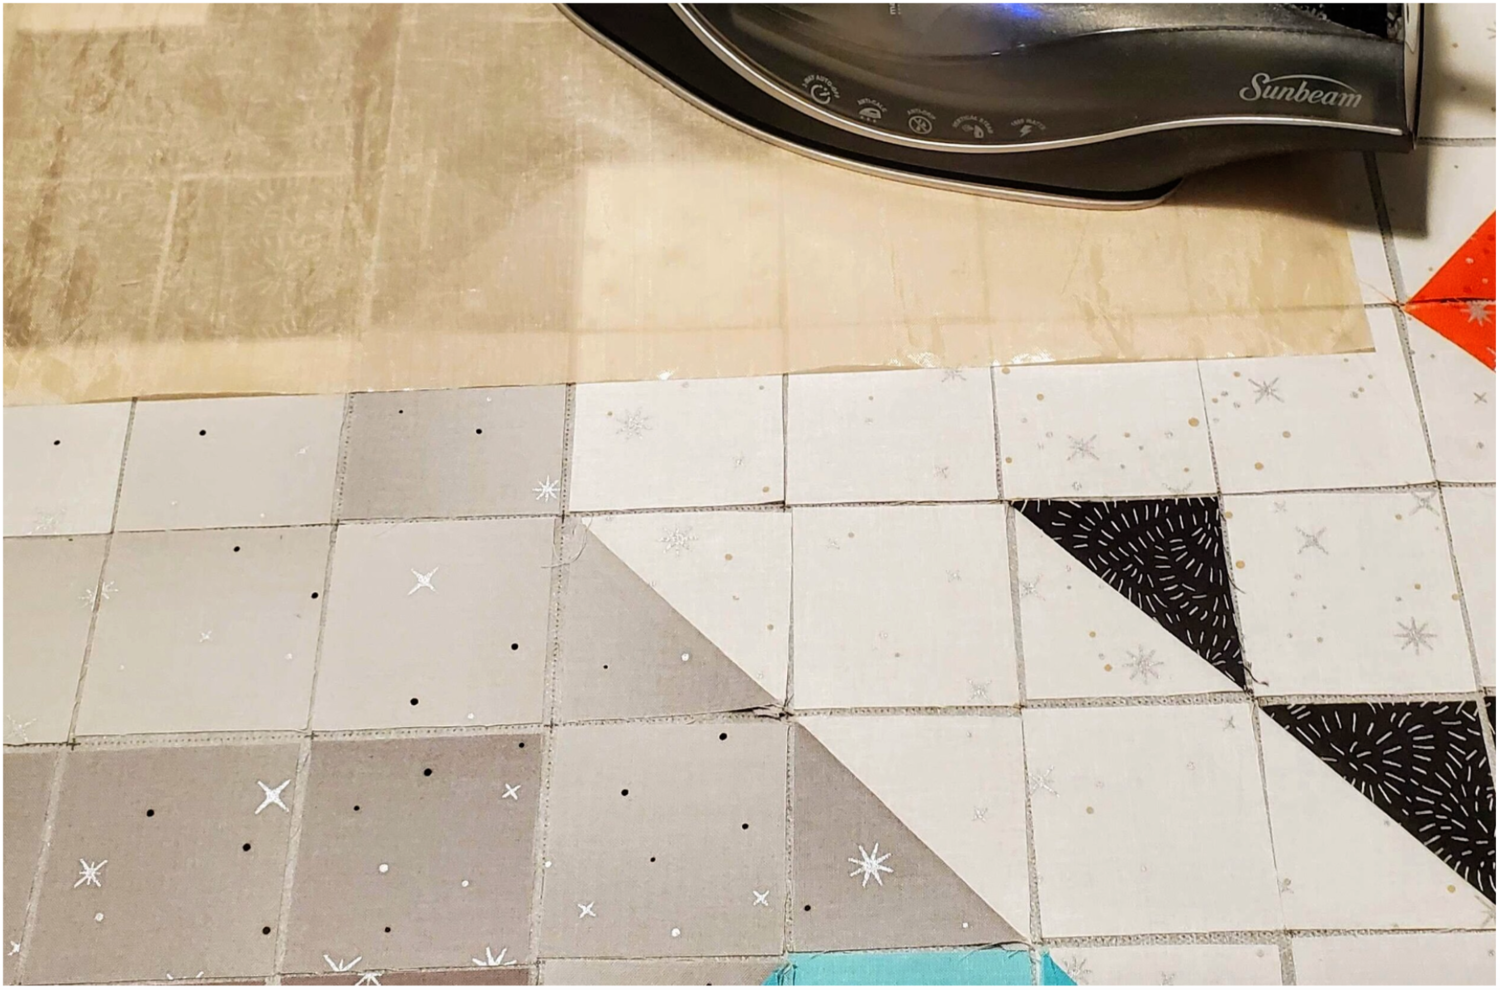
I had a pre cut piece of fusible grid that needed to be enlarged to complete the pattern. I used Steam a seam ¼” tape to adhere the extra pieces of grid together. Be sure to keep the fusible side facing up. I found out it fuses to the ironing board quickly and a mess to clean off.
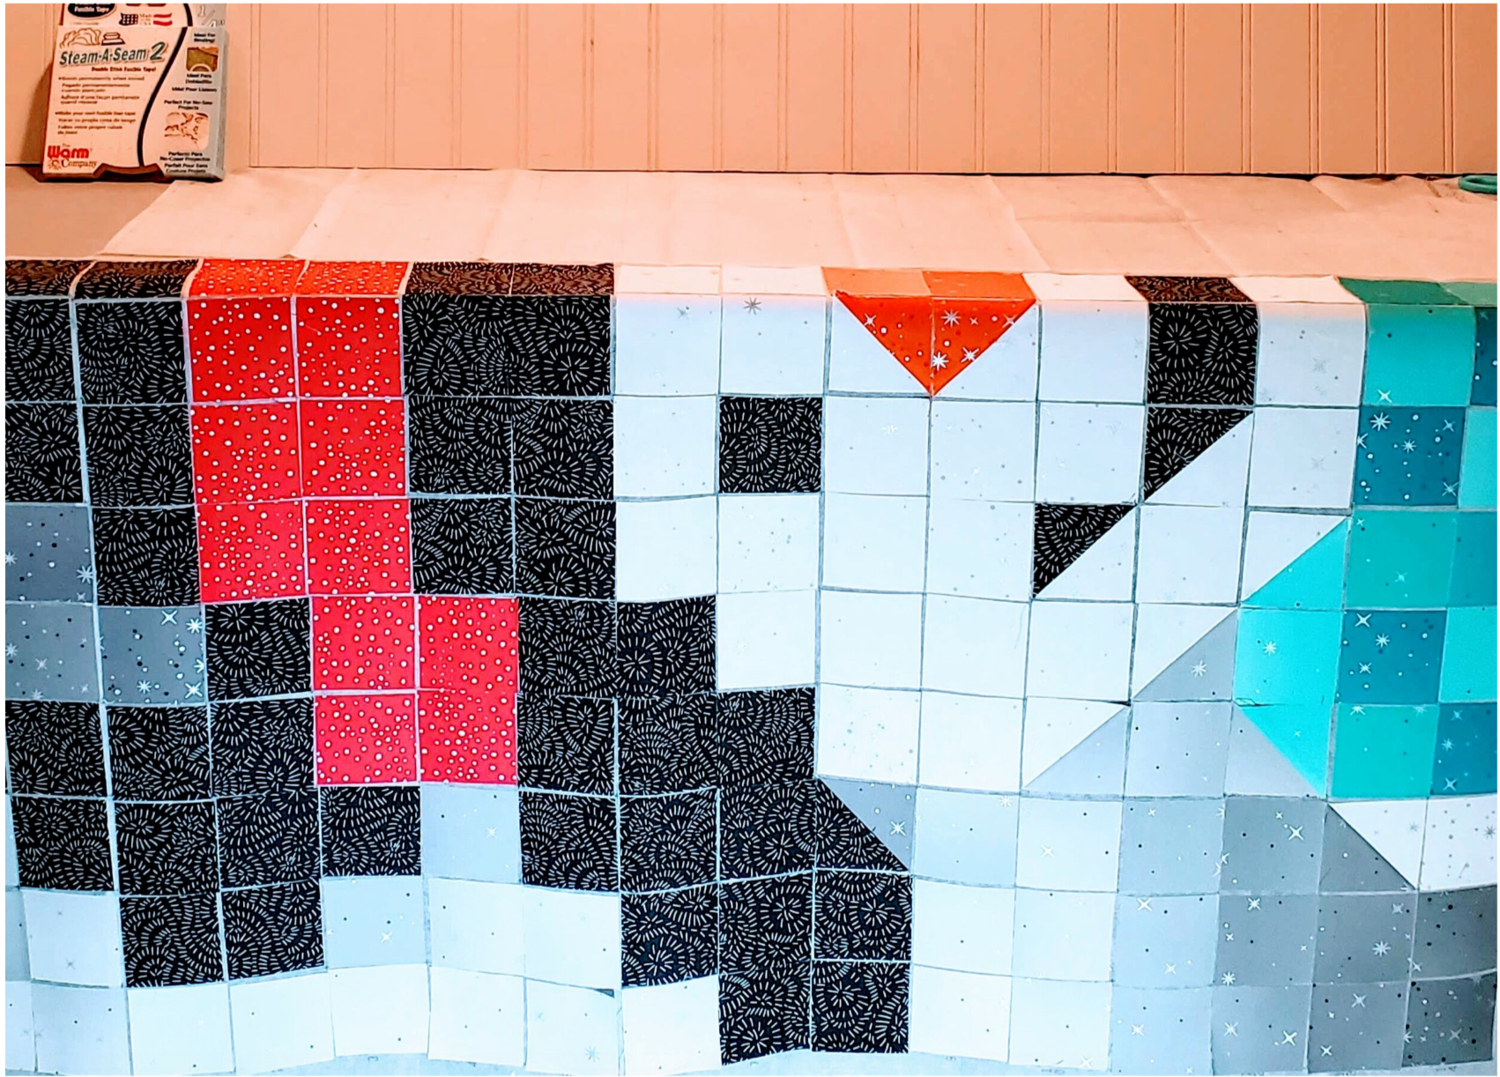
The squares of fabric do not need to be perfectly centered in the grid since you will be sewing a ¼” seam on all sides.
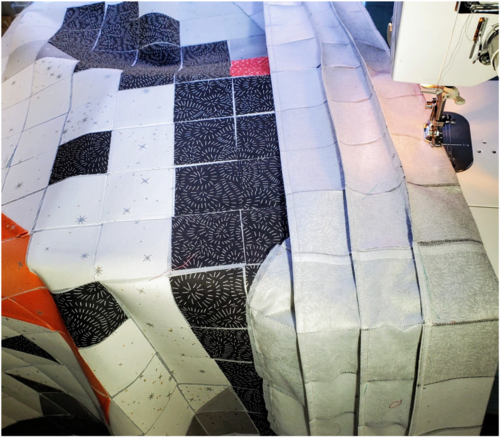
Now you are ready to start sewing the ¼” seams. Sew all the horizontal seams by folding along the dotted lines. You will notice the finished size starting to get smaller as you sew the seams.
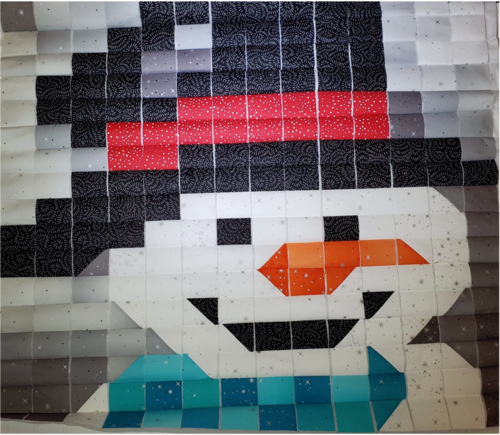
The fusible grid allows all the squares to line up perfectly every time!
At this point you will snip the intersection of each square on the wrong side to the stitching line. If you watch the Youtube video it explains clearly how to do this easily. Then press the seams in opposite directions so that when you sew the vertical seams they nest into each other for smoother intersections.
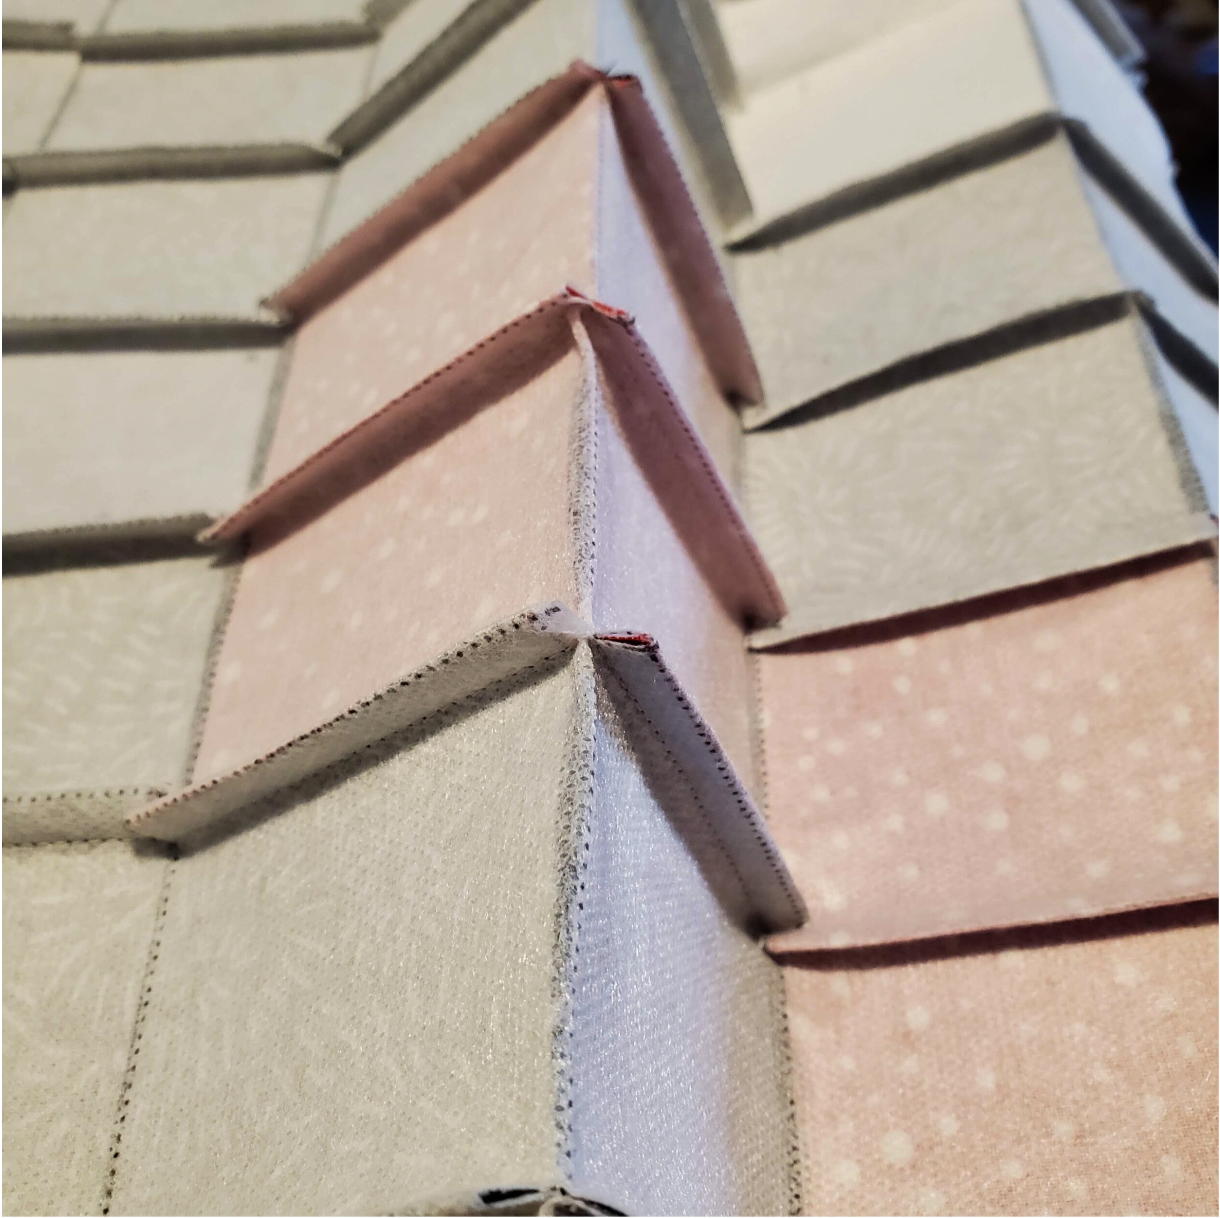
Take it to the sewing machine and fold along the dotted lines and sew the vertical seams nesting the seams as you sew. It is a quick and easy way to sew these 2 ½” squares together allowing you to make quilt blocks or wall hanging, even a table runner.
It is now ready to add borders. I cut 2 ½” wide borders using the grey fabric. Since it was ombré I cut the light part out from the bottom edge to keep the look of the darker fabric all along the bottom. Choose a backing fabric and cut it allowing about two inches extra on all sides. Cut the batting and spray baste the pieces to create a quilt sandwich.
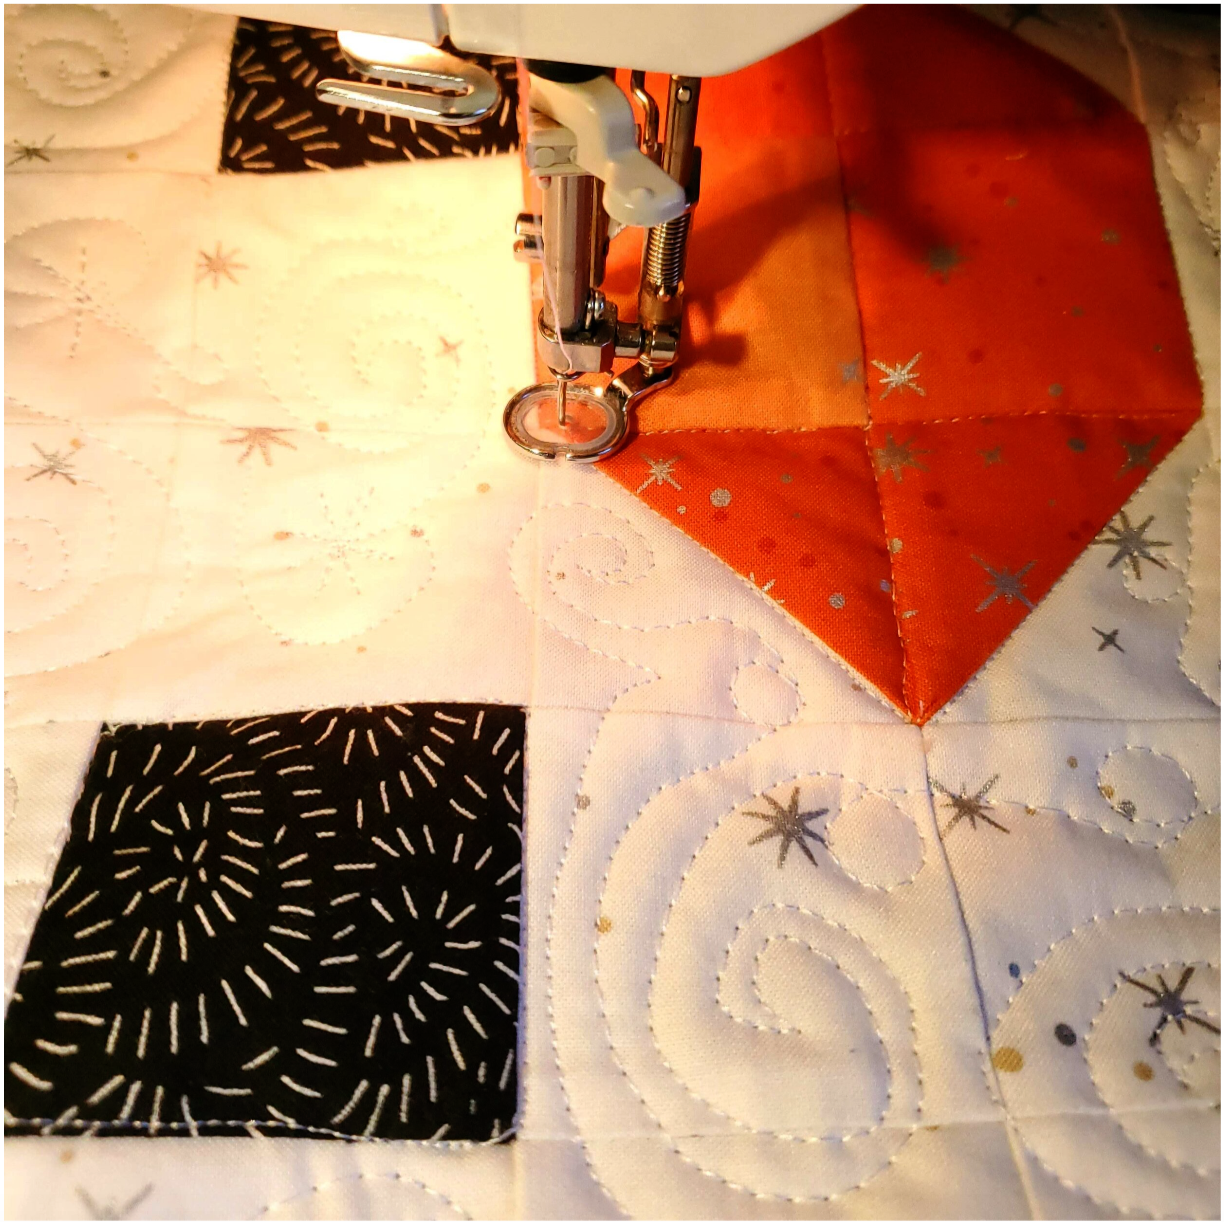
I am still learning and practicing free motion quilting so I decided to do a snowflake and swirl design using a silver grey thread. This snowman could also be quilted by stitching in the ditch along the seams. I found using a #90 jeans needle worked the best to quilt over all the seams. On the face I stitched in the ditch around the eyes, nose and mouth. I used a white thread to quilt on the face.
When you are finished quilting square up the quilt removing the extra fabric and batting.
I cut the binding 2 ½” and sewed it to the front using a matching thread. I folded the binding and pressed it in place securing it with clips. This was the first time I tried stitching in the ditch from the front to sew the binding. Since it is a wall hanging the back will not be seen. I was happy with the results.
This would be a great holiday gift to be enjoyed all winter. It can easily be completed in two afternoons of sewing. The finished size is 32” x 38”.
Be sure to join any of our subscriptions so you don’t miss out on great fabrics in the future!