

Sew Sweet Tote Bag
3rd Feb 2022
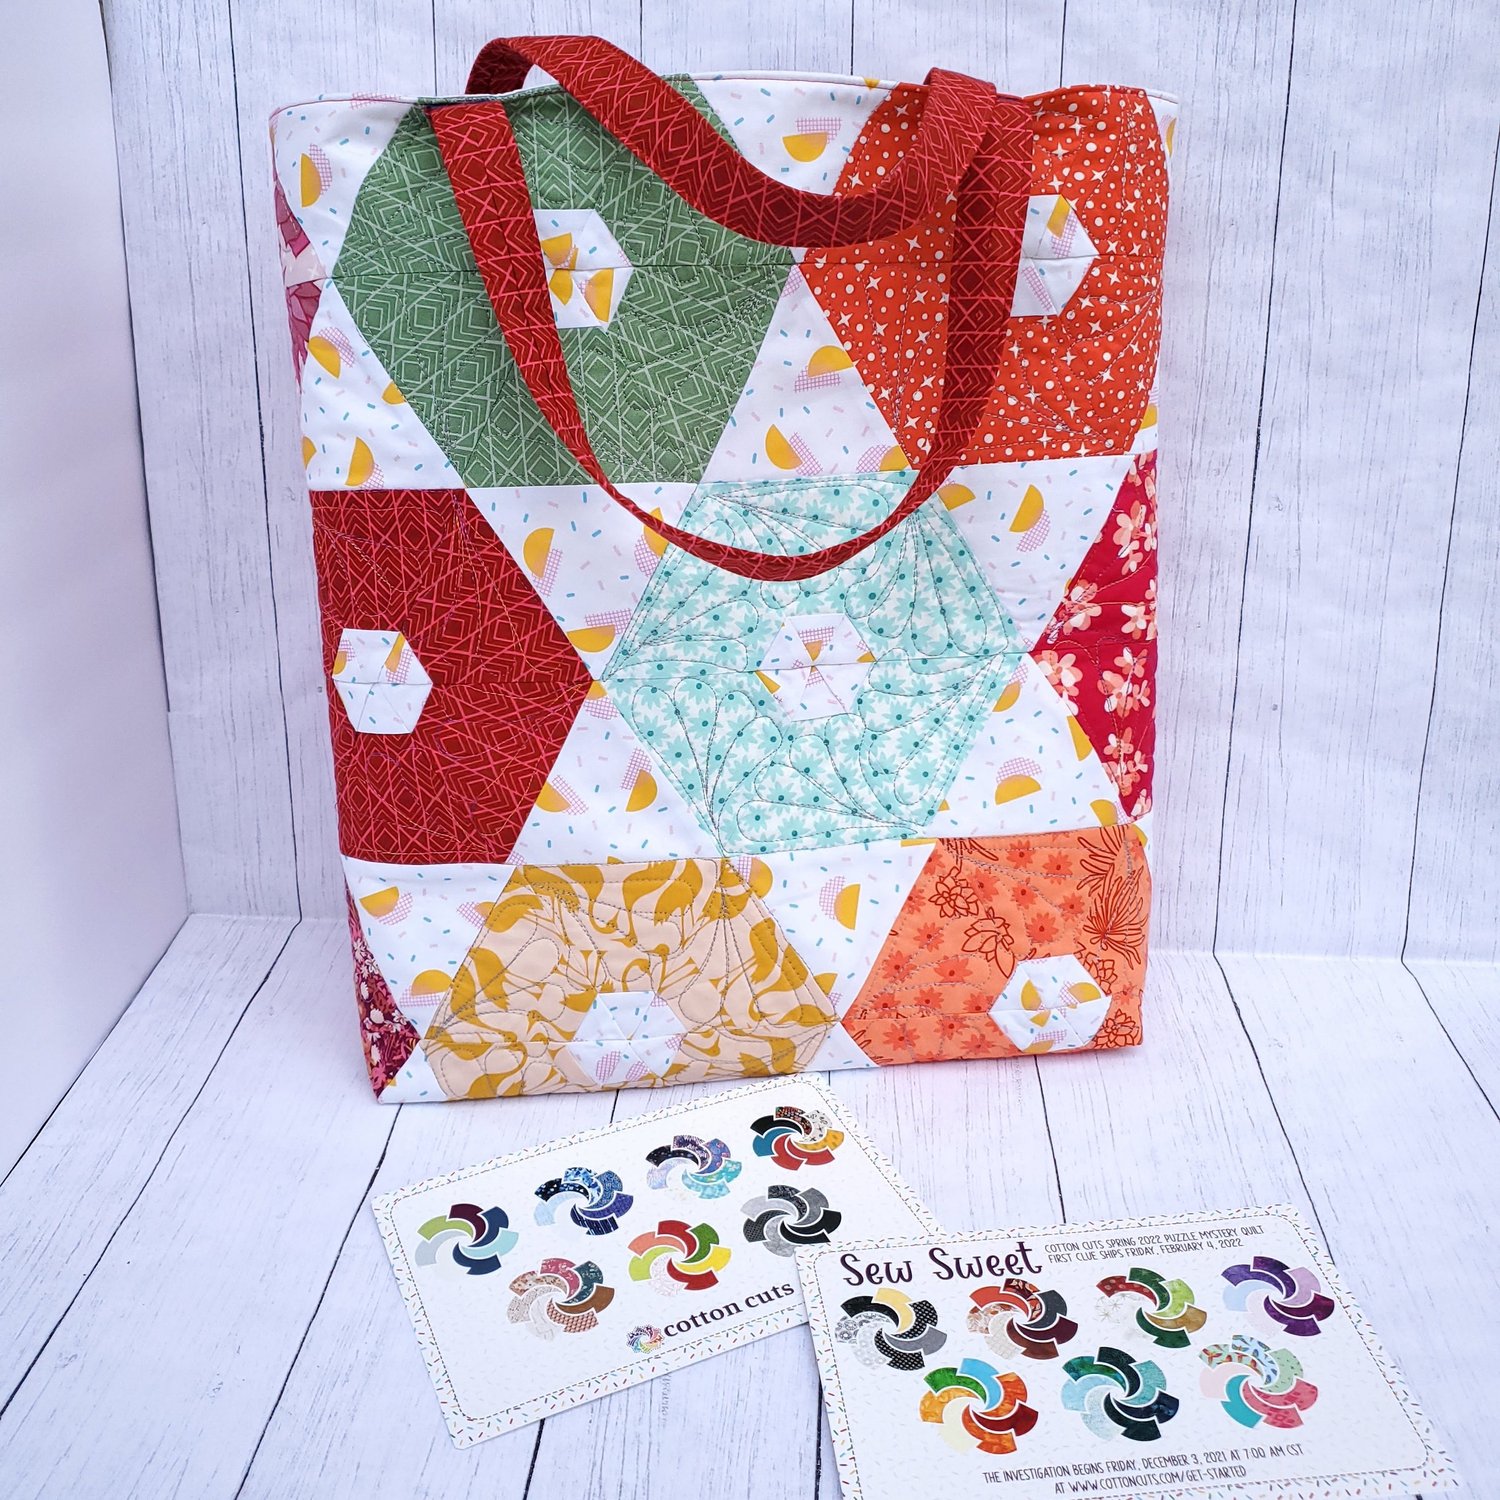
February has arrived! We are SEW excited about “Sew Sweet” the new Cotton Cuts Mystery Quilt shipping out this week! It is not too late to join the fun Click here to learn more. This fun project bag will pair perfectly with the donut theme using triangles to create an assortment of donuts on the front of the tote. This free pattern from Art Gallery Fabrics is made with fabric featured in February’s Classic Membership box. “Sunroom” fabric line is designed by Elizabeth Hartmann for Robert Kaufman fabrics. This tote will accommodate a 12x12” project box to hold each month’s clue as you sew your quilt over the next 10 months. If you are making the Sew Sweet Mystery quilt for someone special this tote would be a wonderful way to present the finished quilt as a gift.
Download and print the Triangle Tote Pattern and the triangle template.
- Materials Needed:
7 Assorted Fat Quarters for the Donuts shapes from Classic Membership box
1 yard of fabric for background triangles and bag lining
¼” yard for tote handles
7 ½” x 14 ½” piece for interior pocket
19” x 21” piece for back of tote
Two 25” long pieces of 1” webbing for handles
Two batting pieces 20” x 22”
Coordinating Aurifil Thread from Chroma membership
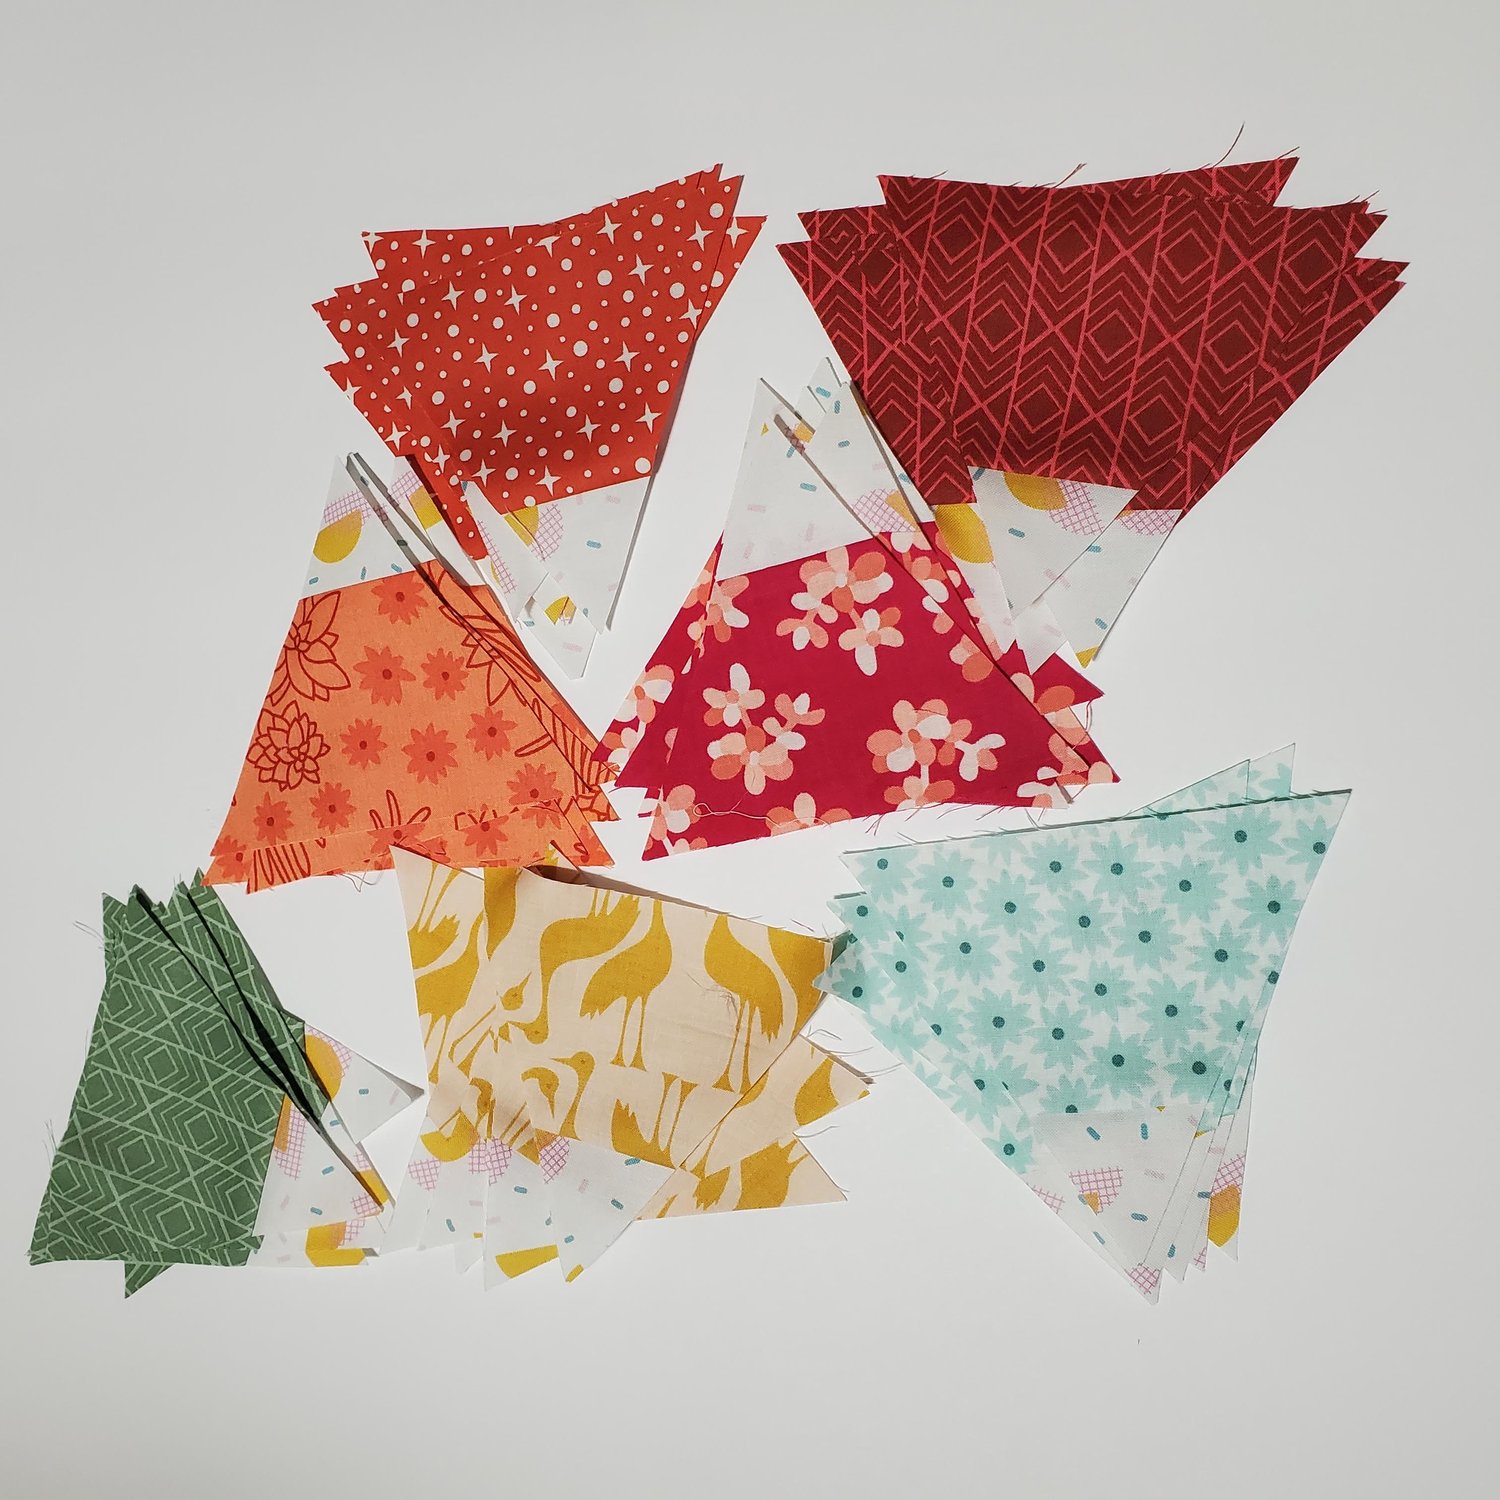
Take the seven fat quarters and cut two three inch strips from the 22” long side.
Cut seven WOF strips 1 ¾” wide from the background fabric to pair with the fat quarter strips and sew ¼” seam with right sides together.
Chain piece by lining up the strips and feeding through one after another will make this step go pretty quickly. Press the seam to the dark fabric. Place the triangle template along the edge and cut six matching triangles for each fabric donut.
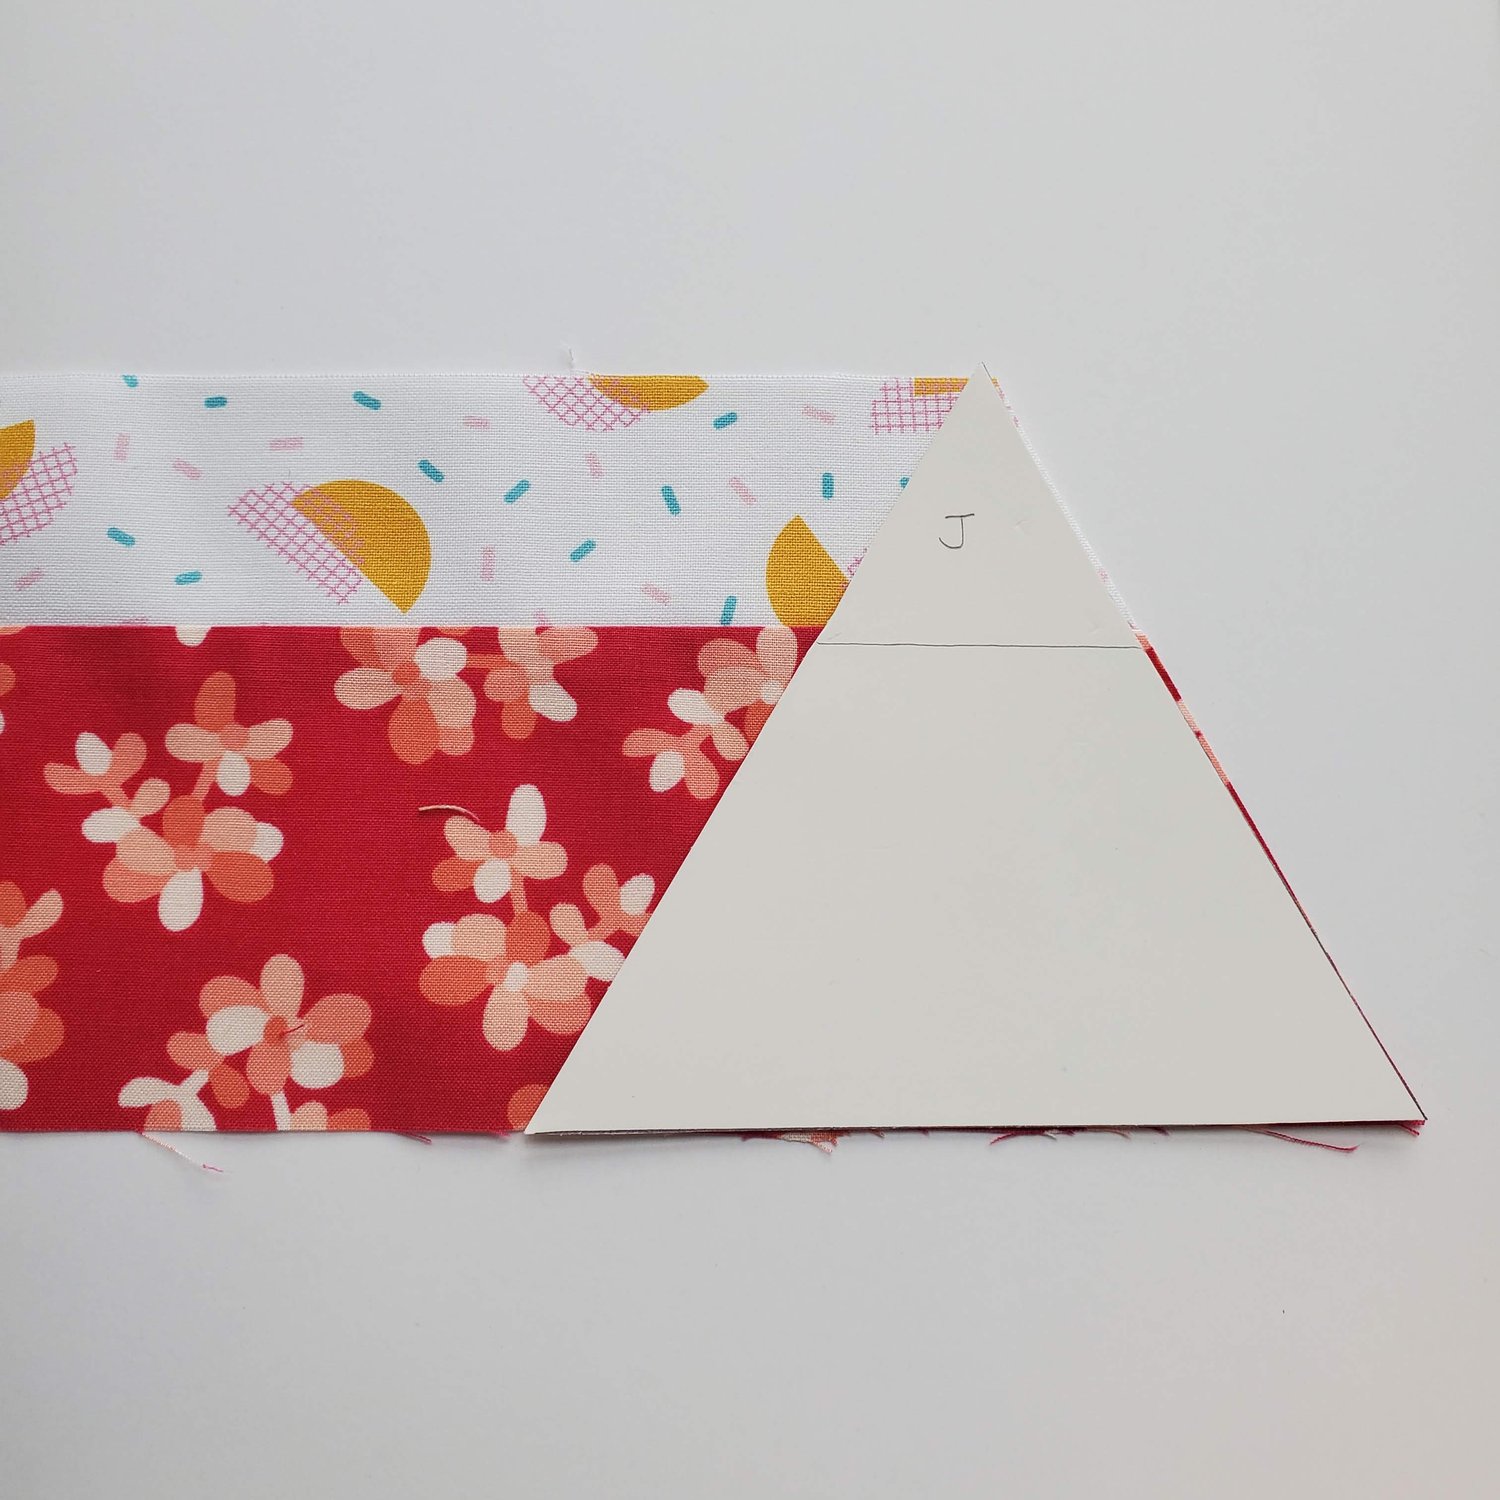
Cut two WOF strips of the background fabric 4 ¼” wide and using the triangle template cut 26 triangles.
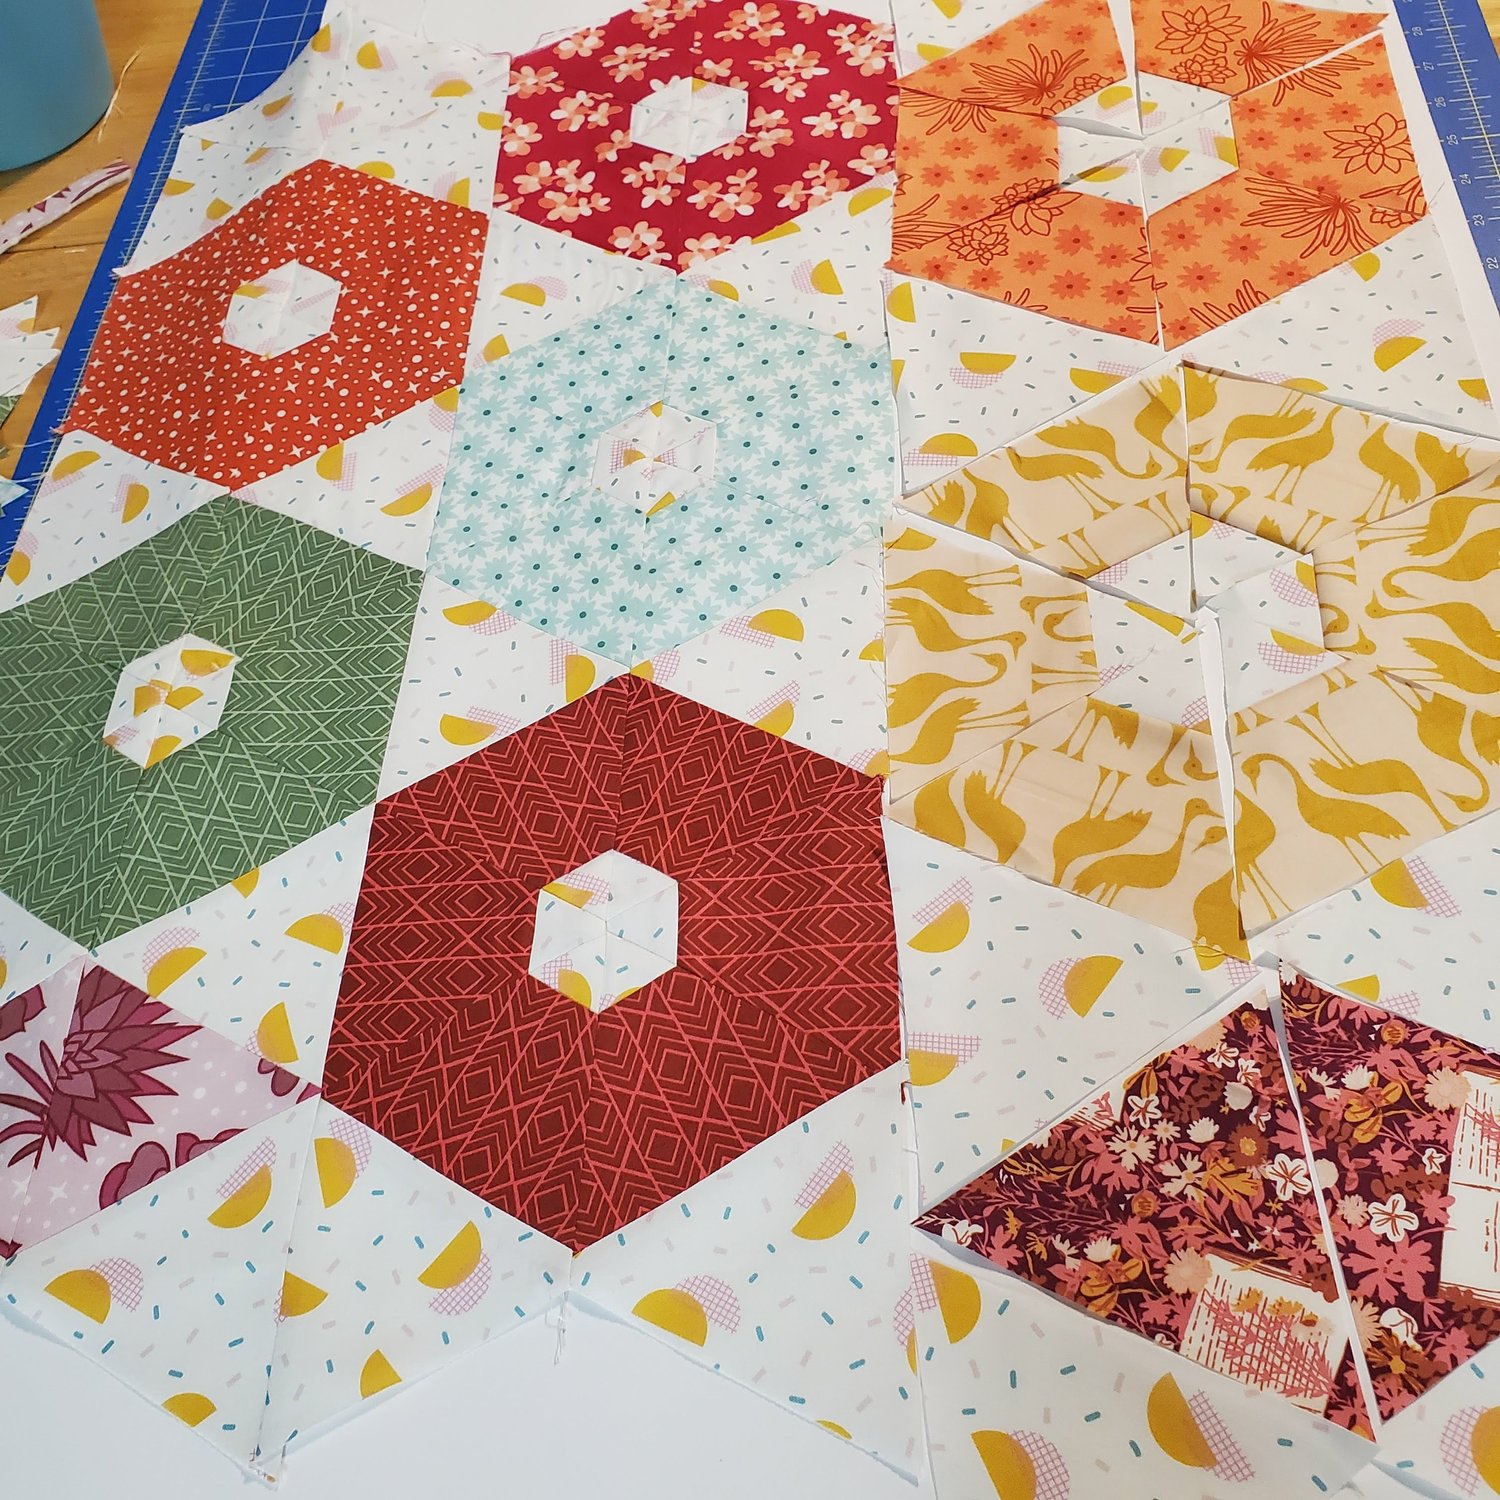
Following the diagram in the instructions lay out the triangles to create the design. I find it helpful to use a piece of foam core board to lay the pieces out and keep it close to the sewing machine. It is a good idea to have a pressing station close to the machine to sew and press each seam as you go along.
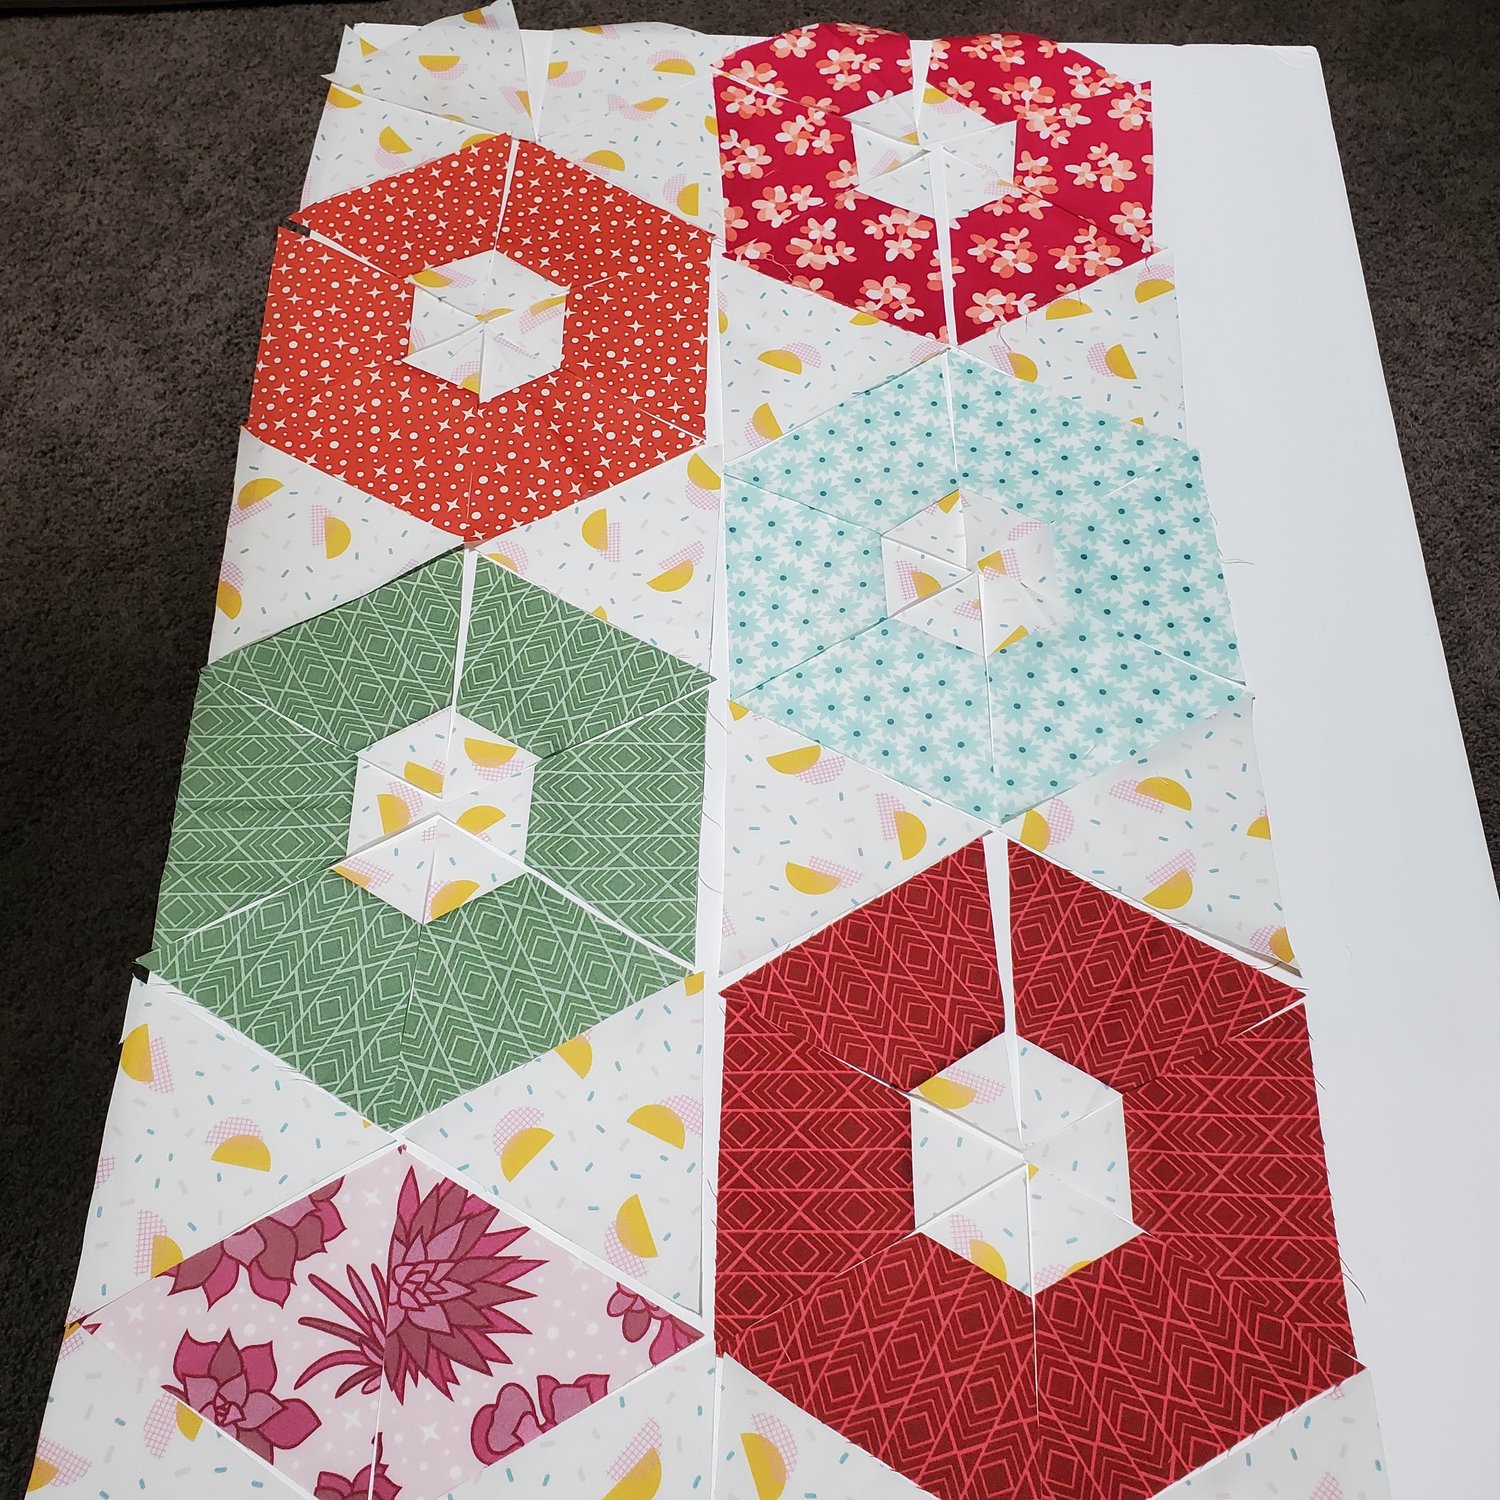
Since these pieces are cut on the bias handle them carefully and as little as possible to keep them from stretching. Pick up two pieces, and align and sew with a ¼” seam. Press. Add the next piece and continue down the row.

Sew the rows across then pick up two rows and align using pins or clips and sew together.
Once all the rows are sewn together the piece will need to be trimmed into a rectangle shape. I allowed a little extra for this first trimming to allow for some shrinkage as I planned to do some free motion quilting by layering with a piece of batting.
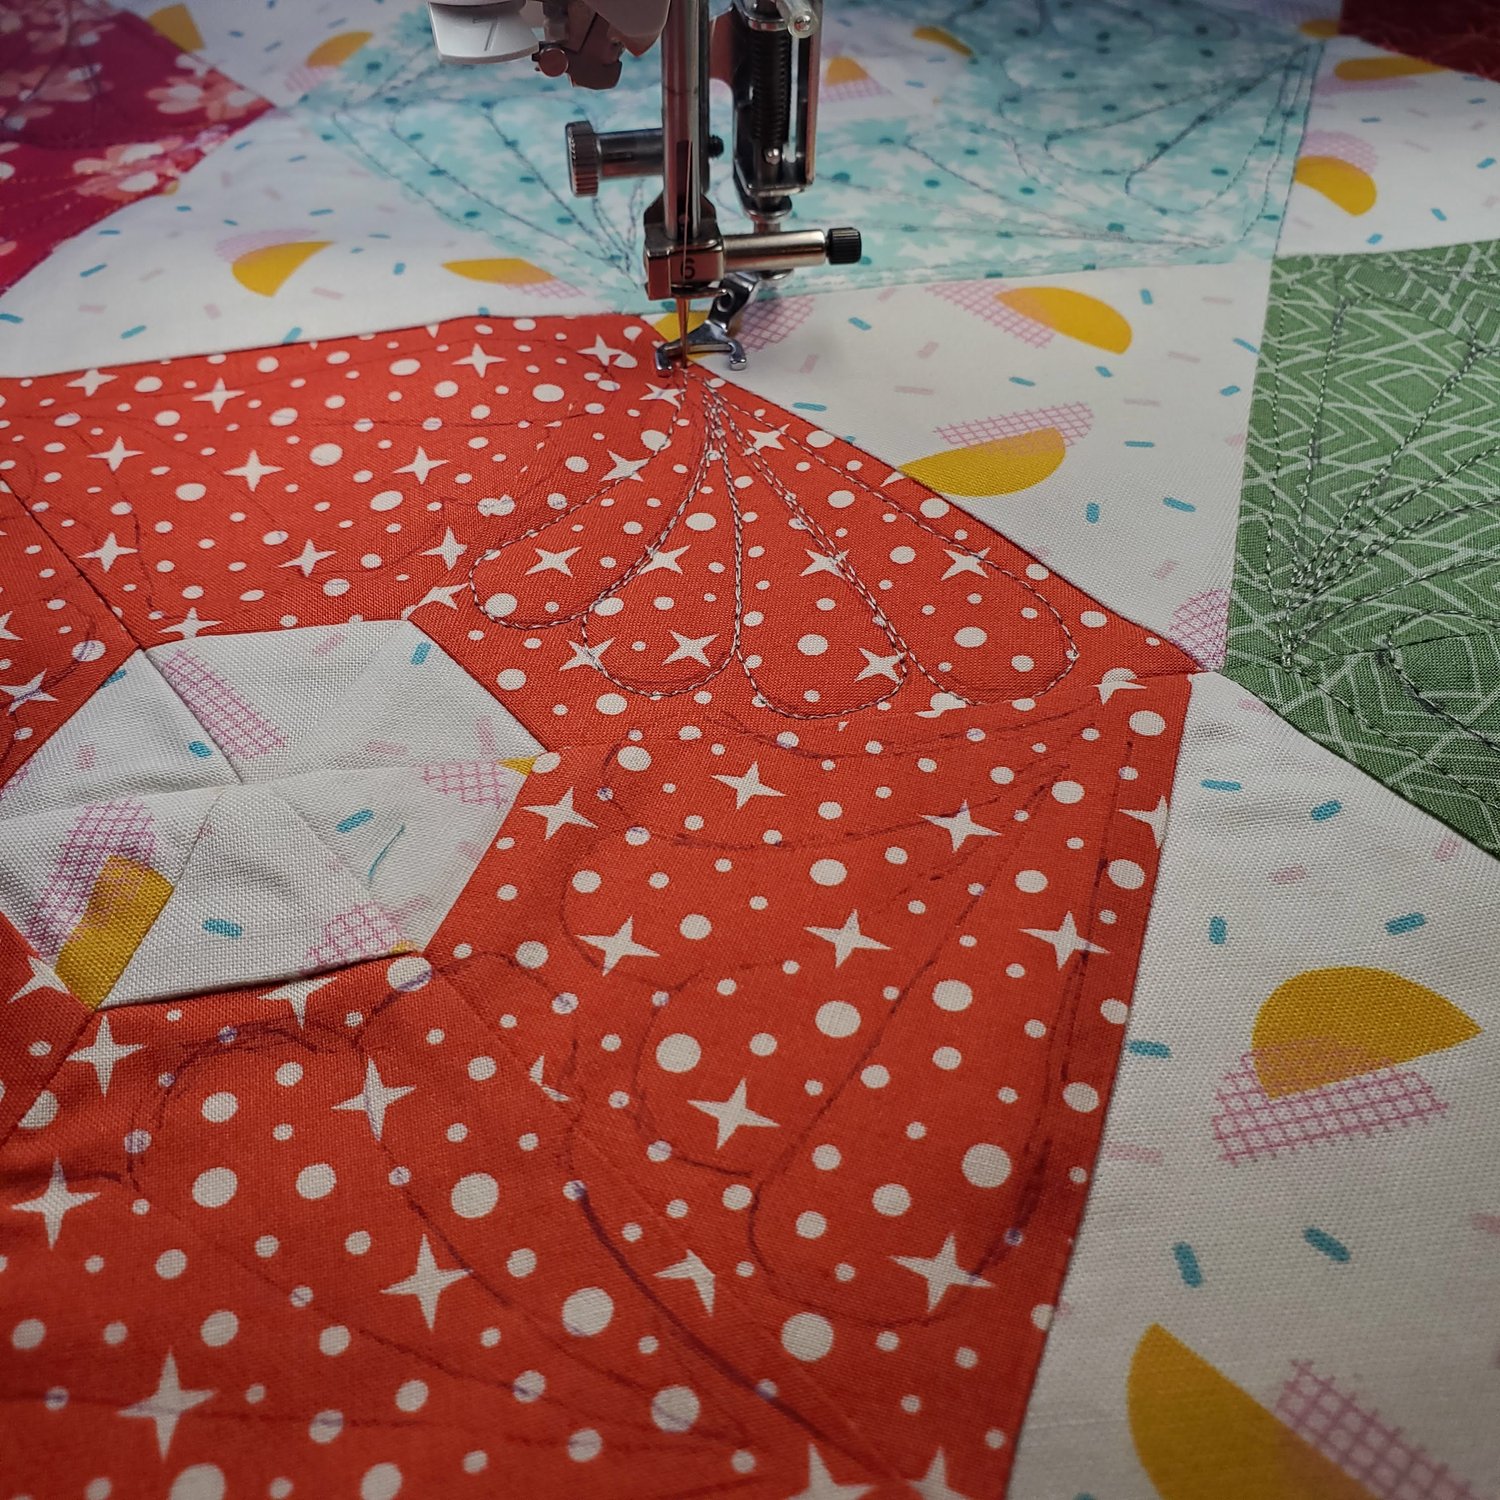
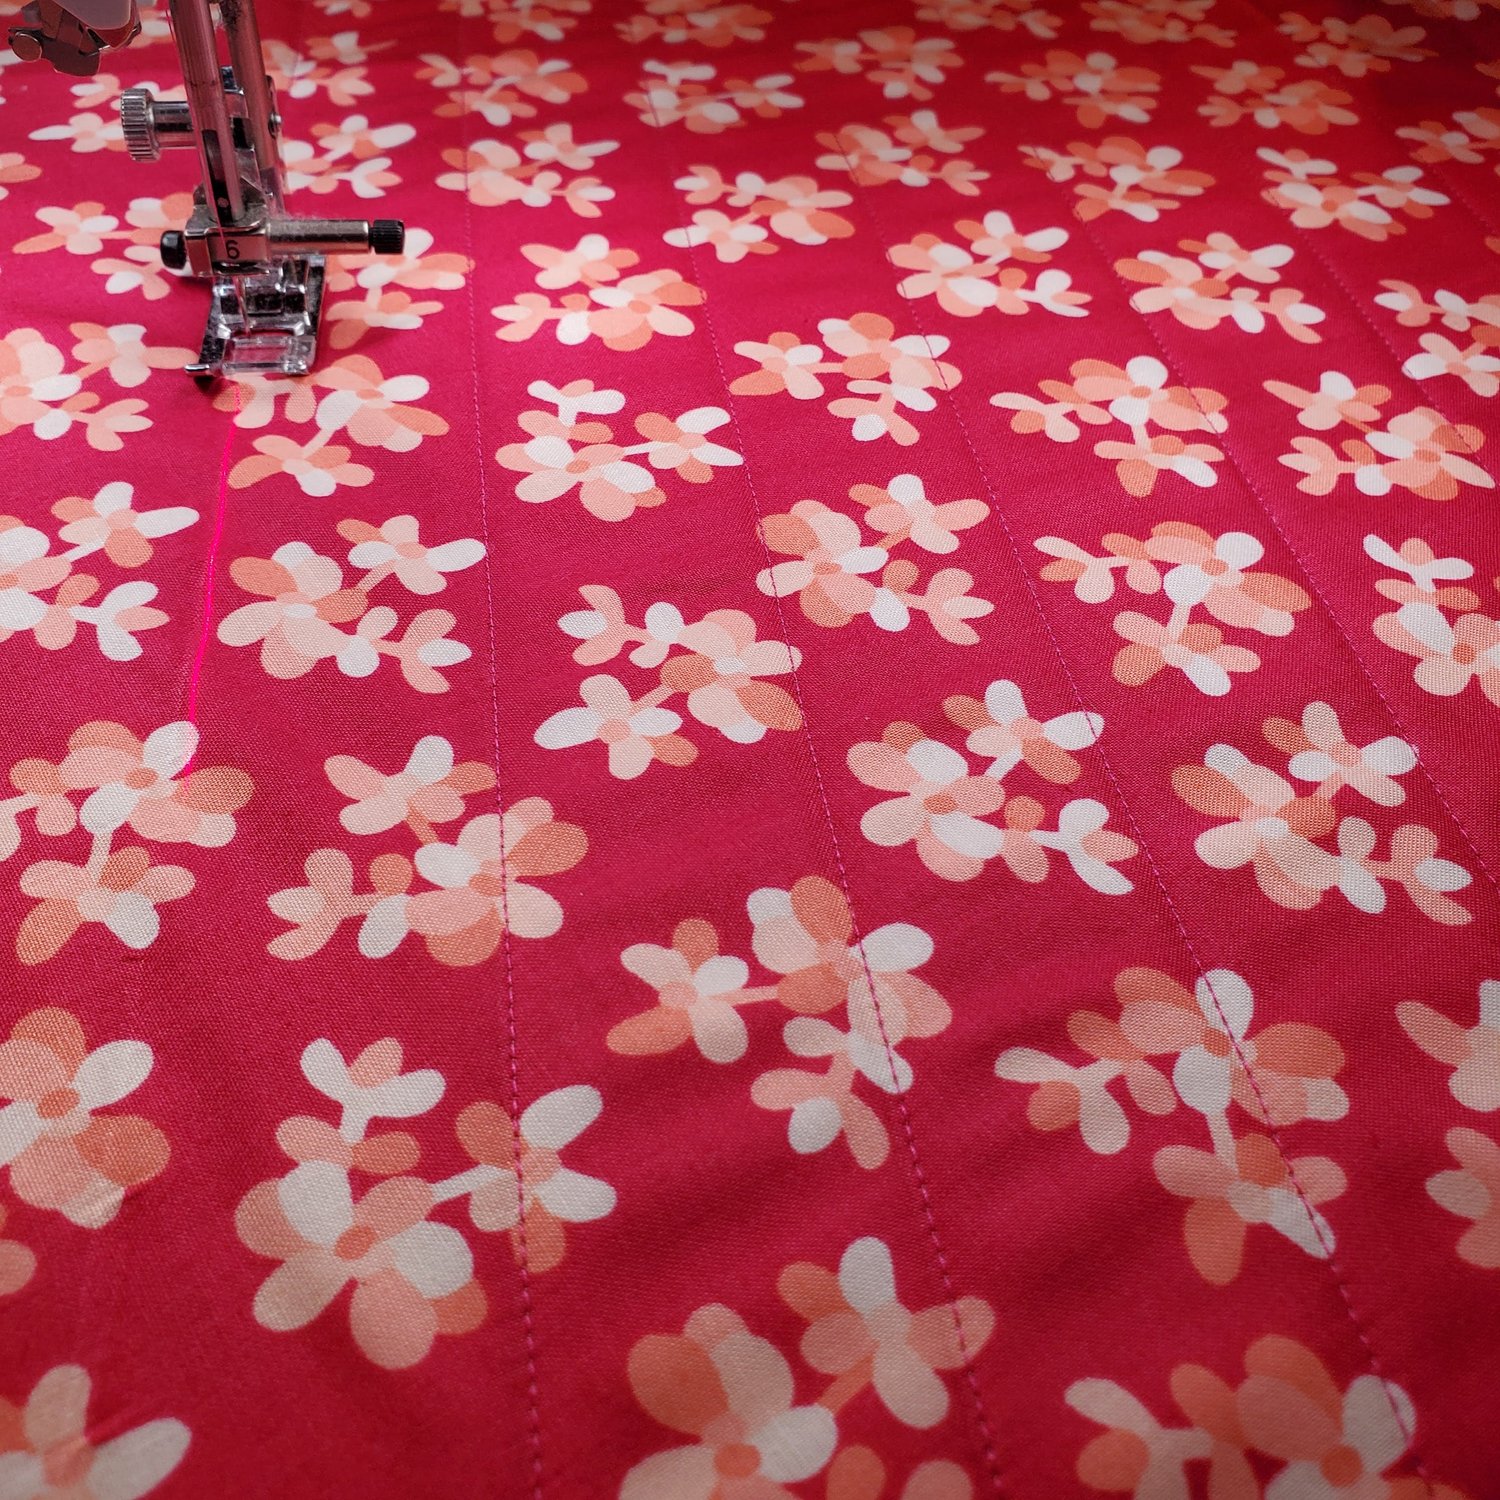
For the other side of the tote I used the pink floral layered with batting using a simple diagonal line quilting design. I used a Hera marker before sewing to keep the lines straight as I quilted with a coordinating Aurifil thread.
After quilting press and square up the front and back to 18 ½” x 20 ½”. With right sides together sew around three sides leaving the top edge open. Box the corners by matching the seams and mark the seam line 2” from the corner.
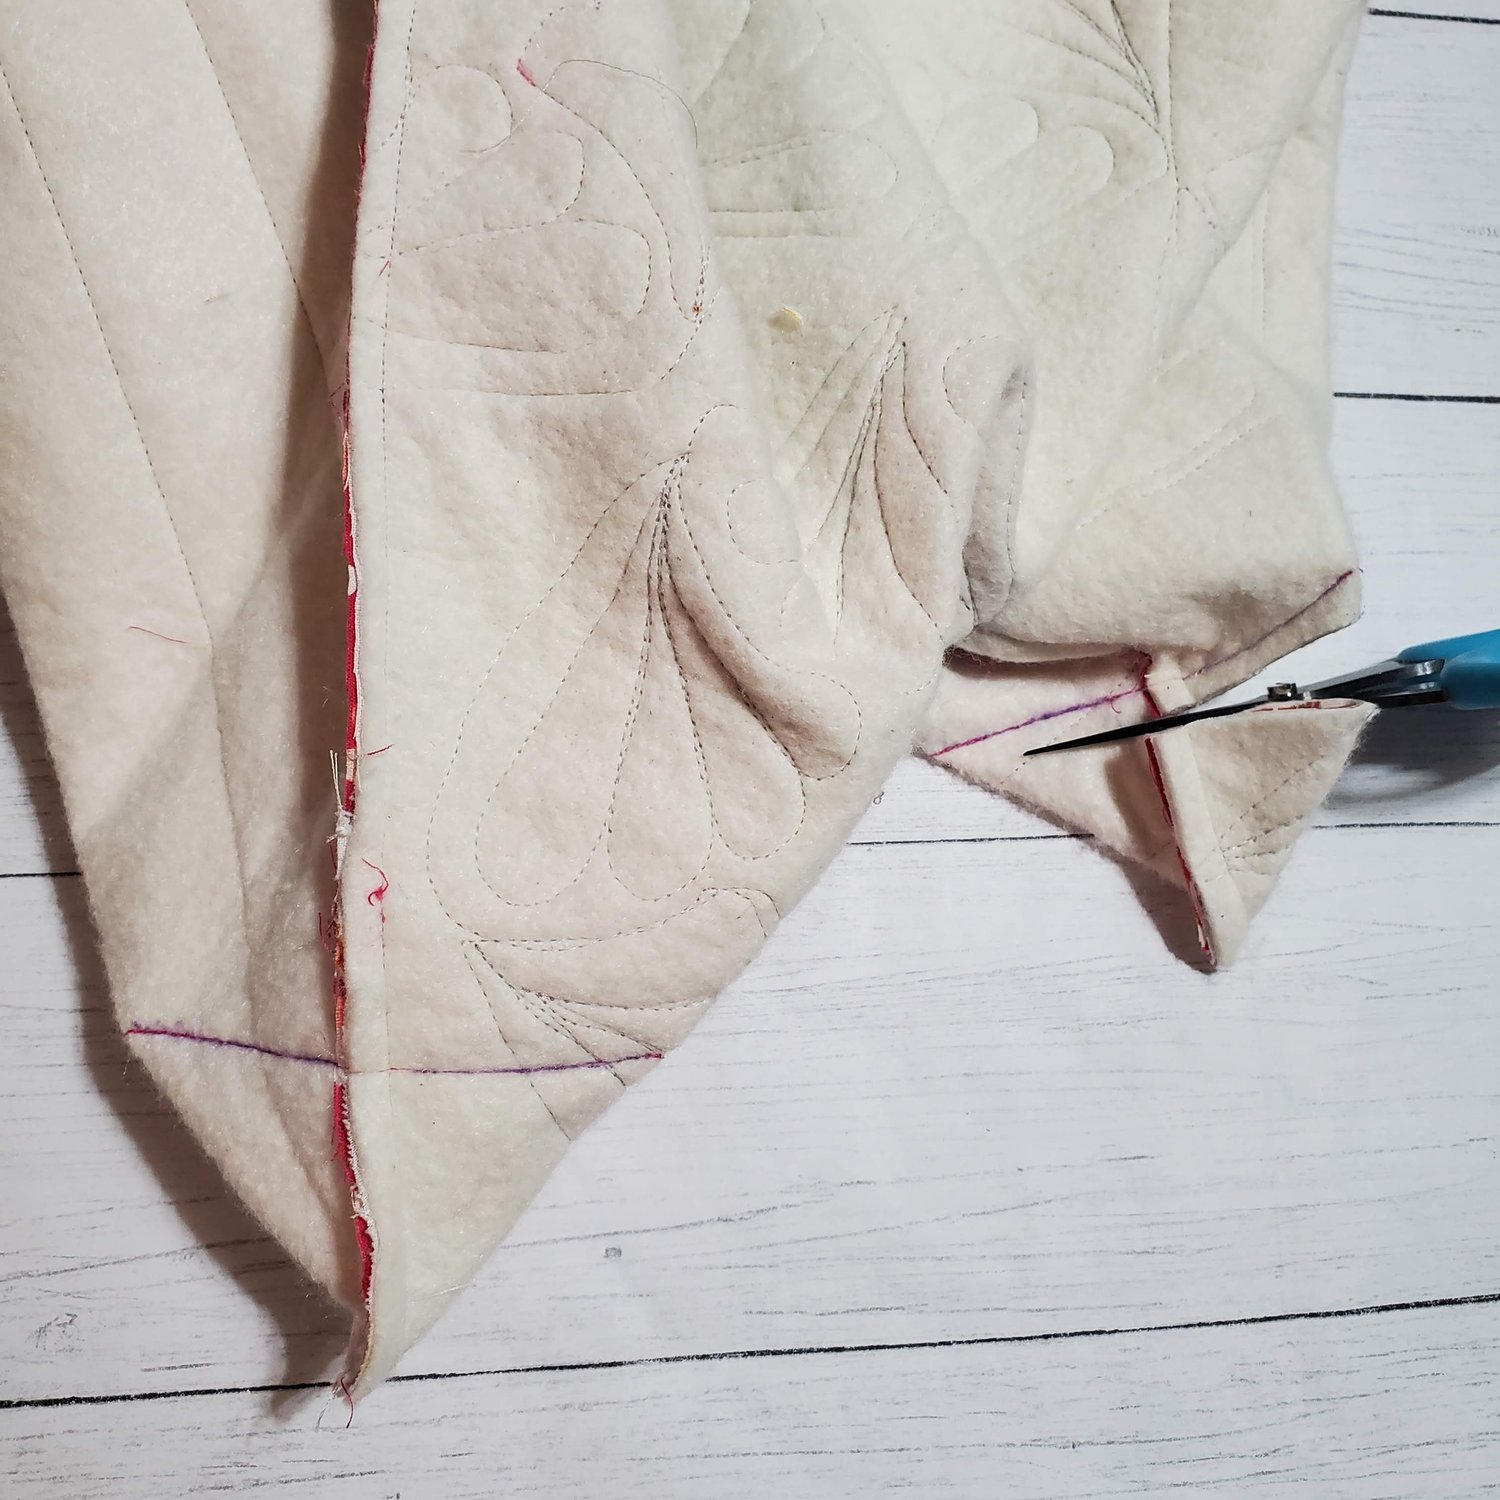
Trim to ¼” seam. Turn right sides out and press the seams. Set aside. Prepare the interior pocket by folding in half right sides together and sewing the short sides. Turn right sides out and topstiitch ⅛” from the folded edge.
Mark 7” from the top edge and line up the pocket with the top of the pocket toward the bottom of the bag.
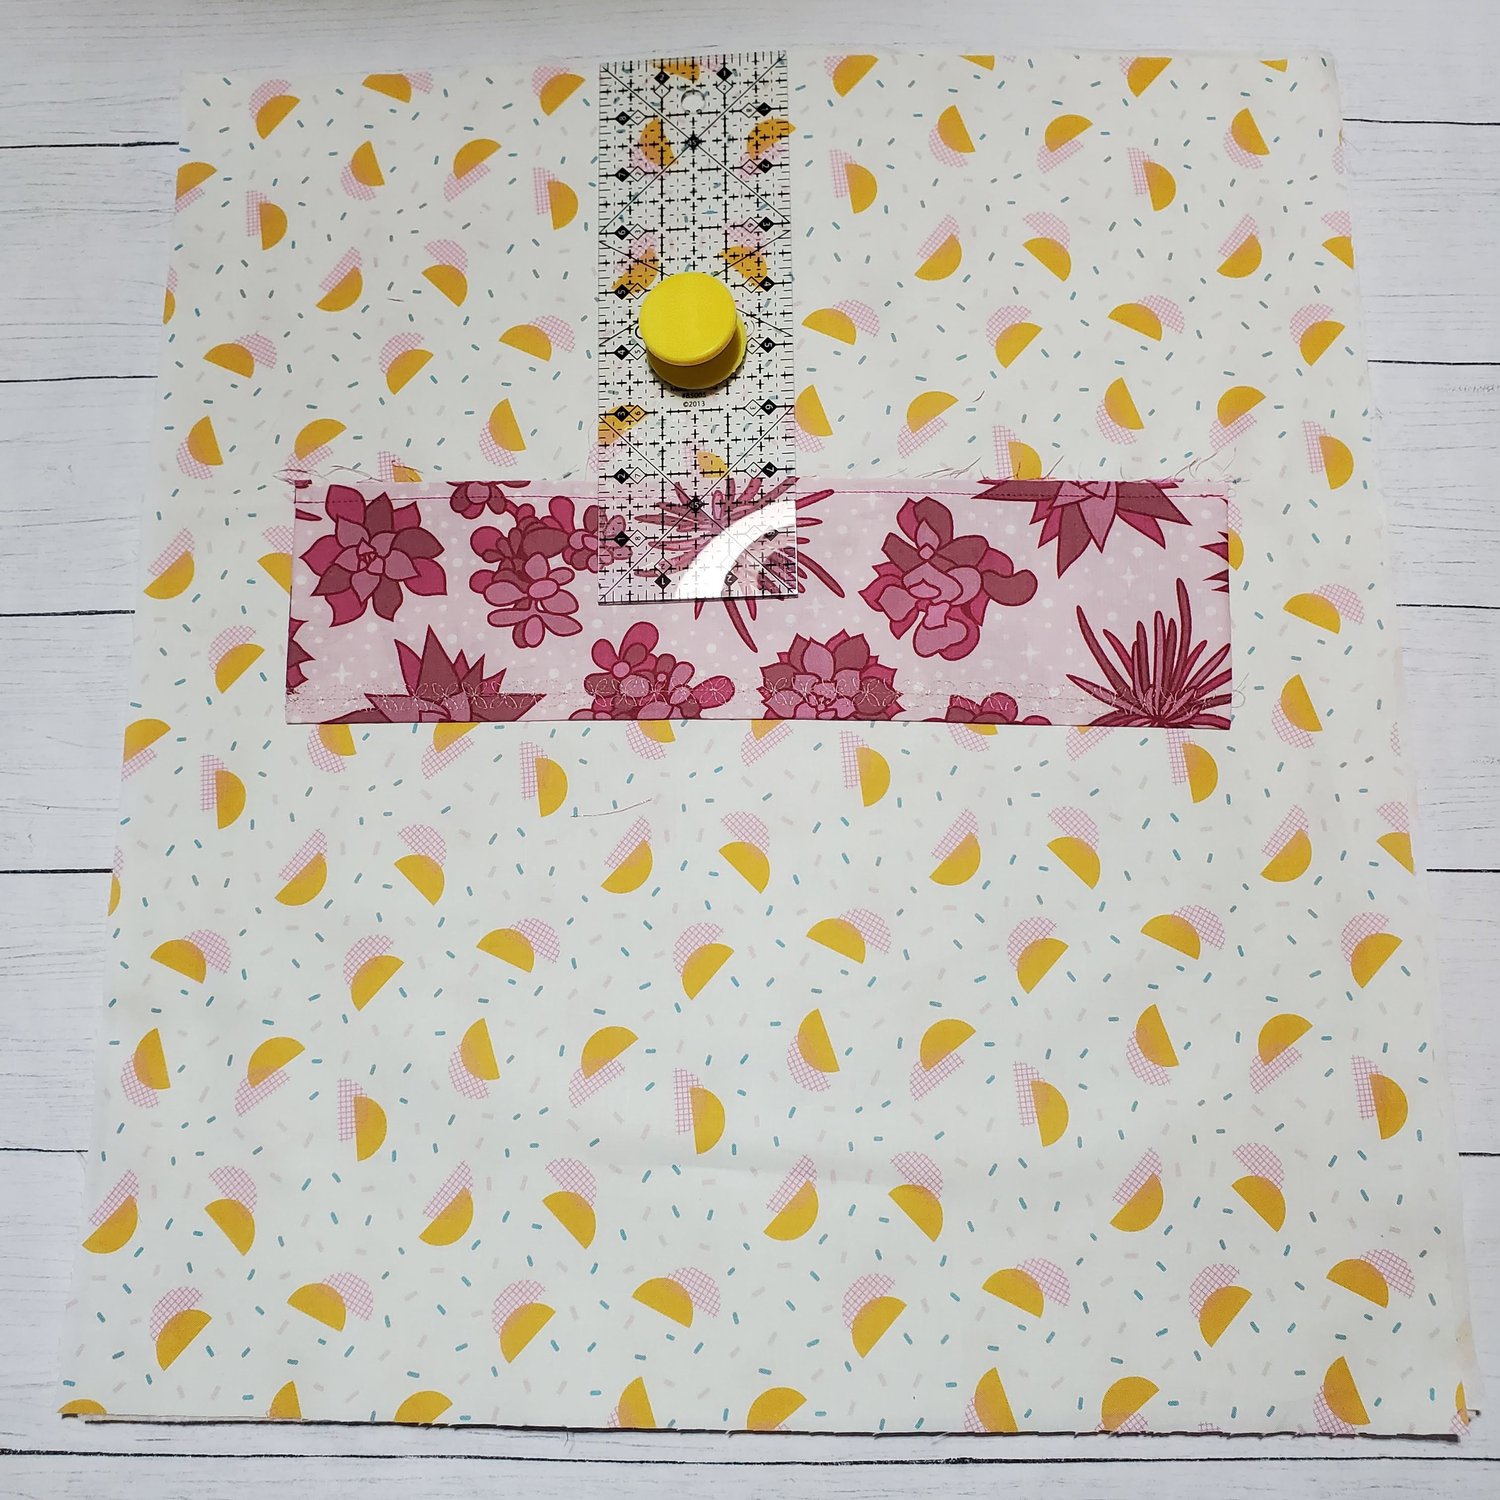
Sew the bottom edge of the pocket to the lining. Fold up the pocket towards the top edge so the seam is hidden. Press and you can add a few pins to secure the pocket in place. Topstitch ⅛” from the bottom and sides. Topstitch 4 ½” from each end to make three sections of the pocket. With right sides together sew the lining pieces together leaving 3-4” opening in the center of the bottom for turning. Box the corners. Press and trim. With the right sides together place the outer bag inside the lining, align the side seams and clip in place. Sew around the top edge. Turn right sides out through the opening in the bottom of the lining.
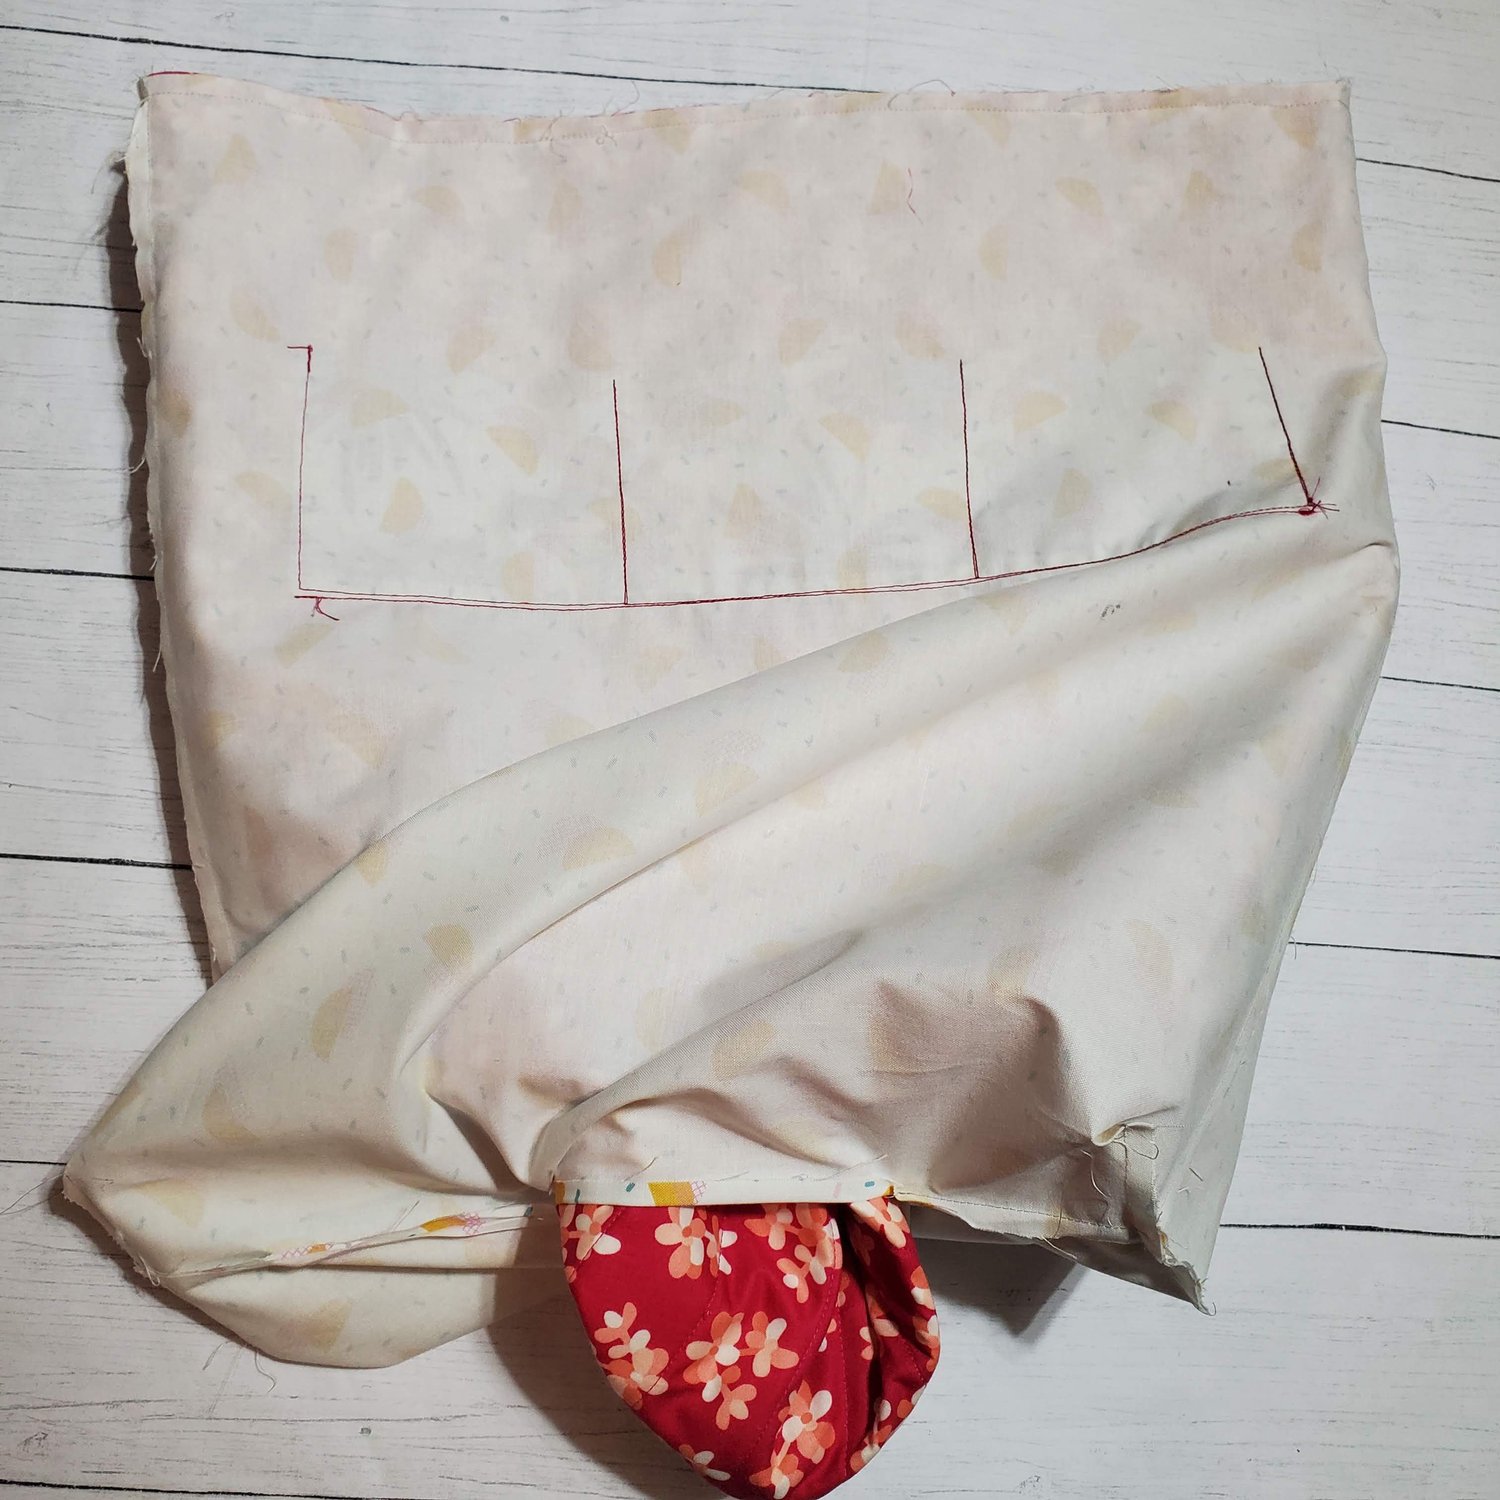
Press out the corners and align the top edges and press. Topstitch ⅛” from the top edge of the tote with a coordinating thread. Topstitch the opening of the lining closed. Set aside to prepare the straps.
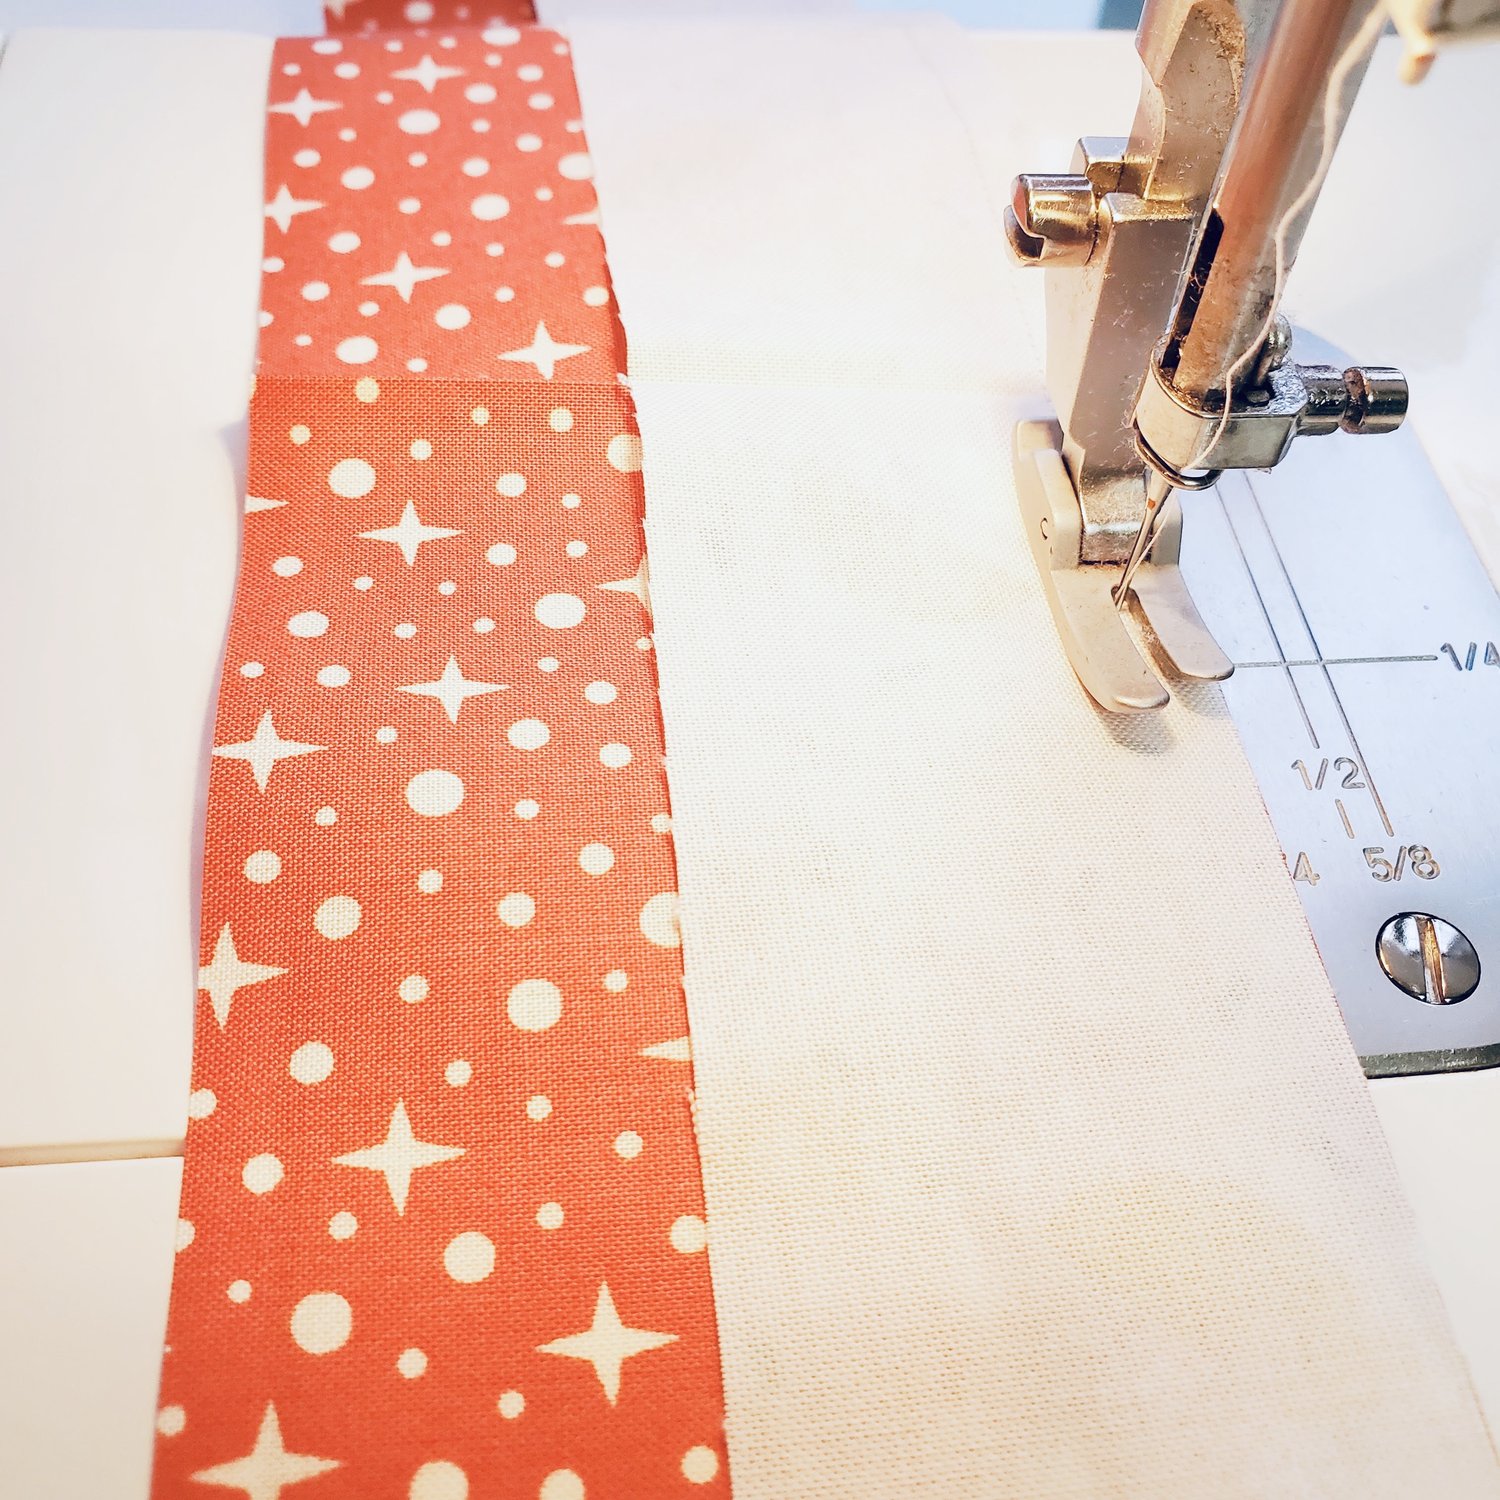
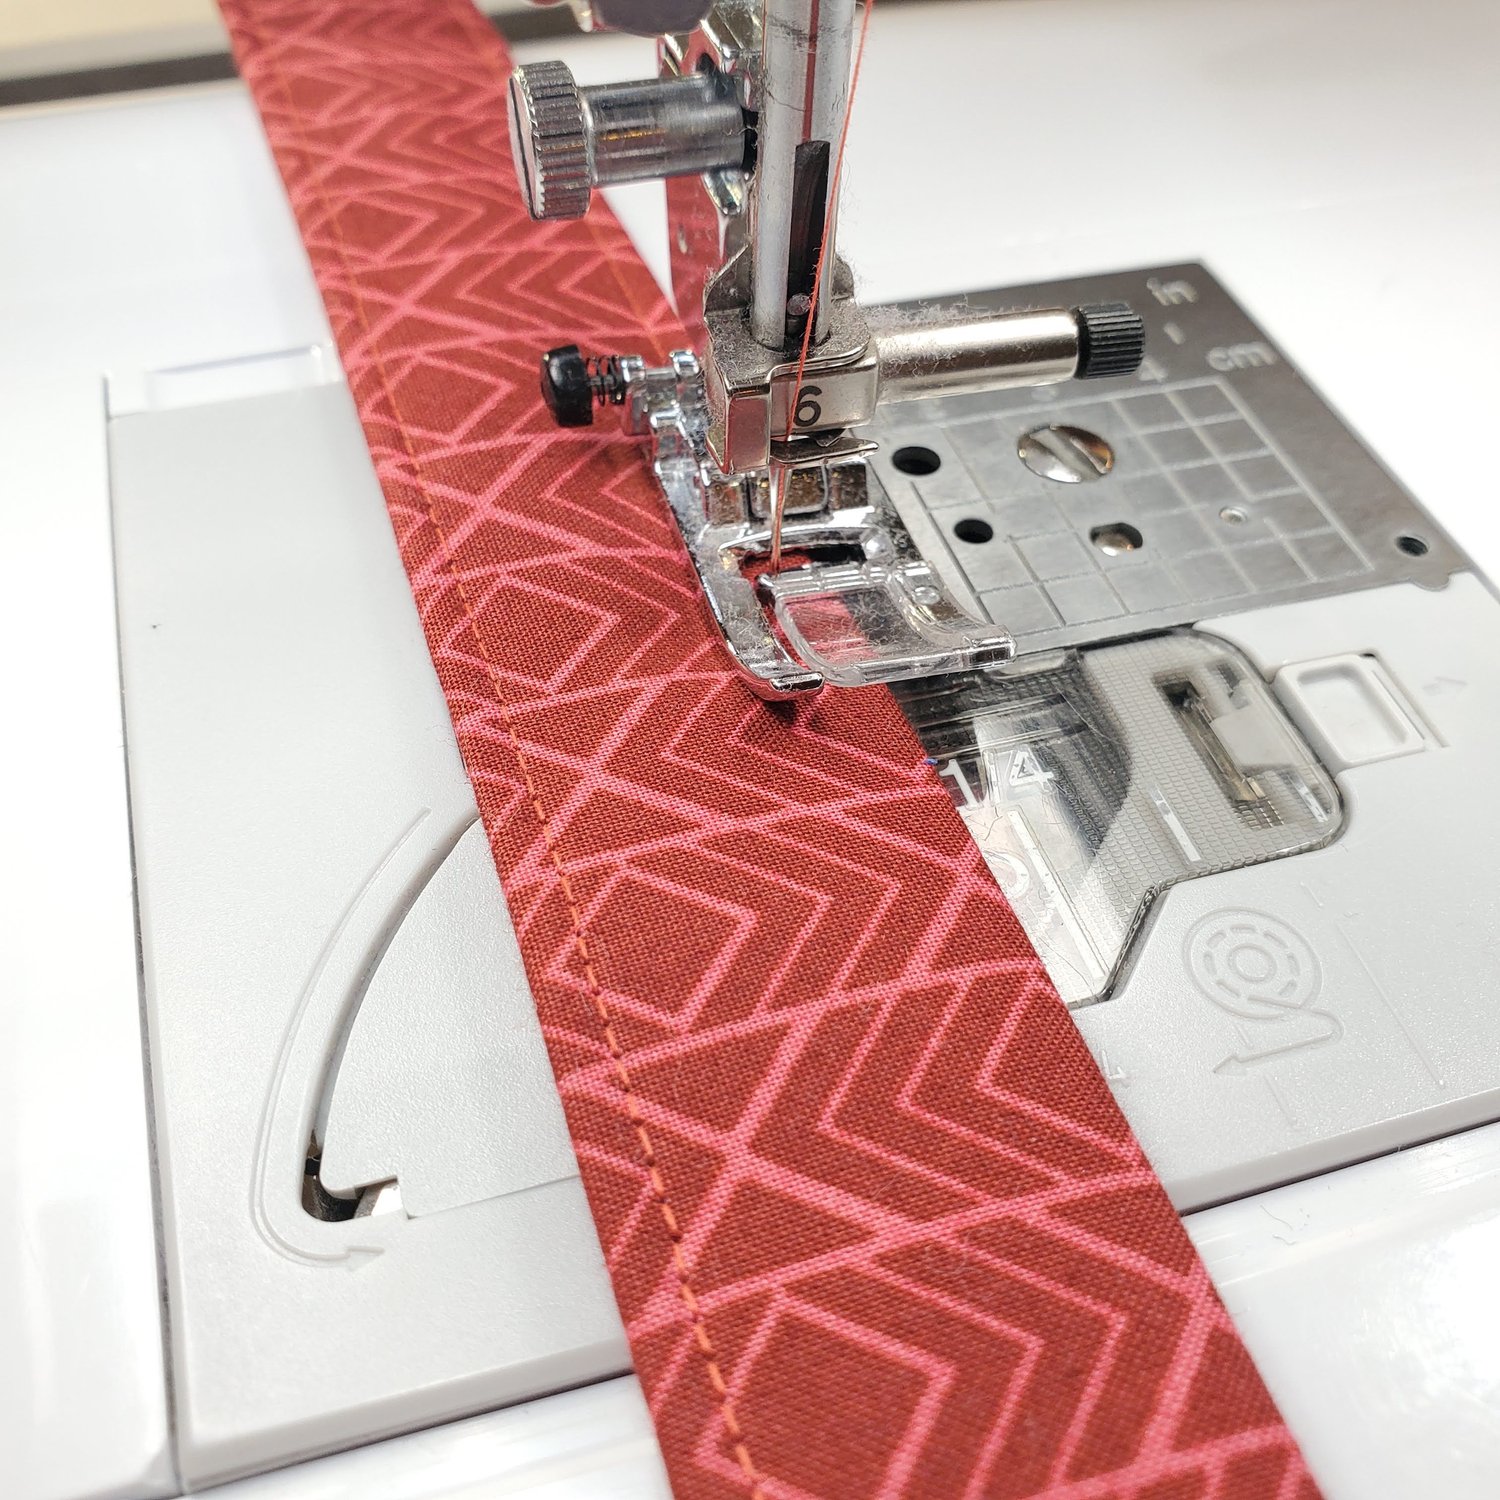
Cut two pieces of fabric 25” by 3”. Fold in half lengthwise and sew ¼” seam. Turn right sides out. Insert webbing into fabric casing.
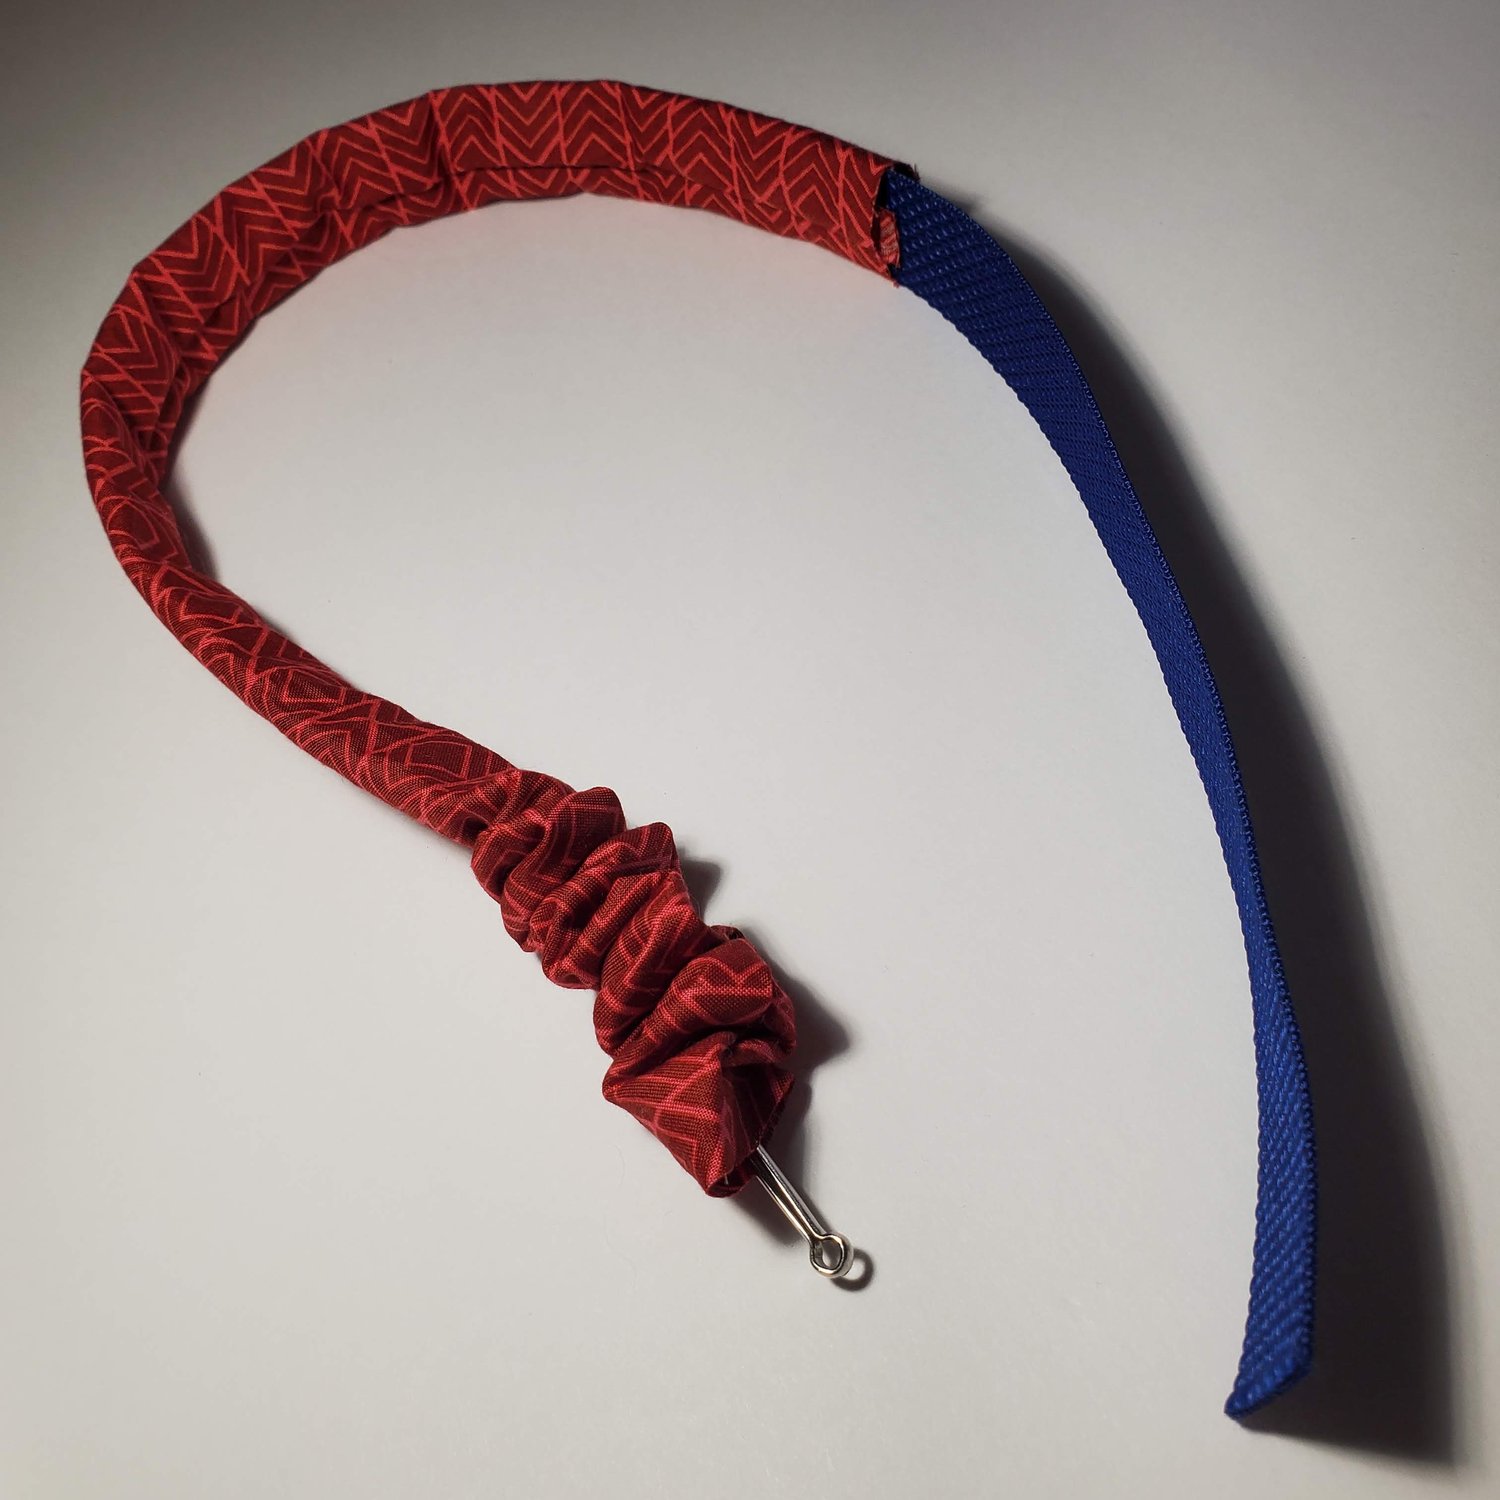
Align the seam to one side and topstitch ⅛” on each side of the strap with a coordinating thread.
Attach to the tote 4 ½” from each side seam. Double stitch to secure the strap. Give the bag a final press.
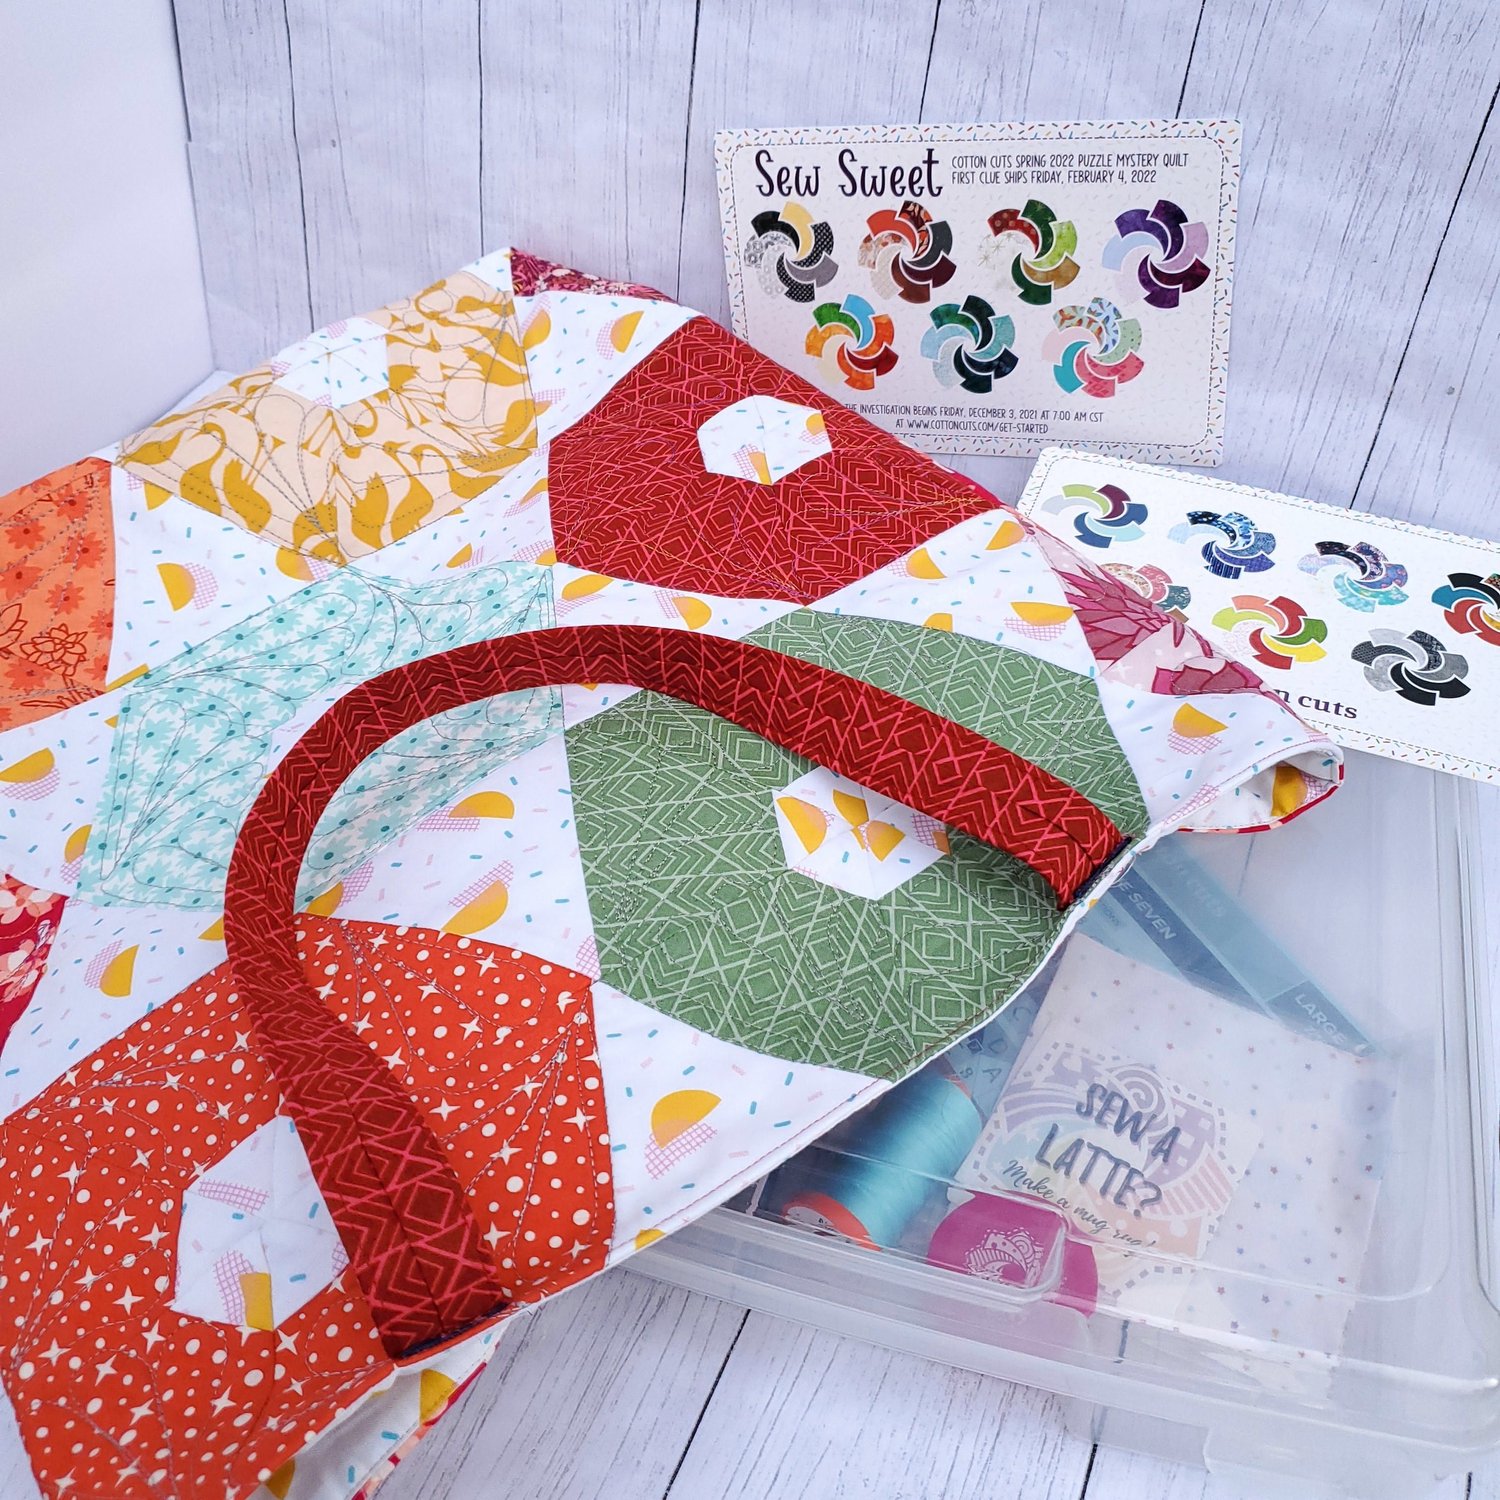
Now you are ready to use this colorful tote to organize your monthly clues as you start your quilt journey.