

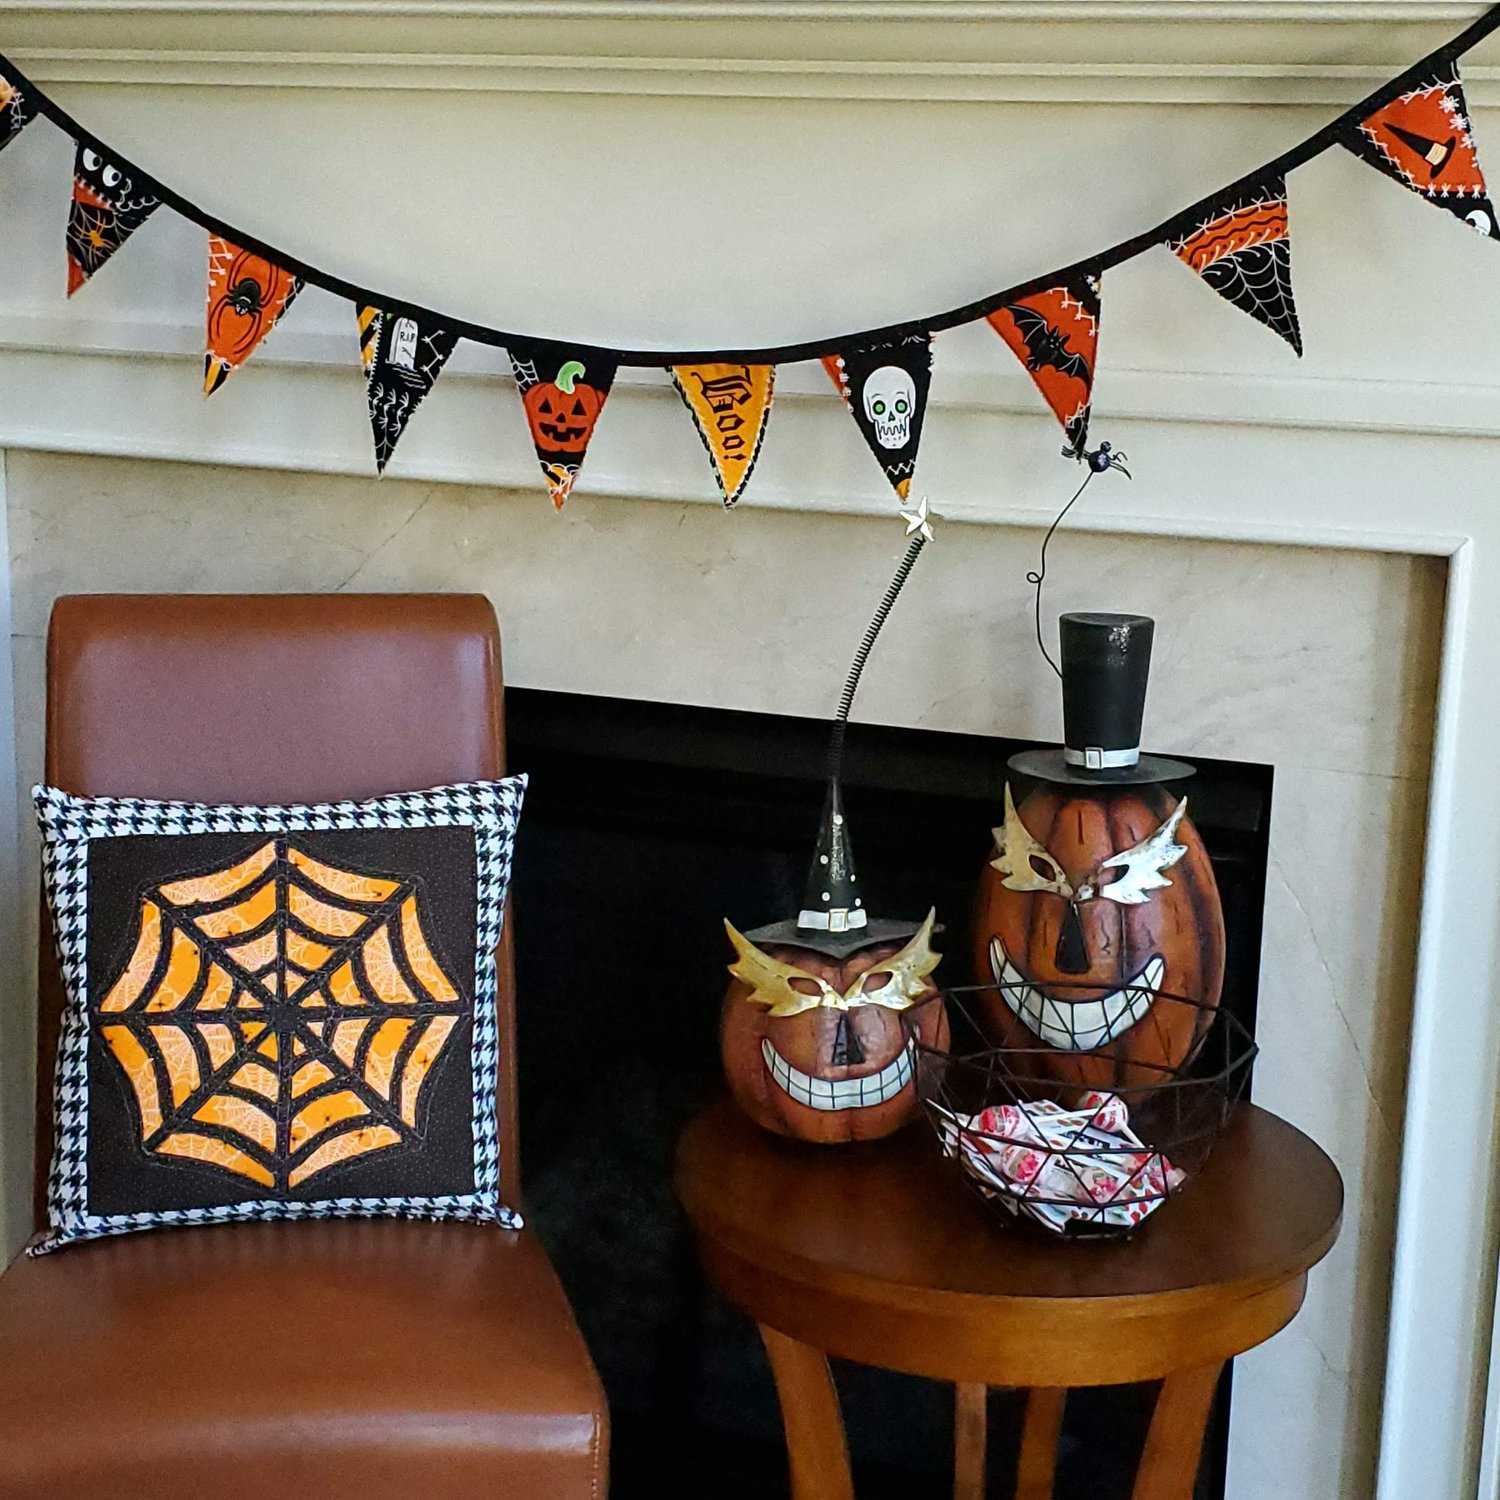
Halloween Bunting
9th Sep 2022
This quick and easy bunting is double sided to transition from Halloween through your fall festivities. It adds a bit of holiday decor to brighten any room of your home. I used this Free Spirit Scaredy Cat by Rachel Hauer fabric that was ideal to fussy cut the individual triangles for the bunting. I found this great template from the Diary of a Quilter website. The Classic Membership box always offers a great assortment of fabrics perfect for these seasonal projects. I also used some fat quarters from the Mystery Bundle available from the fabric shop on our website.
Materials Needed:
- Three Fat Quarters of coordinating Fabric
- Aurifil thread from the Chroma Membership
- Optional packaged ½” double fold bias tape
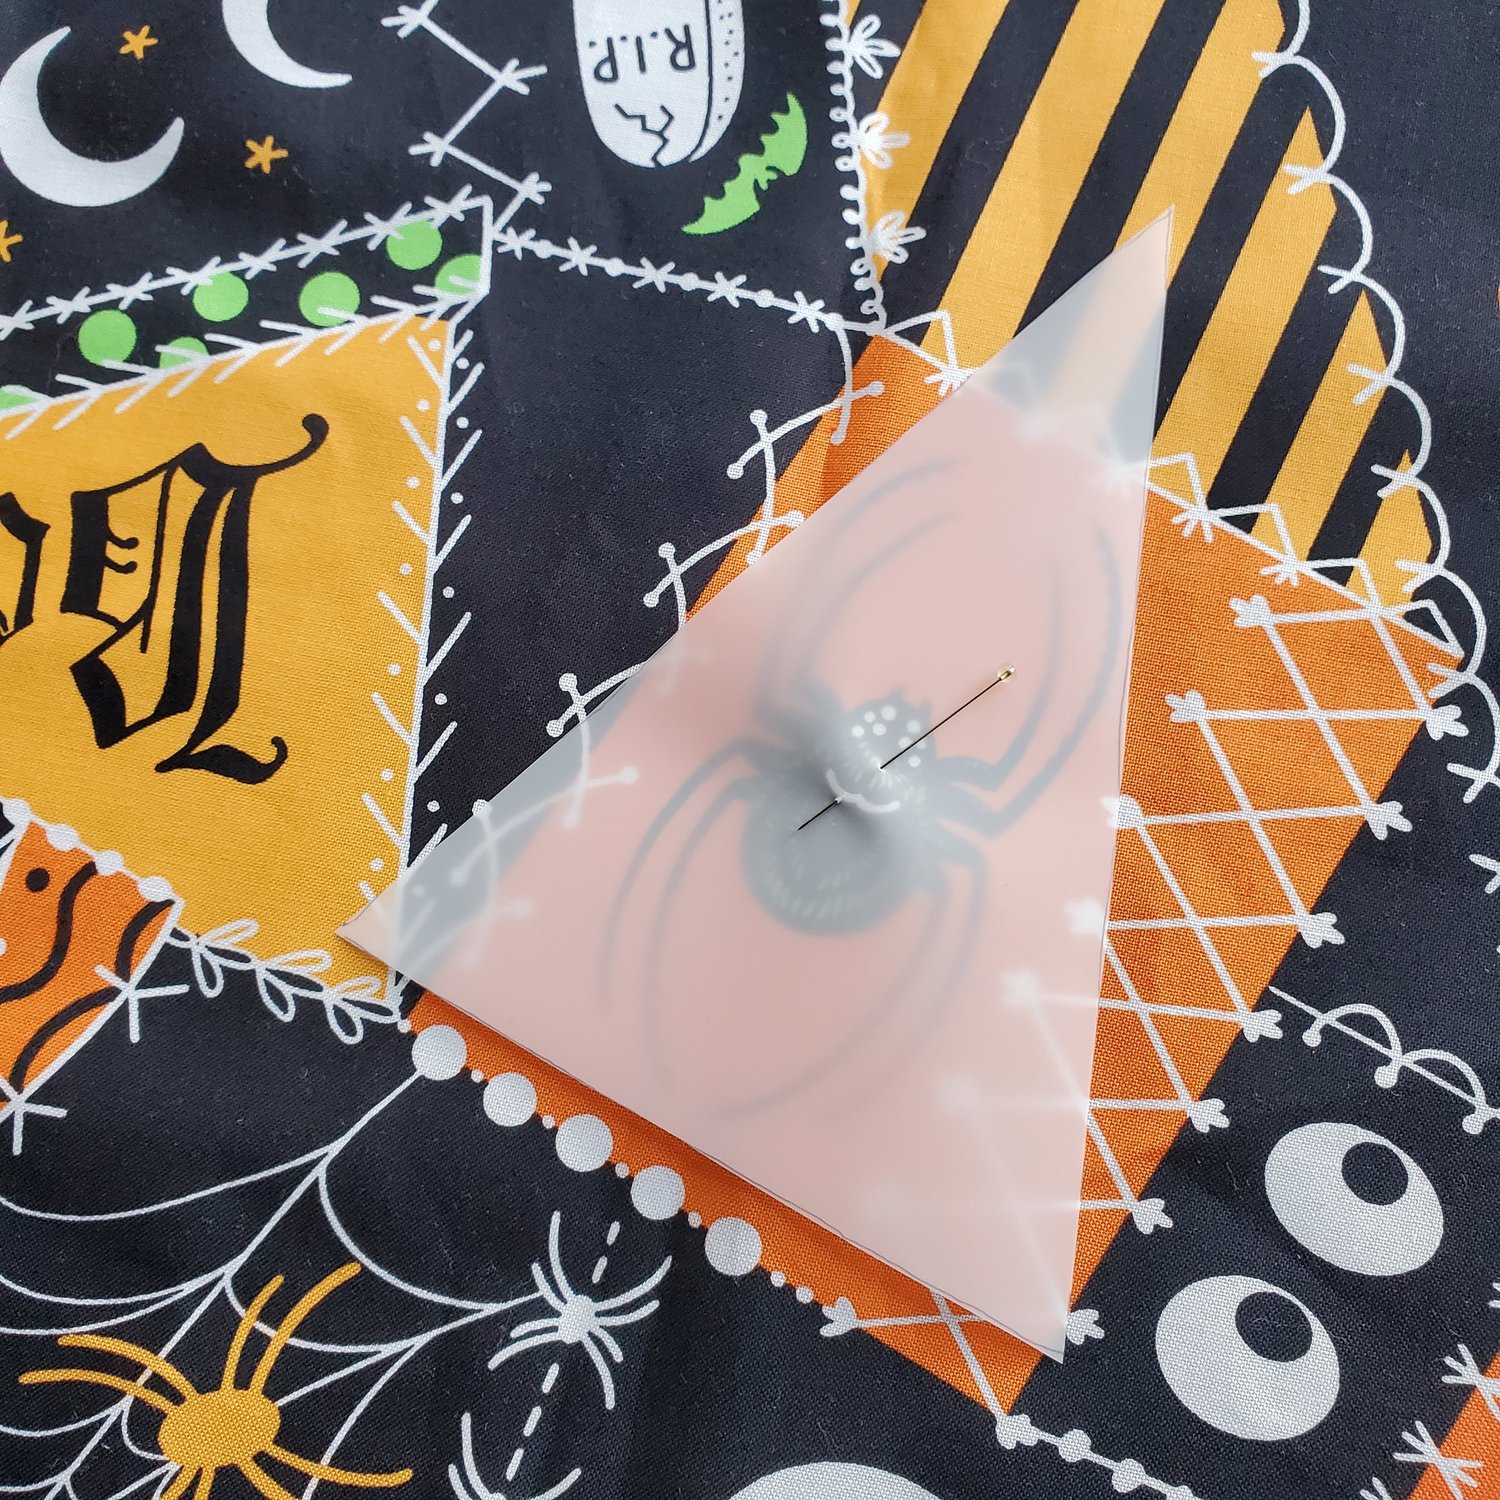
To get started print out the template of the triangle. You can easily adjust the size if you prefer to make it larger. I decided to cut the template from a vellum paper to help me see the area to fussy cut.
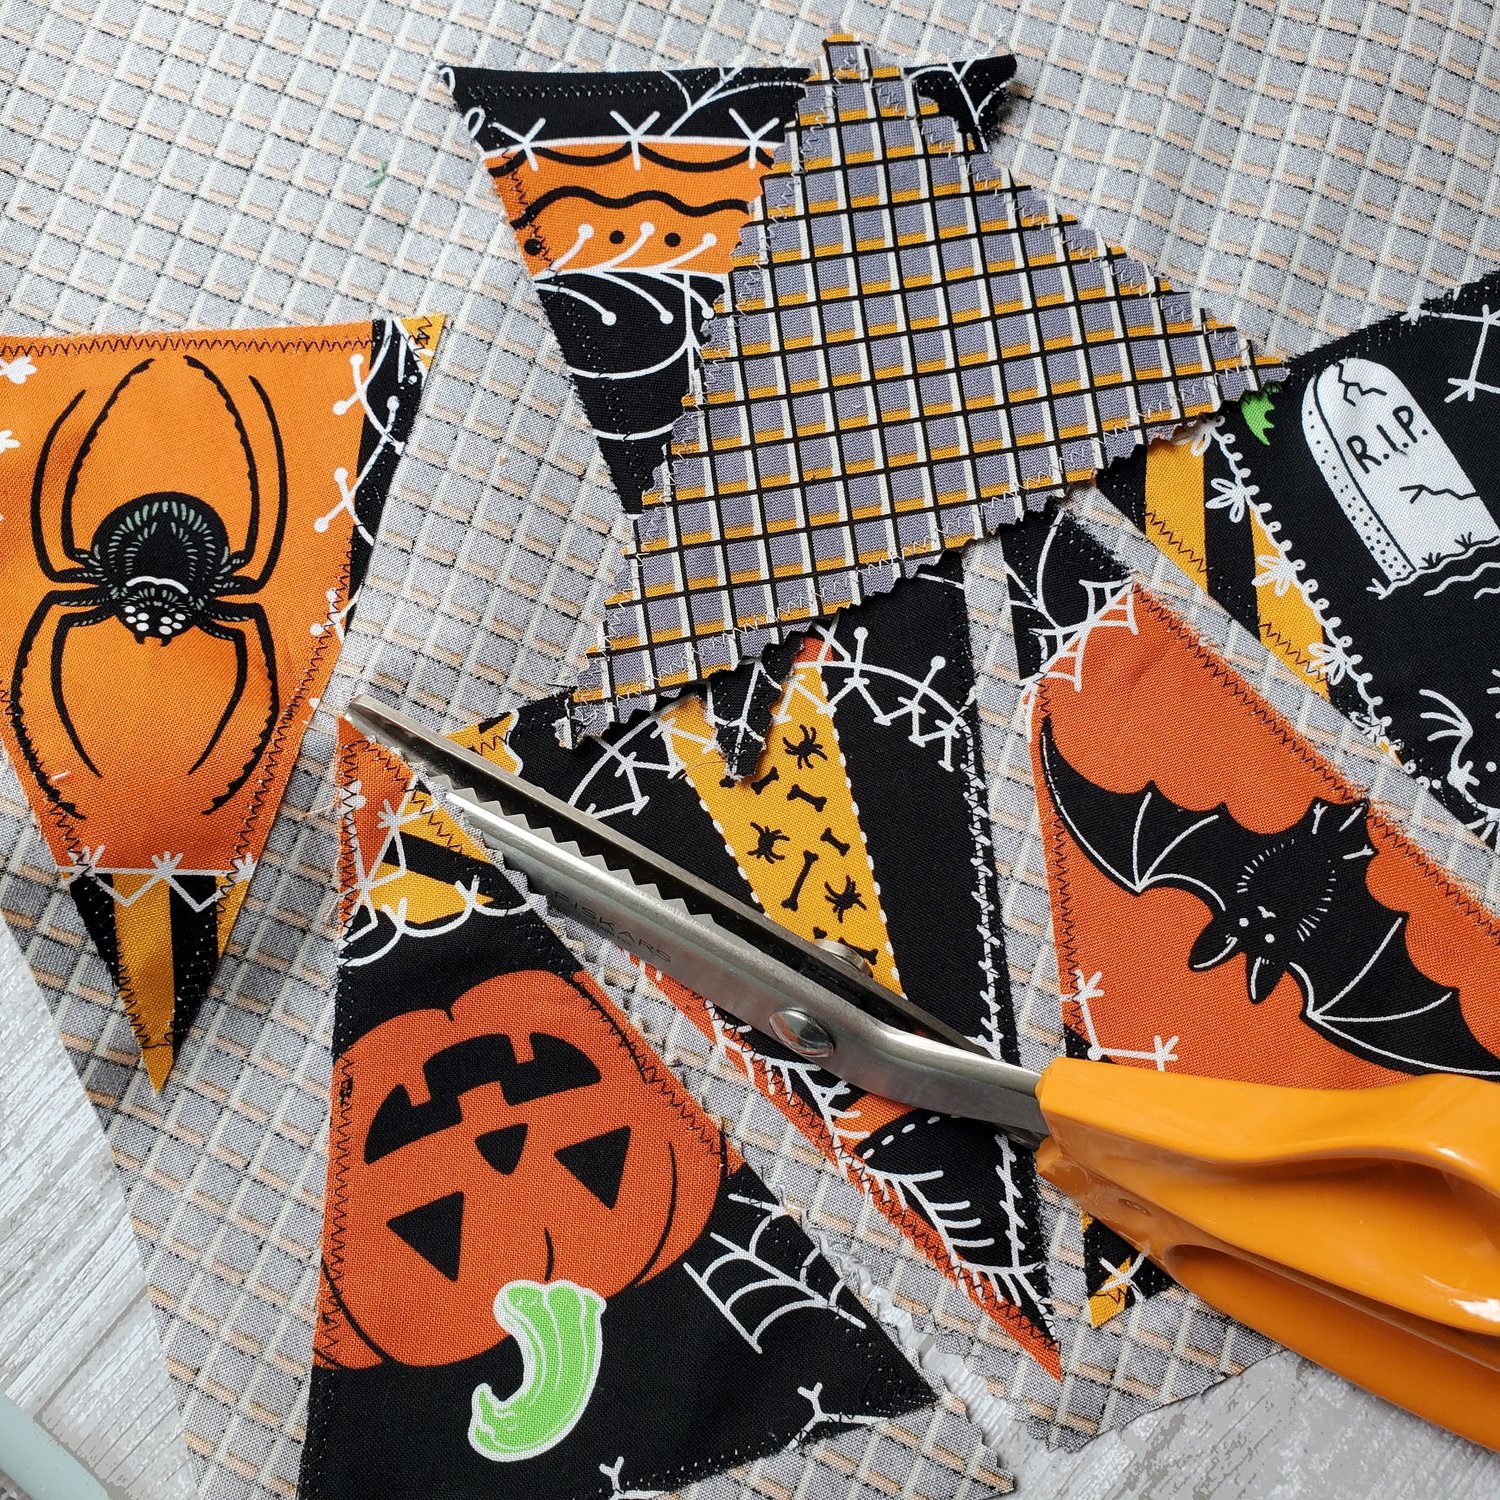
I continued this process to cut out 10 different triangles. I even sewed one together to get the eyes in the proper place for the pennant. I laid the backing fabric wrong side up and used this powder fusible Bo-Nash Bonding Agent to secure the triangles to the fabric. You could also just use safety pins to hold in place temporarily.
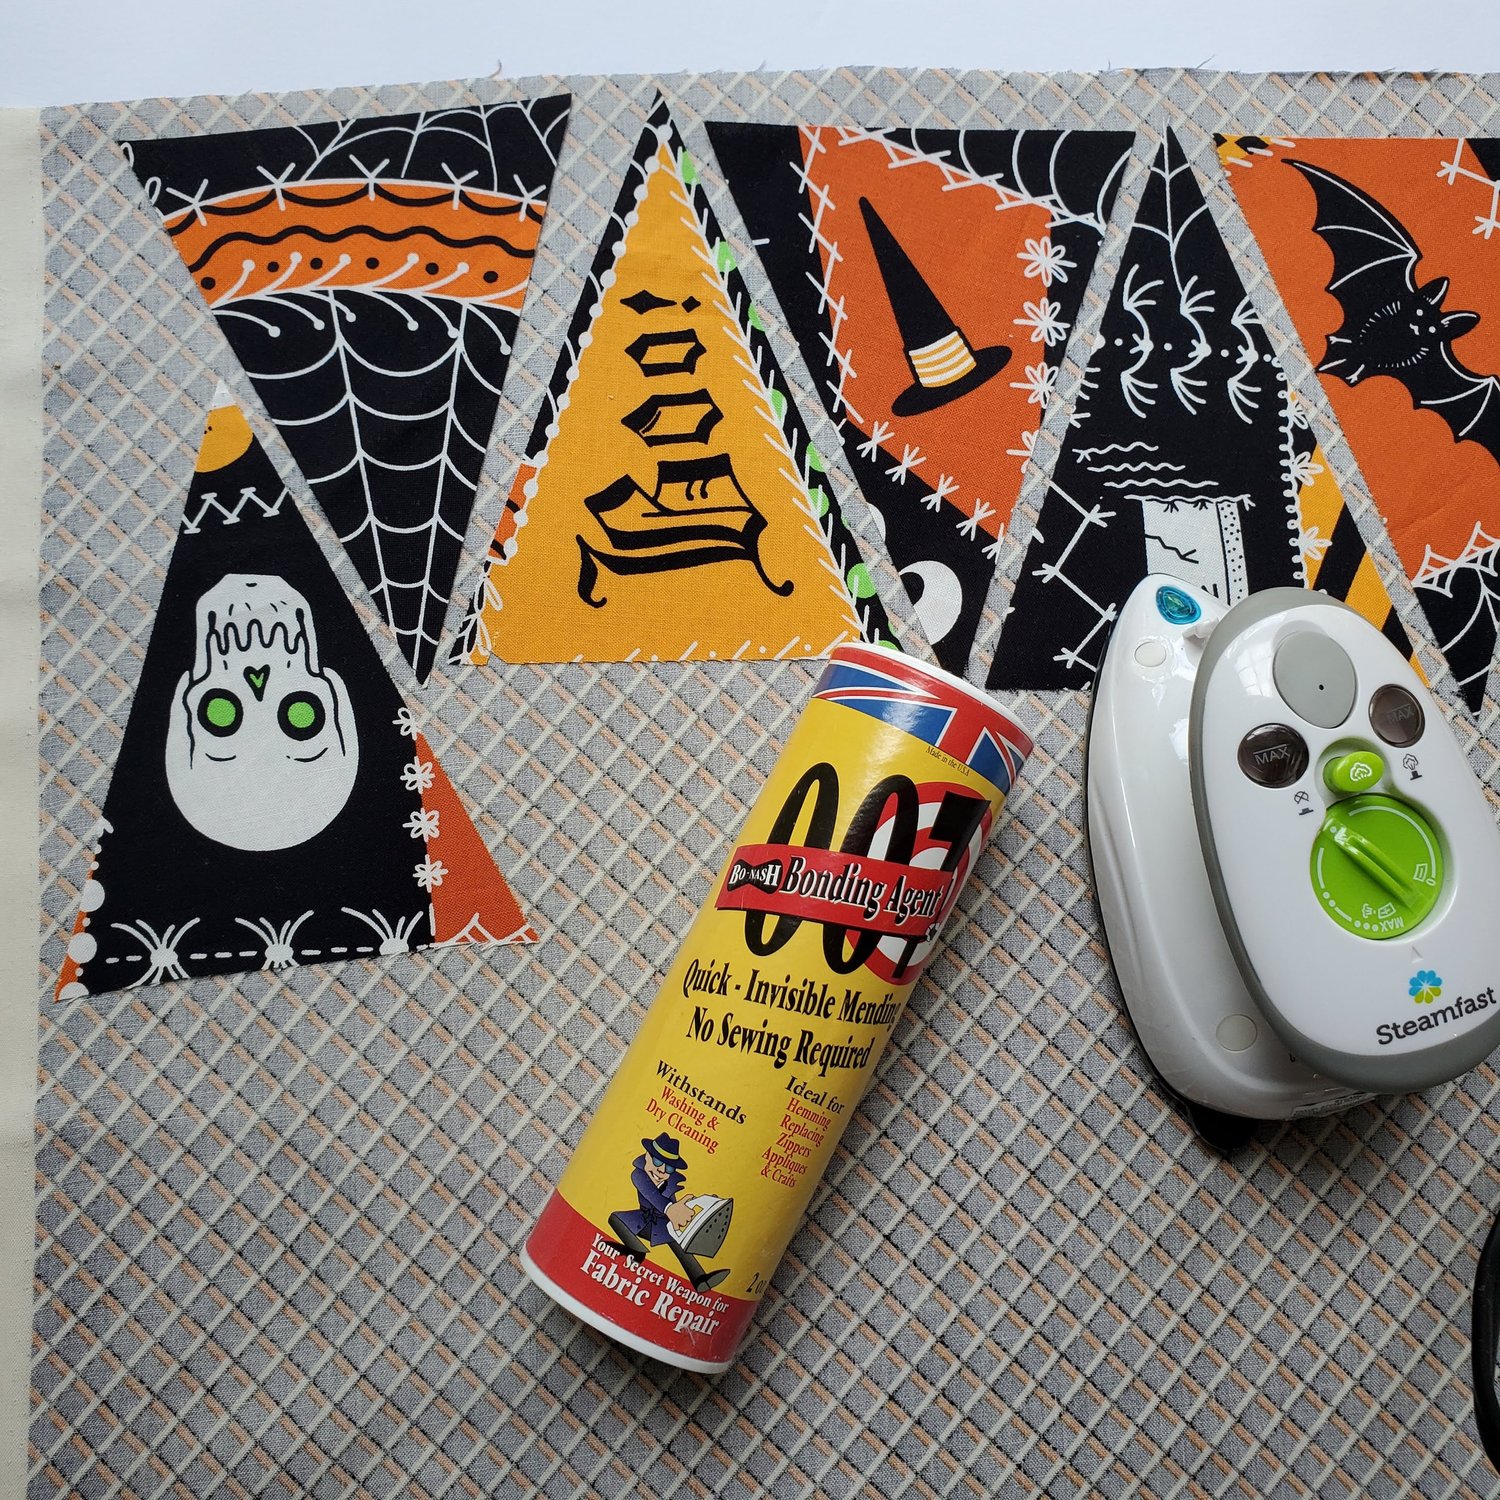
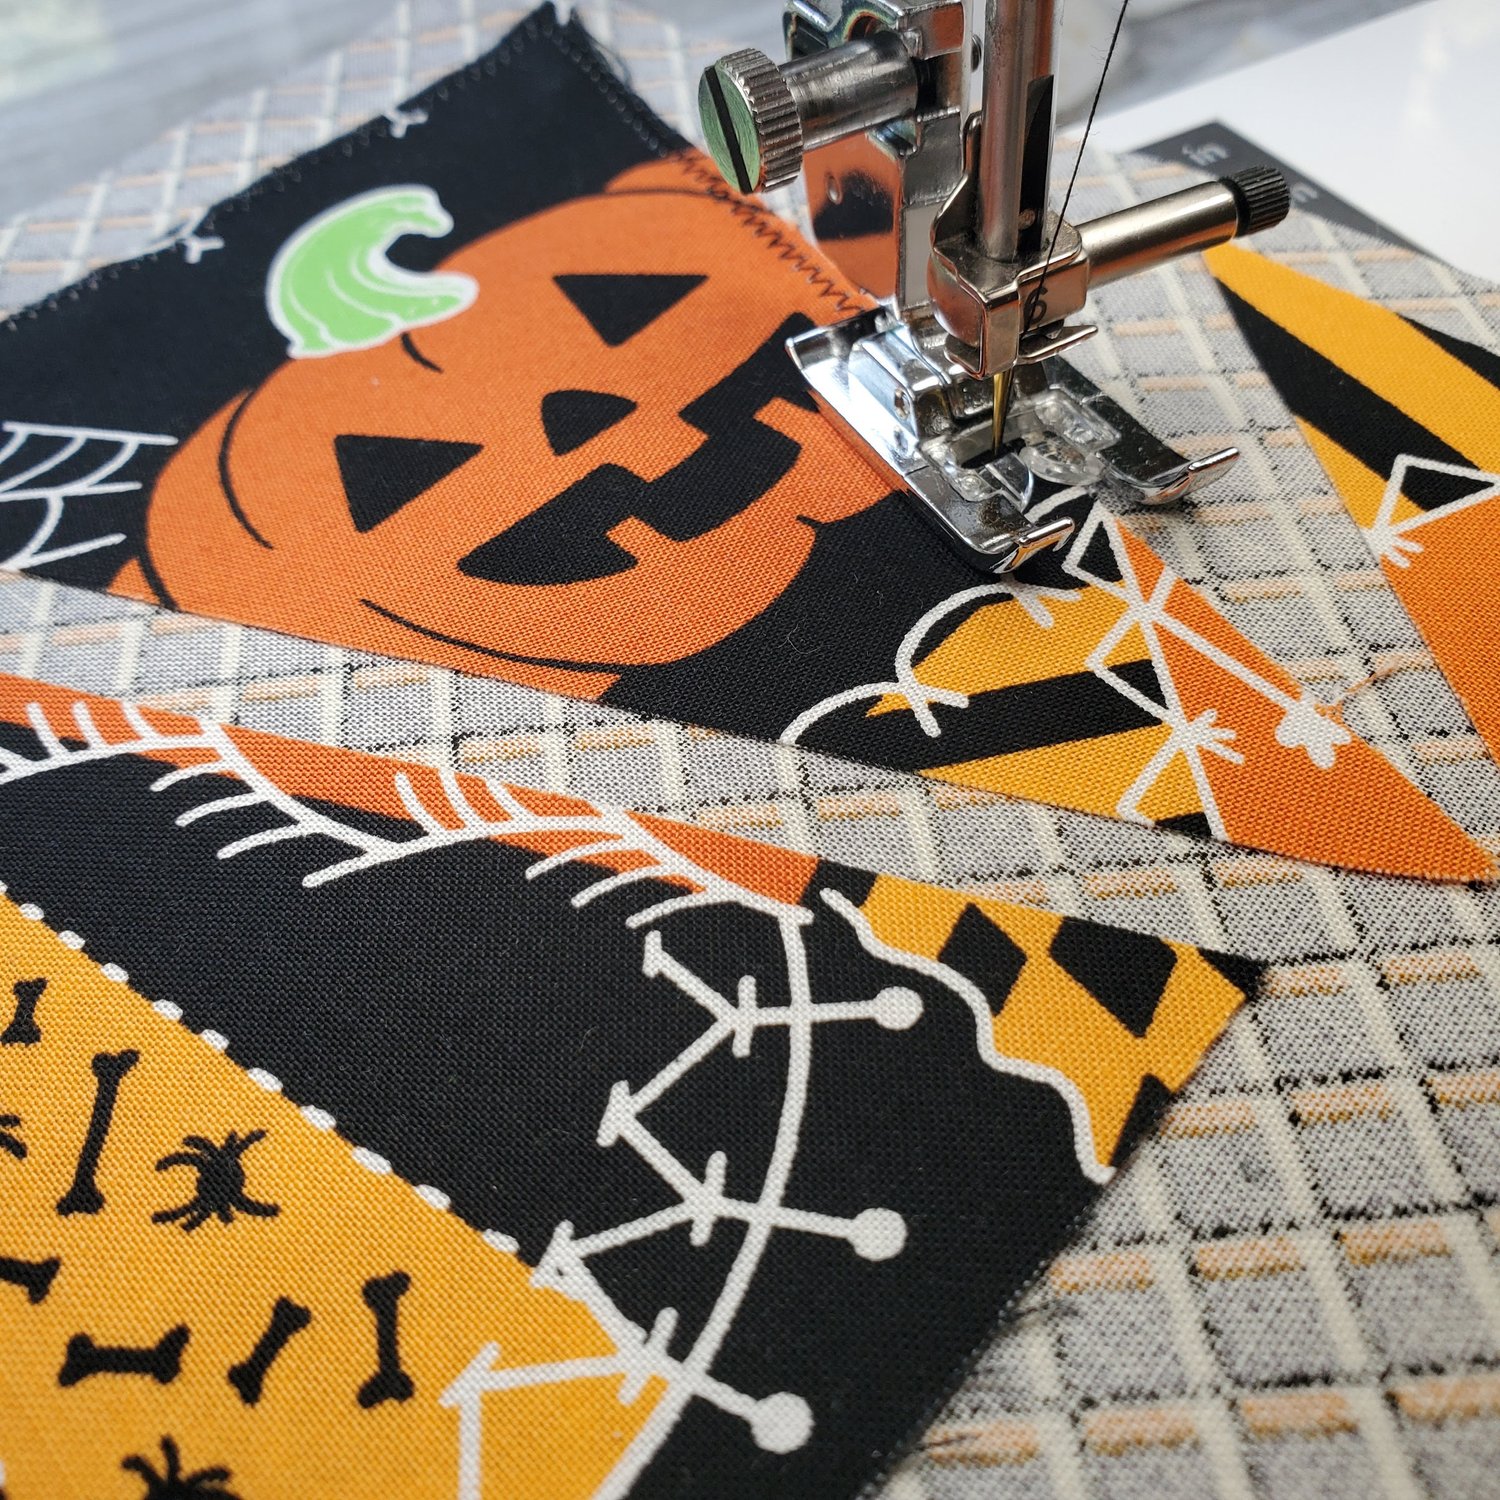
Give each one a quick press to fuse to the fabric leaving a bit of space between each triangle. Take this piece to your machine and sew around the triangle with either a straight stitch or a zig zag stitch.
Now that each one is sewn around all three sides it is time to cut each triangle. I prefer to use the pinking shears to give it a little texture and prevent it from fraying too much. You could use regular scissors and seal it with Fray Check to prevent it from fraying with use.
Next you will cut two 2” strips from the black fat quarter fabric. Fold it in half lengthwise and press. Open out the seam and press the raw edges to the fold. You could also purchase pre-made double fold ½’ bias tape. Plan out your placement of the triangles and clip in place between the fold of the binding.
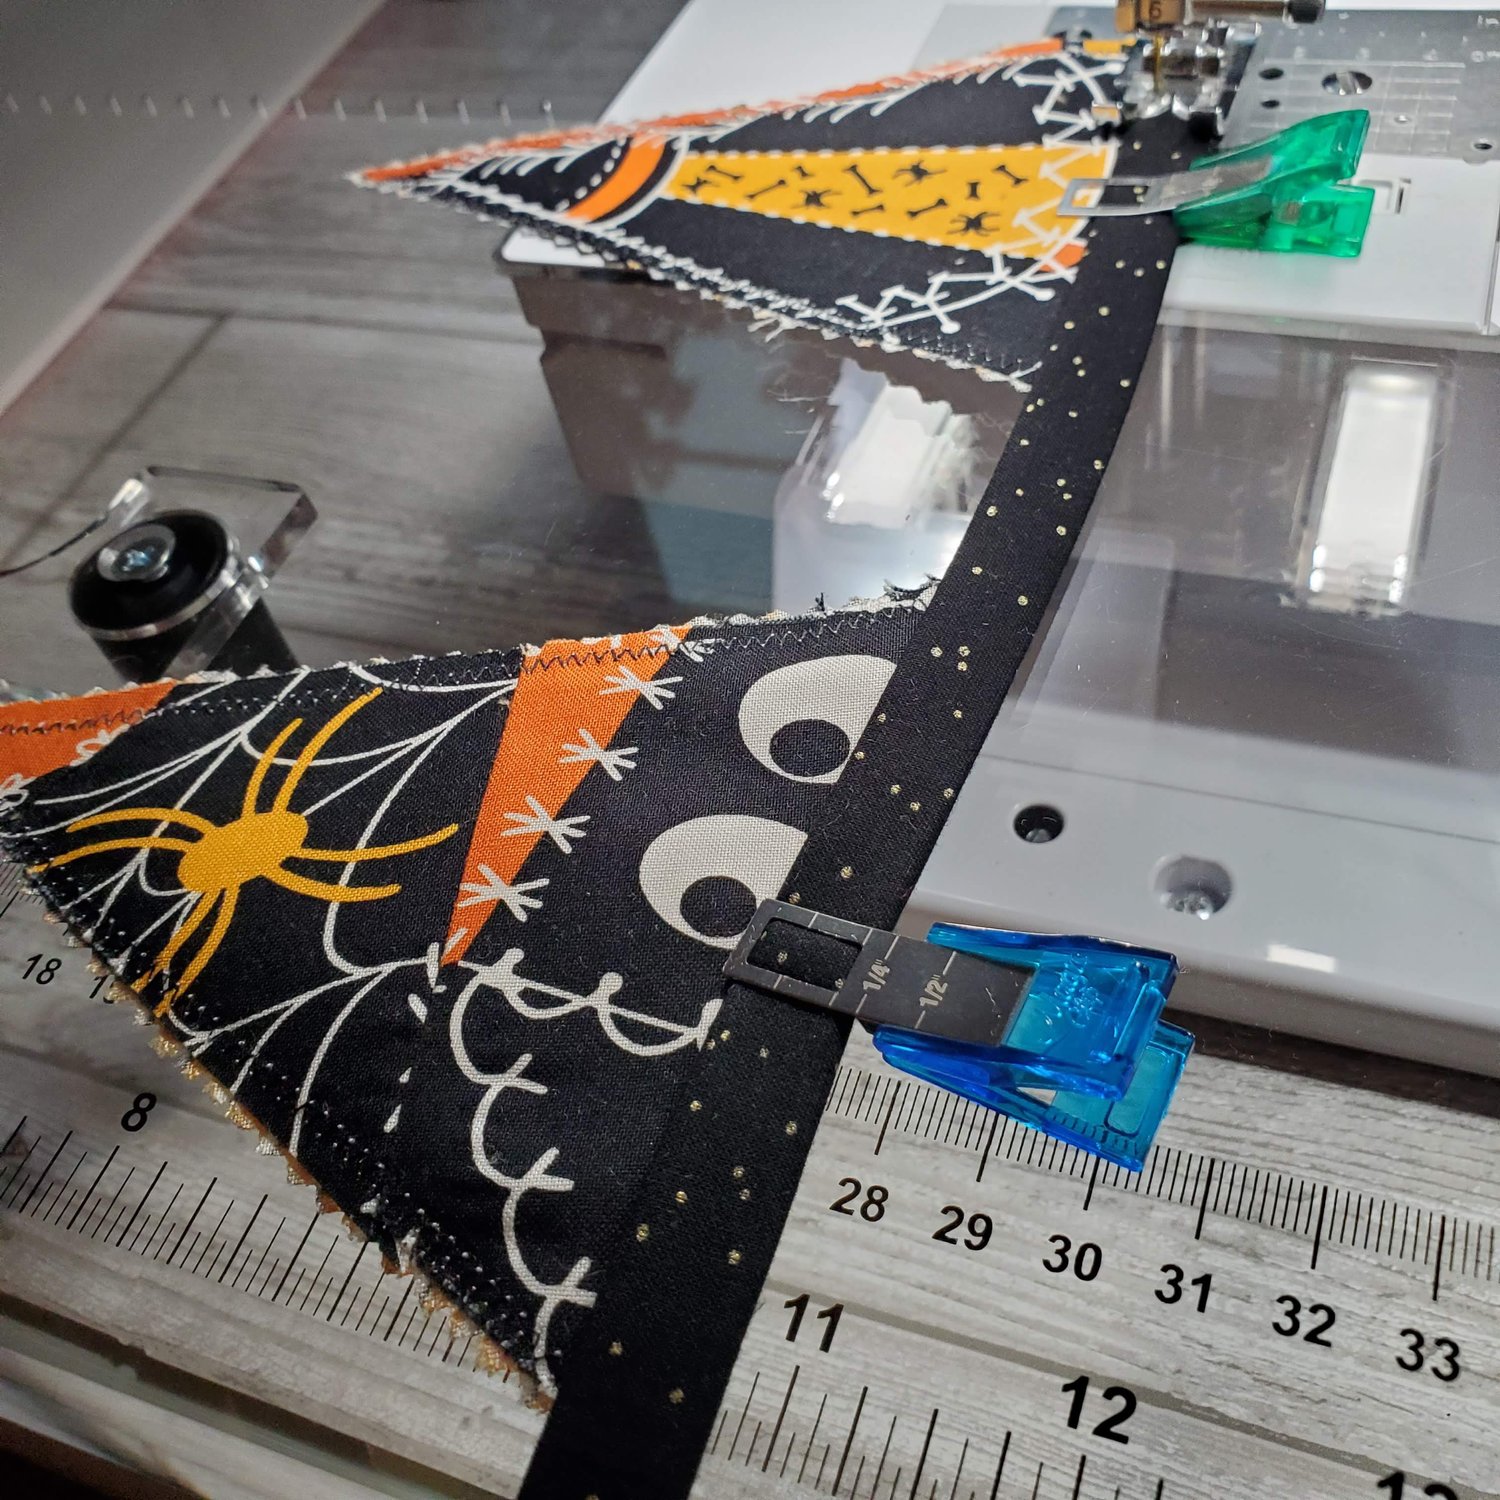
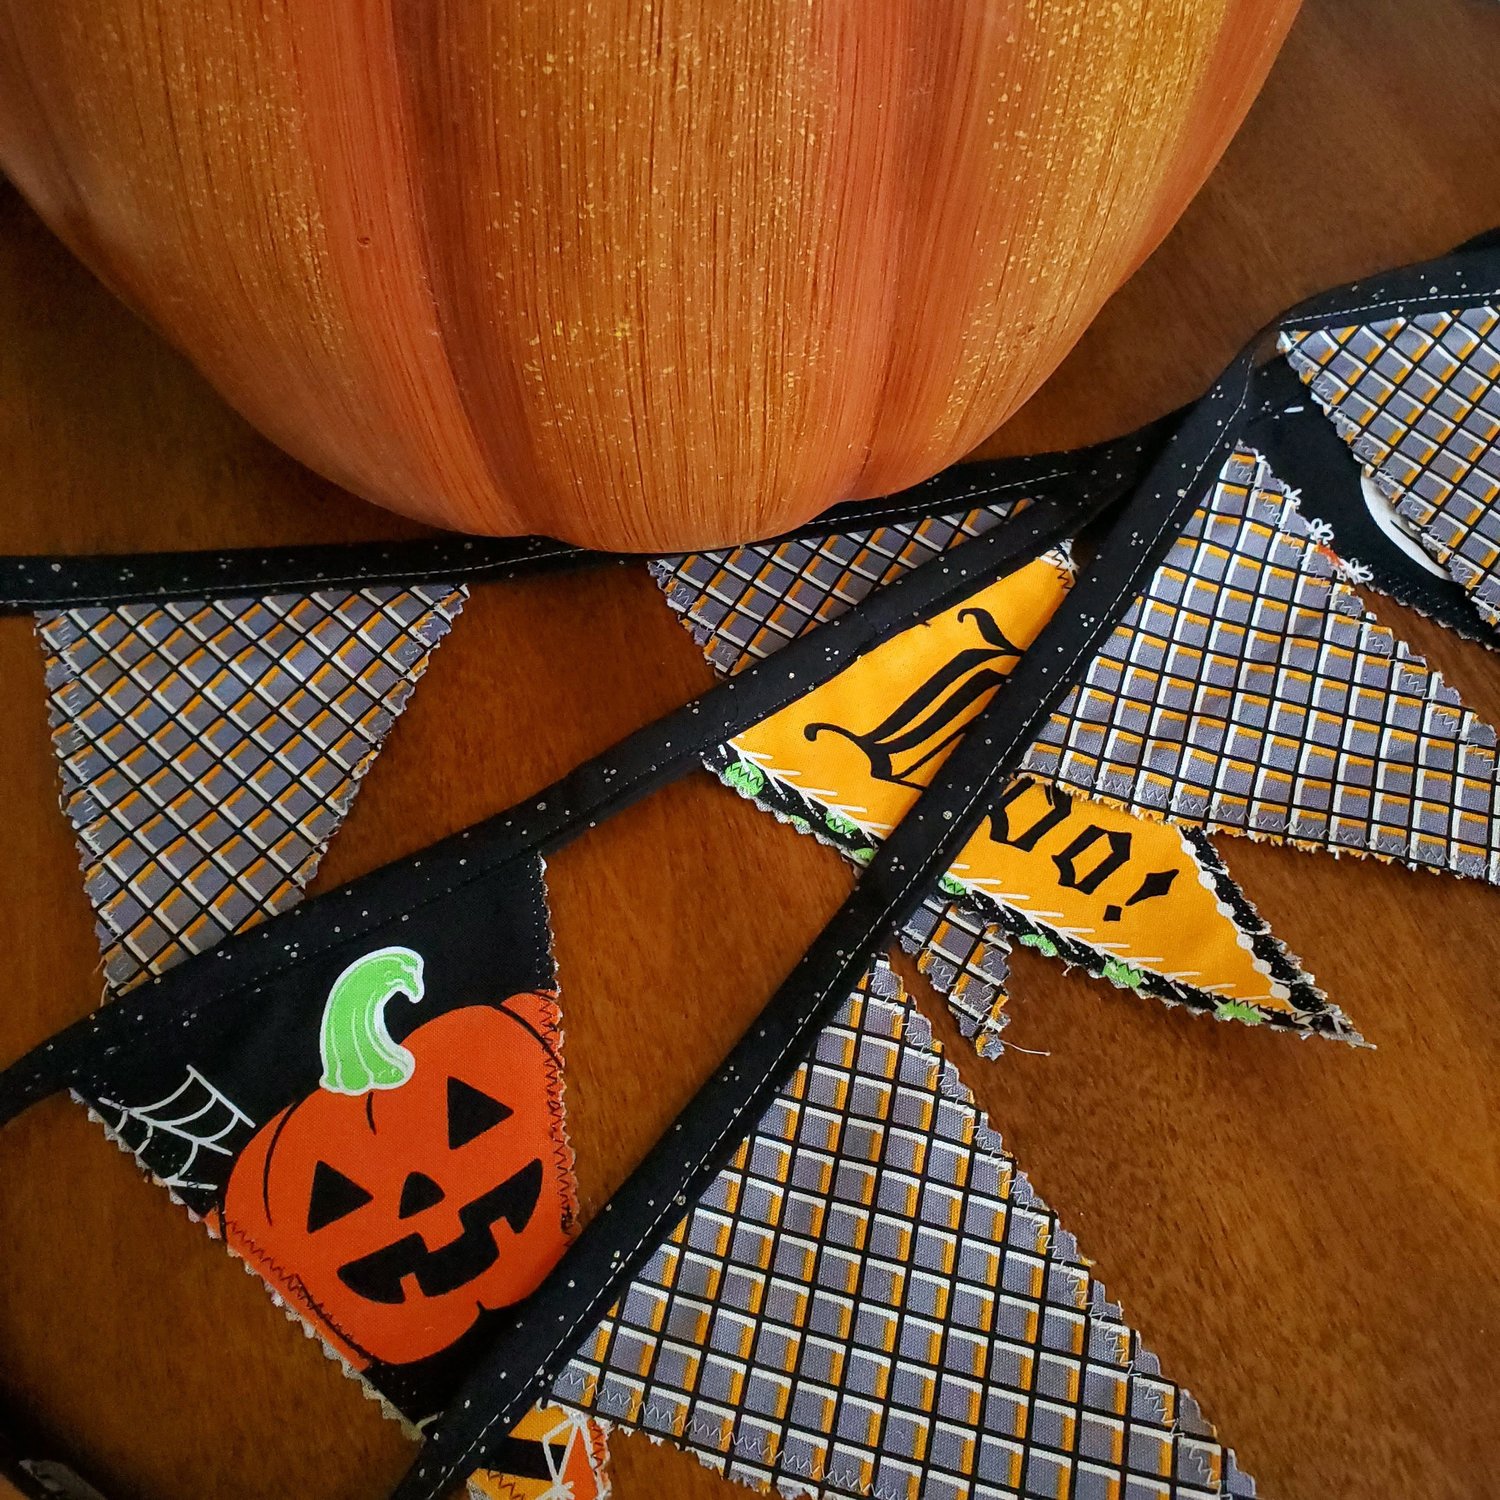
Topstitch about an ⅛” from the edge of the binding catching the top of the triangle in the seam. Give it a final press and you are ready to hang your bunting!
Check out this past blog for more ideas on Fall Decorating with these great fabrics.