Puppy Coin Purse
30th Dec 2021
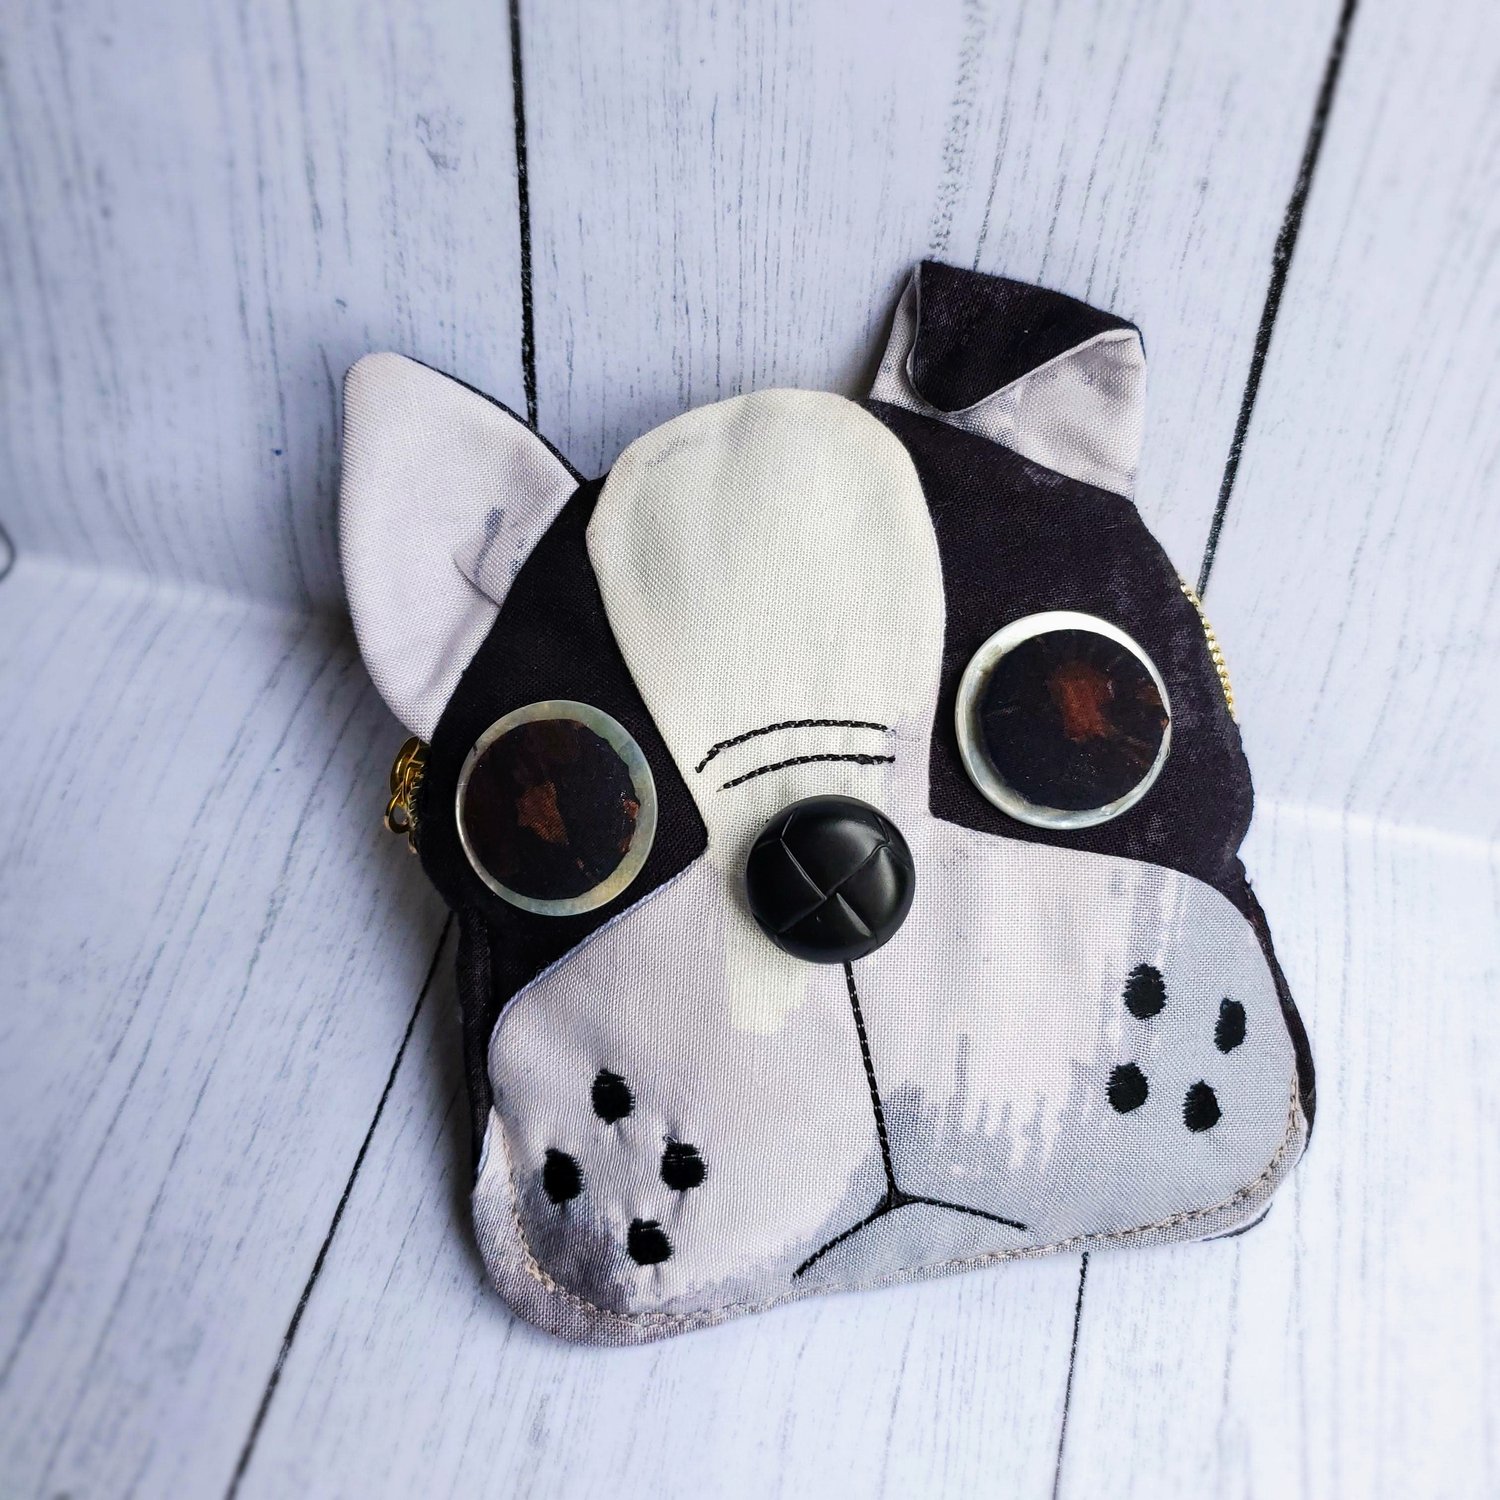
Many quilters, including myself, enjoy the companionship of a furry friend while sewing. They are always ready to play during a break or give some support when the sewing project doesn’t go as planned. My pal Reggie can often be found on his bed in the corner of my sewing room but when he is ready for some attention he will place himself between my sewing machine and the ironing board to be sure he gets a few pats. His favorite fun activity is a game of chase as he grabs a piece of fabric and runs! Nothing like a dog to keep your life balanced between work and play! For the pet lovers out there I found this adorable puppy pattern for a small coin purse free from Craft Passion. There are several variations of the pattern for different animals.

Materials needed:
Fat Quarter I used Giucy Giuce Inferno Ombré fabric from Adover
Pellon Fusible fleece interfacing
Assorted buttons for eyes and nose
7” zipper
Coordinating Aurifil thread from Chroma Membership
Template Pattern from Craft Passion
Pellon shape flex 101 fusible interfacing
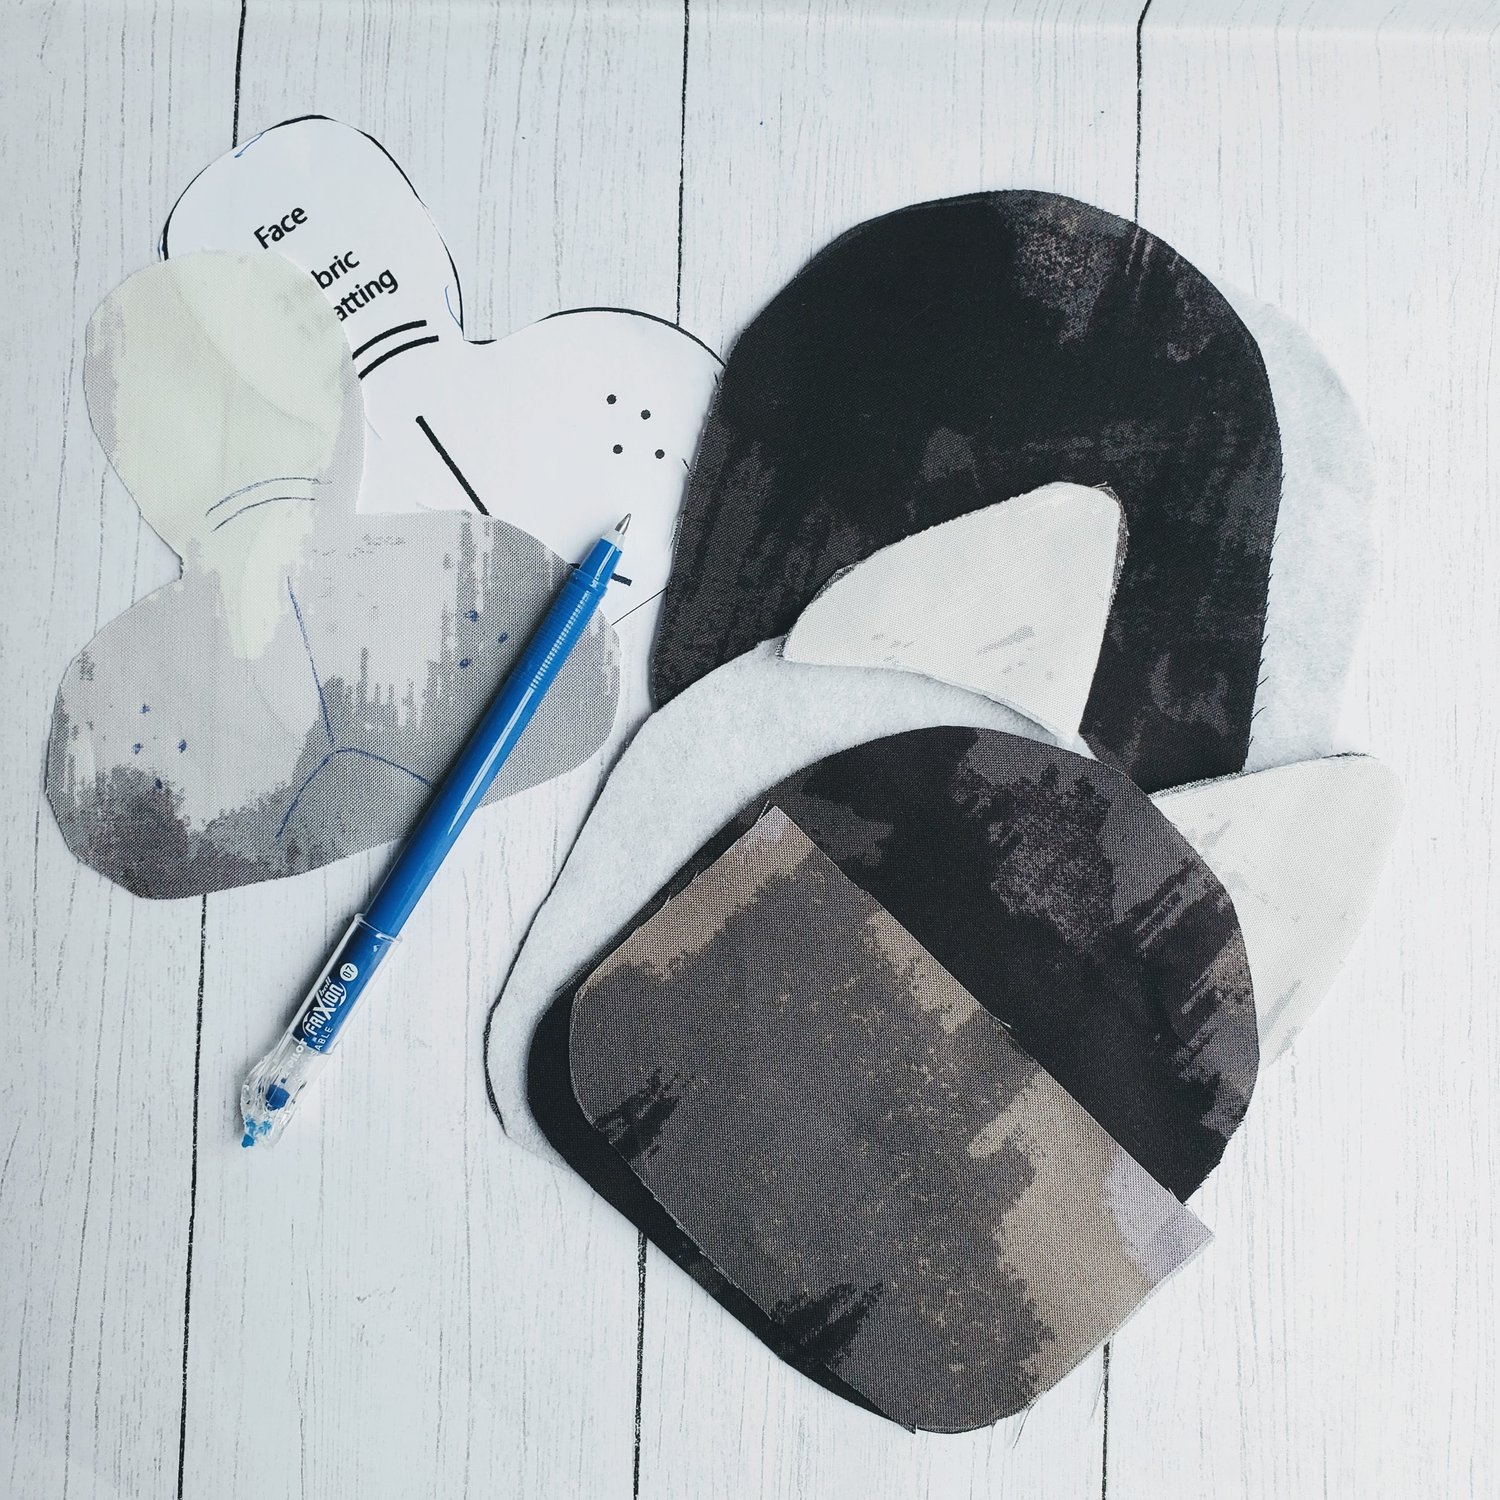
To get started I printed out the template and then made a copy at 157% to enlarge the pattern and include ¼” the seam allowance. This gave me a finished coin purse measuring about 5” square. The original pattern will make a 3 ½” square coin purse. This pattern could even be enlarged to make a cross body purse by adding a strap.
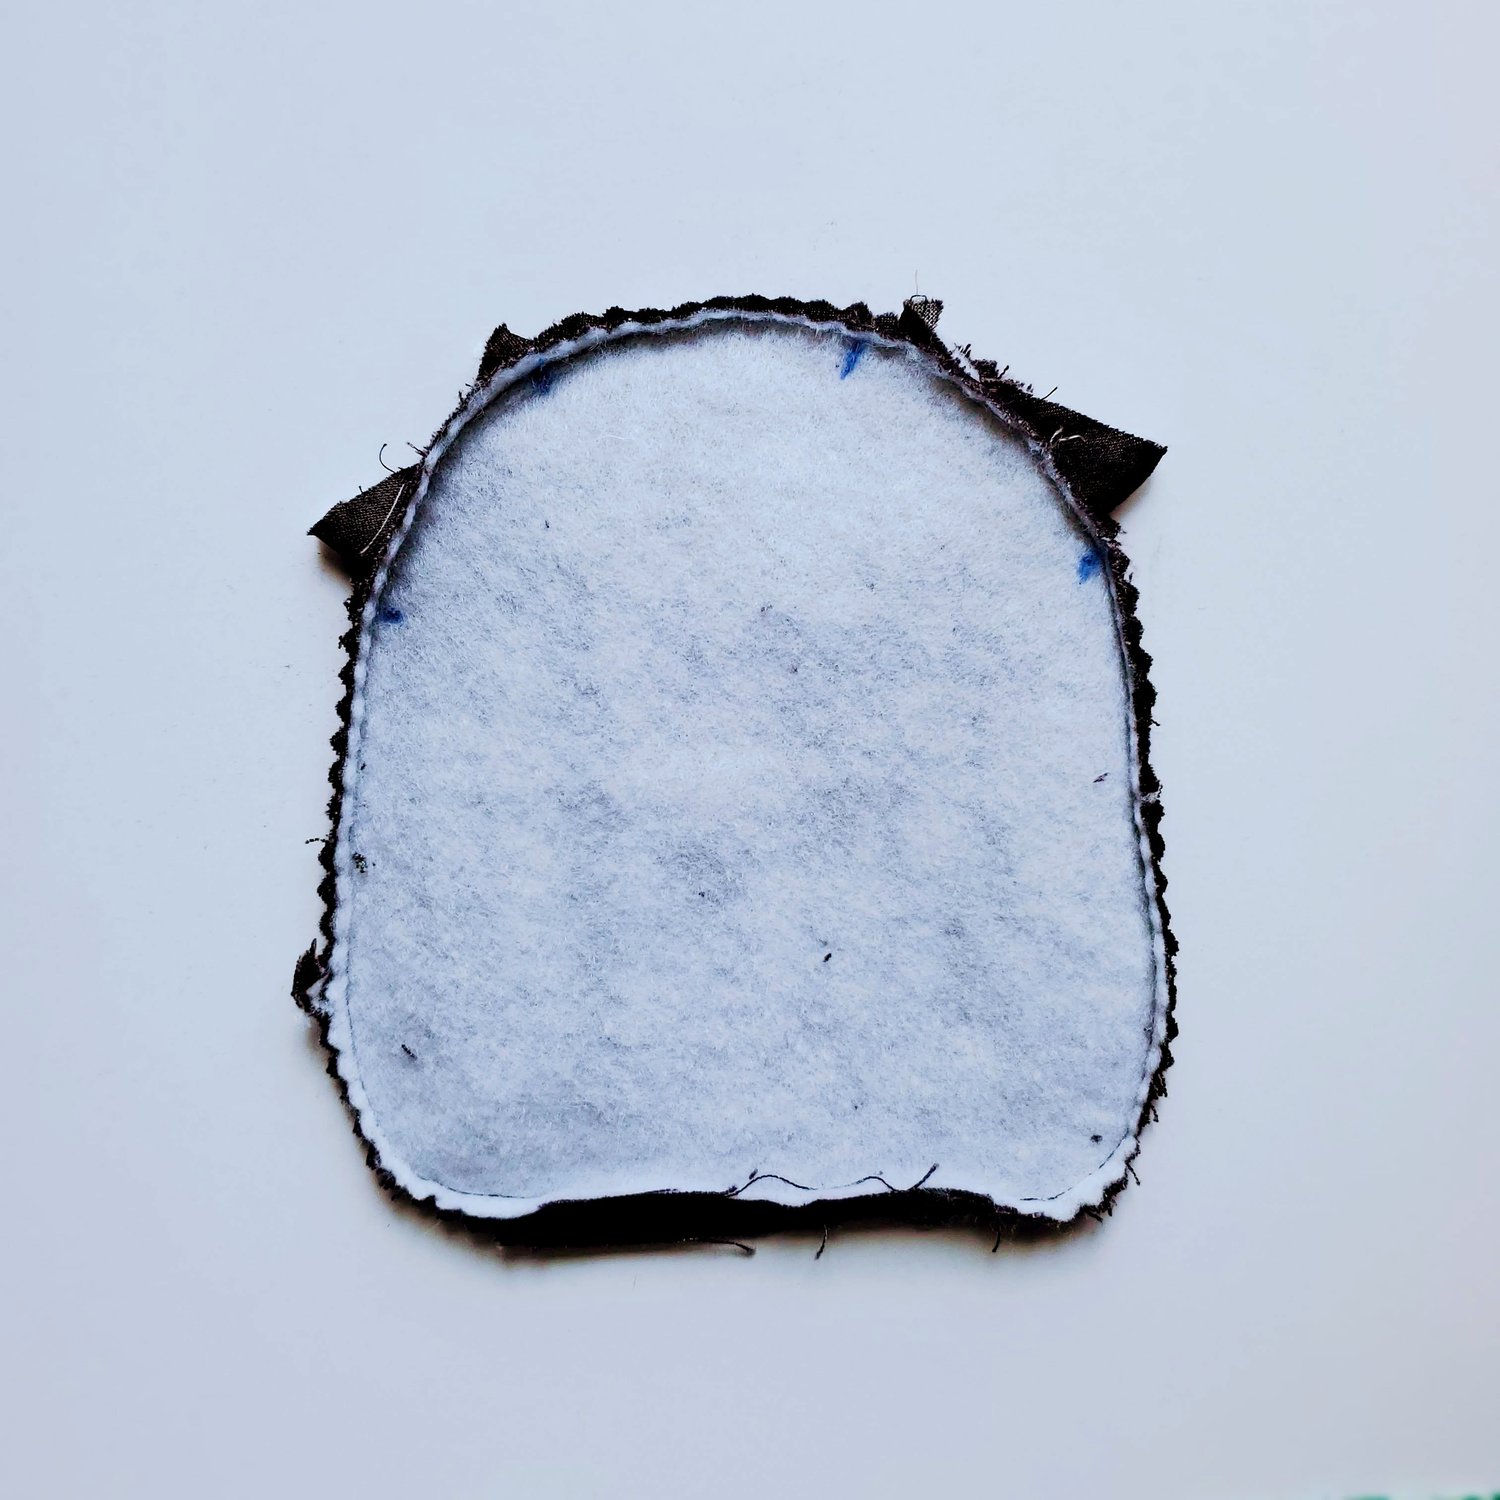
I cut out the fabric with the pattern pieces according to the instructions on the template. Fuse the Pellon fusible fleece to the appropriate pieces. For the back side of the center face fabric I used a scrap of Pellon Shape Flex 101 fusible interfacing. I used a Frixion pen to transfer the markings onto the fabric piece.
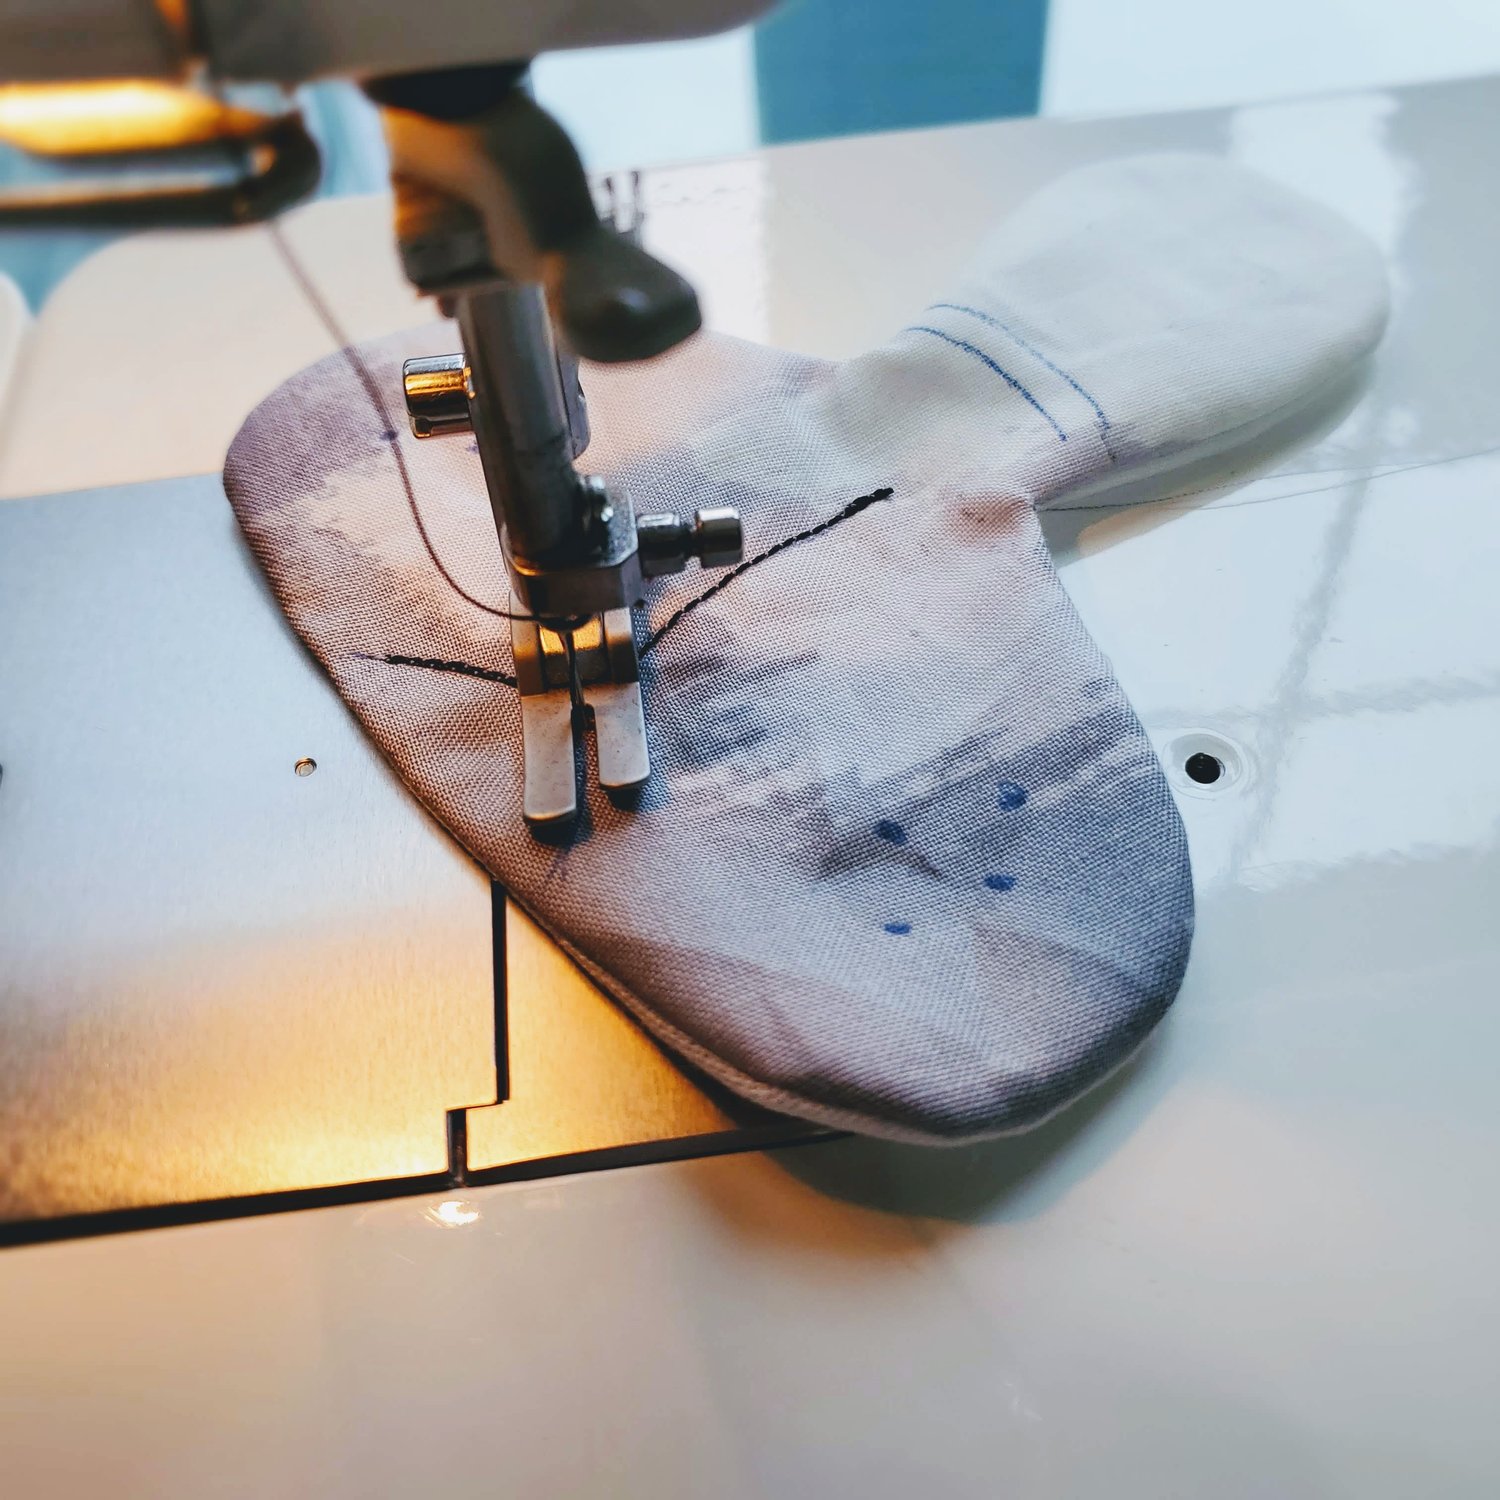
Take the face fabric piece and the Pellon 101 shape flex and place right sides together (fusible glue side being the right side)sewing ¼” around the face. It is helpful to trim the curves with pinking shears. In the middle of the back cut about a 1” opening to turn the piece. Turn right sides out. Finger press the seams.

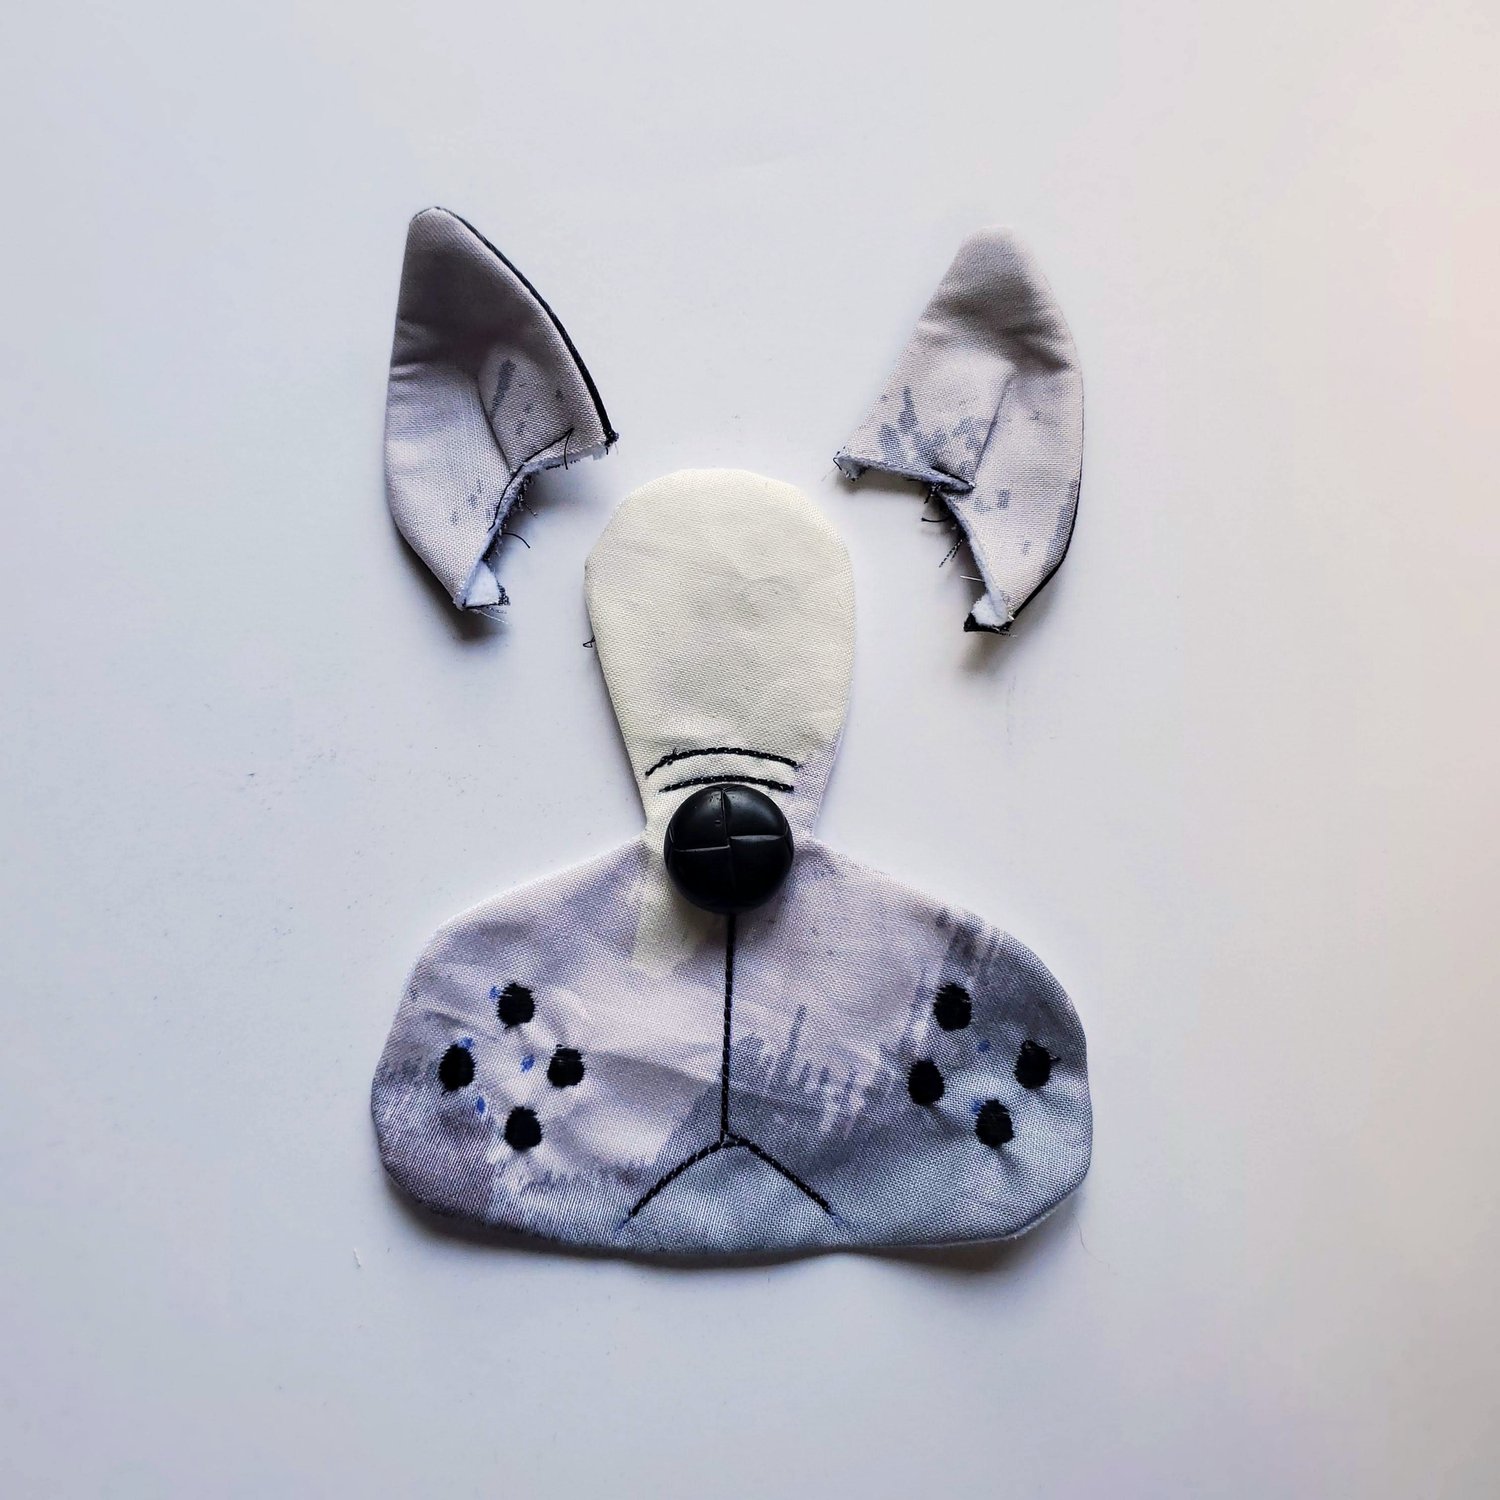
I used a 40 wt black thread to create the mouth and nose sewing over the lines twice to be sure it shows up nicely. I used a circle shaped decorative stitch for the whiskers instead of the suggested French knots.
Next sew the ears with right sides together leaving the bottom edge open. Trim the curves and turn the right sides out. Press. I decided to baste a small pleat in the center of each ear to give it some added interest. Audition a few buttons for the nose and eyes.
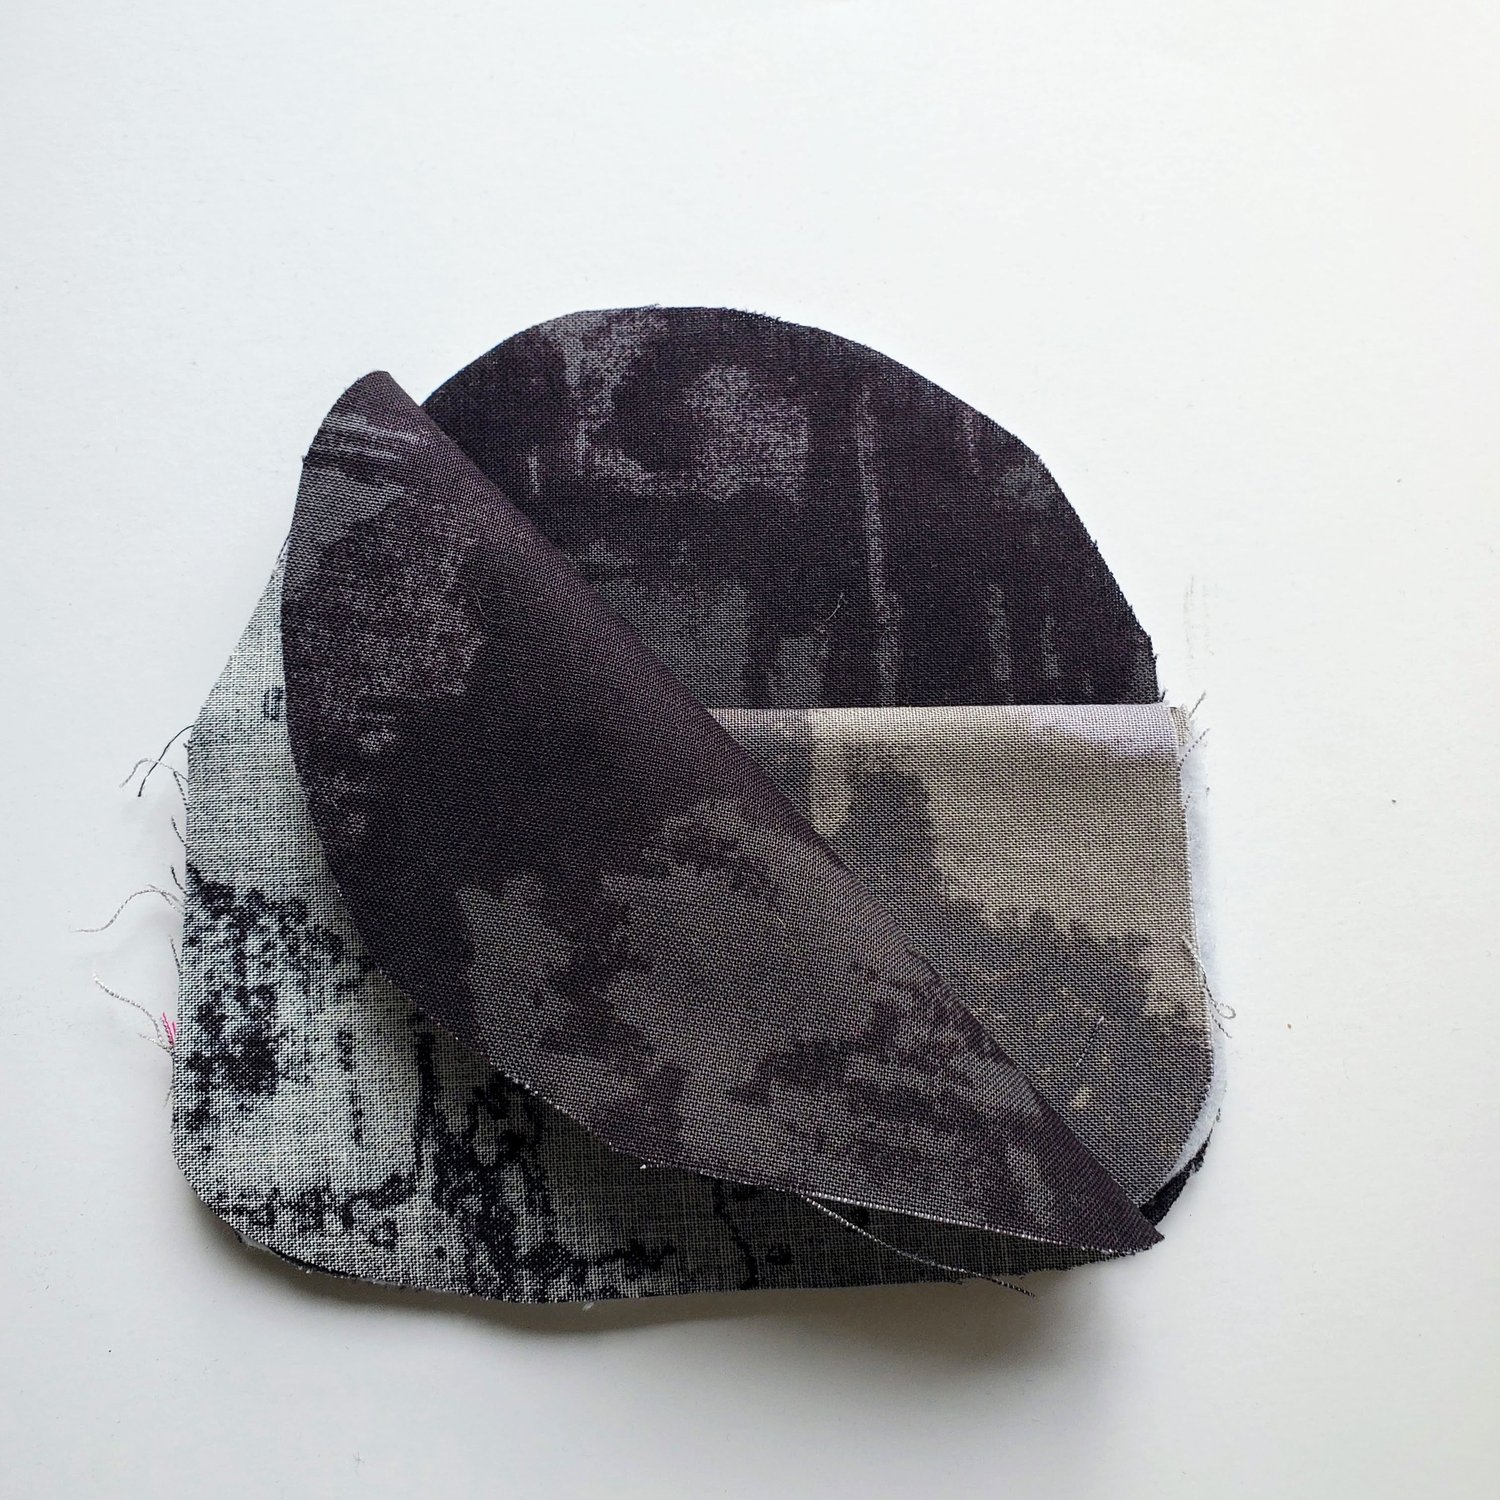
Prepare the main section with the right sides together. Place ears between the layers as indicated on the template. Sew around the shape leaving about a 2” opening at the bottom to turn the piece.Trim the curves with pinking shears.
Turn right sides out and press. Align the face along the bottom edge of the main piece and press in place. By using the Pellon shape flex fusible interfacing on the backside it is an easy way to fuse the face without topstitching.
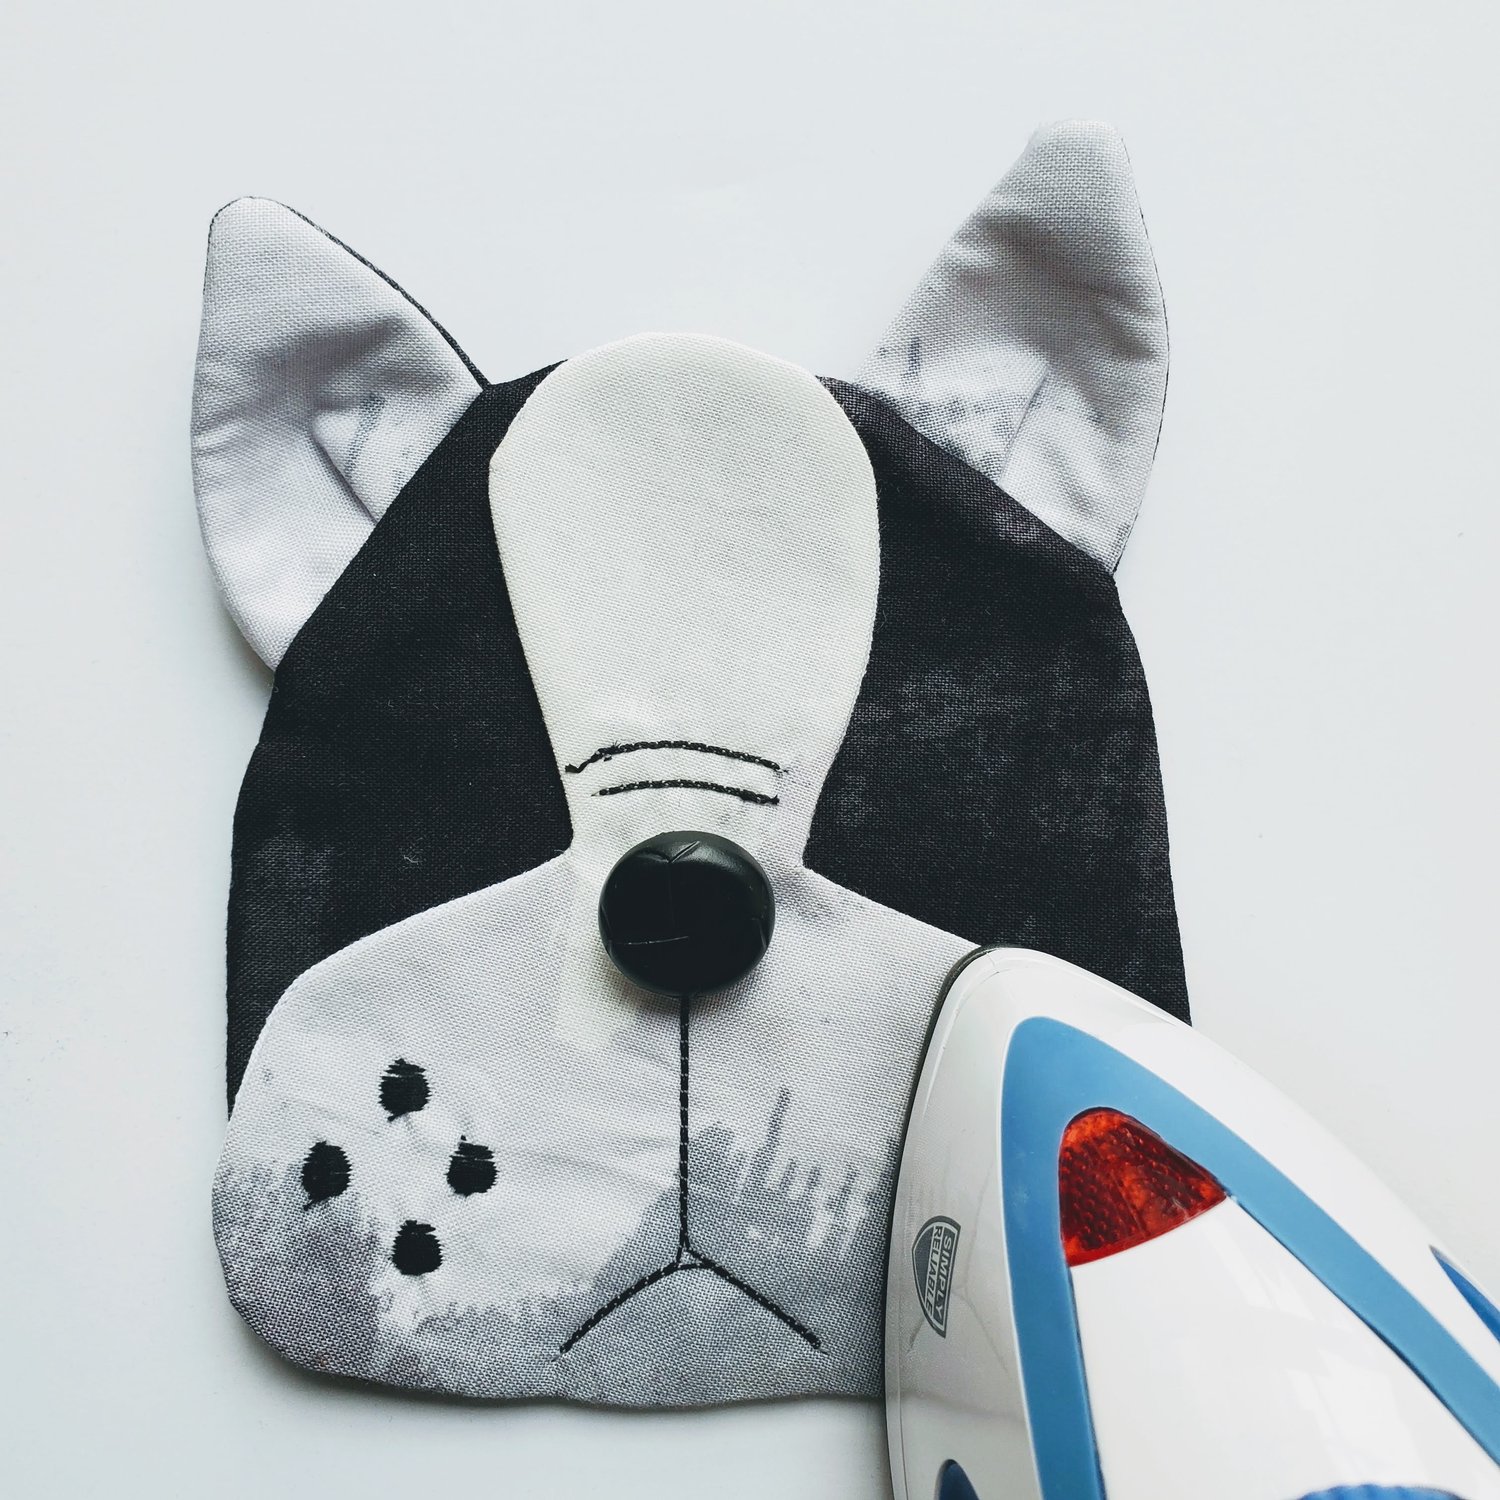
Sew the button nose in place. I used a fine point black Sharpie to fill in the white spaces between the threads and added a drop of fray check to secure the threads.
Prepare the back pocket and press along the top edge. Layer between the back main pieces aligning the bottom edge. Sew around the edges leaving a 2” opening to turn.
Trim the curves with pinking shears. Turn right sides out and press. I added a plastic snap in the middle of the pocket. I often use zippers by the yard in my projects. It is more economical but the edges are not finished. To finish the zipper edges I cut two pieces of matching fabric 2” square. Fold the opposite edges and fold in half over the raw edge of the zipper and topstitch in place. Repeat on the other side. Transfer the markings for the zipper placement from the template. You are now ready to hand sew the zipper in place with the zipper teeth about ⅛” from the fabric edge. Take small stitches using a matching thread to hide the stitching.
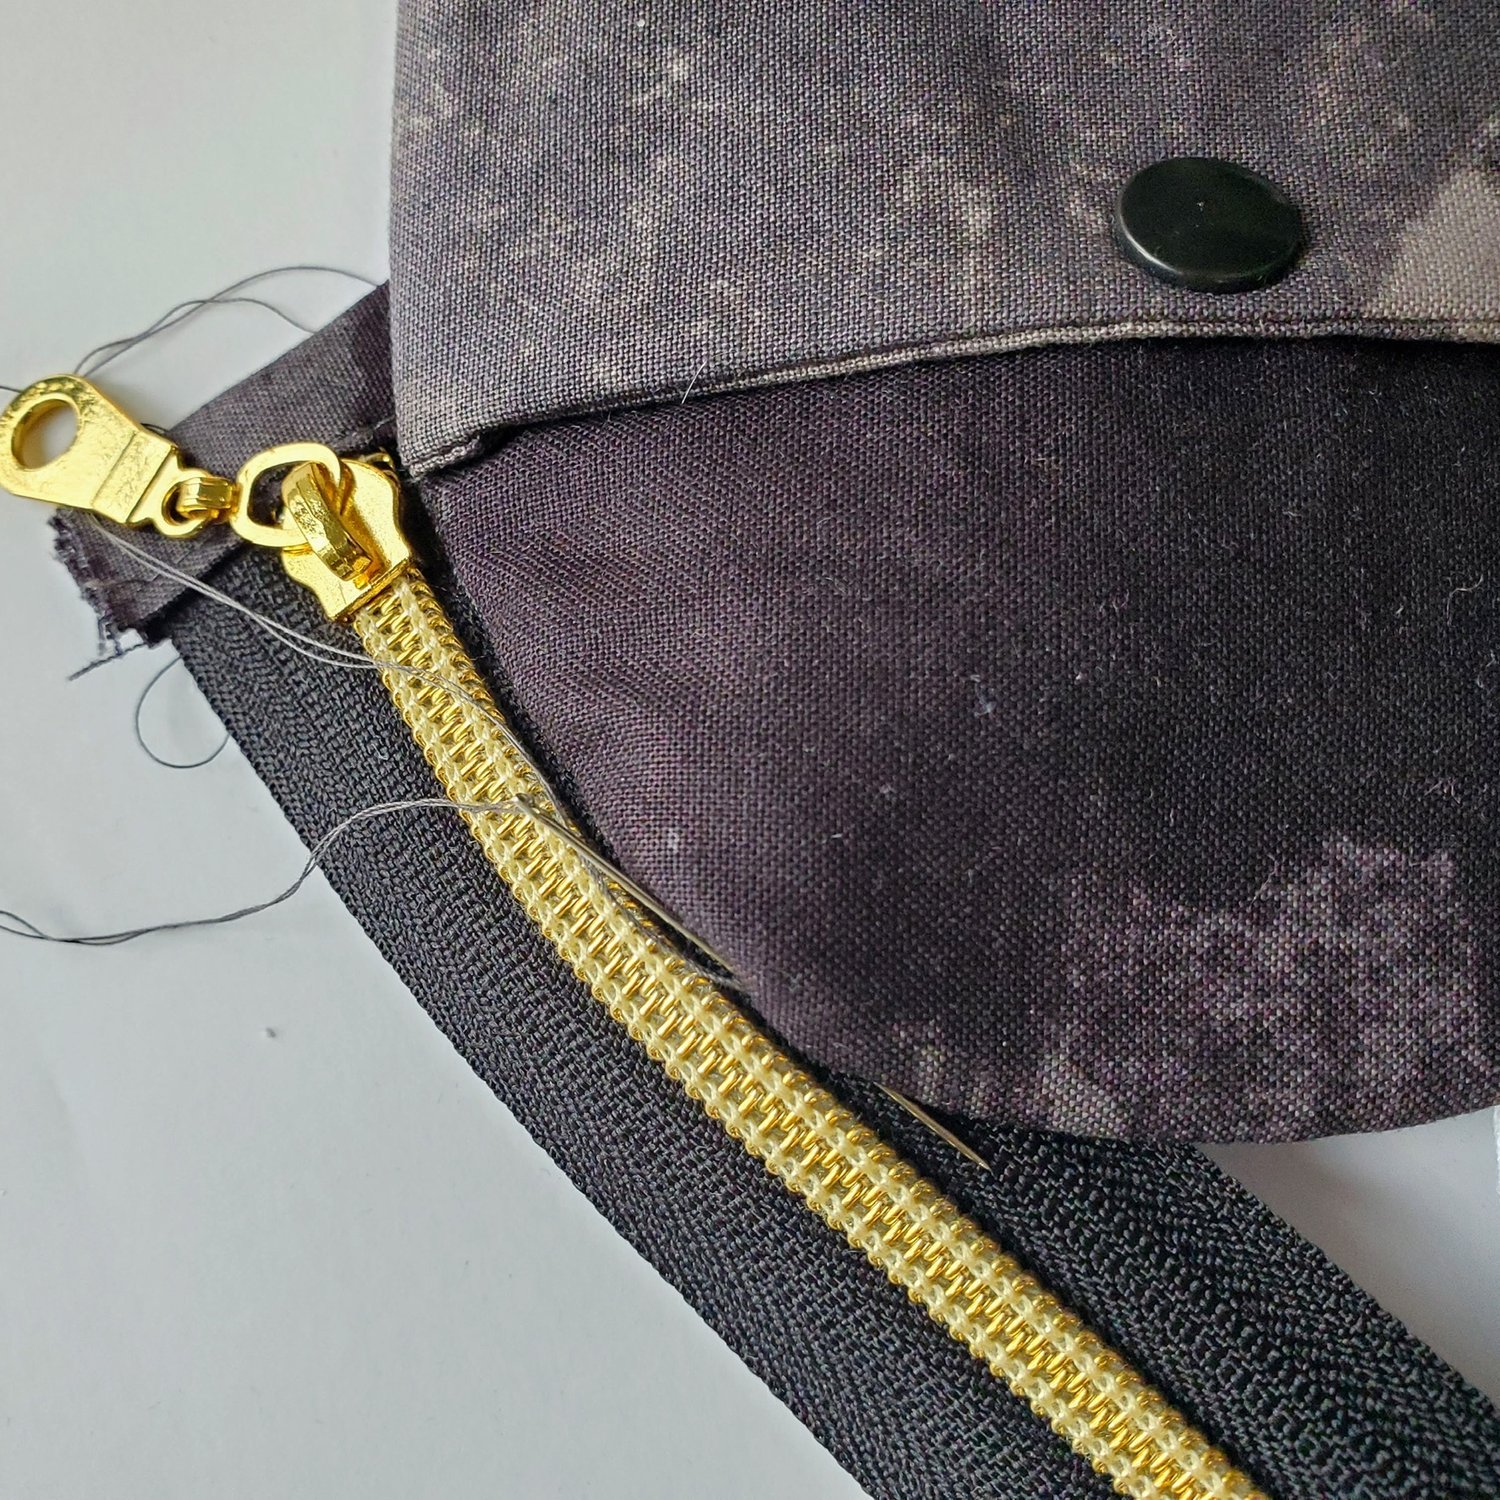
Align the front and back pieces basting in place by hand. Open the zipper and slip stitch the other side of the zipper to the front side of the coin purse. Topstitch the bottom edge of the face with matching thread sewing the front to the back from one edge of the zipper around the bottom to the other edge of the zipper taking care to stitch the openings closed along the bottom edge. Add the button eyes and give it a final press.
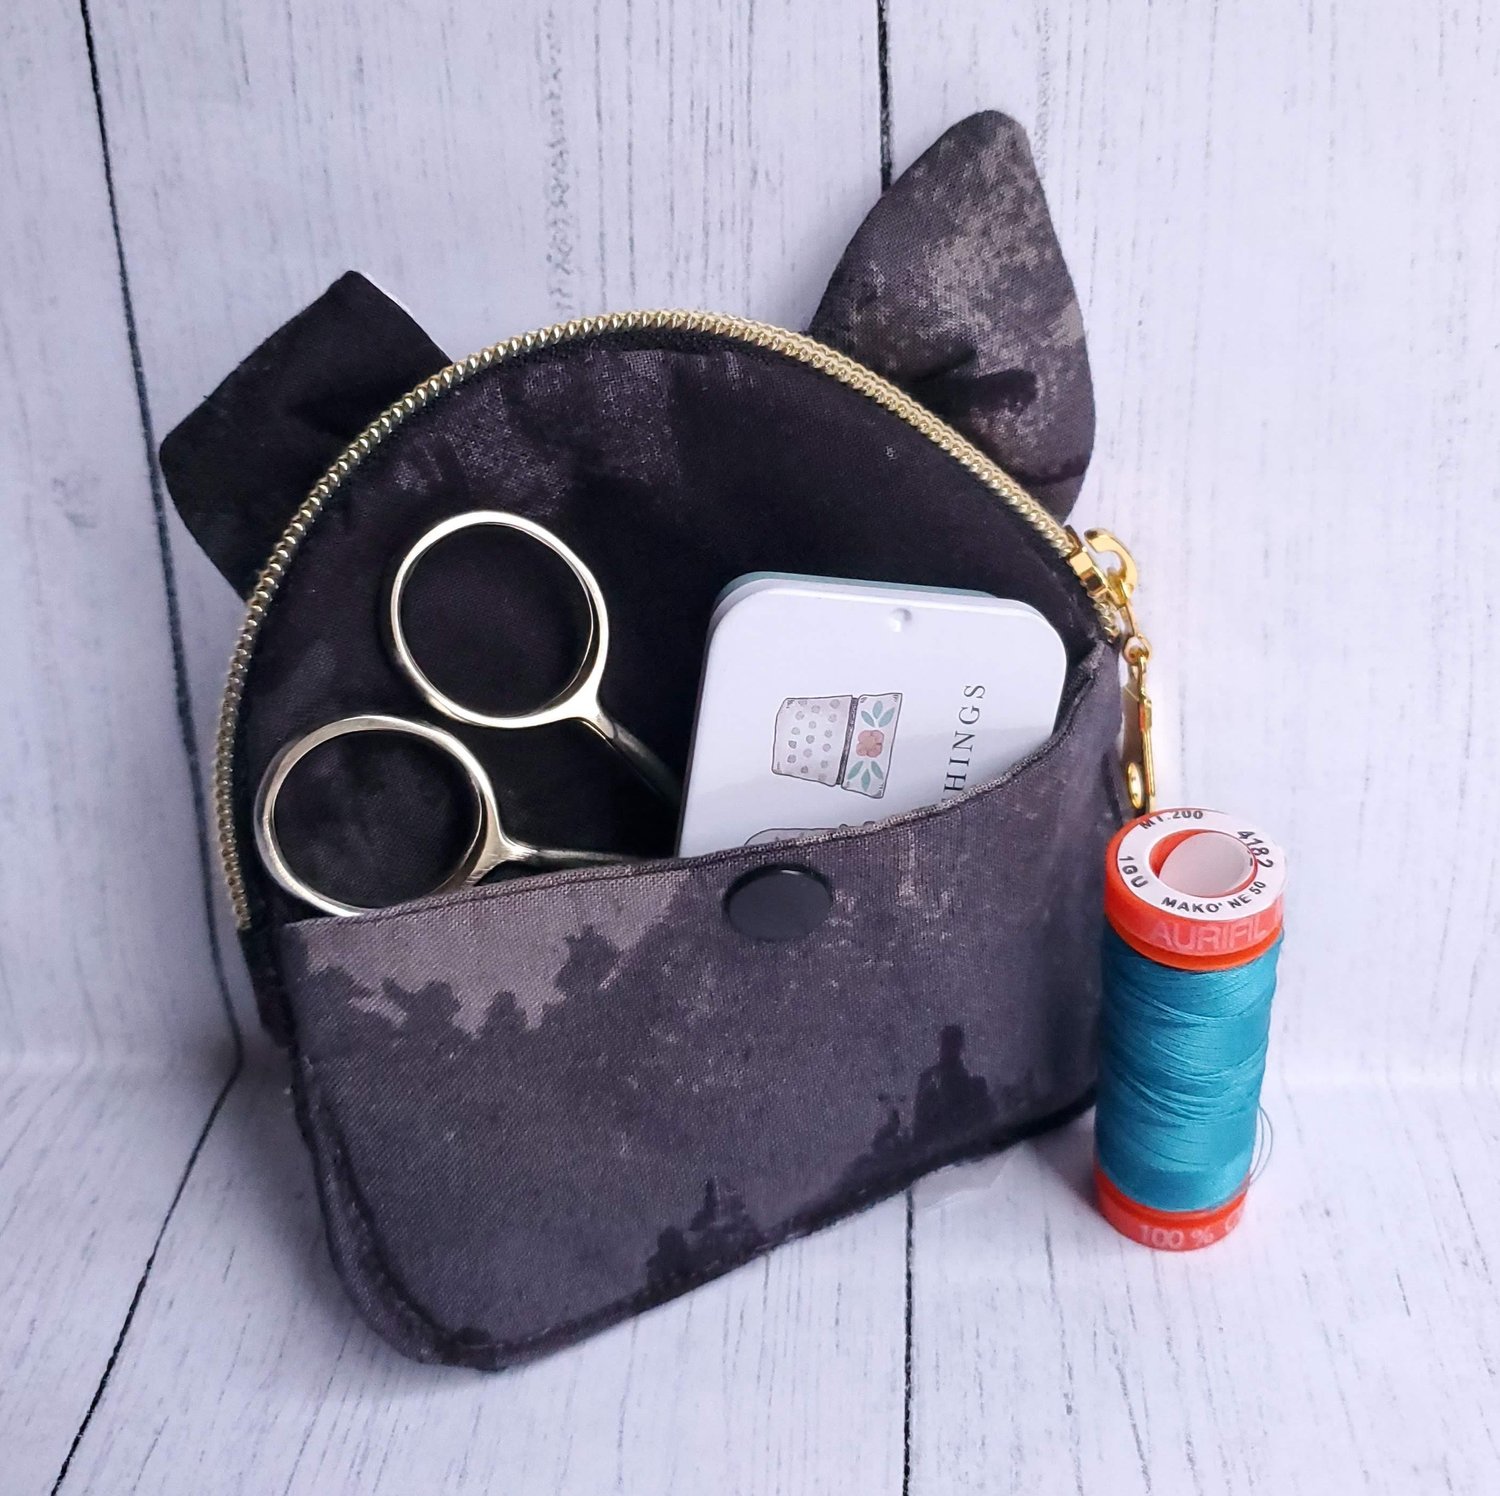
This is the perfect size to carry a few supplies for a hand sewing project like embroidery, cross stitch or paper piecing.
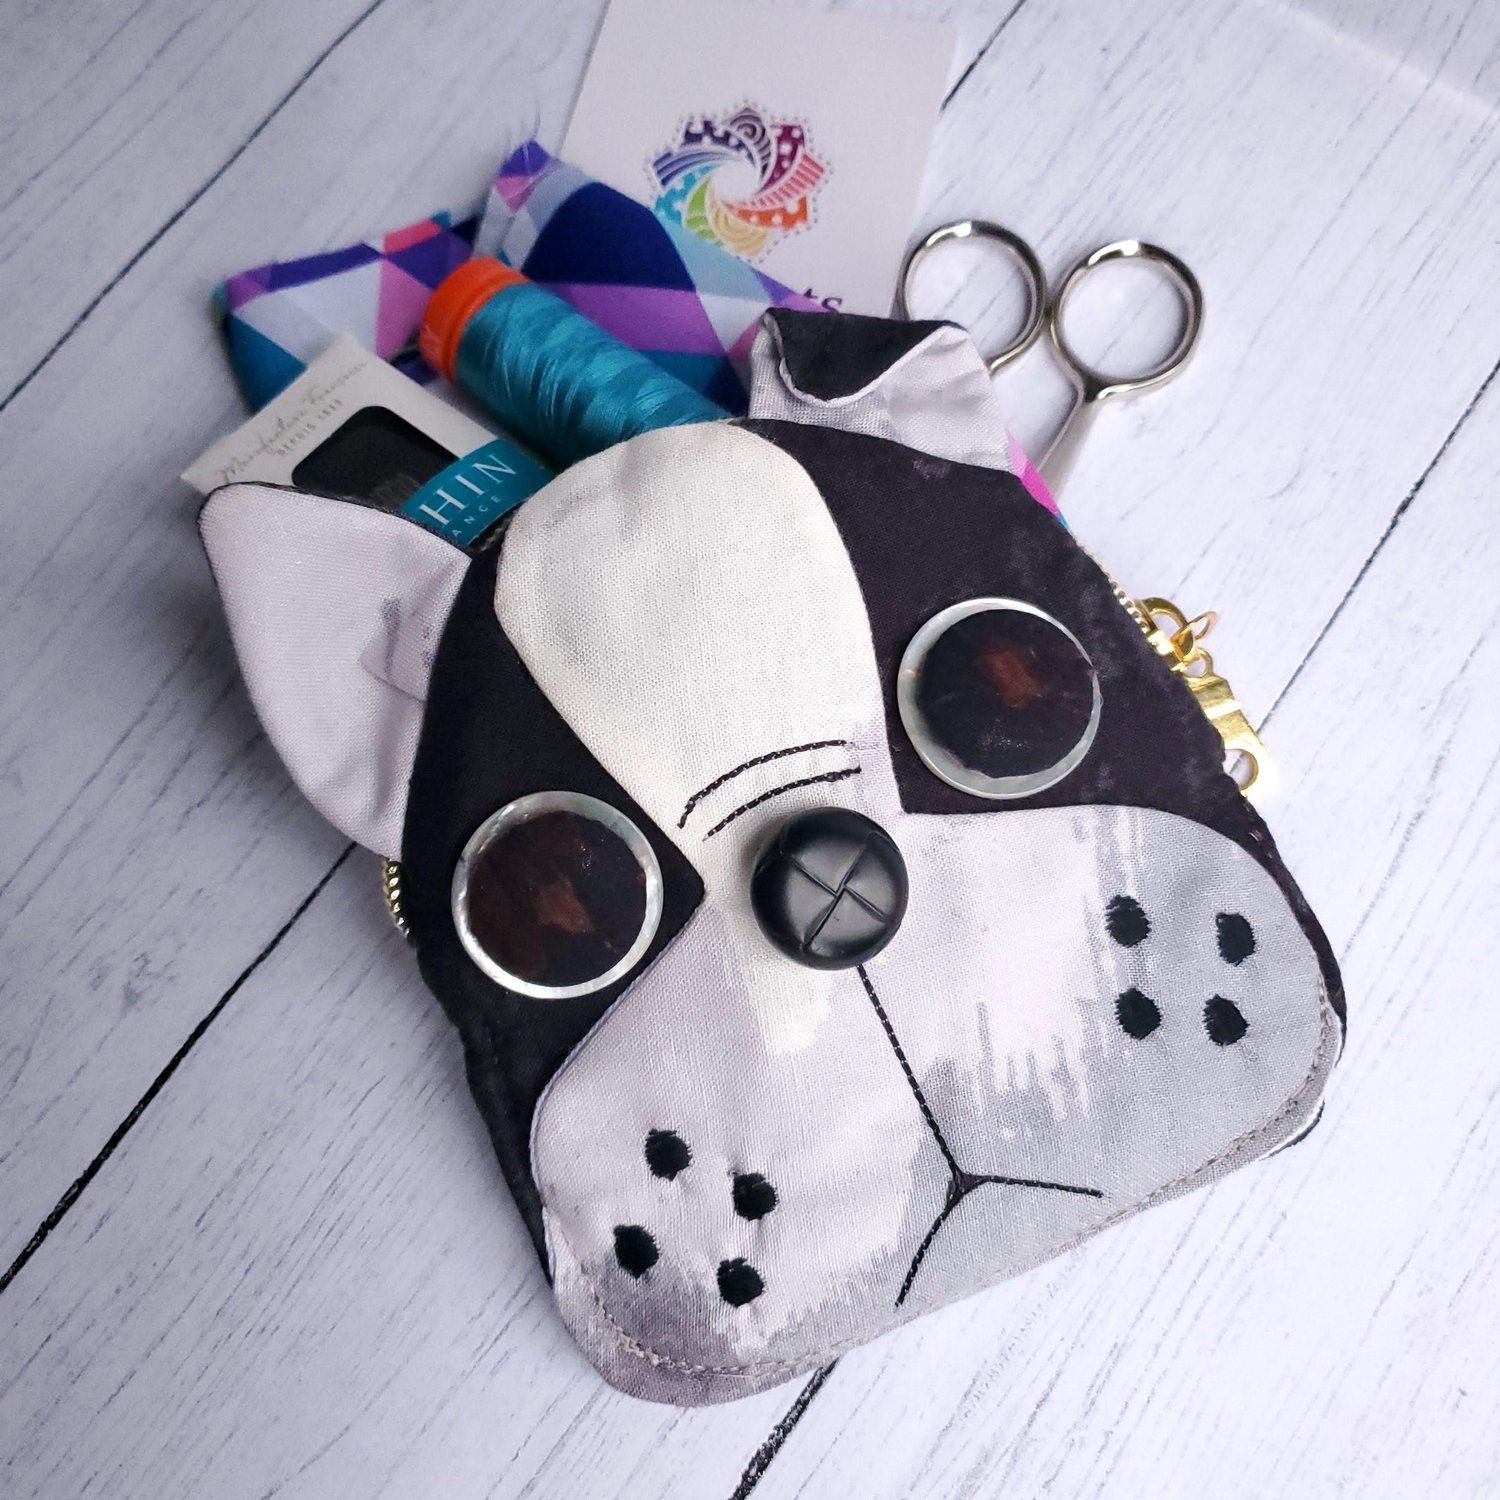
The back pocket is the right size to carry a credit card or your ID and some cash and it is easy to stash in your bag to do some sewing when you have time.