Playful Pet
10th Feb 2022
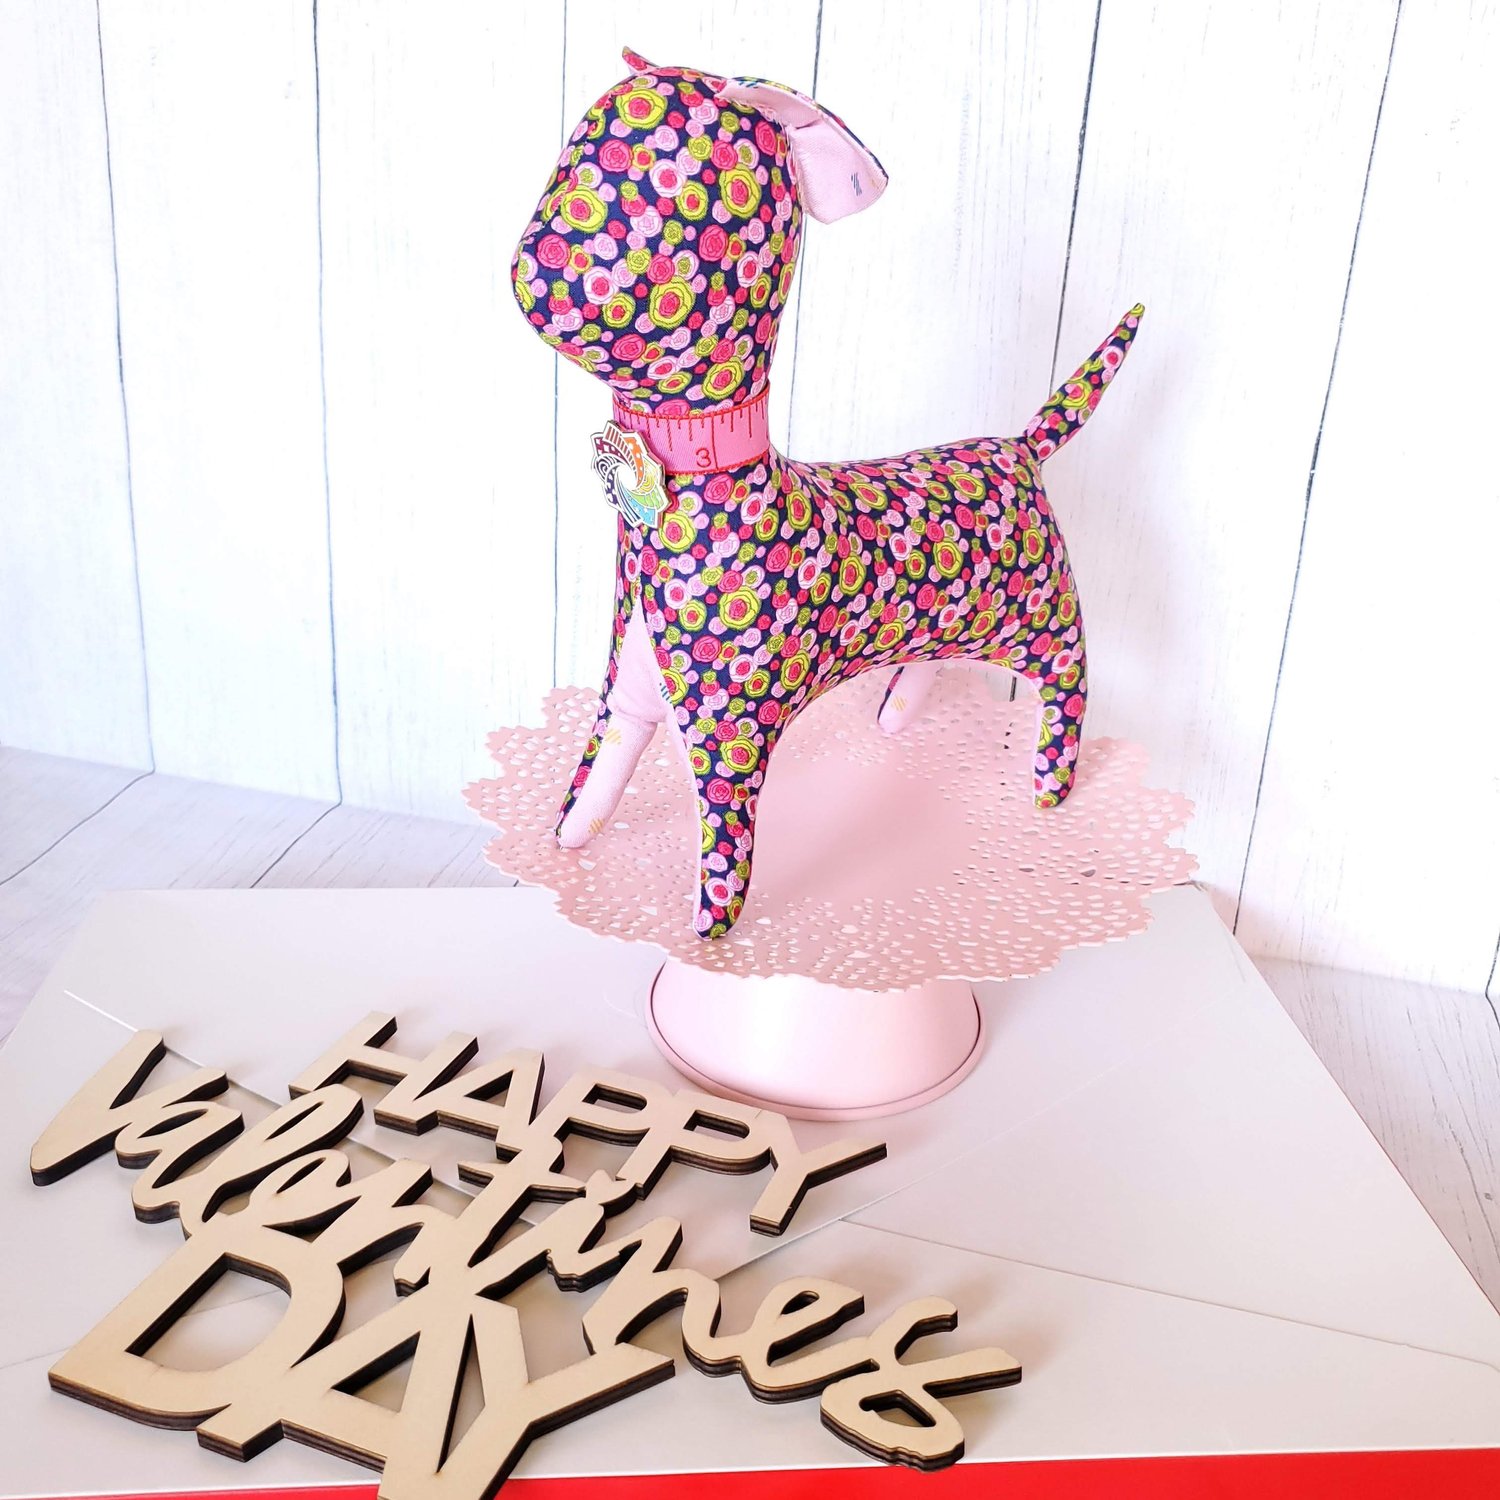
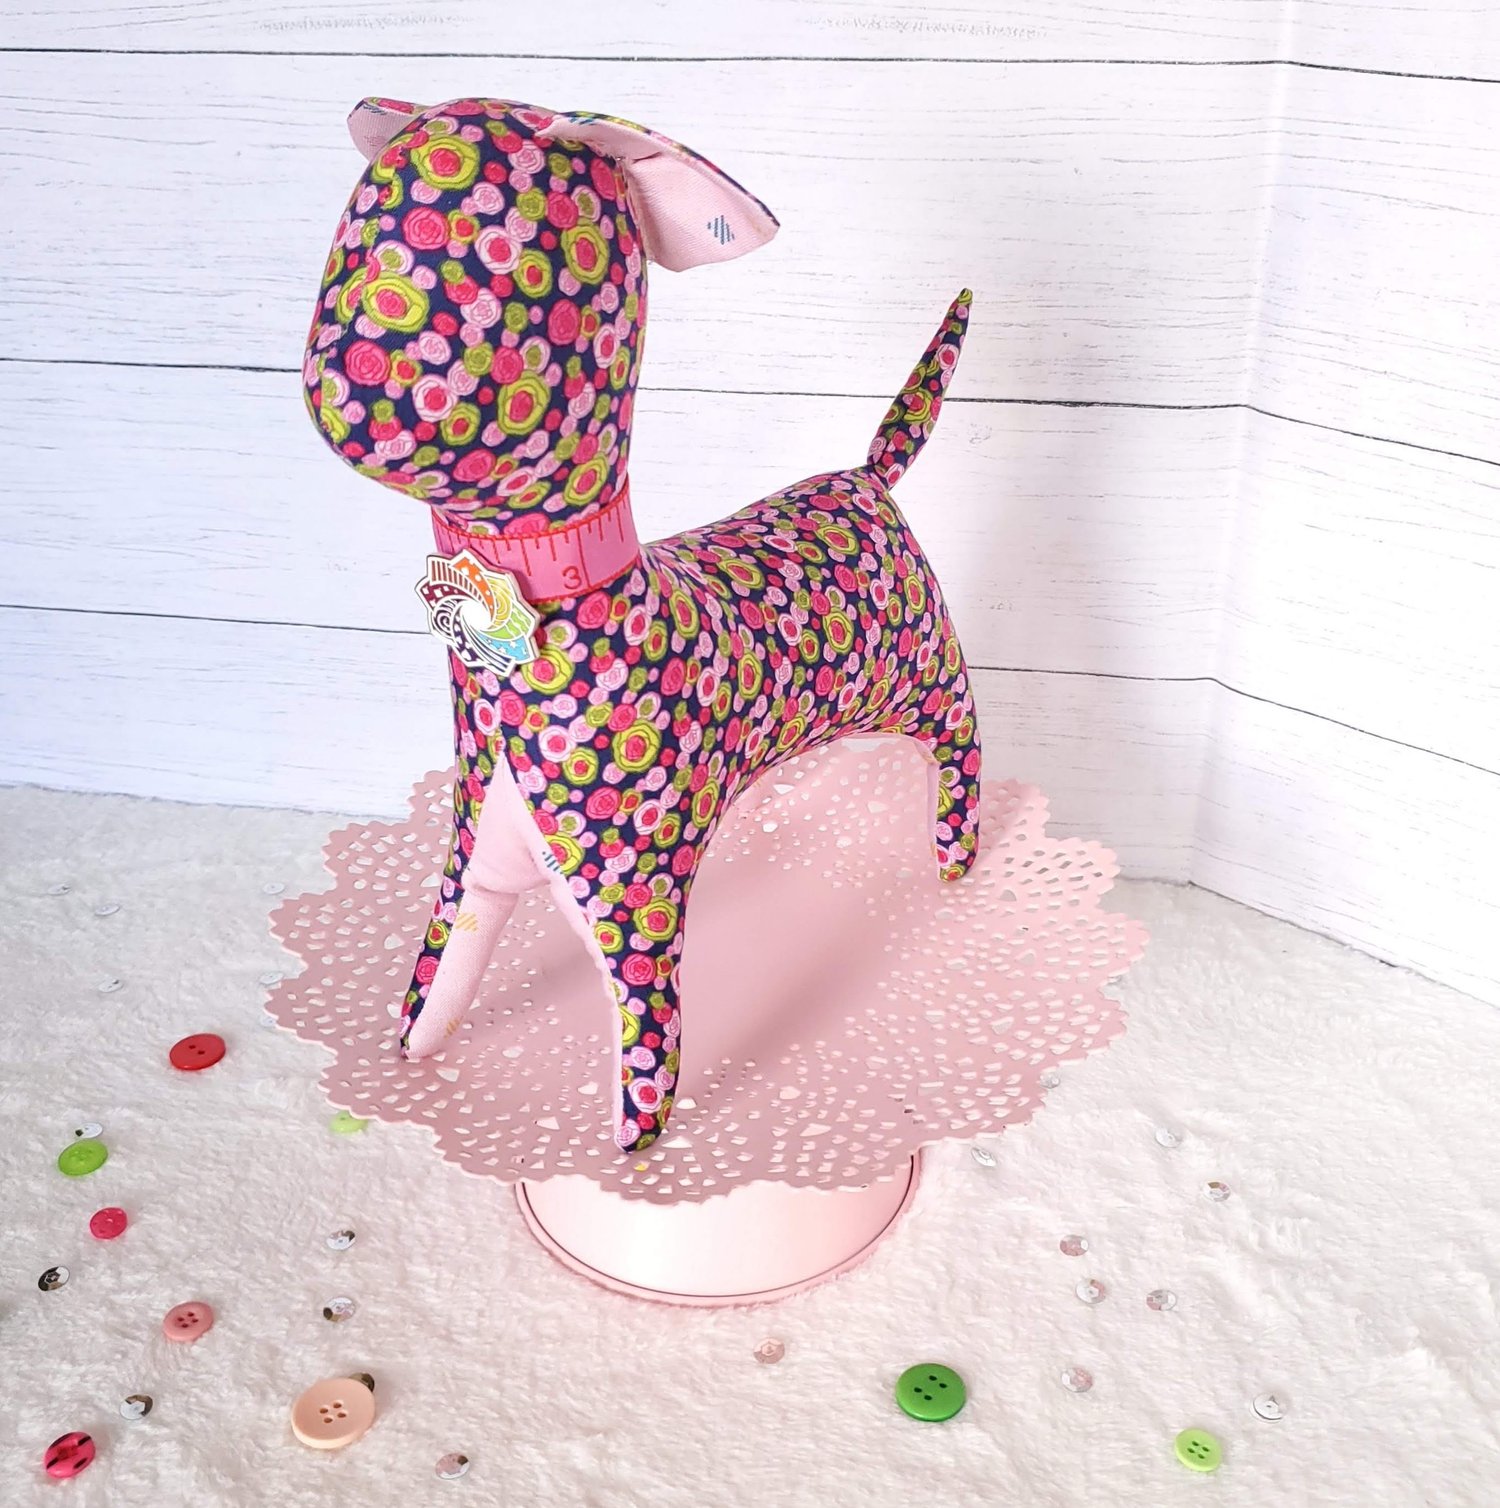
The special bond quilters share with their pets is evident with a quick scroll through Instagram. Everyday quilters share the silly antics of their pets as they entertain us while providing us with their constant companionship. This adorable playful pet is a great project to celebrate our love of pets! It can be a kitty or puppy, depending on the ear placement, as a fun stuffed toy or filled with walnut shells or rice to make a cute pincushion for your sewing table. Tilda’s World offers this pattern for free with many others on their website. The cheerful fabric from Clothworks line Josie Jean by Amy Reber was featured in our Classic Membership box this past year.
Materials Needed:
Main Fabric 14” x 23 ½”
Coordinating fabric 11” x 12”
Ribbon for collar 8”
Poly-Fil
Coordinating Aurifil Thread from Chroma Membership
To get started download and print the Pattern. It is important to note that the seam allowance is not included on the pattern. I carefully drew a line ¼” from the pattern before I cut out the pieces for a ¼” seam allowance. Be sure to set the stitch length to about 1.6mm. You will need the smaller stitching to keep the seams secure as you firmly stuff the pet so it can stand on its own. Pay close attention to markings on the pattern that suggest extra seam allowance like on the base of the ears. I like to starch and press my fabric before I trace the pattern and cut the pieces.
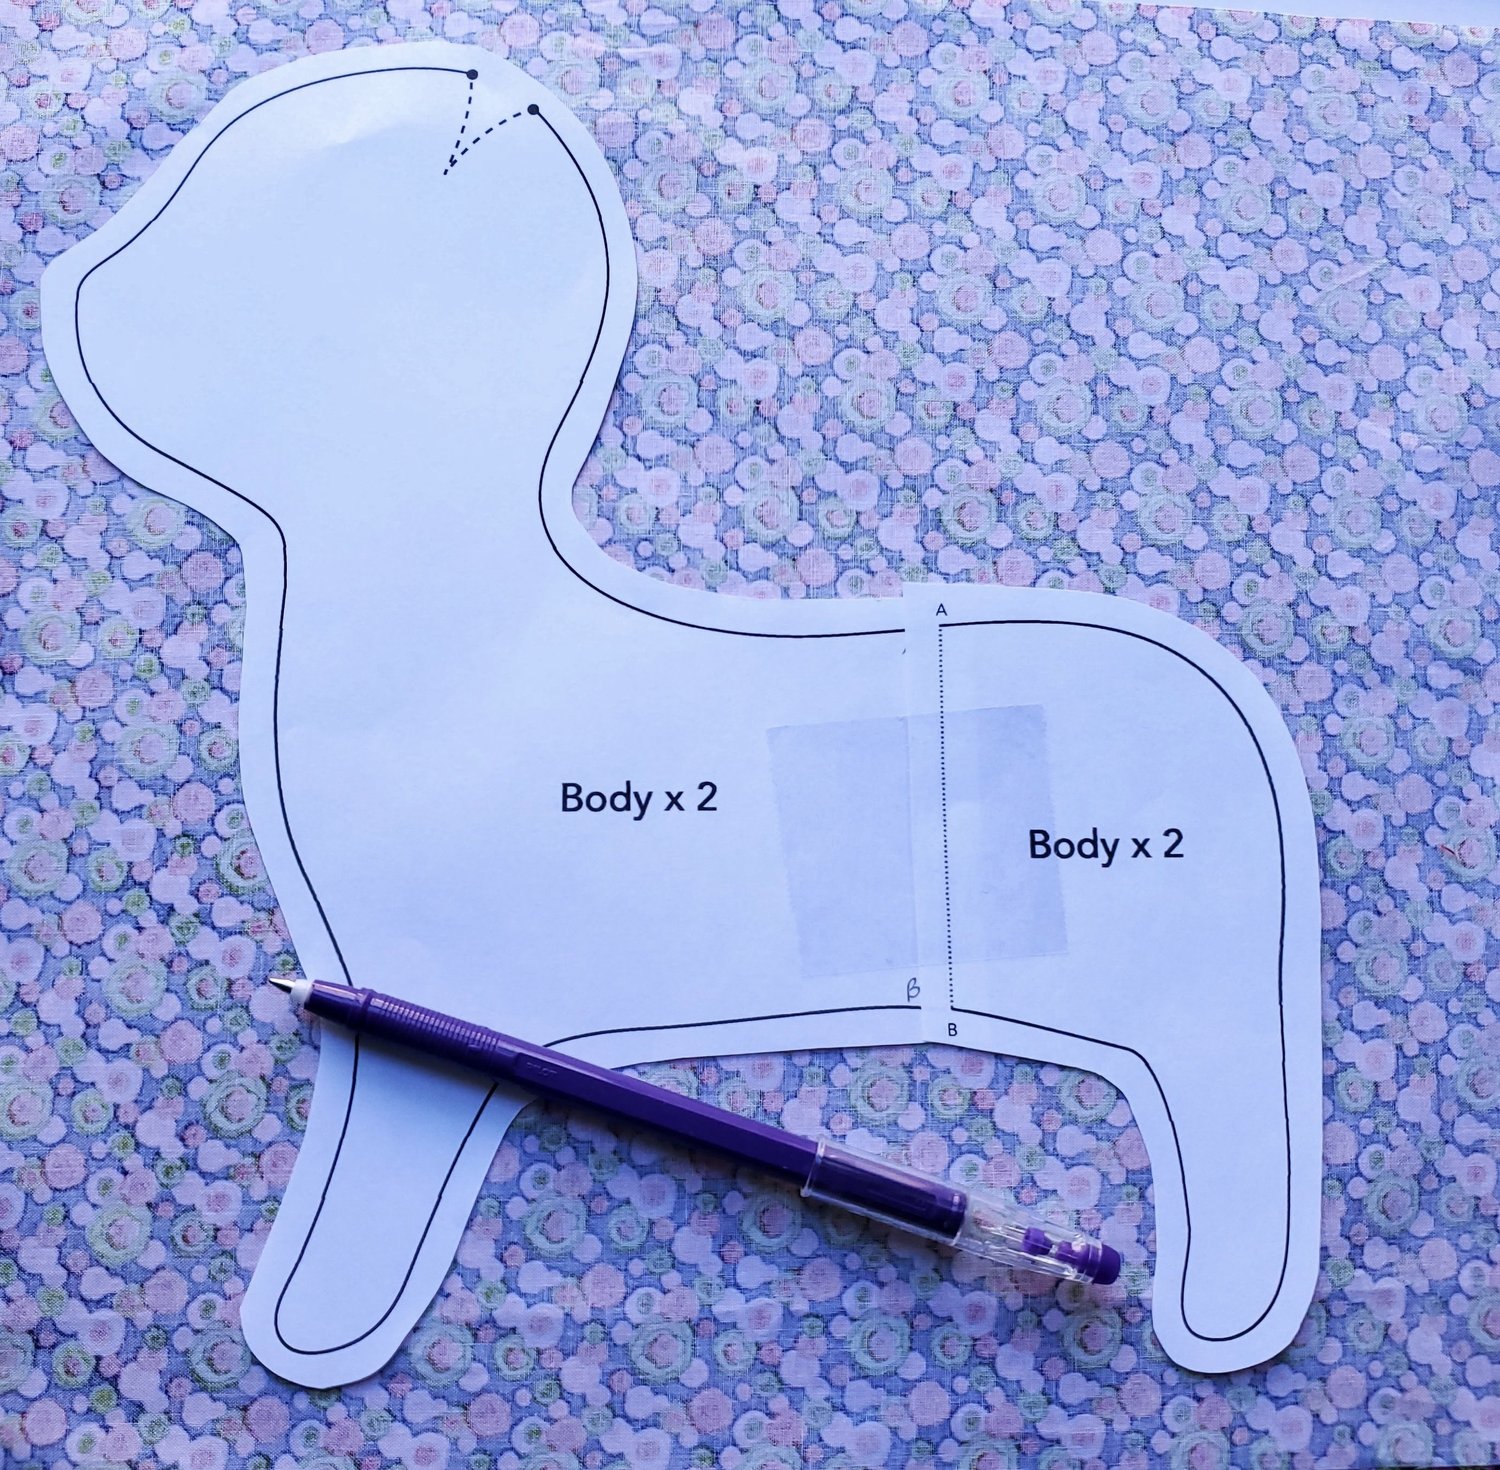
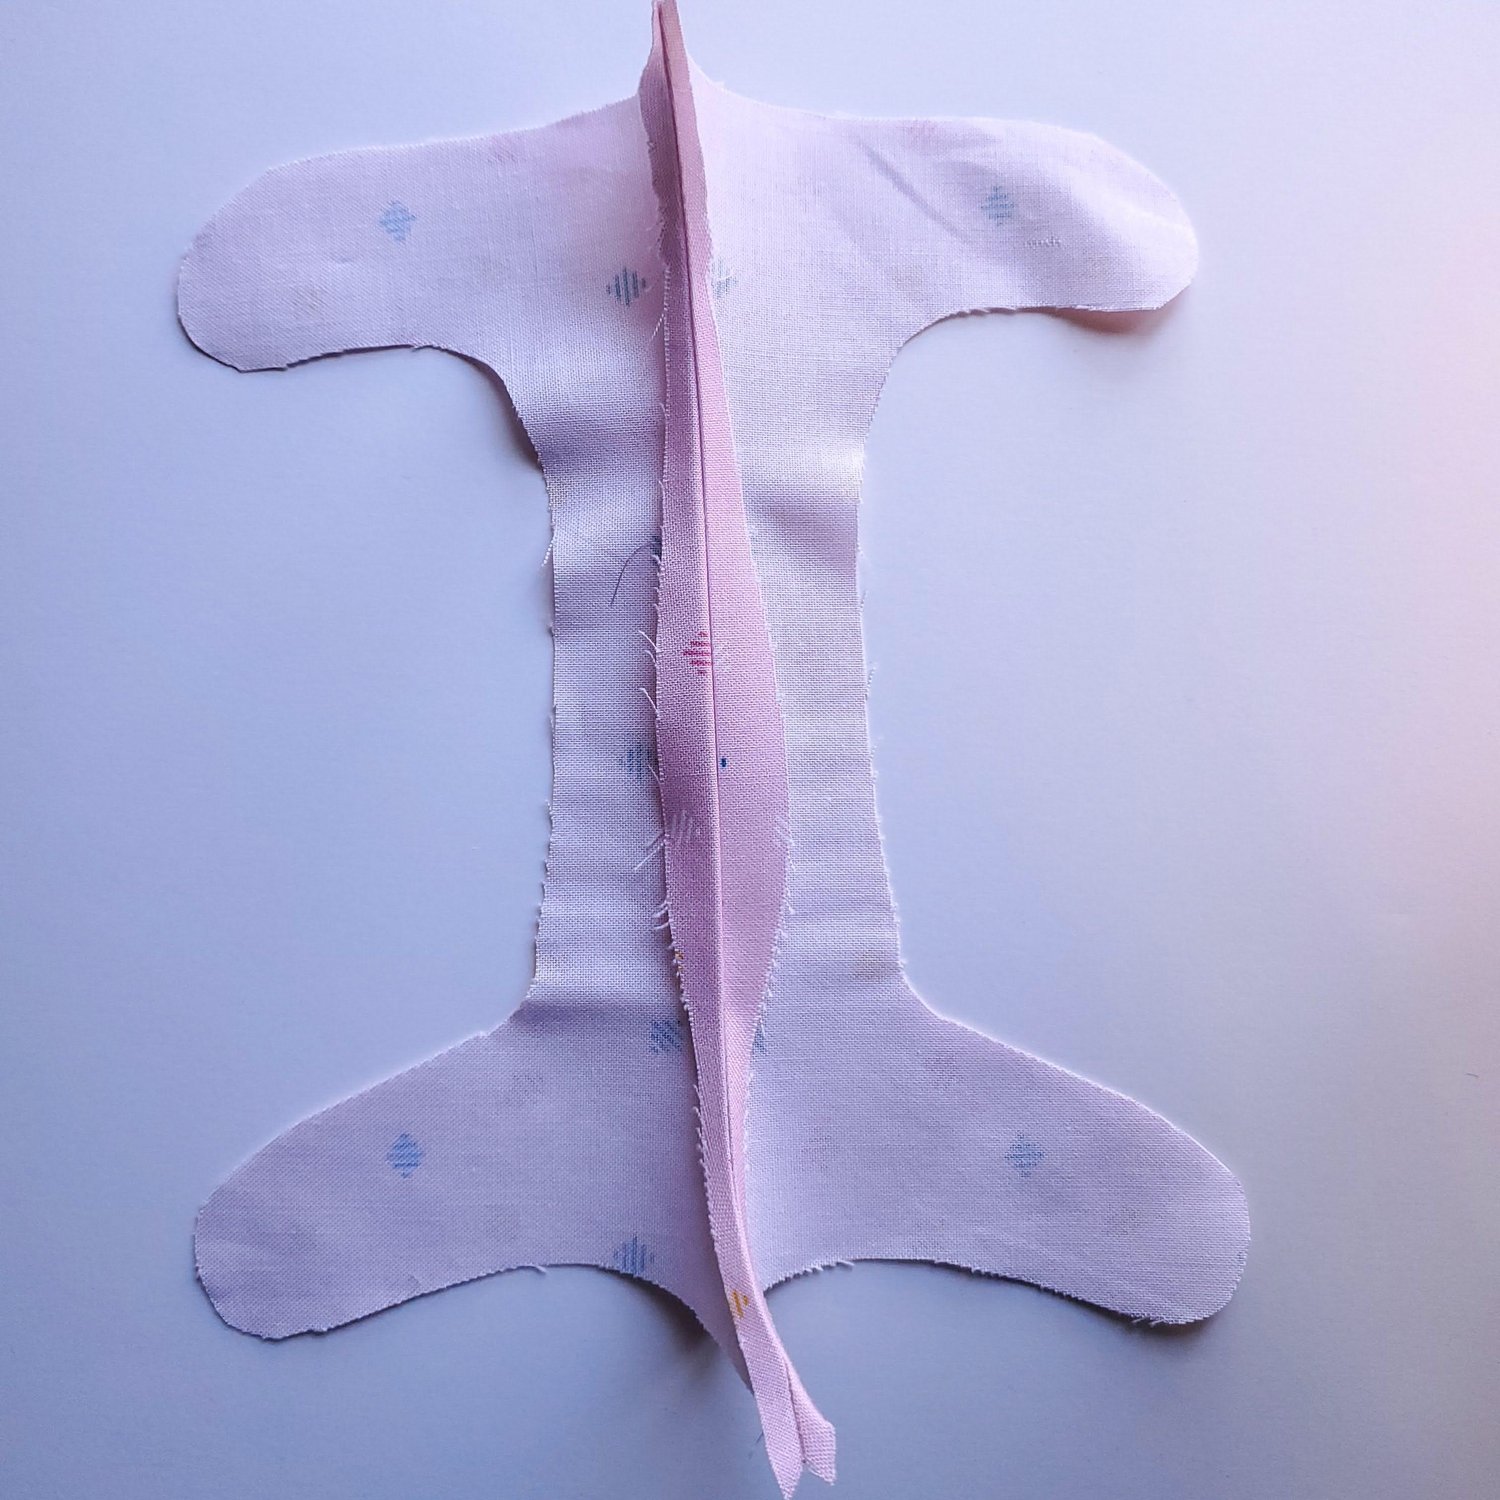
By folding the fabric with right sides together you will have two mirrored body parts. From the coordinating fabric you will want to starch, press and fold in half. Trace the underside pattern piece onto the fabric. Before cutting out the piece sew along the top line only leaving the opening as indicated.
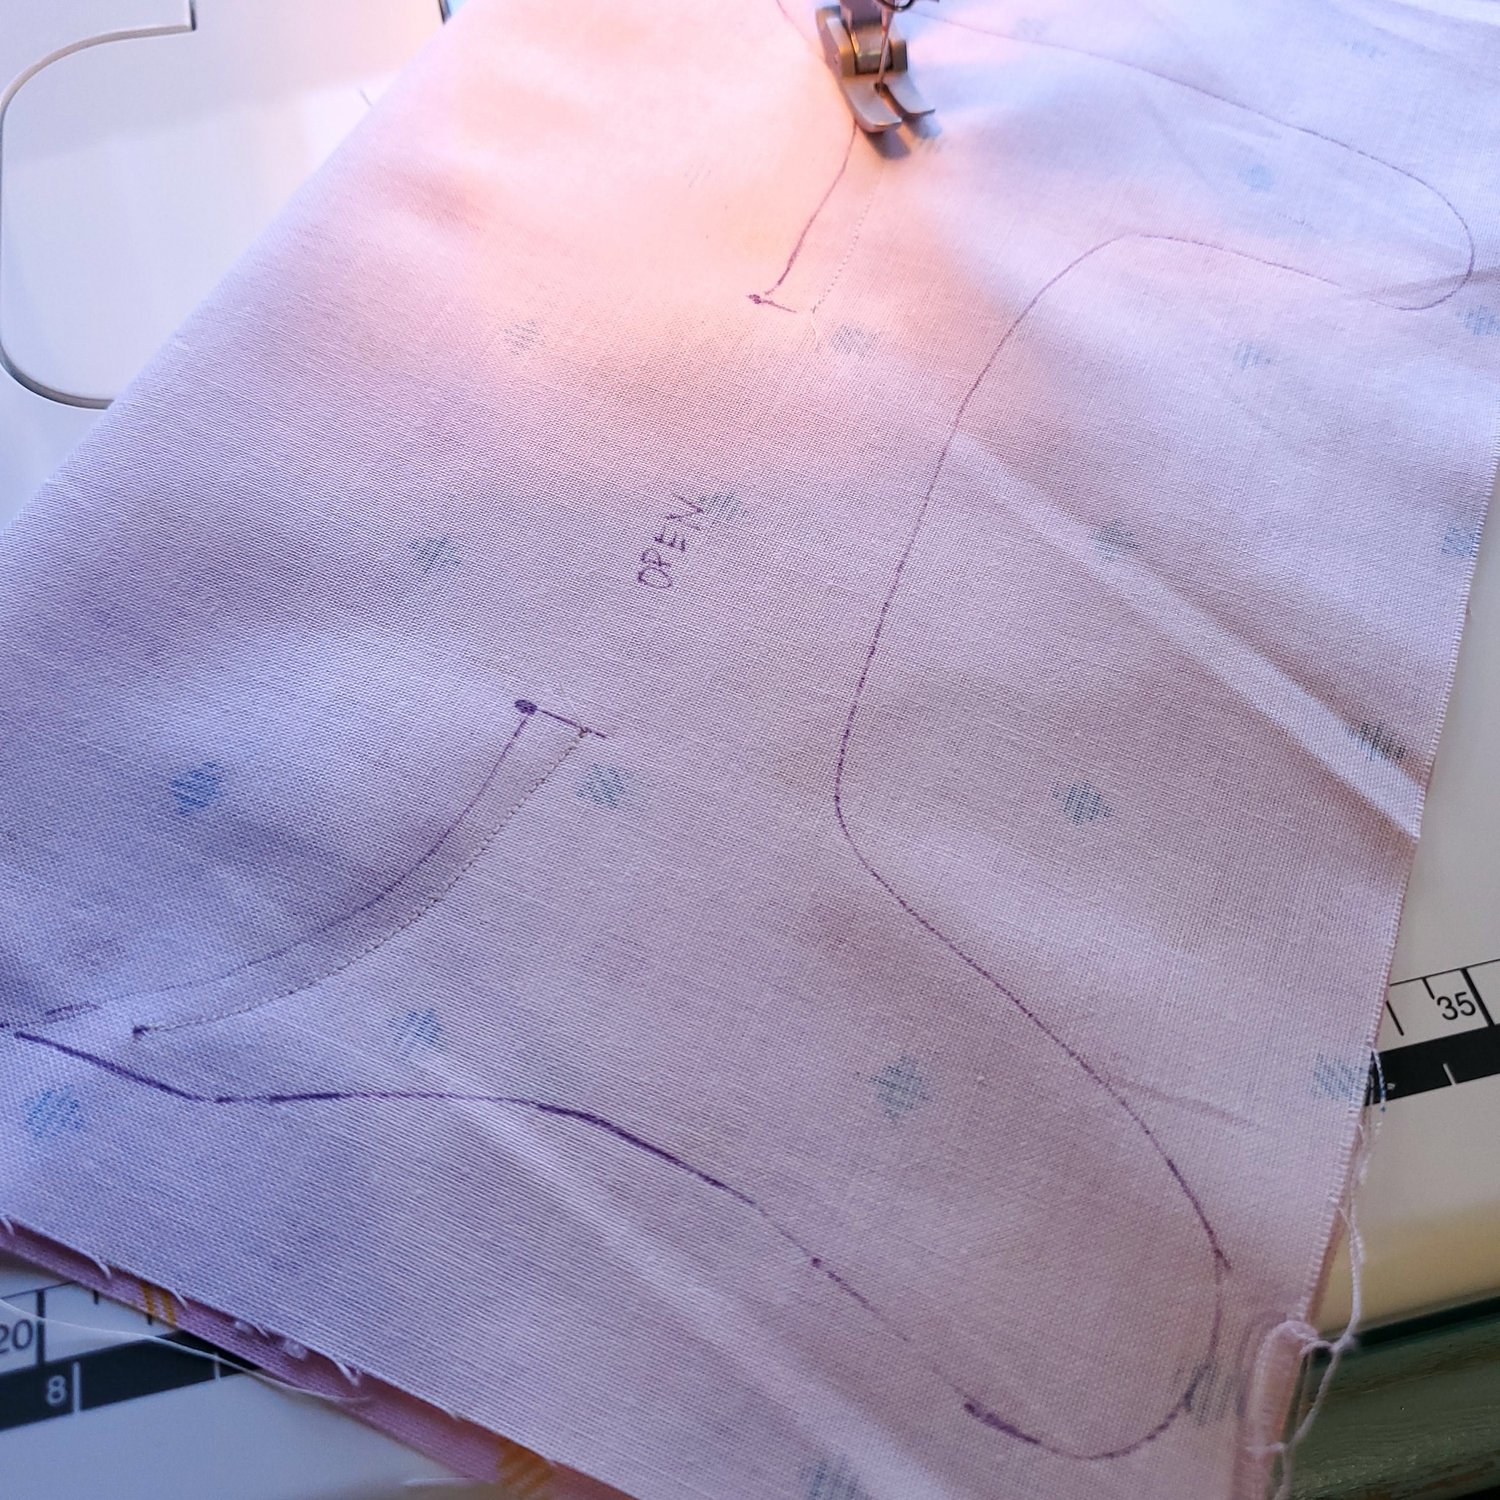
Now cut the piece of fabric along the drawn lines. Press the seam open.
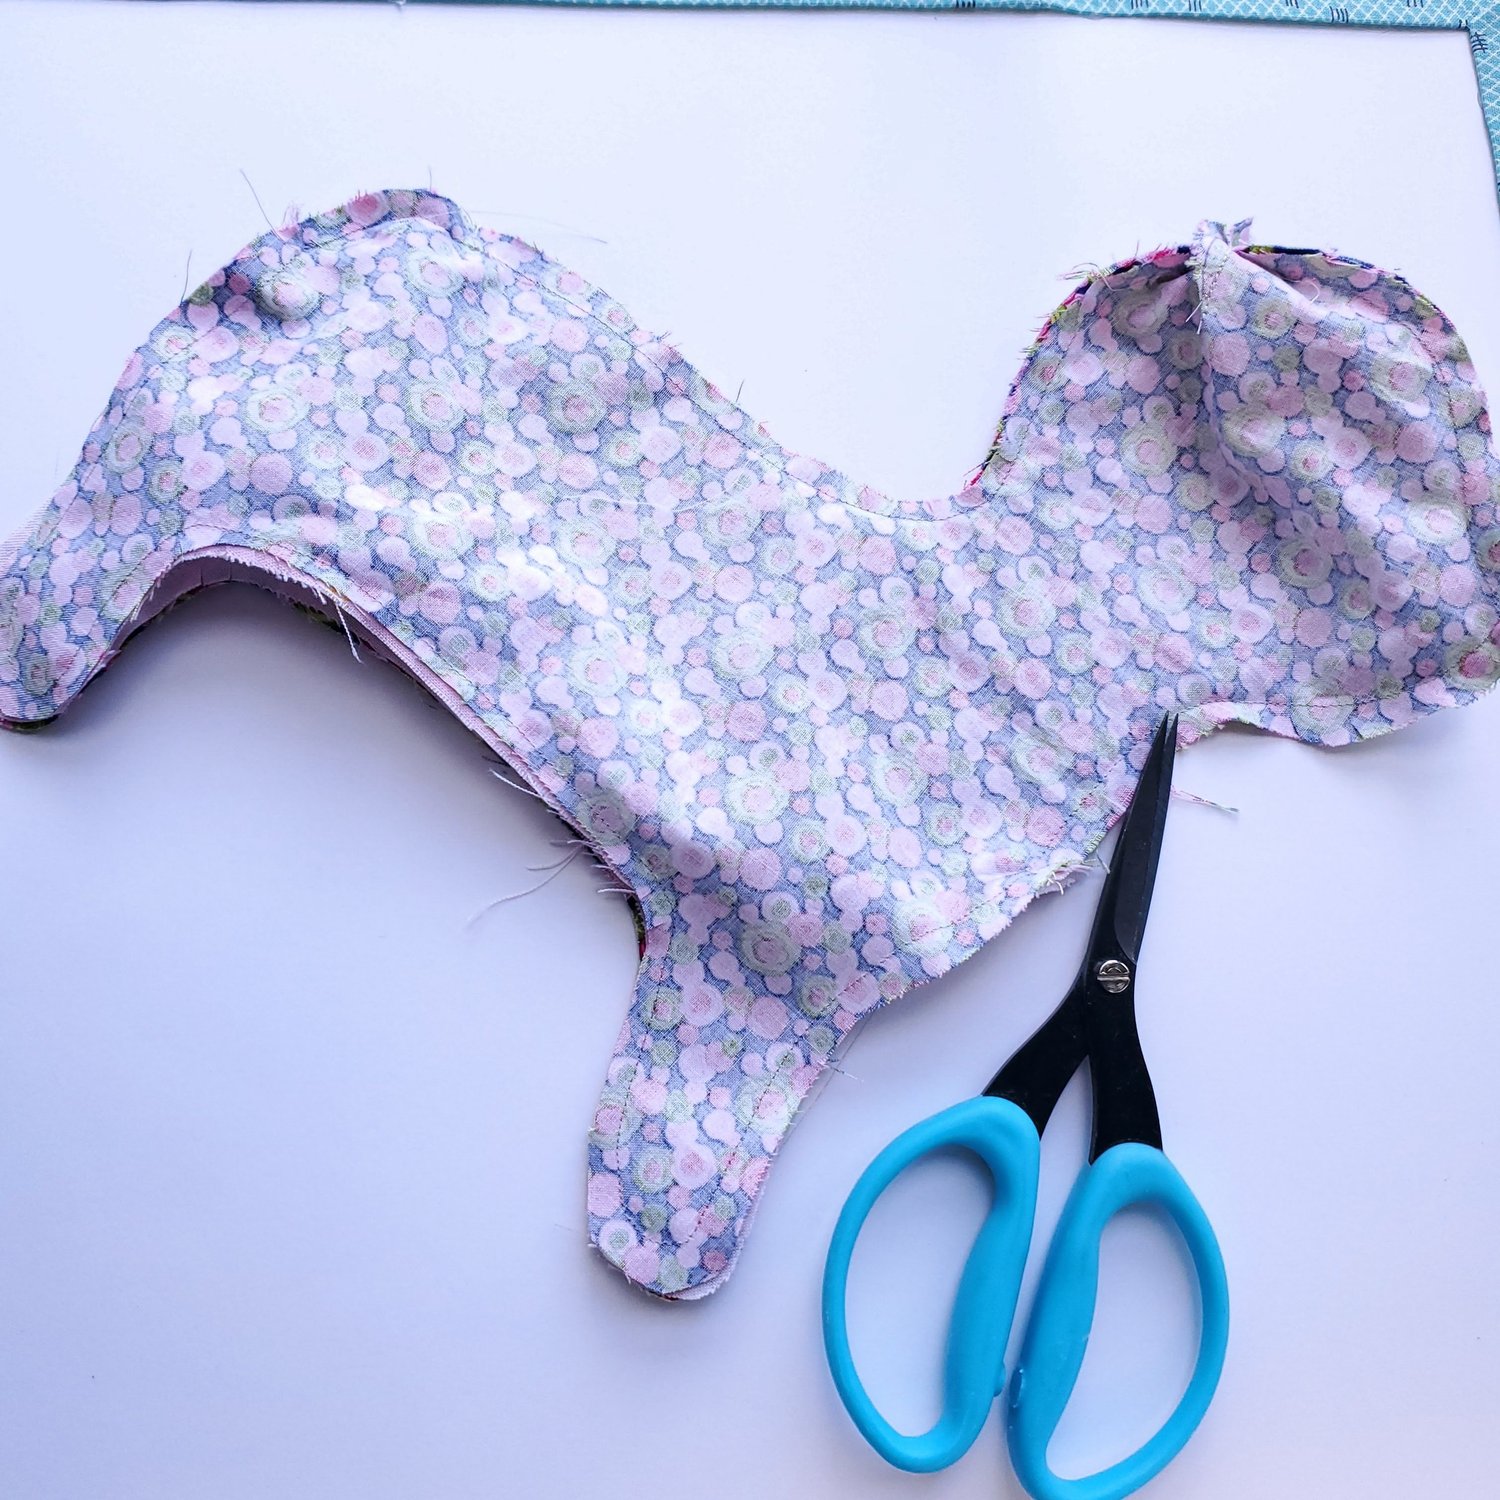
Take the underside piece and align the legs with the main body with right sides together and sew from the back around the legs to the front. It is helpful to go slowly around the curves for a smooth finish on the seam.
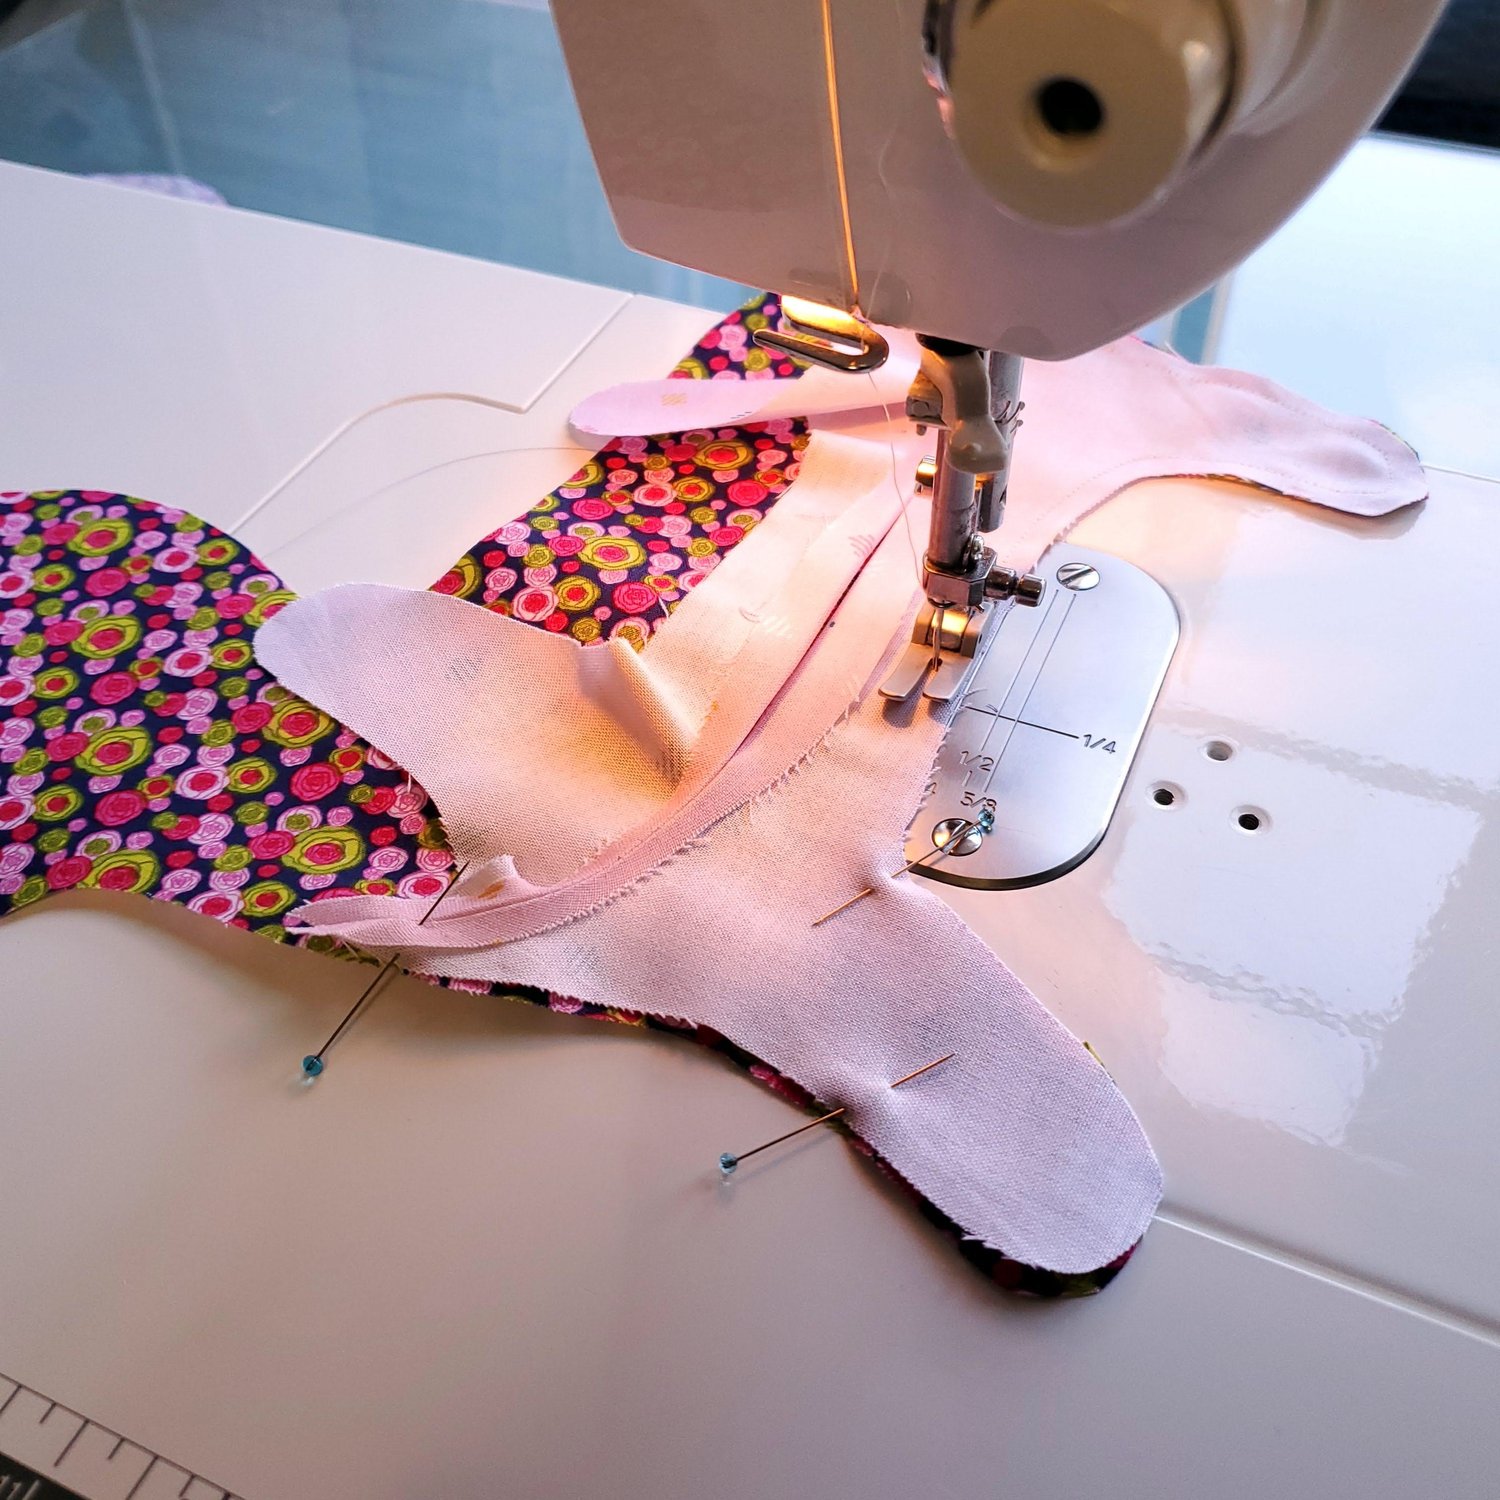
Align the second piece with pins and sew in the same way.
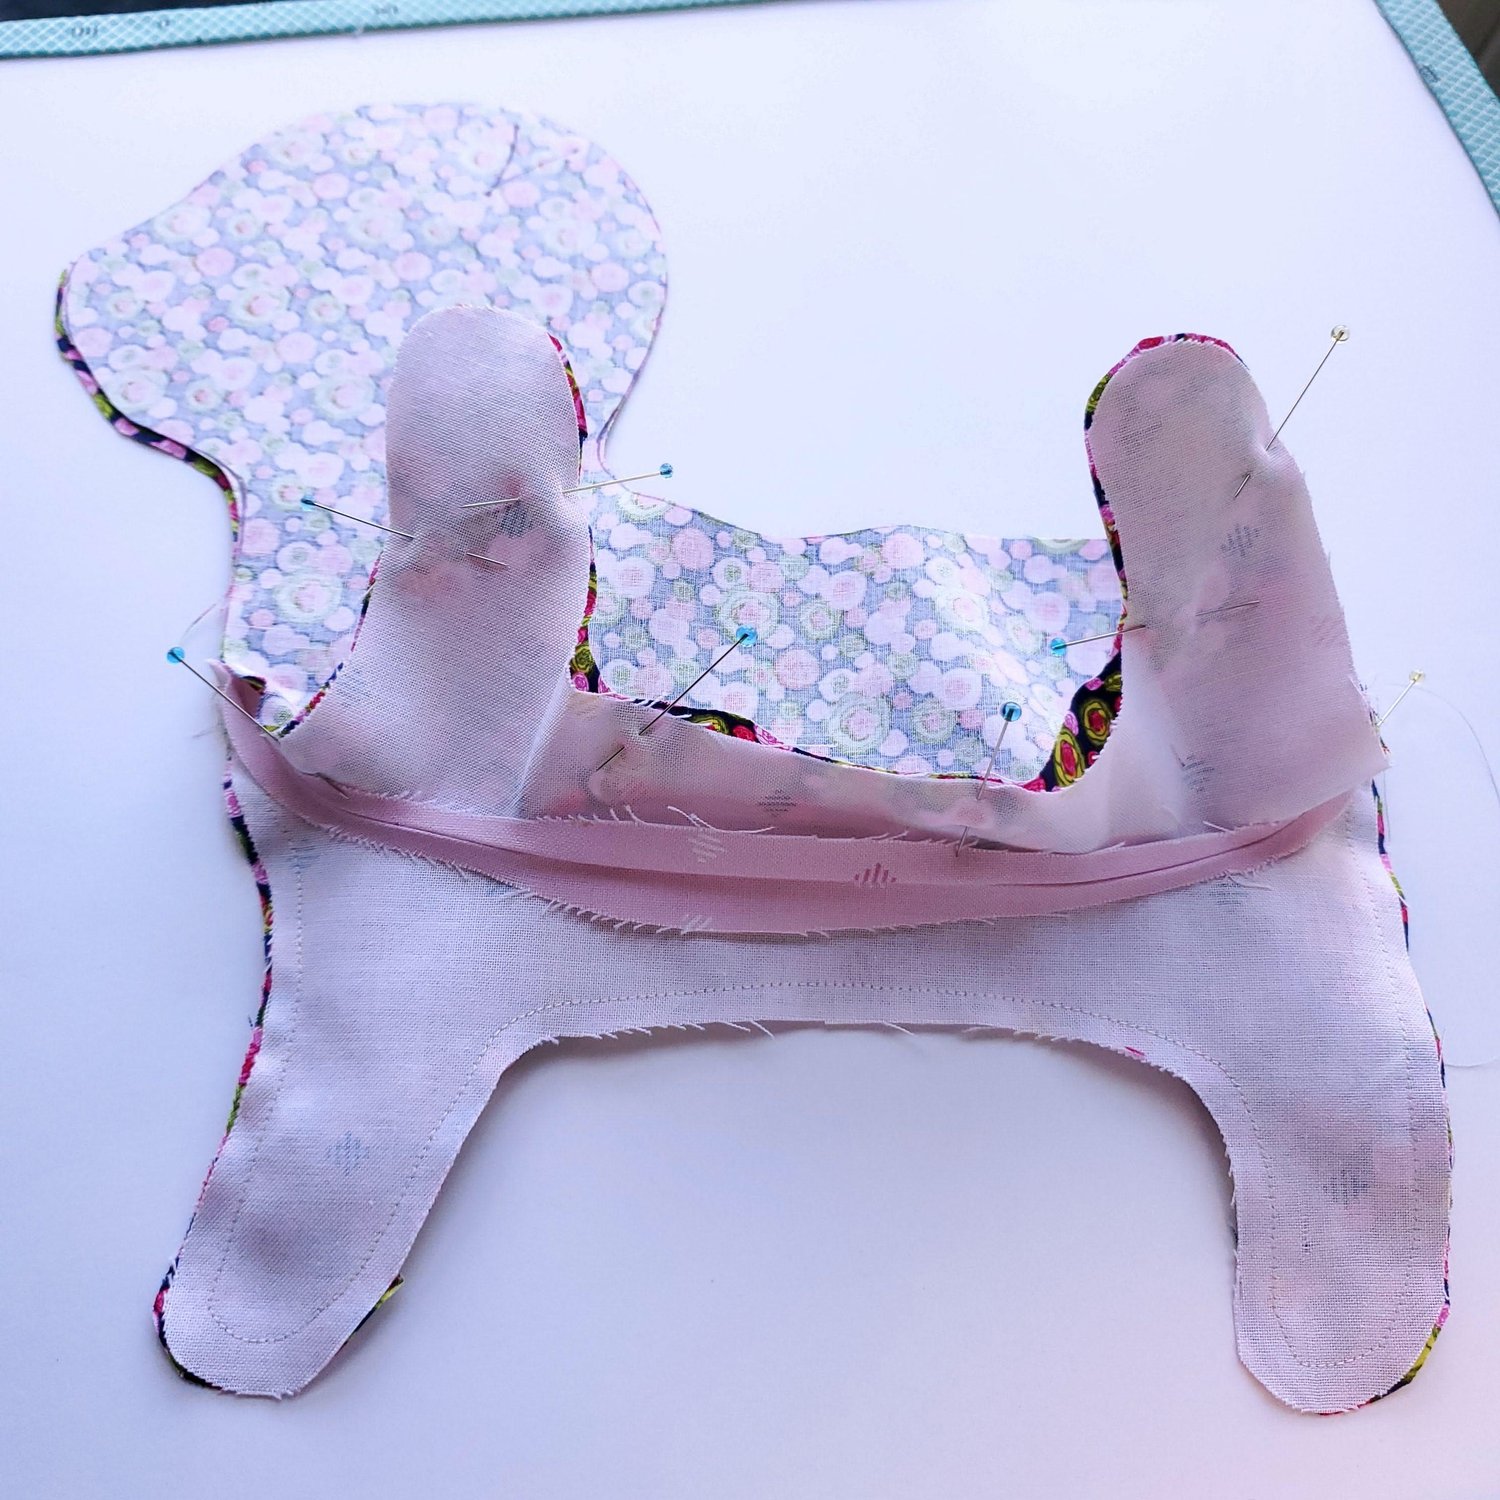
Sew the tail and turn the right sides out. Add a little stuffing, using a dowel to push the Poly-fil in the small opening . Pin in place between the body pieces.

Be sure to line up the main body pieces and carefully sew around stopping at the dots on the top of the head. Clip in the areas where the seam curves inward, avoid clipping the stitching. Cut the small notch on top of the head according to the pattern markings.
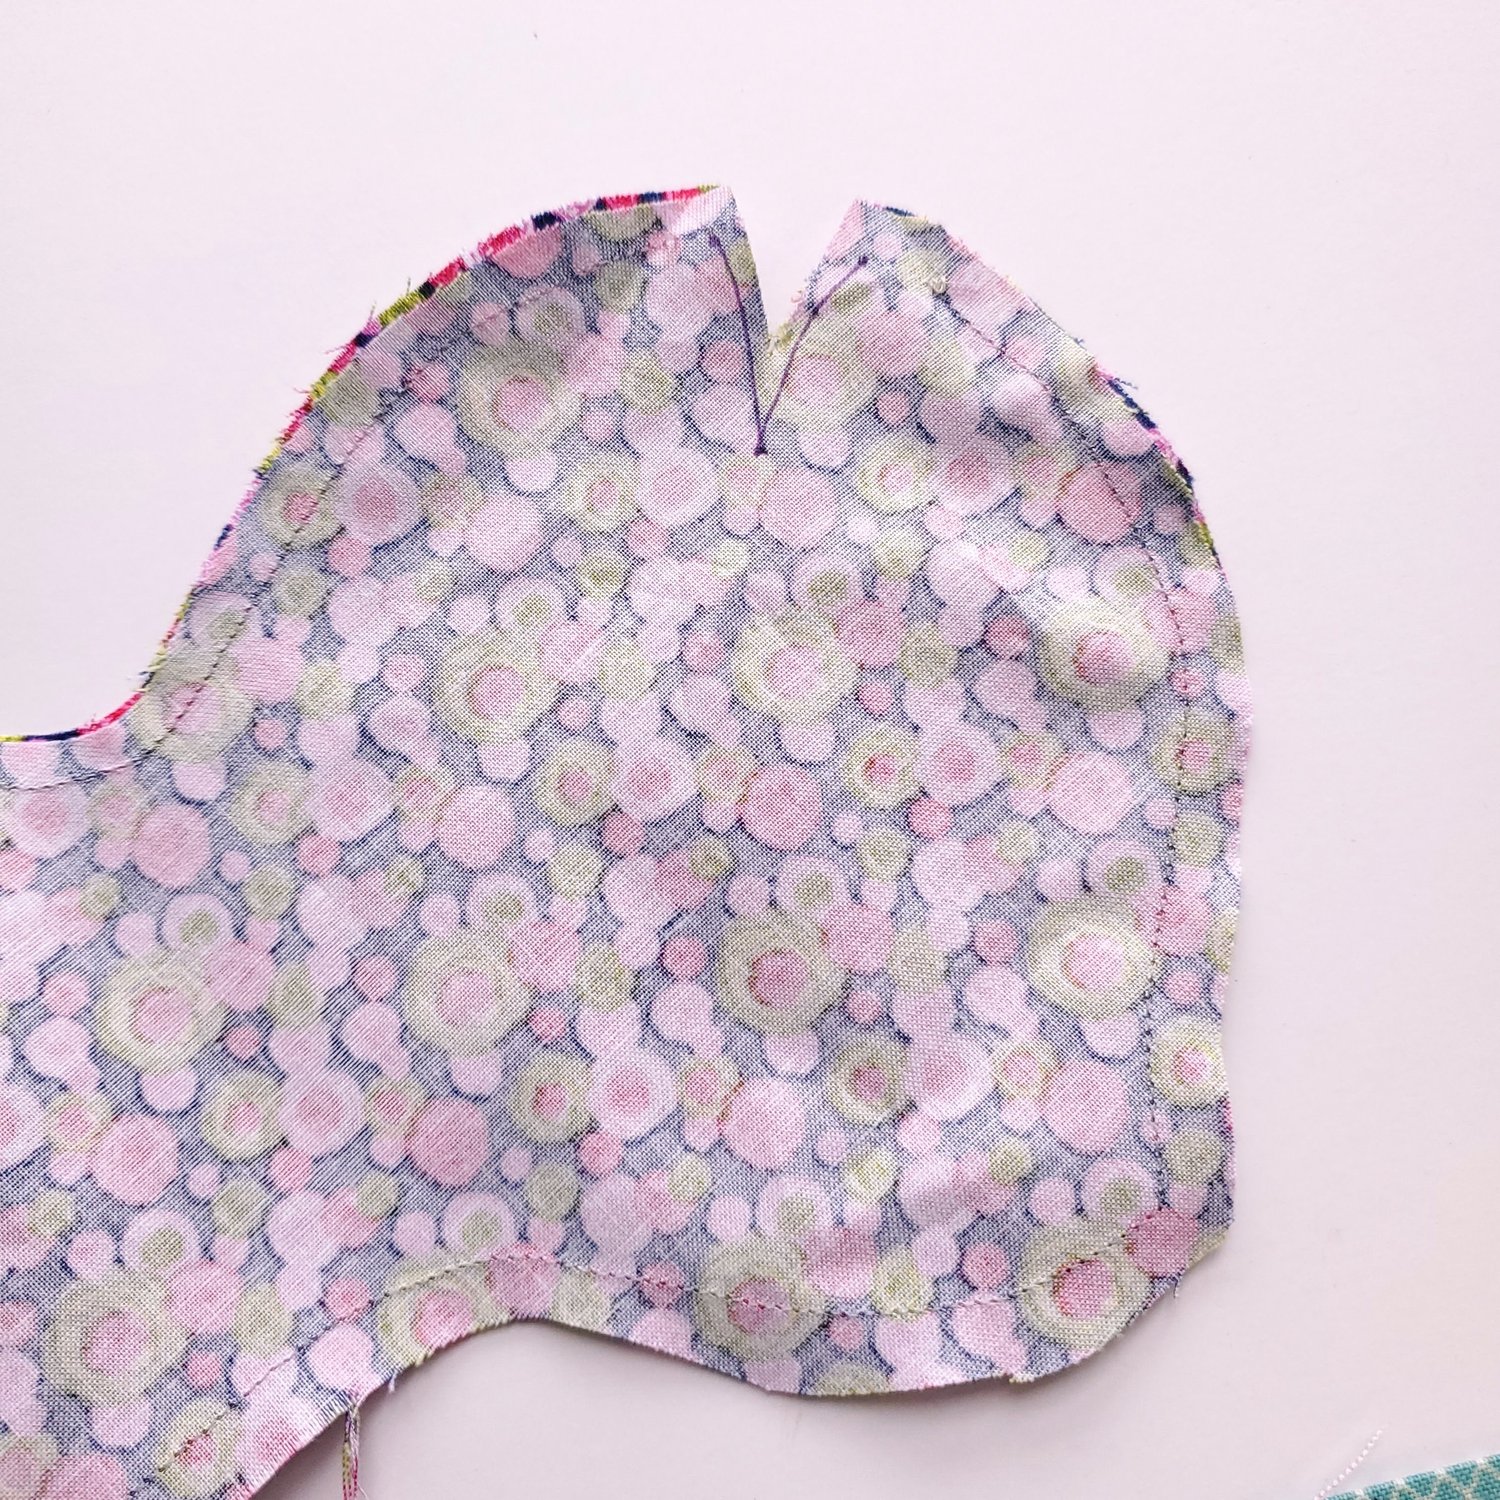
Match the seams and sew along the dart to give the head some shape.
Turn right sides out and give a final press.
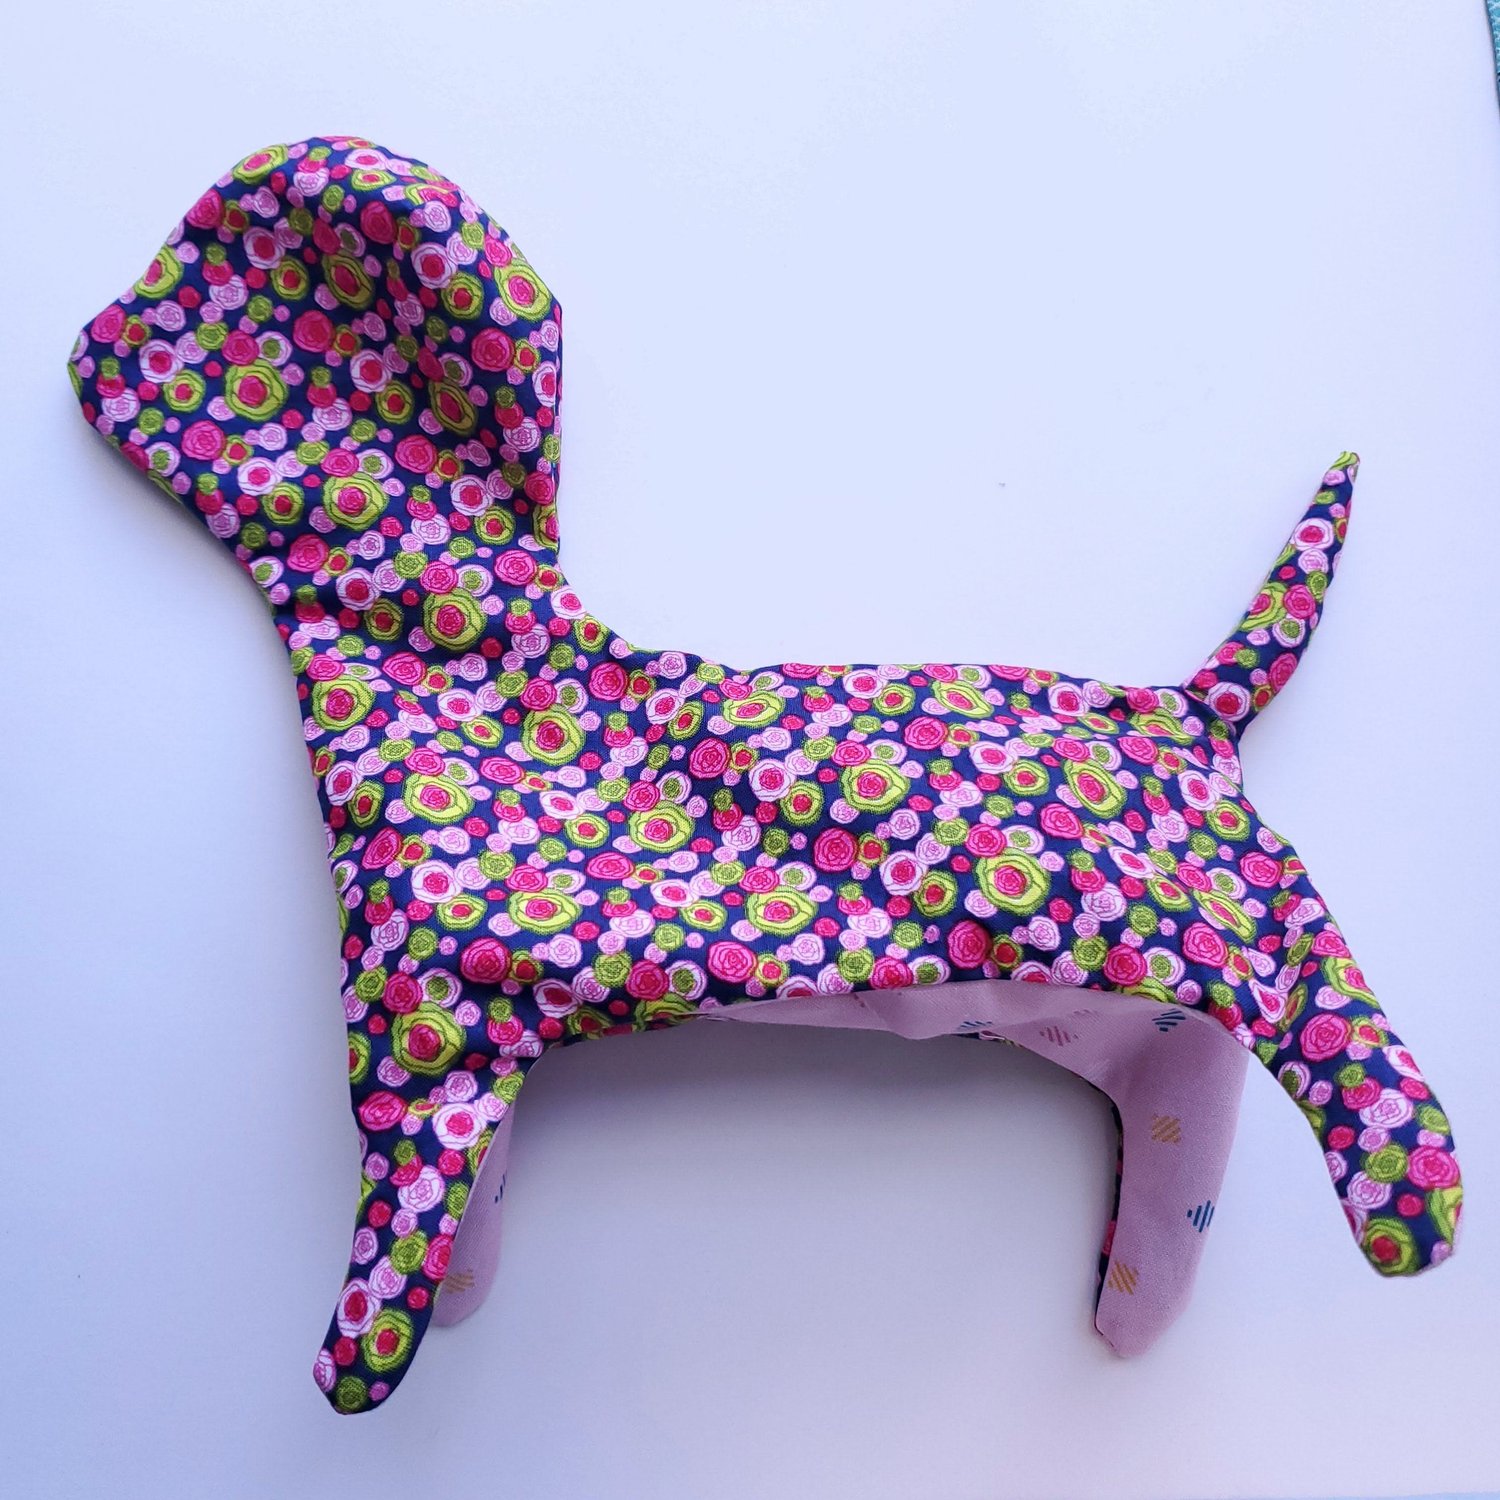
Start stuffing the head and neck so it is firm. It is best to use small fluffs of Poly-fil as you fill in the legs so that they are sturdy to hold up the puppy/kitty. When you are happy with the shape, hand stitch the opening closed with a matching thread using small stitches. If you would like to make this a pin cushion you can fill part of the body with Poly-fil and then add crushed walnut shells, rice or sand. I have seen tutorials that suggest using steel wool as a filler to sharpen the pins each time.
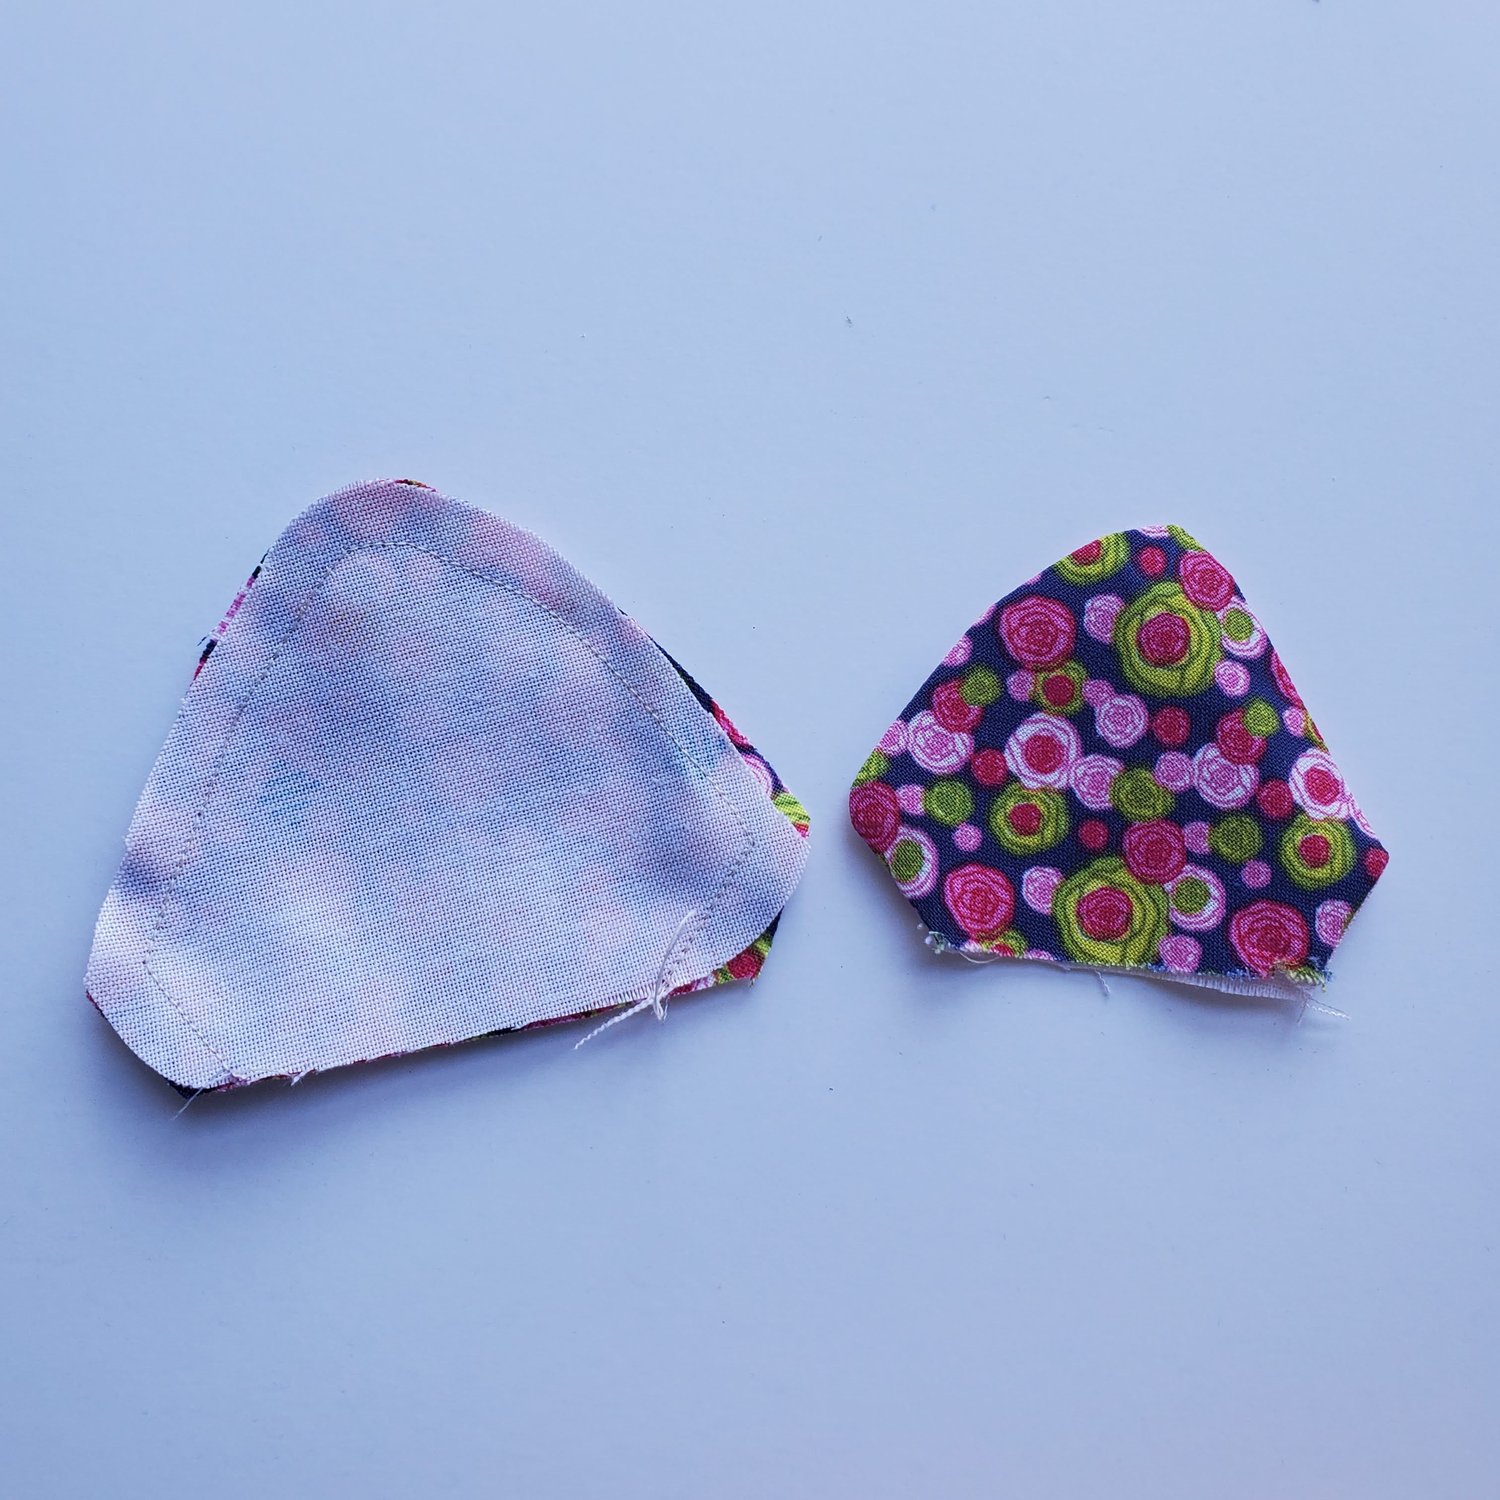
The final step to sew are the ears. Layer together one piece of main fabric and coordinating fabric each about 3” x 8” and trace the ear pattern. Be sure to leave extra seam allowance along the bottom edge. Sew from dot to dot. Cut out ¼” from the seam. Turn right sides out and press.
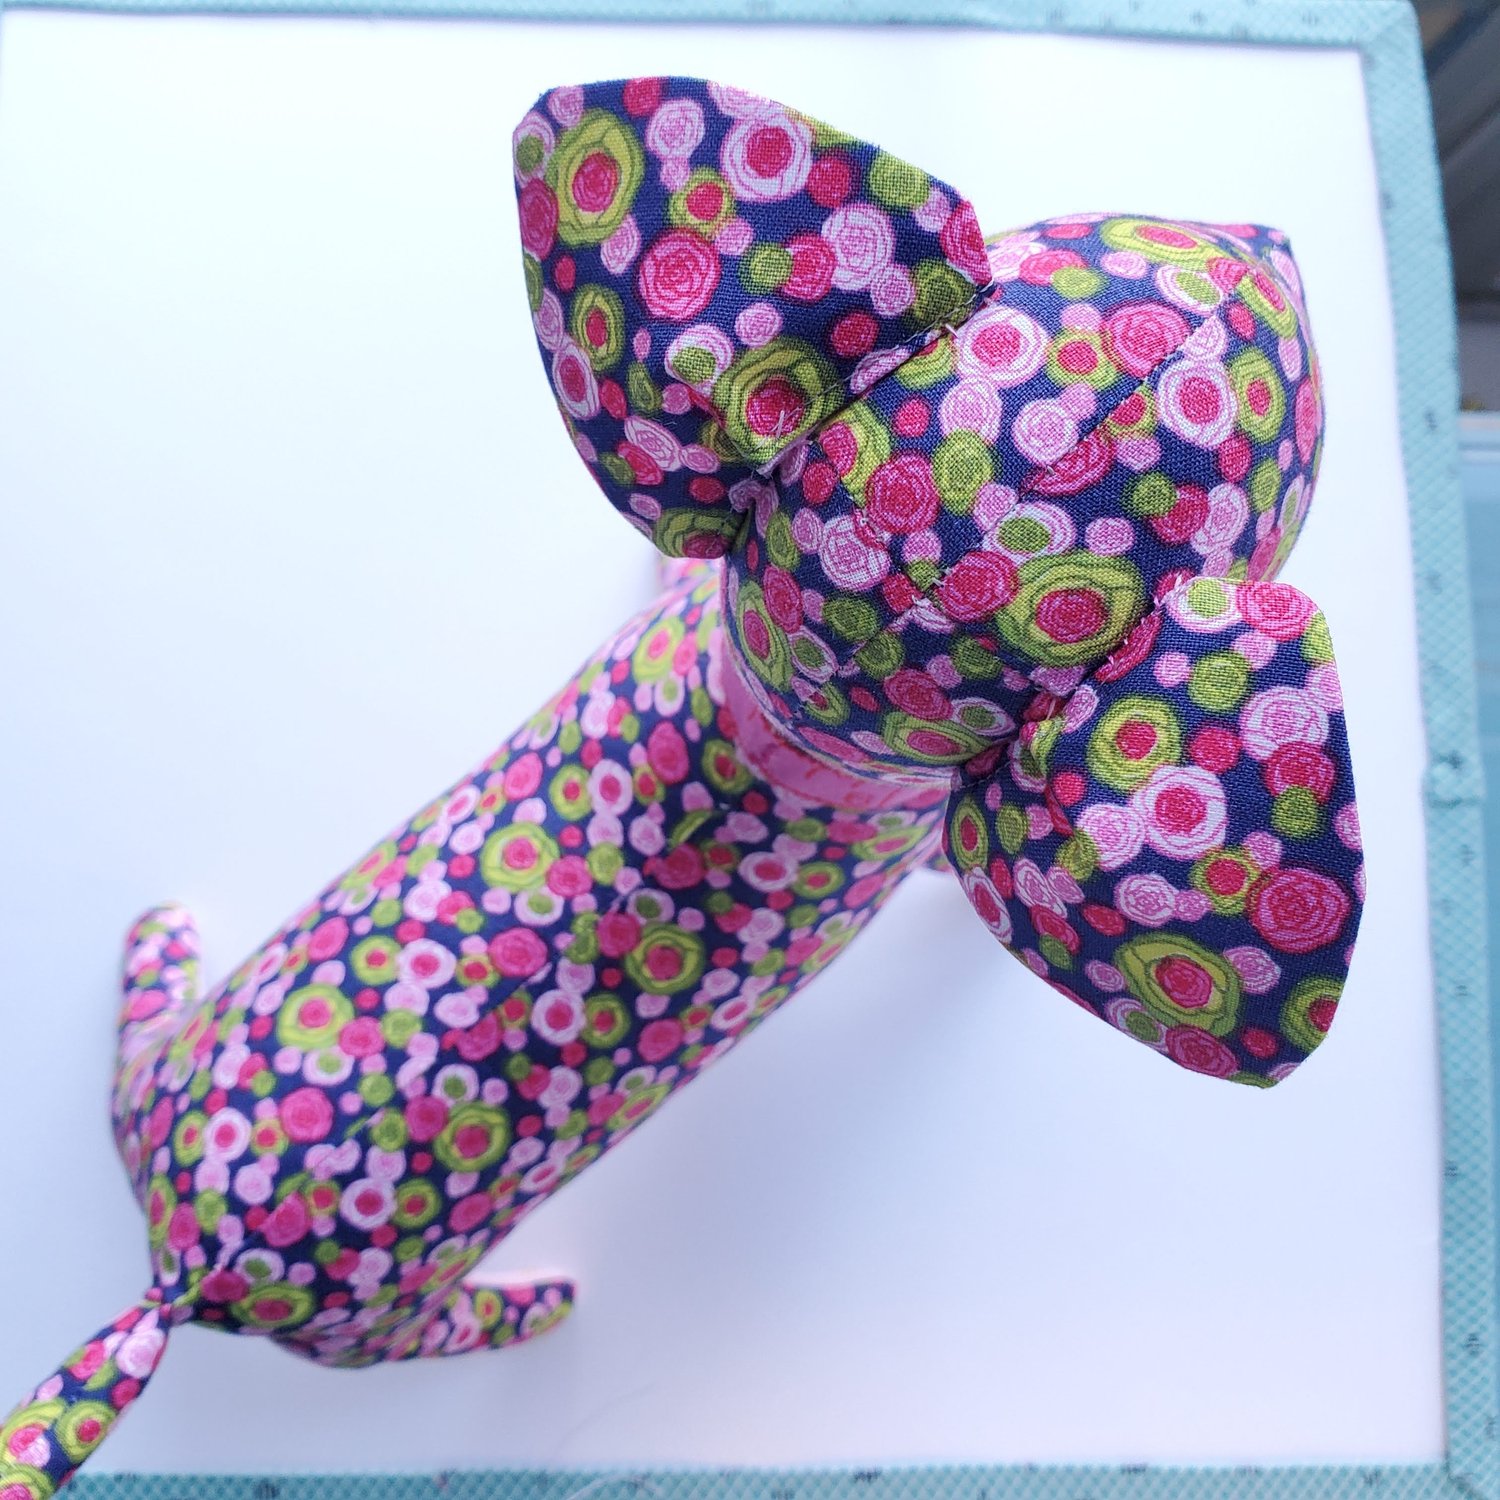
Turn under the bottom edge ¼” and topstitch the opening closed in a matching thread. Determine the ear placement according to if you want it to look like a puppy or a kitty. Hand stitch in place using a matching thread color. You can add eyes, nose and mouth with paint, a Micron marker or even hand embroidery. For my puppy I decided the fabric was so busy that the face was not needed and would be safer since I was giving it to a baby.
The final detail is to add a ribbon for a collar. Fold the edges under and wrap around the neck and carefully stitch the edges together. You could even add a fun charm or name tag to add some “purr-sonality”. If you like making cute stuffed animals check out this blog for Sabrina Puppy. This would be a cute gift for Valentine’s Day next week!