Penguin Hand Warmers
27th Jan 2022
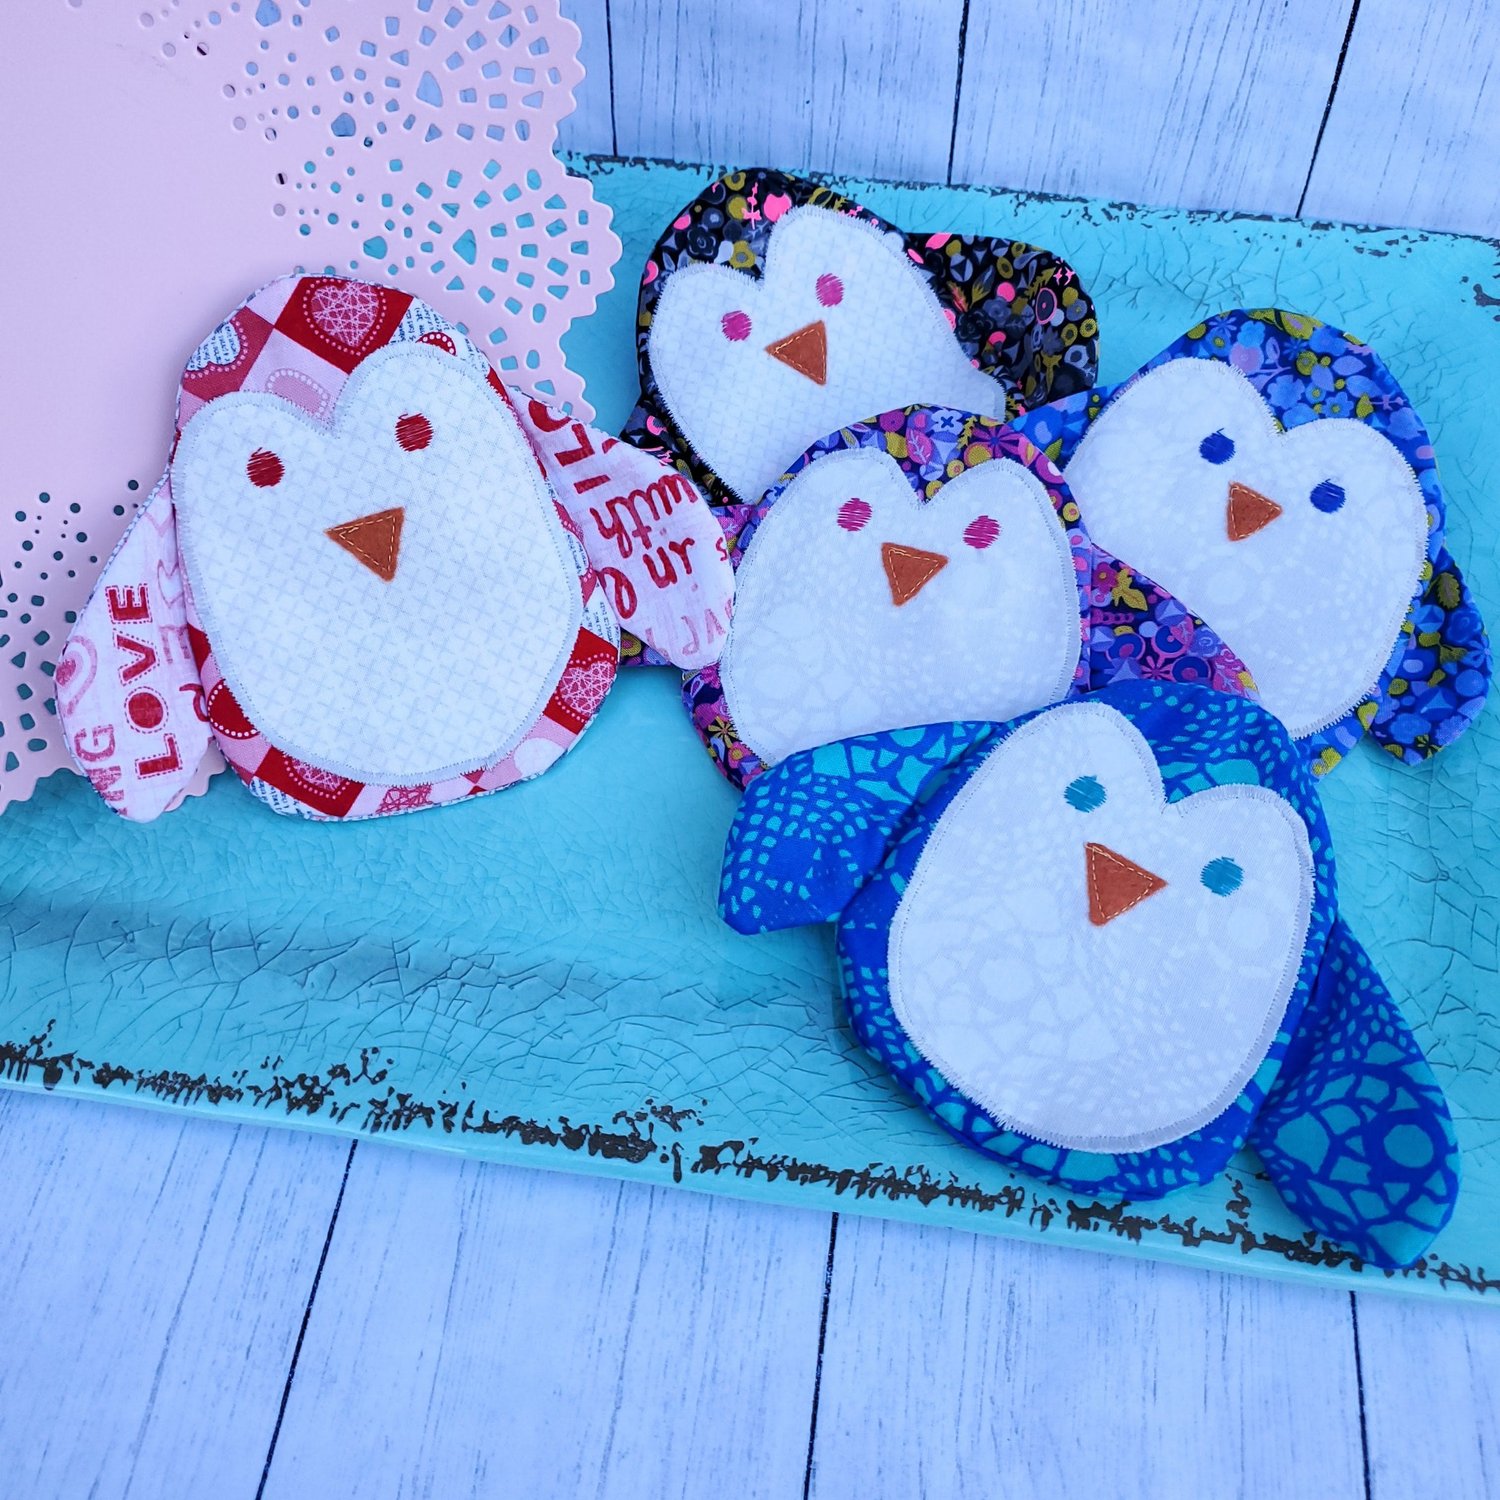
Arctic cold has settled in the Midwest this week and these adorable penguins are the perfect project to warm your heart and your hands. This is a good skill building project using these fun Alison Glass Sunprint fabrics. Check out the Happy Birthday banner I made a few months ago with these bright Alison Glass fabrics. I found this Quilting Digest article featuring the penguins on Pinterest but unfortunately there is no longer a pattern link. Luckily this is a basic shape, and I will share with you how to draw your own pattern.

Materials Needed:
Assorted fat Quarters
Cotton Batting
Aurifil Thread from the Chroma Membership
Felt for the Penguin’s beak
Pellon shape flex 101 interfacing
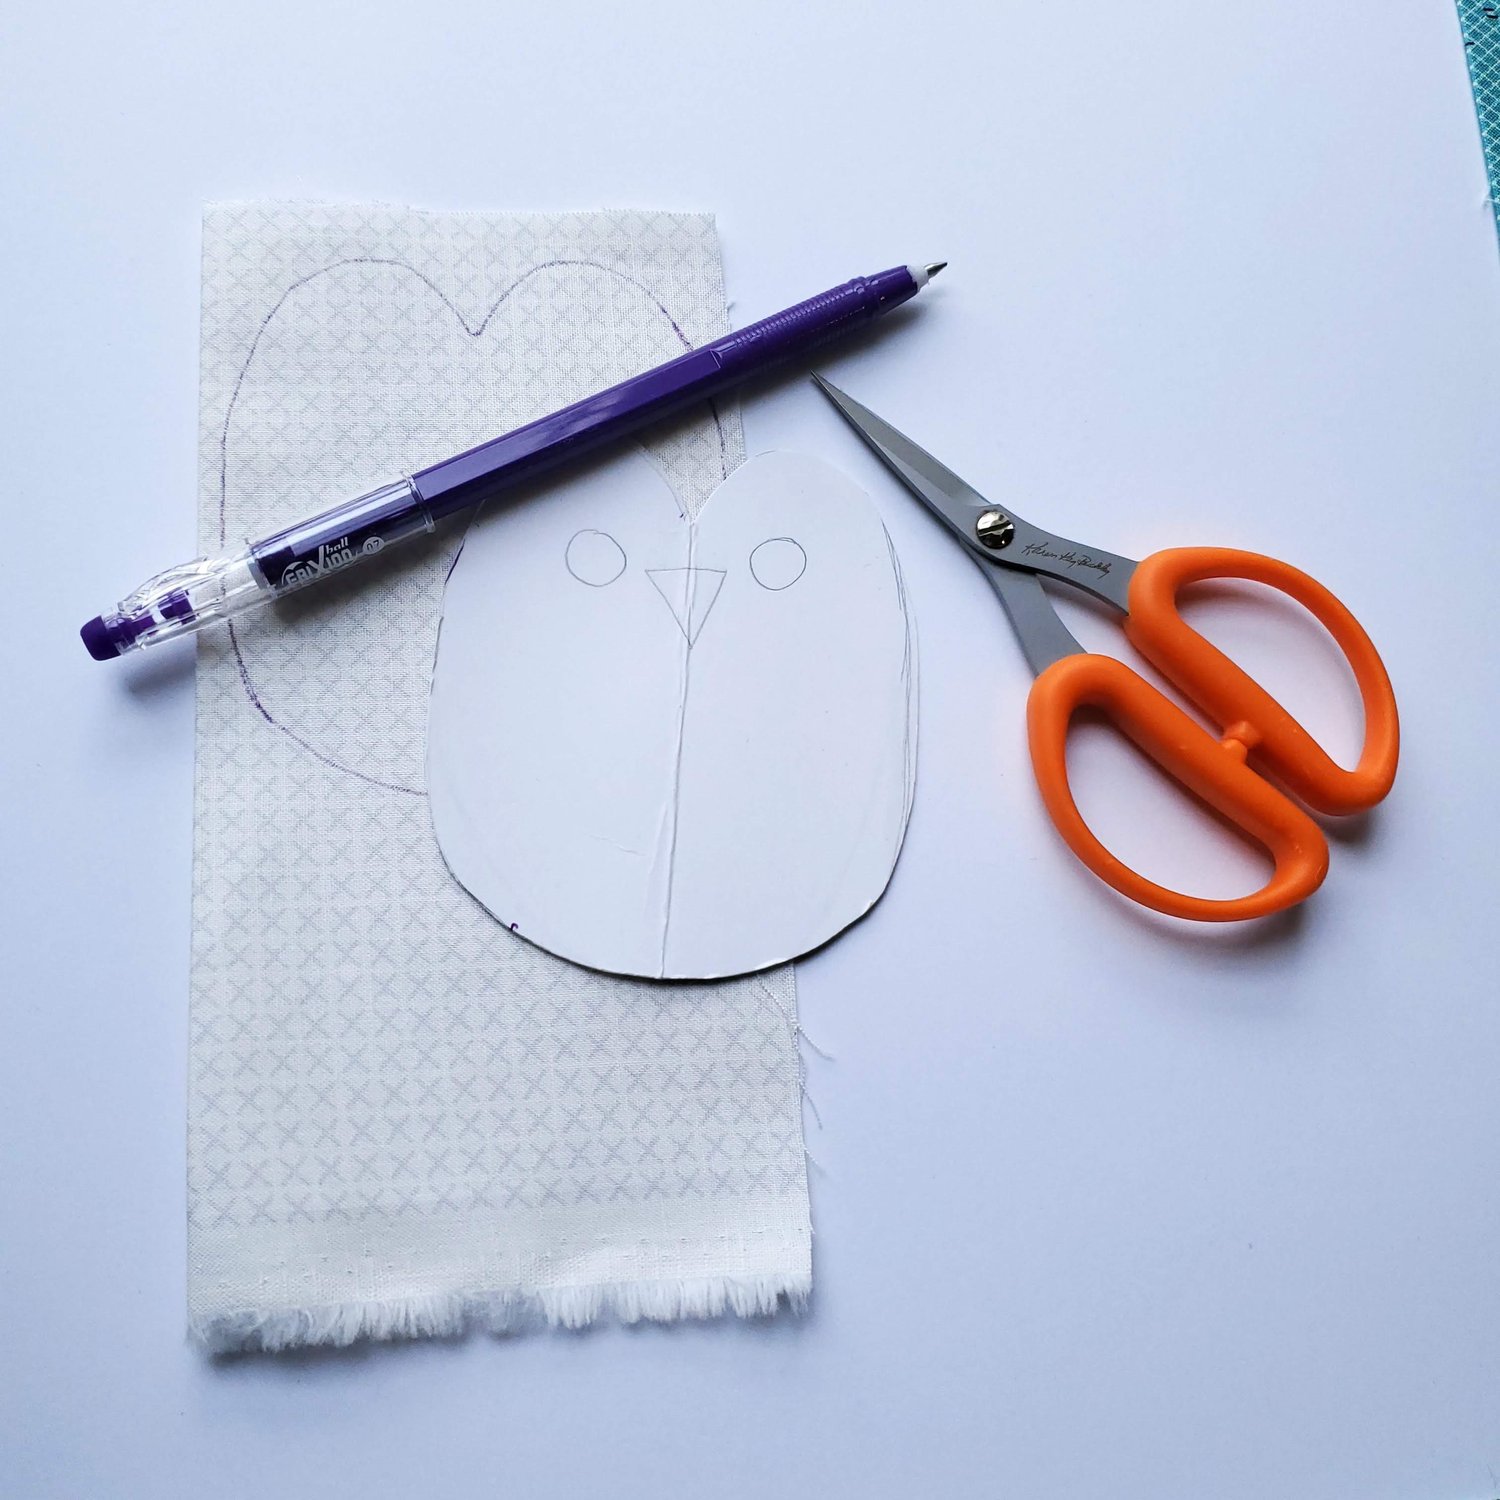
To get started, measure the hand warmers package that you intend to use inside the penguin. Draw that shape in the center of your paper, then draw an oval with a flattened bottom for the basic outline shape around the first shape. Add the wings on each side and then the white face leaving room for the background fabric to show around the edges. Cut out the individual pieces. For the back piece that makes the pocket you will trace the main oval, cut it in half and add an inch to each side to accommodate for the overlapped edges of the pocket. The back piece will look like an elongated oval with a flattened bottom.
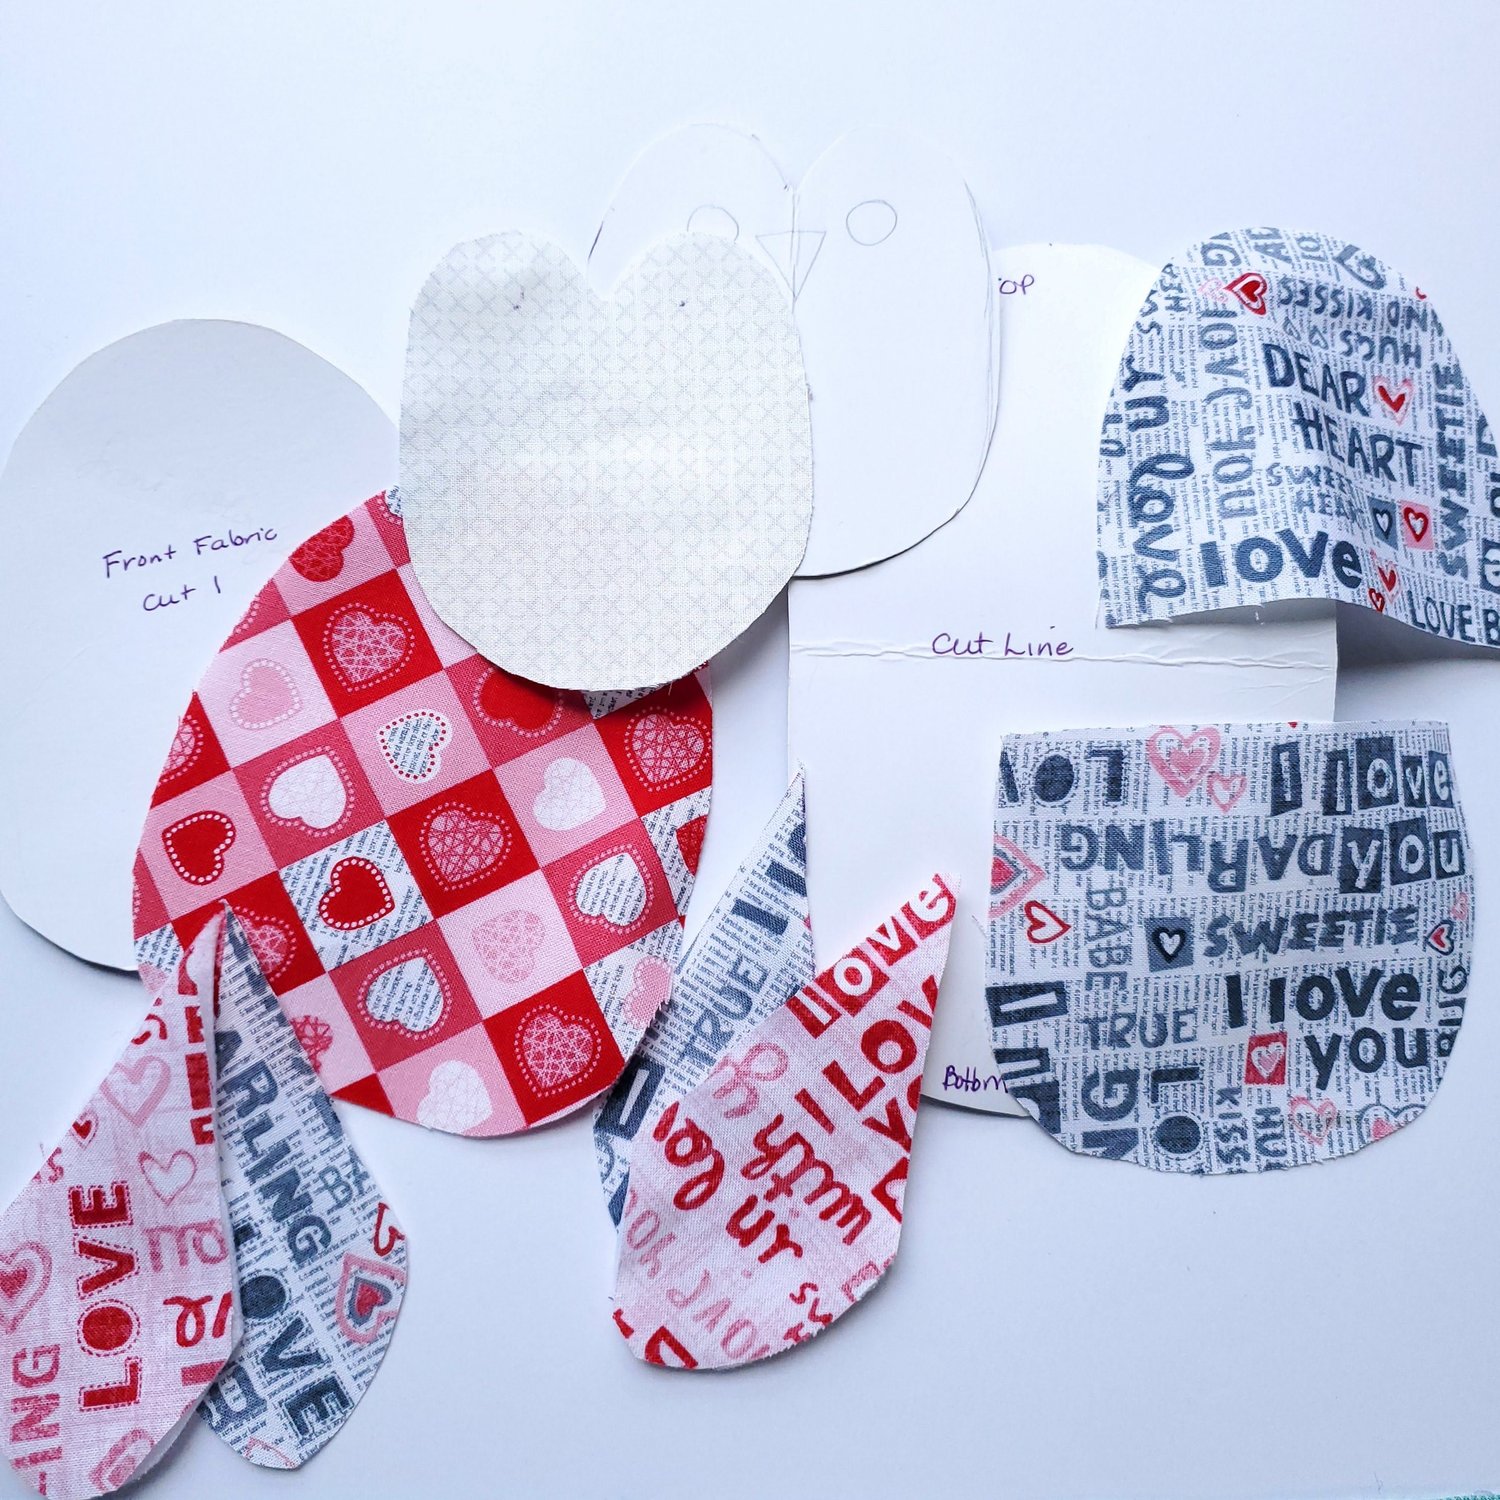
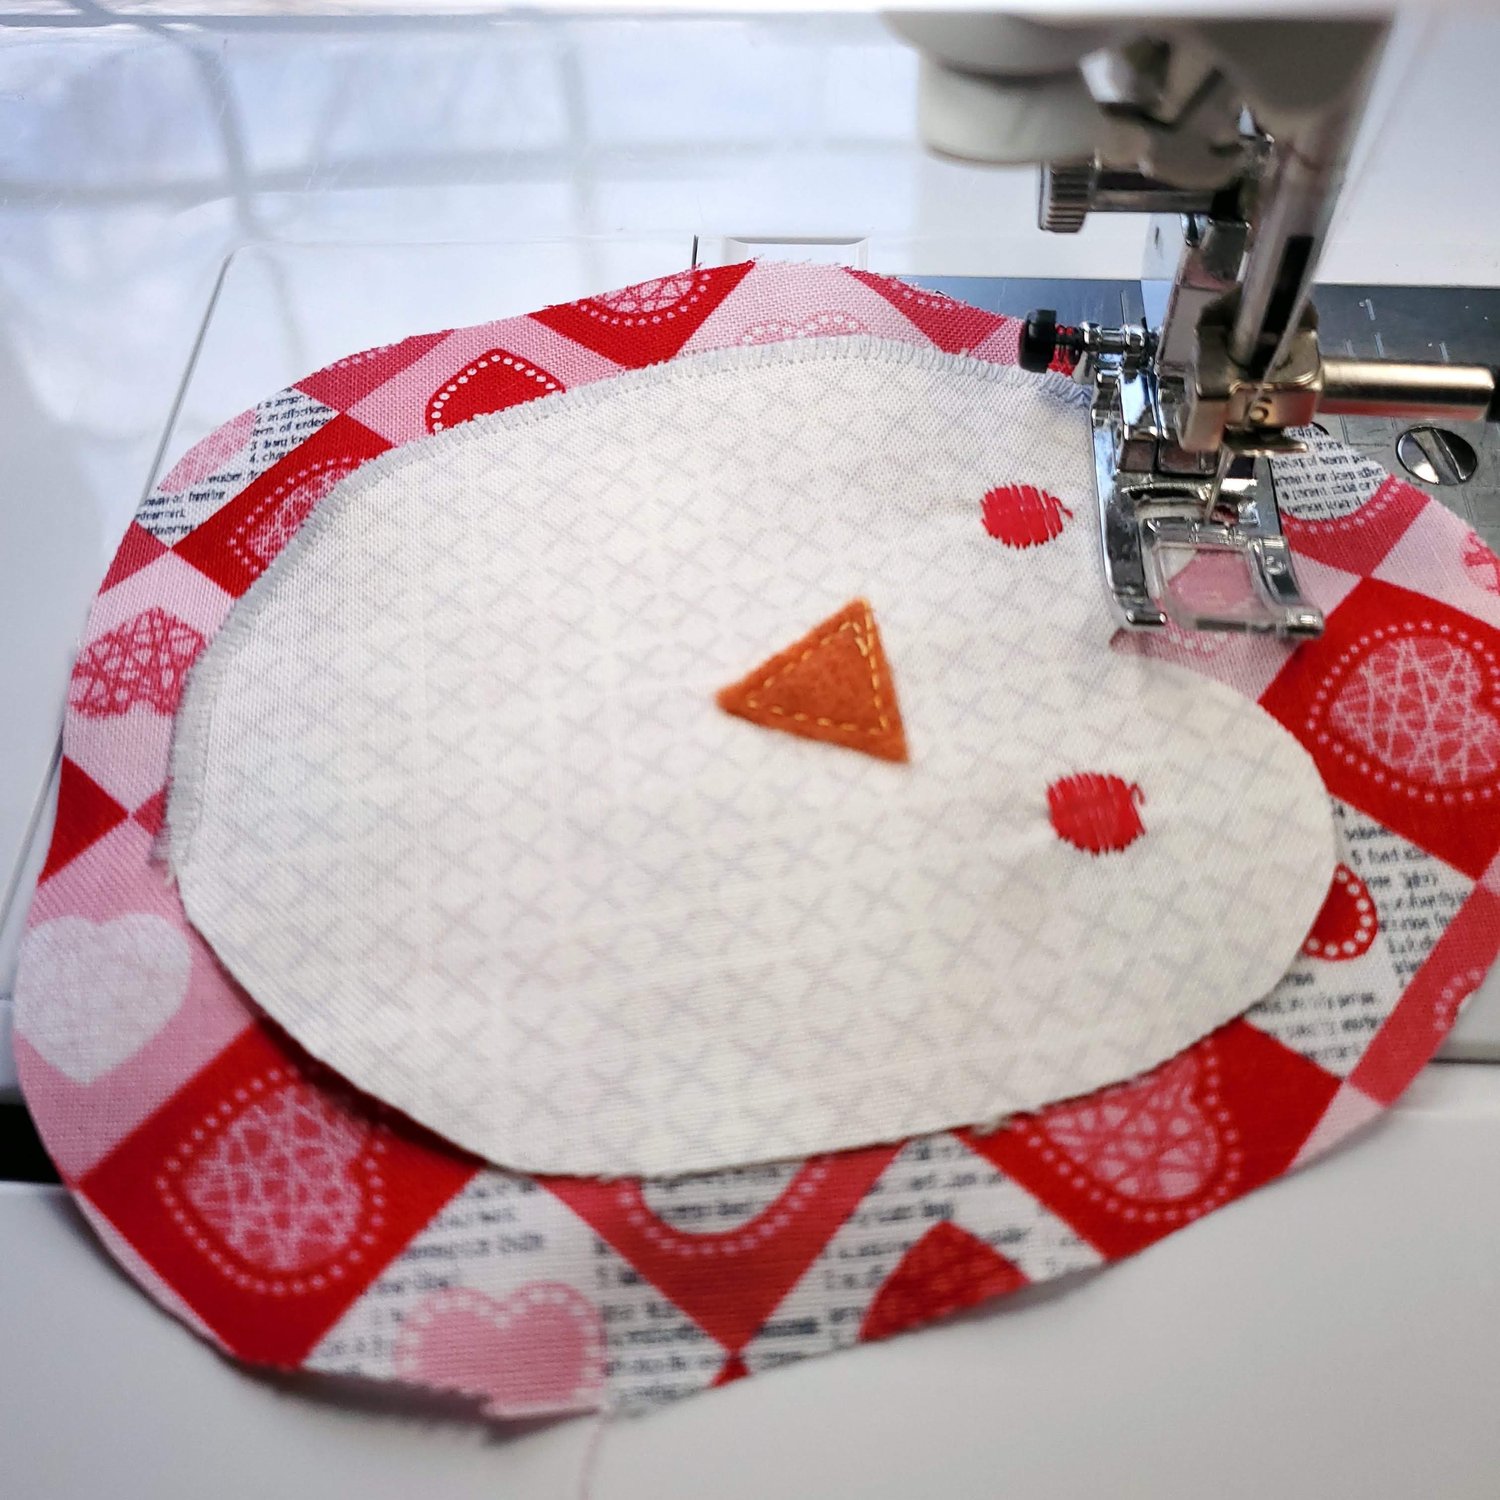
Lay the pattern pieces on the wrong side of the fabric and draw about ¼” from the edge to include the seam allowance. Since the white face of the penguin will be sewn using the raw edge appliqué method you will not need the extra seam allowance. I added a layer of the Pellon shape flex 101 interfacing to the wrong side of the white face to stabilize the fabric to prepare for the embroidery and zig zag edge stitching.
Fabric Cut List: One of the white face fabric with interfacing, one of the front fabric with a piece of cotton batting, one of the back oval (cut in half), 4 wings with one layer of batting for each wing.
The eyes can be sewn by hand, made of felt, or drawn with a permanent marker. I used a small triangle of orange felt for the beak.
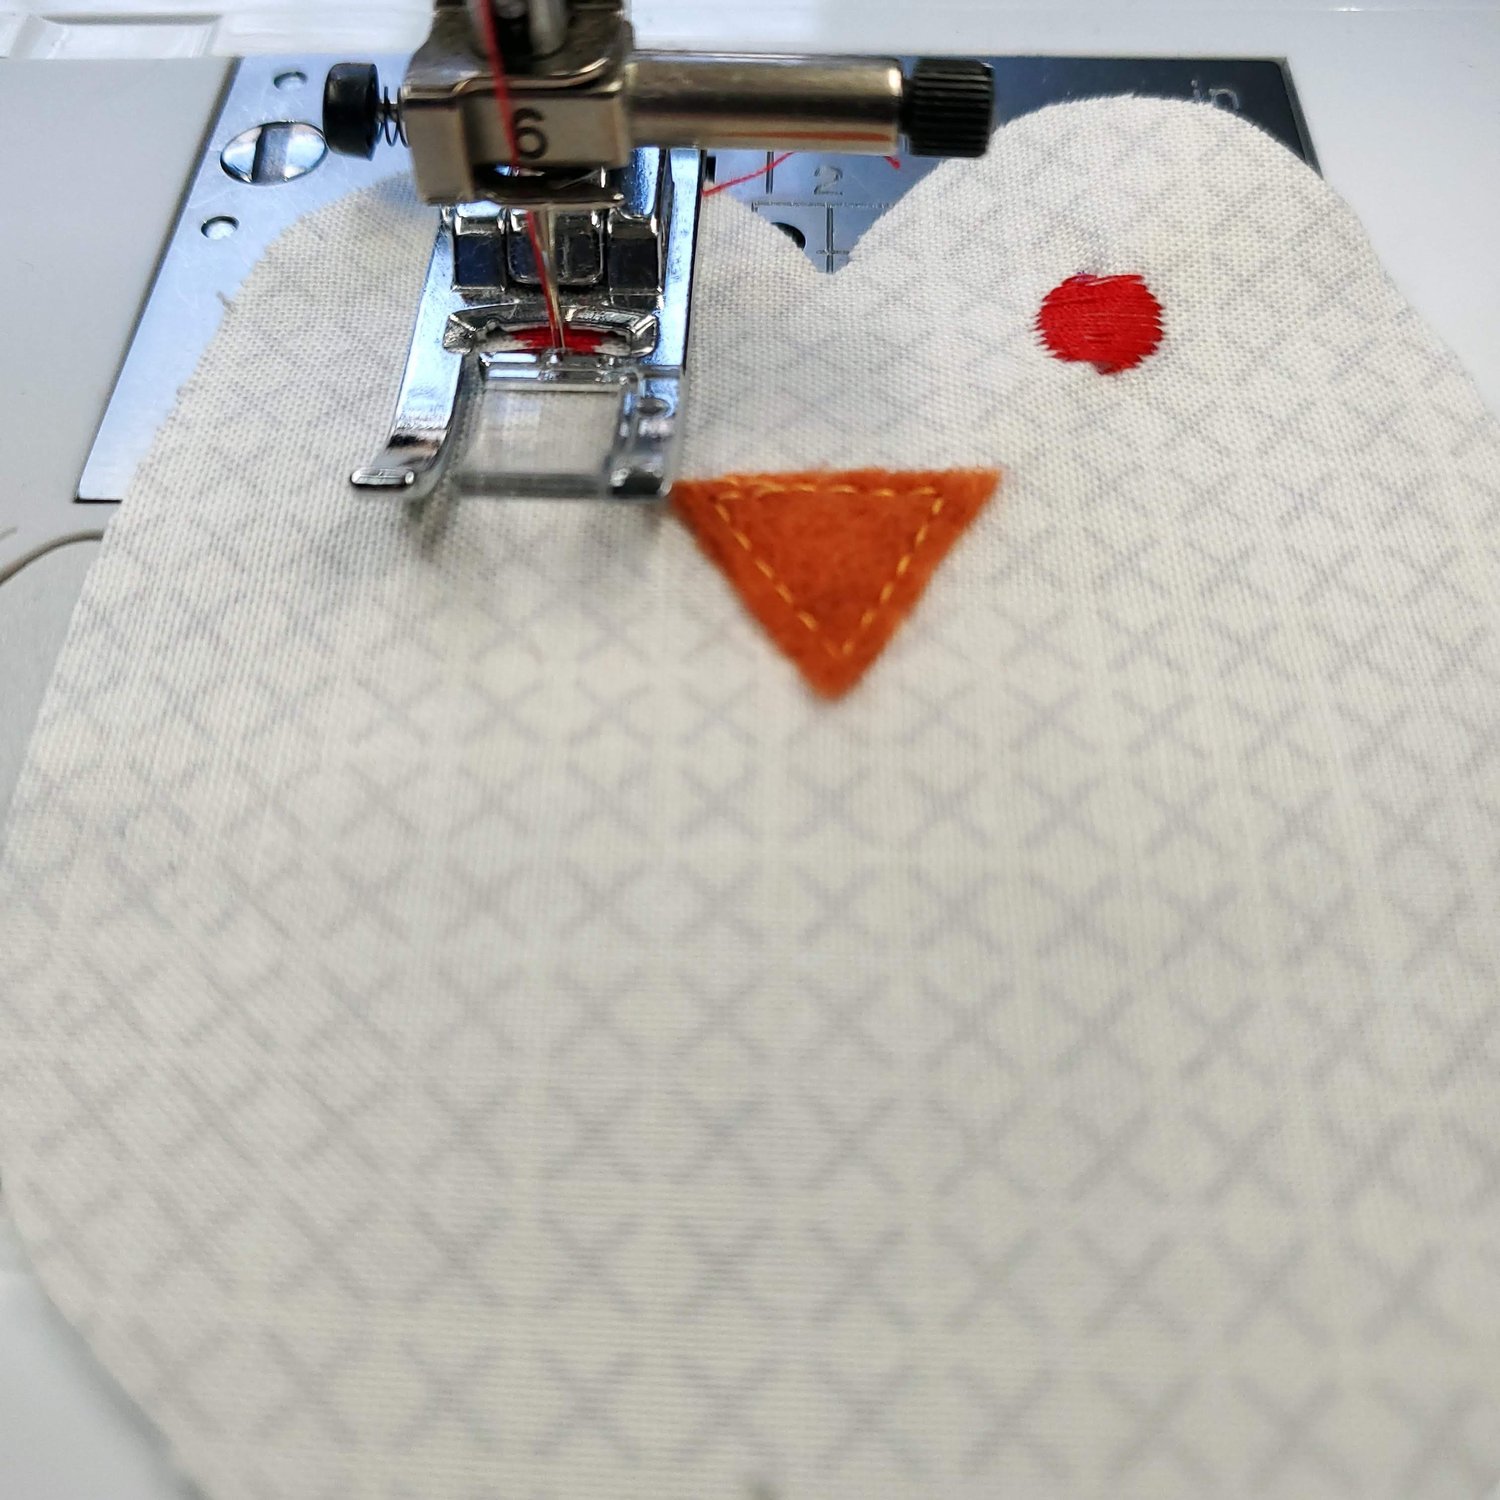
It is a good idea to press and starch the face fabric before stitching it to the front piece. Set up your machine with a zig zag satin stitch using a coordinating thread. You may want to add a pin to hold it in place as you sew.
Sew your two wings and the cotton batting with right sides together leaving the side that attaches to the body open for turning.
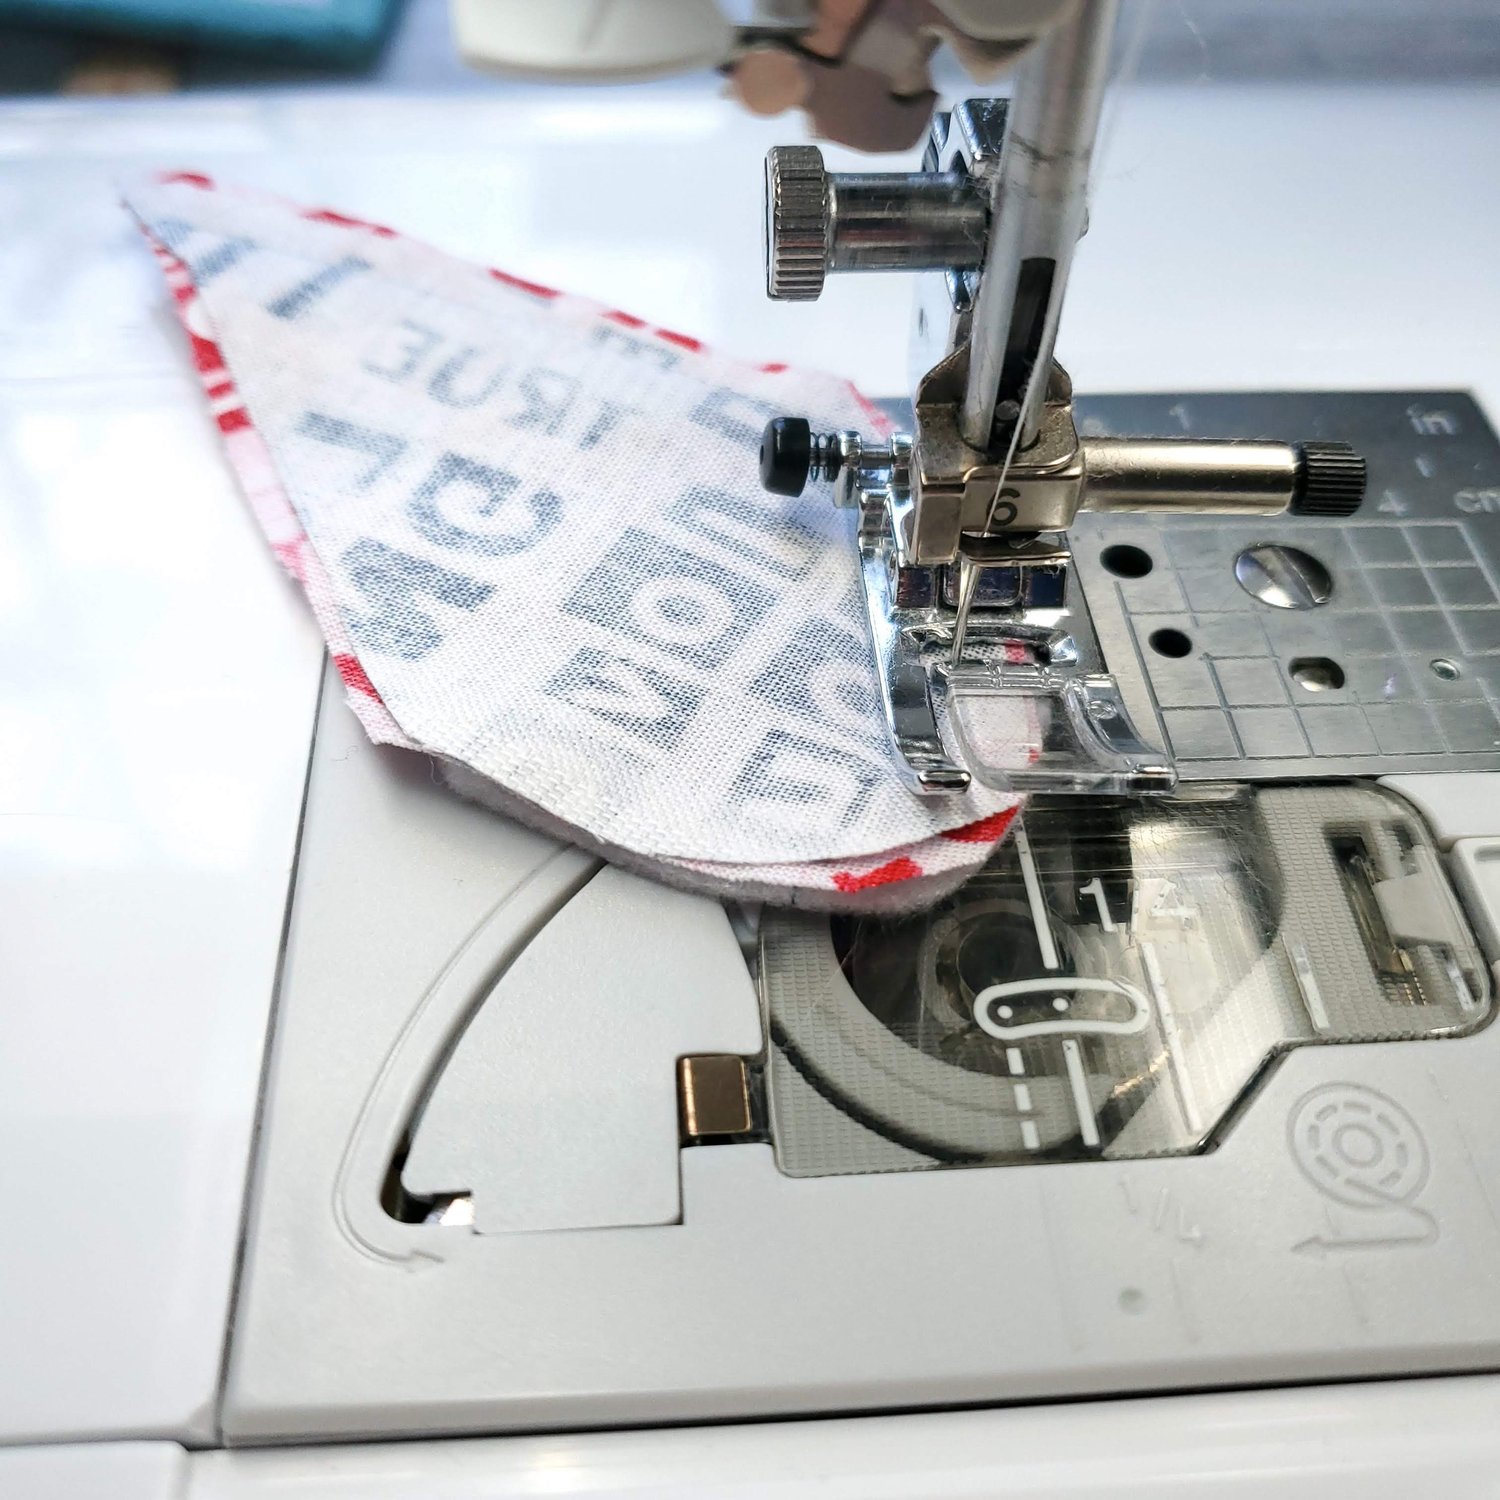
Turn the wings right side out and press. Align on the sides of the body with the wings facing inward and sew about ⅛” seam. You may need to trim the open edge of the wing piece to align with the body.
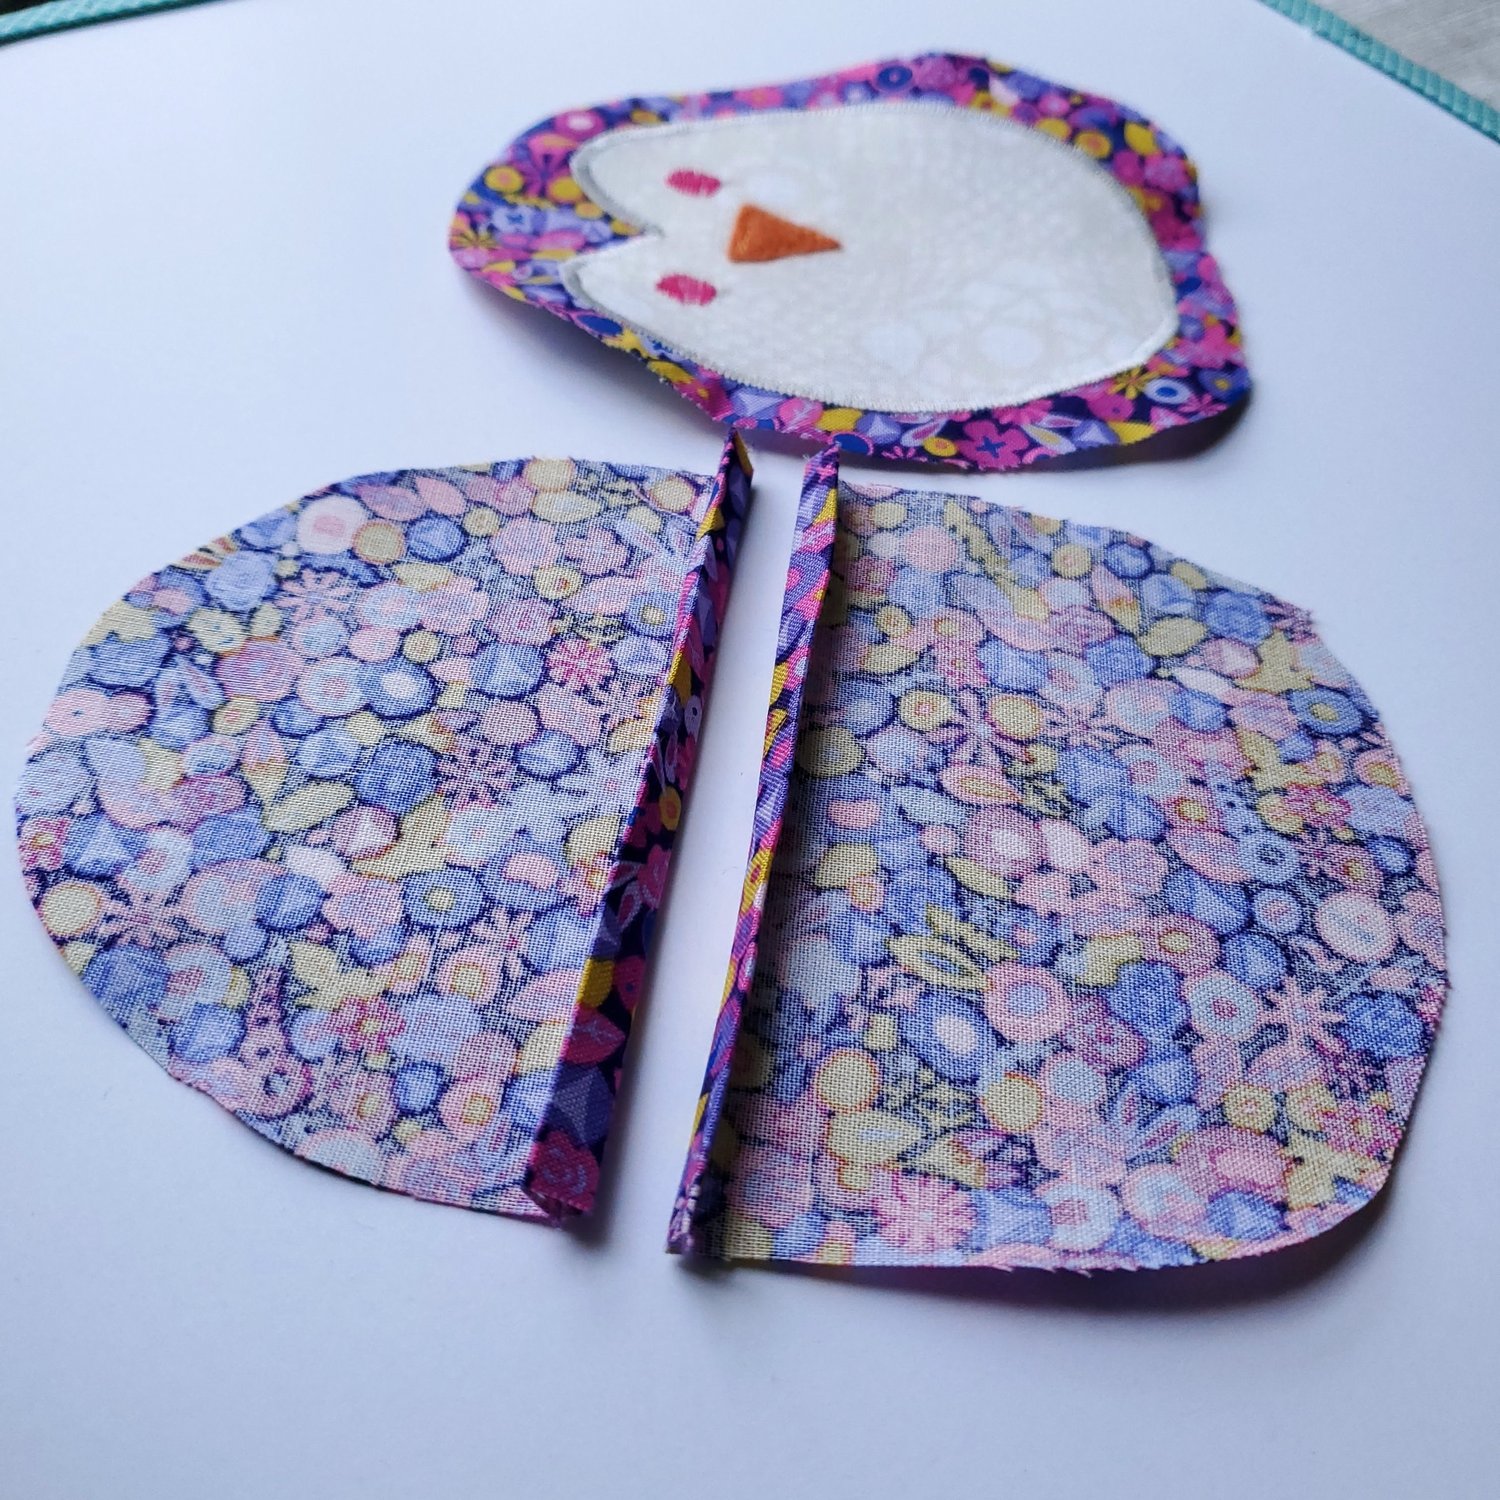
Prepare the back pocket by pressing the edge under ¼” and another ¼” enclosing the raw edges. Topstitch close to the edge on each half.
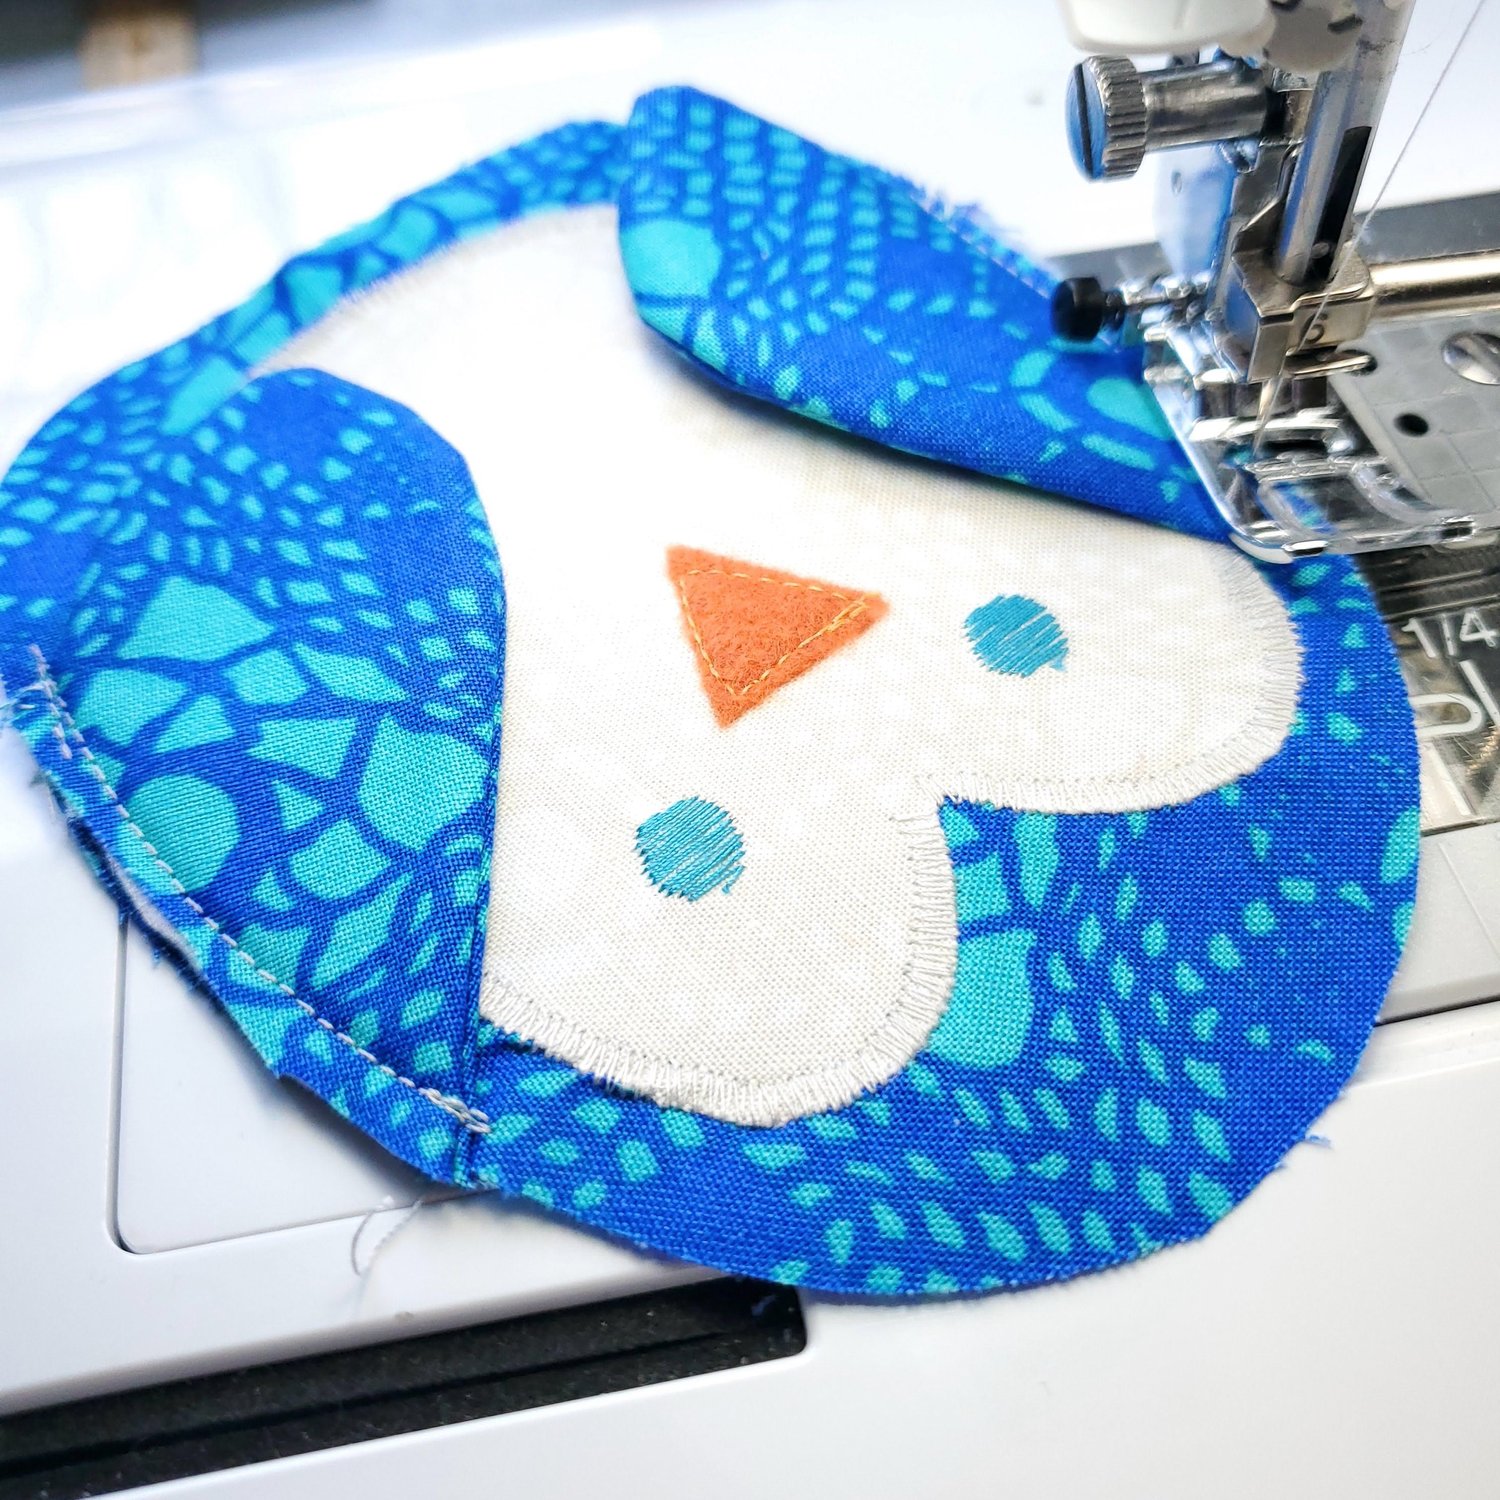
With right sides together, layer the front, the batting and the back two pockets overlapping the edges and pin in place.
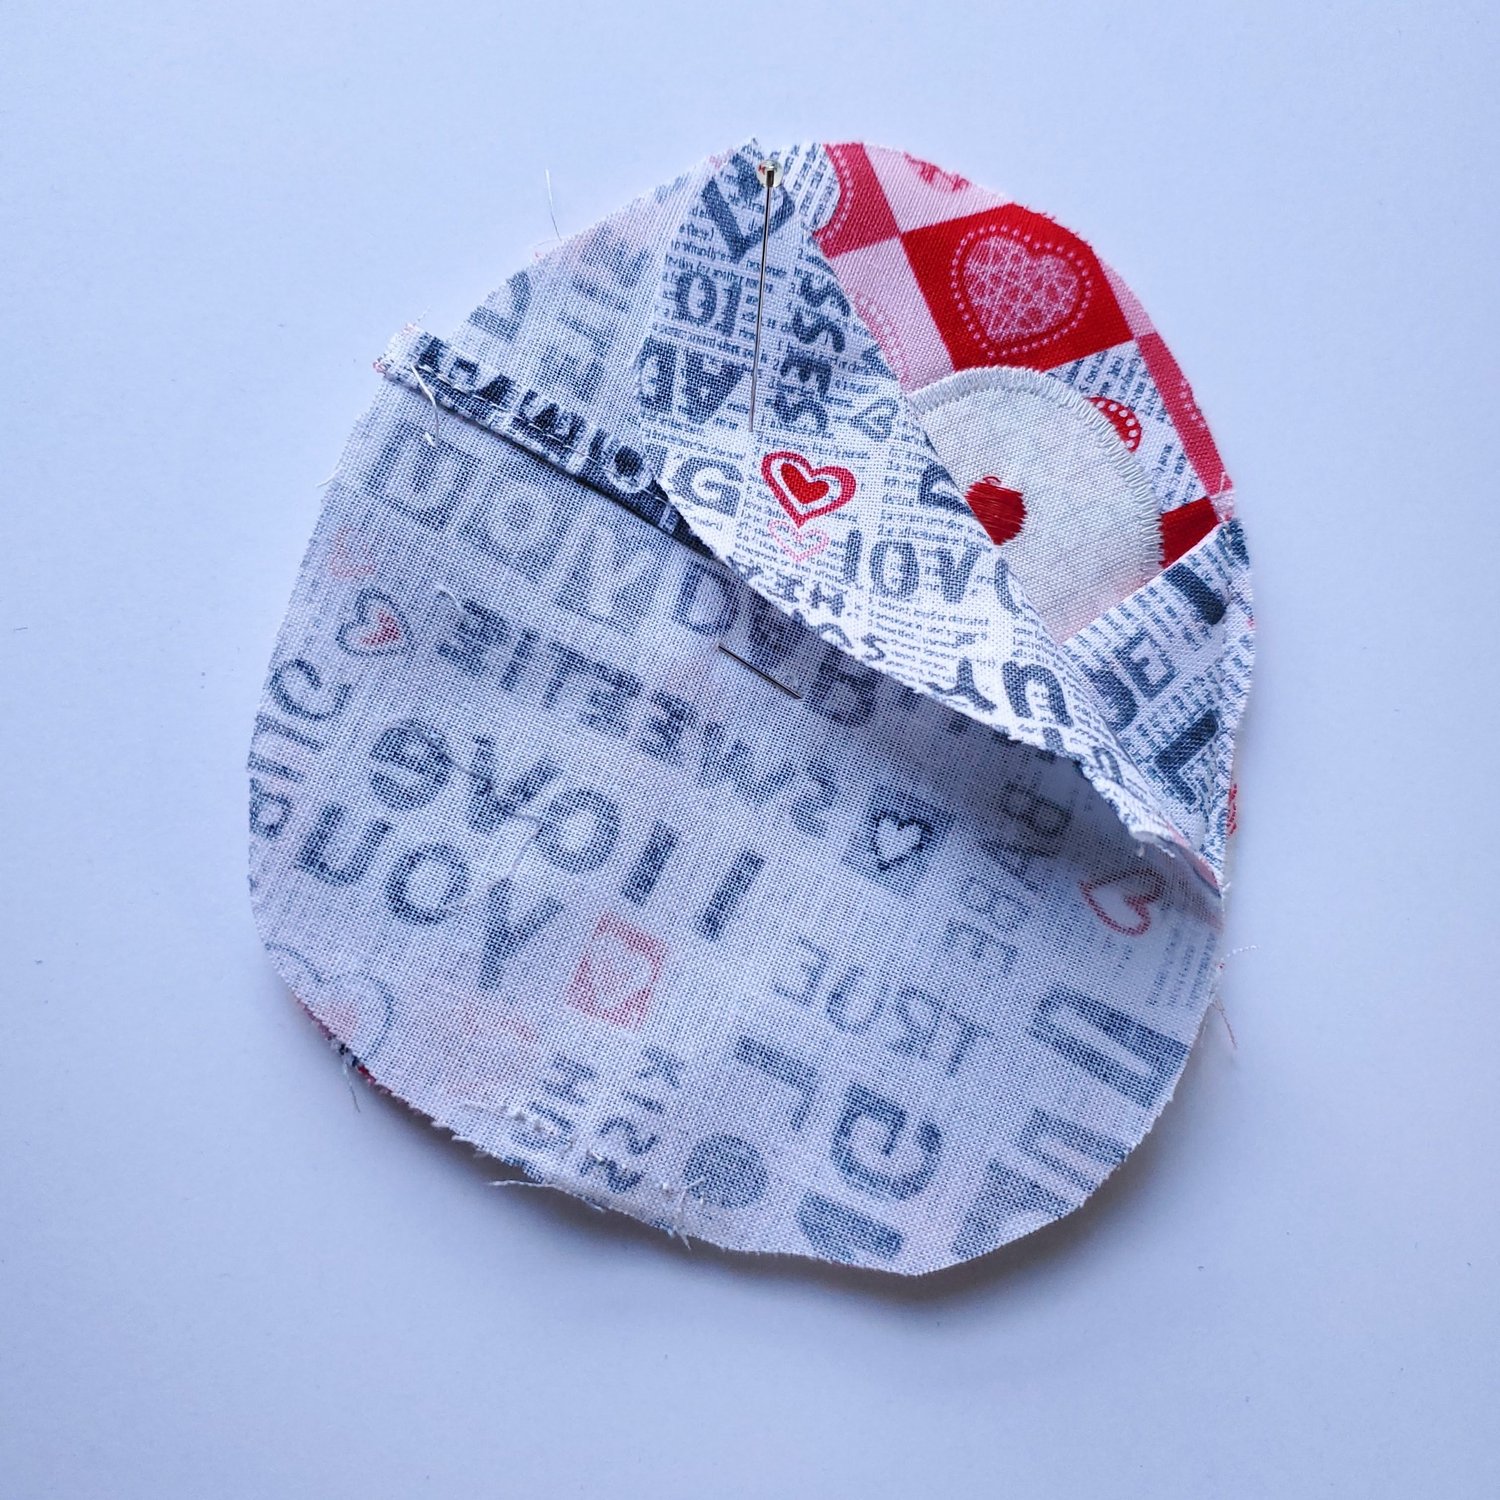
I used the overlock stitch on my machine to sew the layers together. You can straight stitch also with about a ¼” seam allowance.
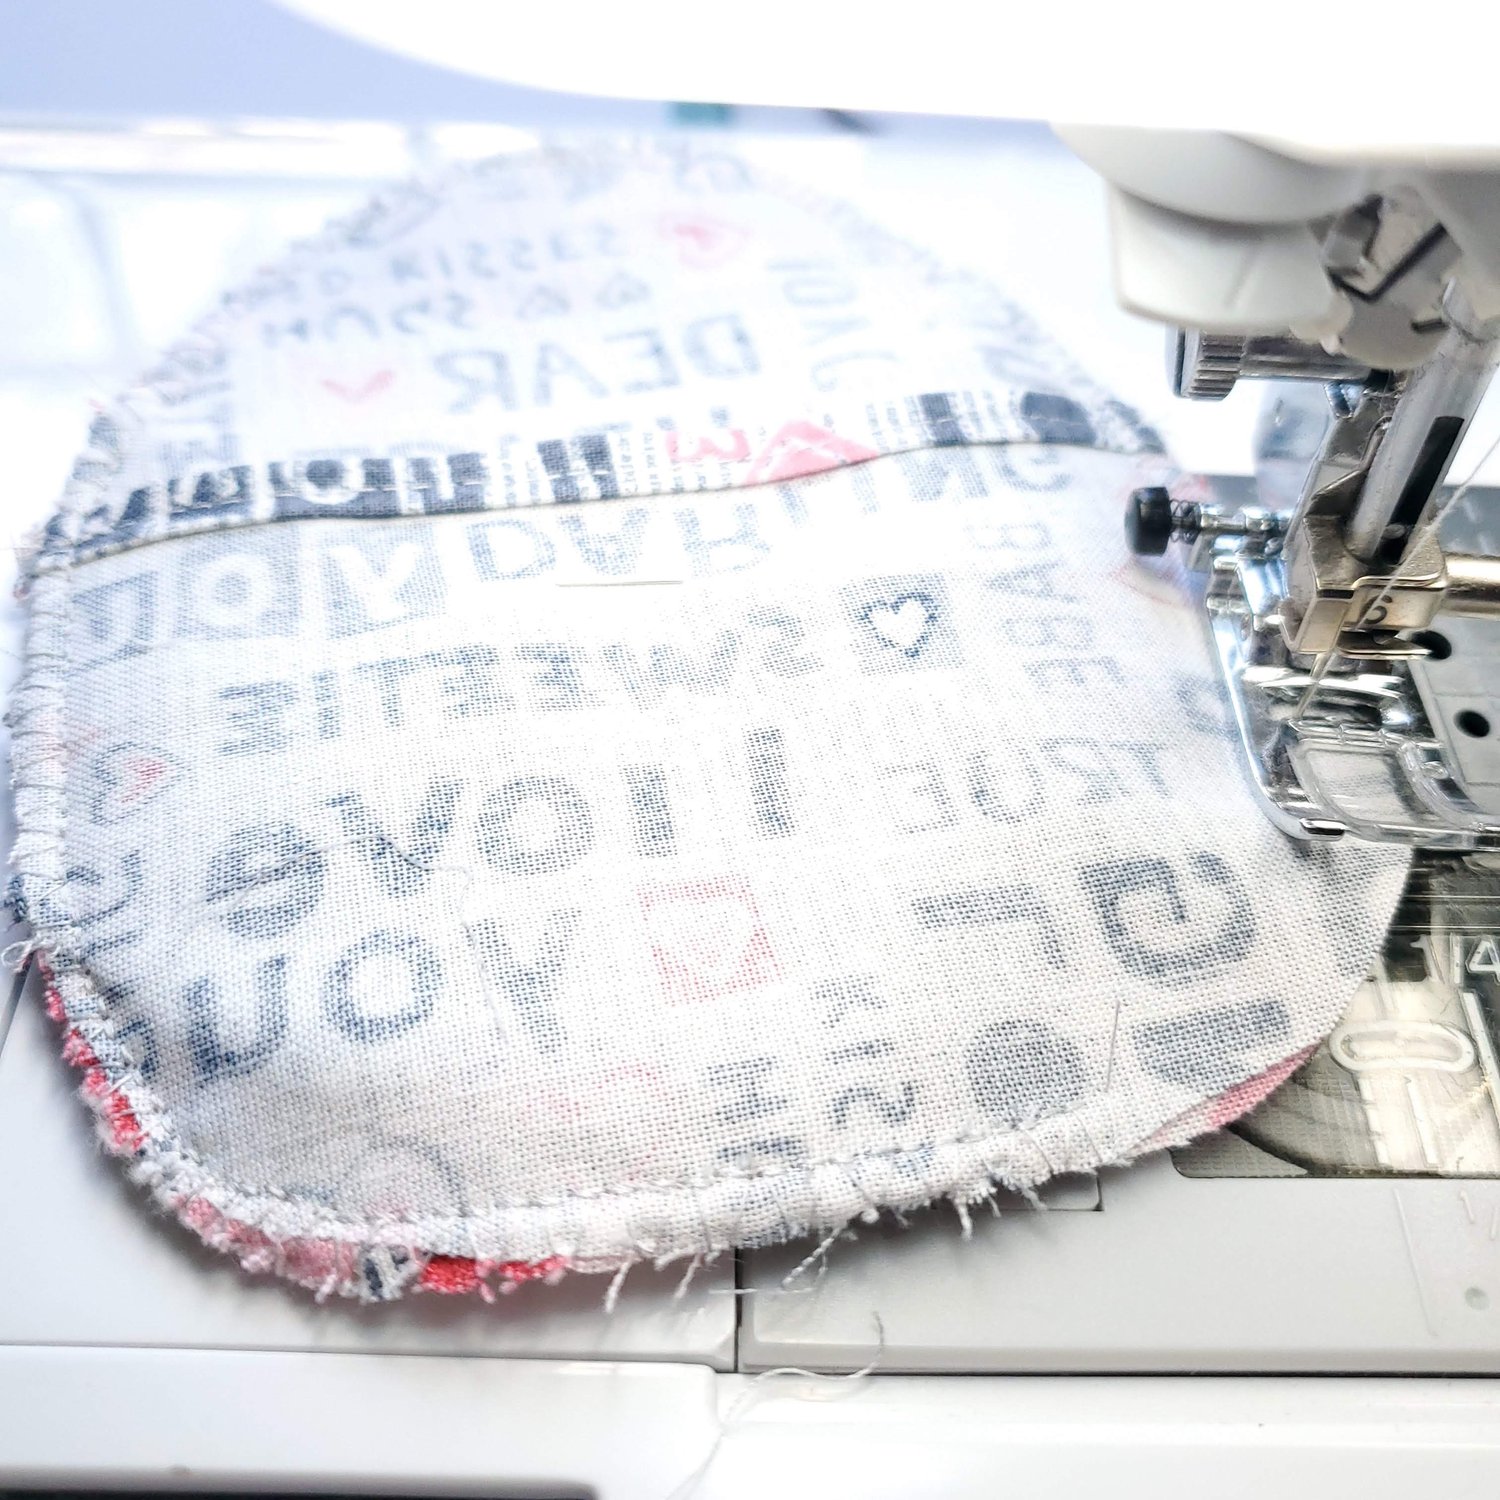
Turn right sides out through the pocket flap, and press. These penguins were so much fun to make I had to make a whole family! You could also eliminate the pocket and make it a stuffie by filling it with Poly-fil. Now that you know how to design the pattern you can make all different sizes. These would be cute Valentine’s Day gift filled with candy.
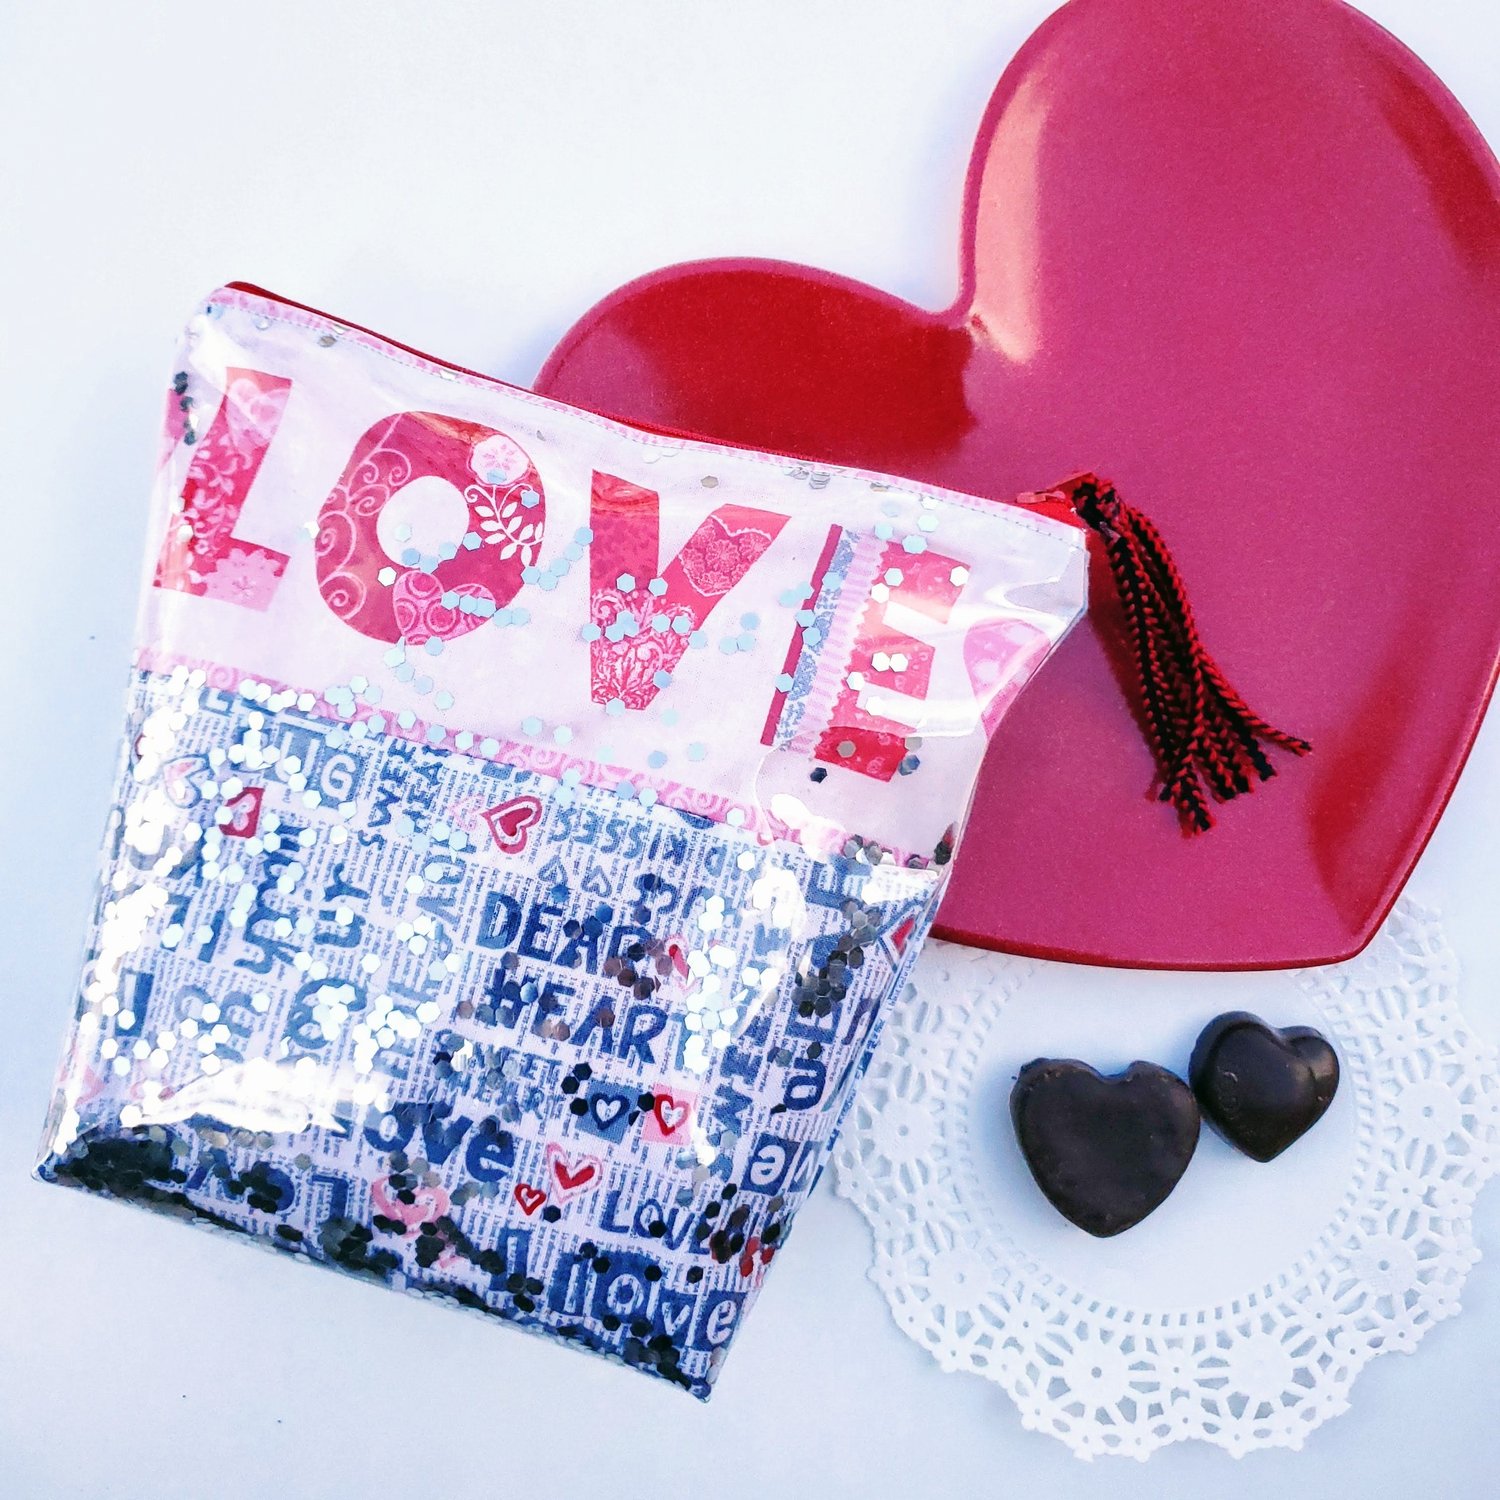
The DIY Glitter Pouch would be another fun and useful Valentine’s Day gift idea.