

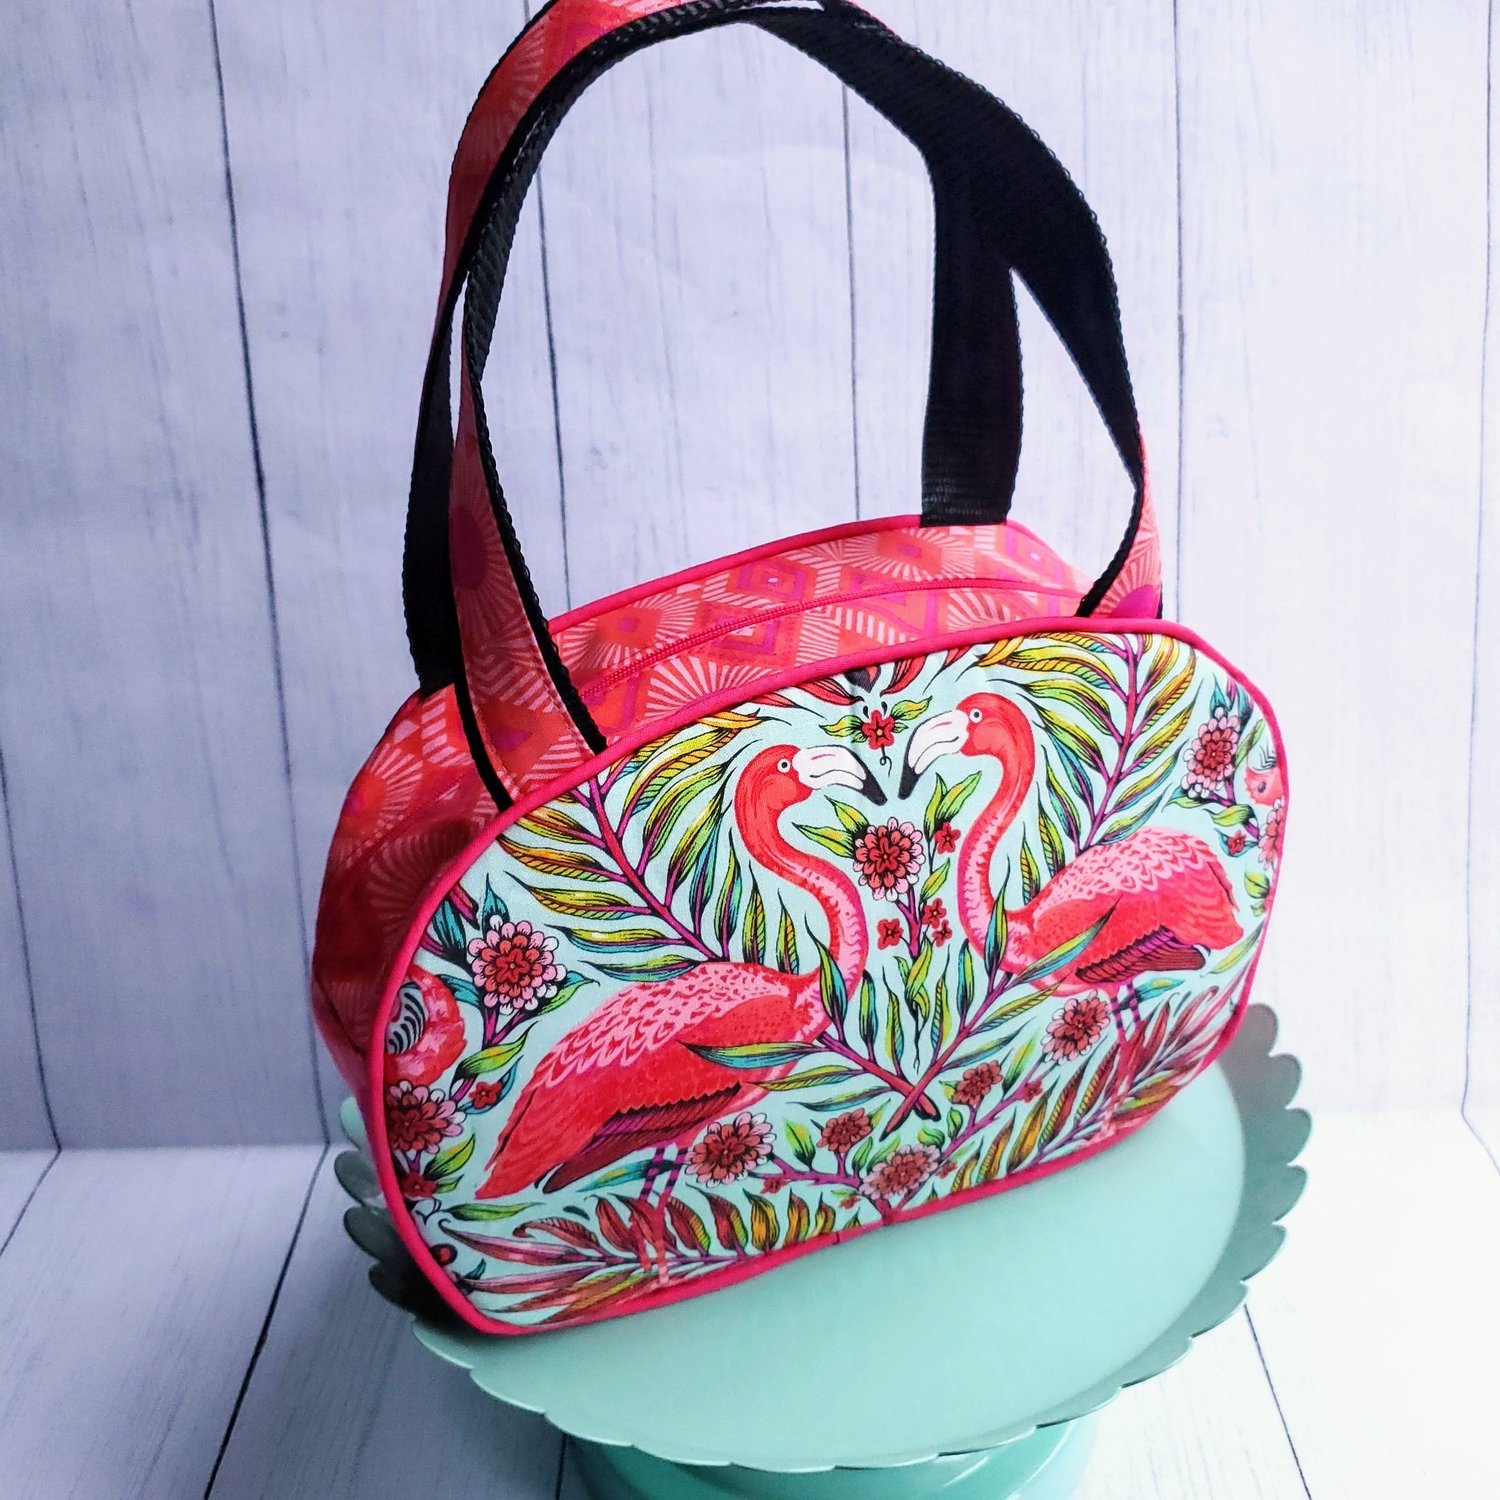
Flamingo Purse
16th Dec 2021
If you are reading this you probably can relate to the excitement over a new fabric release from Tula Pink! I love fabric and all the possibilities it offers to create a one of a kind useful item. Once I received the selection of fat quarters from the new Tula Pink fabric line I had my projects planned. The Daydreamer Mango Pretty in Pink flamingo design was ideal to be center stage on this free Sew4Home purse pattern. It pairs perfectly with the Quilted Scarf featured last week in the Cottonville Cuts blog.
Materials Needed:
Fat Quarter of Mango Pretty in Pink from Classic Membership Box
Fat Quarter of Daydreamer Dragonfruit Lucy fabric
Fat Quarter for purse lining
Coordinating Aurifil Thread from Chroma Membership
⅓ yard Pellon Flex Foam double sided fusible interfacing
1 yard of webbing for the handles
12” coordinating zipper
⅓ yard Pellon mid weight fusible interfacing
Prepackaged piping
1 yard of coordinating double fold elastic ⅝” wide to cover interior seams
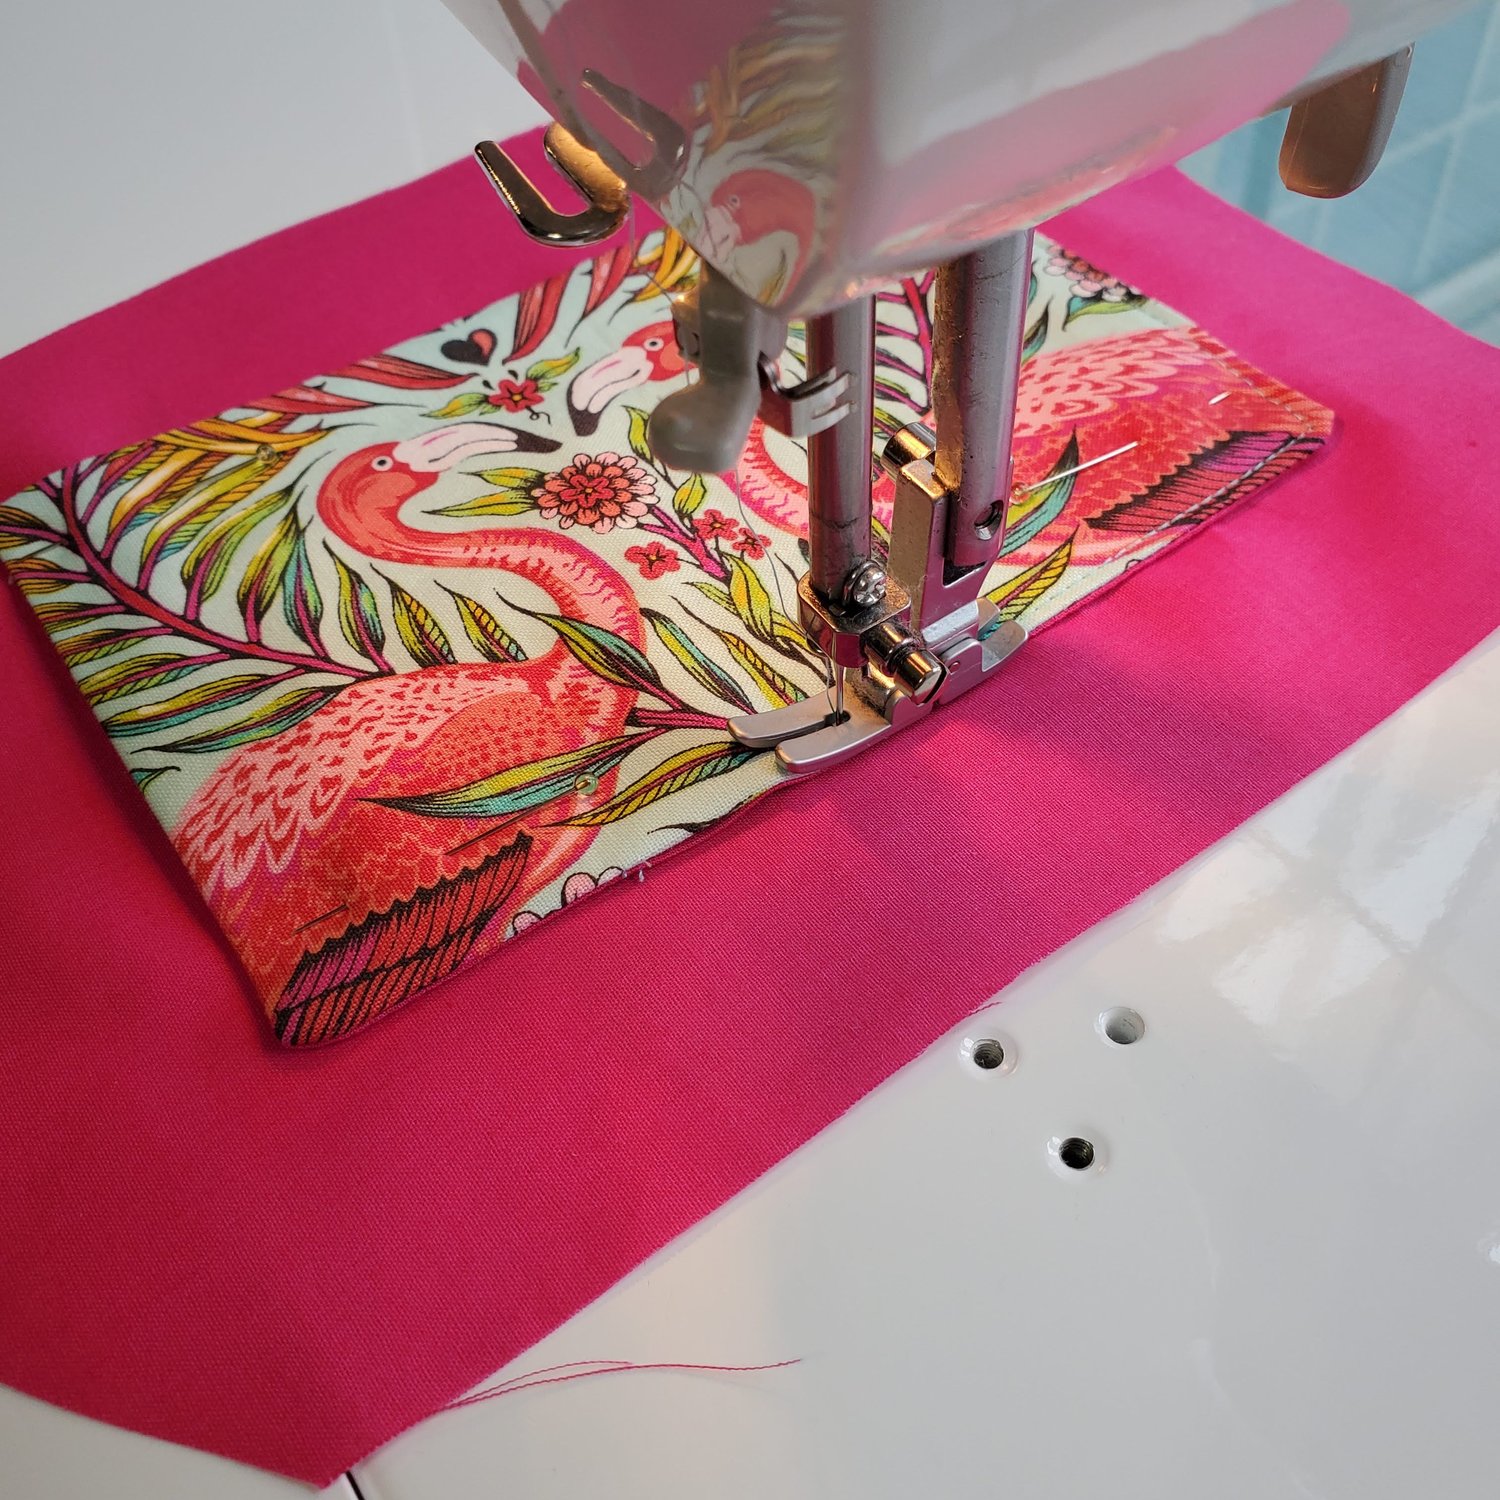
To get started download and print the free Pattern Template from Sew4Home. Use the template to mark front and back pieces of the purse with a Frixion pen. Check to be sure the orientation is correct and you are pleased with the look before cutting out the pieces.
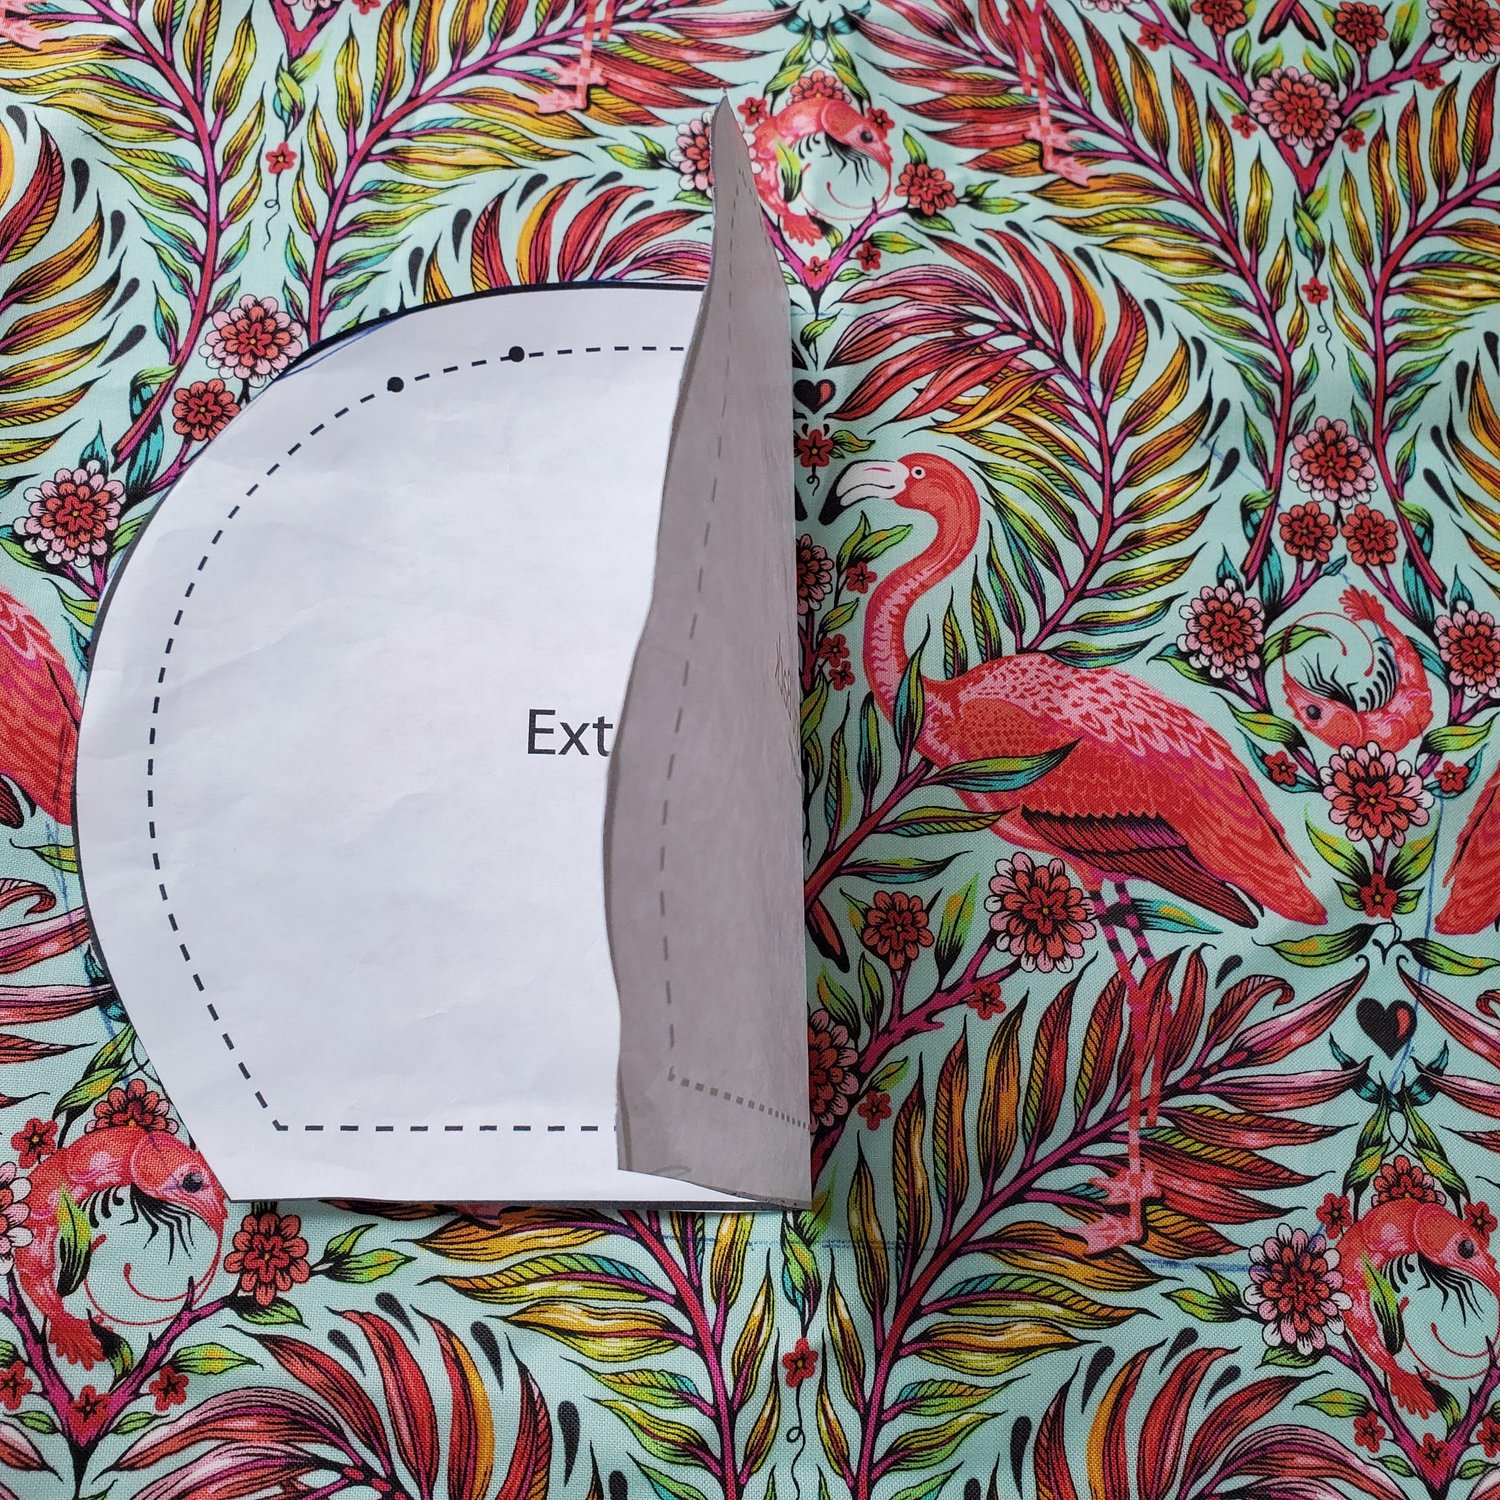
Allow about ¾” - 1” around the design to allow for the seams. I found it helpful to print out the cut list and check off the pieces as I went along. I used a solid lining with a fussy cut pocket to add interest while keeping it simple as I cut the pieces.
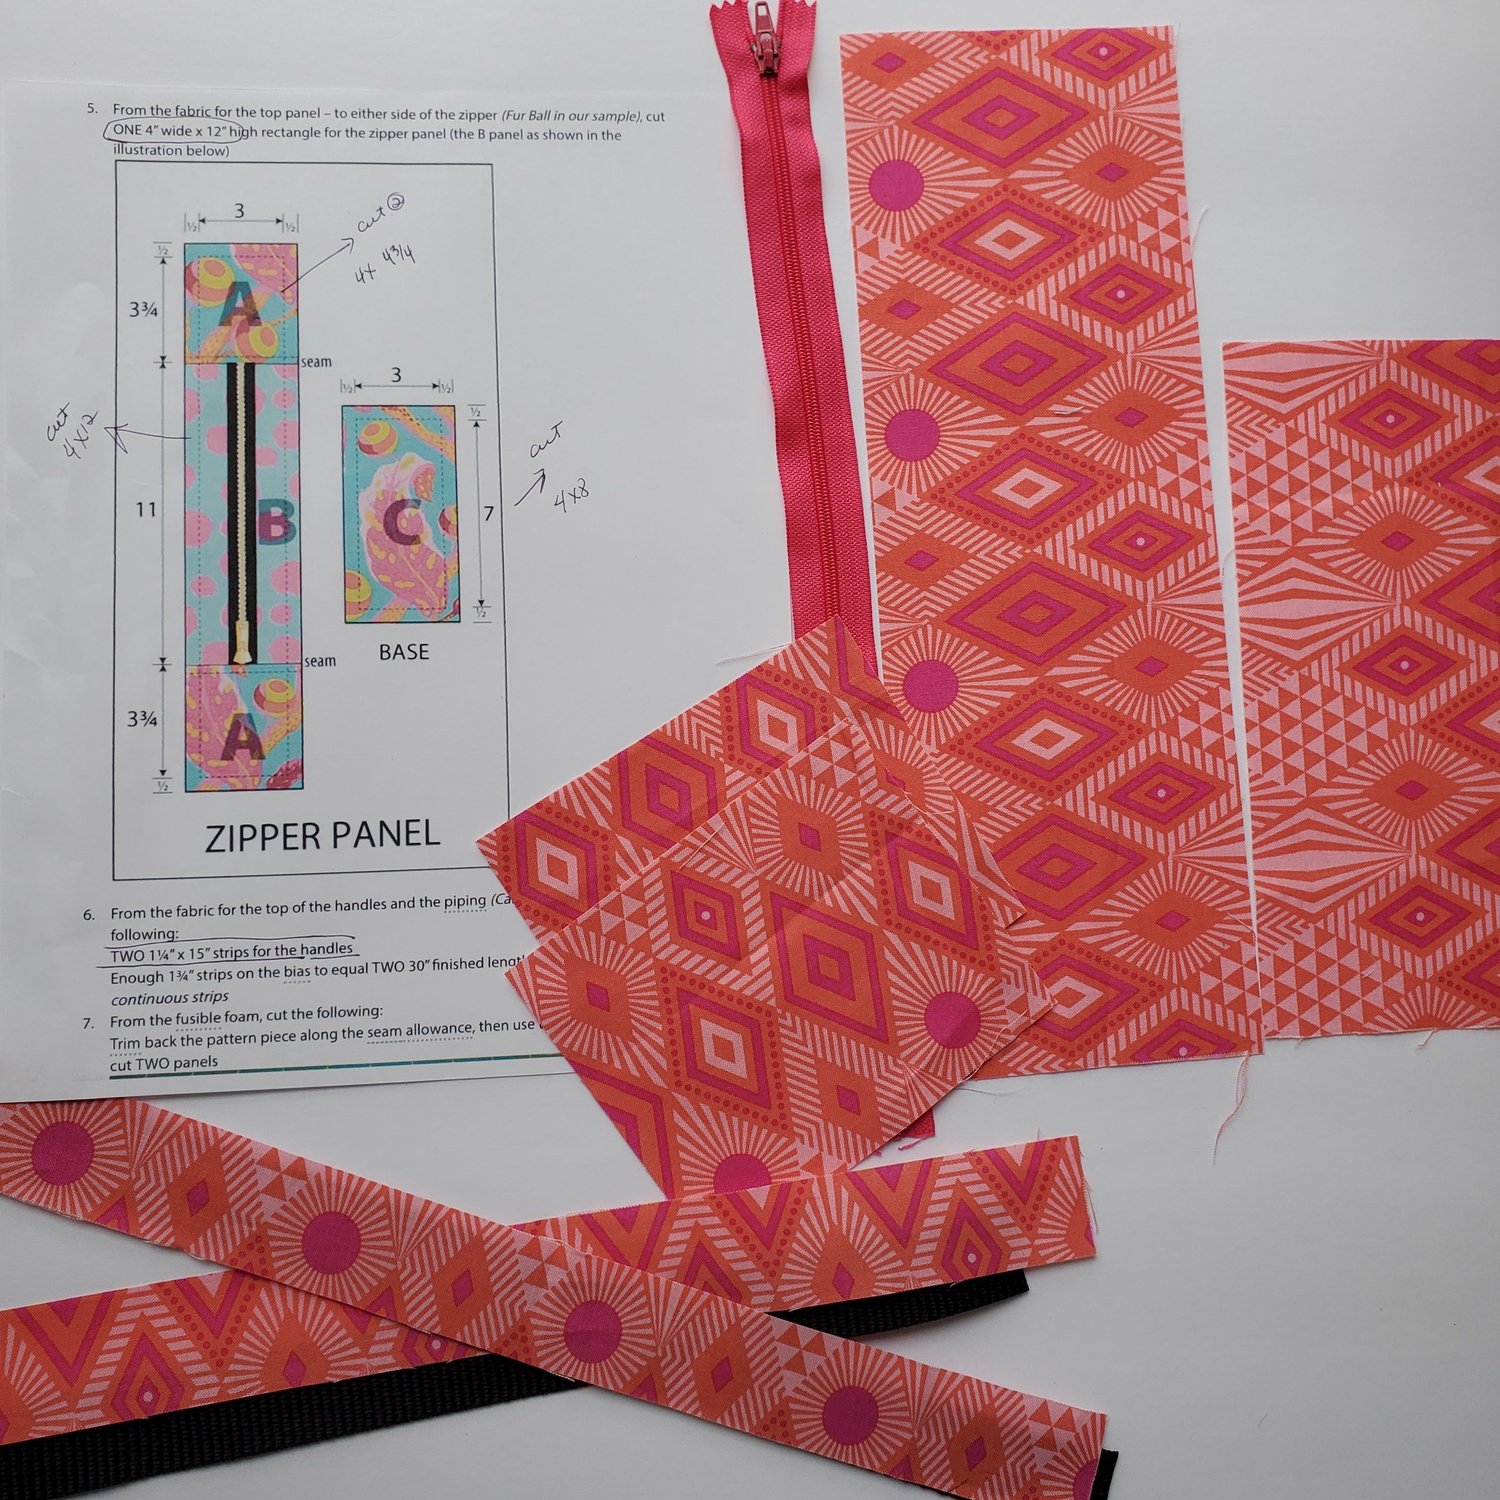
The Sew4Home has a very detailed visual tutorial that will help you step by step. Keep in mind that it is important to cut and sew as accurately as possible so it all fits together in the final step. After the pieces are all cut it is time to fuse the interfacing in place on the matching pieces.
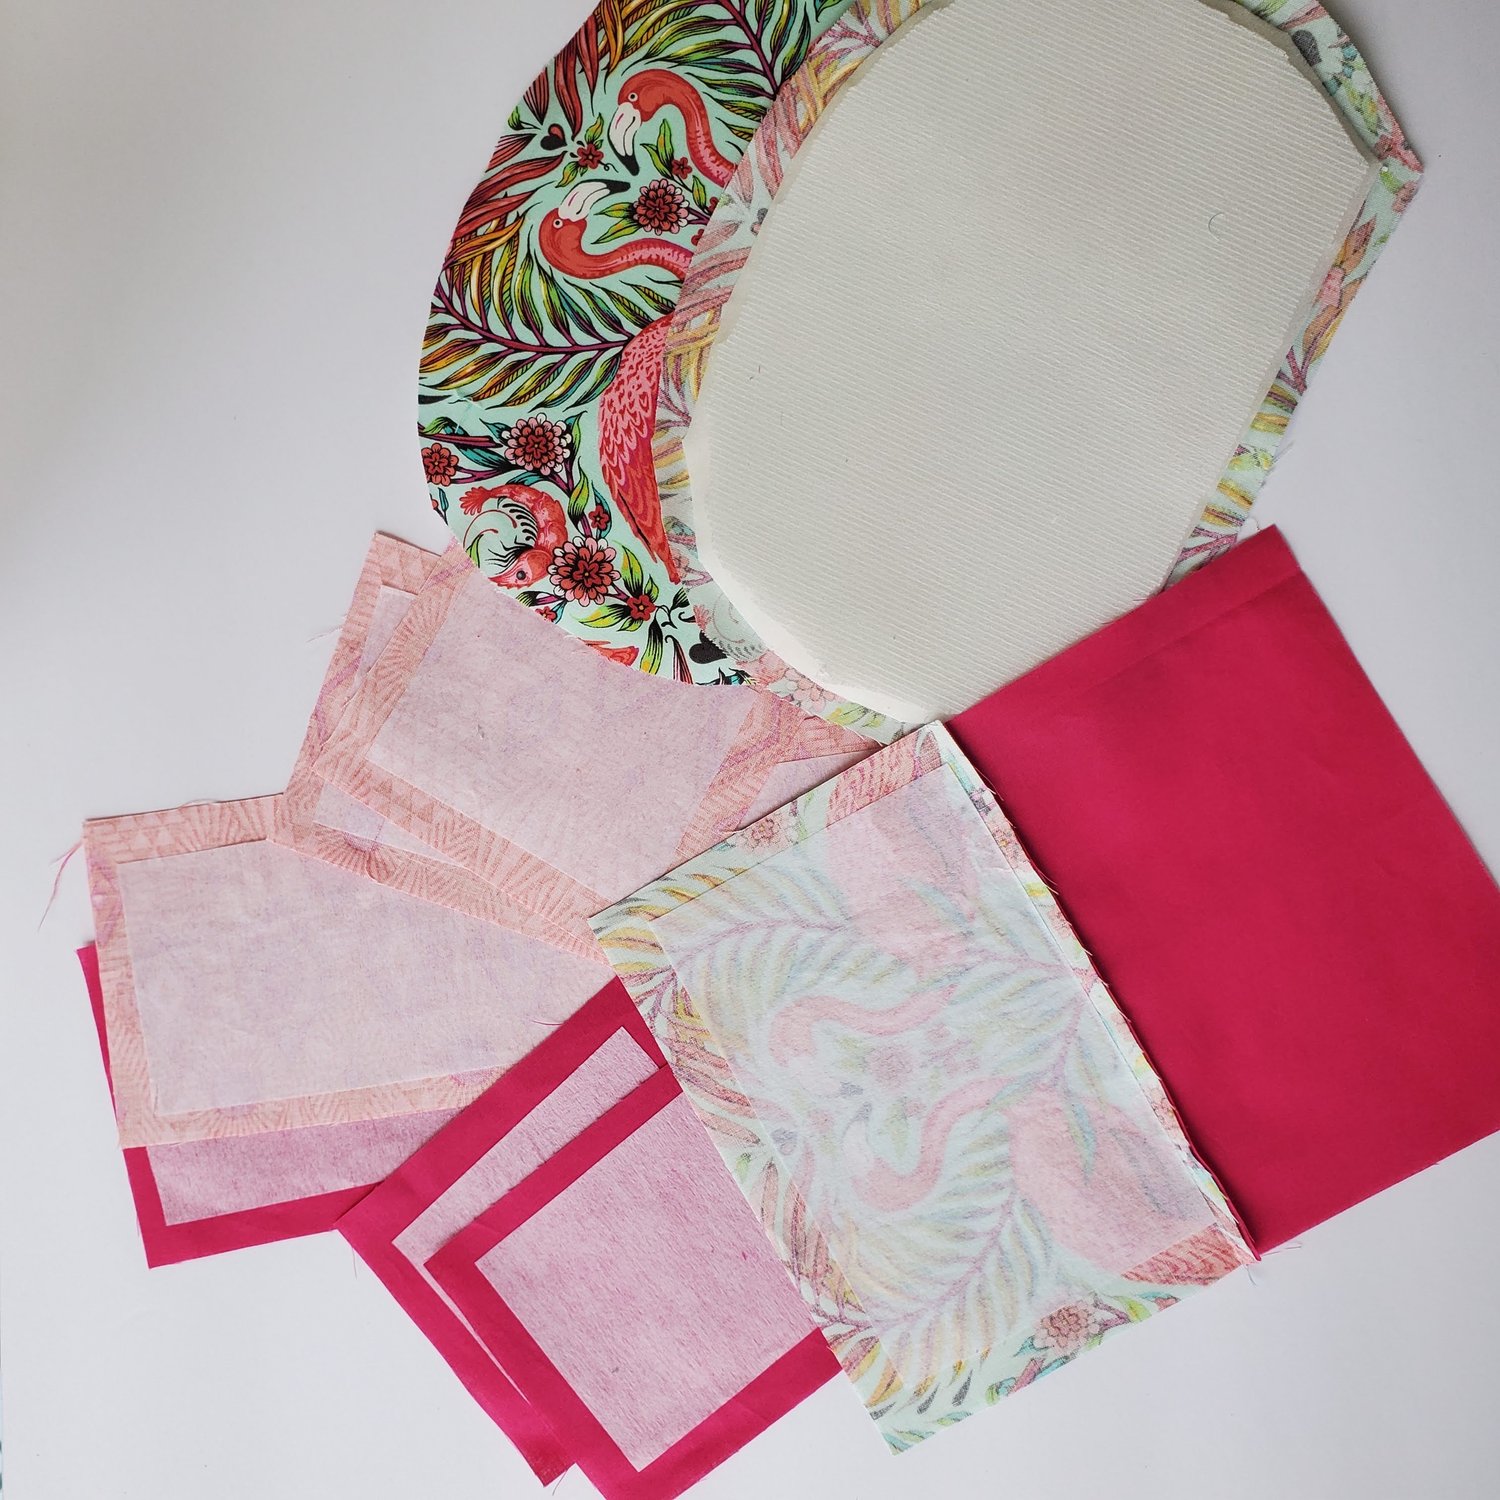
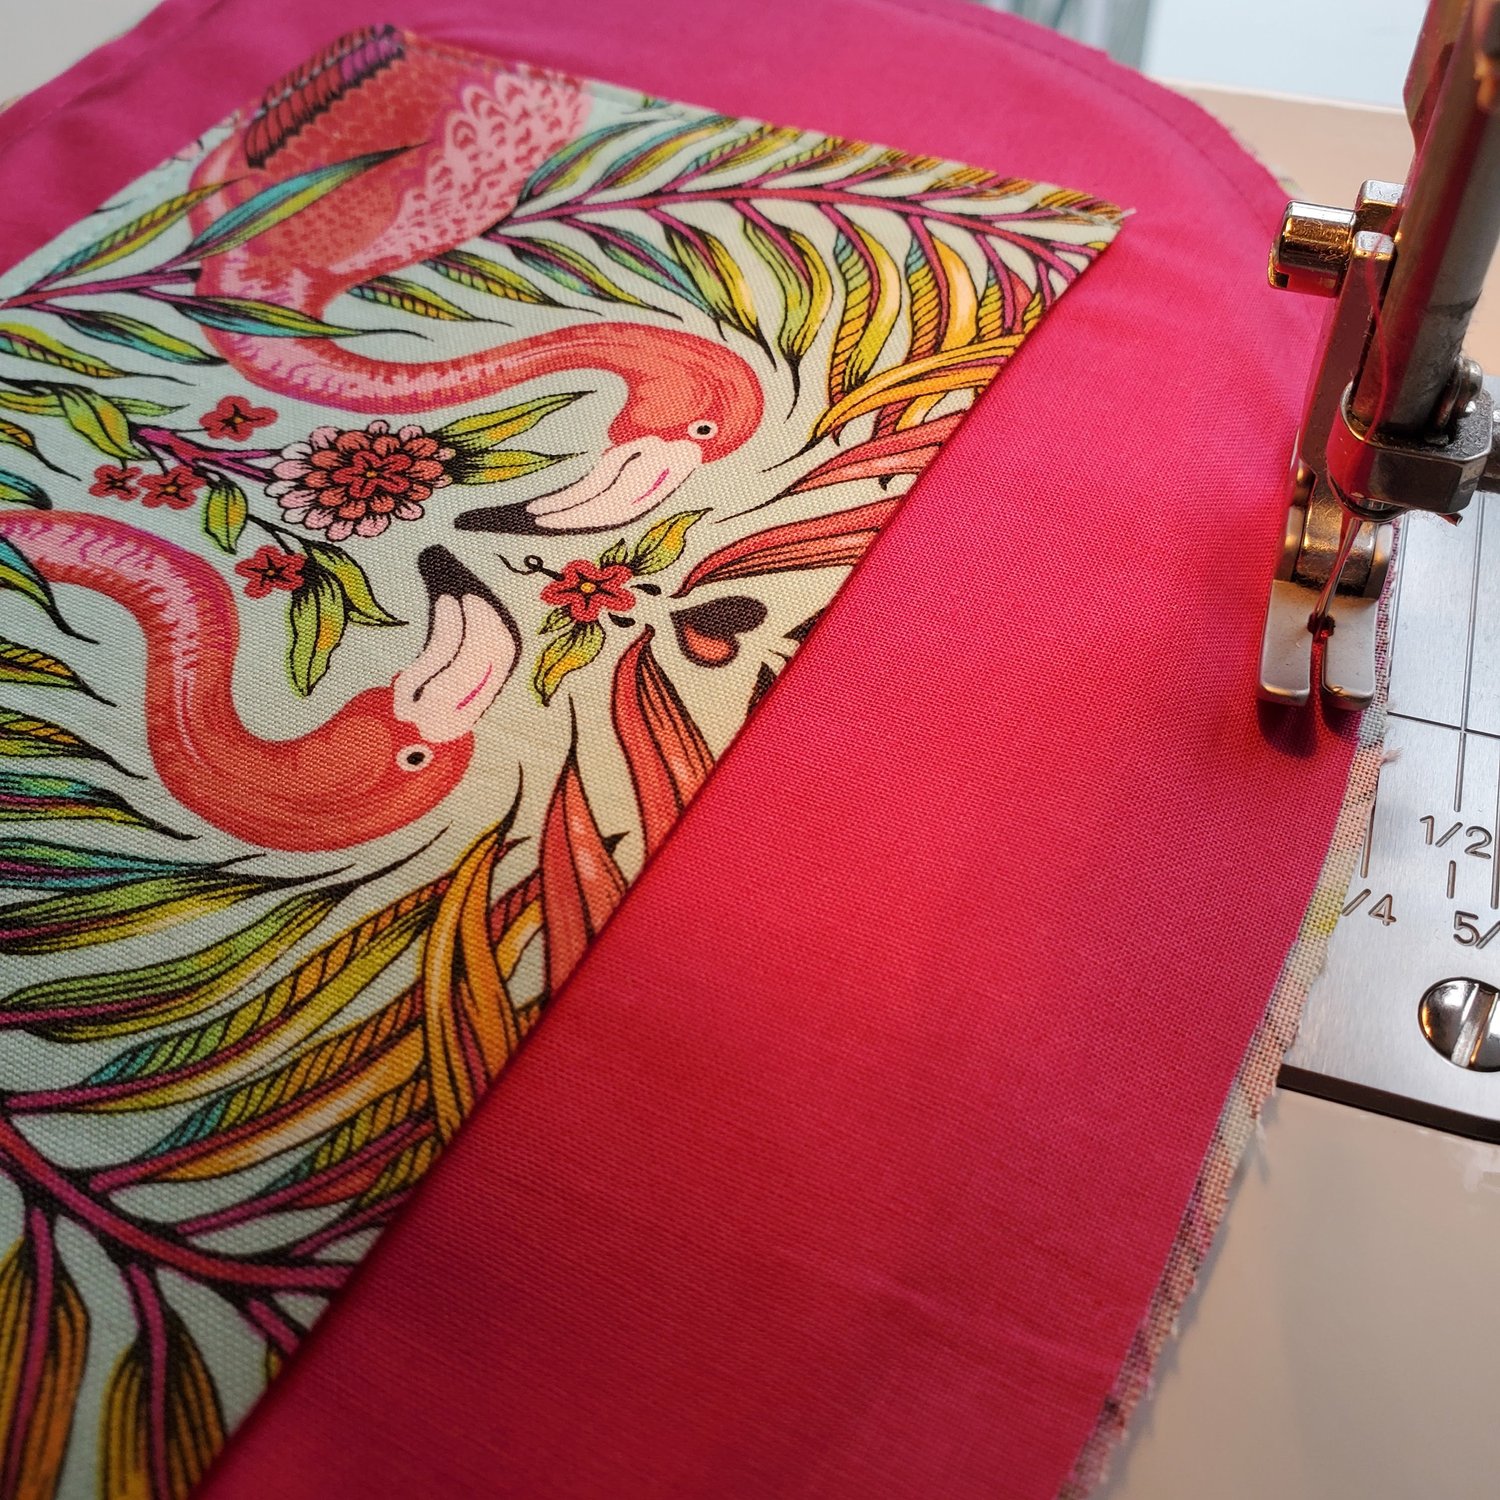
Take note that the interfacing is fused in the center of the pieces allowing for ½” seam allowance. To reduce the bulk of the flex foam it is suggested to trim the edge at an angle on the three pieces used in the purse construction.
The first piece to sew is the interior pocket. To add some interest to the interior pocket I cut a 7 x 4 ½” rectangle of the flamingo and the solid fabric. With right sides together sew around the rectangle leaving a 3” opening at the bottom edge to turn. Trim corners and turn right sides out and press. Align the pocket centered on the right side of the lining with the bottom edge of the pocket 1 ½” from the bottom edge of the lining and edge stitch in place.
Take the webbing piece and cut it into two 15” pieces. Prepare the fabric strips for the handles by pressing ¼” under on each of the long sides. Topstitch onto the handle pieces using a coordinating thread to match the top and bottom handle.

If you are using double sided fusible flex foam prepare the outer curved pieces by ironing the outer fabric and lining fabric to the foam. I like to baste ¼” around the outer edge to be sure a section doesn’t accidentally fold over.
Next cut two pieces of prepared piping 30” long. Using a zipper foot start in the middle of the straight bottom edge baste the piping in place. Cut the piping at the curves to ease it around the corners. The piping should nestle against the edge of the flex foam.
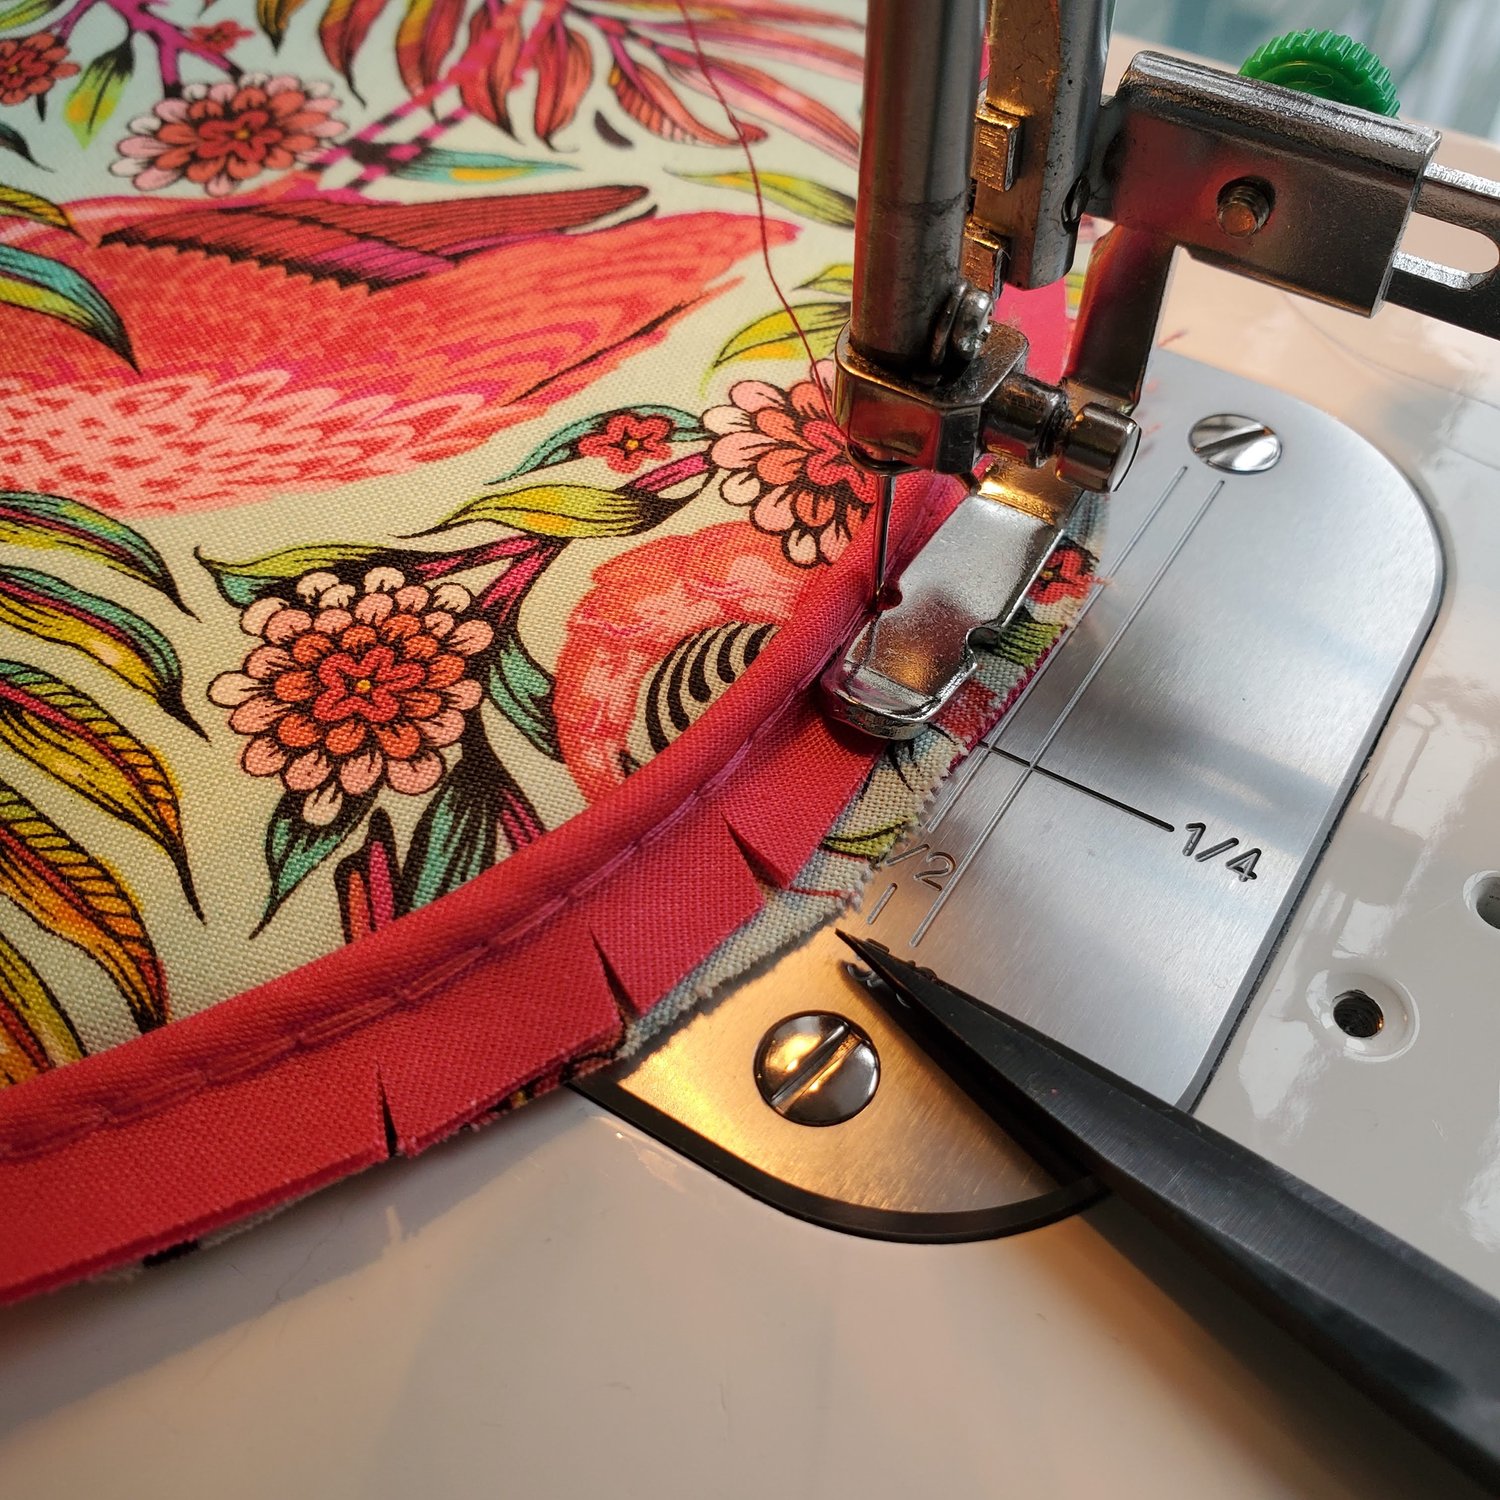
Follow the detailed instructions on how to connect the piping in the tutorial. You are now ready to baste the handles in place. I used the template again to align the webbing handles and stitch in place.

At this point you should have the front and back of the purse complete.
The tutorial gives great instructions on how to construct the zipper panel and side ring of the purse. I used a serger to finish the edges before I sewed the final seam to connect the pieces making the ring shape.
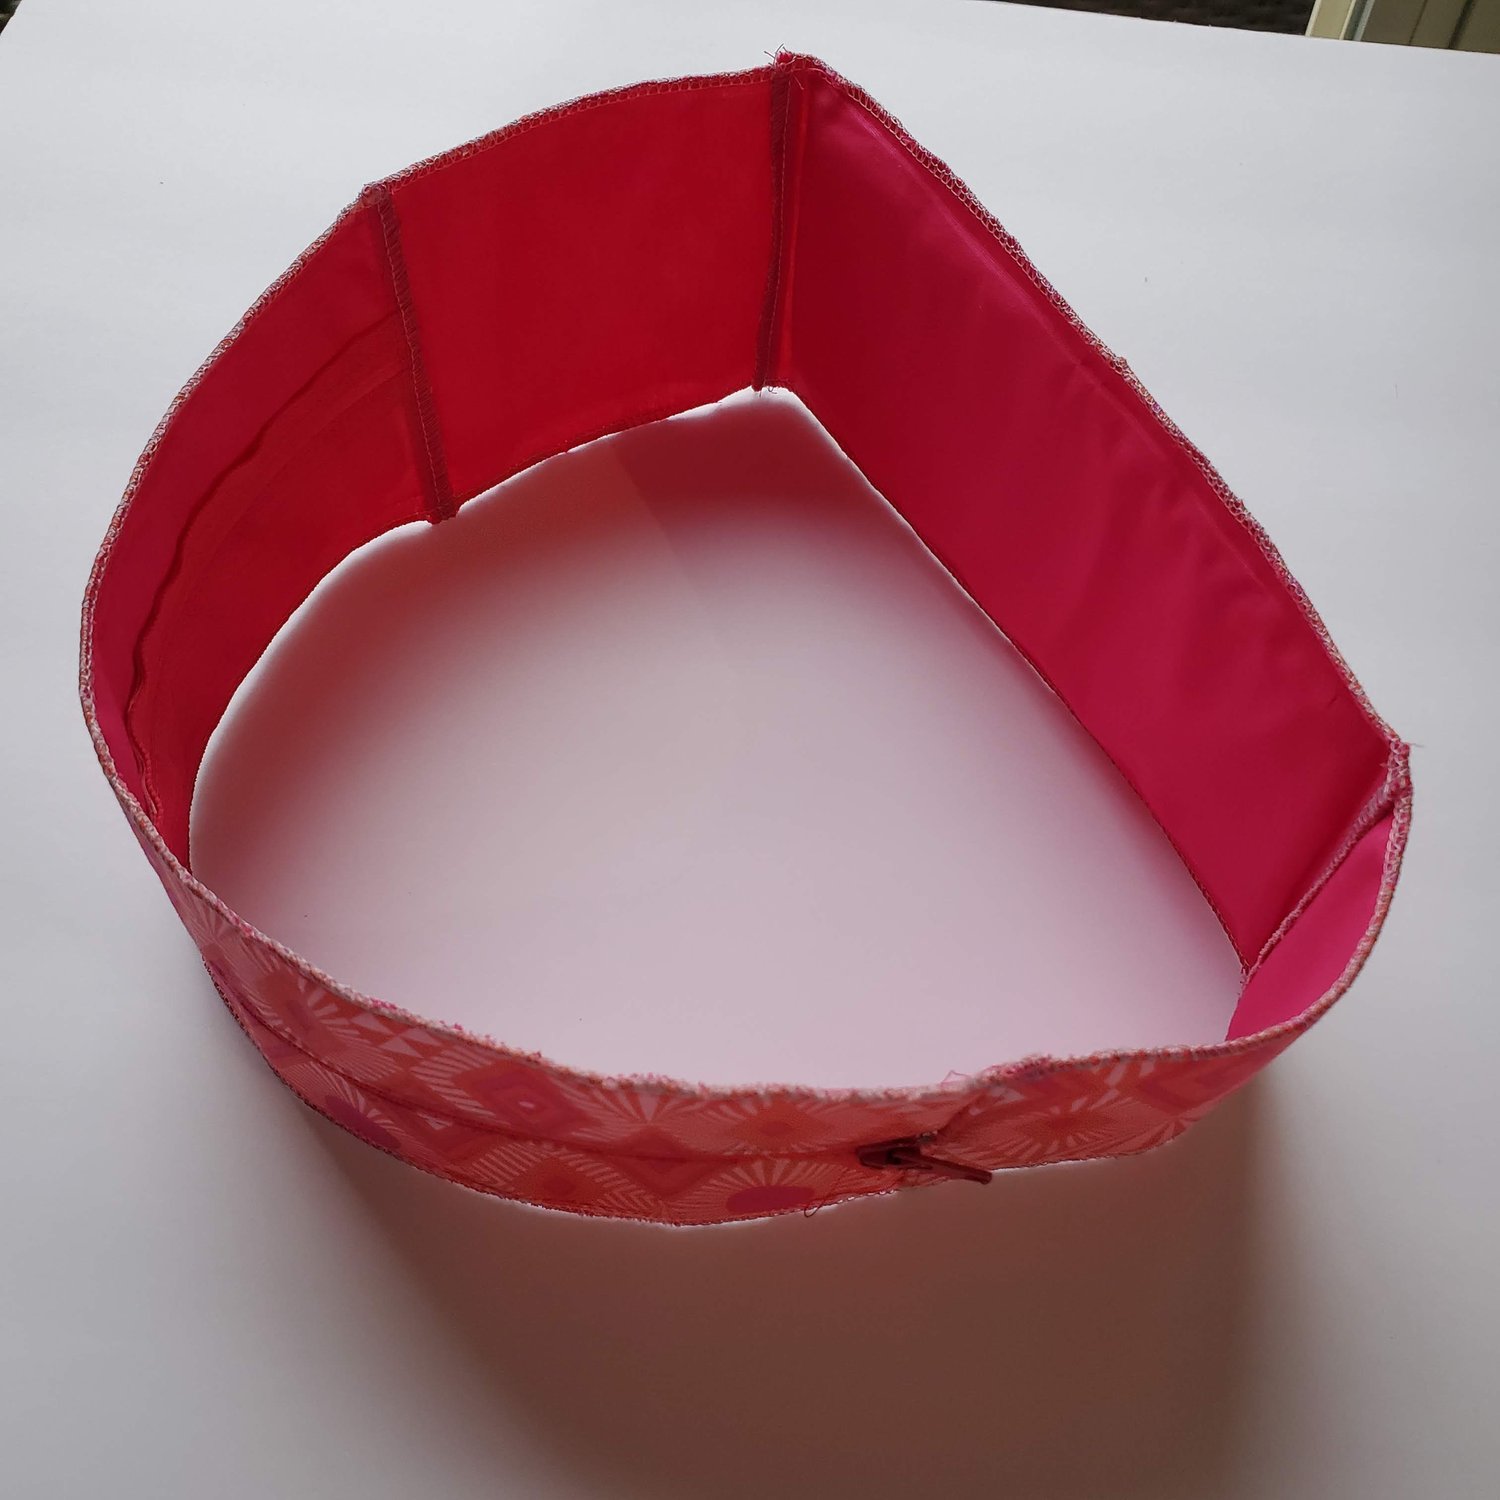
With right sides together clip the outer panel to the ring starting along the flat bottom edge. The seams should match up with the corners.

Take it to the machine and sew as close as possible to the piping using the zipper foot.
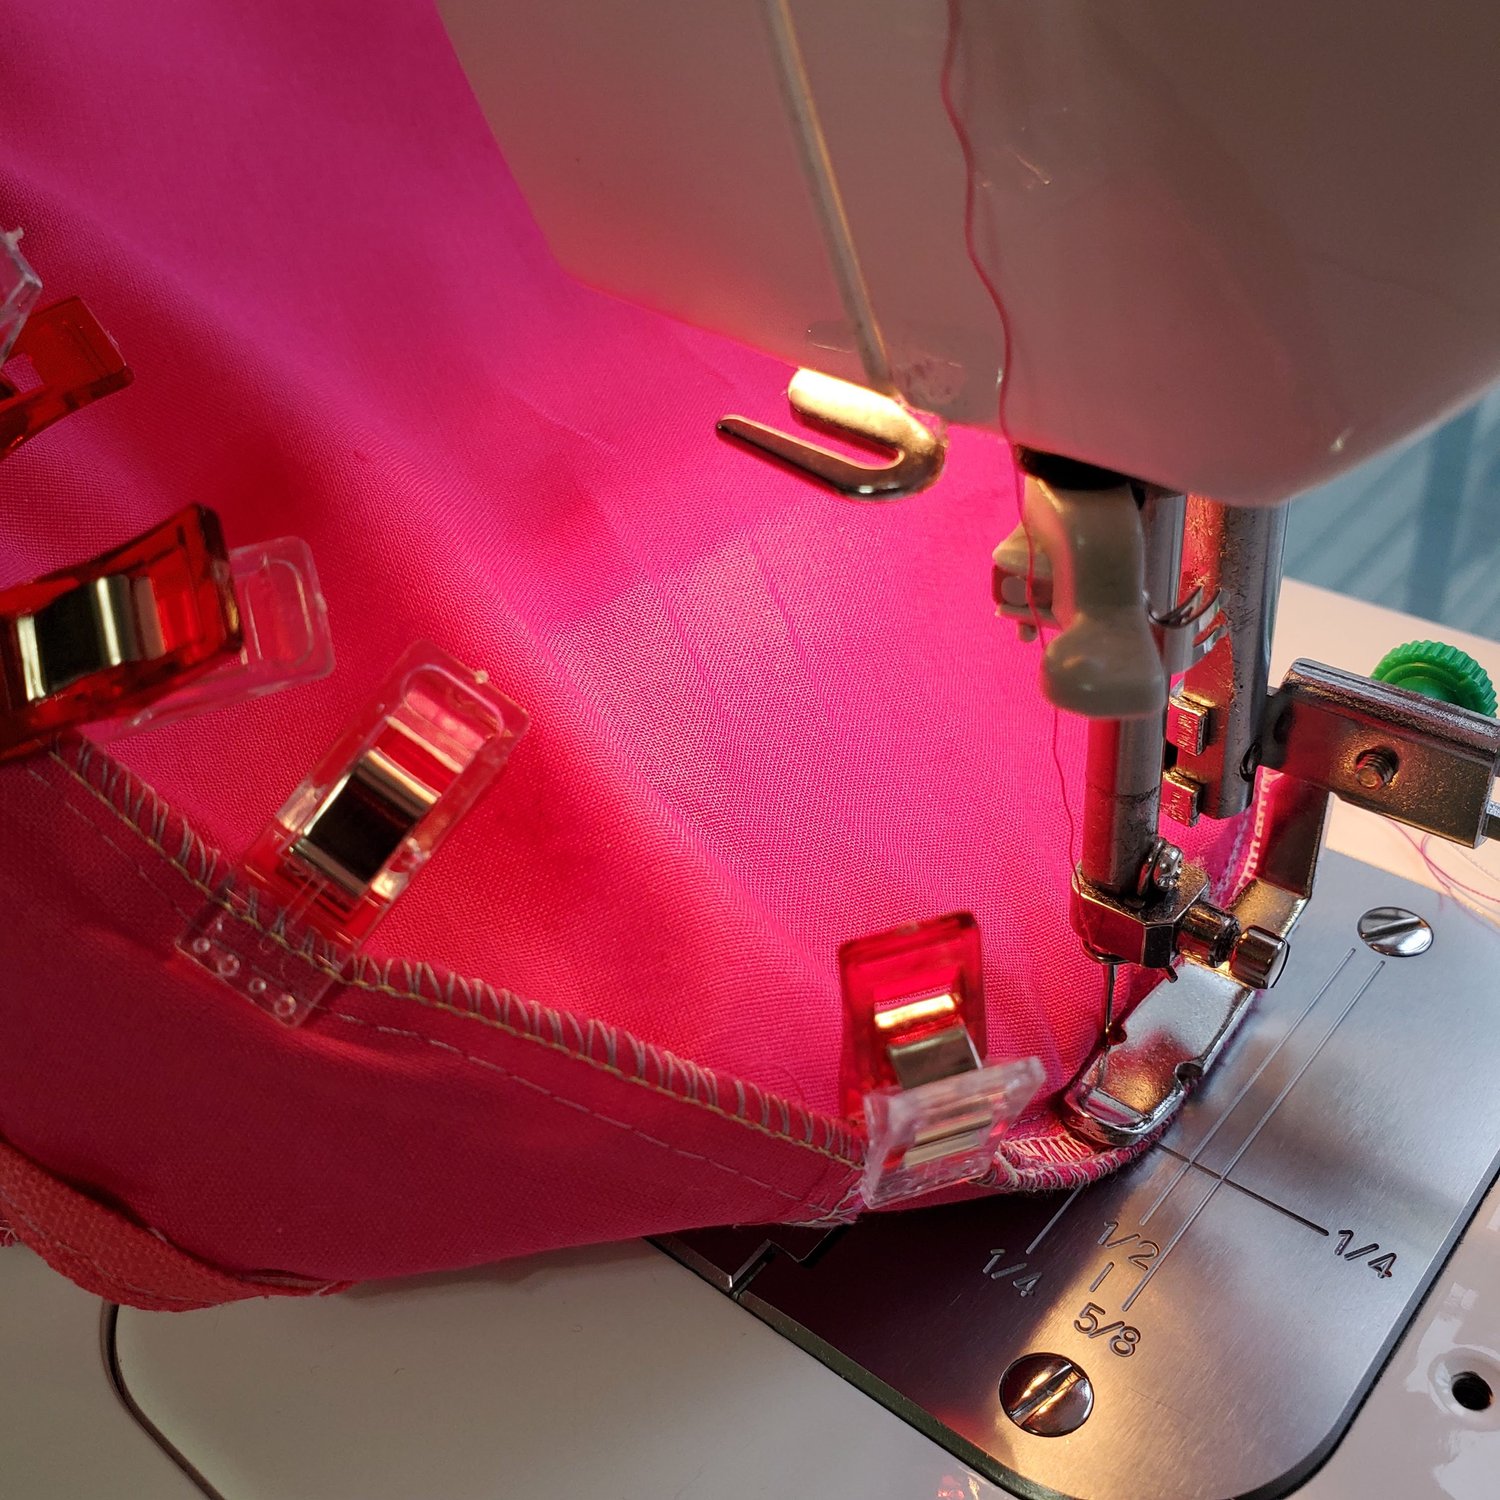
Check to be sure the seam looks nice on the right side. I found I needed to adjust my seam in a few places to get it right up against the piping. For the second panel it is important to have the zipper fully open to turn after sewing the final piece in place. You will repeat the process of clipping and sewing as you did with the first panel. Go slowly and when you need to adjust the layers keep the needle in the down position to hold its place.
Turn right sides out and press using a pressing ham or rolled up towel. At this point you have the option to zig zag the seams on the inside or cover with the ⅝” fold over elastic as detailed in the tutorial. I used the fold over elastic for the bottom half and serged the seams under the zipper area.
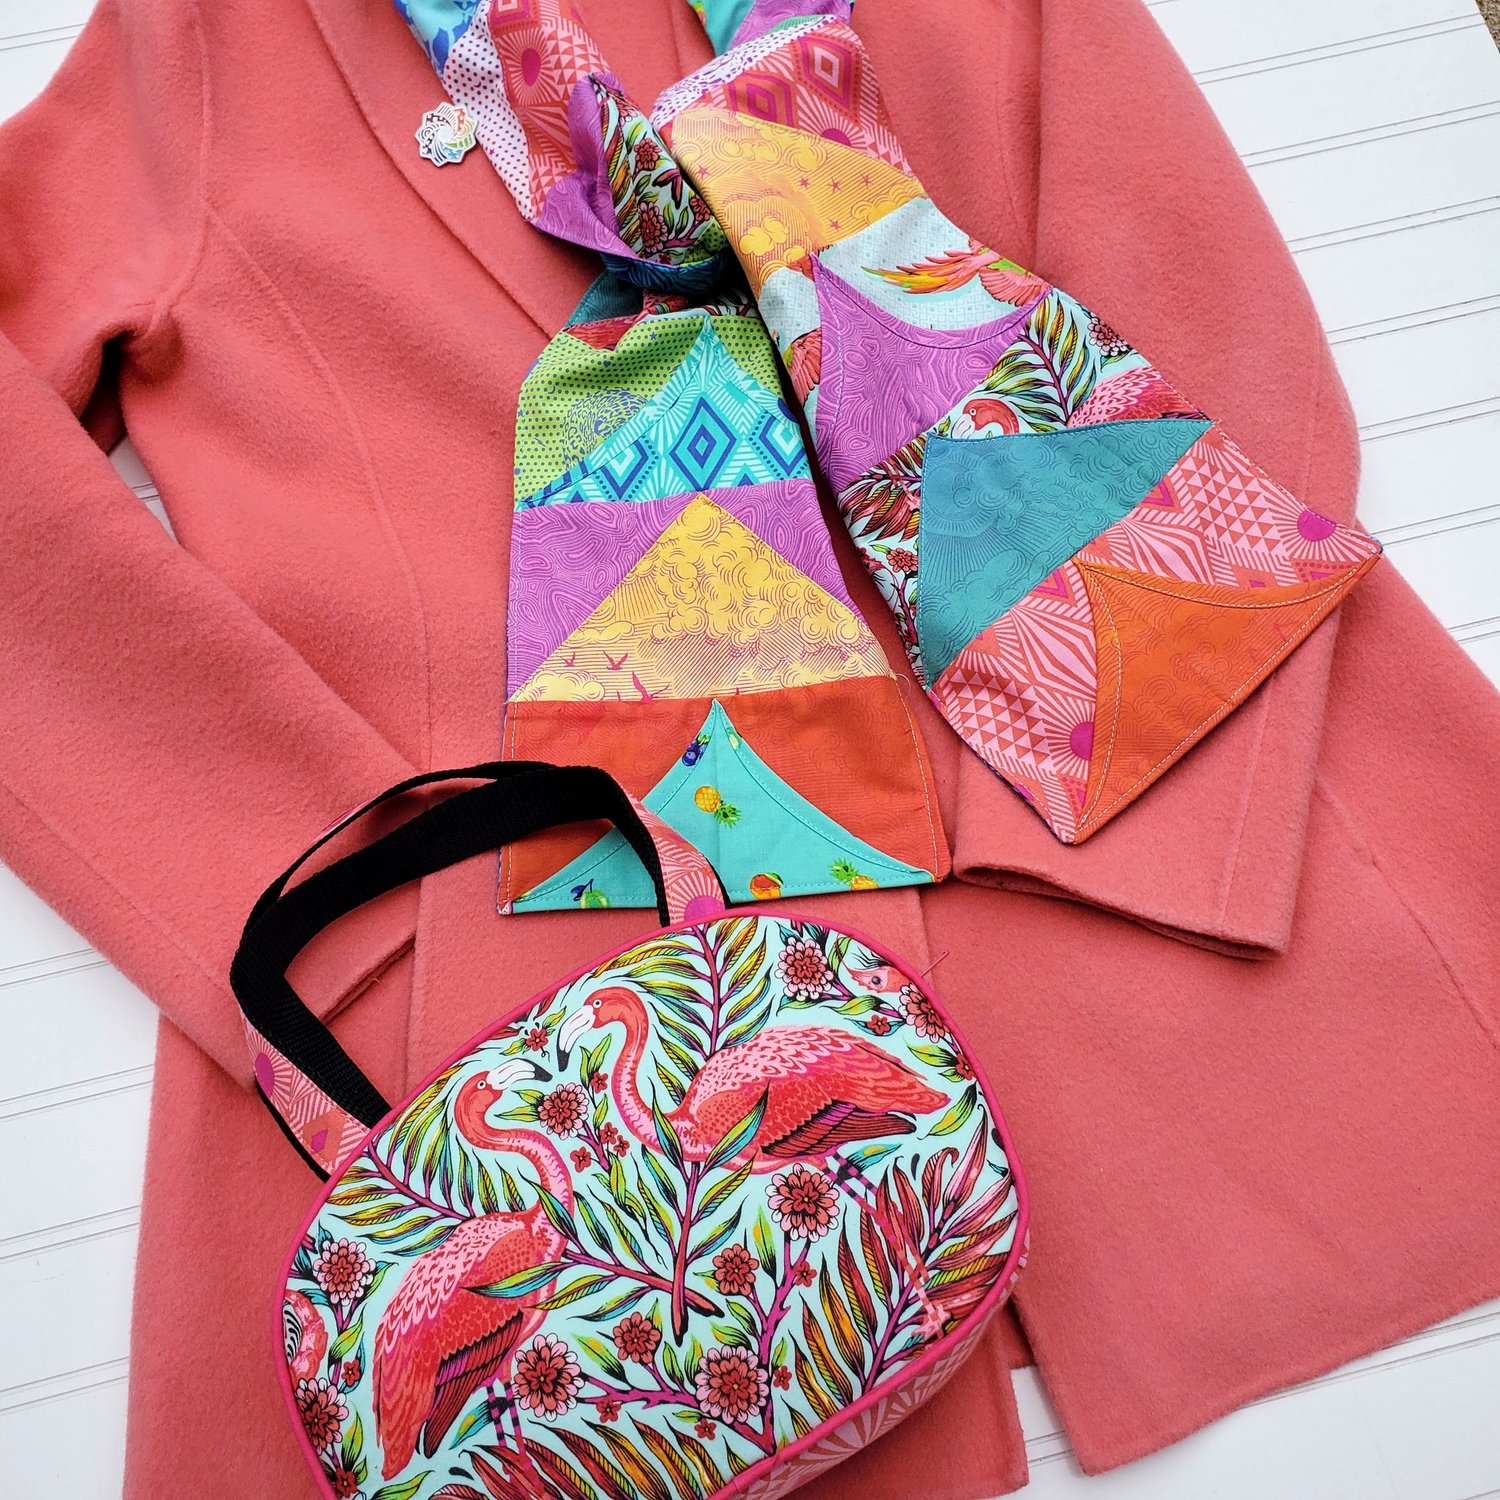
This purse paired beautifully with the scarf and coat for a pop of color. Time to take this Flamingo out on the town to show off its “Purse-onality”!