DIY Cat Shaped Bed
18th Nov 2021
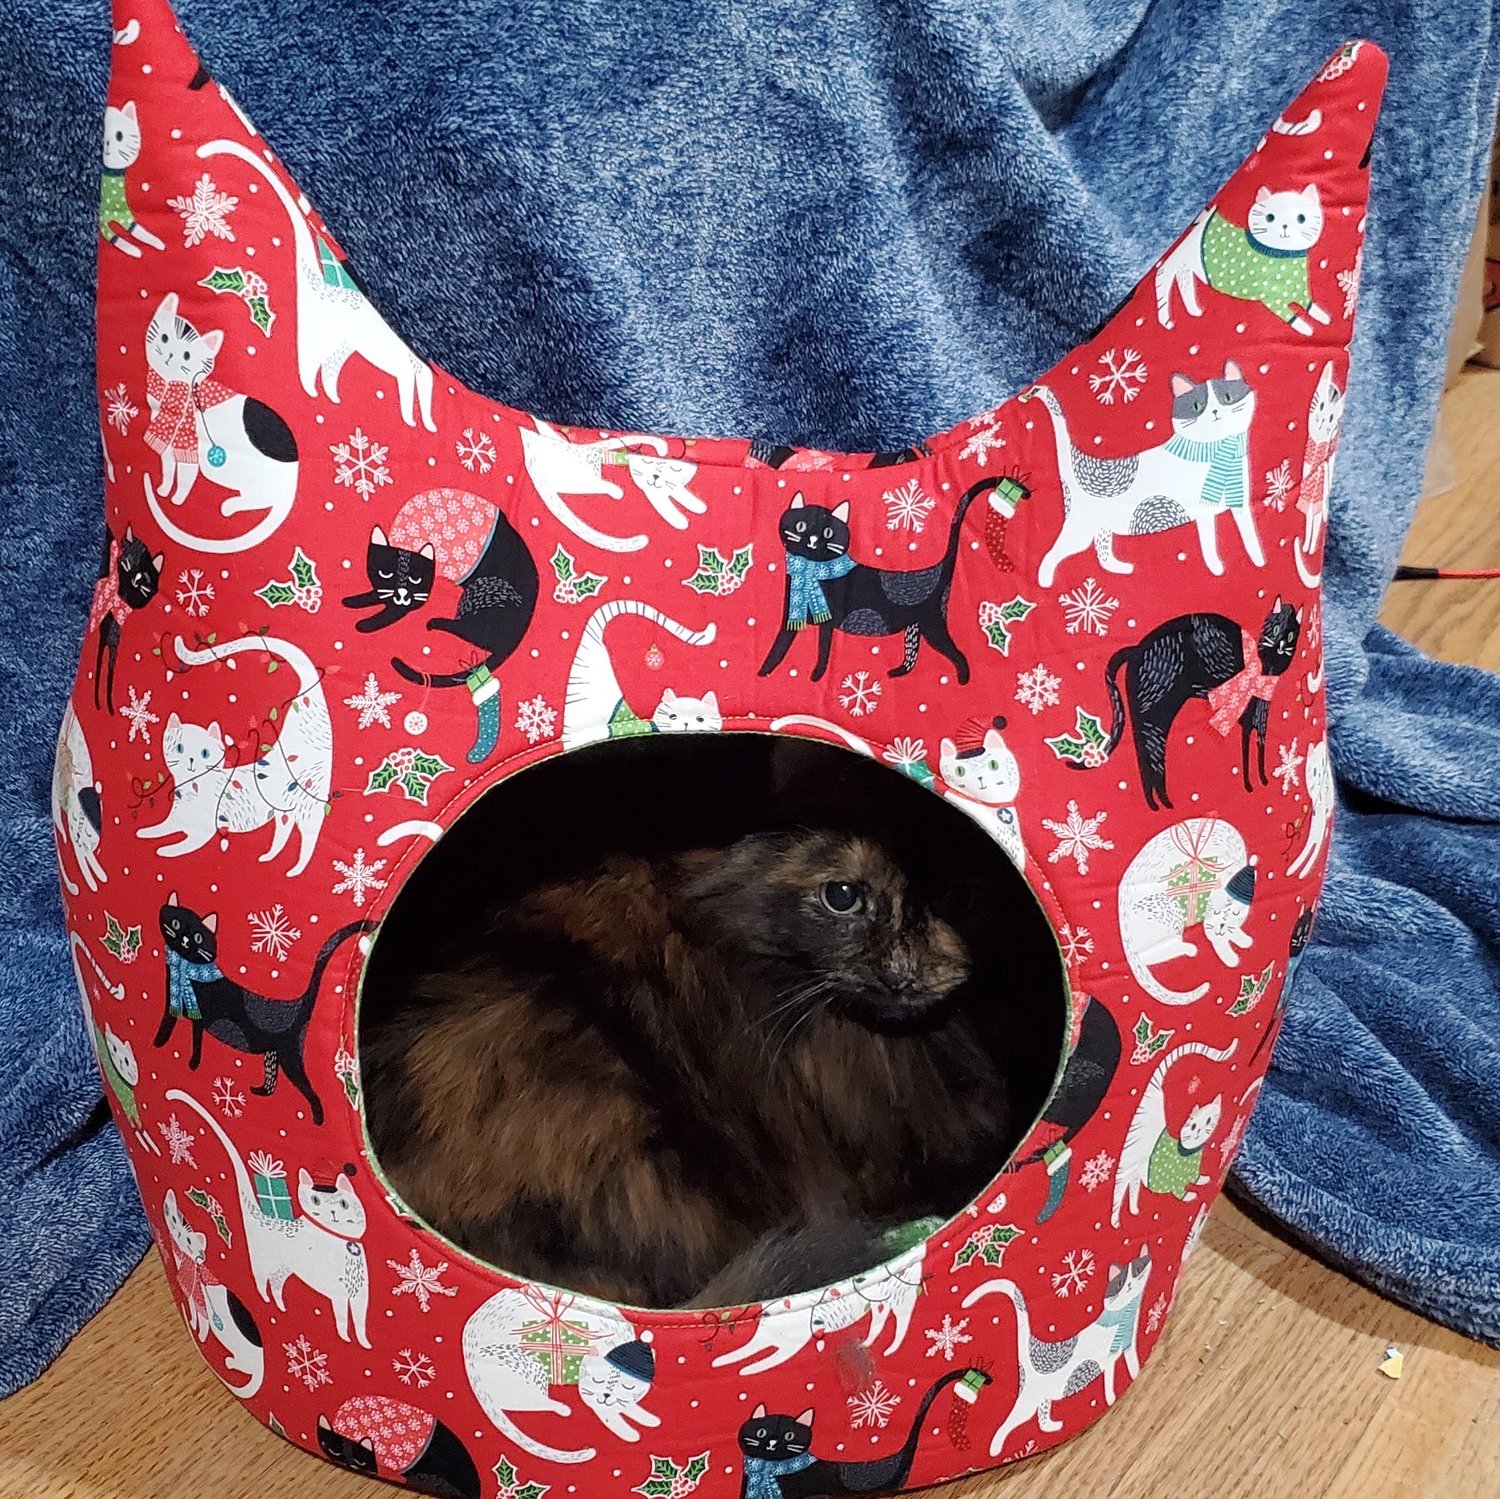
This is the perfect little get away for the special kitty in your life! We know how much cats love to snuggle and play in your fabric stash. This adorable Northcott fabric designed by Deborah Edwards, appropriately named Santa paws features some kitty cats in their winter attire is just right for this project.
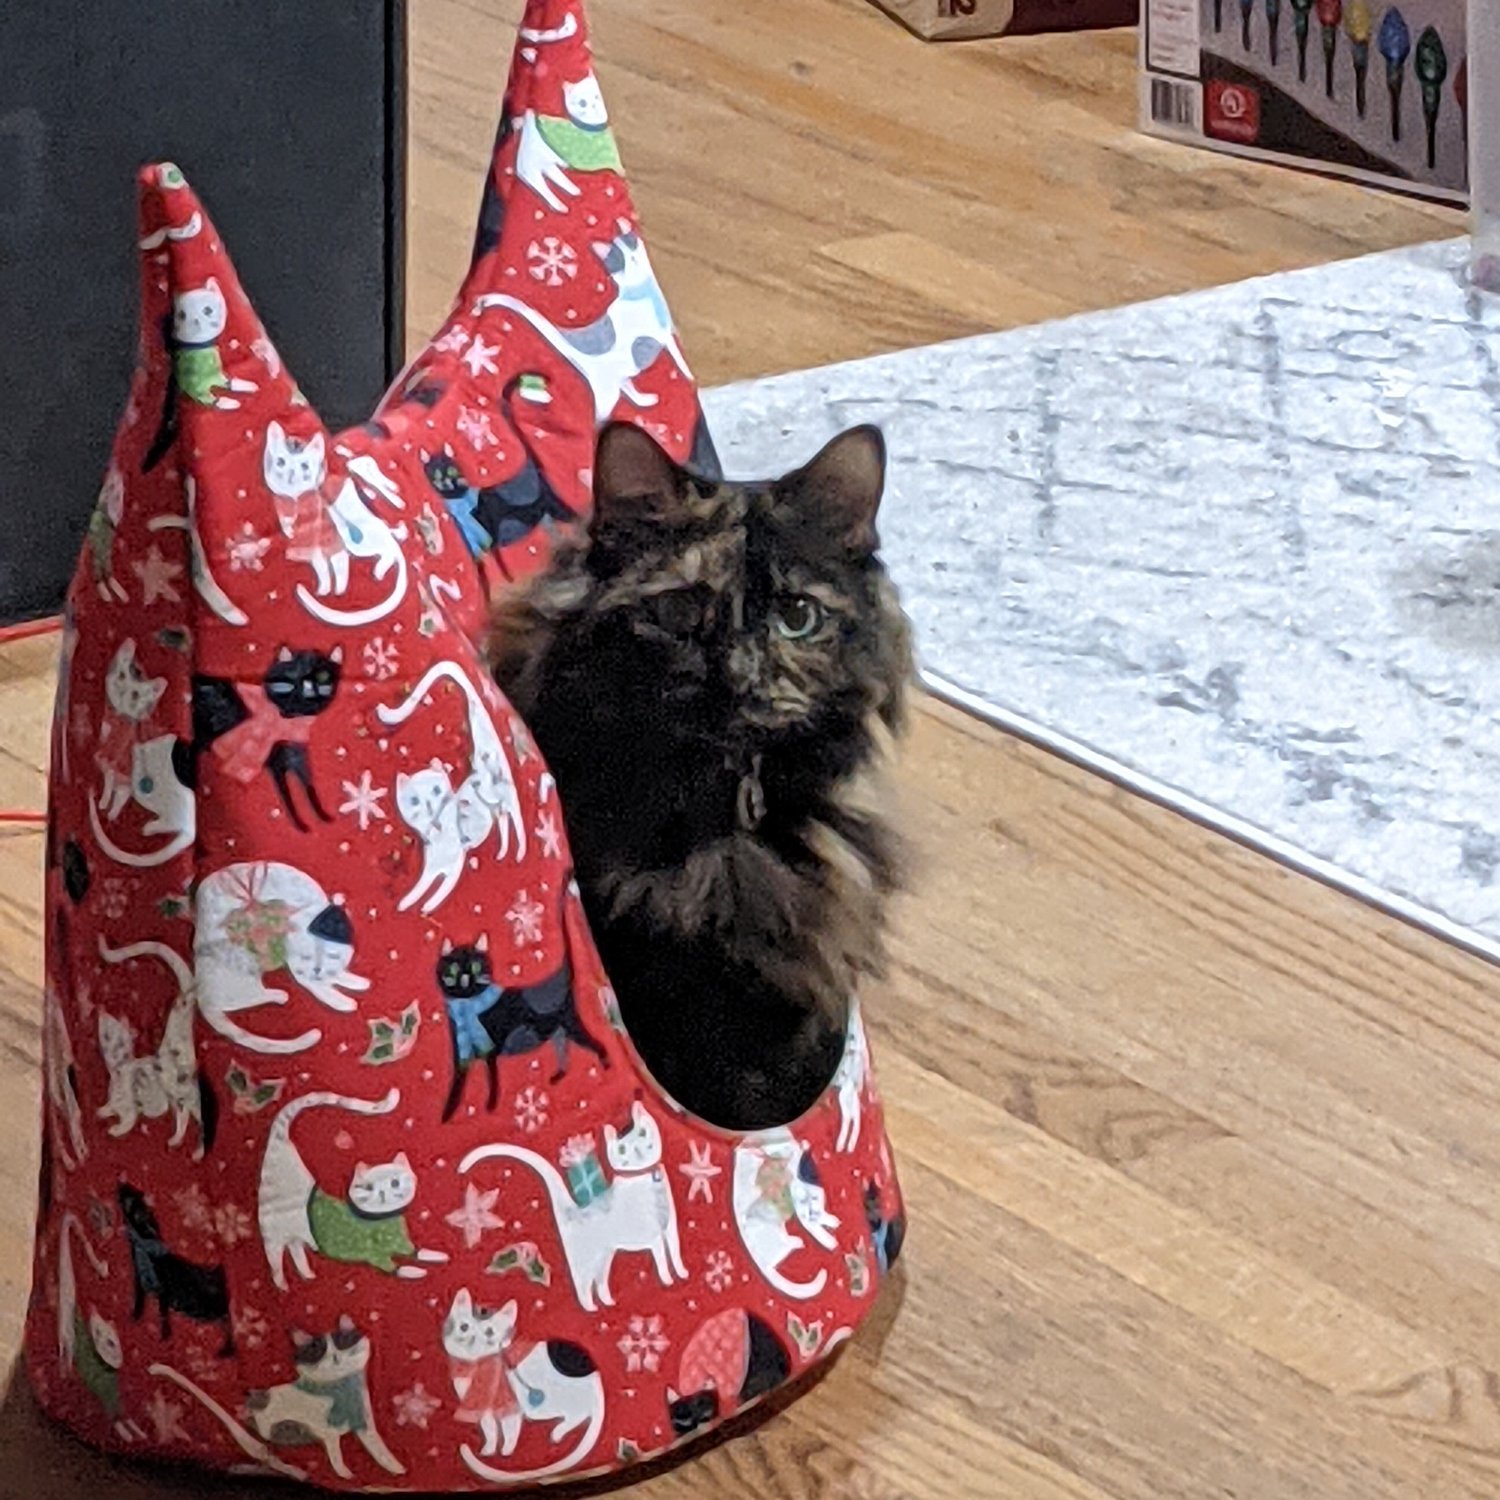
To get started you will need to download the free pattern from See Kate Sew website. She has a wonderful tutorial using different materials. I made a few changes in the way I sewed the project and I will share my method of construction. If you have a bigger cat you can just add an inch or two all around the pattern pieces to accommodate the cat's size.
Materials needed
- Free Printed and taped together
1 yard of Santa Paws fabric
1 yard of Snowflakes fabric for lining
2 yards of Pellon double sided fusible flex foam (20” wide)
Poly-fil or small scraps of fabric and batting for stuffing the bed cushion
Coordinating Aurifil thread from the Chroma Membership
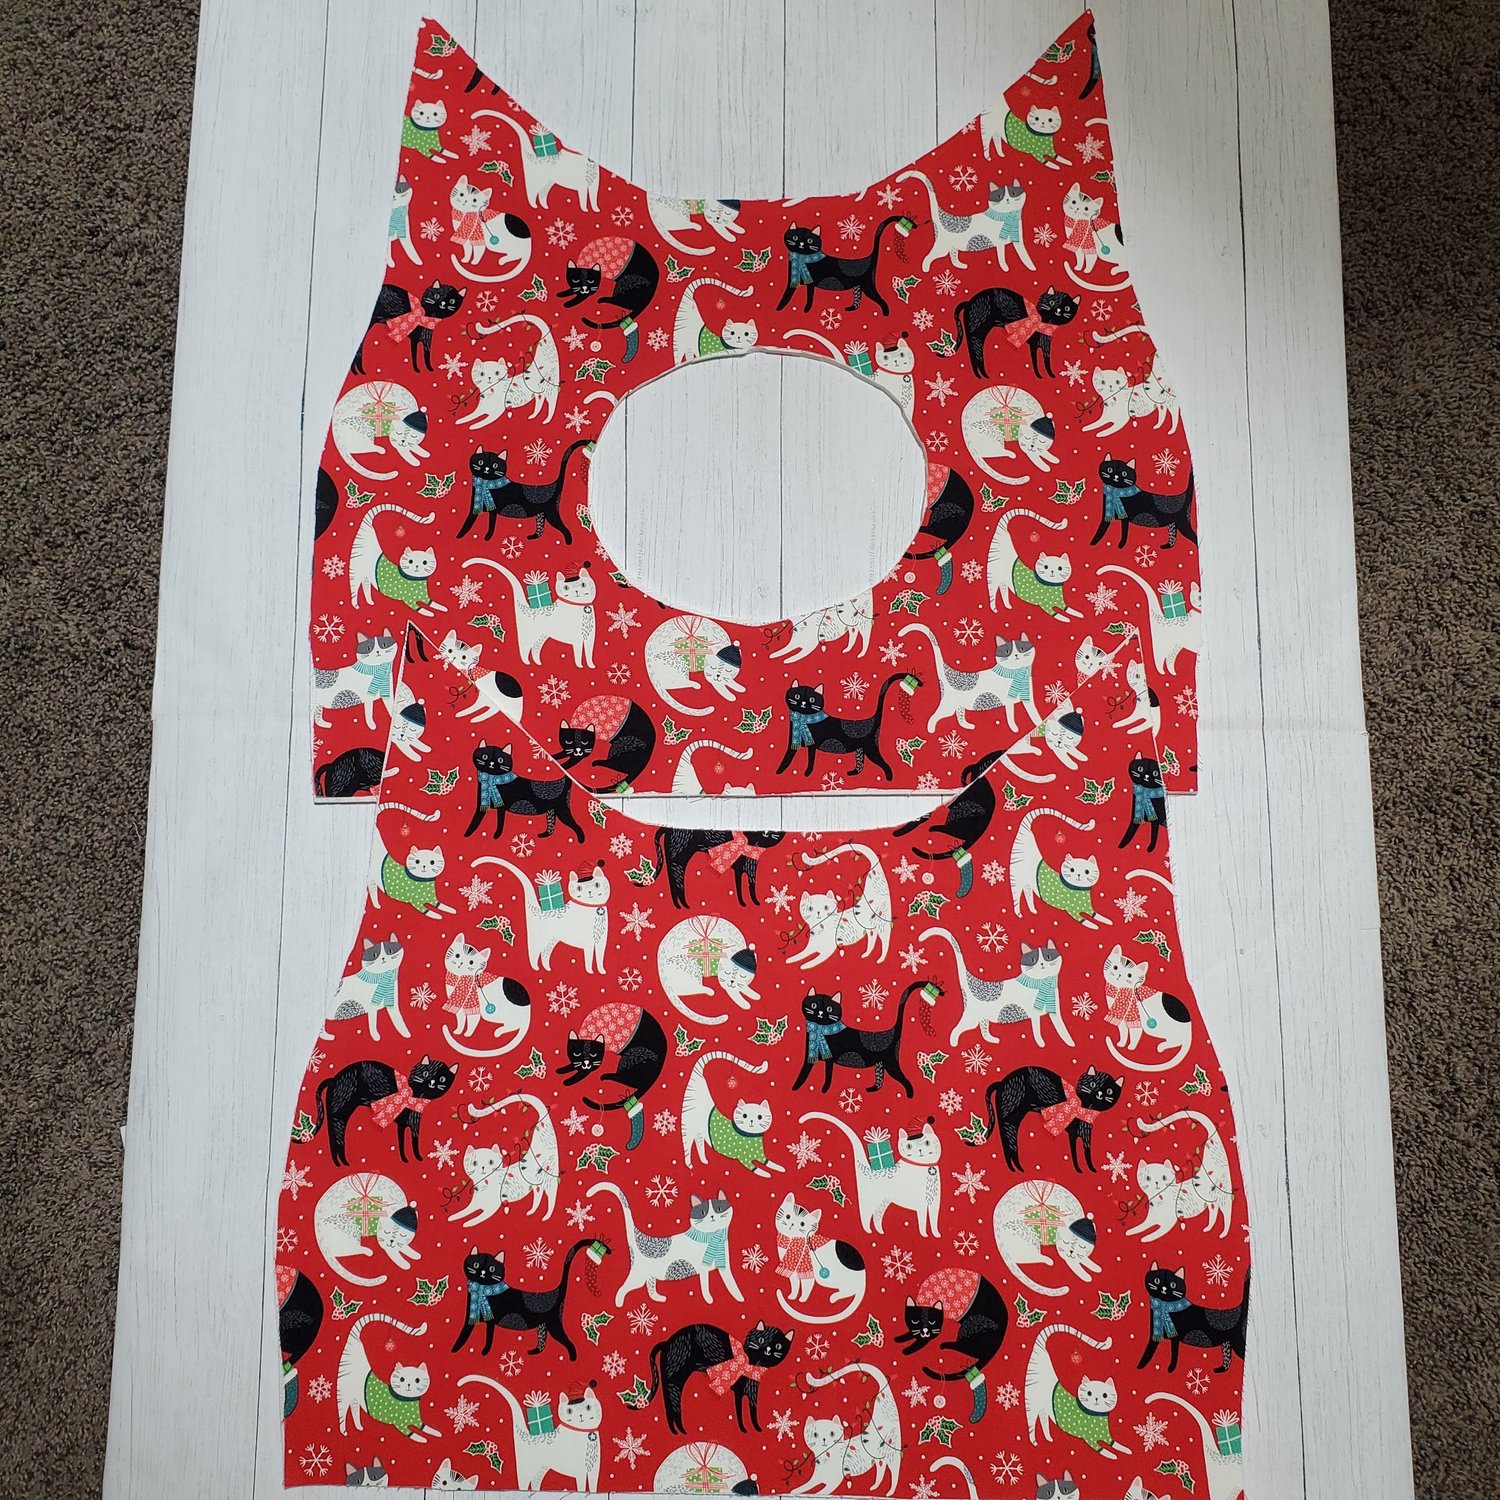
To get started, print, cut and tape the paper pattern pieces together. I taped the center piece to the front of the cat bed to make it one continuous piece. Cut on the outermost cutting line for the pieces.
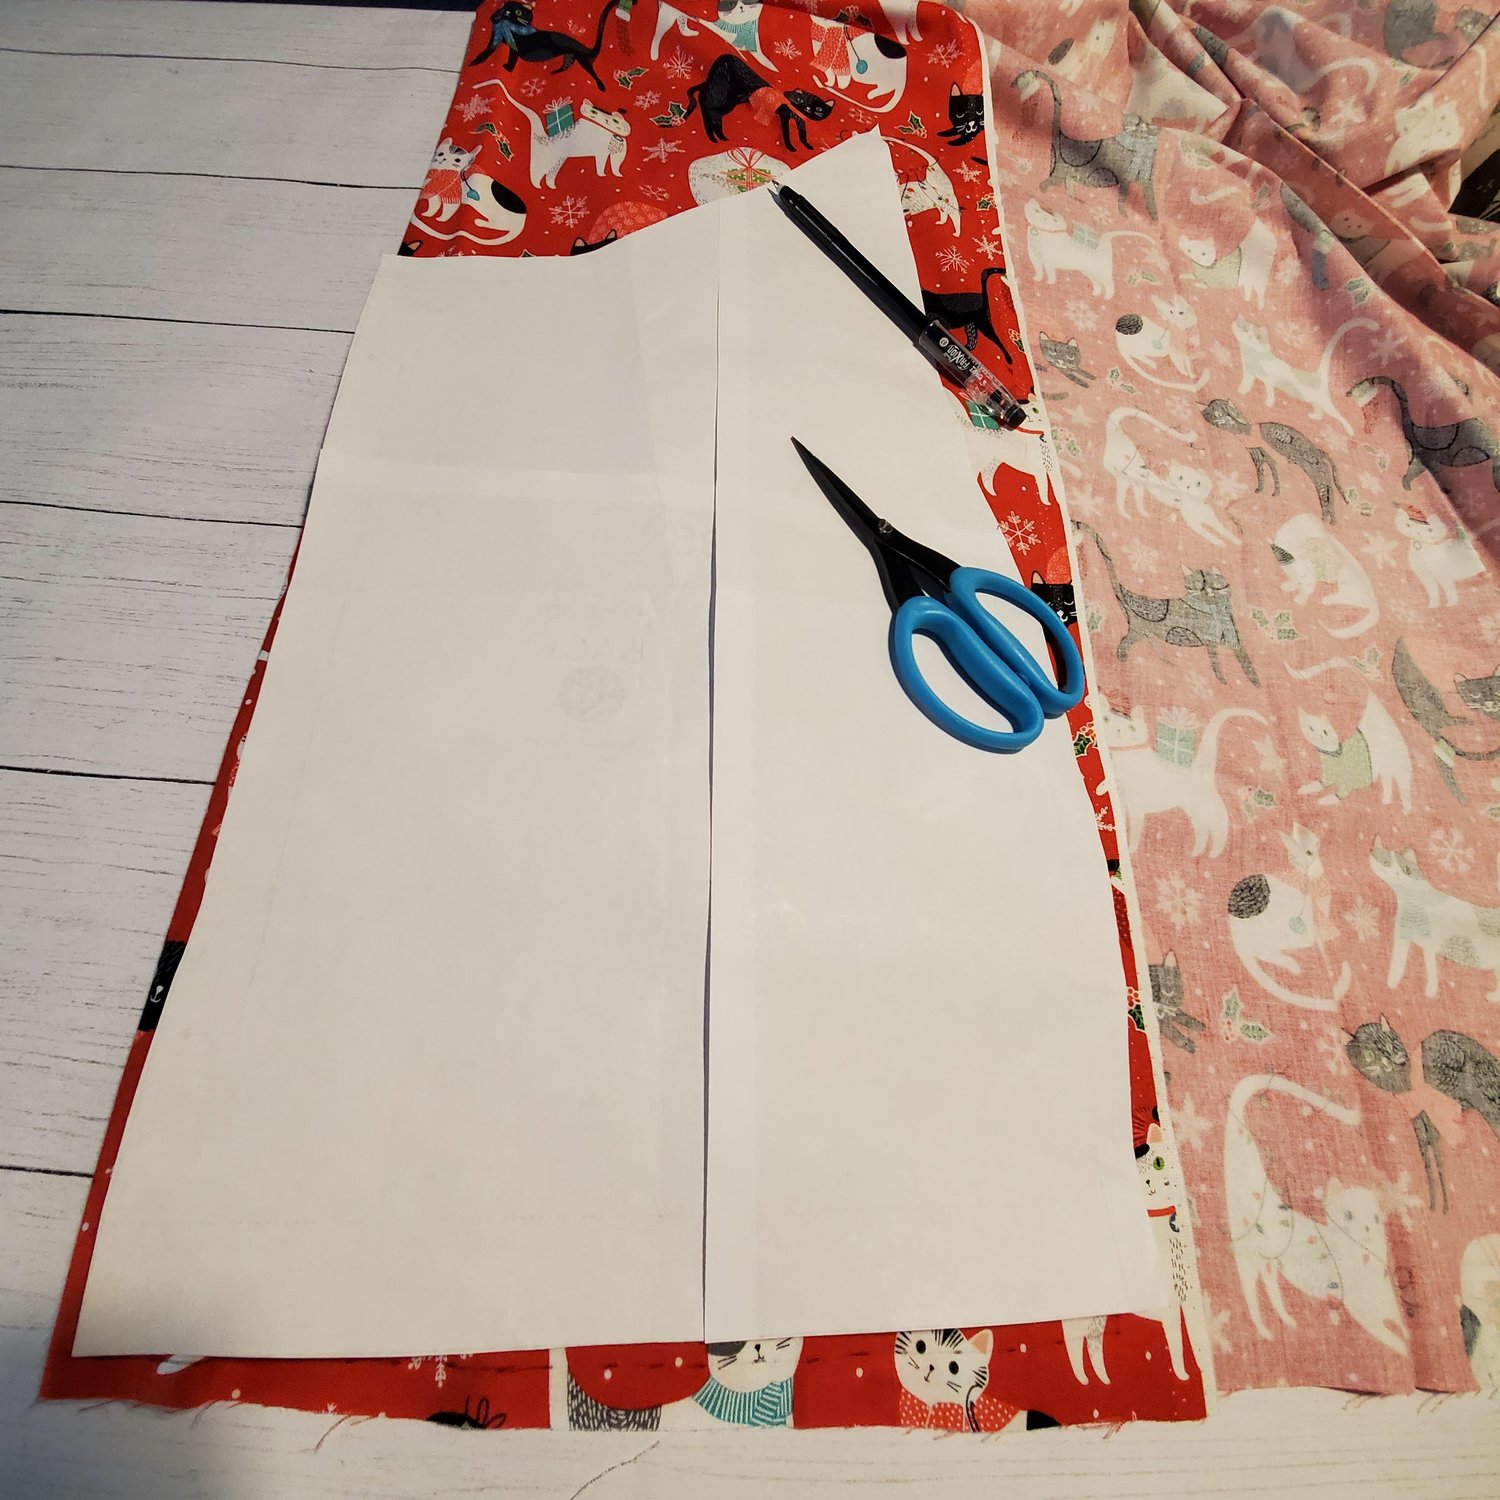
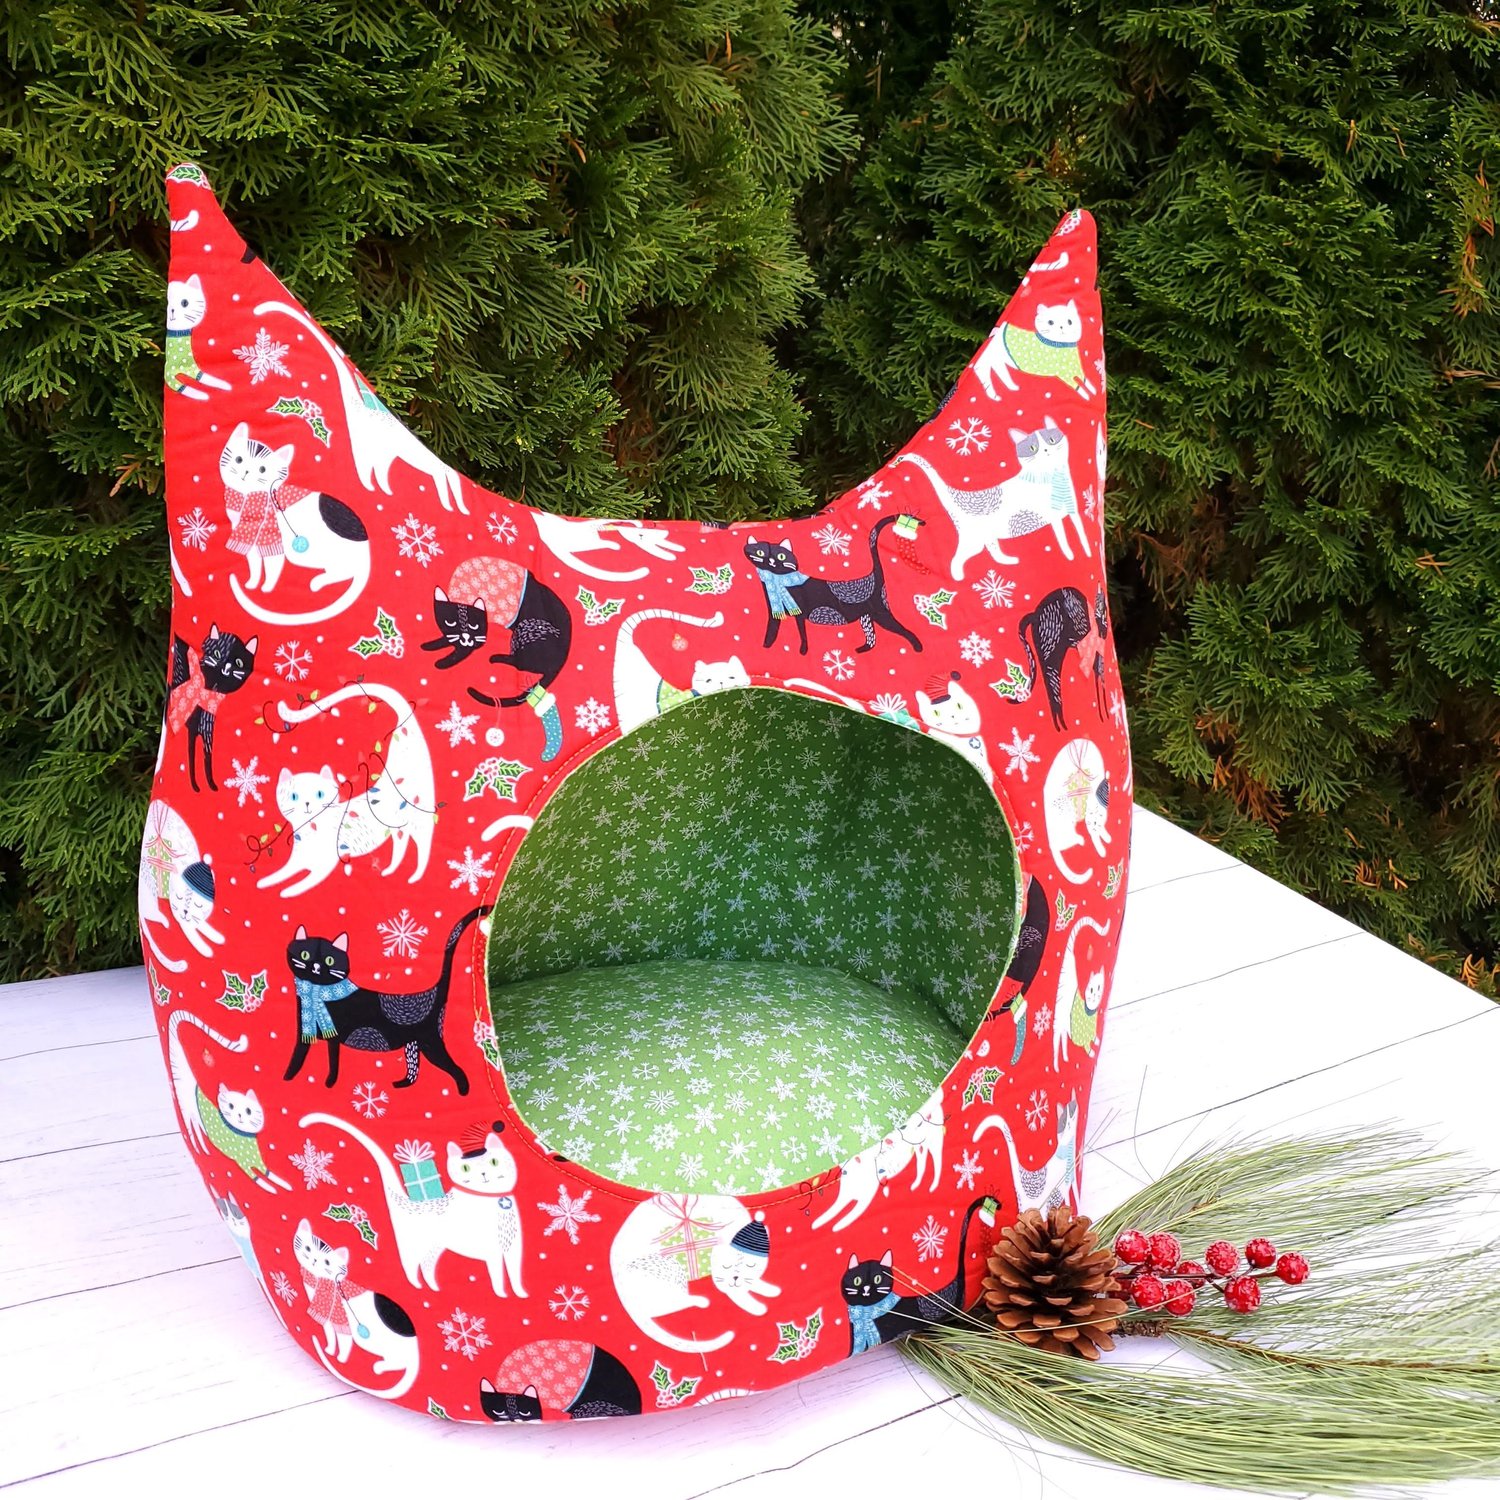
I find it easier to draw around the pattern and then cut it out to prevent the paper from shifting as I cut. I cut the bed cushion and bed bottom from the green snowflake fabric. I did use another fat quarter of coordinating fabric for the bottom of the bed since it would not be visible.
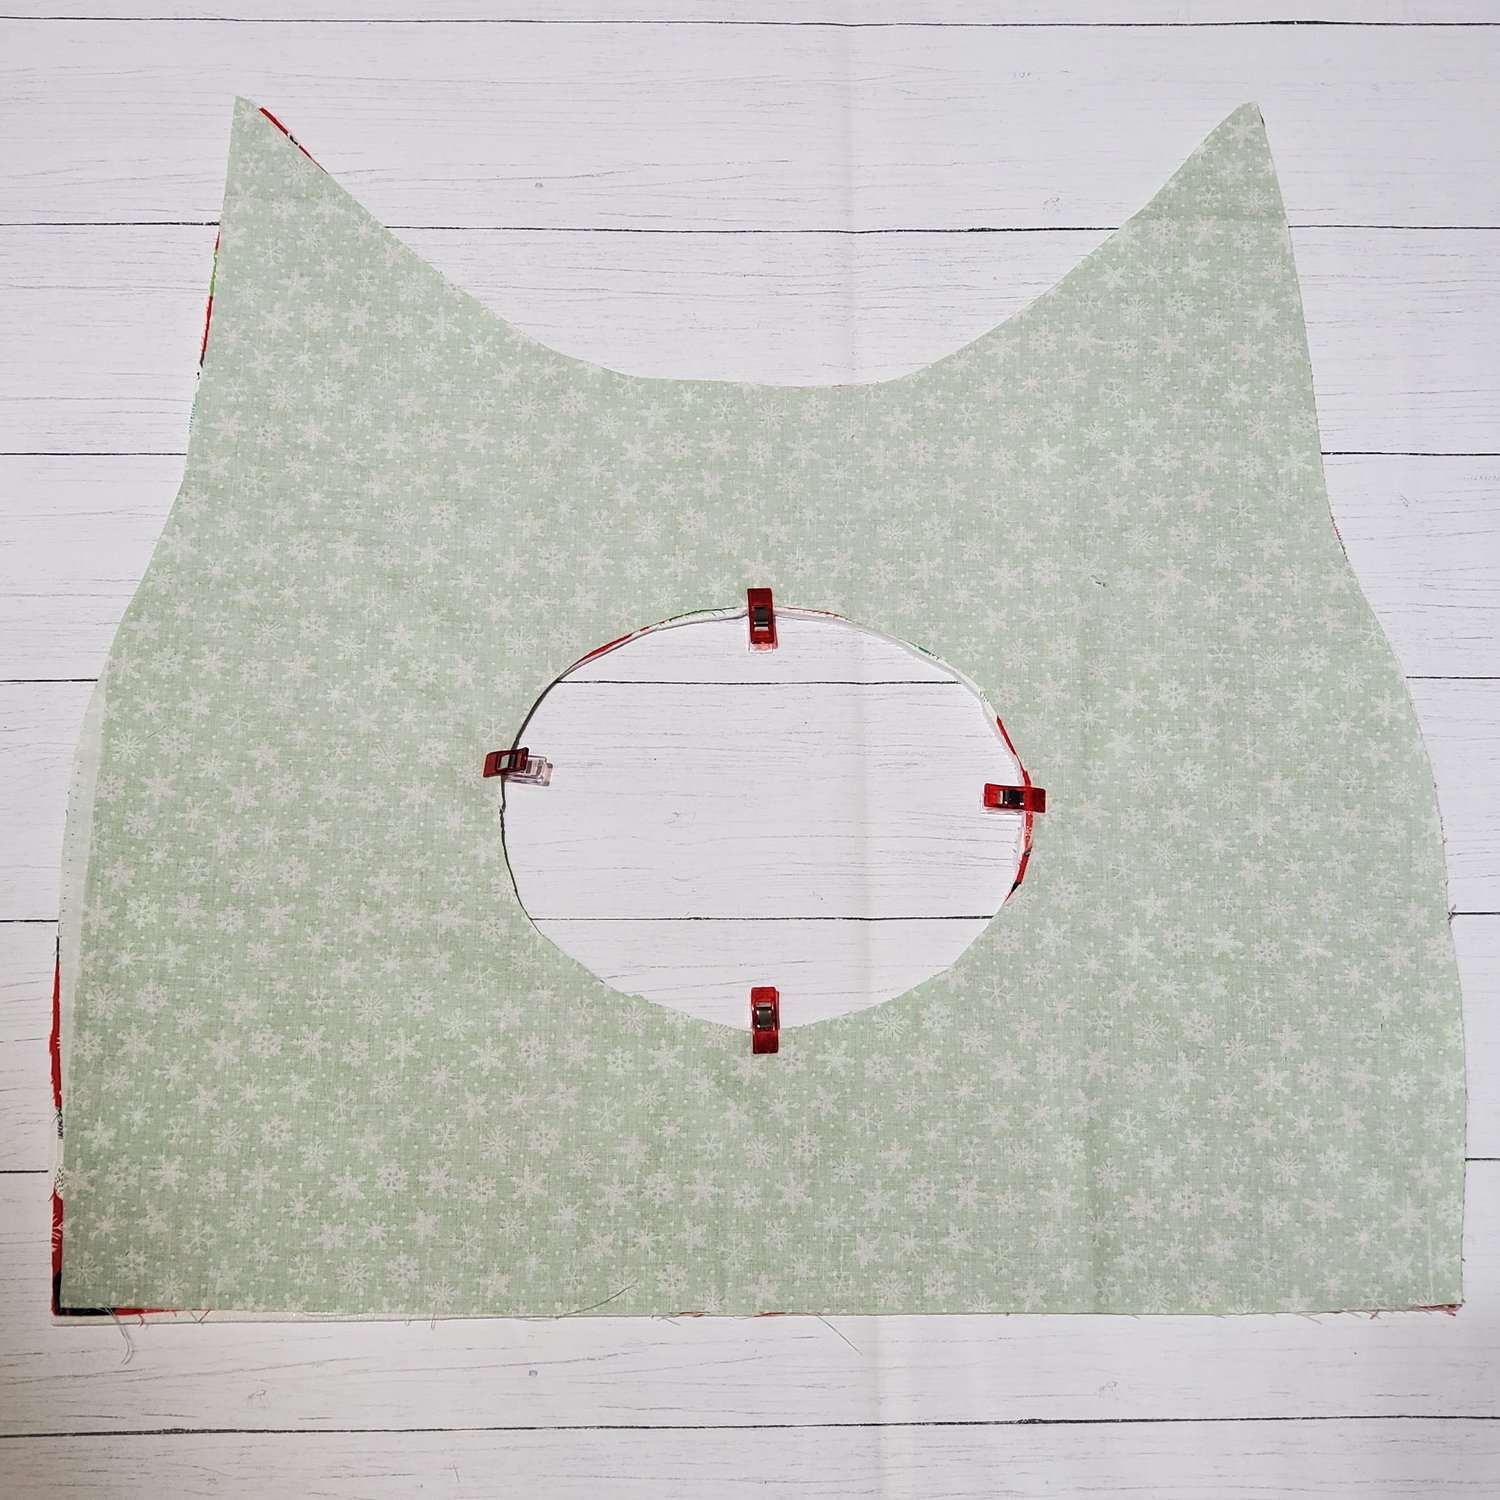
I then laid out the outer fabric front and back onto the Pellon Flex-Foam and pressed it lightly to adhere the fabric enough to cut out the shape.
With right sides together lay the lining fabric on top of the outer front piece and clip in place around the inner circle.
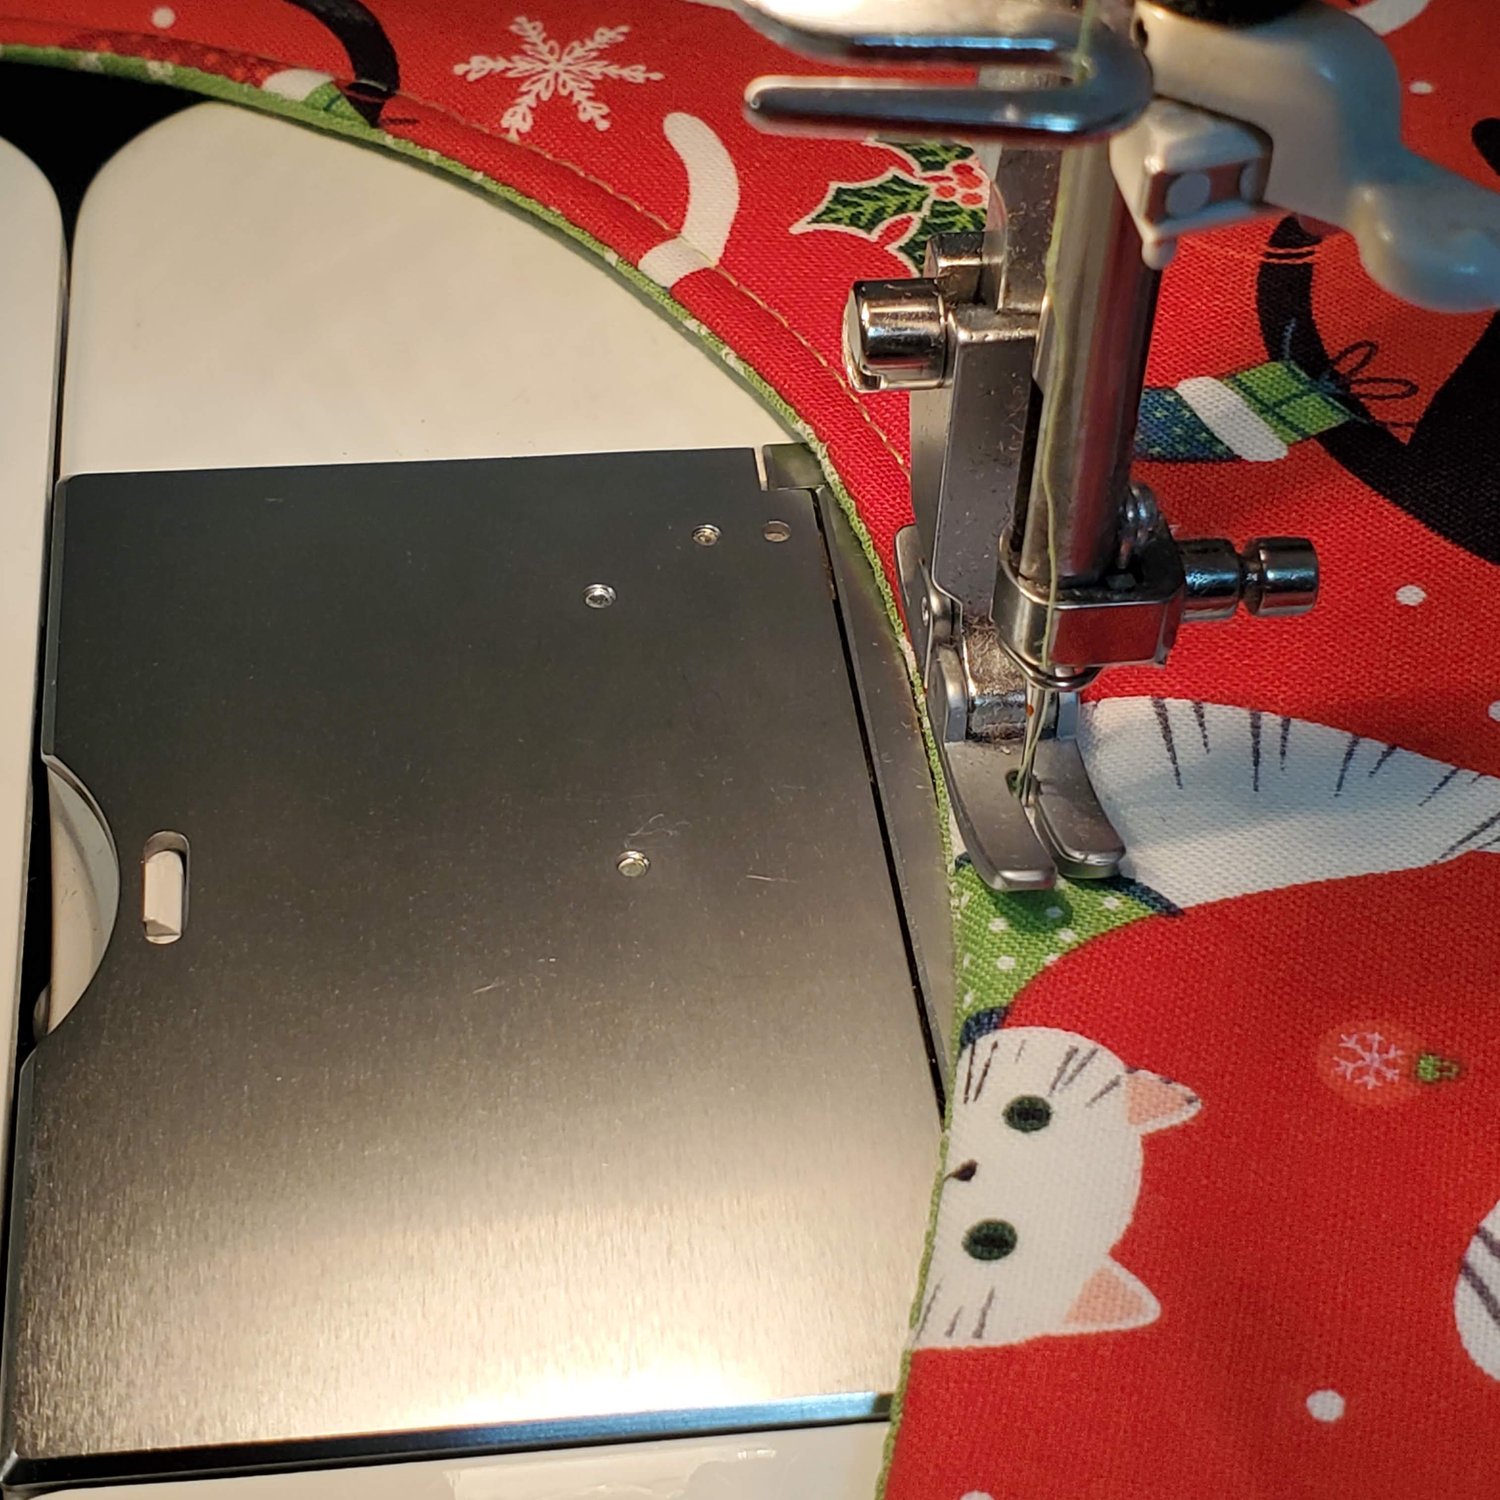
Sew ¼” around the inside of the circle. Turn right sides out through the circle and carefully press in place aligning the outer edges and the seams around the circle. With a coordinating thread topstitch about ⅛” from the edge of the inner circle.
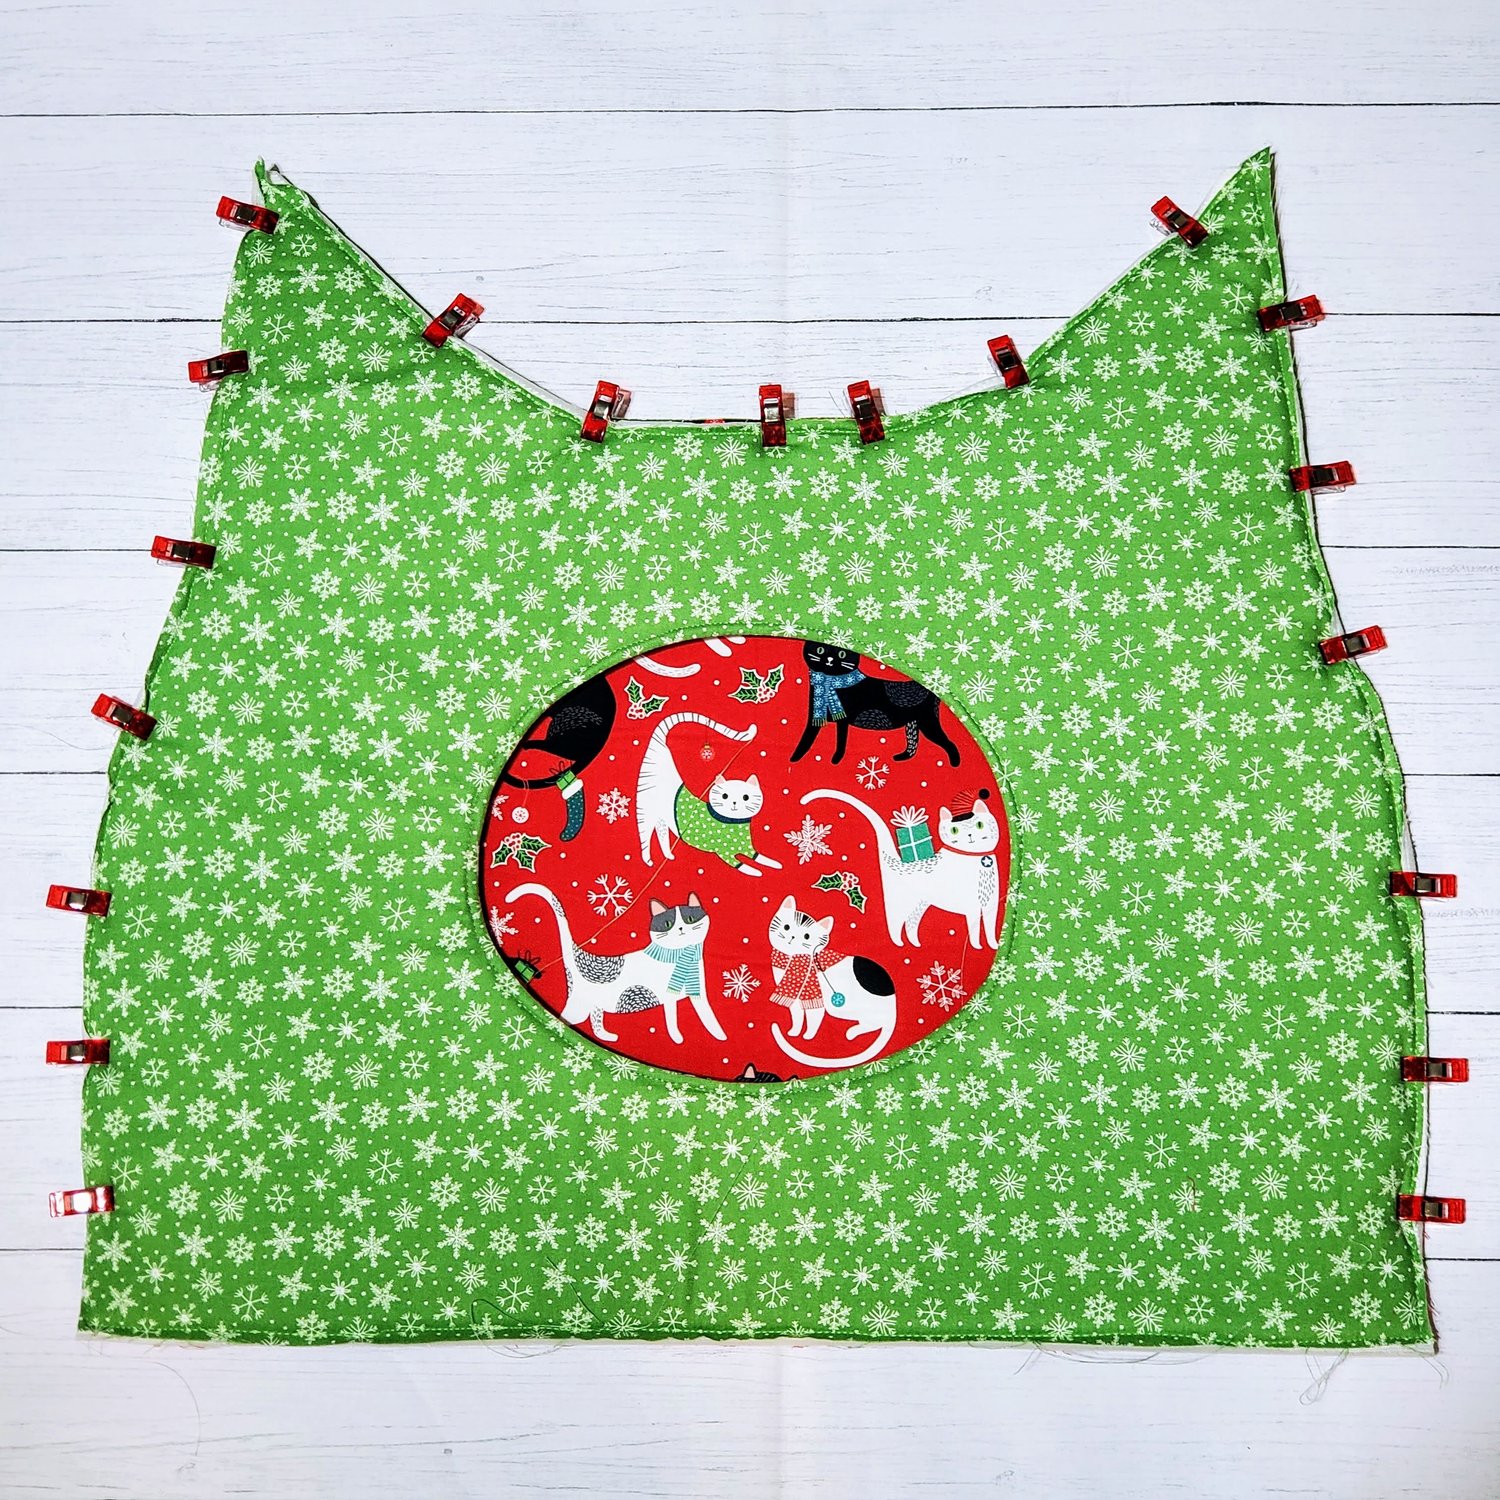
Align and press the green lining to the outer back pattern piece to the Pellon Flex-Foam. The next step is optional, I like to baste around all the outer edges about ⅛” from the edge to be sure the fabric is secure on both sides to the very edge for a clean seam finish. I did this on the front and back pattern pieces. In a past project with the Flex-Foam I had a section of fabric fold and it is difficult to rip out the stitches from the foam. For me it is worth the extra few minutes of sewing to get it right the first time.
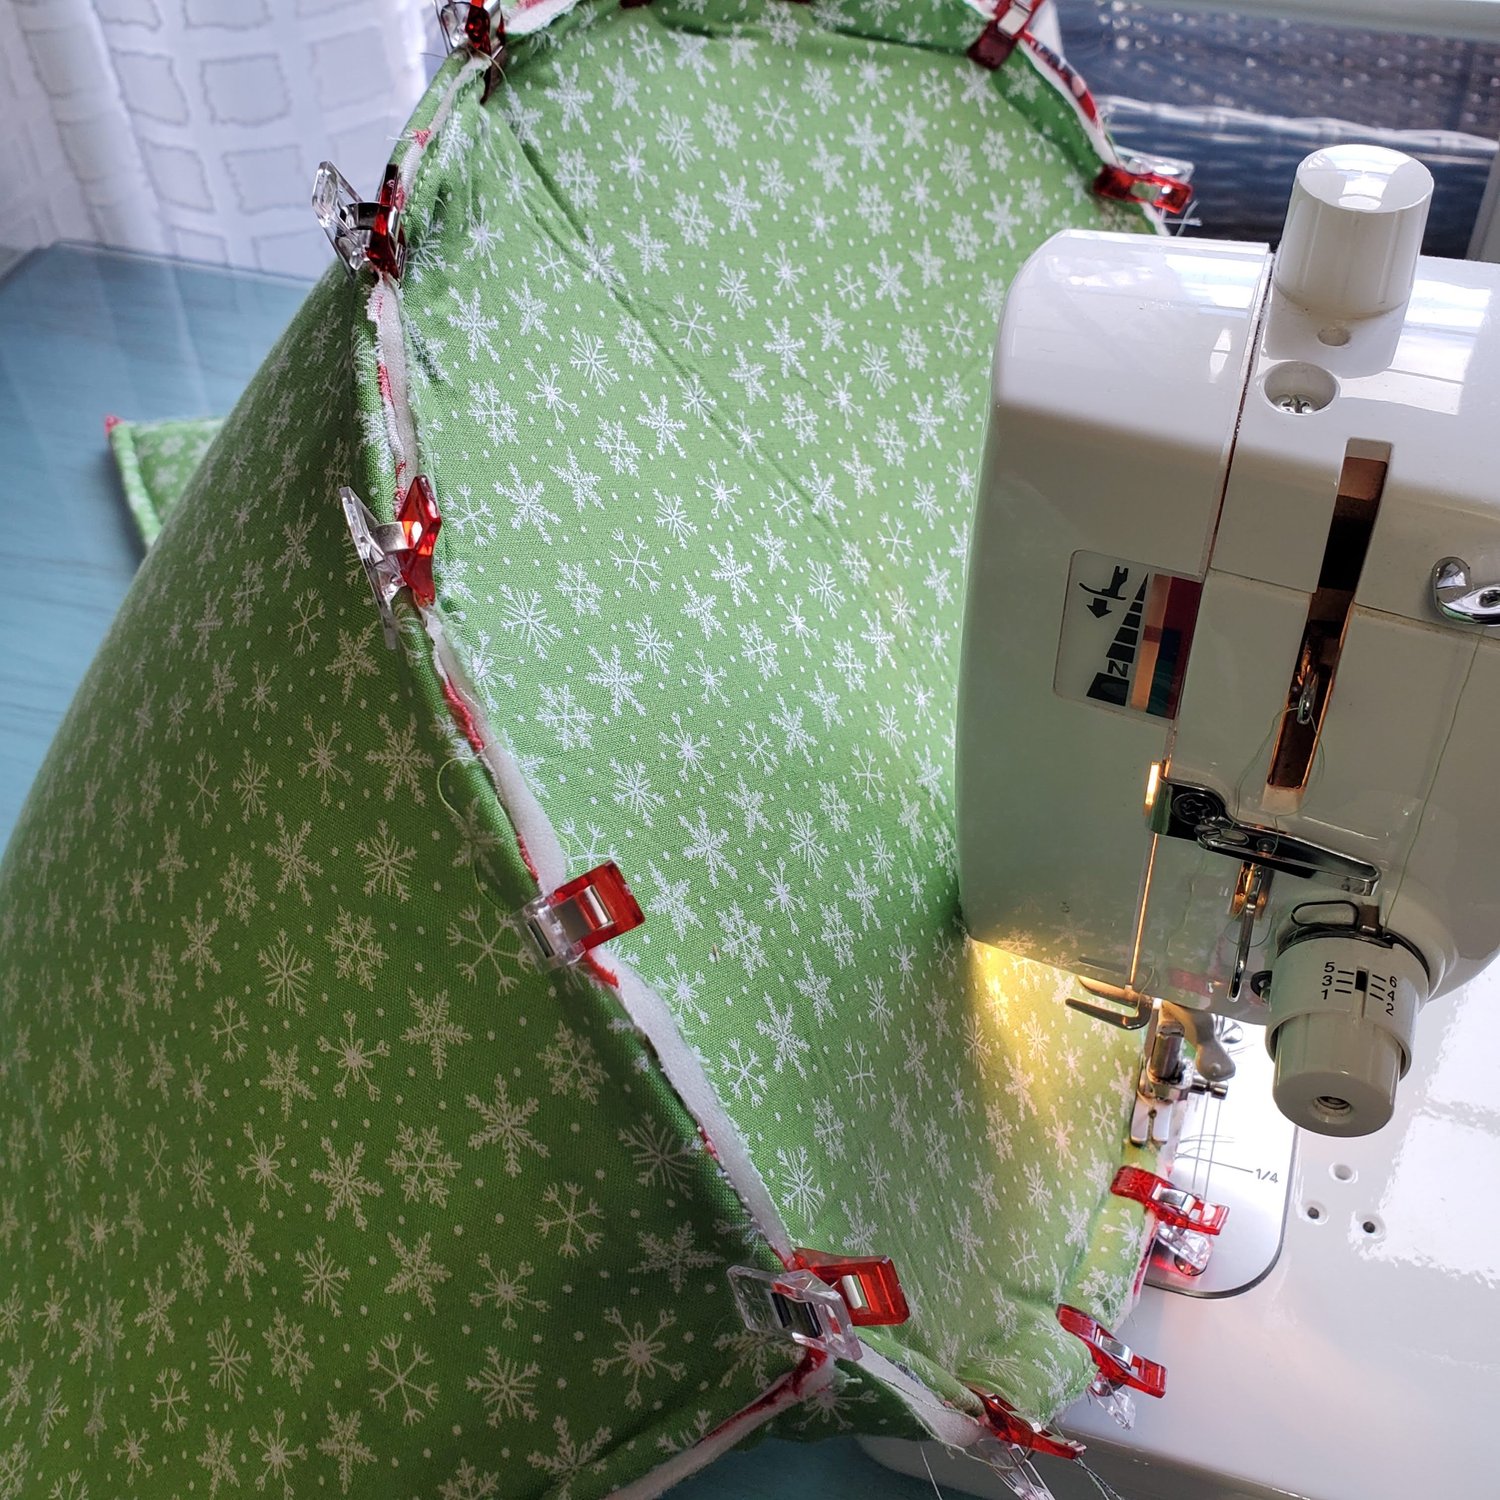
Now place the right sides together, aligning the edges and clip in place.
Sew from the bottom edge back tacking at the start and finish all the way around to the opposite bottom edge. I did need to make a bit of an adjustment with my rotary cutter along the straight bottom edge to be sure the pieces were properly lined up before starting on the oval bottom.
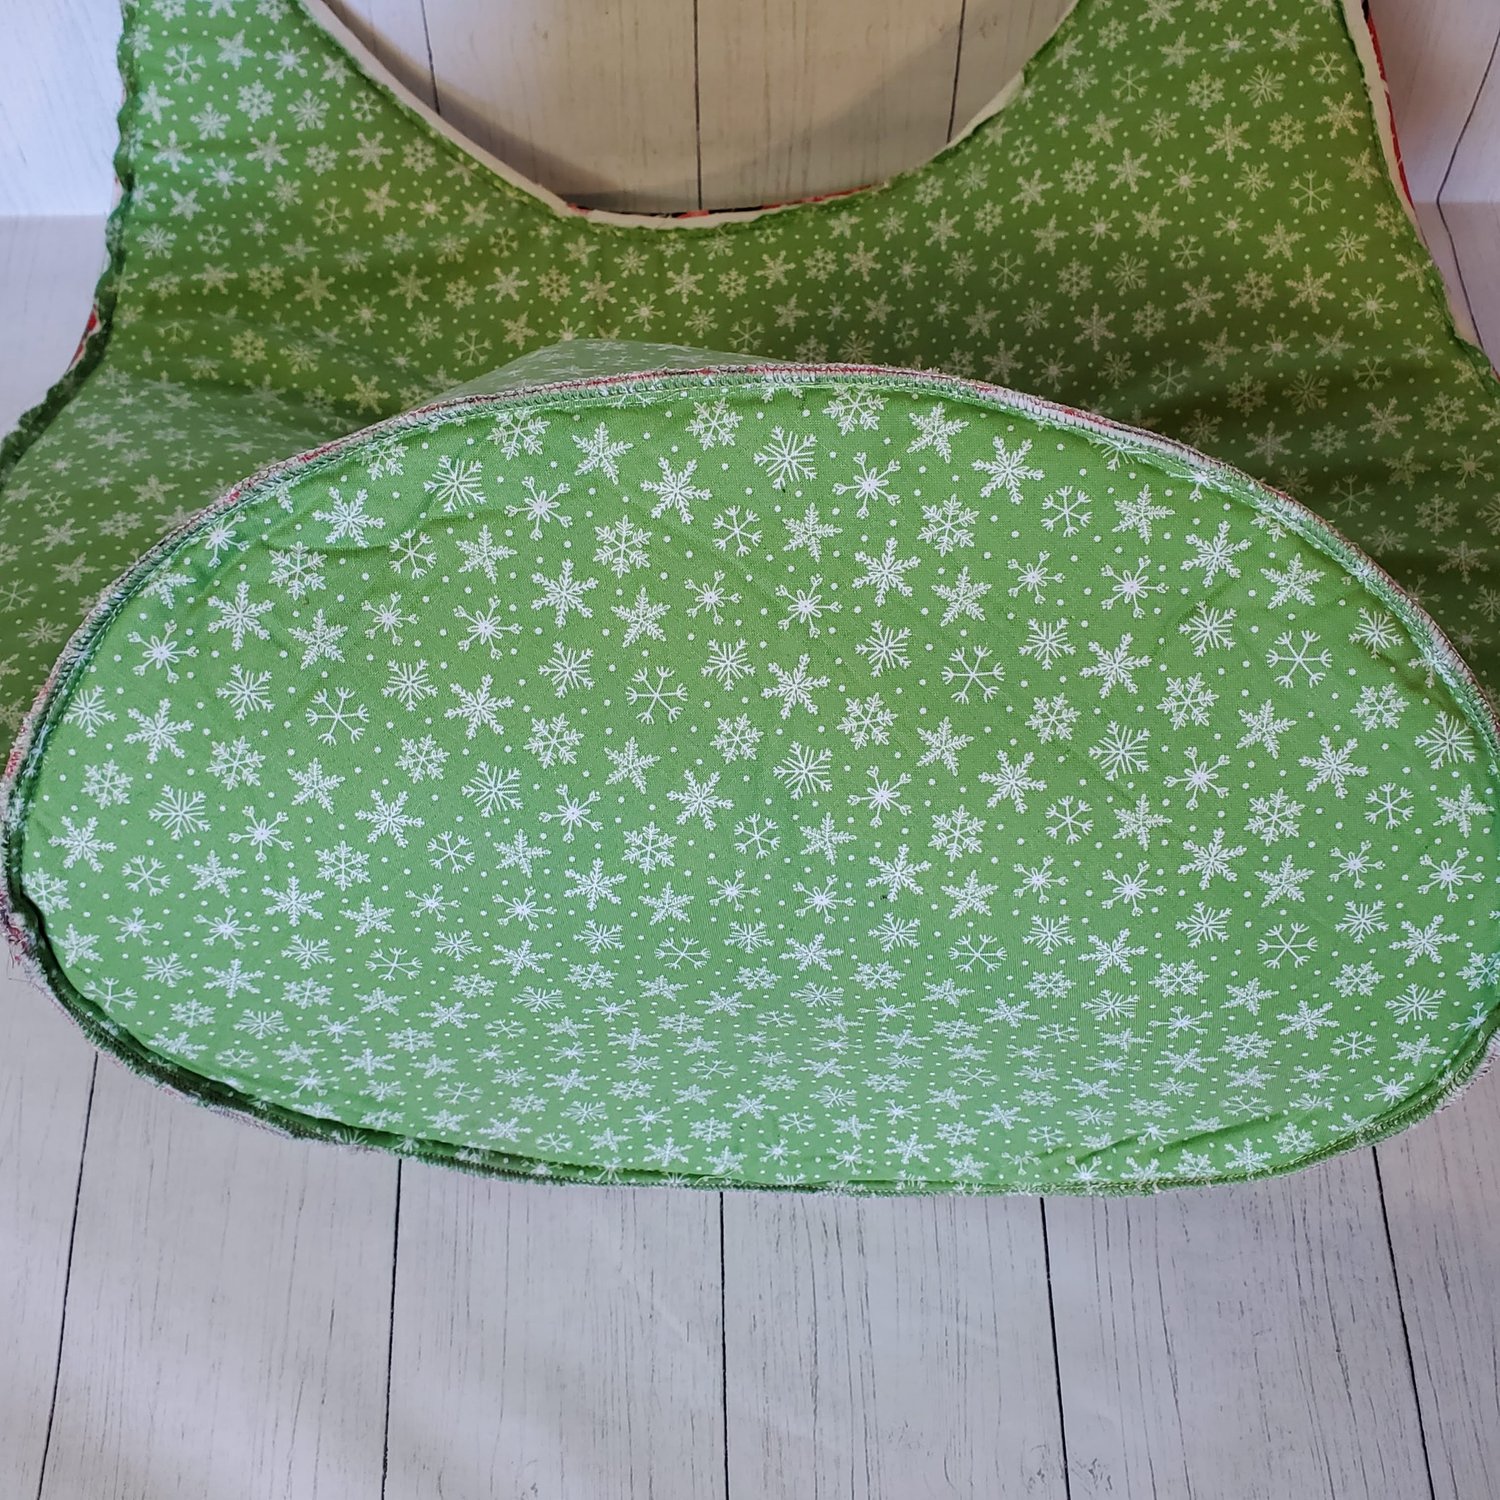
The bottom oval piece is cut from a green snowflake lining fabric and coordinating fat quarter fabric pressed in place on a piece of Flex-Foam with a basting stitch around the edges.

Mark the quadrants with pins by folding in half lengthwise and widthwise to mark the center points. Mark the center of the front and back of the cat bed. The sides will line up with the side seams. You will start with clipping the bottom piece matching these points around the oval bottom. Once you have it clipped together, take it to the sewing machine and sew a ¼” seam all the way around. Carefully check the seam to be sure you caught all the edges.
At this point you can leave the edges of the seam unfinished or use a serger or a zig zag stitch on the raw edges. I used a serger to finish the seams, with the exception of the top two inches of the ear. I trimmed the seams to ⅛” and clipped the tops to help keep the point when I turned it right sides out. You will need to use a point turner to get into the small triangles at the top of the ears.
The last step is to sew the bed cushion. Cut out the two oval pieces and sew together with a ¼” leaving about a 3” opening to turn and stuff the cushion. I like to use my fabric and batting scraps to fill the bed cushion.
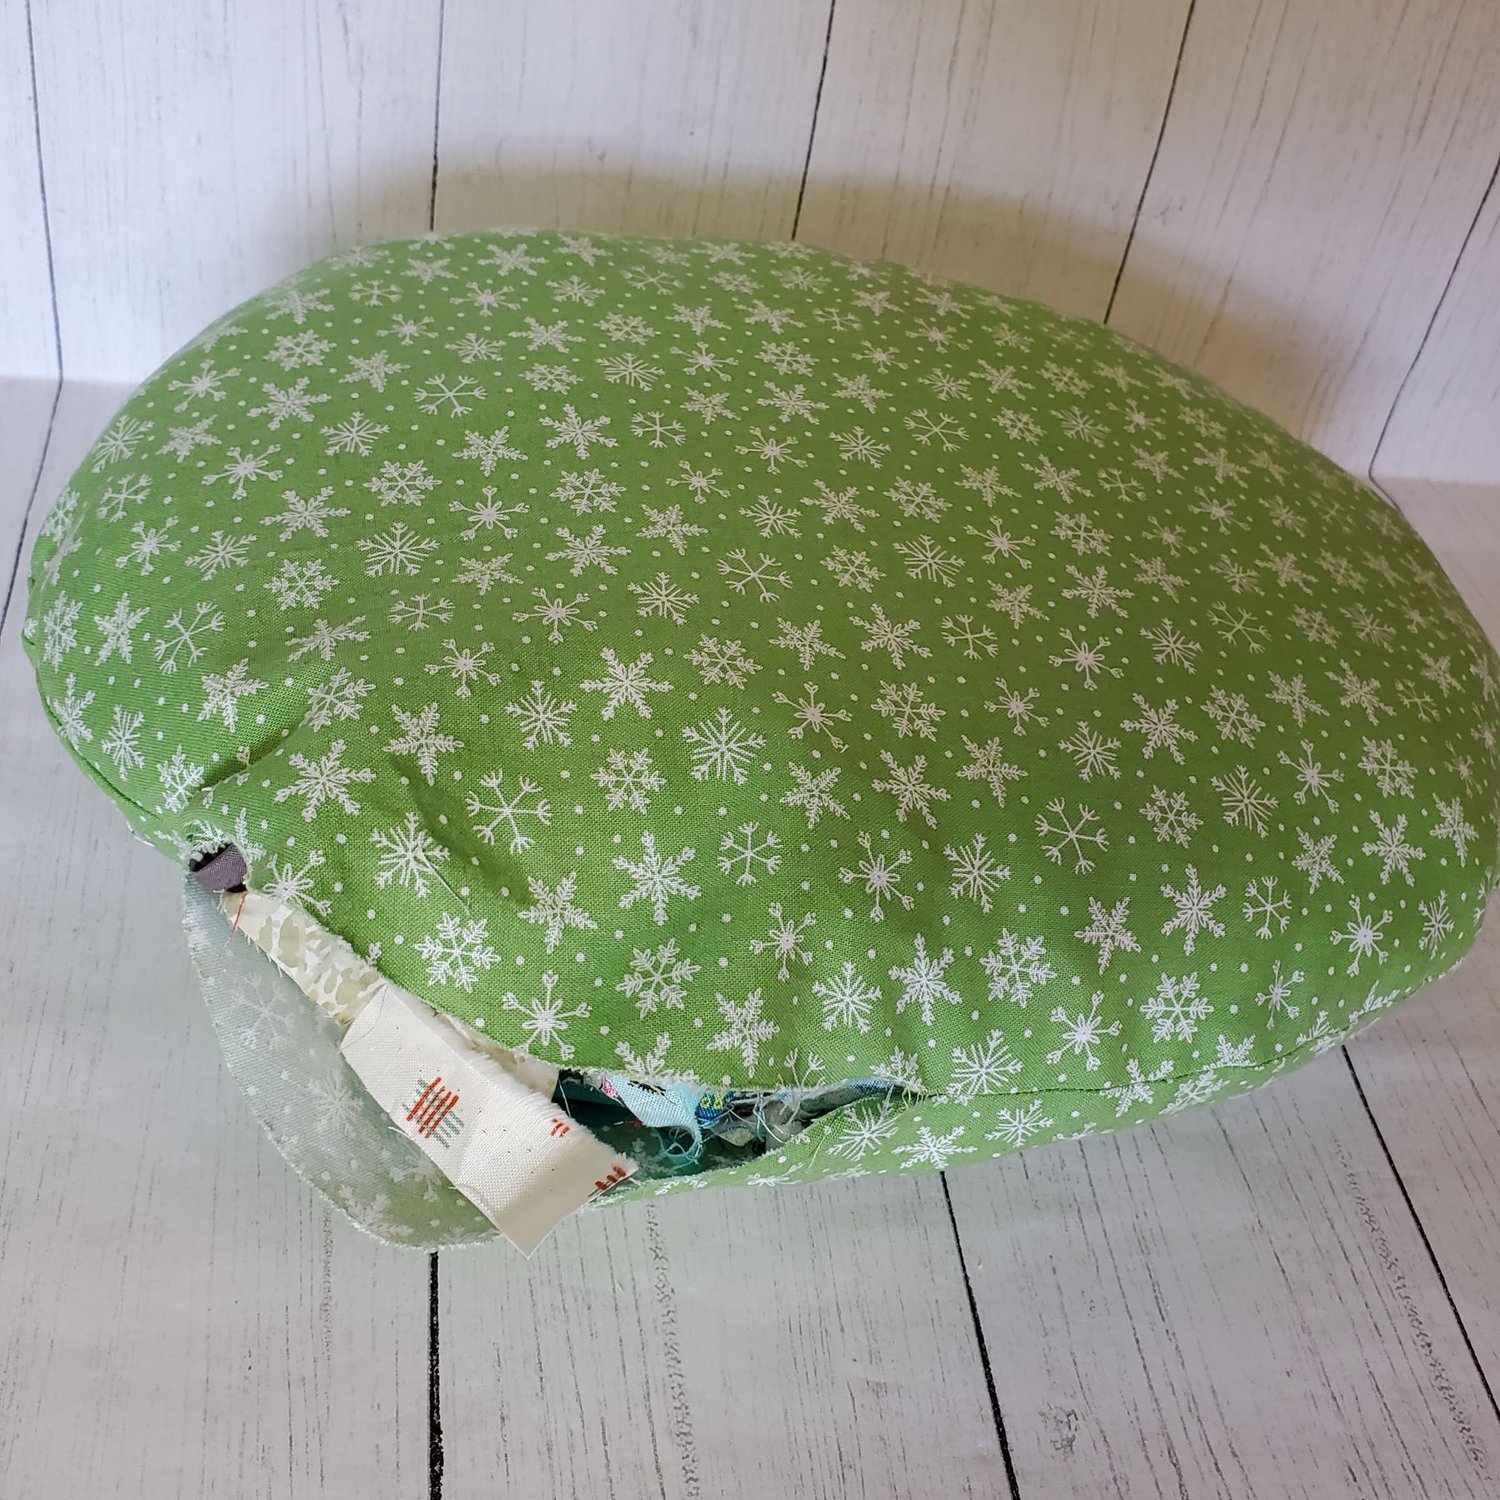
To close the opening you can hand stitch, topstitch in a coordinating thread or my choice of using the serger to sew the opening closed. Place the pillow inside the Kitty house and you are finished. I bet it won’t take long for your cat to find it’s new favorite hideout!