DIY Quilted Dog Coat
26th Nov 2020
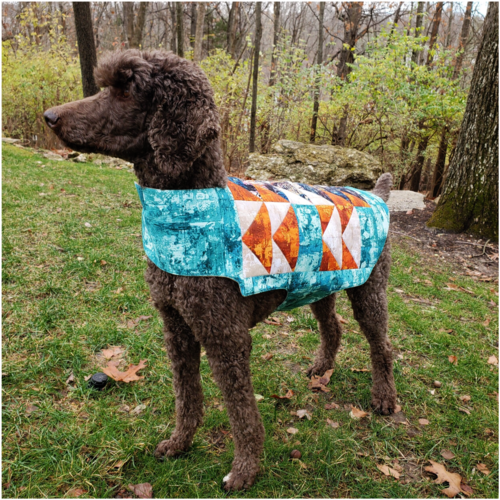
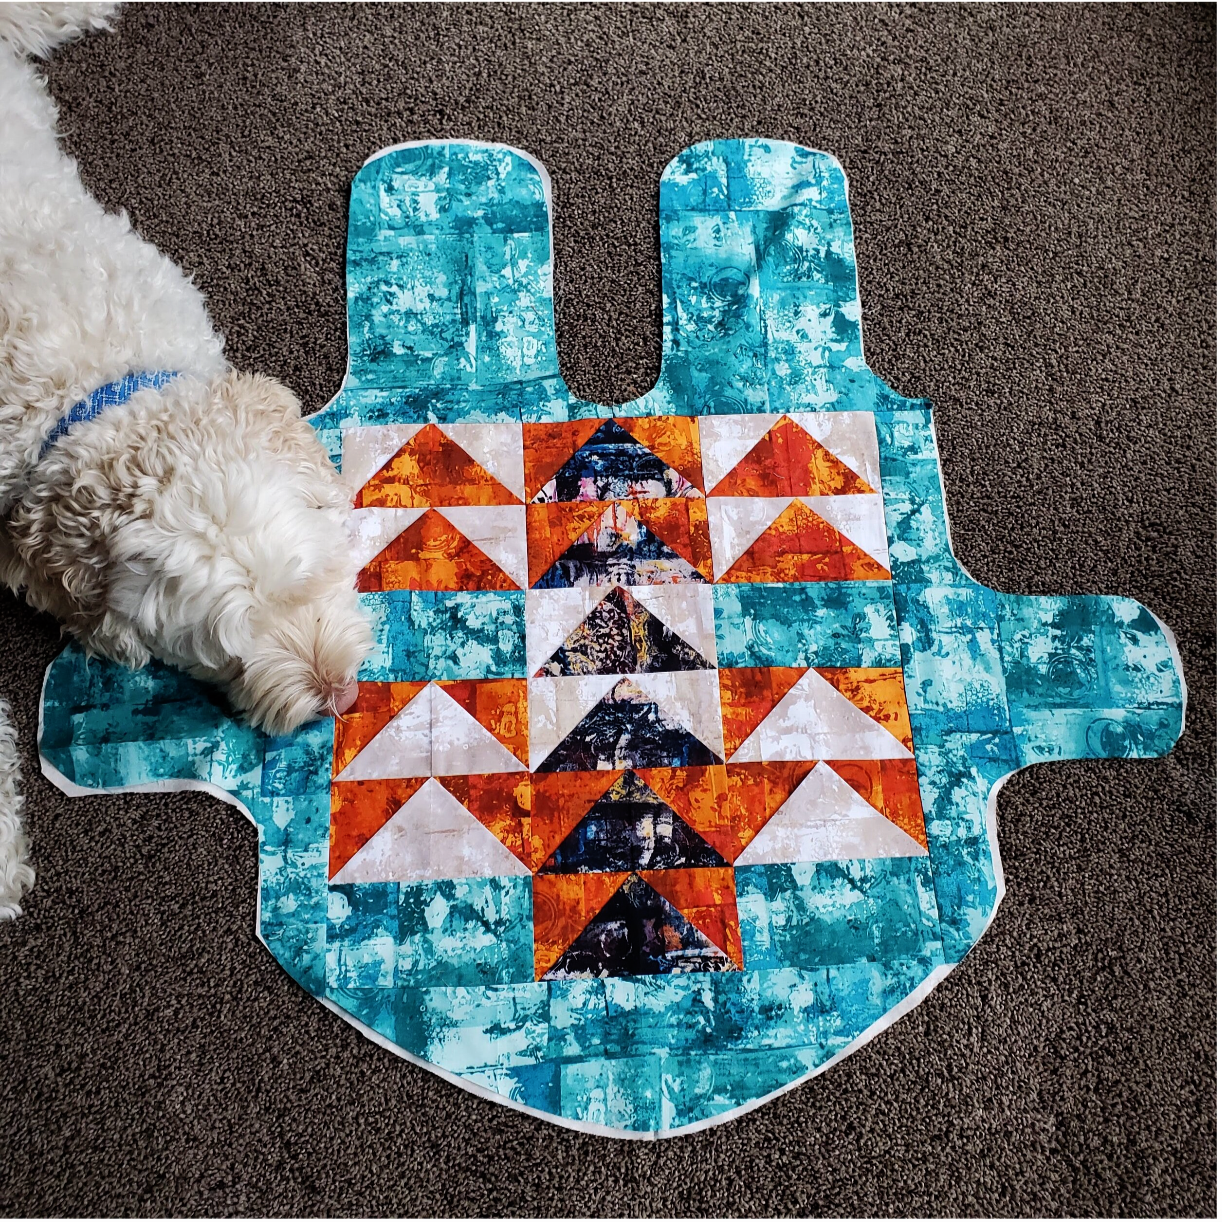
As winter weather approaches your best friend will love you even more for making this quilted coat. When I received the Robert Kaufman Warehouse district fabric in the November Classic Membership I knew the perfect project. I have seen several dog coats on Pinterest recently and I found this dog coat pattern easy to personalize to fit your pup.
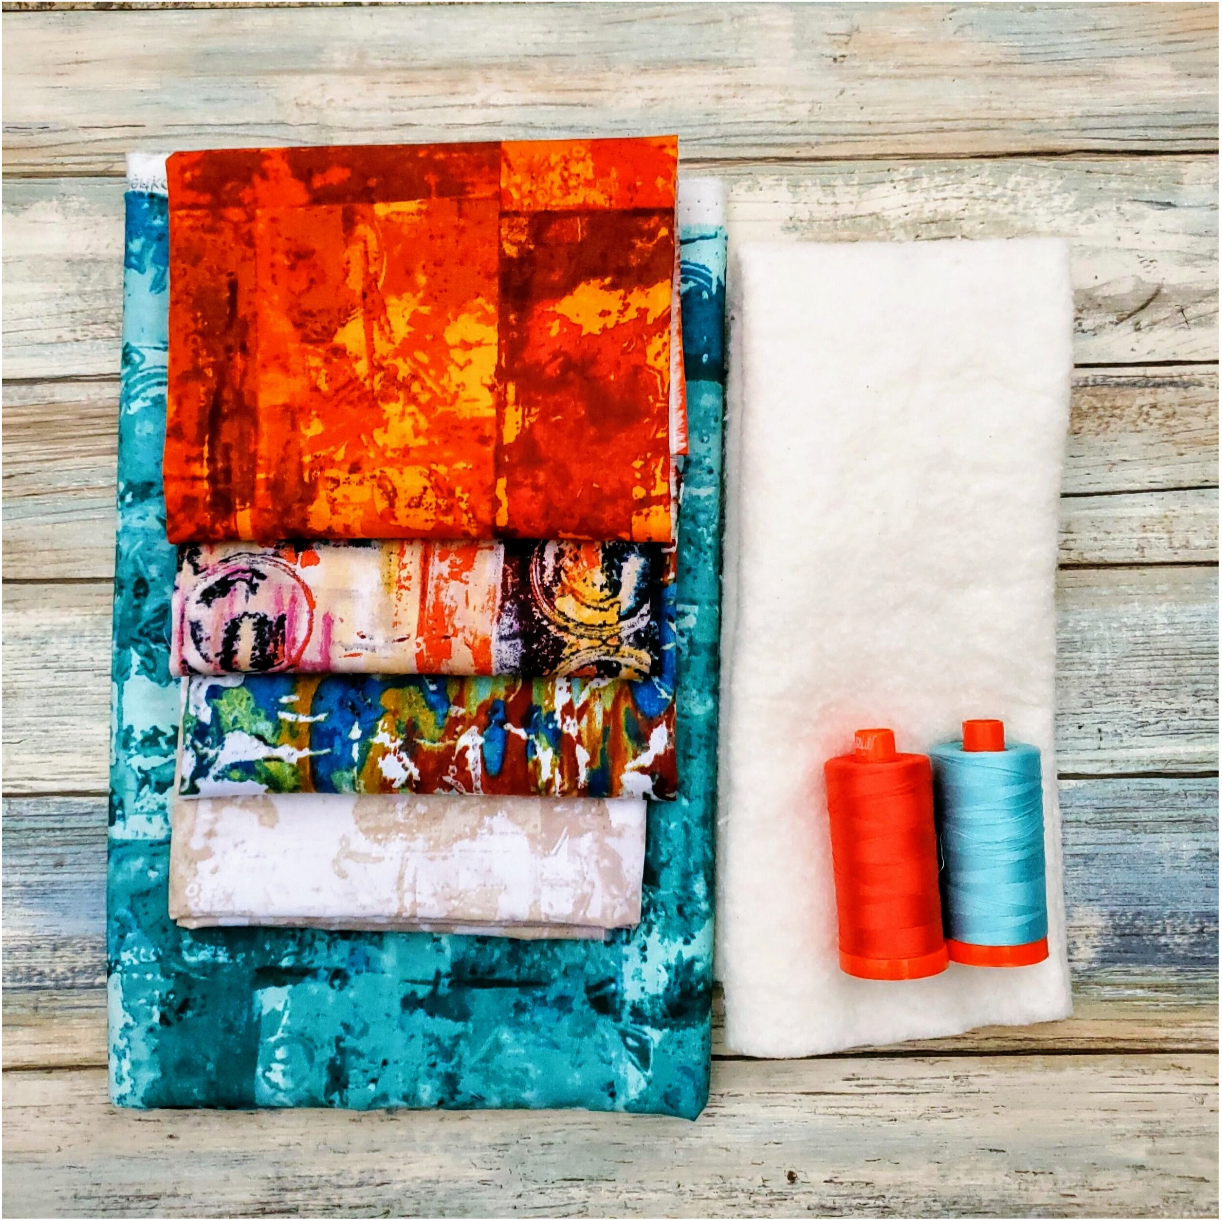
Materials needed
Fat quarters of several fabrics
Flannel backing fabric
Fusible fleece
Aurifil Coordinating thread from the Chroma Membership
Snaps or Velcro for closure
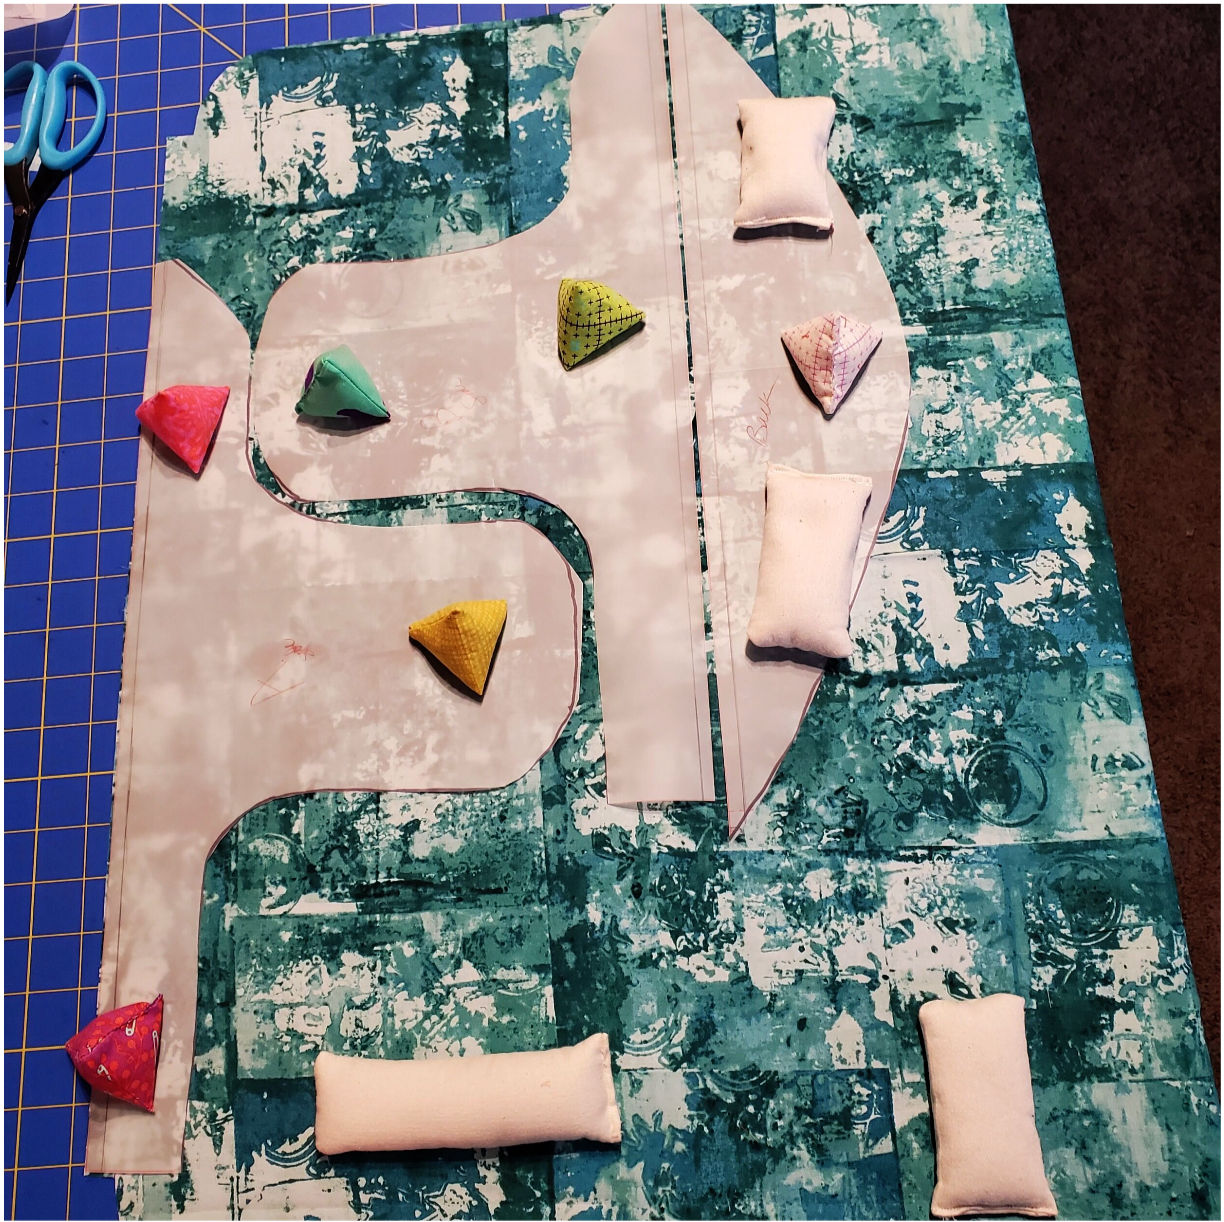
To get started download the instructions to measure your dog and create the pattern on paper. I used some vellum pattern paper I already had but wrapping paper works great to draw out the dimensions.
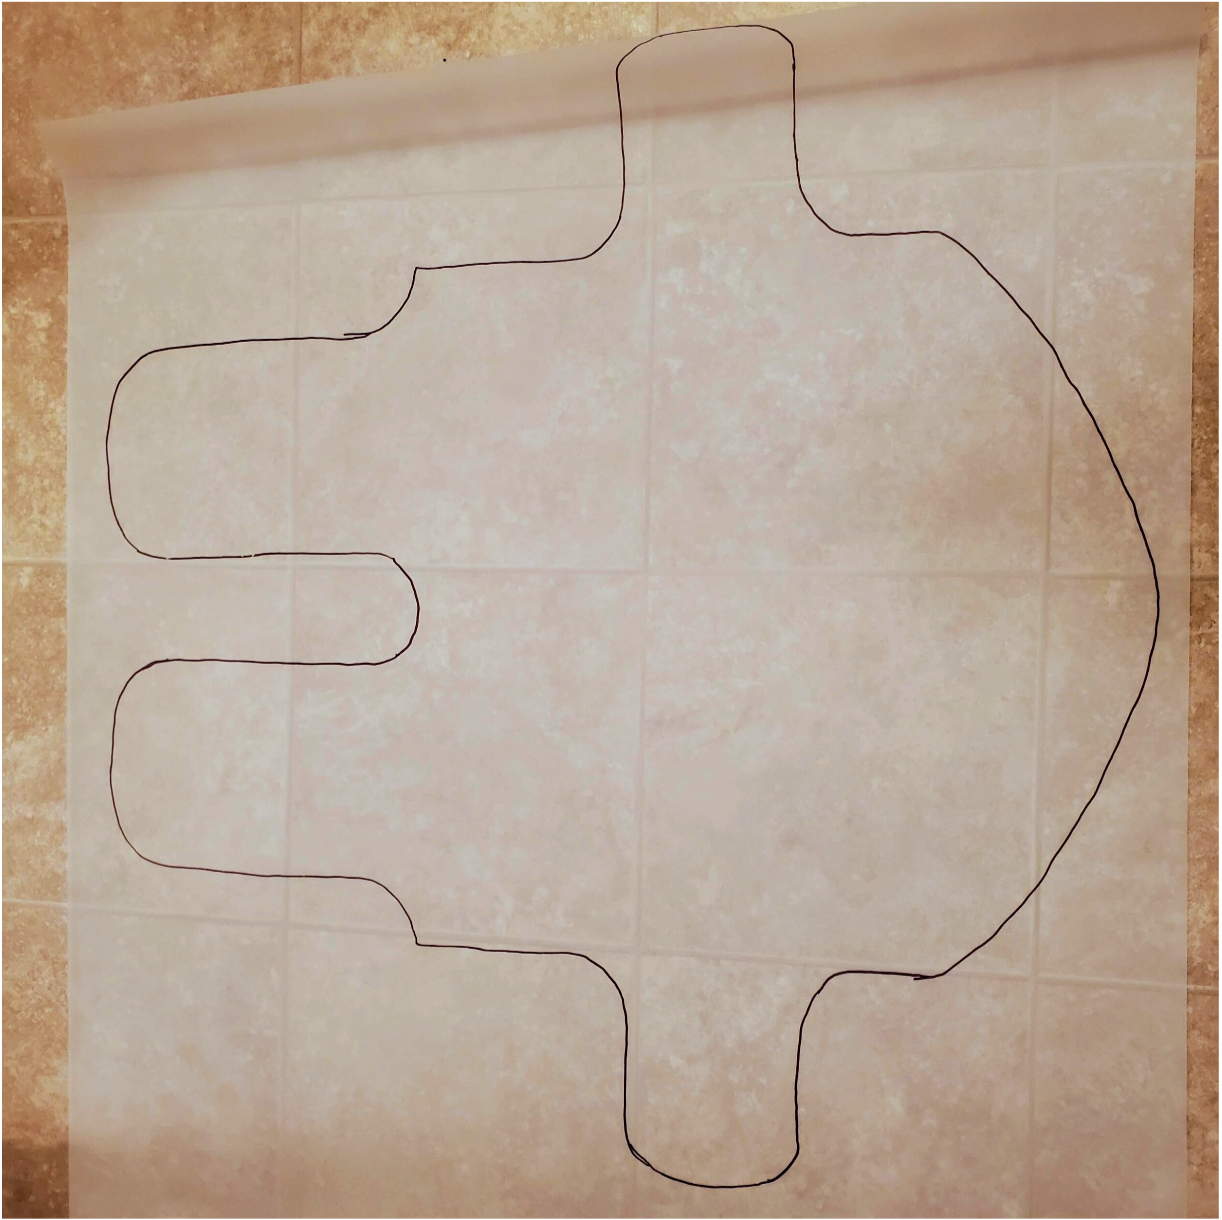
This gives a nice visual of the area you have to work with to plan the design. Cut out the backing fabric from the pattern. Try the cut fabric piece on the dog to be sure it fits with some extra to allow for ¼” seams and overlap for snaps or Velcro. Adjustments at this point are easily completed. I found that it was too long across the top resting on his tail so I was able to cut a few inches off for a better fit.
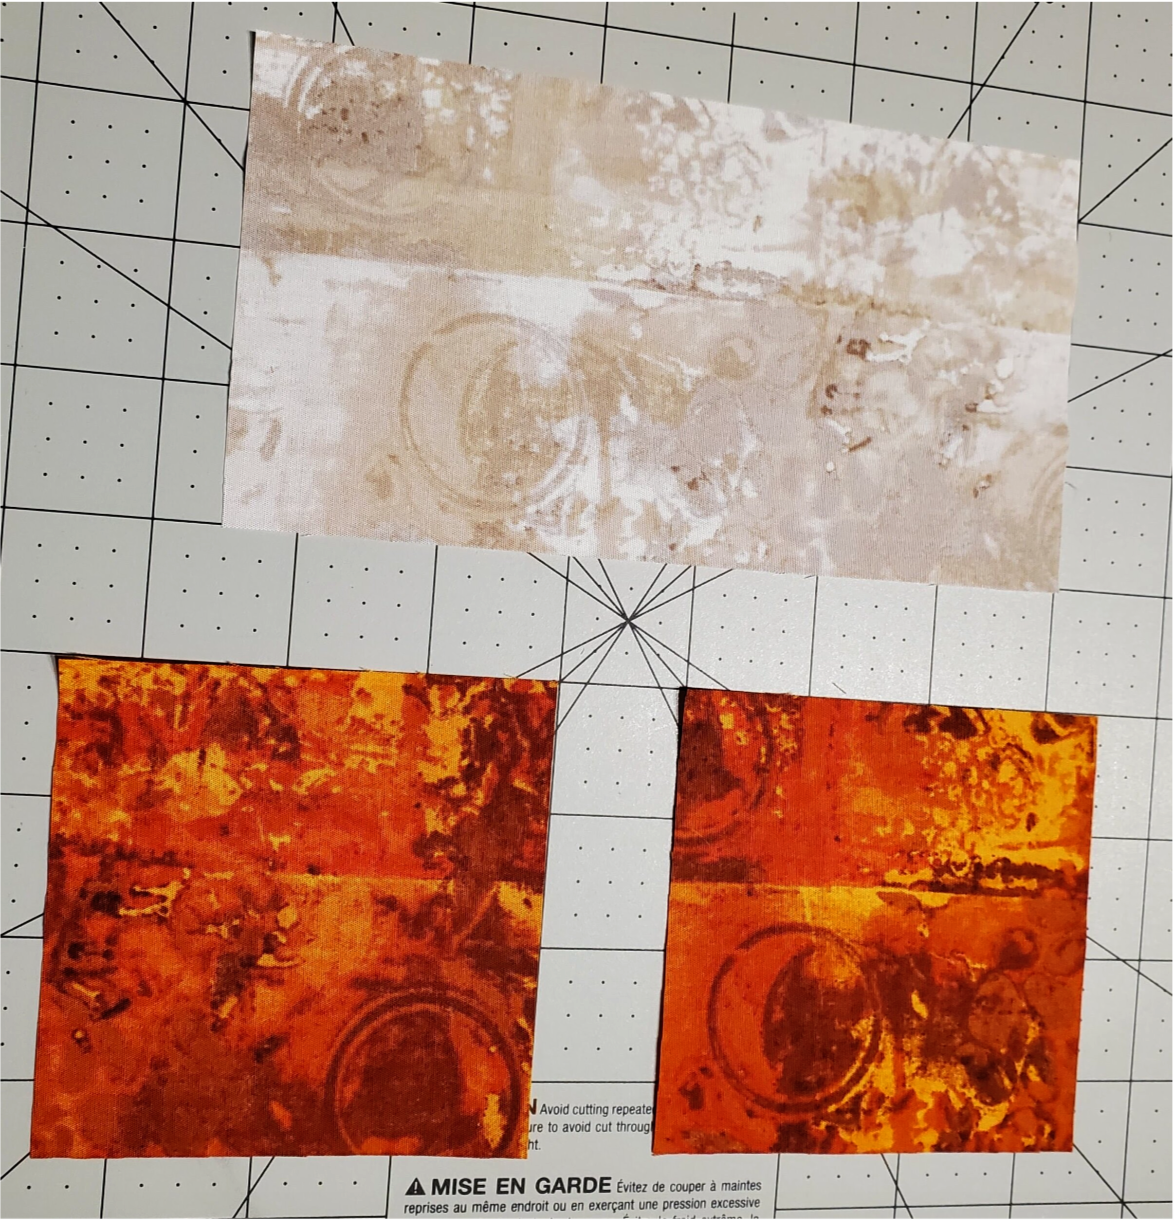
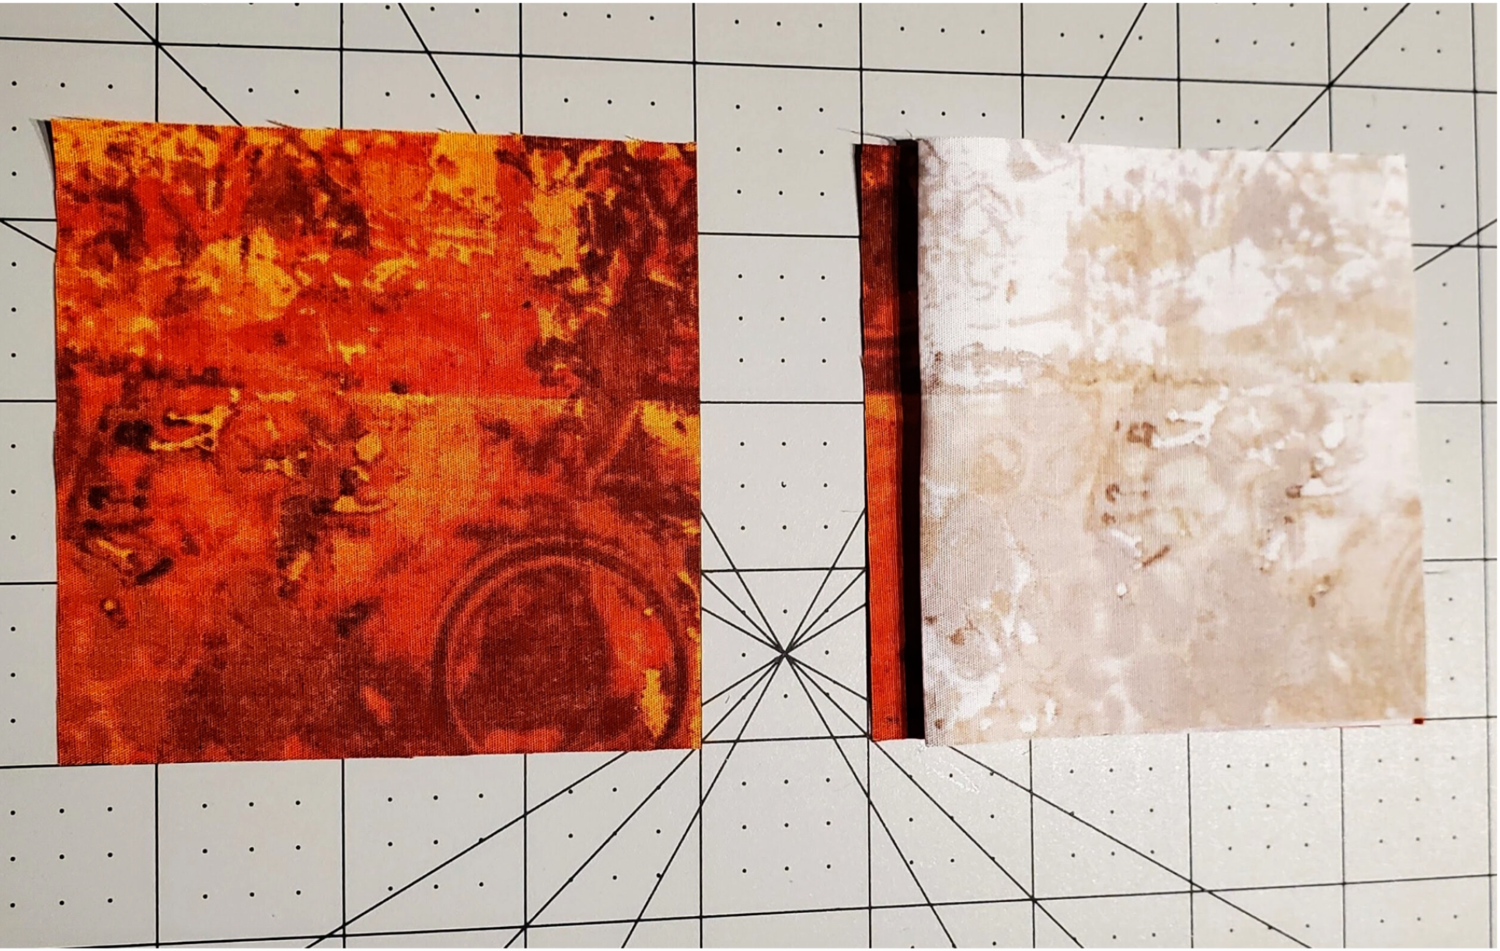
For this project I was inspired to try one seam flying geese featured in The Creative blog from Art gallery fabrics. This is a great tutorial and I found this to be a successful method to make perfect flying geese. I cut the squares 3 ½” and the rectangle
3 ½” x 6 ½”.
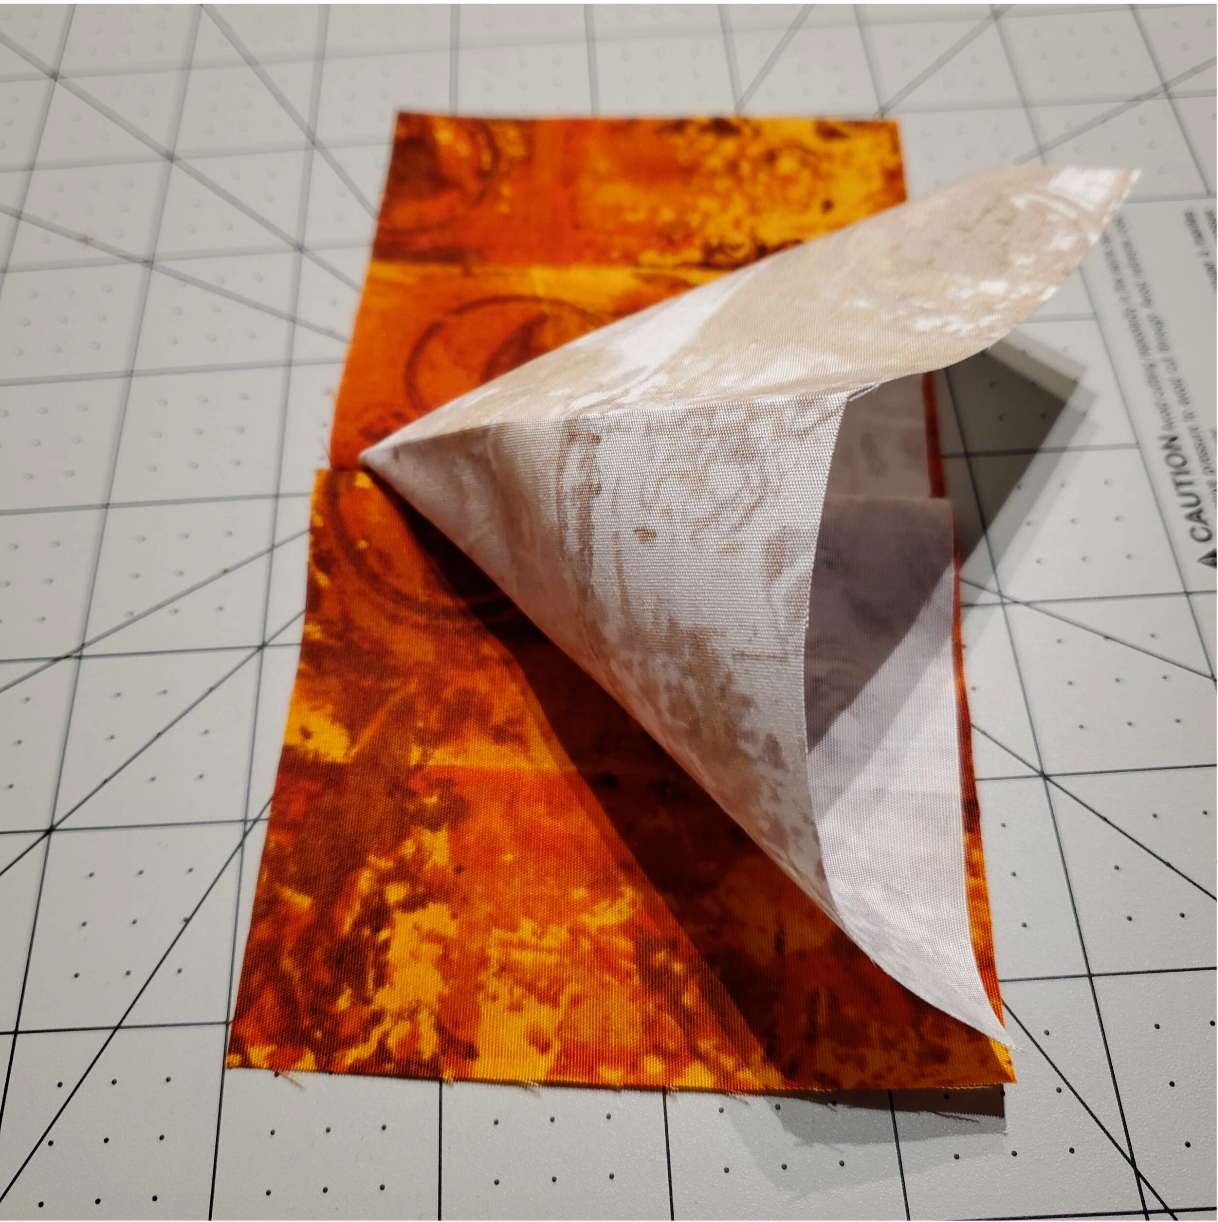
Place a square right side facing up then fold the rectangle in half right sides out laying it on top of the square. Finish the sandwich with a square facing wrong side up.
Pin in place and sew along the bottom edge. You can cut and set up all the flying geese to chain sew the units quickly and easily. The amount of geese will vary depending on the size of your finished coat. For this coat I was able to chain sew the 14 geese in a relatively short period of time. You will cut the units apart and press the triangle in place lining up the corners.
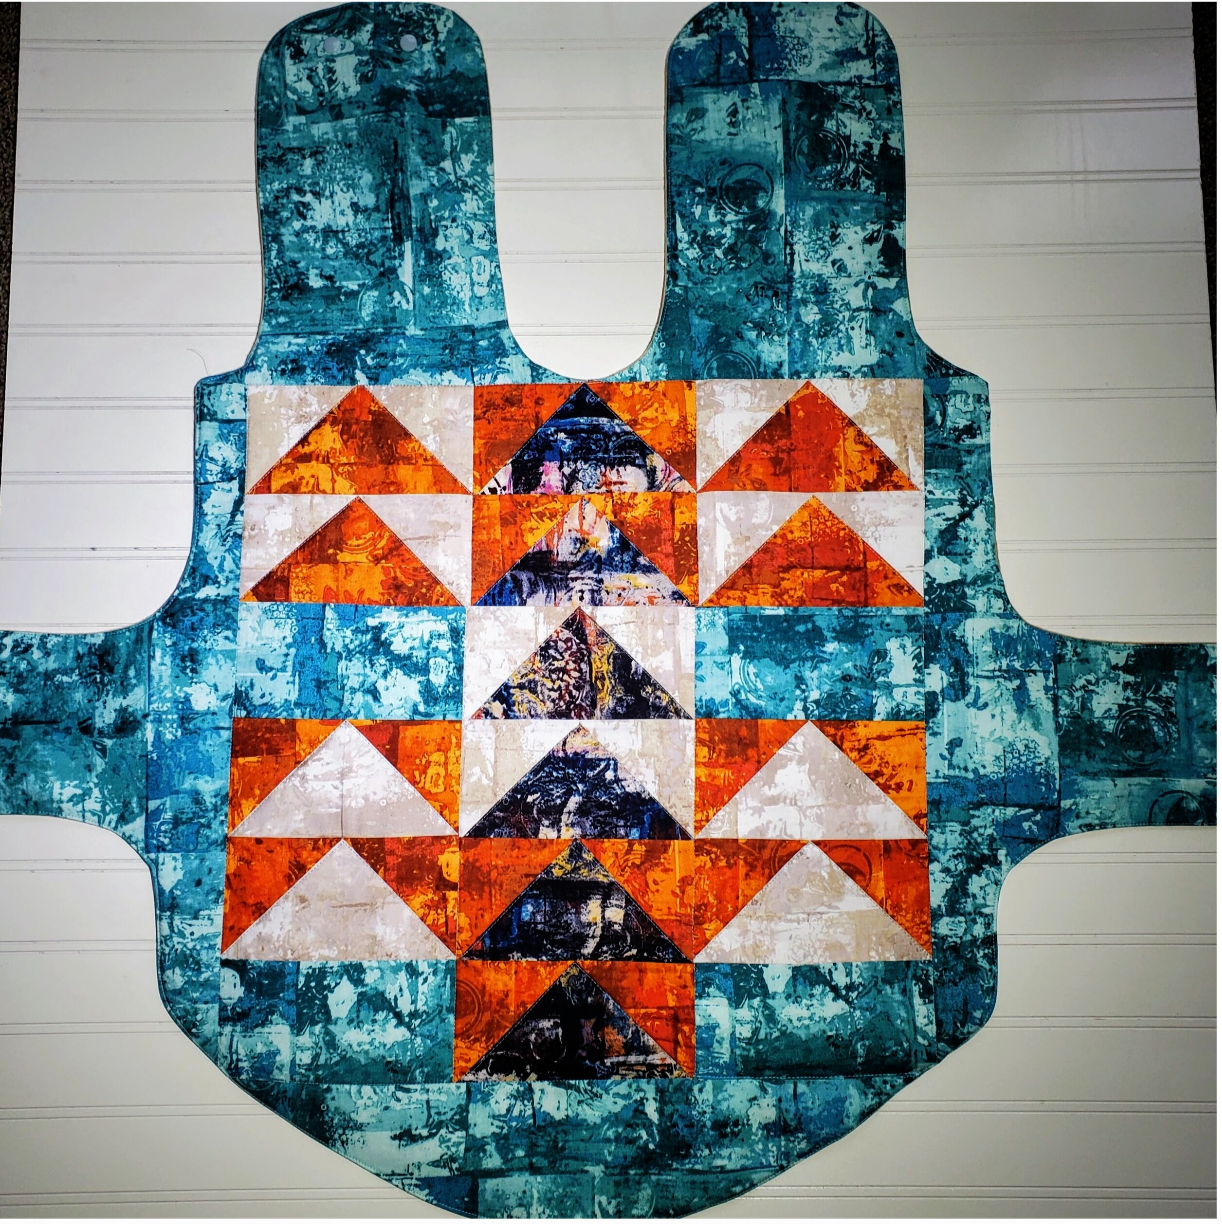
As with any quilt there are endless options of how to arrange the units into a pattern. Take a few minutes arranging till you decide on a pleasing design to sew together for the center of the coat.
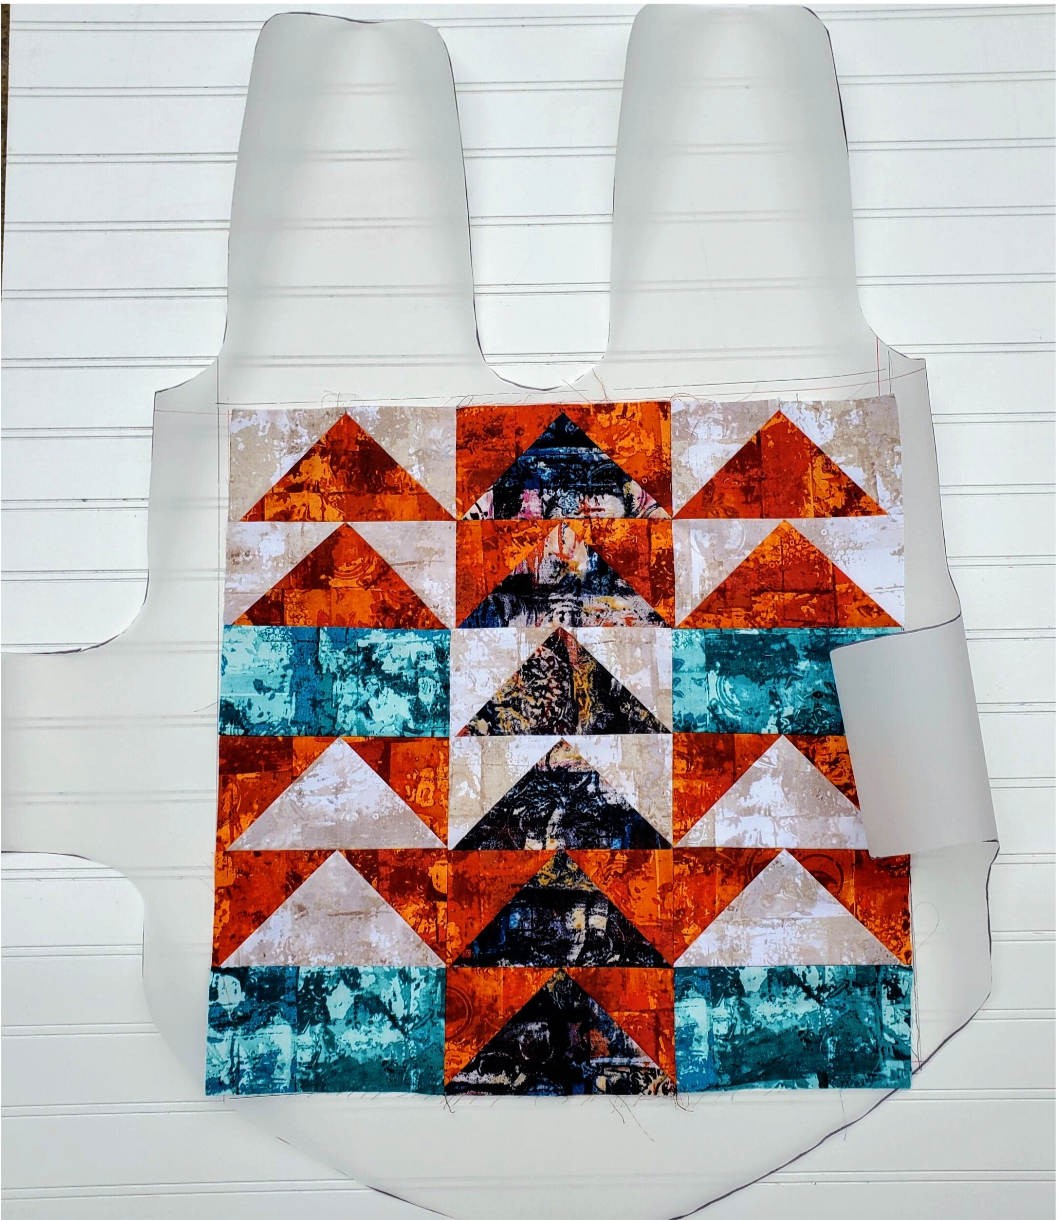
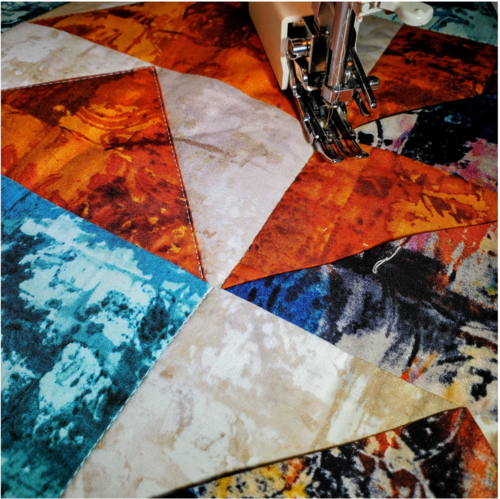
To make a pattern for the main turquoise fabric from the Cotton Cuts Classic Membership, I first drew around the center design onto the pattern. In a different color ink I added a ¼” seam allowance drawing a line inside the rectangle I just drew. Next cutting on the lines you just drew creates the pattern pieces. Keep track of the order you cut them in because you will sew them together in the same order once you cut the fabric. Identify the pattern pieces with a marker to make it easier to sew them together later.
Sew the pieces together using a ¼” seam allowance and press. You are now ready to add the fusible fleece. Press the fleece to the wrong side of quilted piece.
Lay right sides together with the backing flannel and pin in place around the outer edges making sure it is flat and matching the edges of the top piece. Sew around the outer edge using a ¼” seam and leaving a 4-5” opening to turn the fabric. Trim the inner curves and use pinking shears on outer curves to help it lay flat. Turn the right side out and press carefully. You may want to add some safety pins to keep the layers in place as you quilt.
To quilt this dog coat I used the walking foot and started with stitching in the ditch along all the seams. Because of the folded design of the flying geese you will want to stitch around the triangle on each unit to secure the fabric in place.
To finish sewing the coat top stitch about ⅛” from the edge all around the piece. The final step is to try it on your dog and mark for the placement of the closures. Sew on the Velcro or snaps.
Beau was so proud to show off his custom made quilted coat! It will keep him warm when the cold winter winds blow this season.