

Scrappy Fabric Tree Ornaments
Posted by Daisi Toegel on 15th Dec 2022
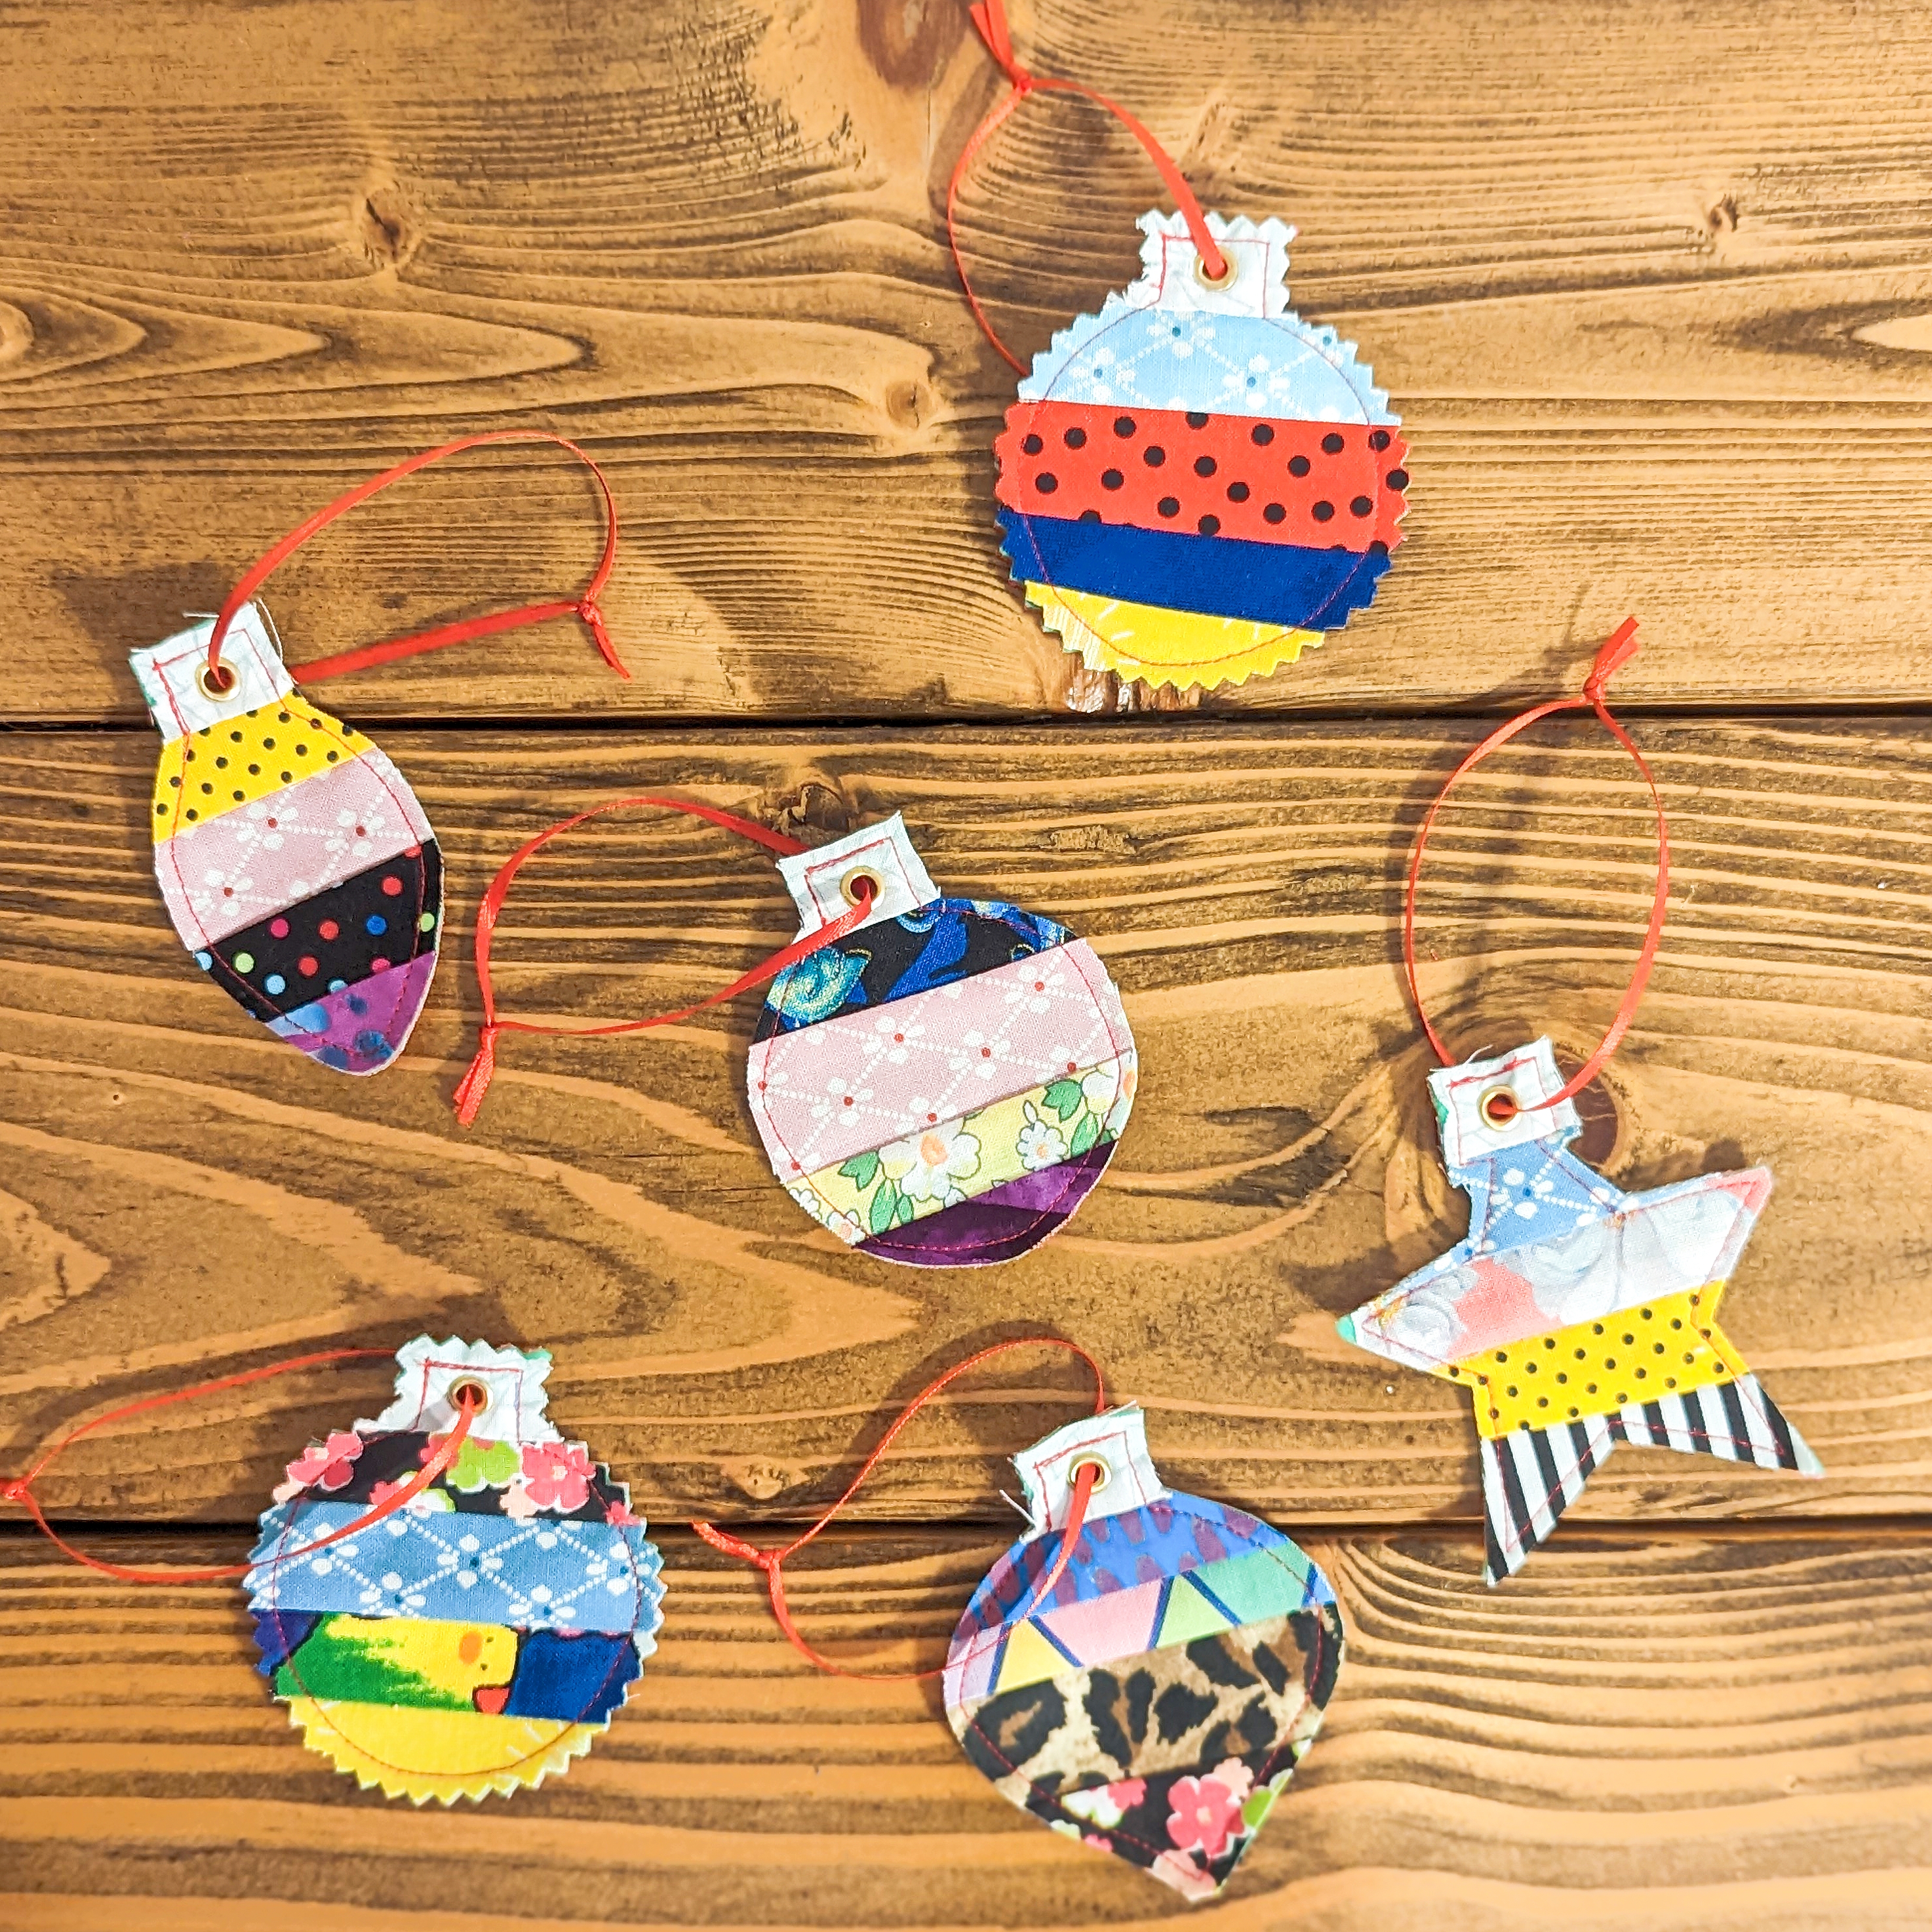
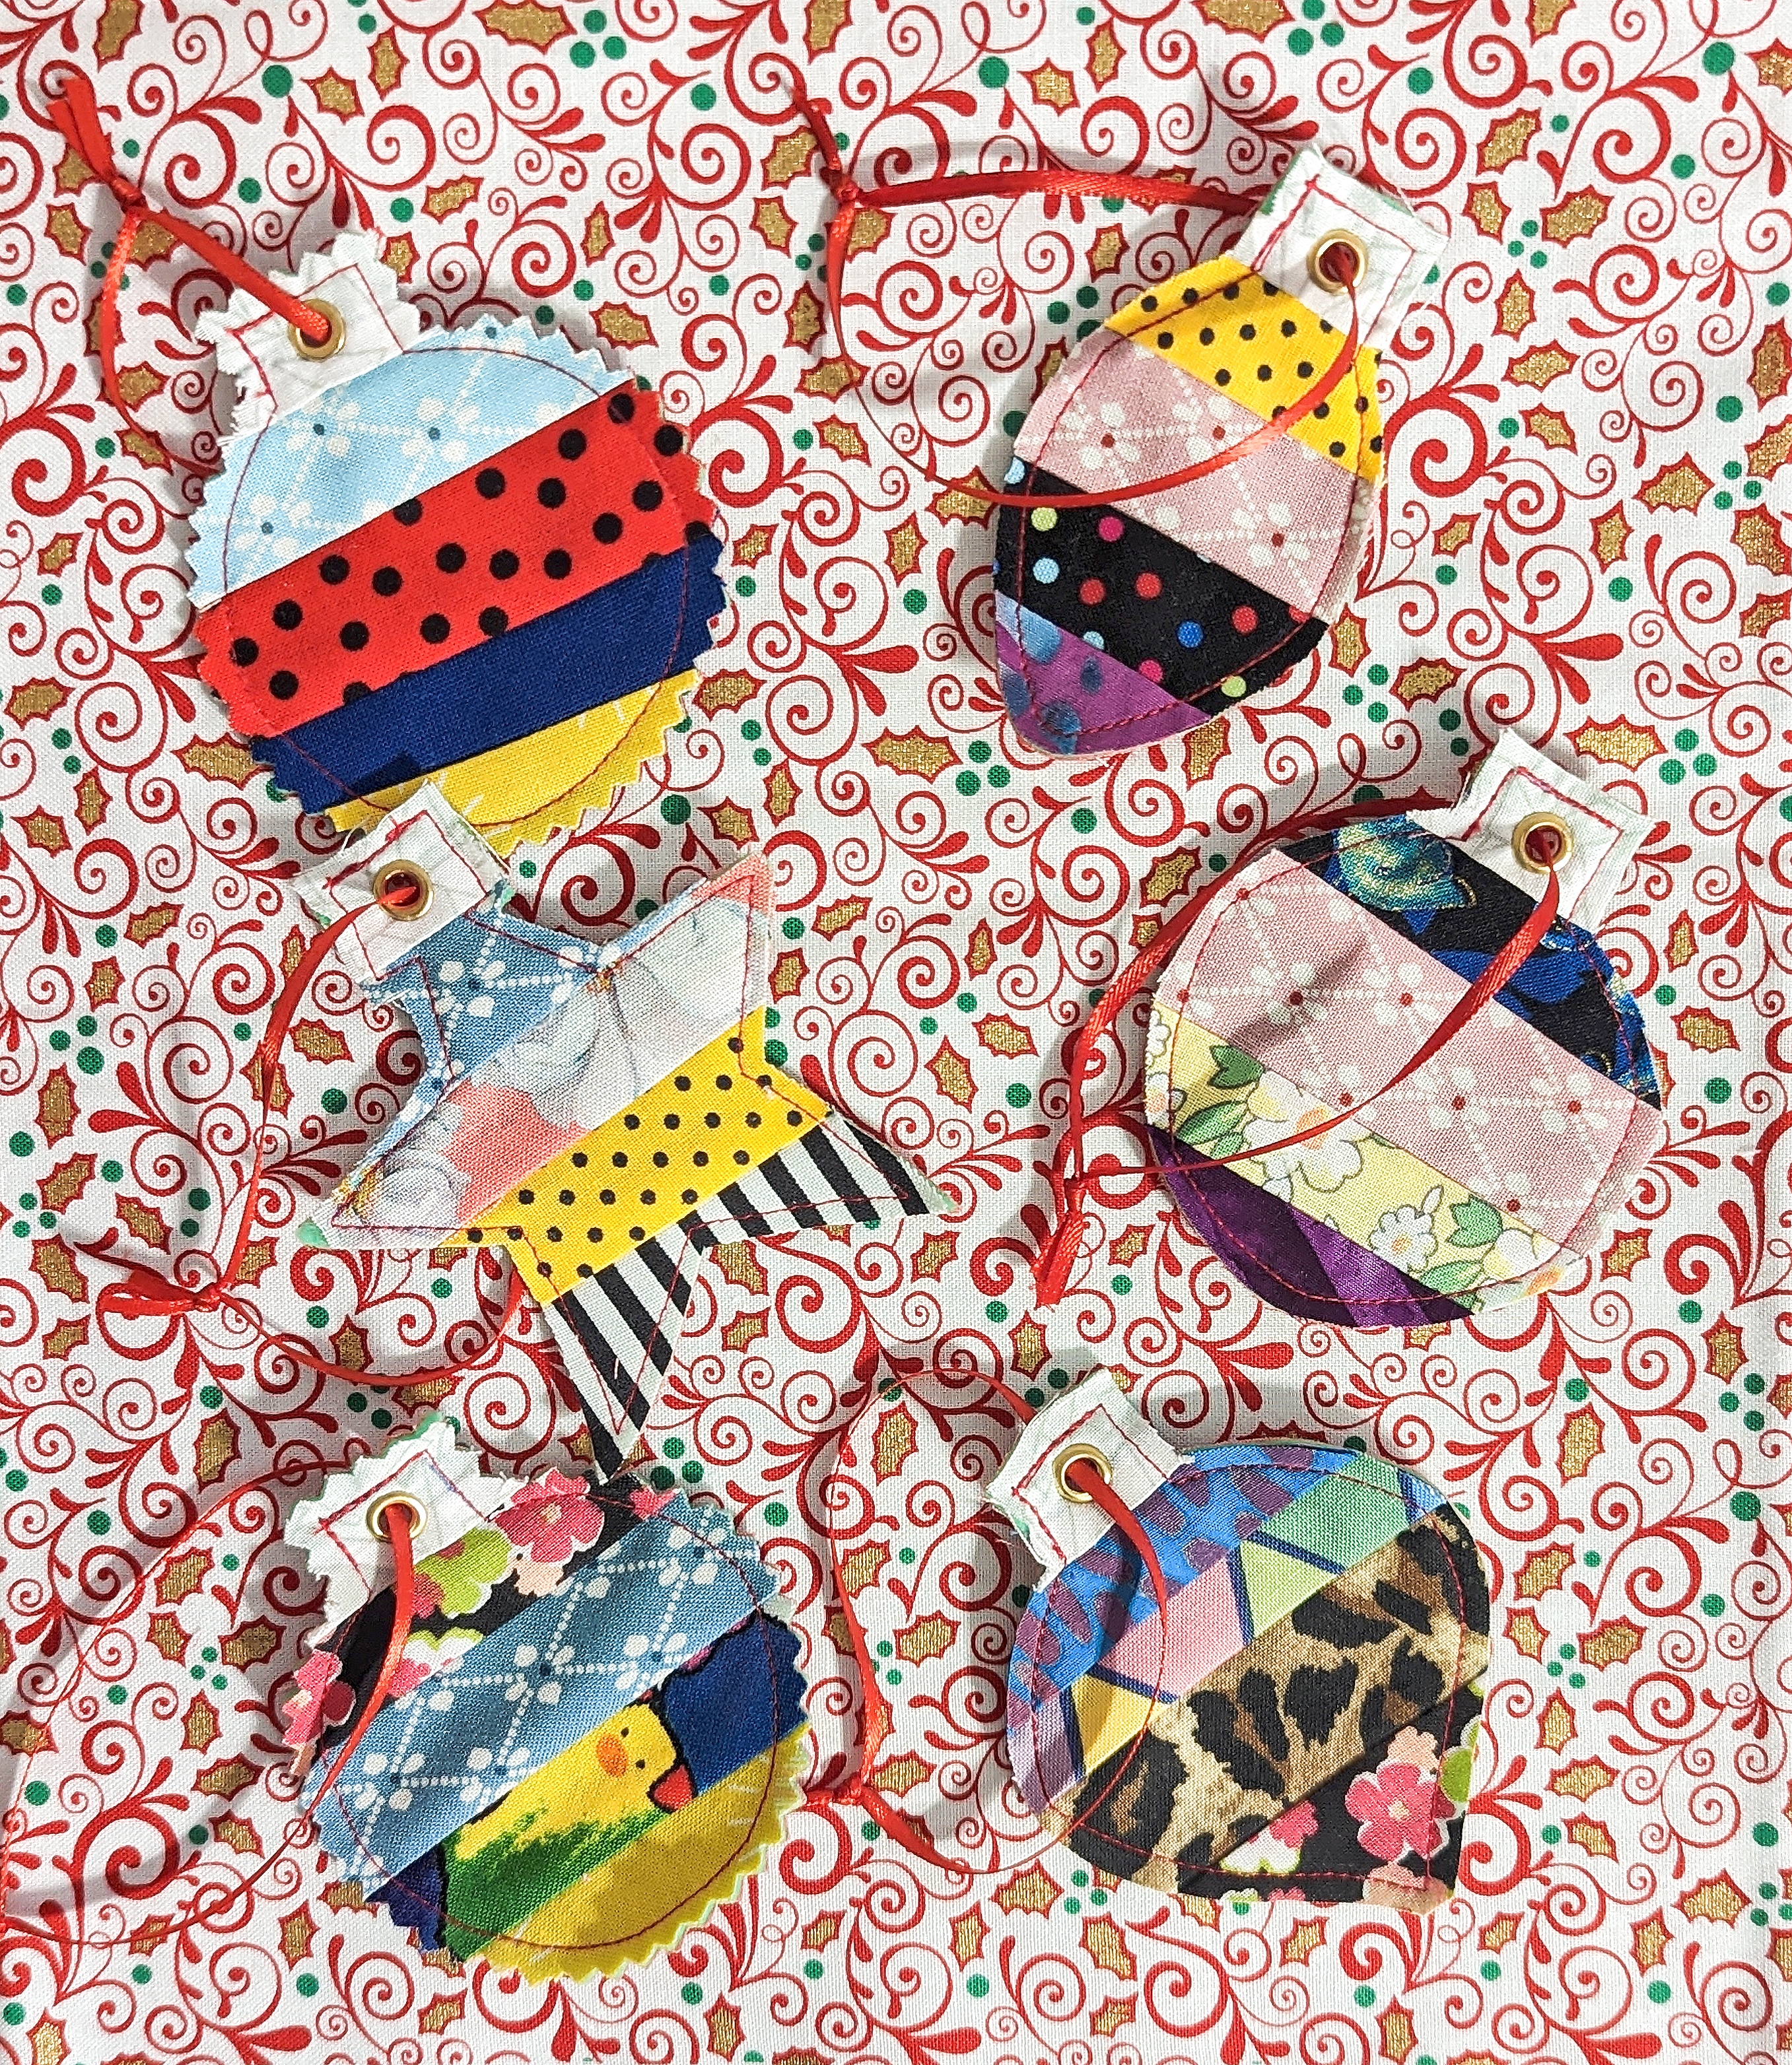
We’re very close to Christmas and with so much going on, sometimes there’s no time left to decorate enough, or make a cute add-on to our gifts. So what about using up those scrap fabric pieces to make some quick tree ornaments? These are perfect to gift too! Add them as a tag, on a card, or anywhere you want!!!
Let’s get started!
Materials:

PATTERN DOWNLOAD HERE.
(Free file from www.printablee.com)
https://drive.google.com/file/d/1cc_RshlG6md7CobH9ha3OTtwYdiUy8Qa/view?usp=share_link
1) Scrap fabric.
2) Felt.
3) Ribbon.
4) Scissors, pins, ruler, rotary cutter.
5) Thread.
6) Heat erasable pen.
7) Eyelets, eyelet plier and leather hole punch plier.
STEP 1:
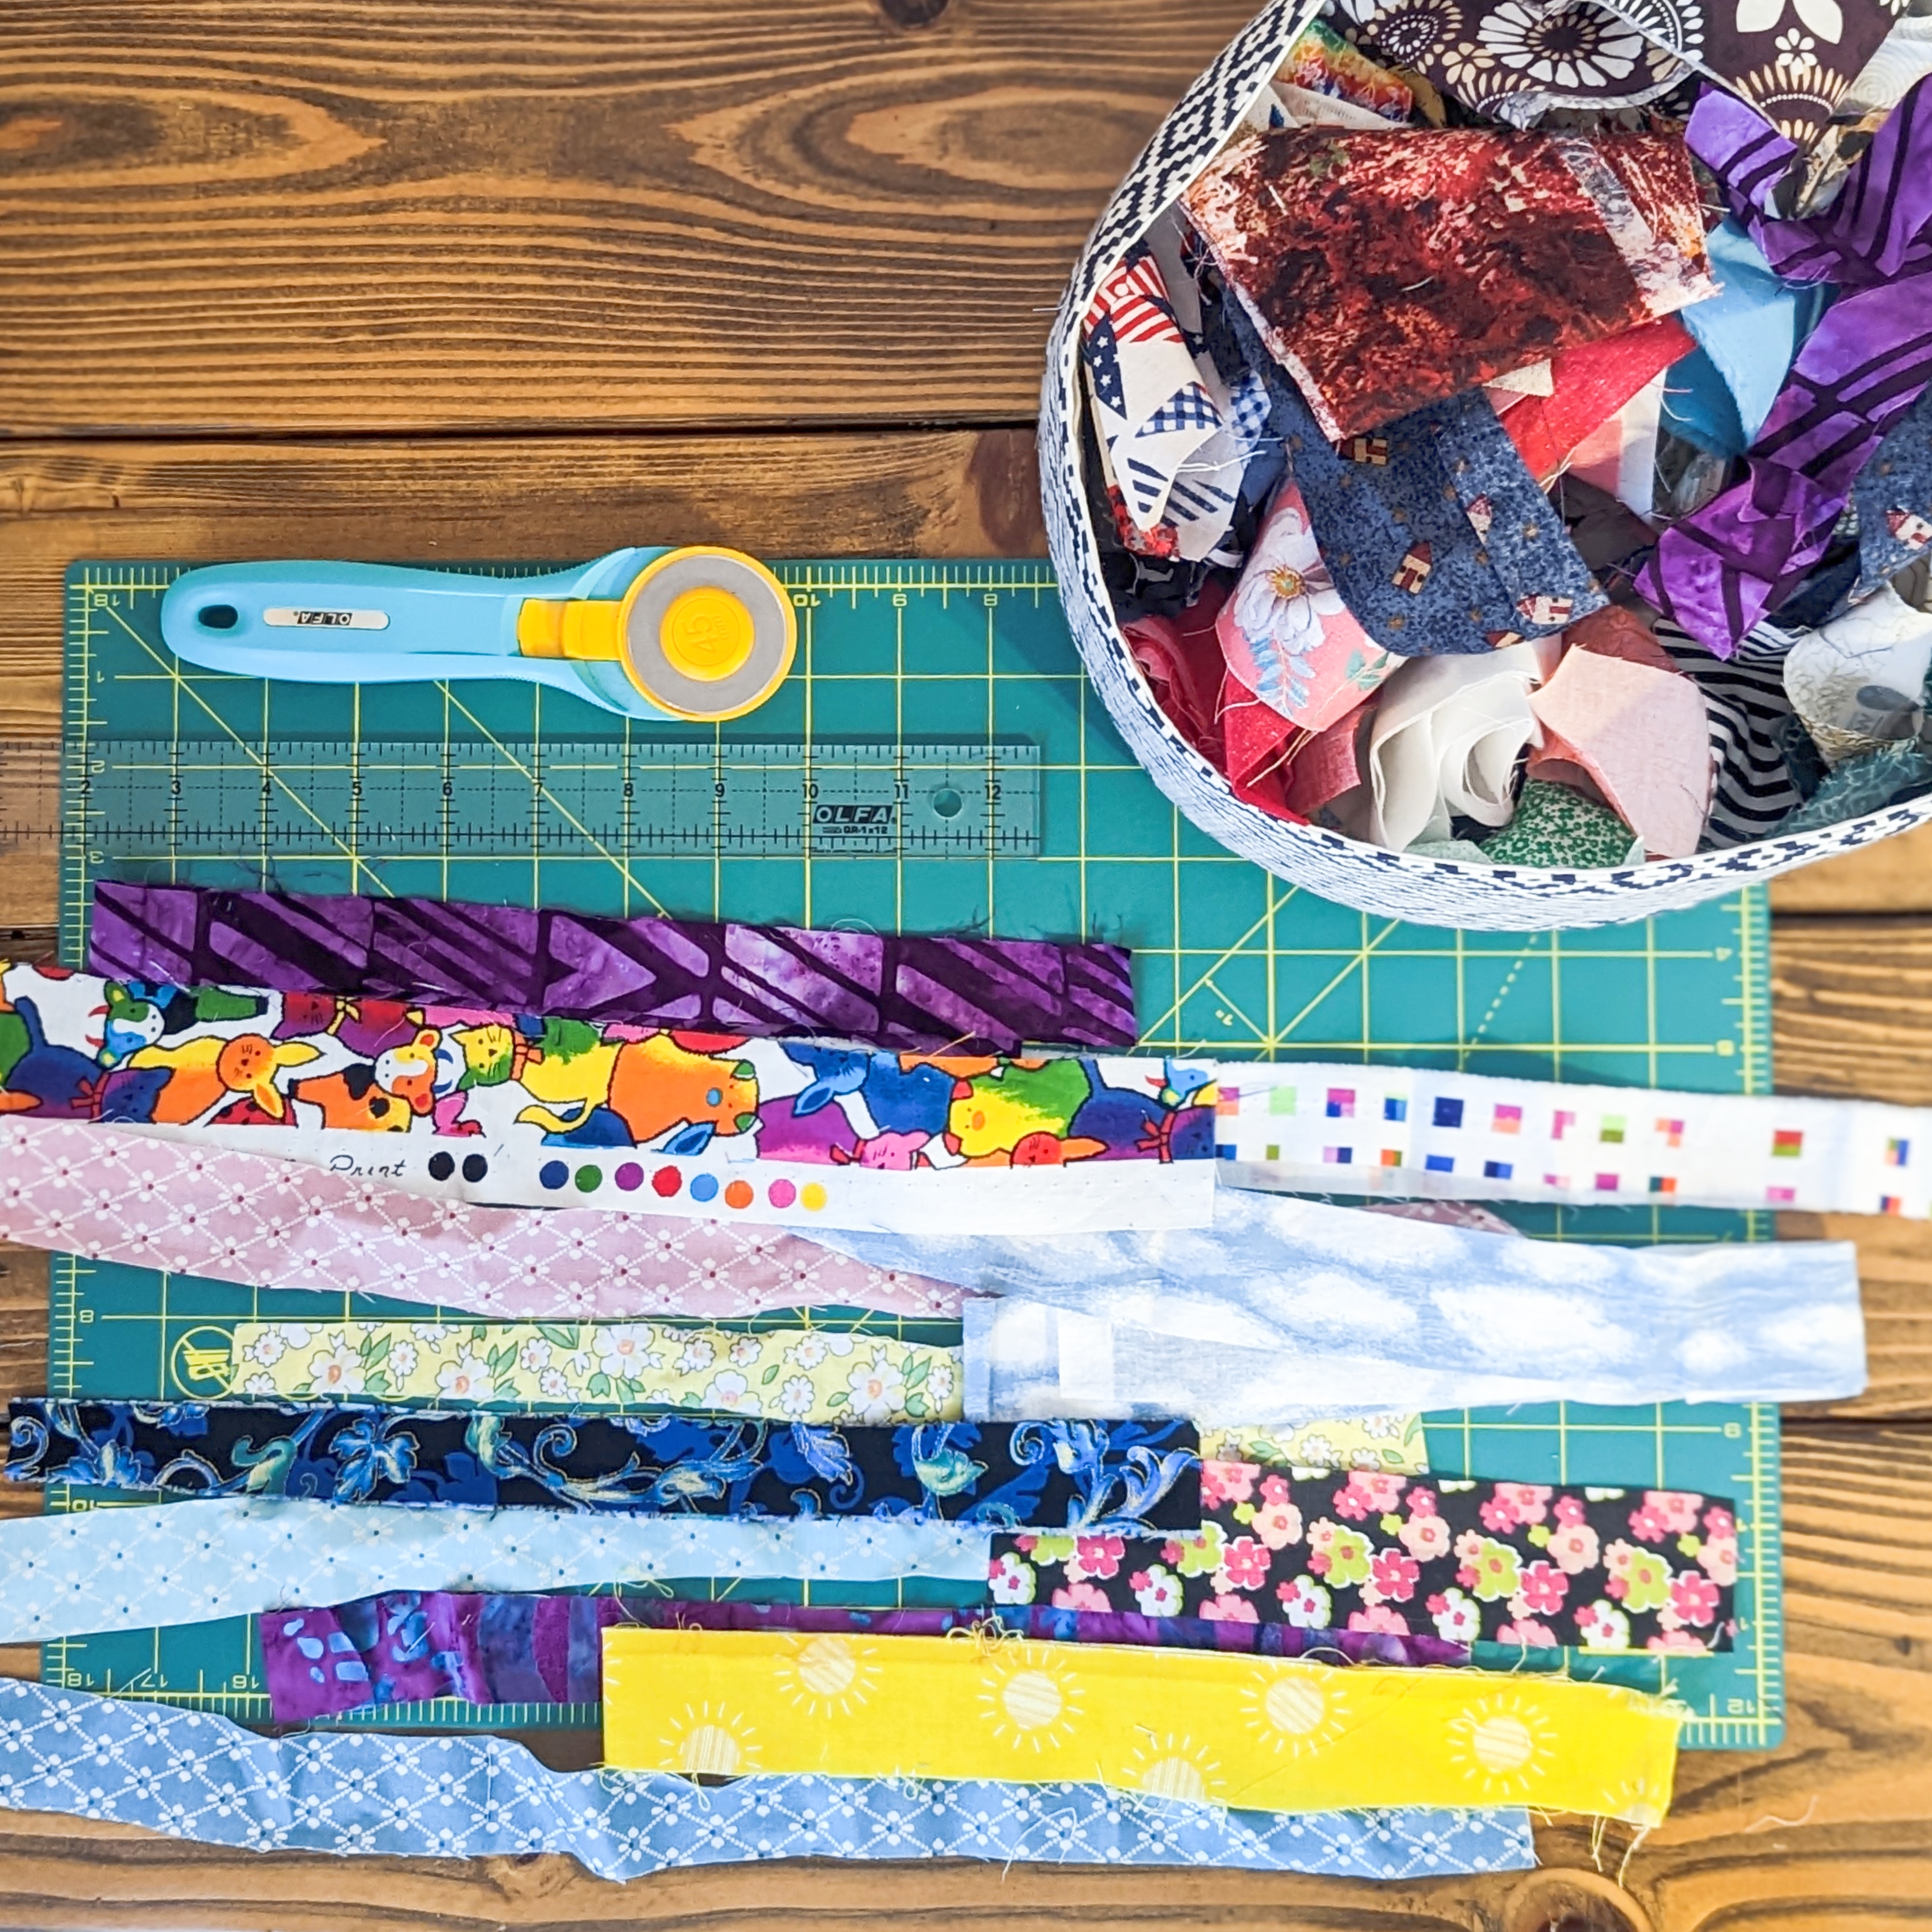
Cut out strips from your scrap fabrics, I suggest them to be 3/4” or 1” wide.
STEP 2:
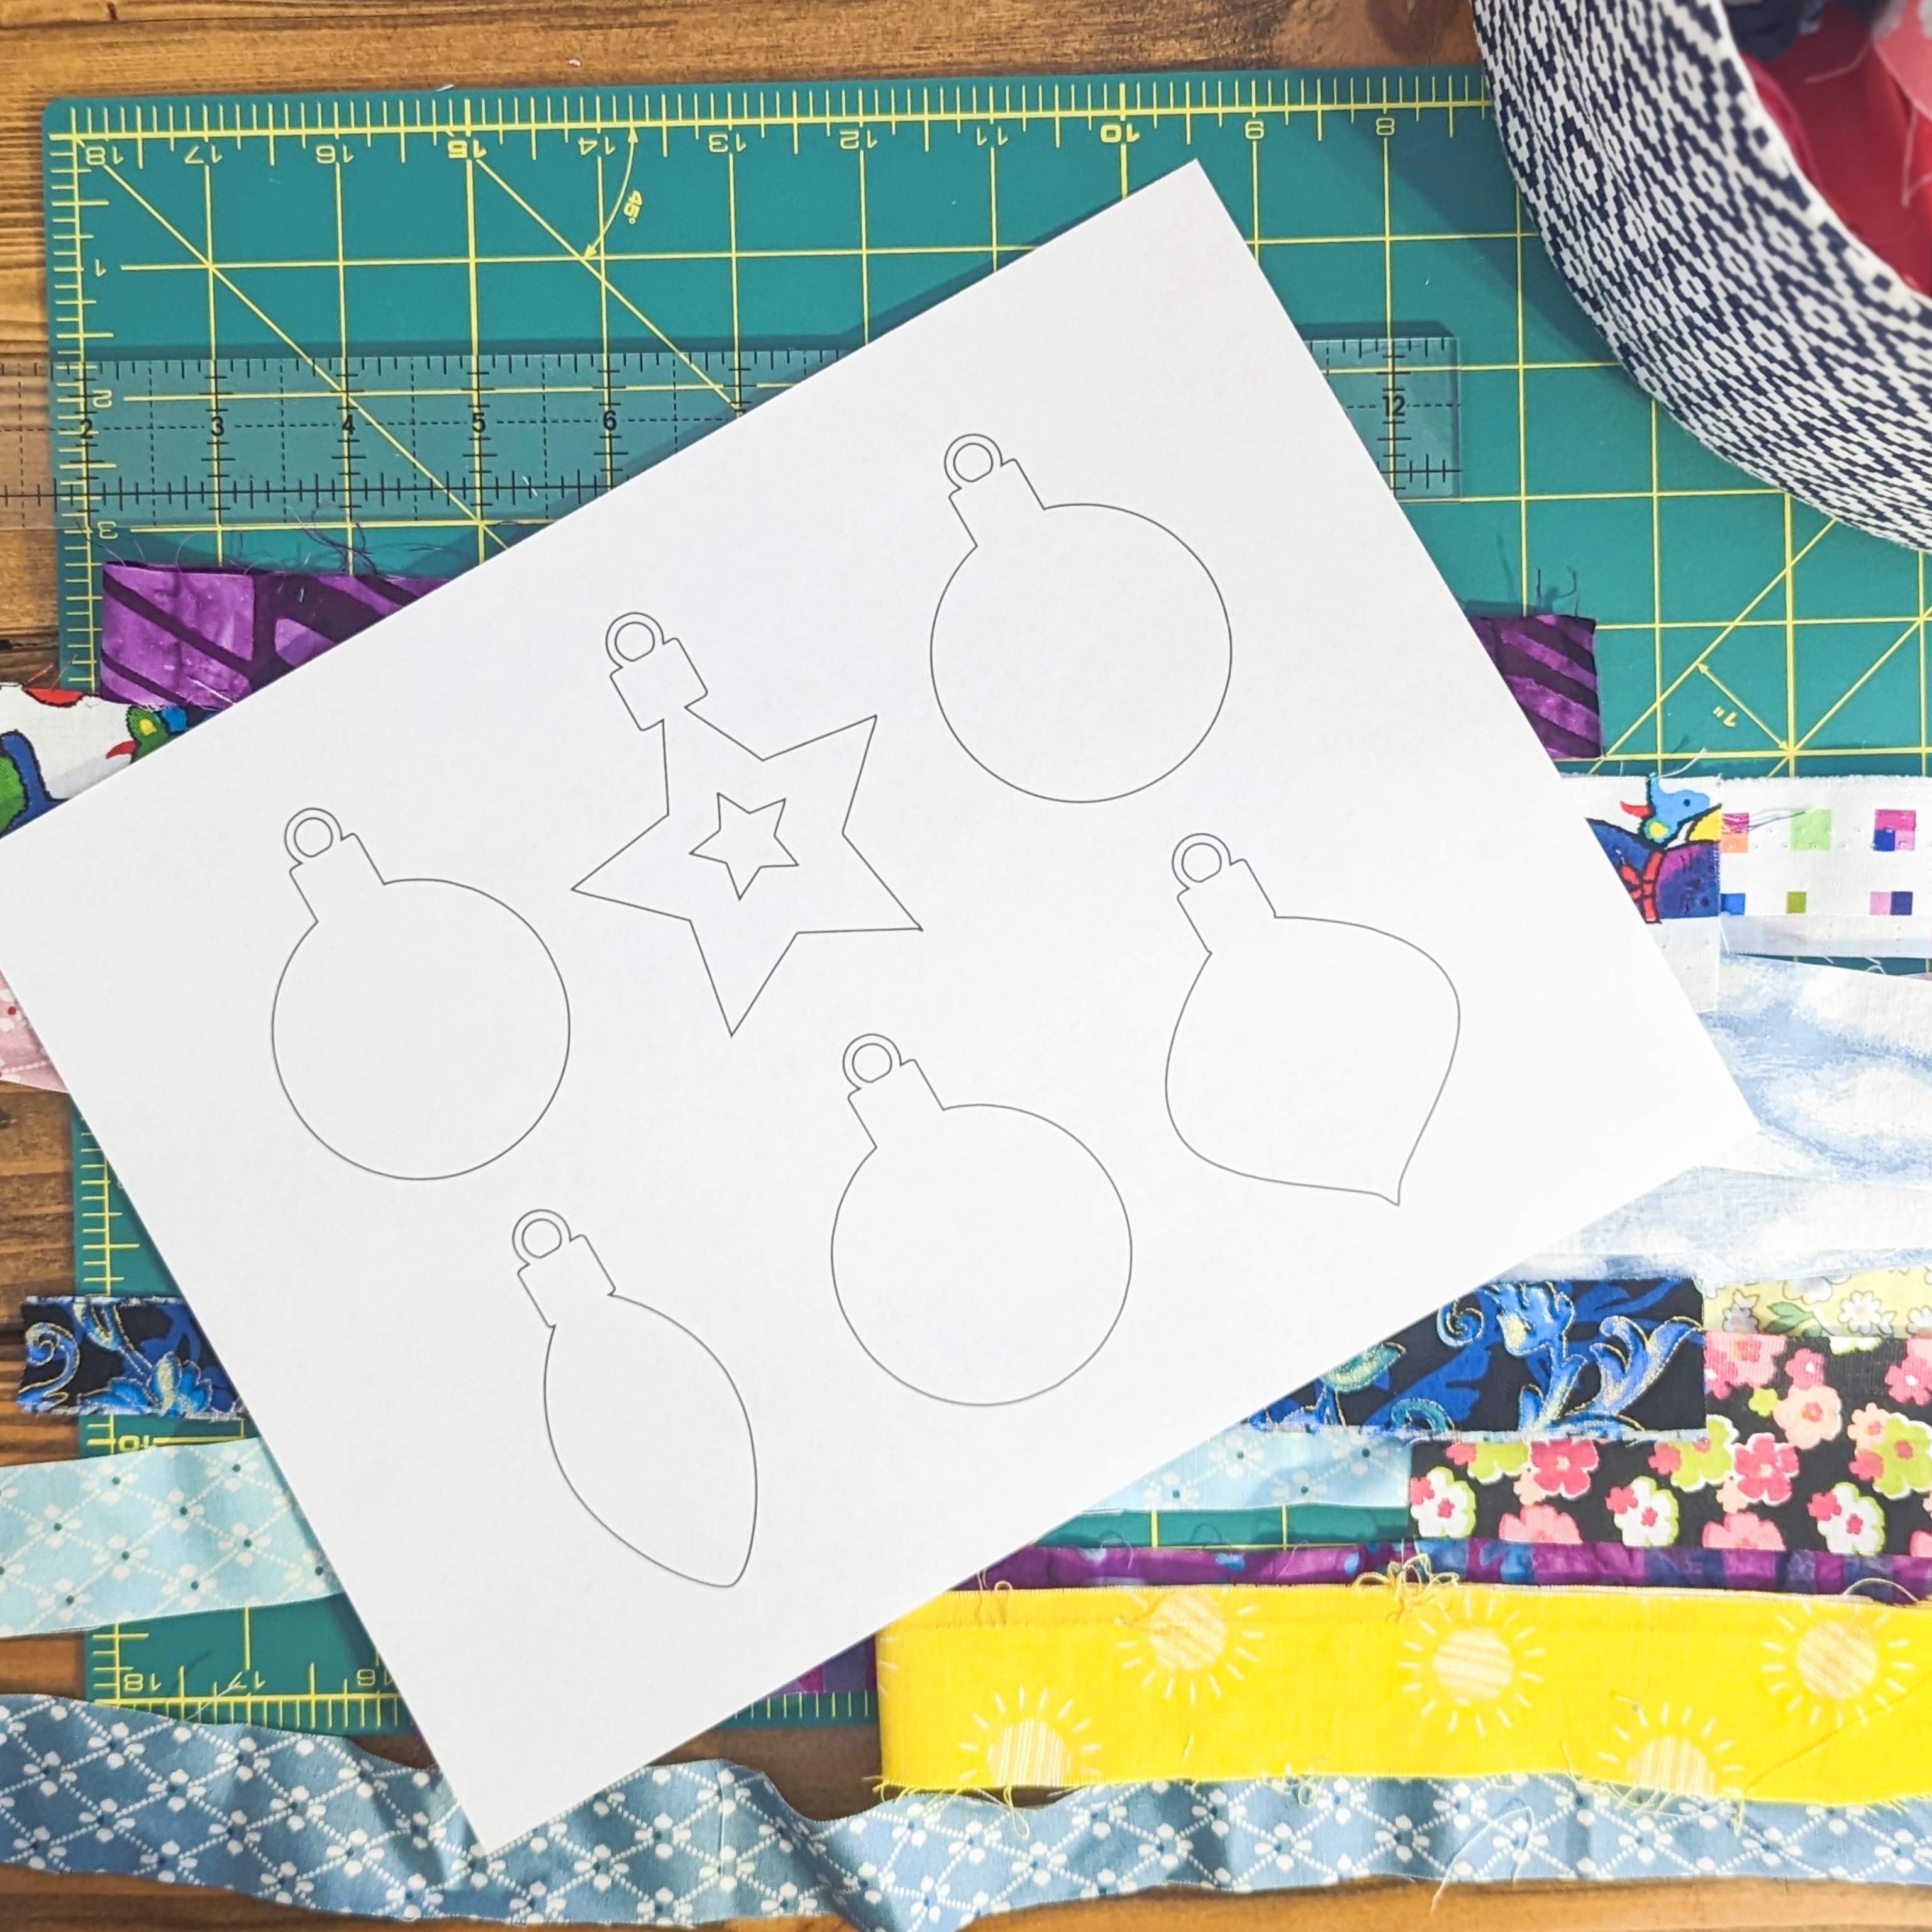
Print the pattern file and cut out the shapes, there are 4 (cut the circle once).
STEP 3:
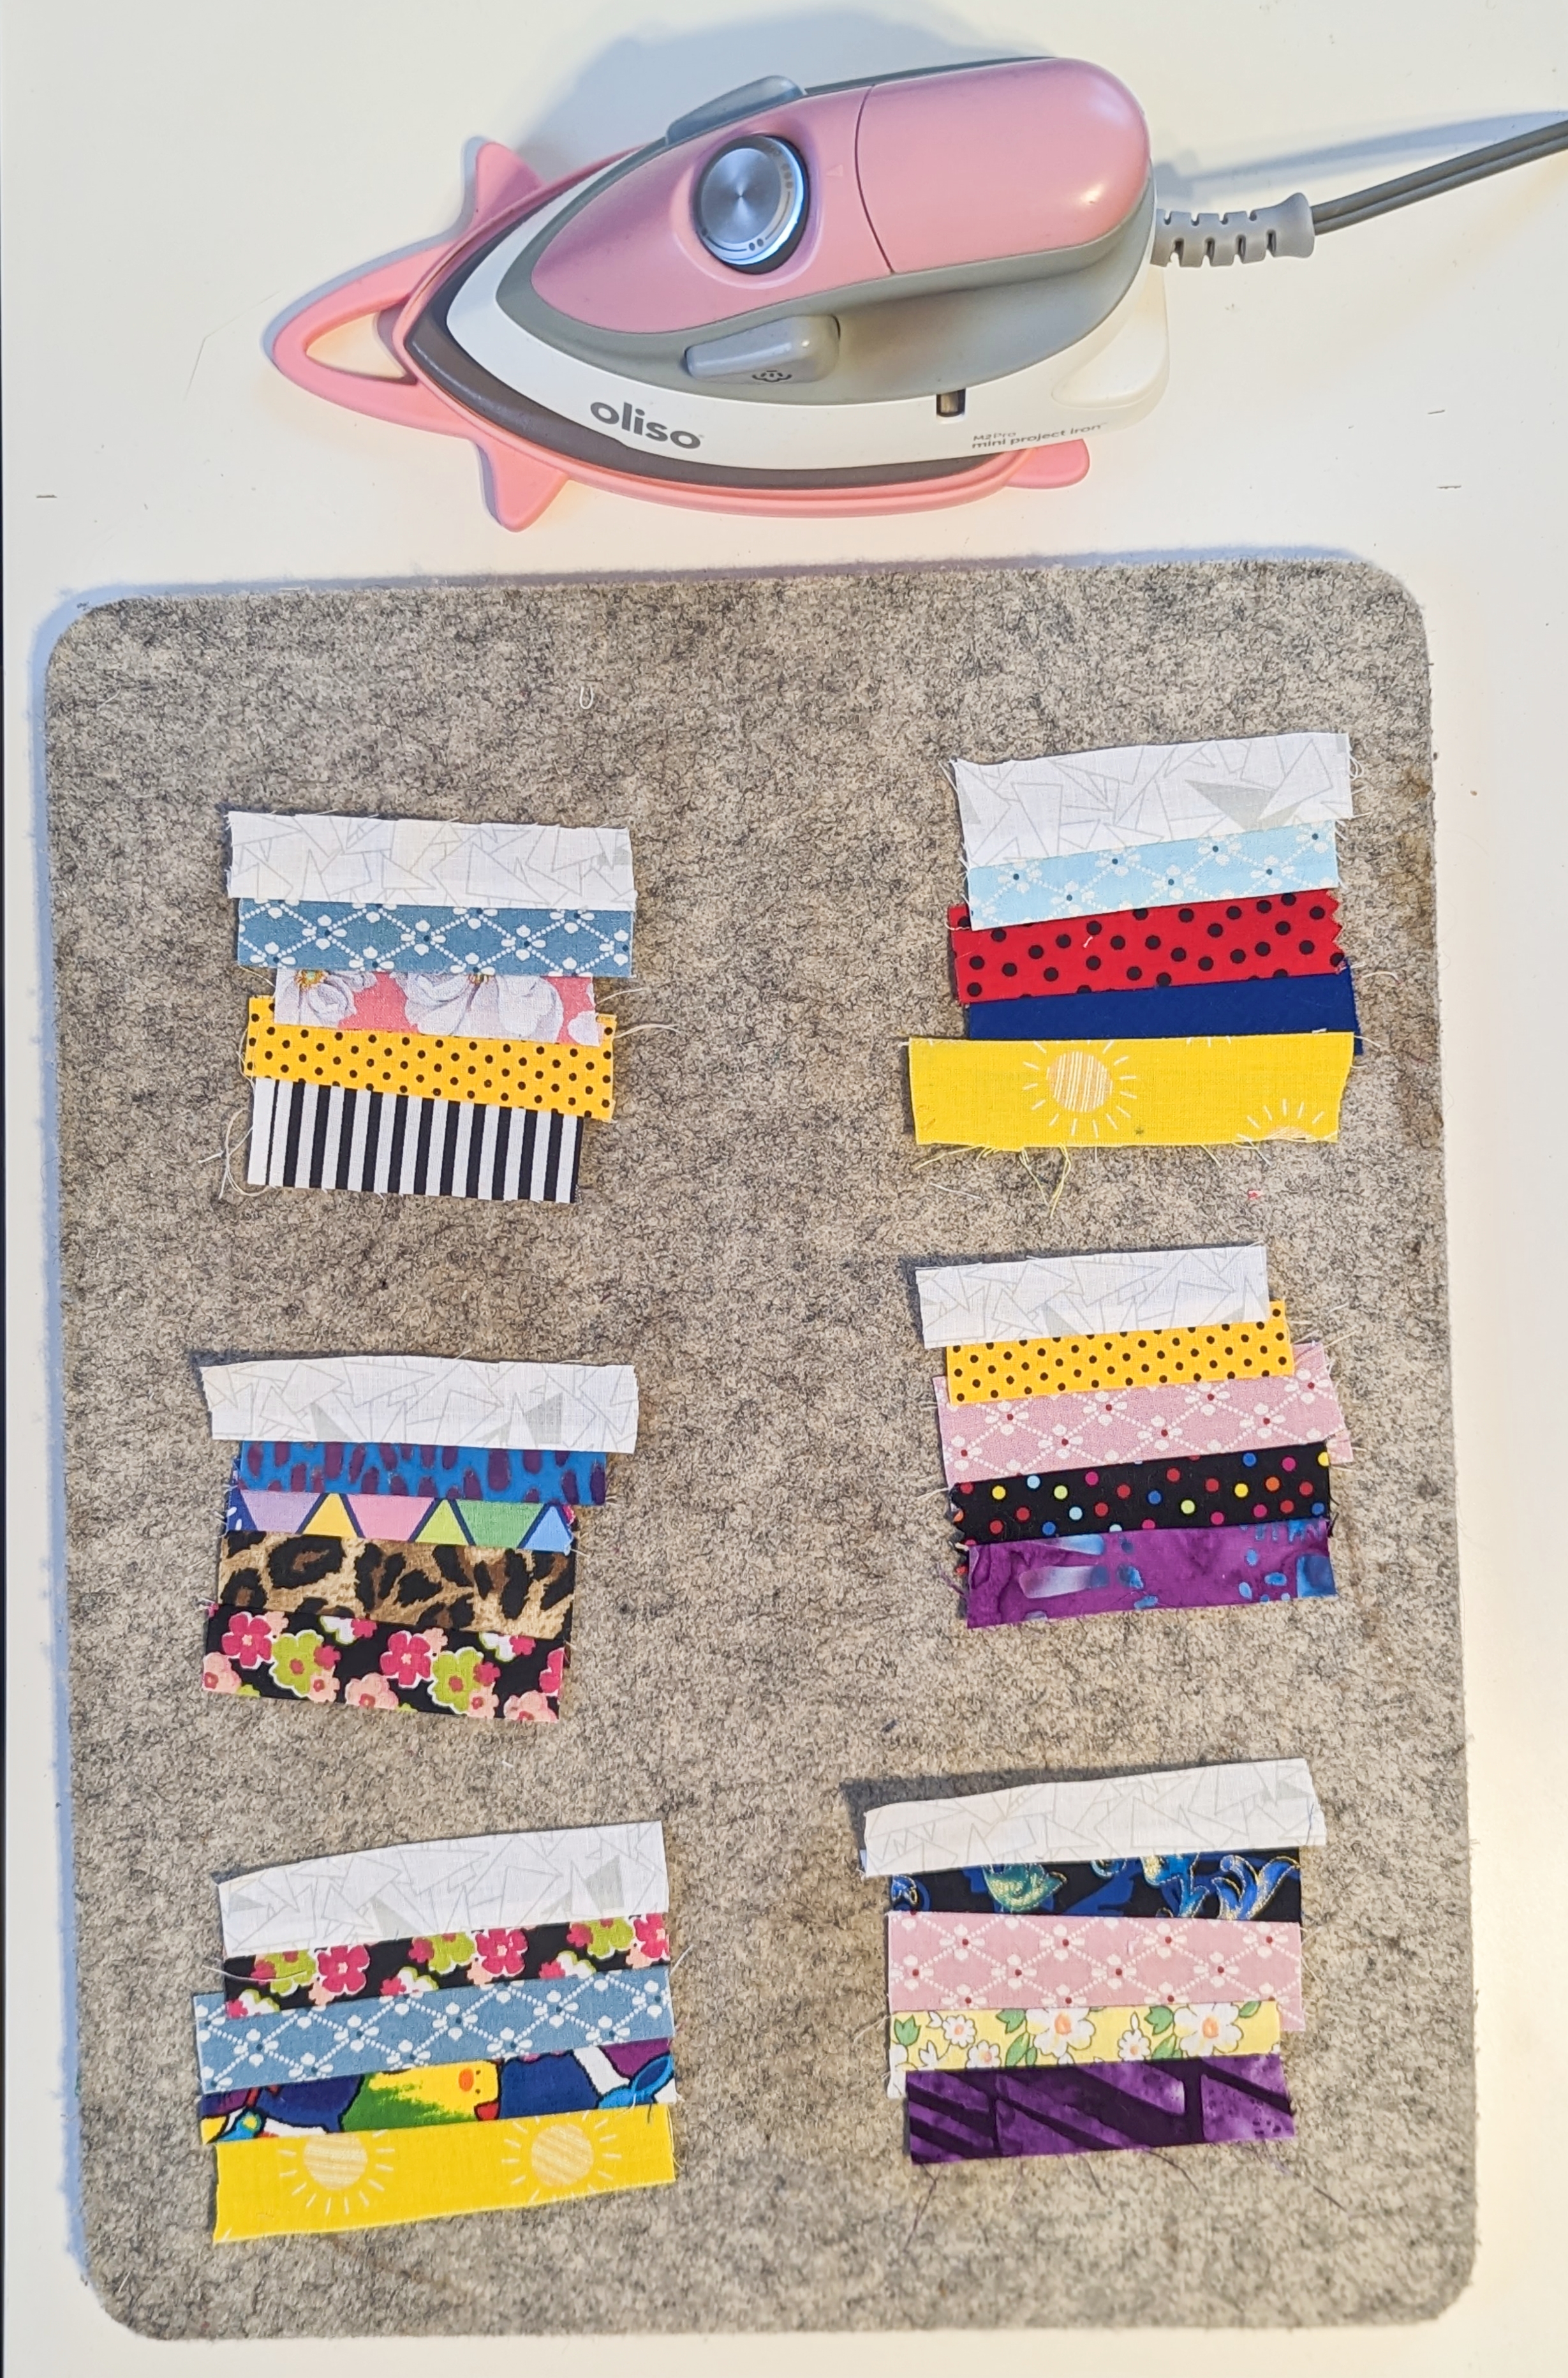
Cut smaller sizes of scrap fabric strips and sew 5 together. I like to keep the top strip all the same color to resemble the top silver part of a regular acrylic/glass ornament. Remember to cut the smaller strips long enough to cover the shape size. Press the patchwork units.
STEP 4:
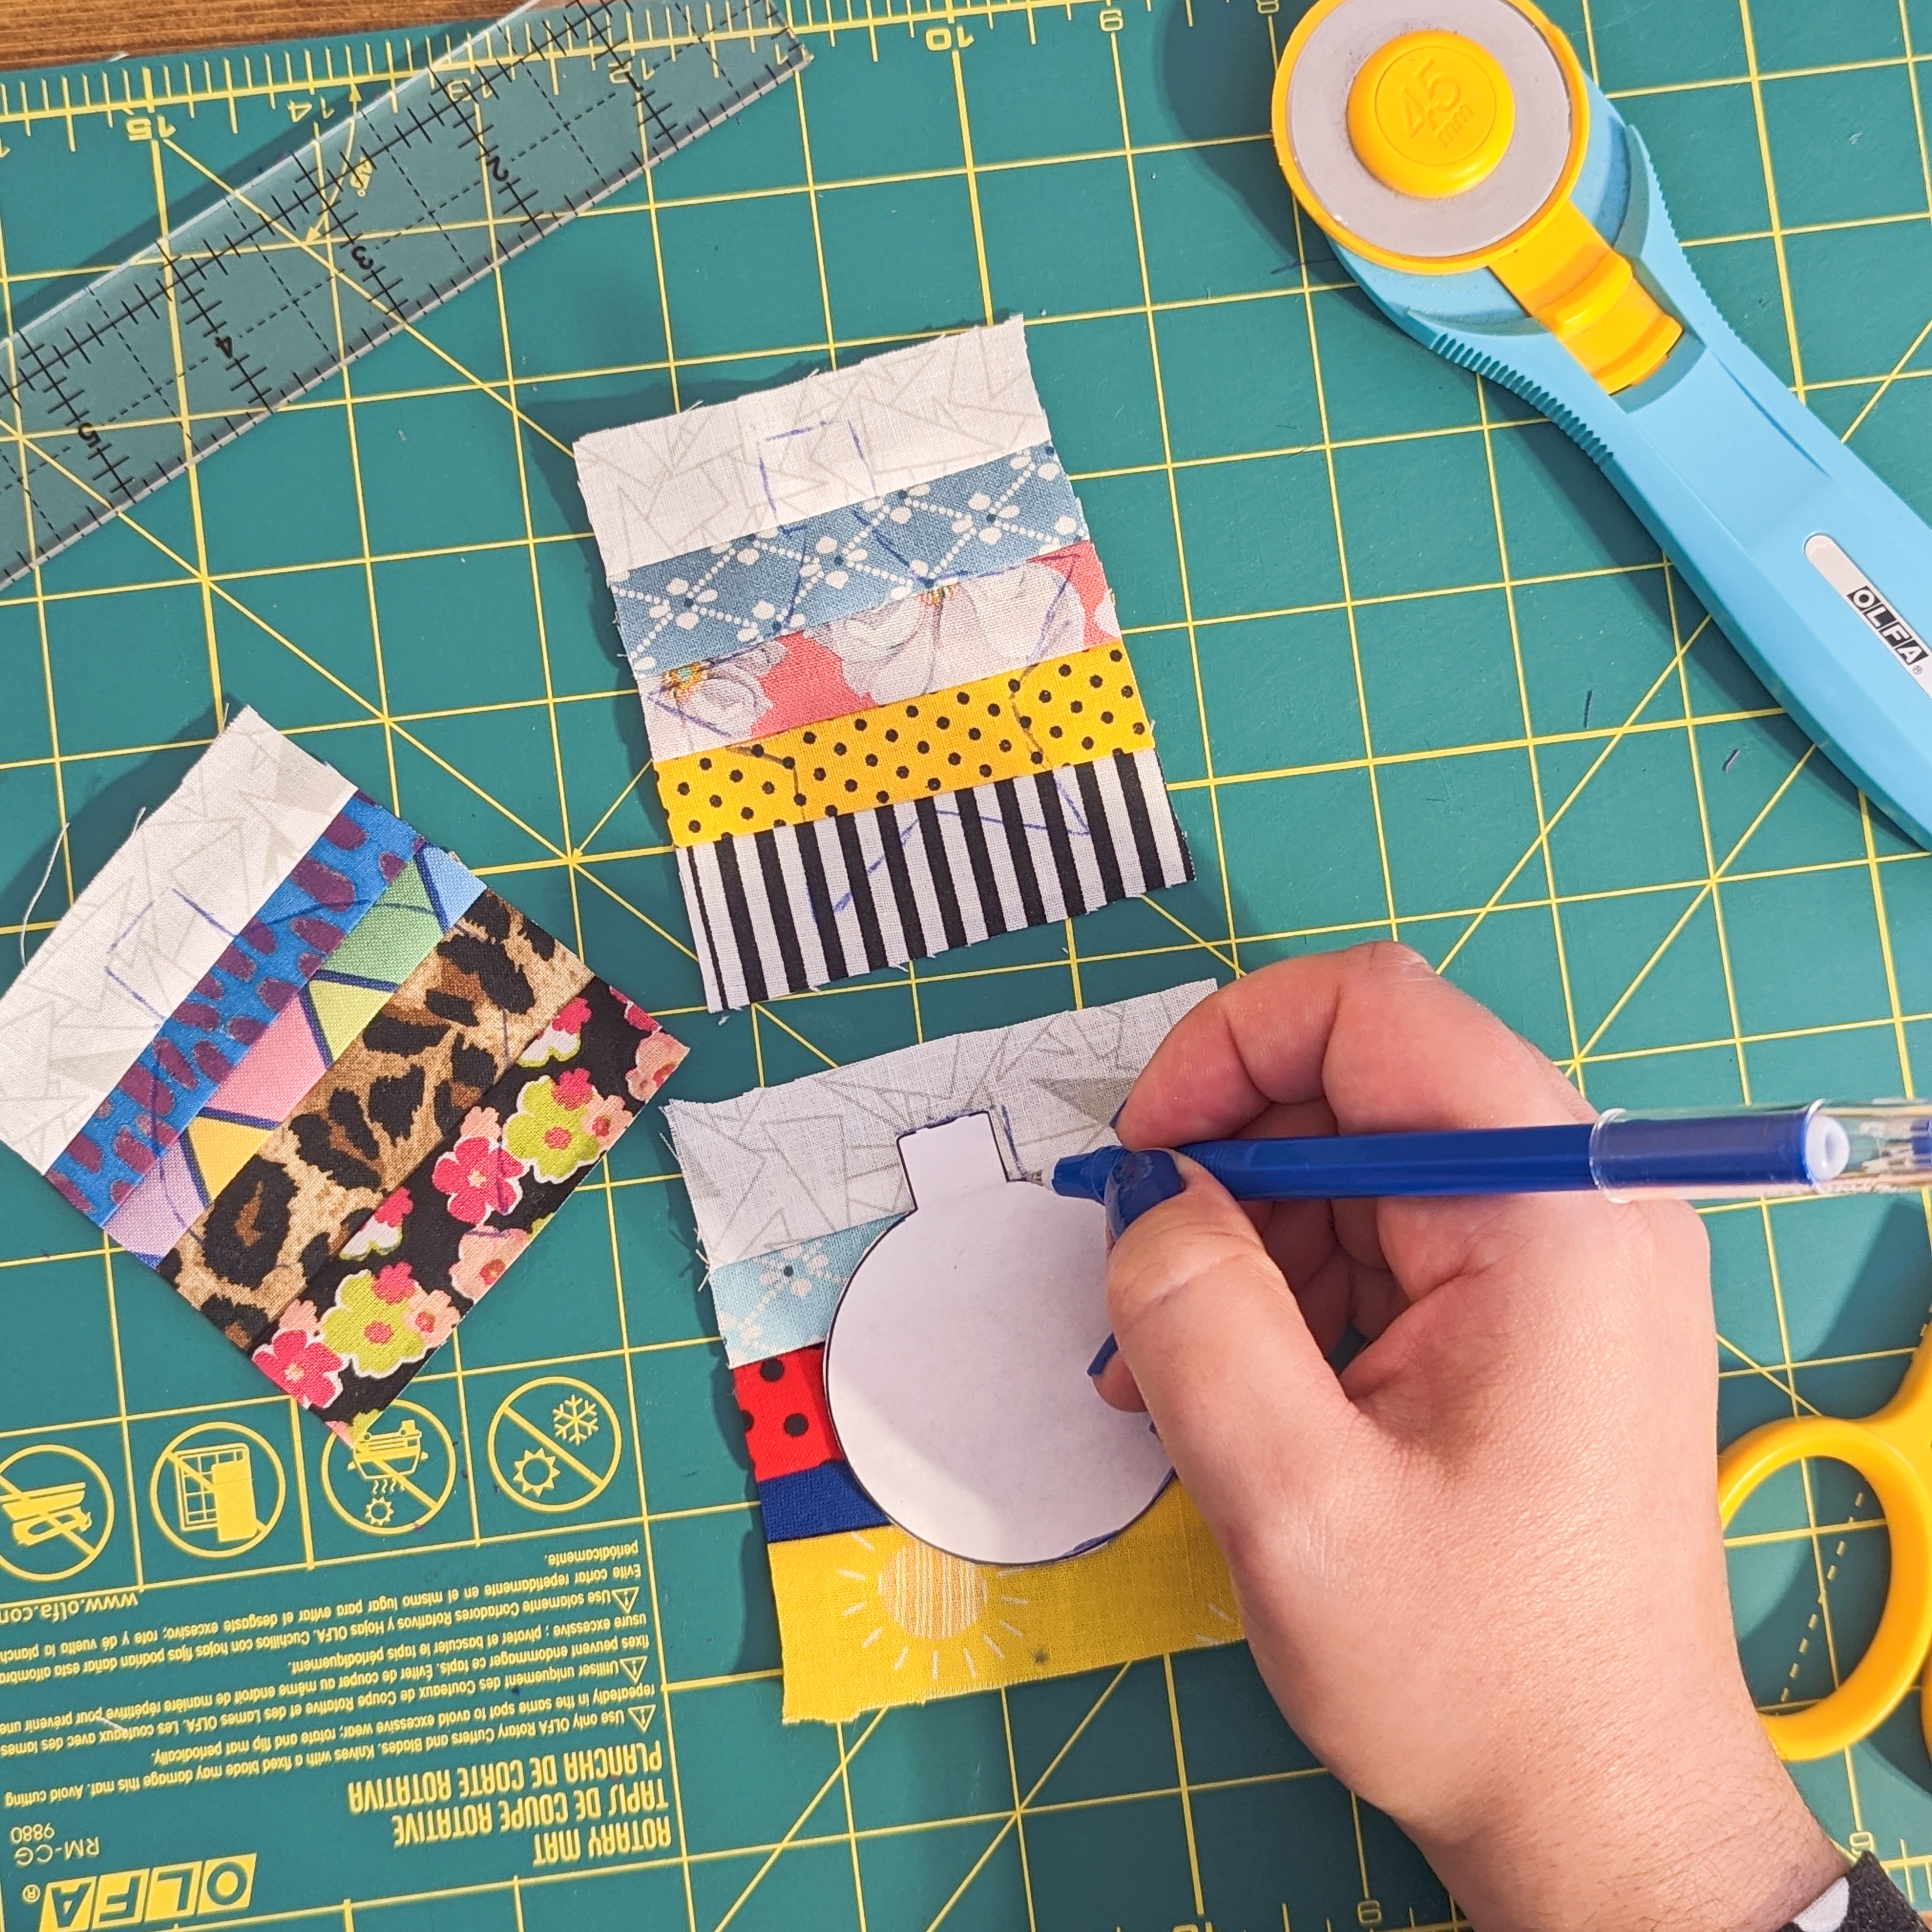
Using a heat erasable pen, trace the shapes you want to use on the front of each patchwork units.
Cut out a piece of fabric for each patchwork unit in order to cover the entire back. This will be the backing fabric of the ornament. You can also use patchwork units as backing so both sides are fun!!!
STEP 5:
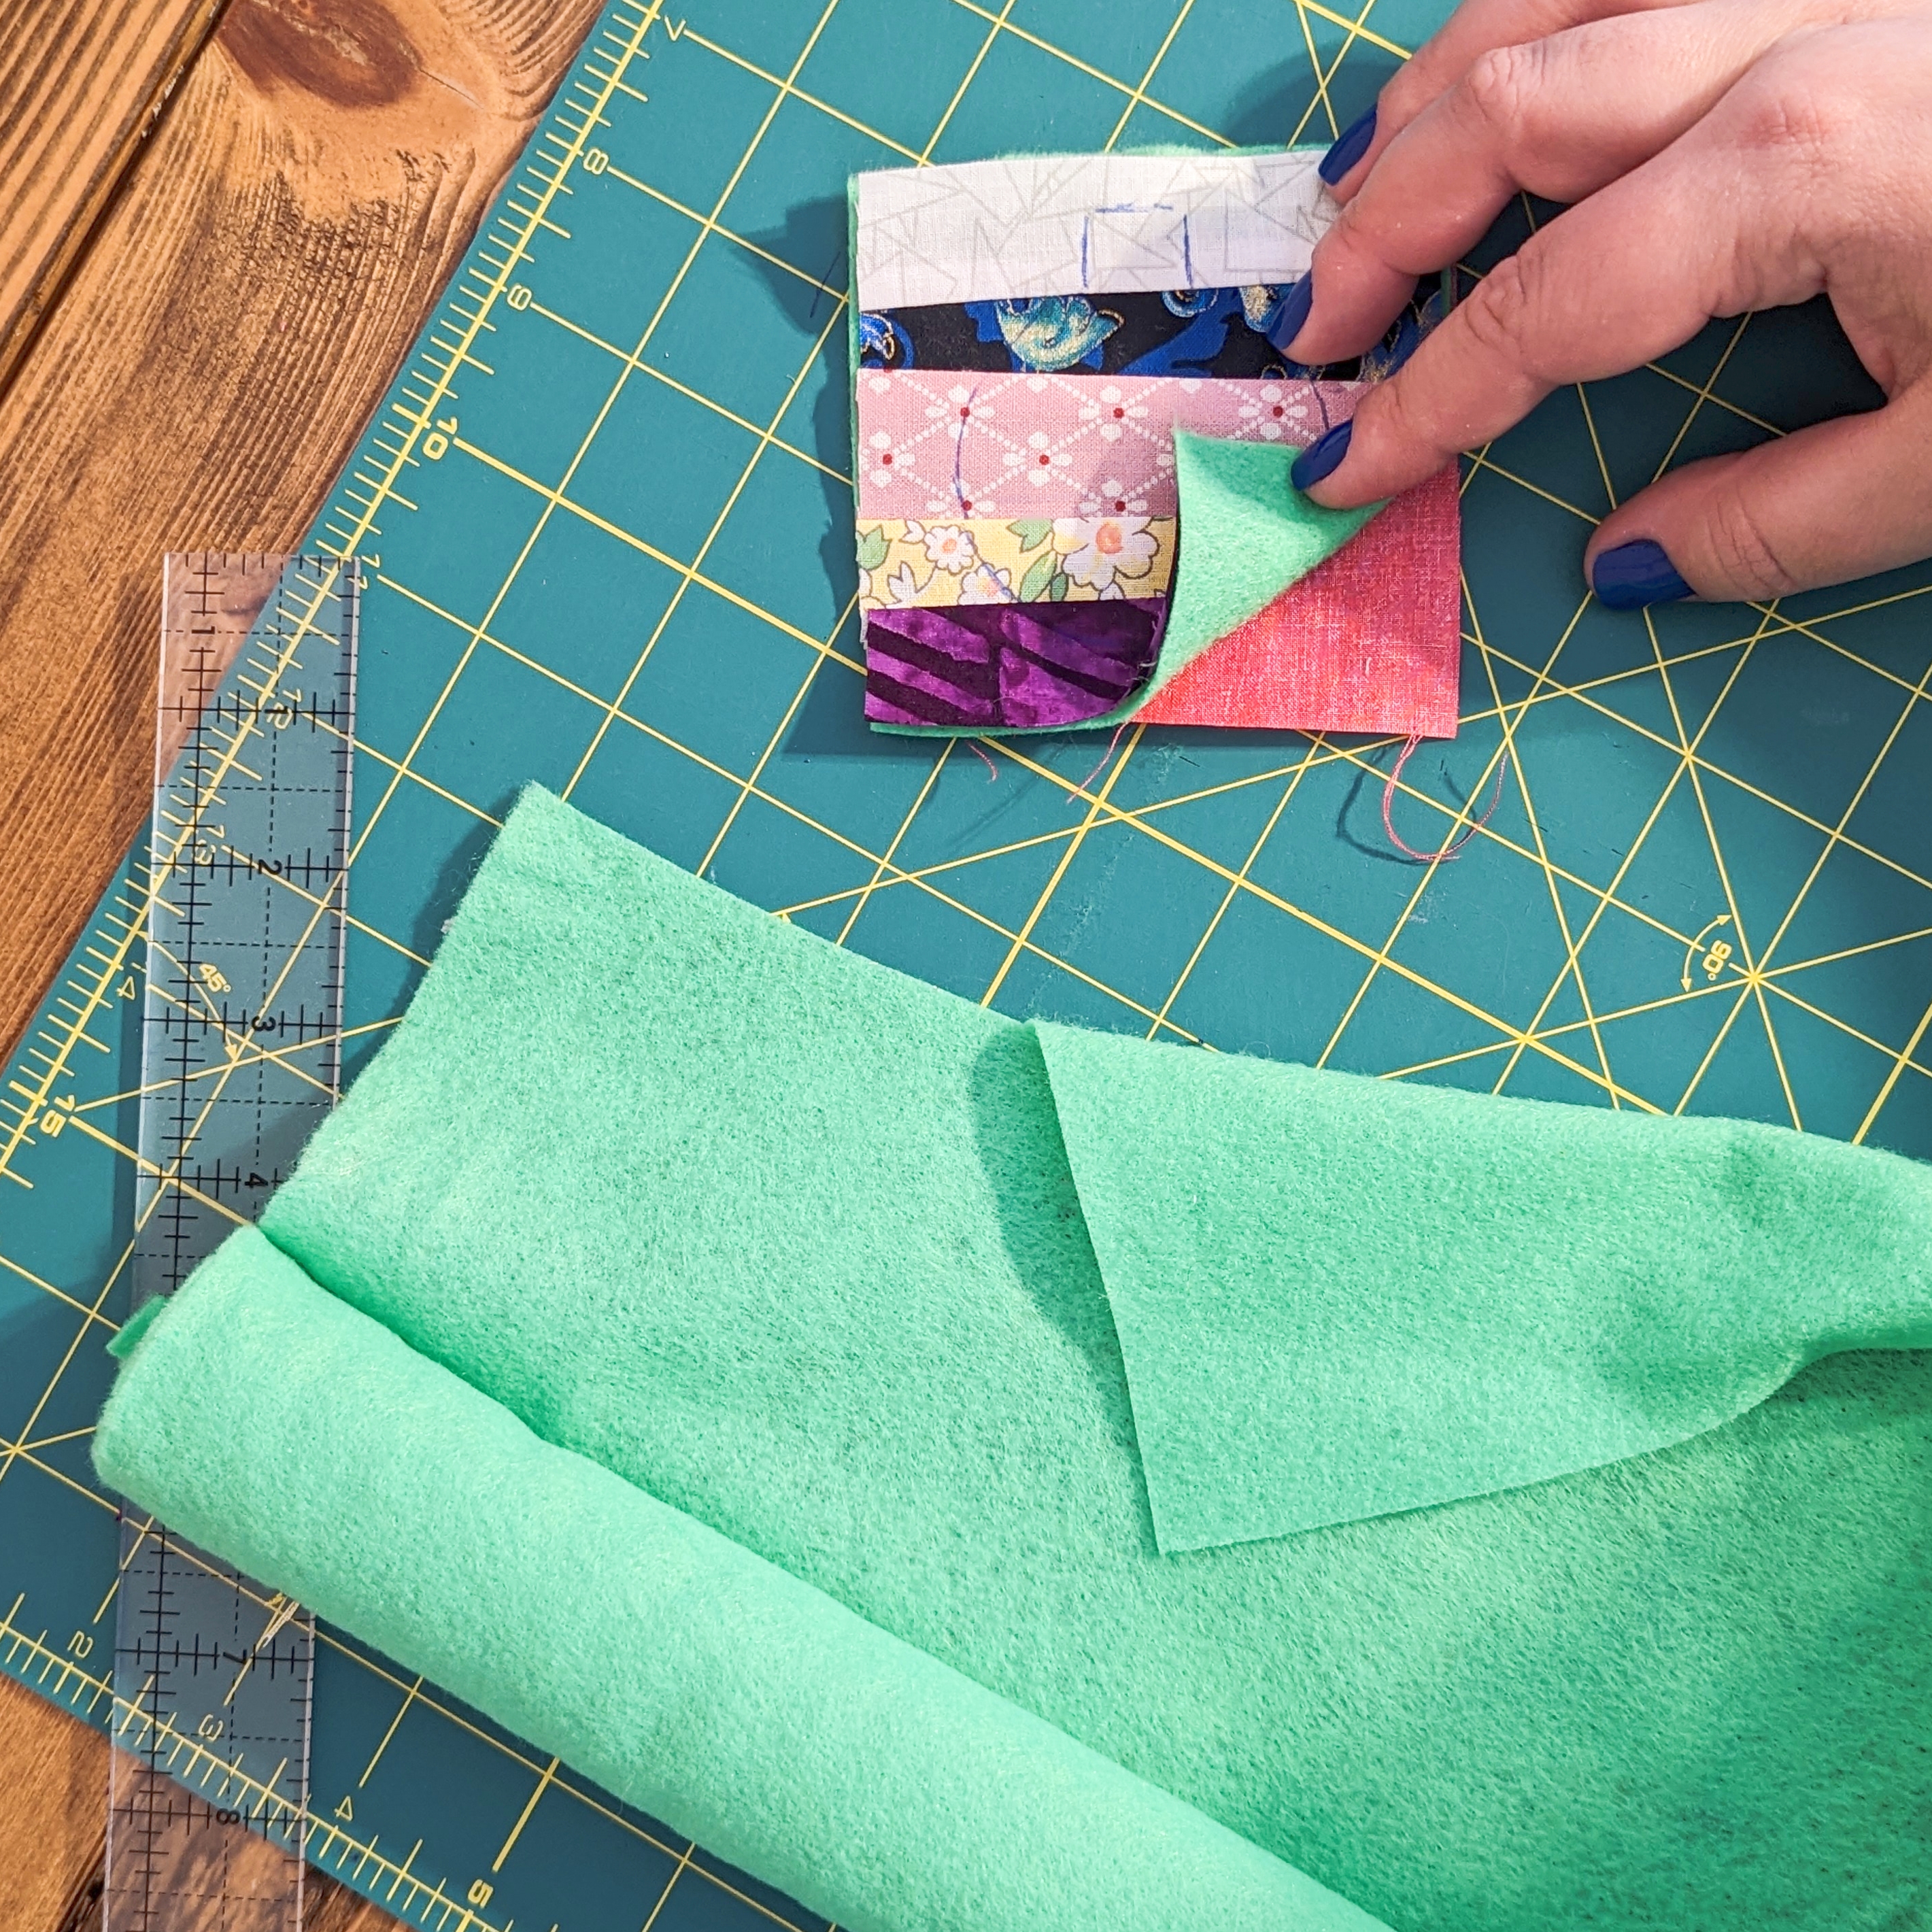
In this step use felt to interface the top part and backing of the ornament. Using felt is fun as it comes in various colors, but you can also use regular quilt batting in this step.
Cut the felt in the same size of each patchwork units and backing fabrics.
STEP 6:

Sew on the traced shape, make sure the ornament sandwich is secure with a pin (backing fabric facing right side out + felt + patchwork unit facing right side out).
STEP 7:
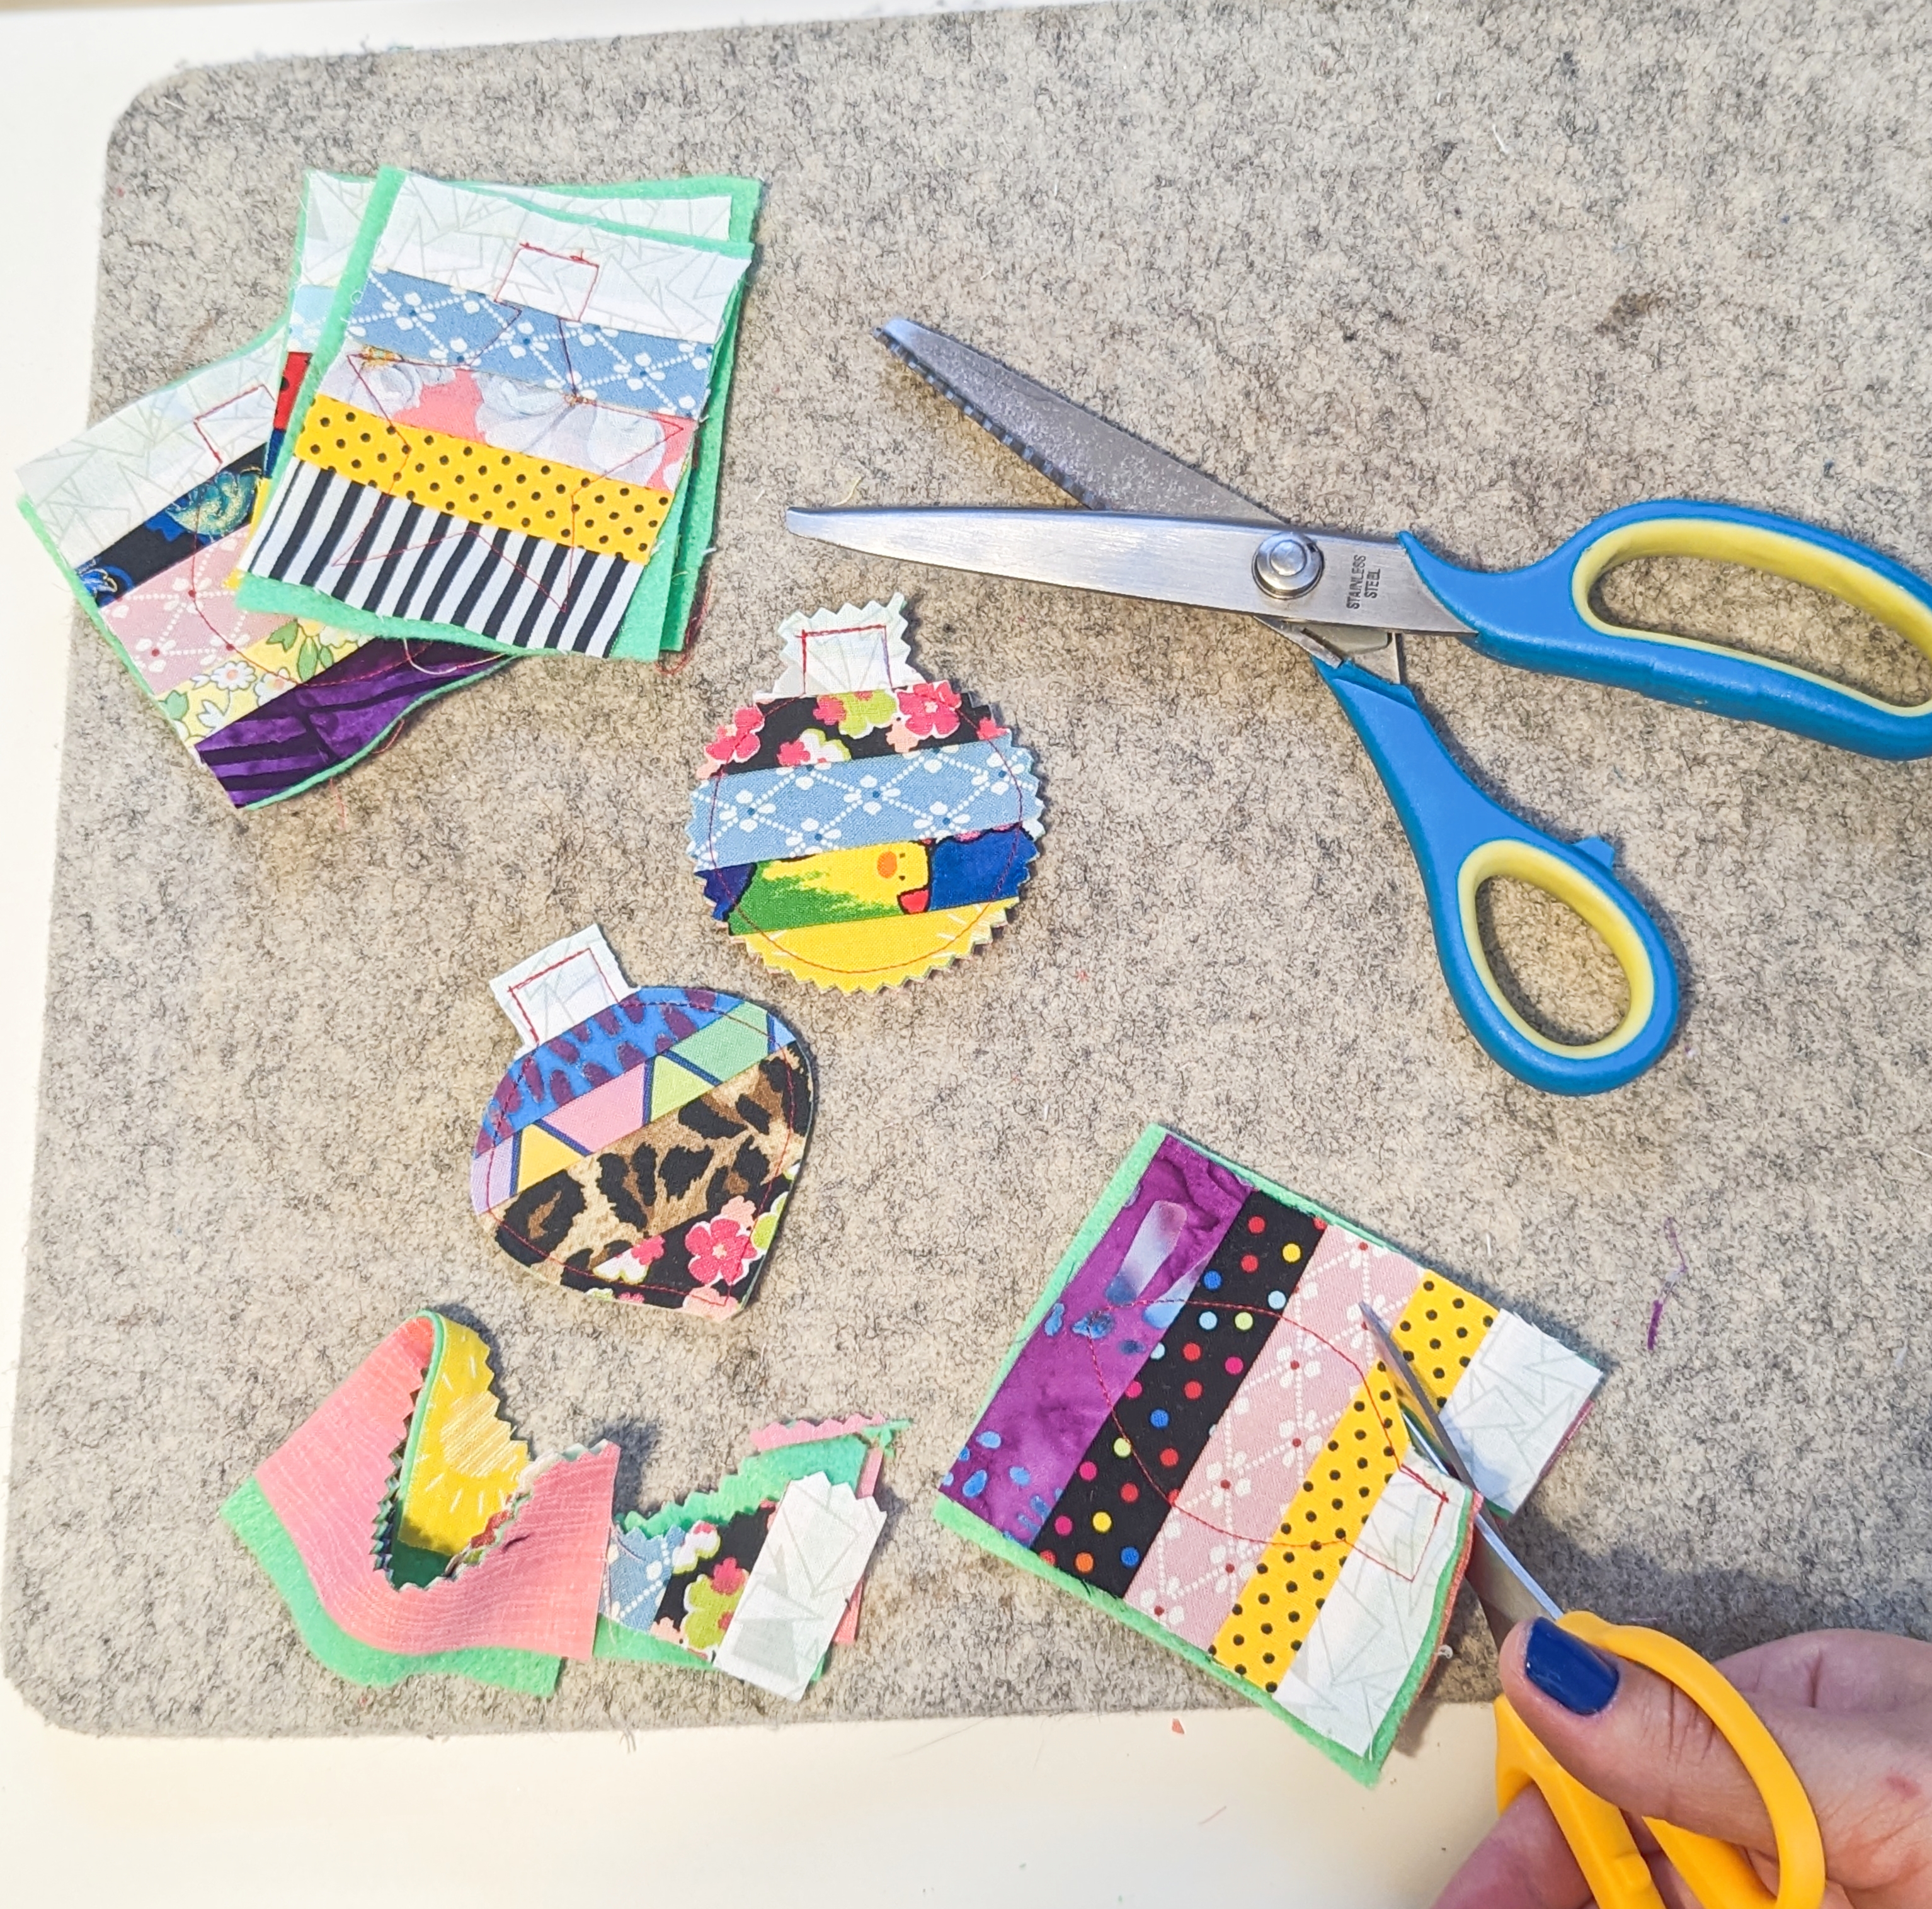
Cut out around the shapes using regular scissors or pinking shears 1/8” far from the sewing lines.
STEP 8:
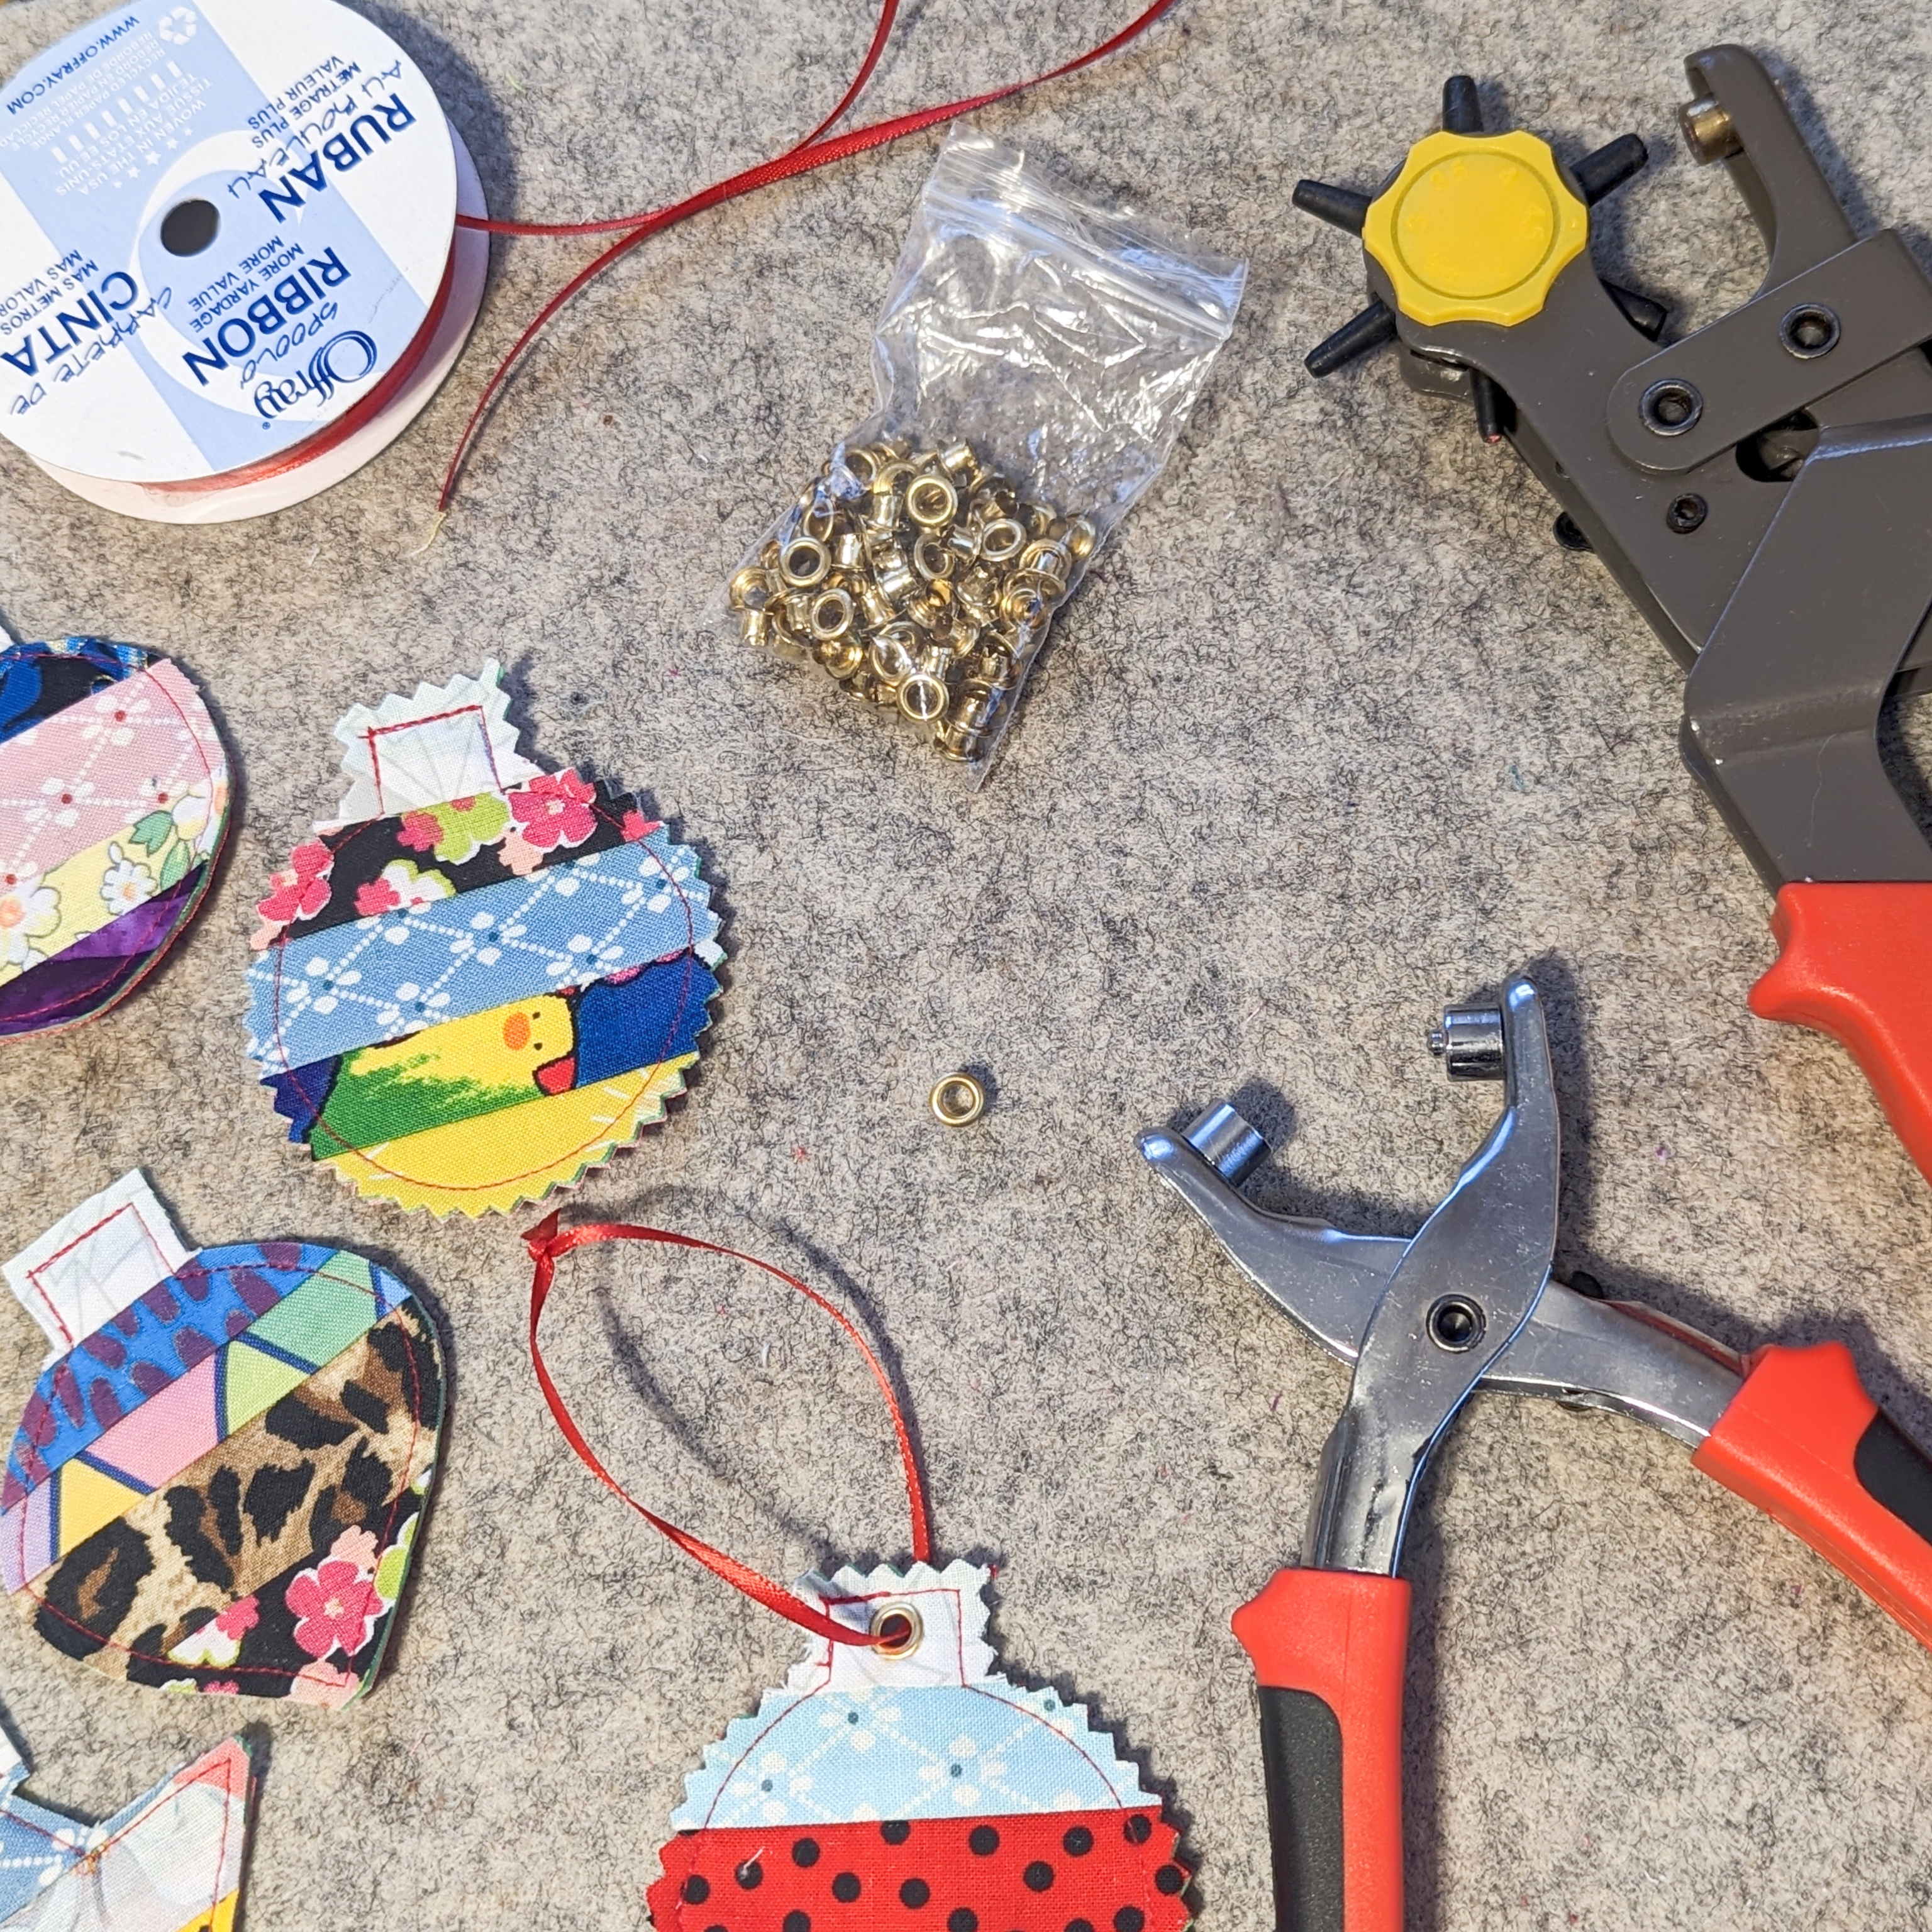
Install the eyelets and tie the ribbon to hang the ornaments.
Daisi Toegel
@daisitoegel