Trying Texture
22nd Aug 2022
With Jaszmine Howard
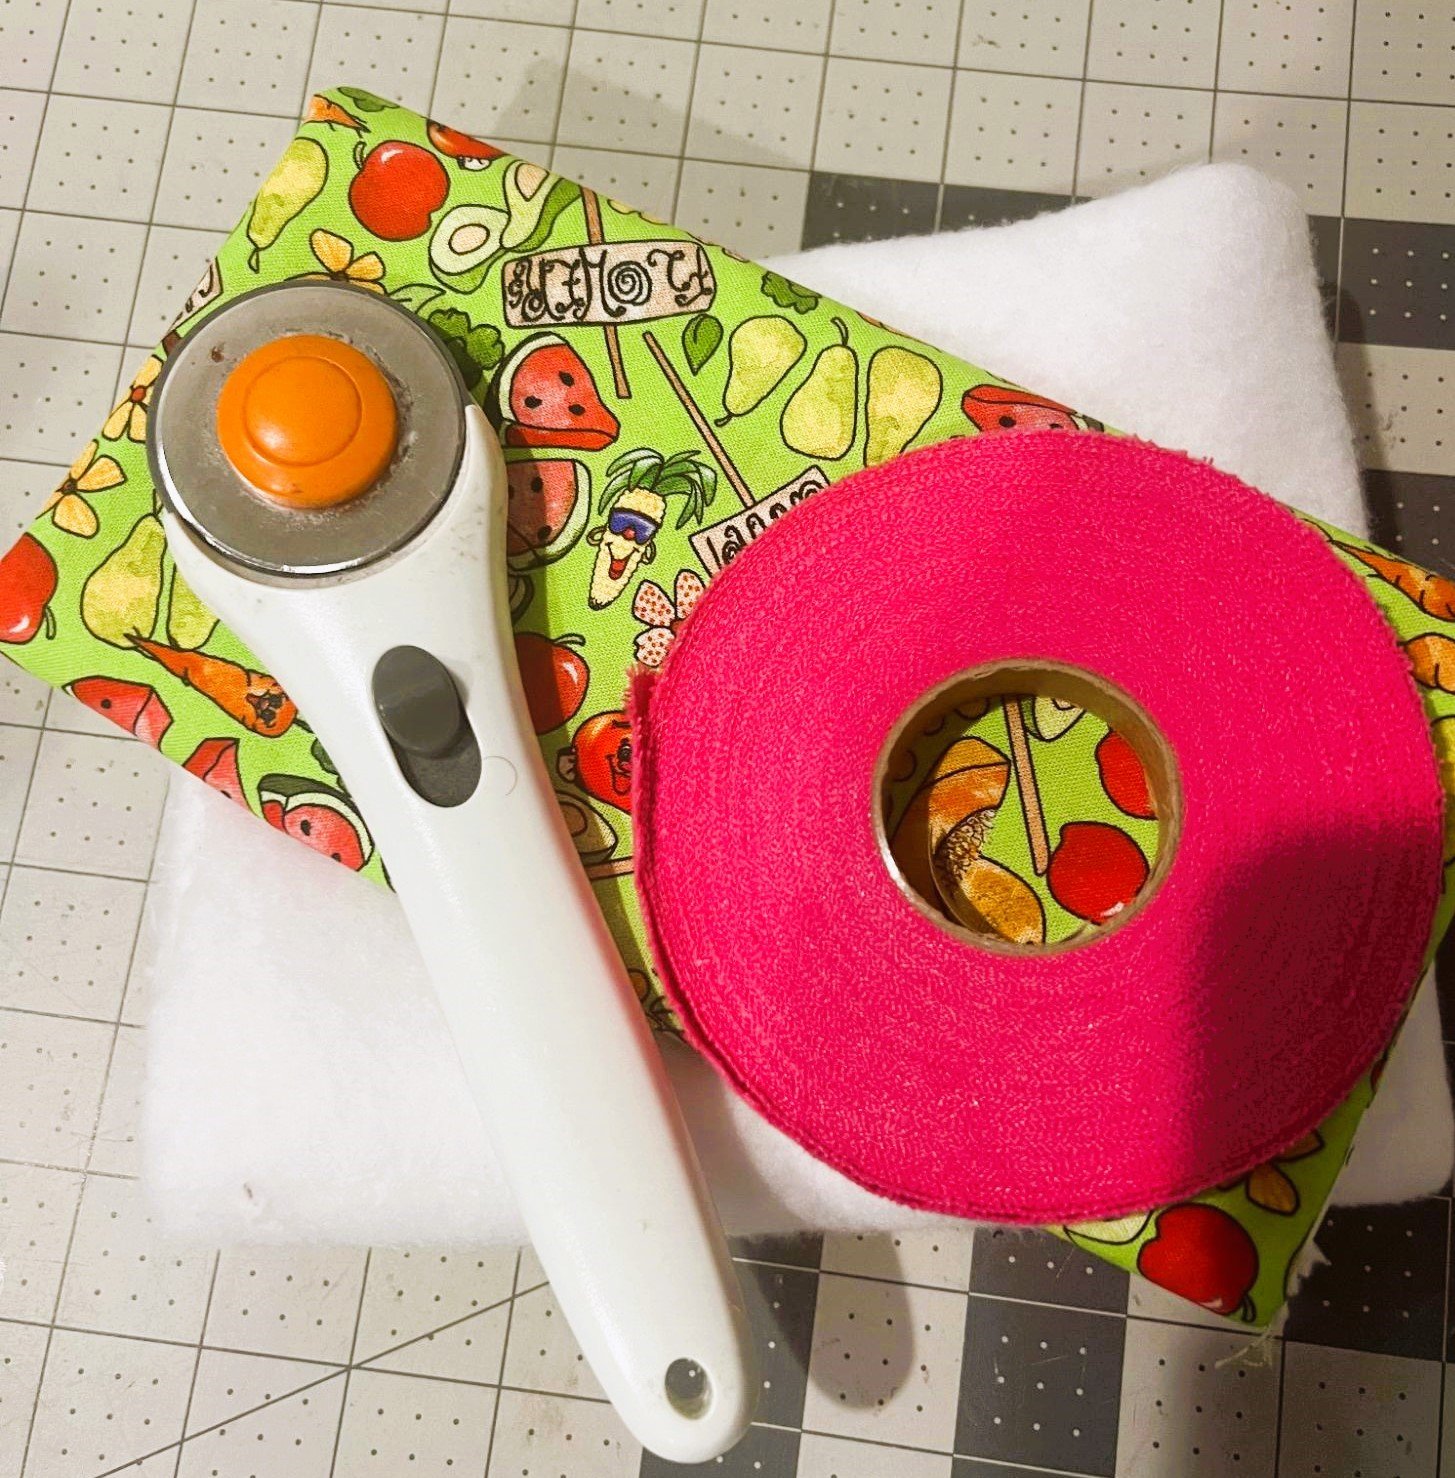
Materials:
5 ½ inch squares (2)
6 ½ inch square batting (1)
Dritz Make your own chenille (20 yd package) or Chenille It!
Hand sewing needle (optional)
Nylon bristled brush (optional)
Hello fabric friends! Today I’d like to invite you all to something that we handle as quilters daily, but may not think deeply on. TEXTURE. We often think of the word when we think of whitework, trapunto, and even that lovely crinkle we see from the batting that shrunk has an effect on the quilt top. Today, we are using something new to add a lot of texture and doing it quickly with chenille tape.
What is this tape and how does it work?
Chenille tape is a woven bias tape that frays when brushed, or agitated from washing. This process creates a fluffy feel and can add lots of texture to specific areas while remaining secure from being stitched down the middle, attaching it to your project.
To practice using this technique, I found that the fun is in keeping it small, simple and stunning. As we come to the close of summer, these coasters are a super fun way to enjoy those last few outdoor gatherings.
Let’s Create!
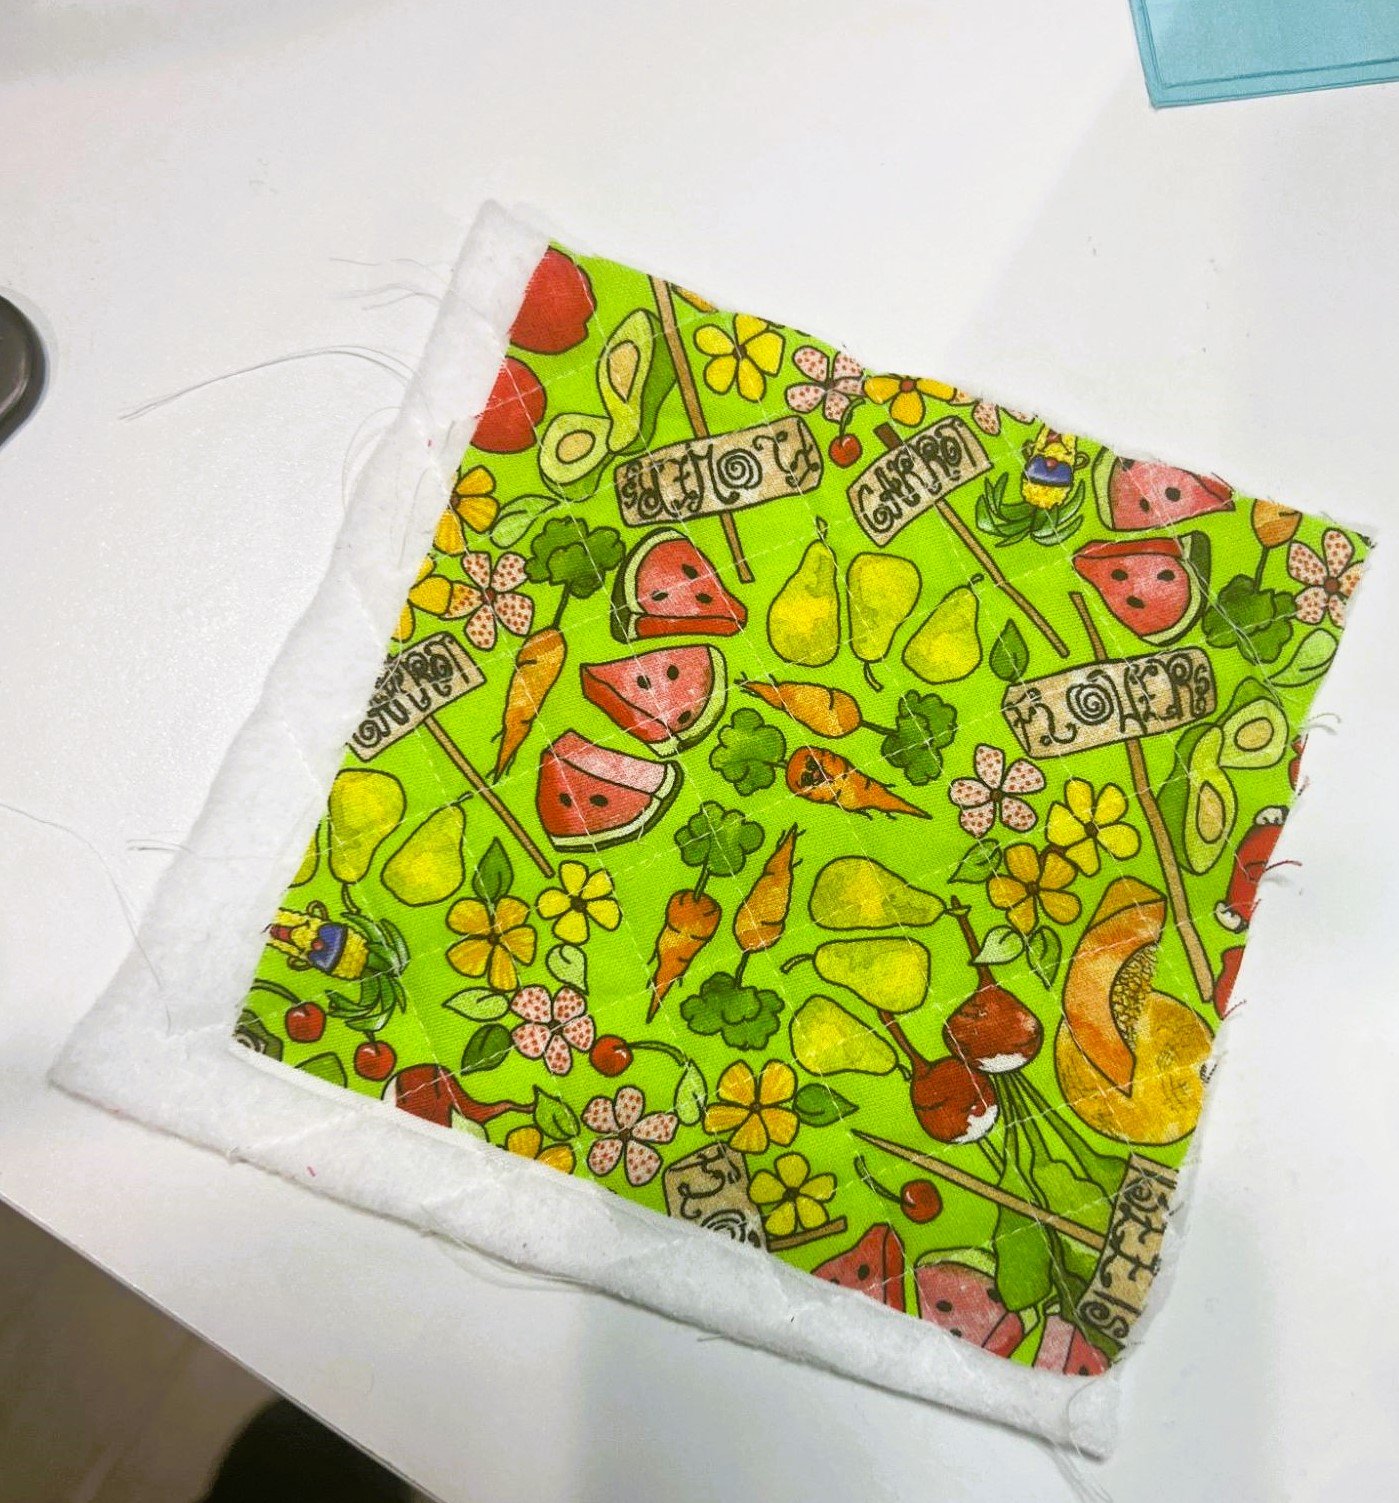
Step one: Quilting
Quilting is the first step here and we have a few options. Choose what side you would like to have quilted and quilt the batting and ONE of your fabrics together. In the example, I decided to quilt the top fabric which also will have the chenille attached. Once quilted, trim the batting down to the size of your square.
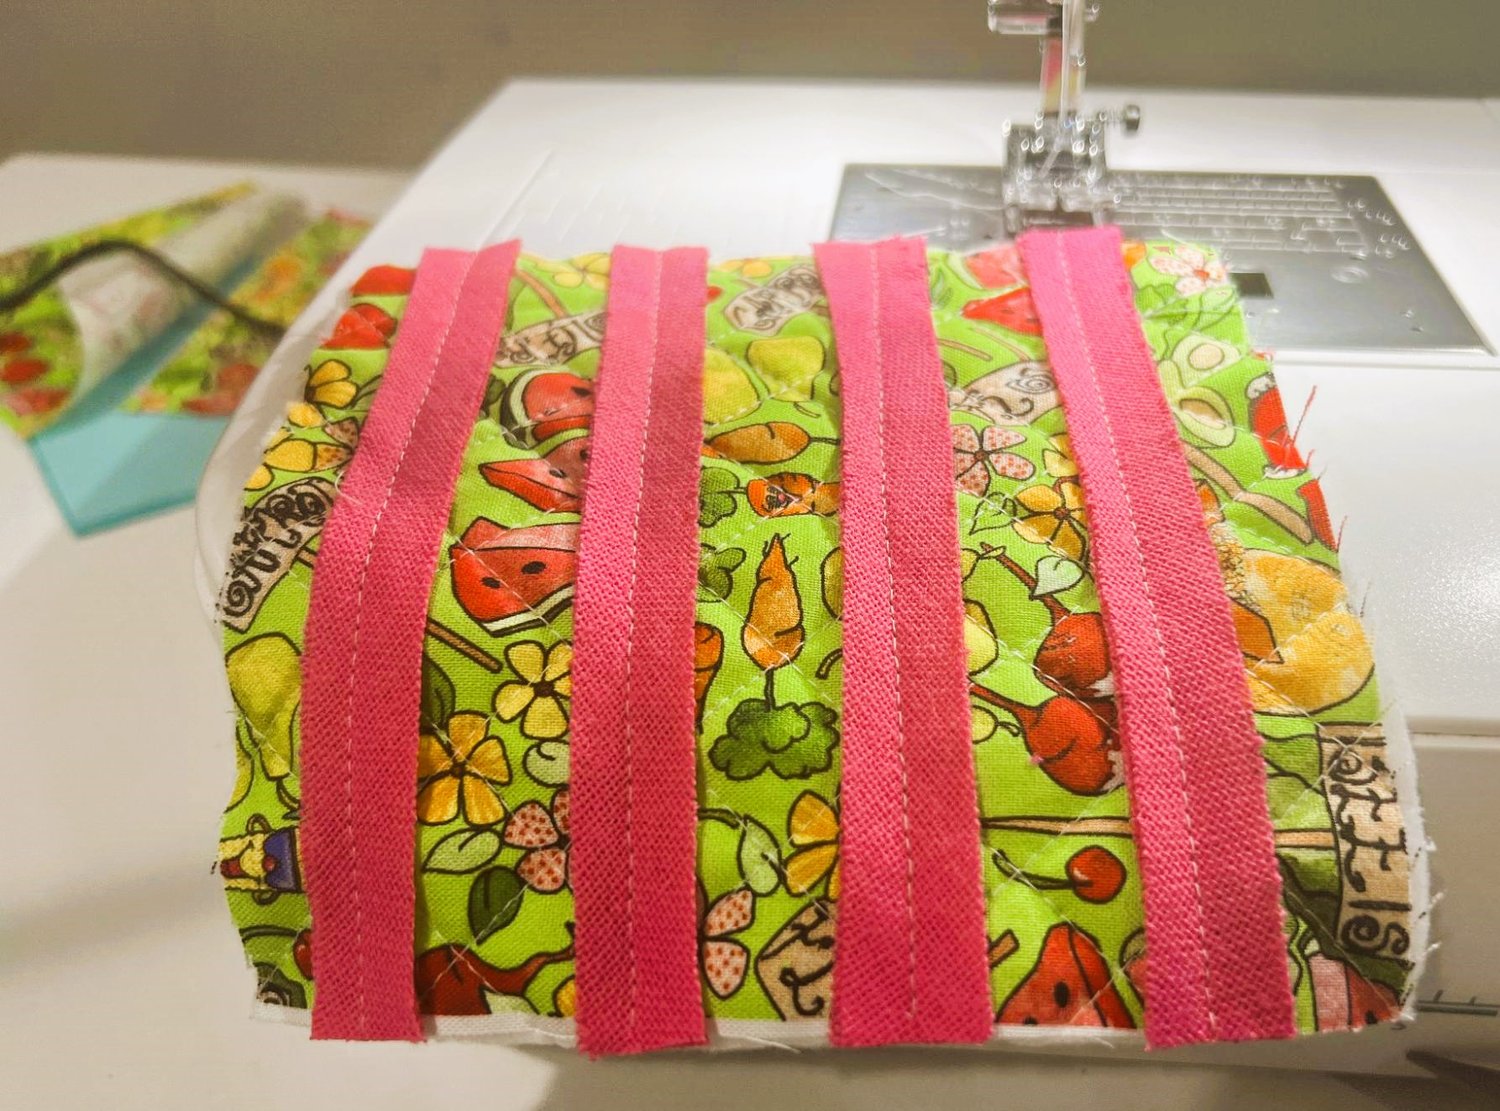
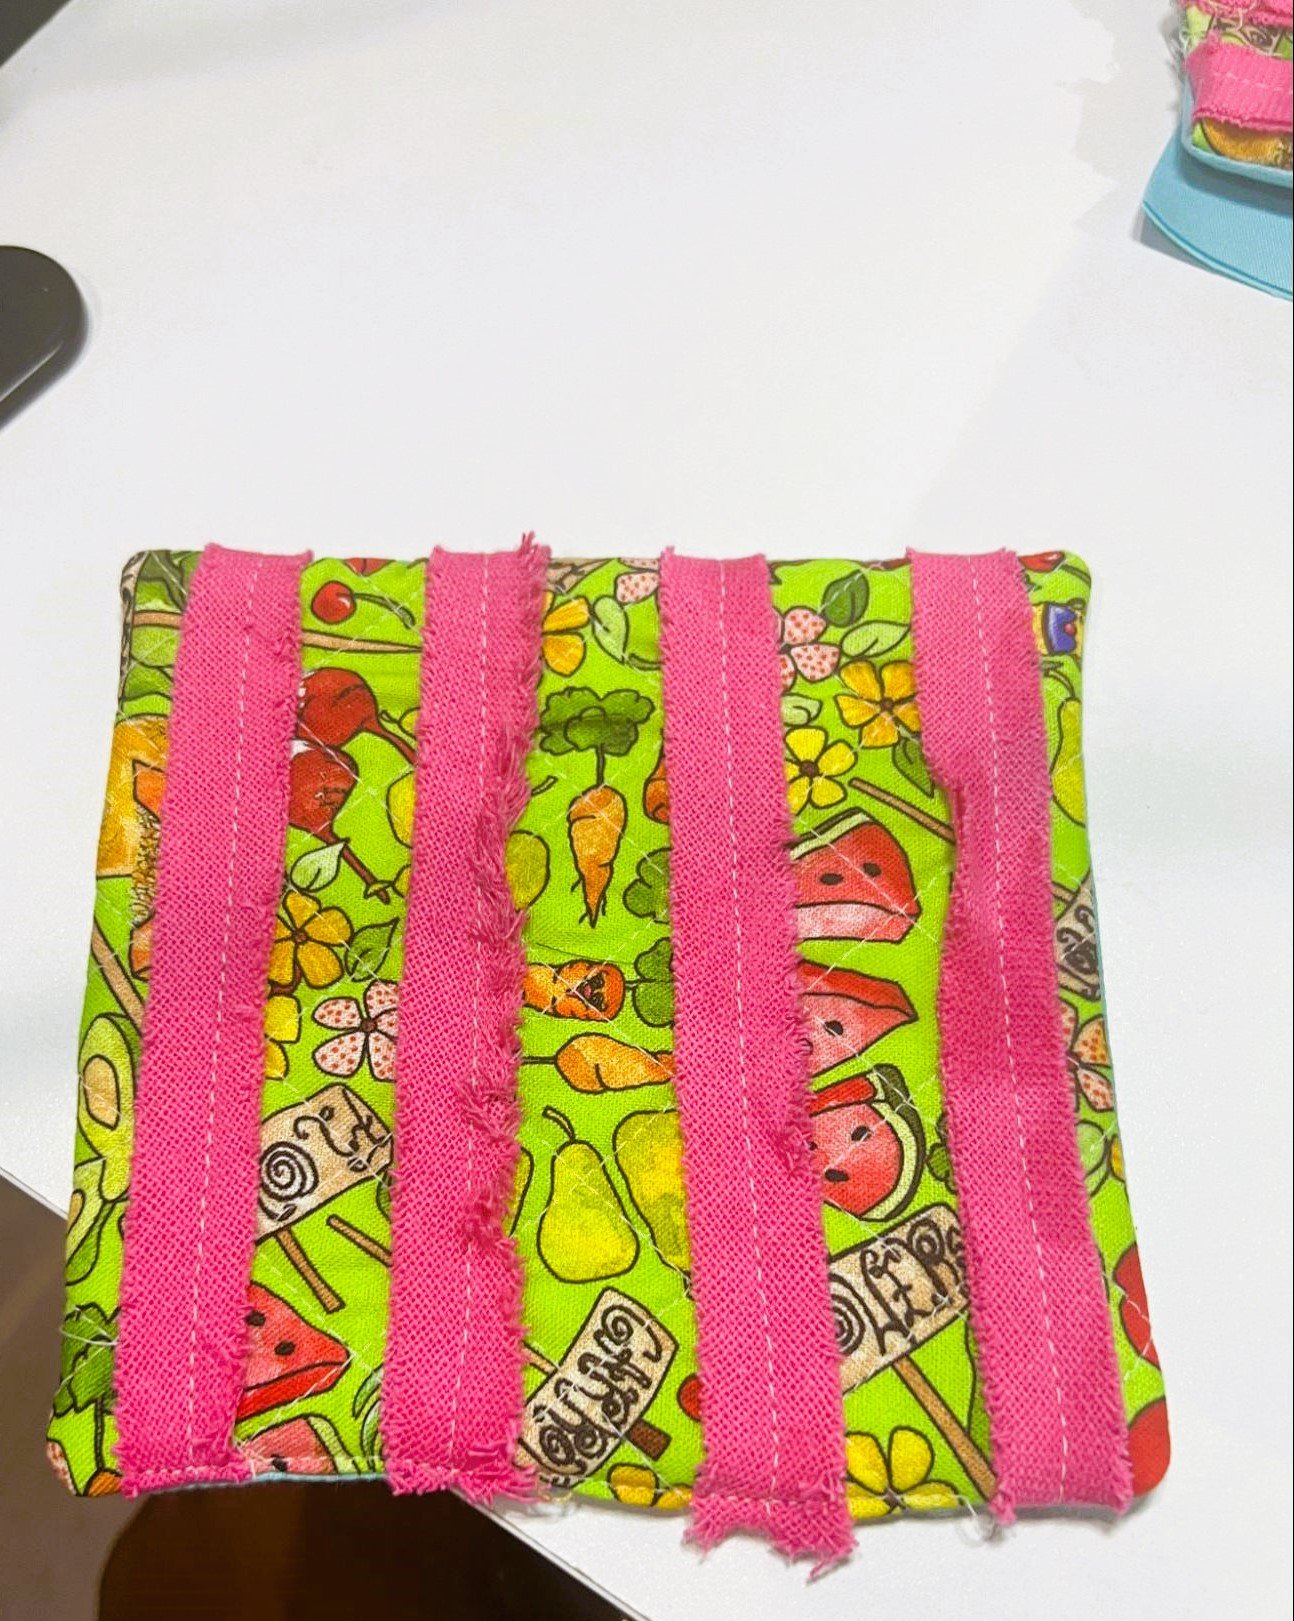
Step 2: Attach the chenille tape to your project
To attach the chenille to the coaster, you will simply cut TWO strips of it and sew down the middle of the chenille tape onto the project. The instructions on the package recommend to cut and sew the pieces one at a time, but I found that pre-cutting my strips and applying them together work best for me. I recommend you try both methods to see what you enjoy better. You will repeat this step as much (or little) as you’d like.
Once completing this step, trim any excess from your square.
Step 3: constructing the coaster
1) To complete the construction of the coaster, you will place your backing fabric and chenille side right sides together.
2) Sew all of the way around, leaving a 1 ½” - 2” opening with a ¼” seam allowance

3) Clip the corners (optional) and turn coaster right side out
4) Hand or machine stitch the opening closed by doing an invisible stitch or topstitch at ⅛ “ Seam allowance
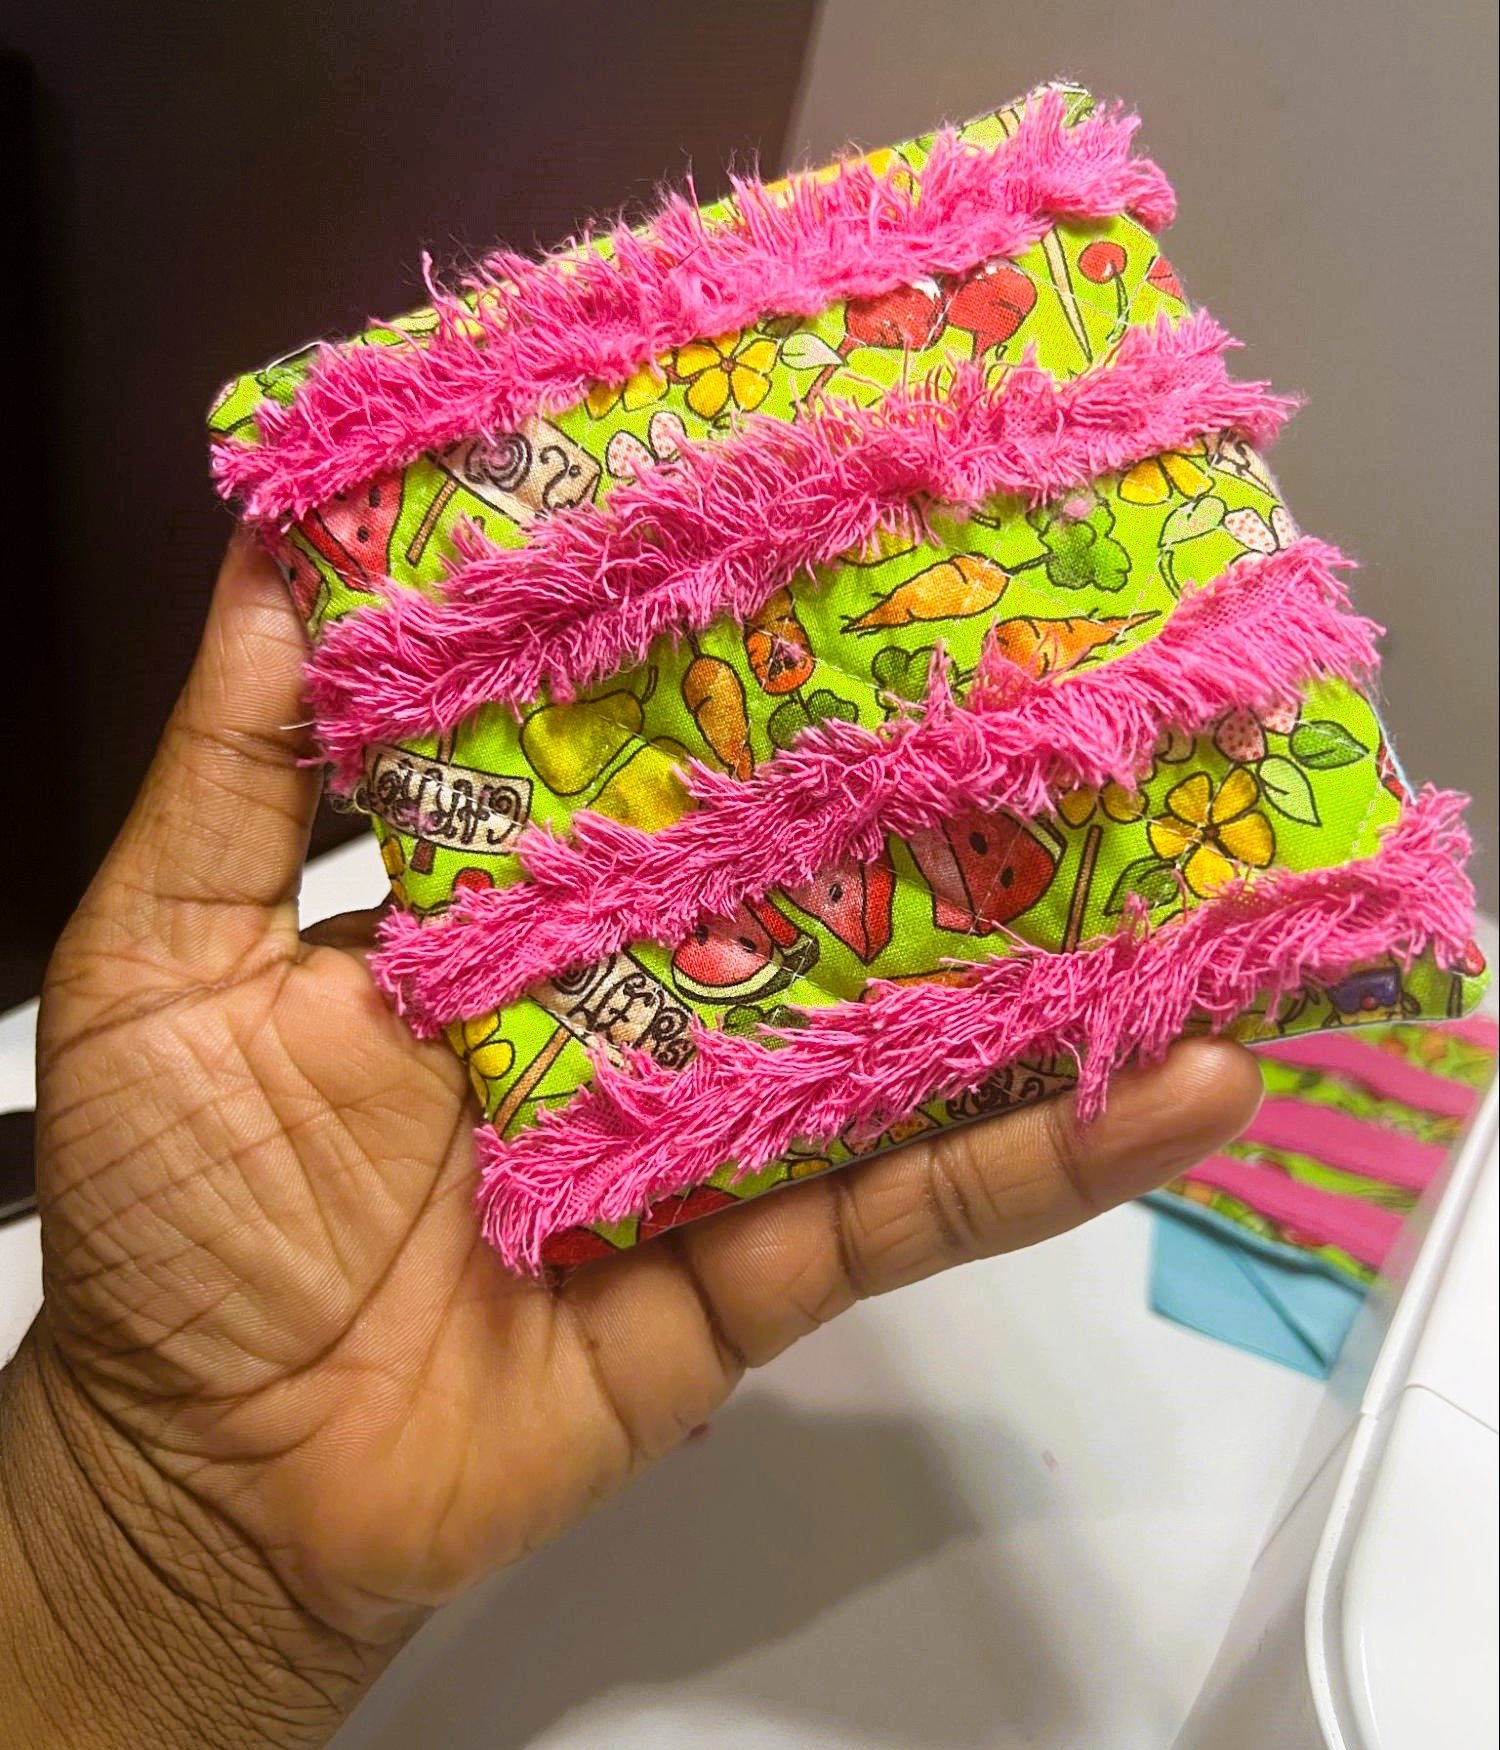
Step 4: Fluffing Fun!
There are two ways to get the full effect of the chenille and both have their place in our project. Be sure to consider trying both!
Method One: Wash and Go
In this method, You will simply toss your project into the washing machine and dryer and let the agitation of your machine do the work. Once dry, It’s done!
Method 2: Brush it out
Using this method, you will use a clean, nylon bristled item to create this look. Some examples would be a hair brush, toothbrush, or something similar. In the example, I used this method using what is known as an “edge brush” in my community. This brush is small and has a small toothed comb on the other side that also helped me get the fluff style I was looking for.
Step 5: YOU DID IT!
I really hope you have found some fun playing with texture with me today and have created something great. Whether it be coasters, a quilt, zipper pouches, or something completely different, chenille has a place in your craft room.