

Tissue Box Cover
12th May 2022
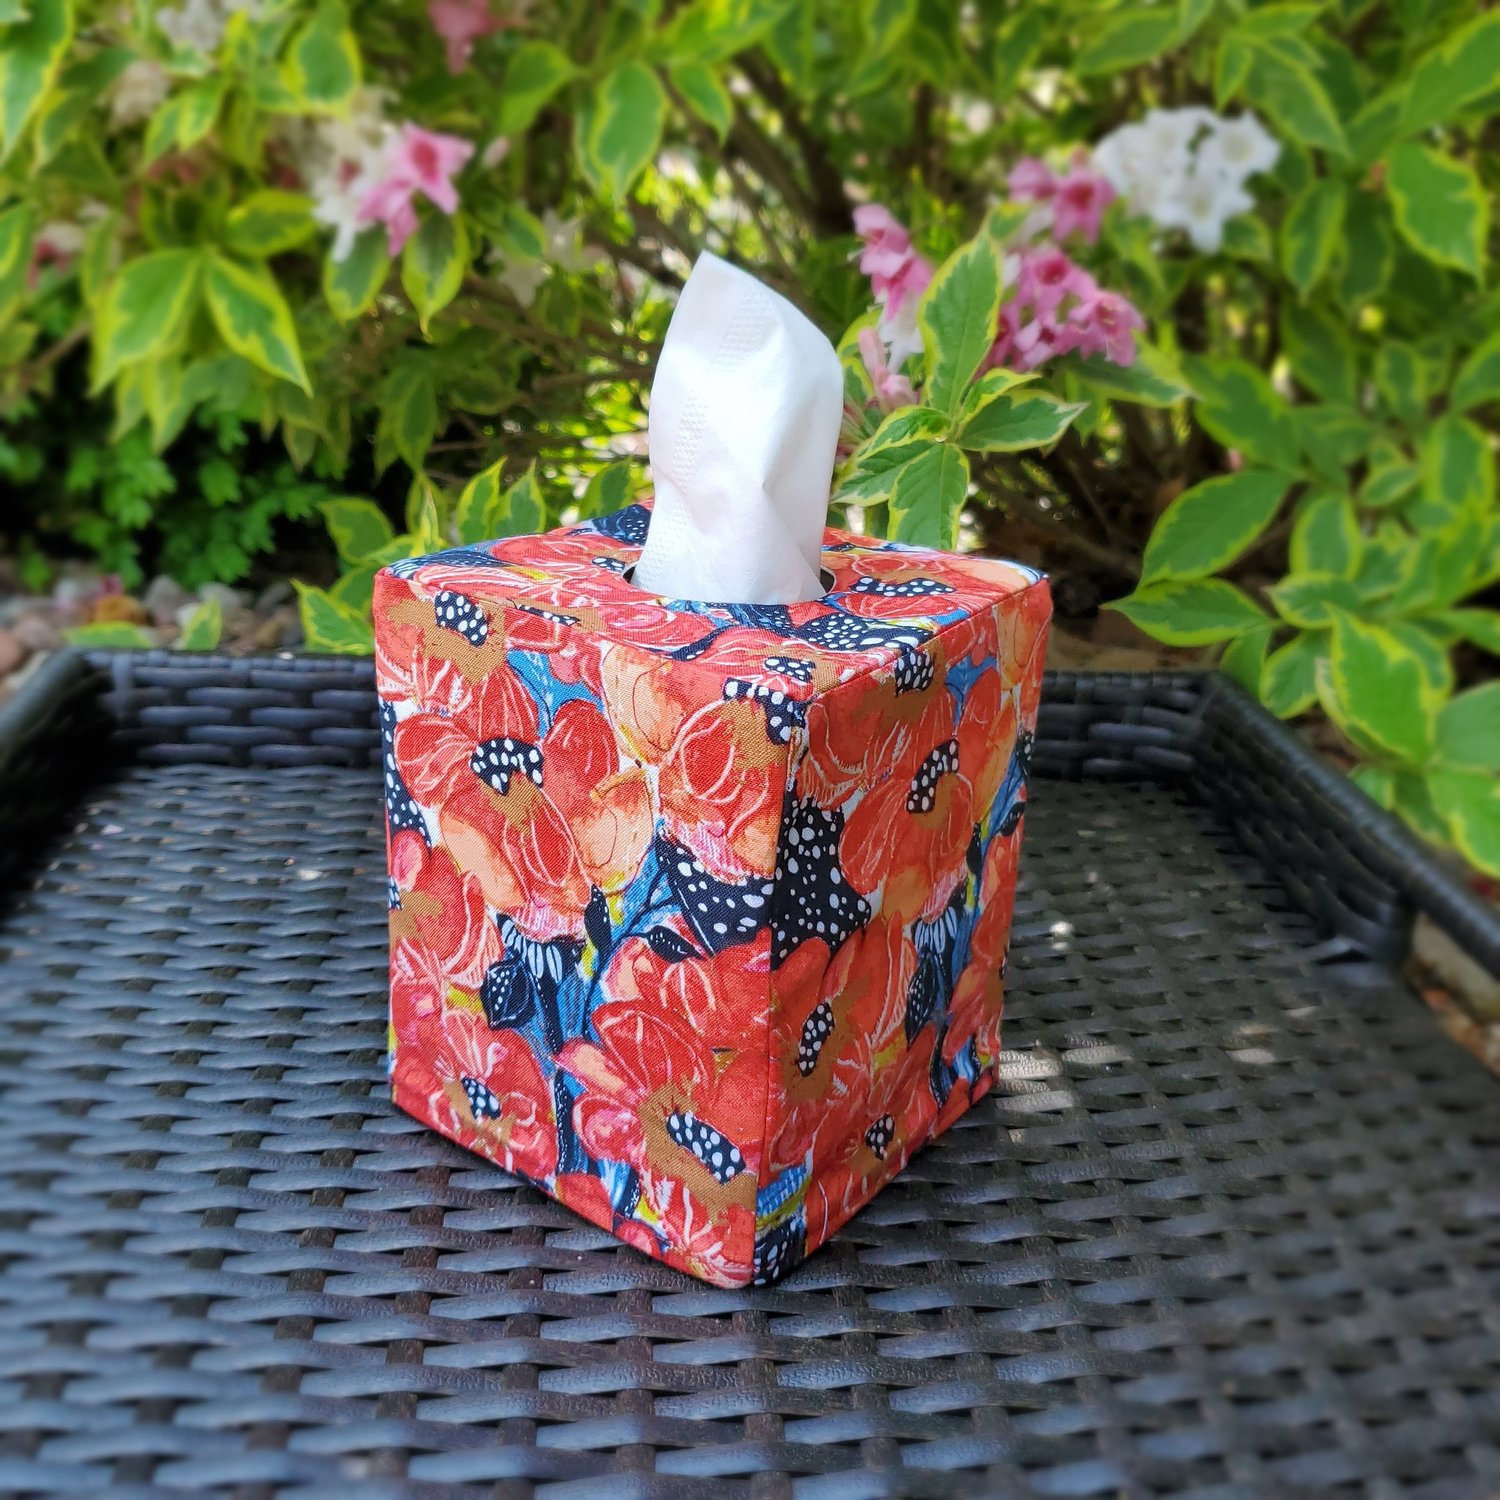
Spring is in full bloom here in the Midwest. An absolutely beautiful time of year if you can endure all the pollen! Since I have a tissue box in so many rooms I thought it was the perfect time to make a tissue box cover to blend in with my decor. Free Spirit fabrics Boho Blooms by Kelli May-Krenz was just right for my kitchen tissue box.
Materials Needed:
Fat Quarter From the Mini Pop Membership box
Coordinating Aurifil Thread from Chroma Membership
Cube shaped Tissue box
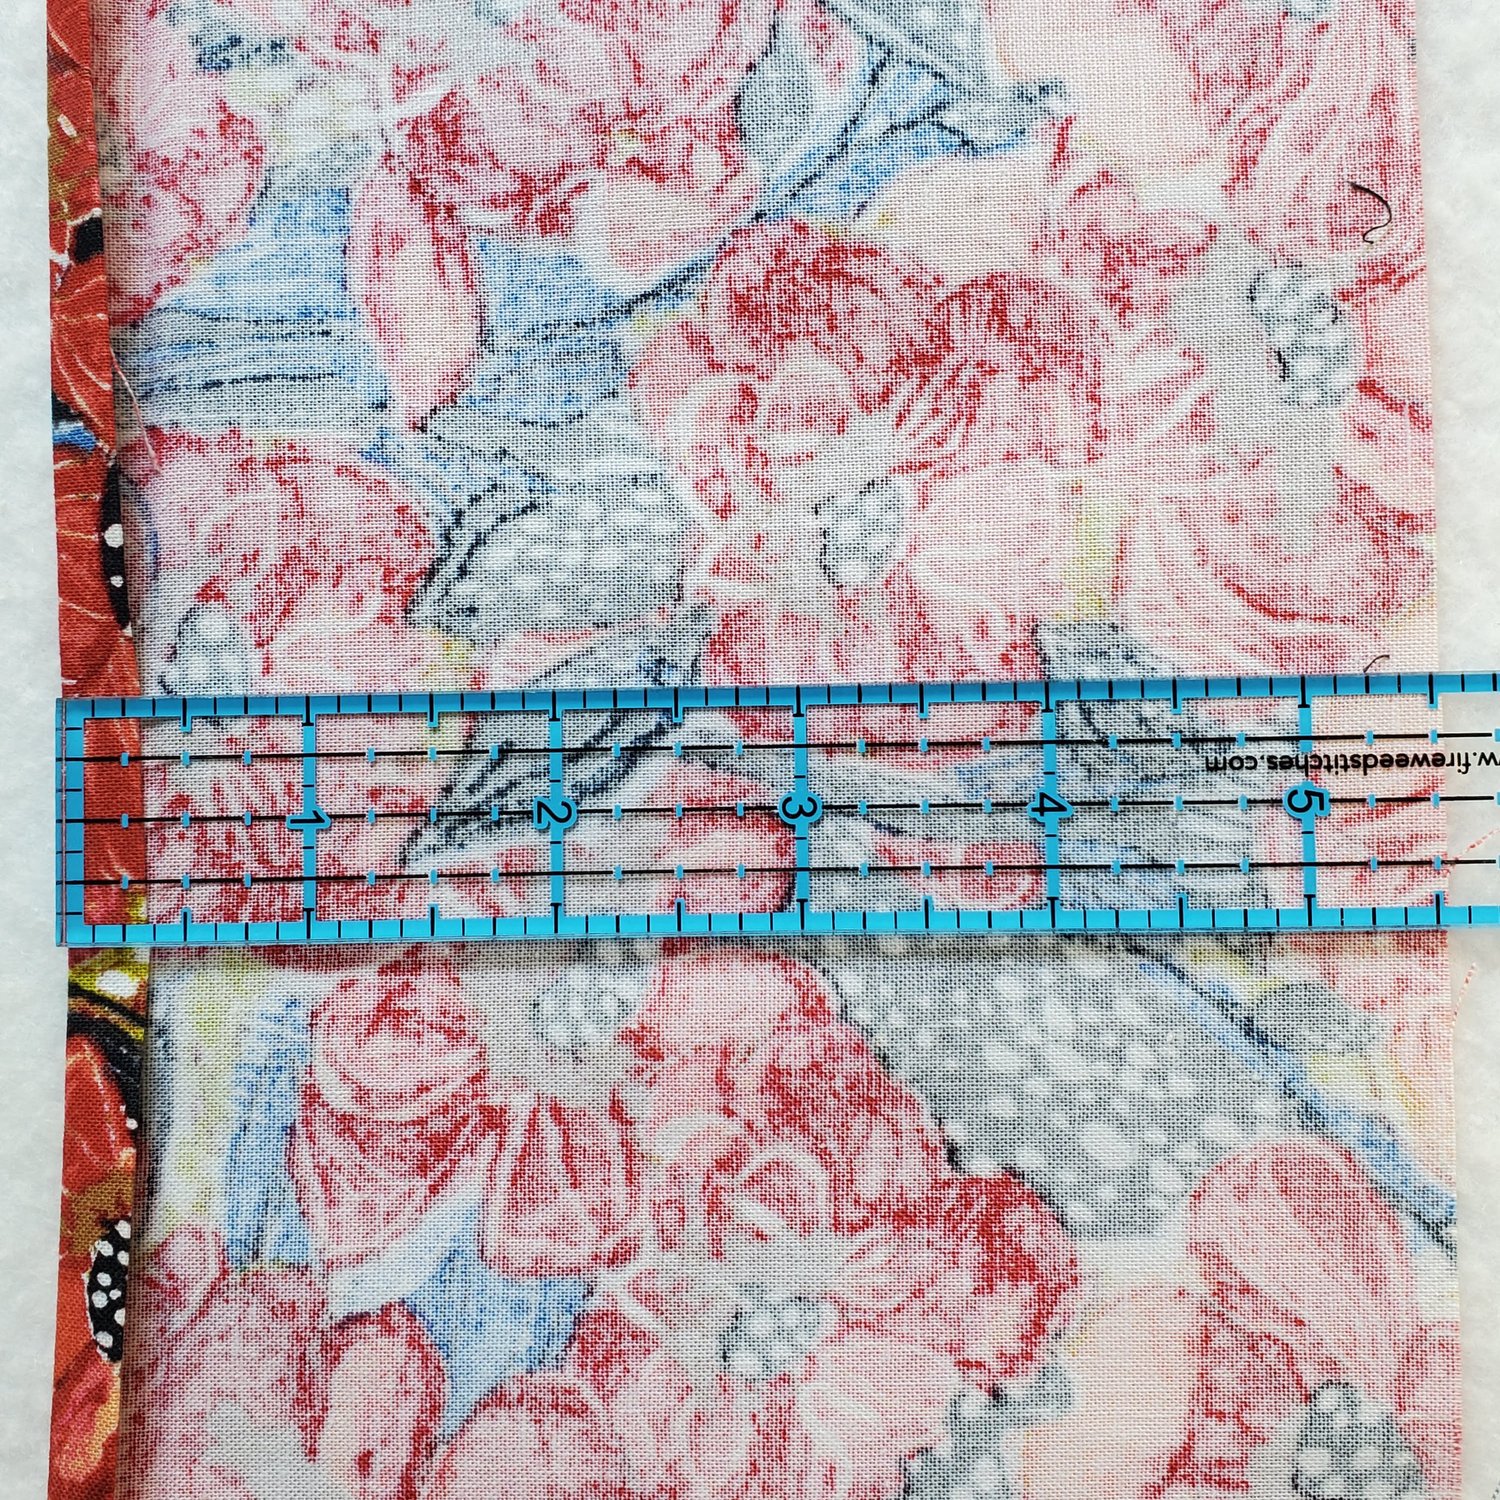
To get started I measured the outer box at 17 ½” and added ½” for a quarter inch seam allowance on each side for a total of 18”.
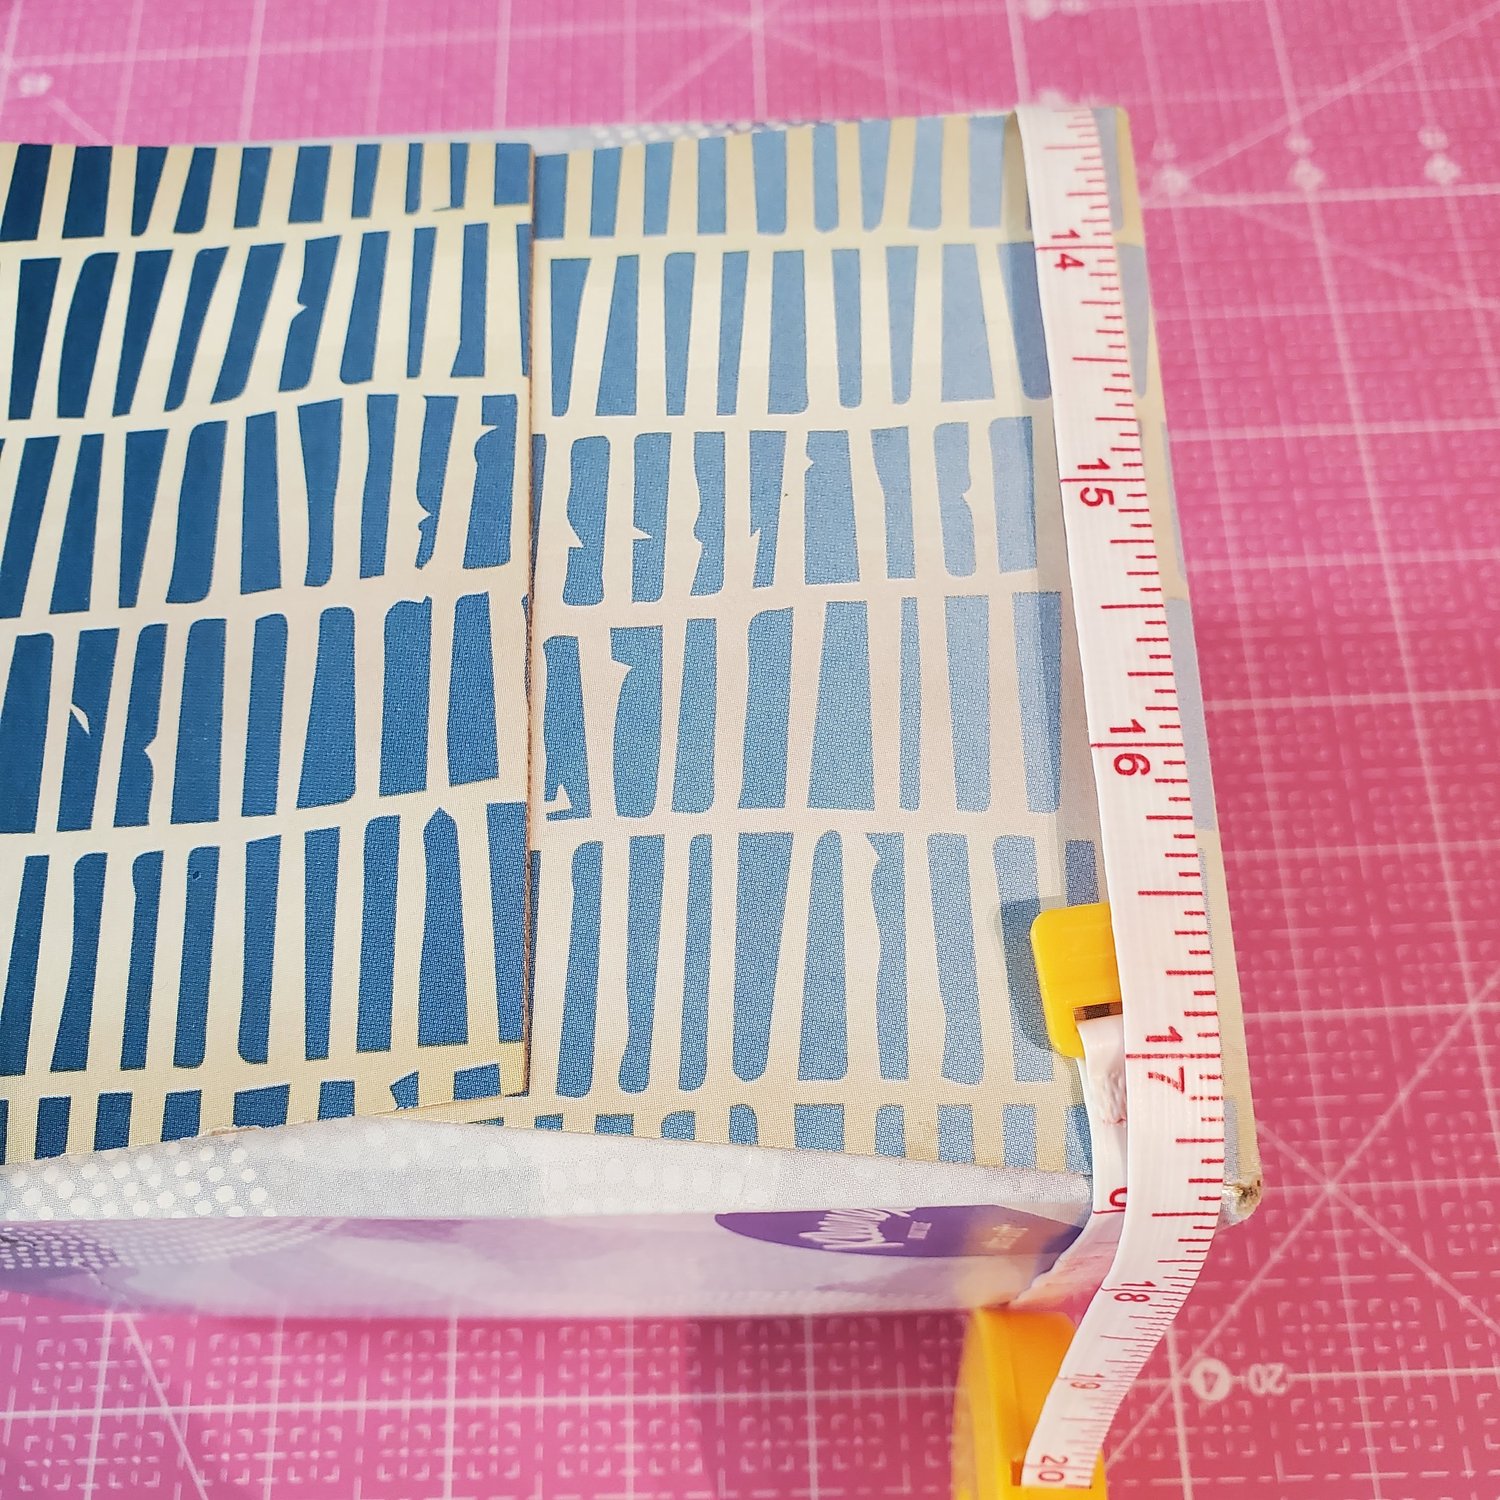
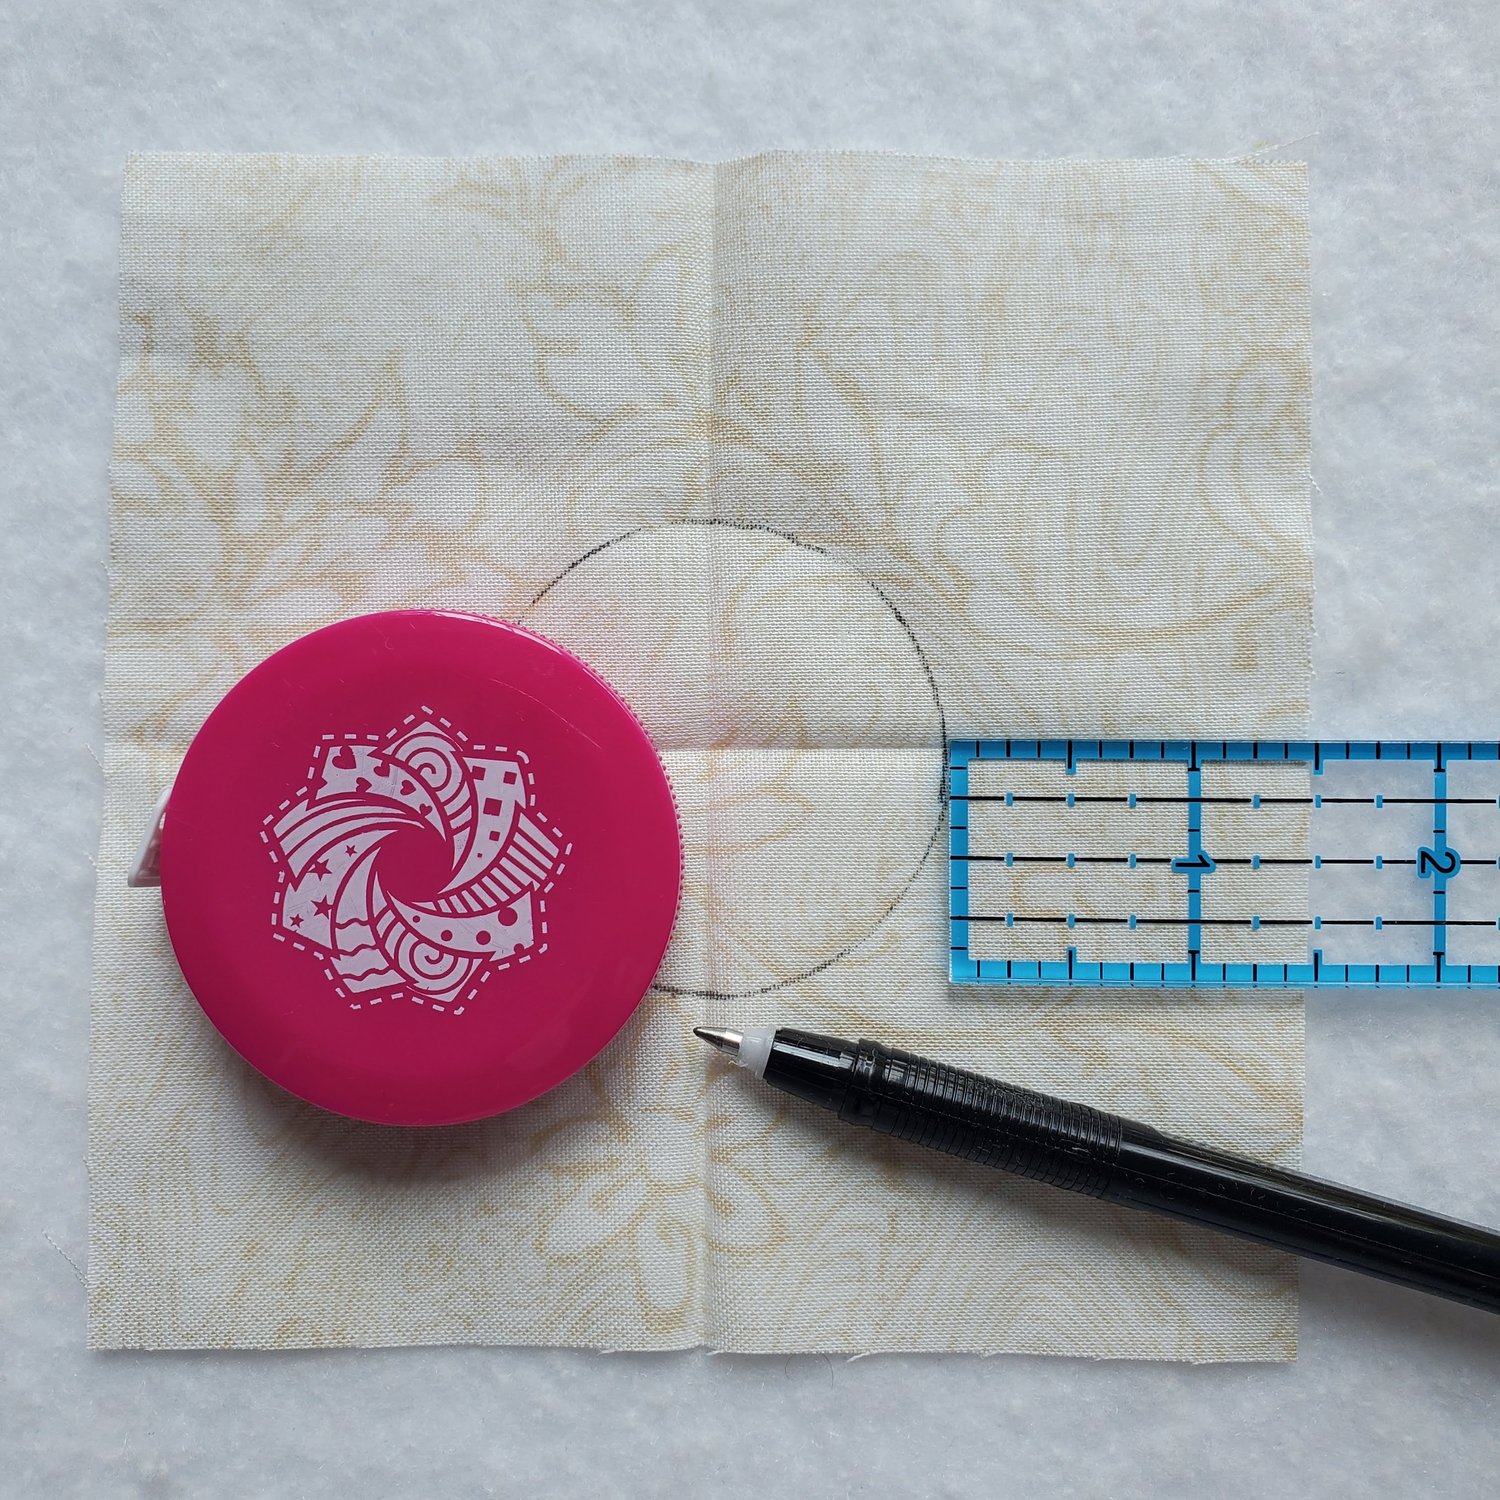
I then measured the height at 5 ¼” and added an inch for a hem on the bottom and seam allowance on the top. Cut a strip of fabric 18” x 6 ¼”. Take into account the direction of your fabric when cutting. For the top piece cut a 5” square of outer fabric and a lining fabric. Mark the center of the lining fabric by folding in half and opening and folding in half the other direction. The Cotton Cuts tape measure is the perfect size to mark the opening on top of the box.
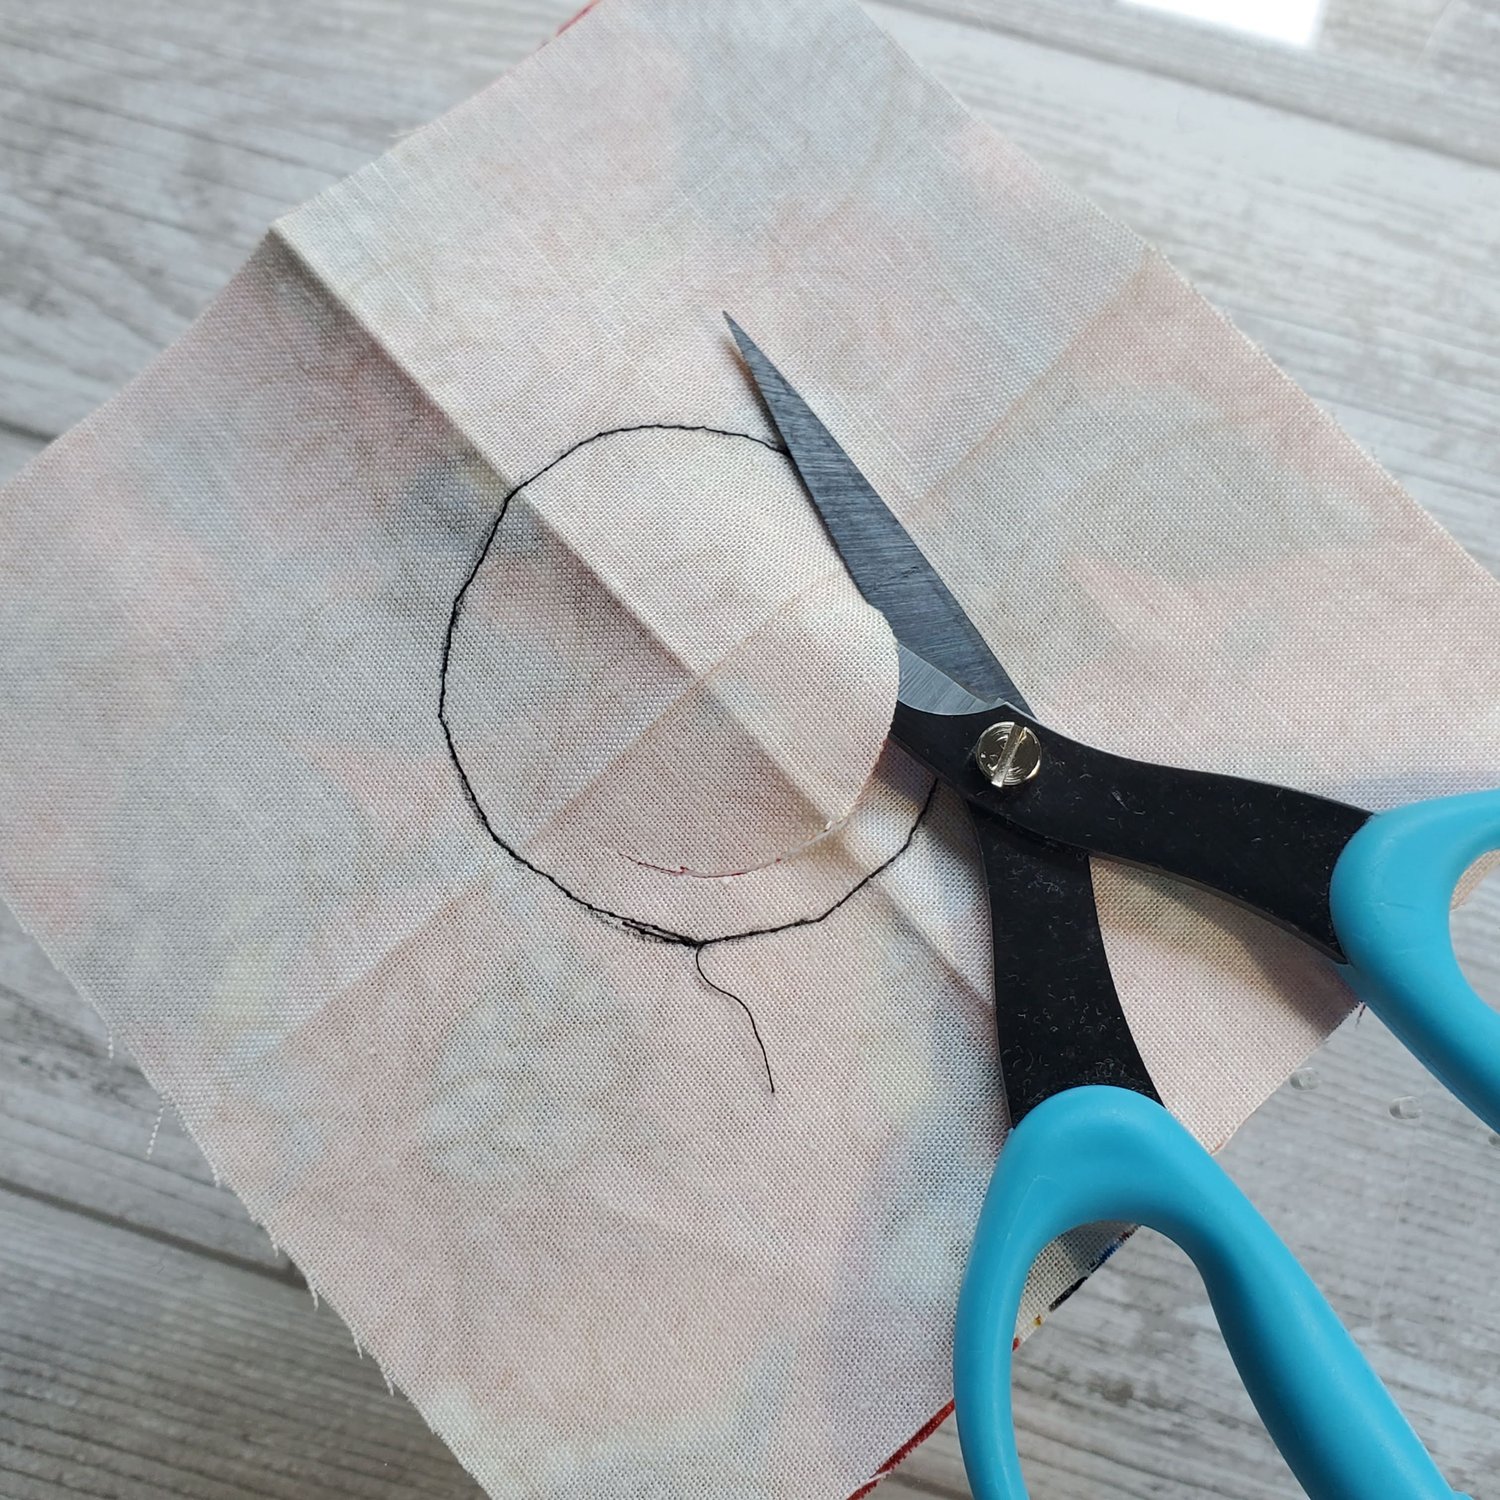
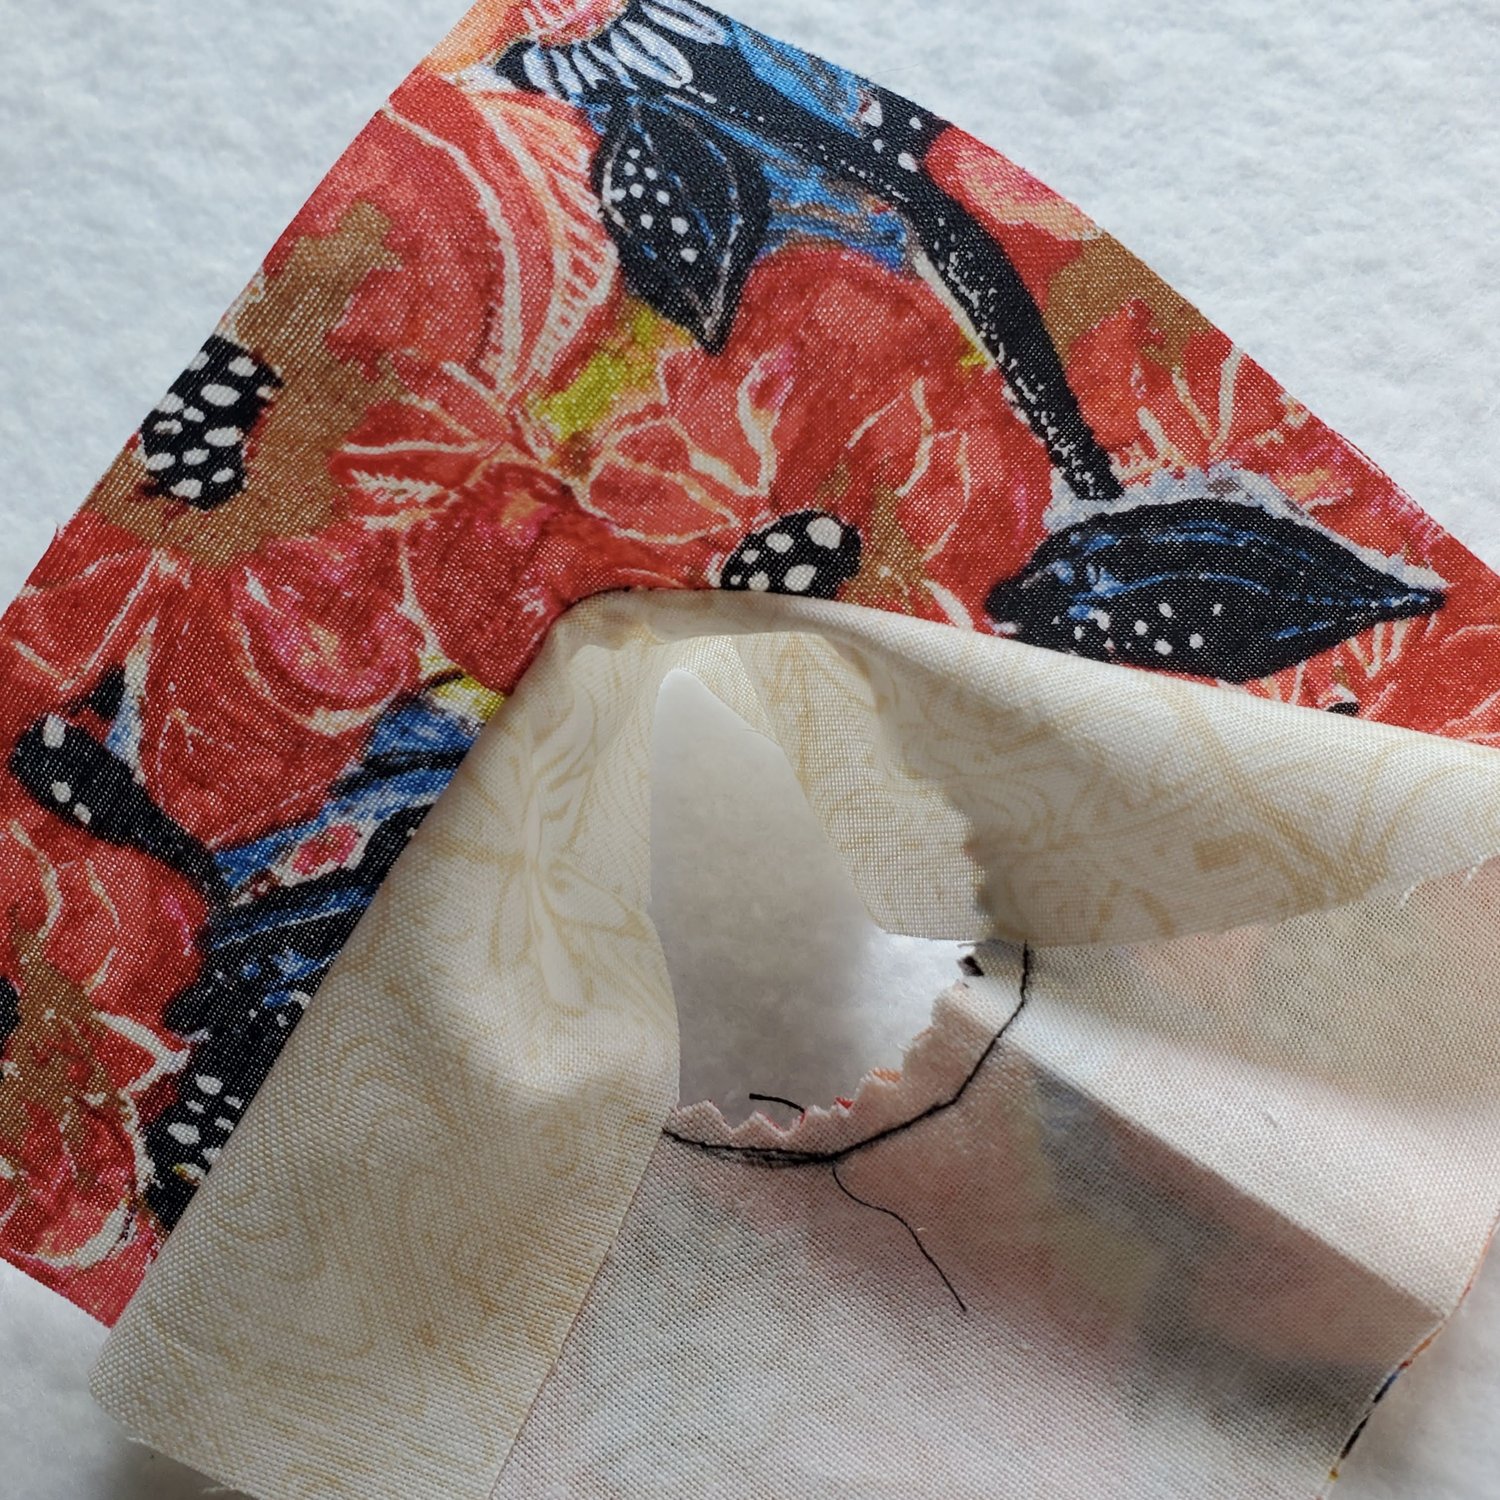
Place the two 5” squares right sides together and sew around the circle. Cut a smaller circle out of the center leaving about a ¼” seam allowance. It will be helpful to use pinking shears or make some small snips up to the seam without cutting your stitching to help it lay flat in the next step.
Turn the fabric through the hole so the right sides are out and carefully press the opening. Set this piece aside.
Take the 18” long strip and turn the bottom edge under ¼”, press and turn another ¼” and press. Measure to be sure you have a 5 ½” strip after pressing the hem in place. Topstitch with a coordinating thread to create the bottom edge hem.
Fold the strip in half lengthwise with right sides together bringing the sides together and sew a ¼” seam on the short side.
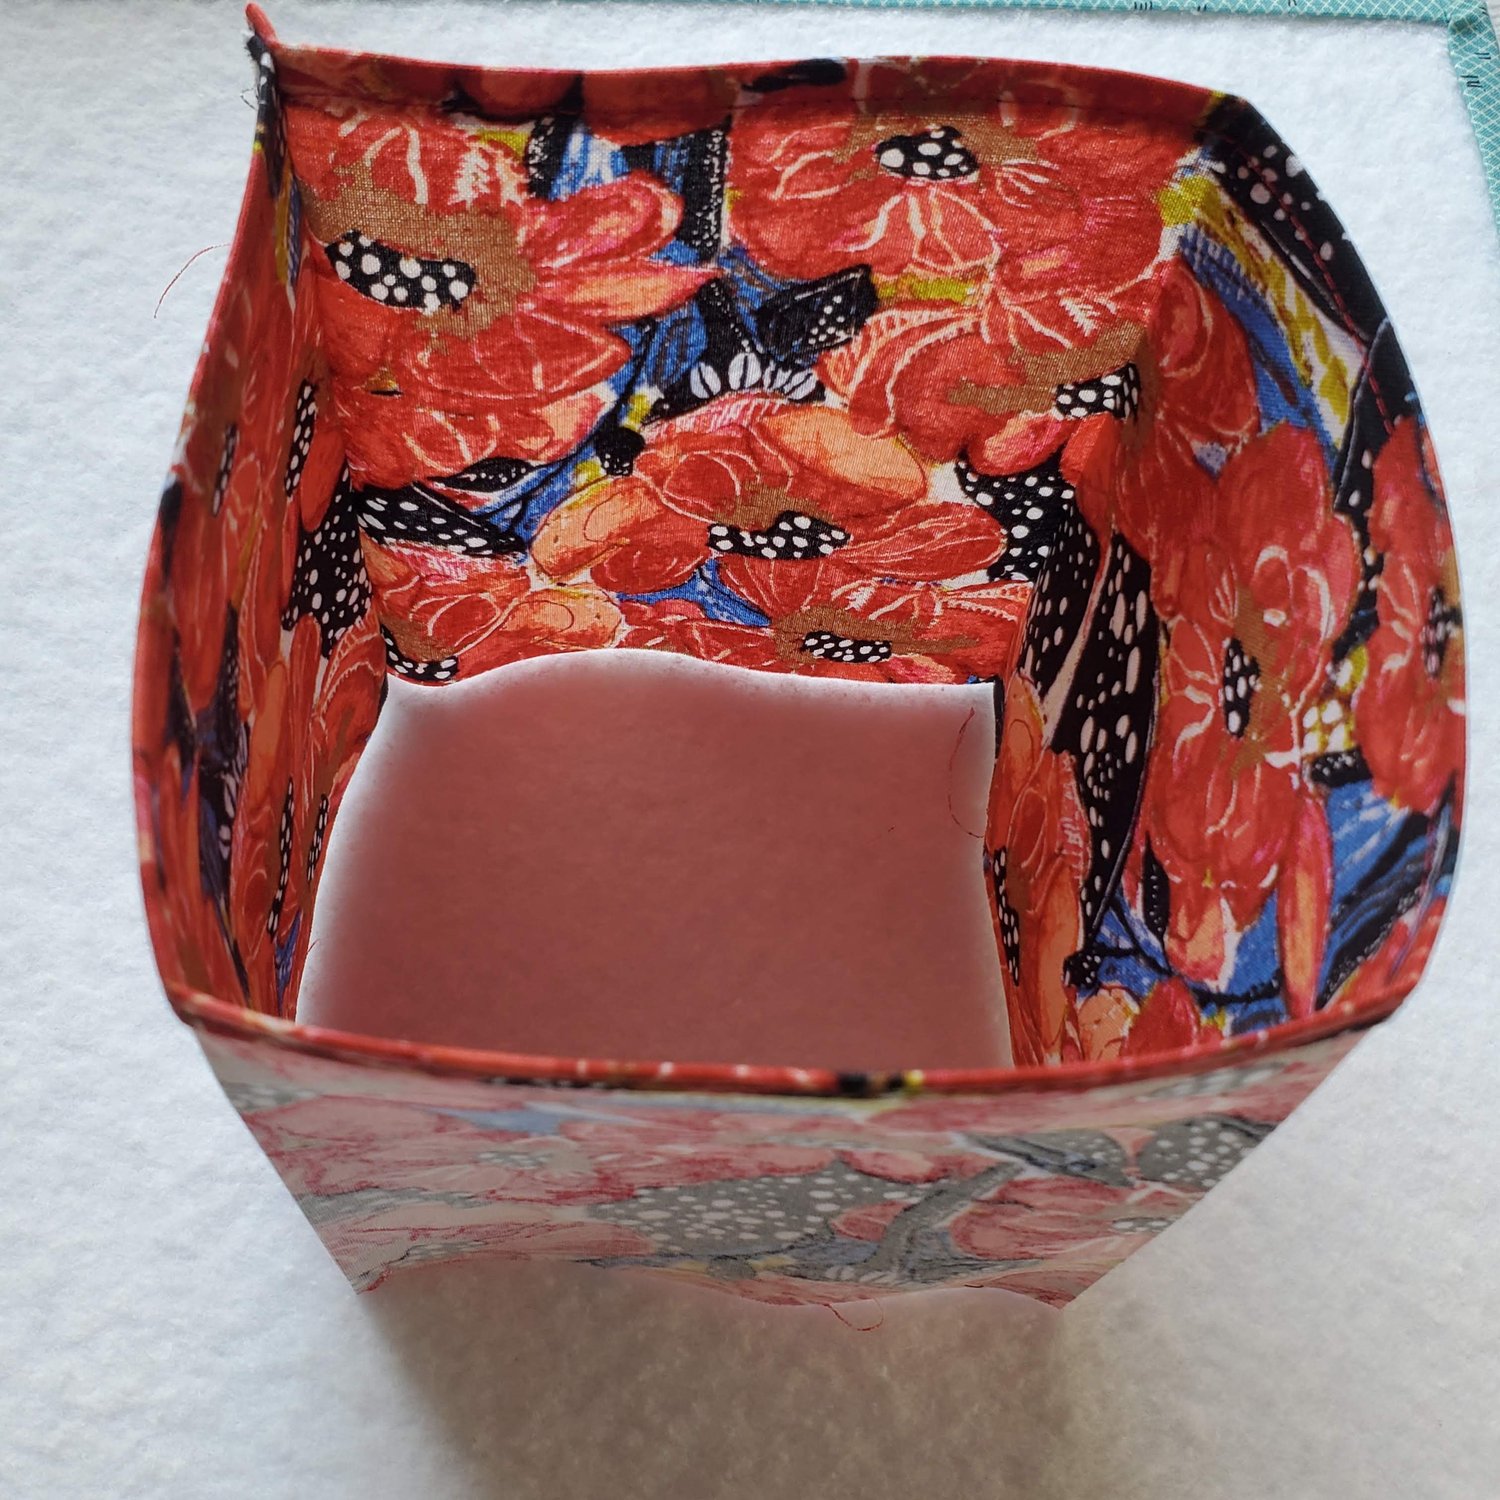
With the wrong side facing out, slip the bottom of the tissue box cover onto the box. Place the square with the opening on top with the wrong side facing up.
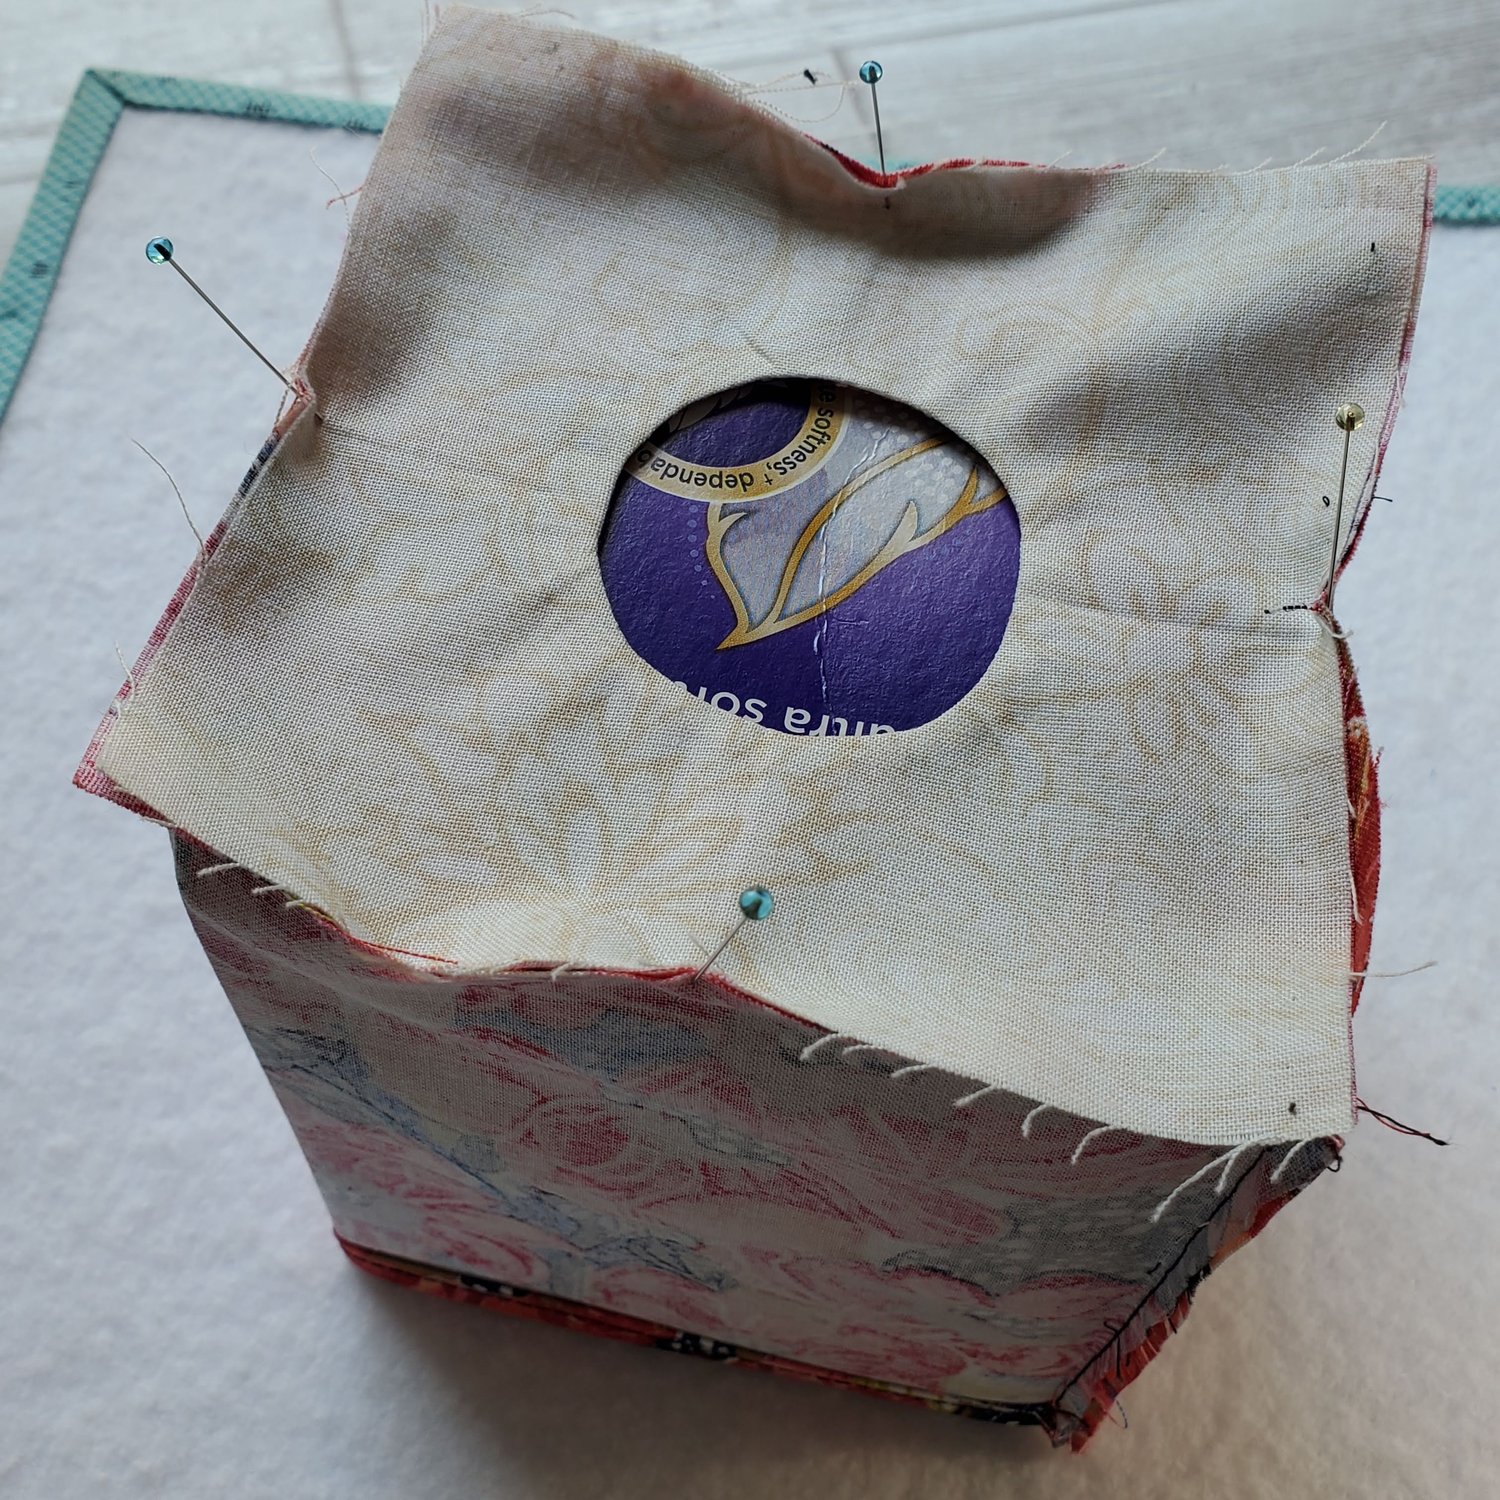
Start by pinning the top to the sides at the center point fold lines. Work your way around the top pinning the top to the outer strip. I was careful to only take a small “bite” of fabric when pinning, keeping it within the quarter inch seam allowance if possible.
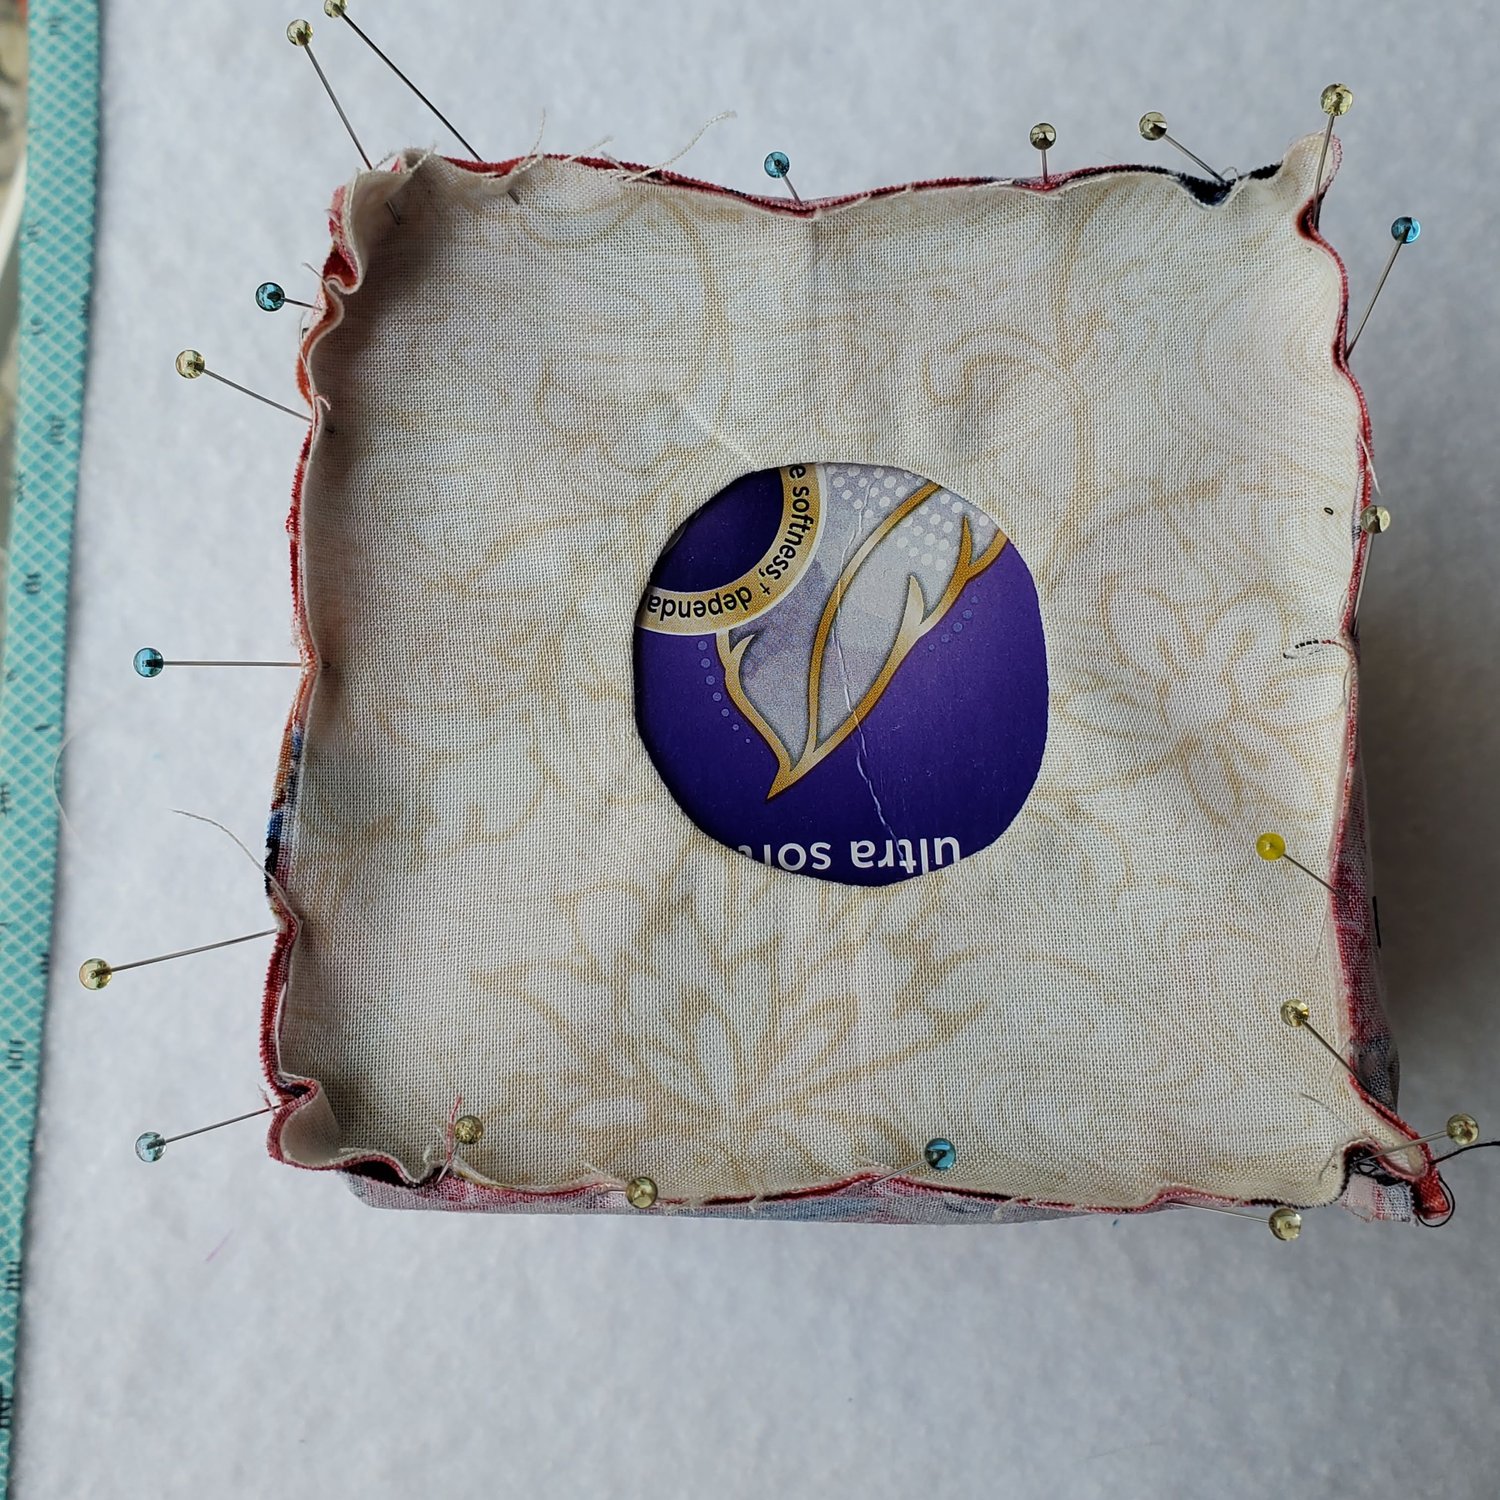
I suggest starting in the middle of a side to get it started before turning a corner. Take it slow and lift the presser foot to pivot at the corners. It may be helpful to make a small slit to ease the corner fabric as you turn the corner.
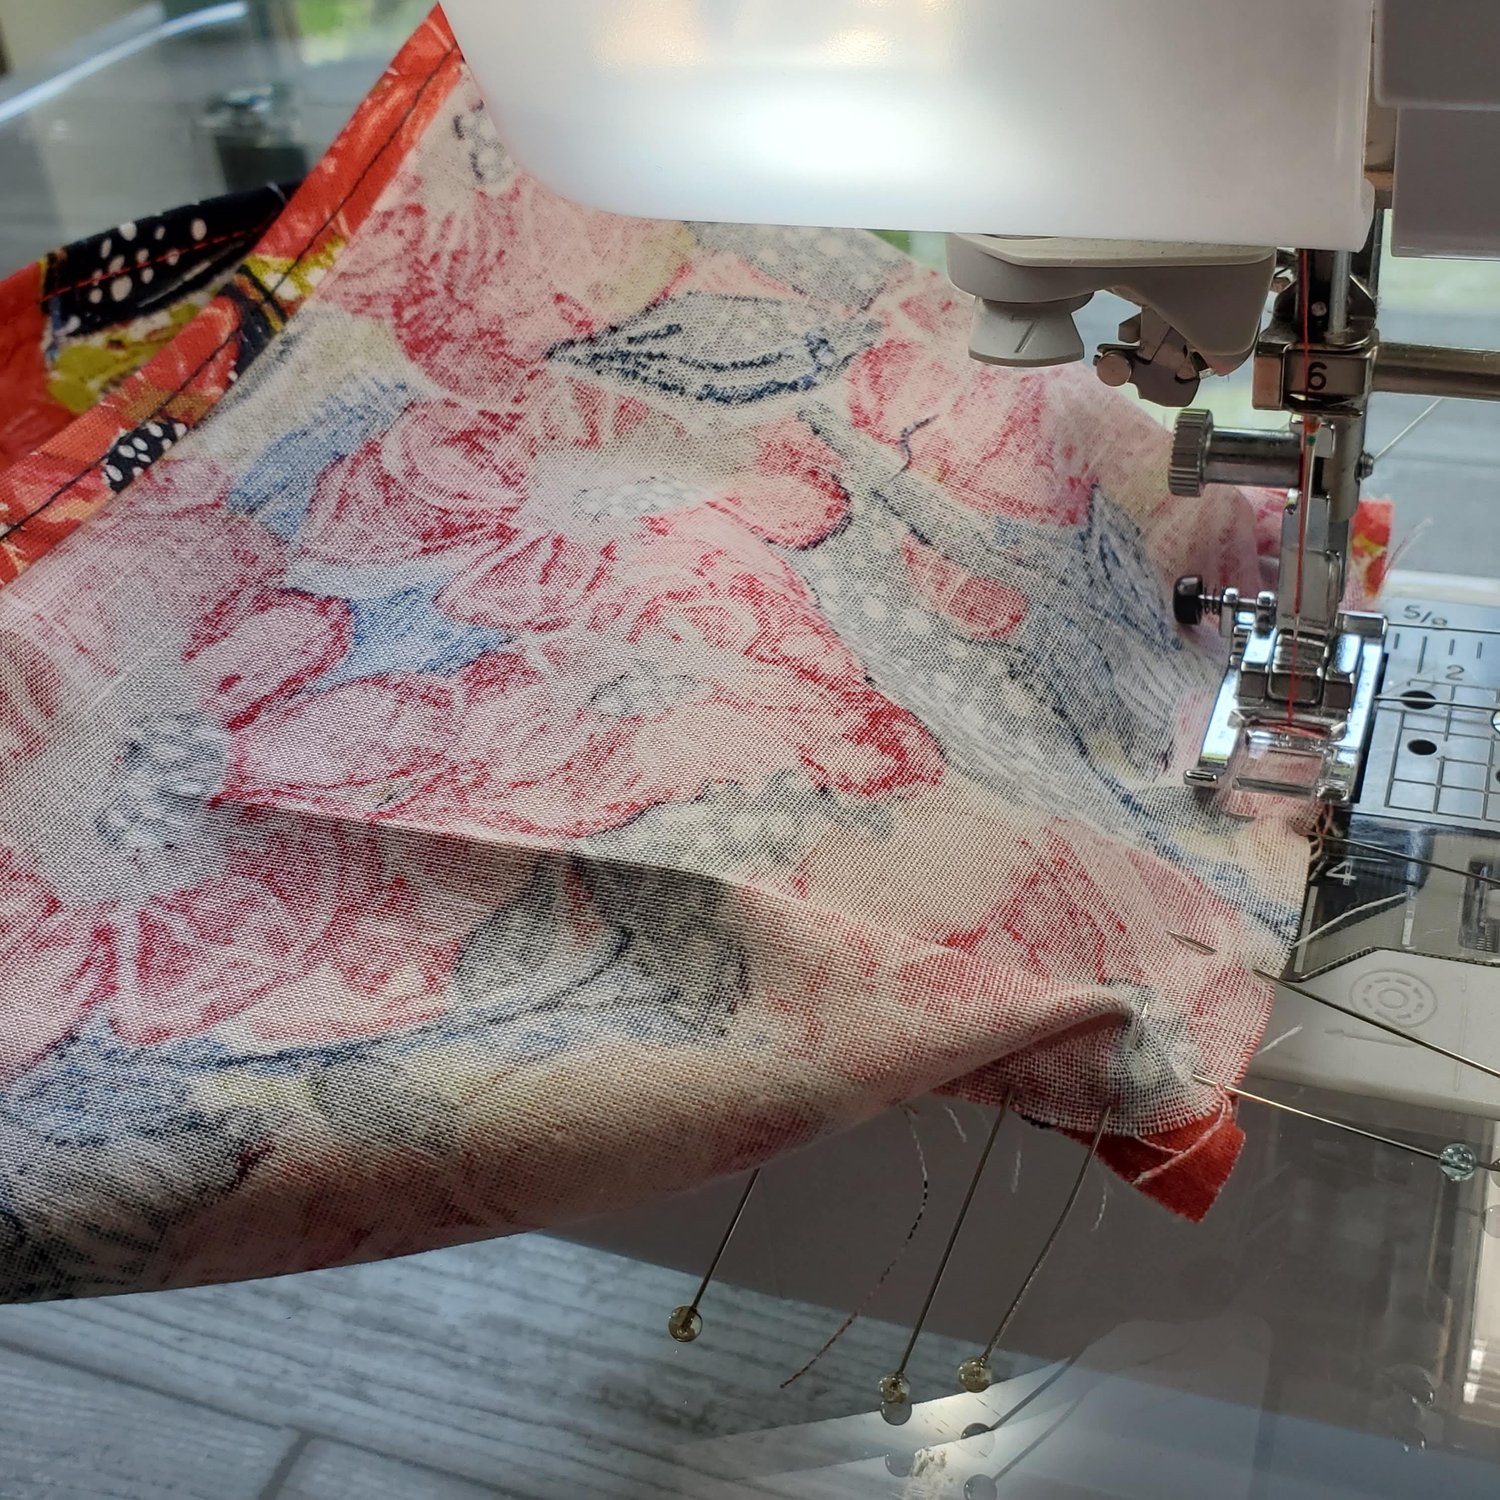
To keep the seams from fraying I used an overlock stitch on my machine to finish the edges.
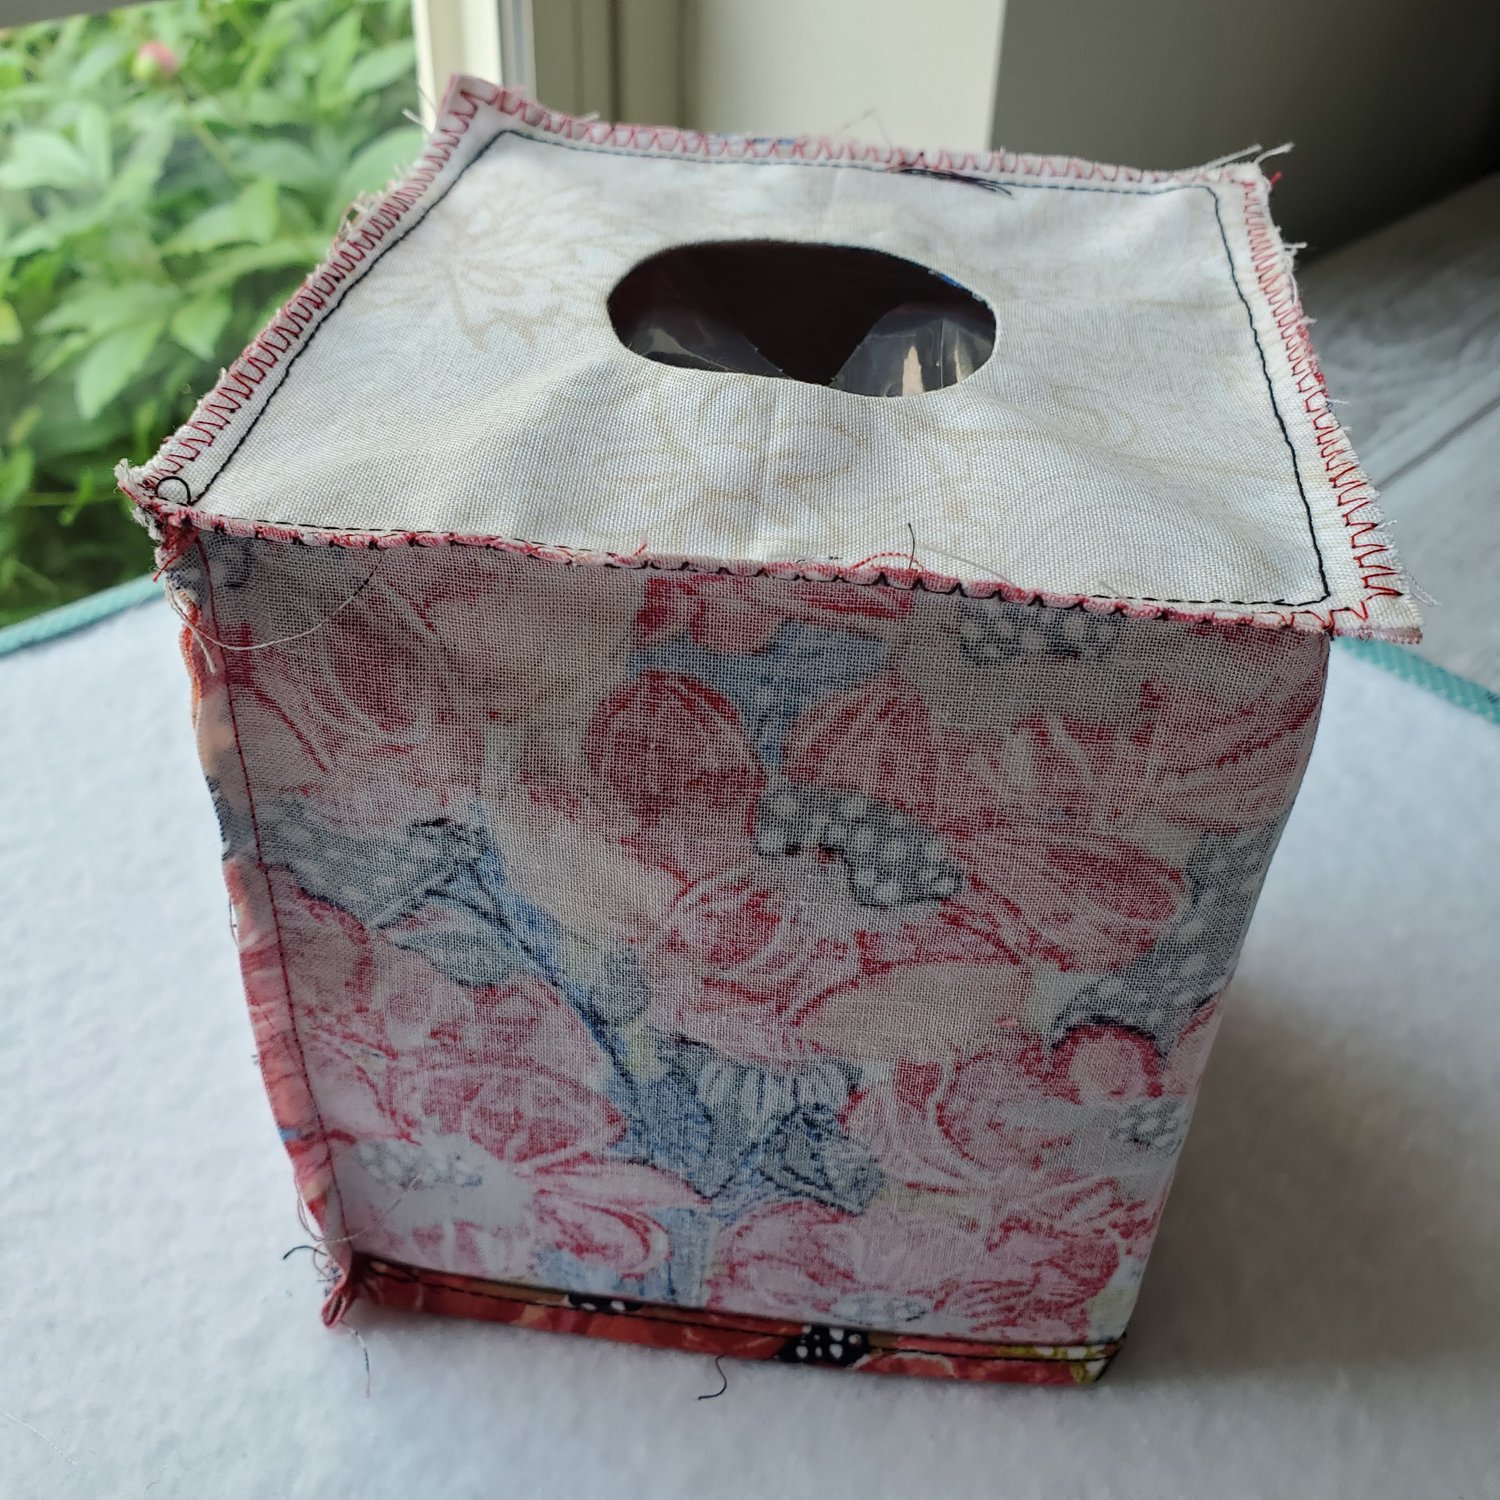
Turn the right sides out and give it a good press using some spray starch. If you would like a stiffer cover or you are using a light colored fabric I would suggest using Pellon fusible Shape Flex 101 on the wrong side of the outer box fabric.
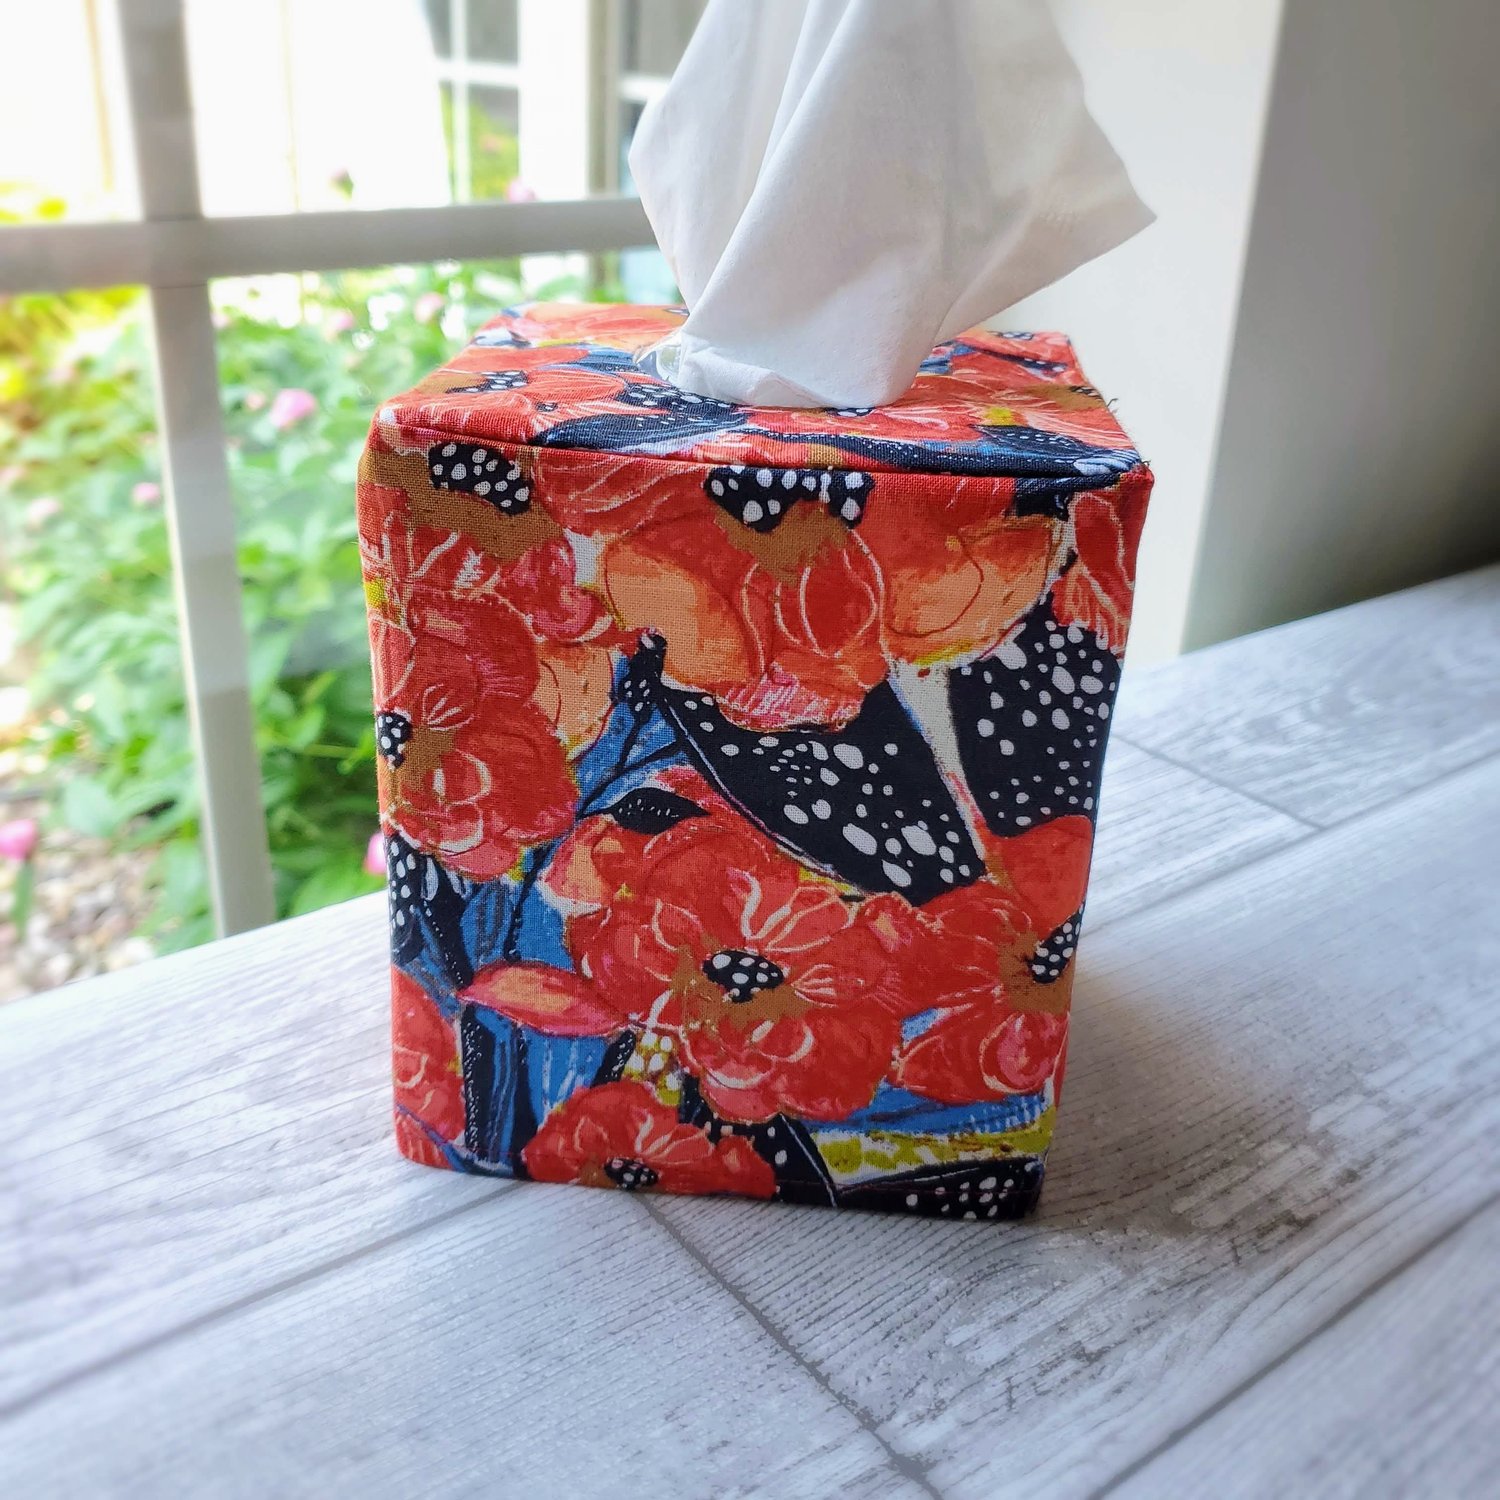
These would be nice to make for different rooms in your home. They could even be personalized with embroidery or Cricut for a fun Hostess gift. It would be great for your sewing room using a piece of your favorite fabric to keep it out on display.