The Munch Lunch Bag
22nd Jul 2021
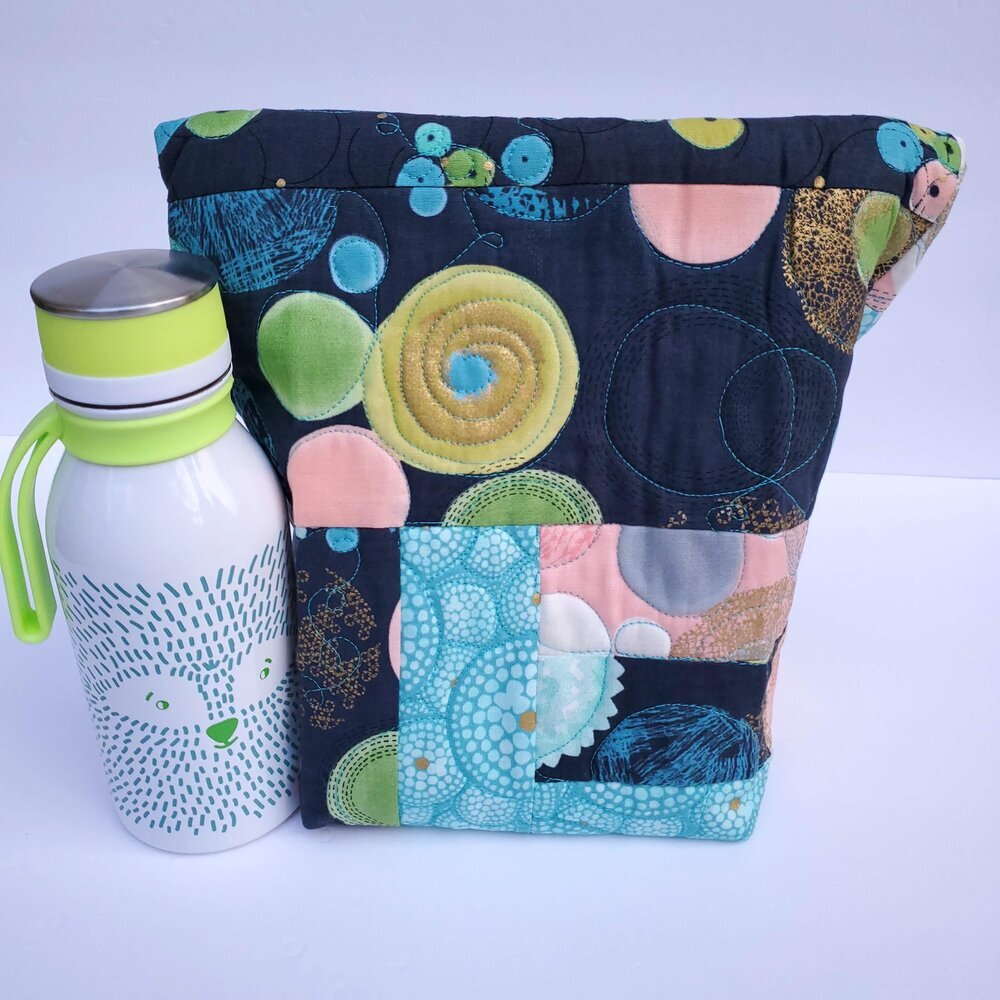
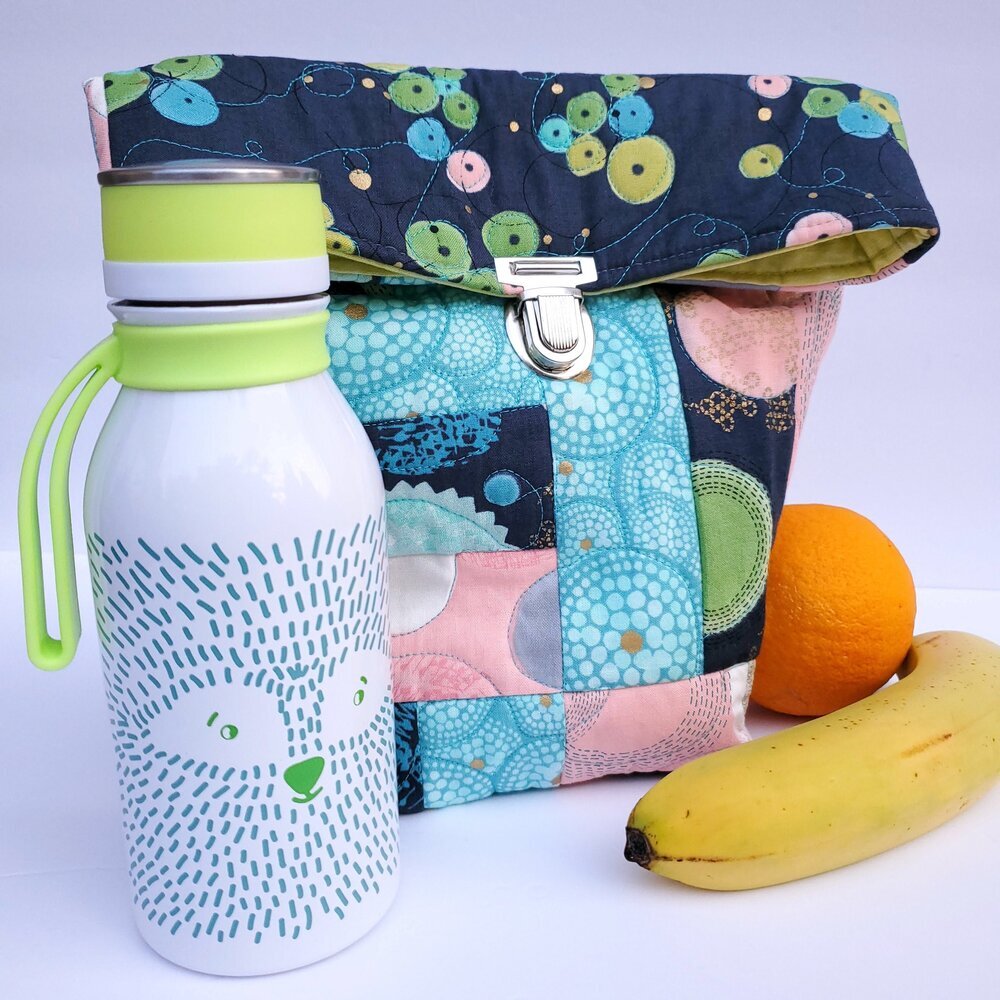
Carefree summer days are coming to an end. As we transition into August, the focus changes to preparing for back to school. This is the perfect time to make this quick and easy insulated, washable lunch sack using beautiful fabric scraps from the July Modern Maker membership box. The fabric featured is from the Dance in Paris collection by Moda fabrics. I found this free Munch Lunch Bag pattern on the Art Gallery Fabrics website, a wonderful resource for inspiration. This is a great pattern that you can easily personalize with your Cricut or embroidery machine to make it truly unique. You can also make it bigger to accommodate your favorite water bottle and food storage containers for an environmentally friendly alternative to single use plastic.
Materials needed:
Cut two 2 ½” wide WOF cuts of three different fabrics
Two fabric pieces cut approximately 4 ½” x 12” of coordinating fabric
Coordinating Auriful thread from Chroma membership
Cotton batting 13x26
Pellon Insul-Bright 12”x24”
Lining fabric 12”x24”
Purse hardware or Velcro for closure
All seams will be ¼”. To get started, sew a set of 2 ½” WOF strips together and repeat, making two matching sets. Press the seam to the dark side. This method conceals the darker fabric edge when paired with a lighter fabric in the finished product. It can show up as a shadow along the seam detracting from the design. Subcut to make squares. For example, if you measure the width of three strips sewn together at 6 ½”, then subcut to make 6 ½” squares. You can have some fun arranging the squares to create a design or focal point on your lunch bag. I used 8 squares in my design.
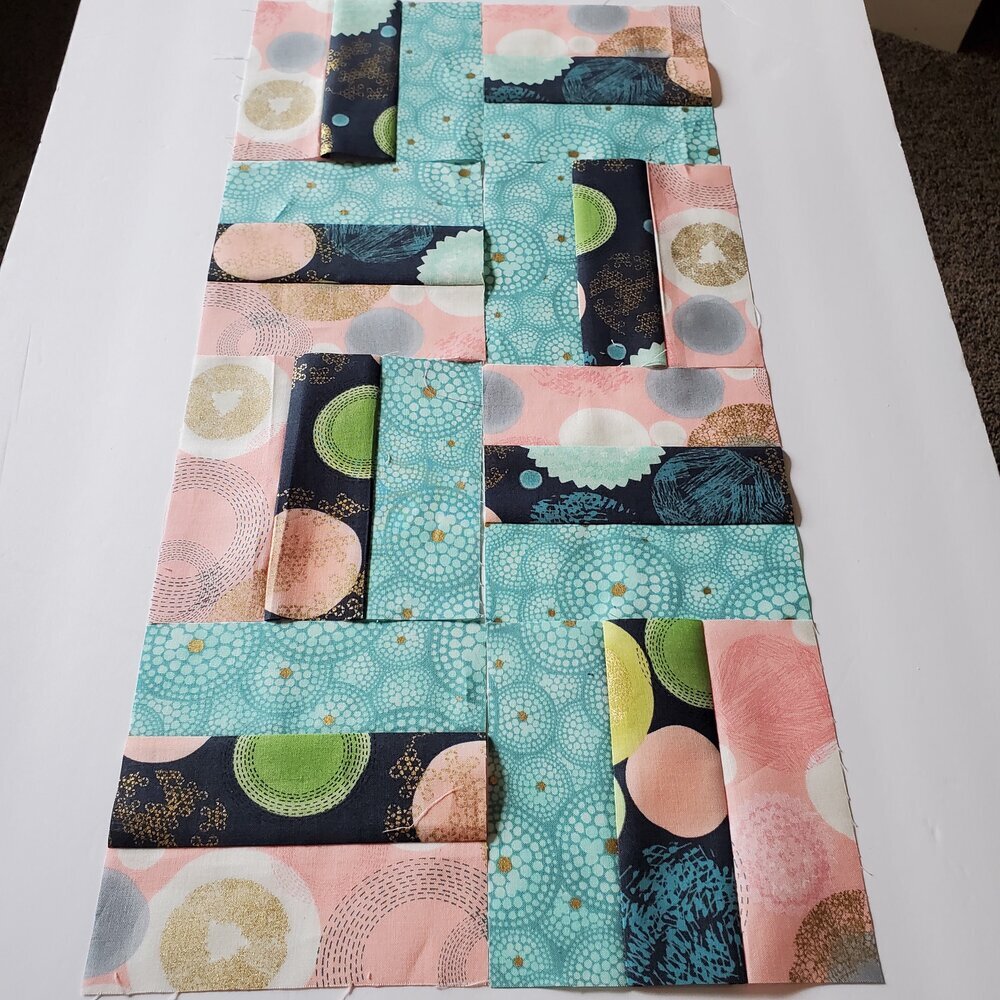
Sew the squares together two by two, then join the rows and press the seams to the dark side. Next, add the two 4 ¼” x 12” (measure your piece for the exact width) coordinating fabric pieces to the end to create the length to fold over and close the bag. Press the seams to the dark side.
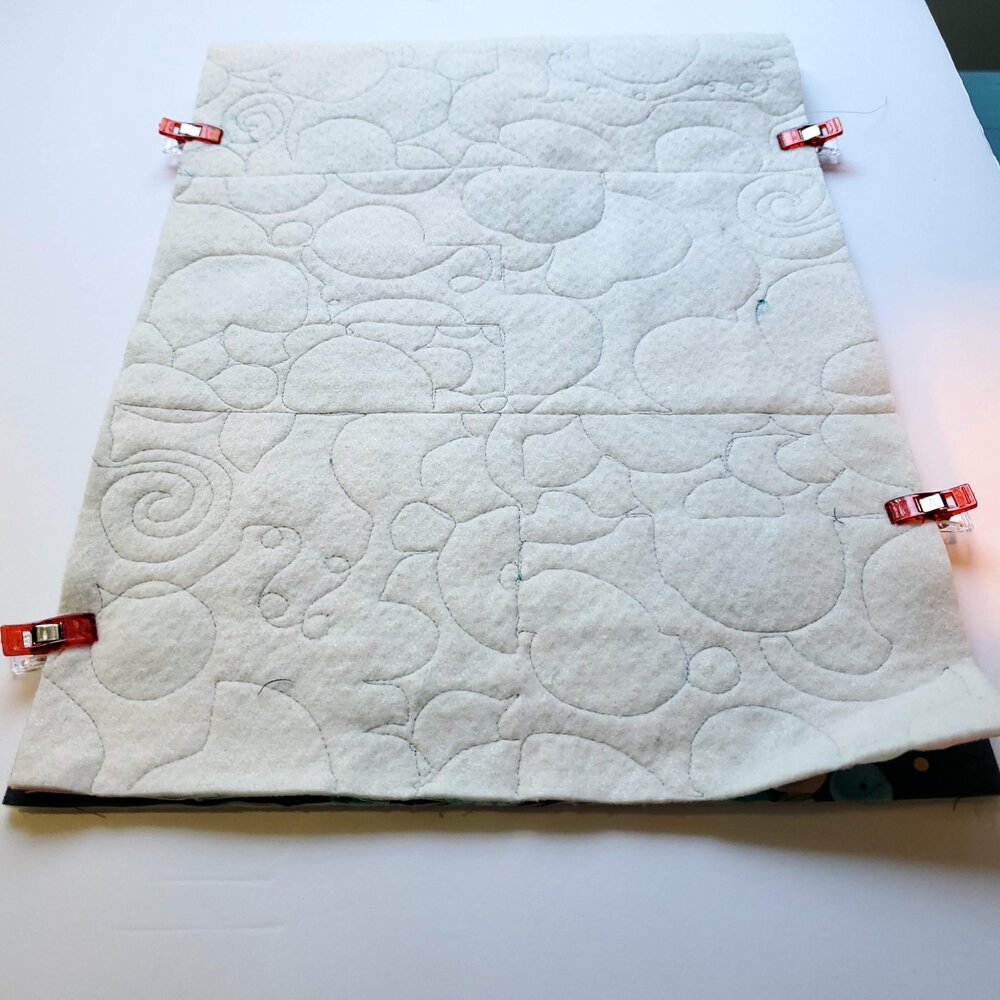
The next step is to layer the 12x24 with the slightly larger piece of batting. You can use spray baste or add a few safety pins to keep the layers together as you stitch. This is a fun project to practice free motion quilting by stitching around the circular shapes. If you prefer you can stitch with a walking foot along the seams to hold the two layers together.

Square up your piece with a long ruler, trimming the excess batting from the fabric. Measure the outer fabric piece so you can cut the lining the same size. With right sides together, align the edges and clip in place. Sew the two side seams.
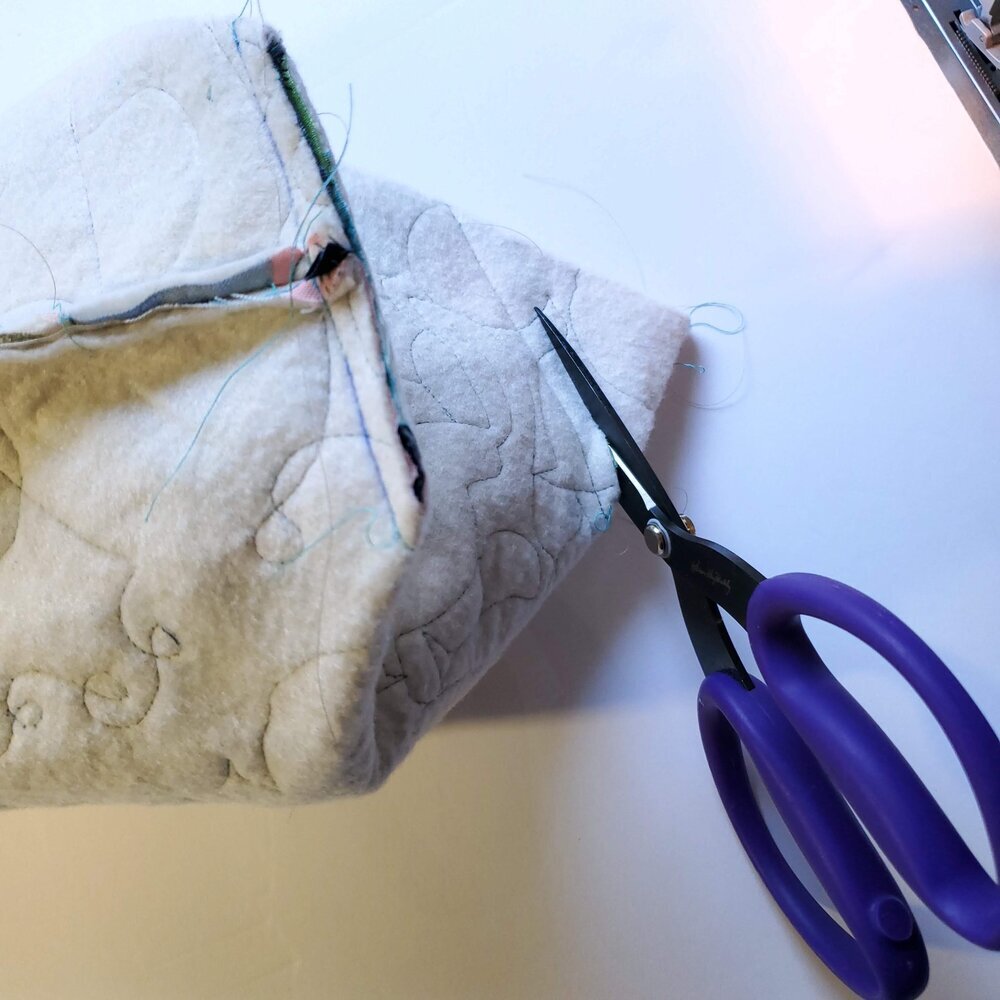
In this next step, you will box the corners by aligning the side seam with the center of the folded bottom creating a point. Measure 2” from the point and mark a line.
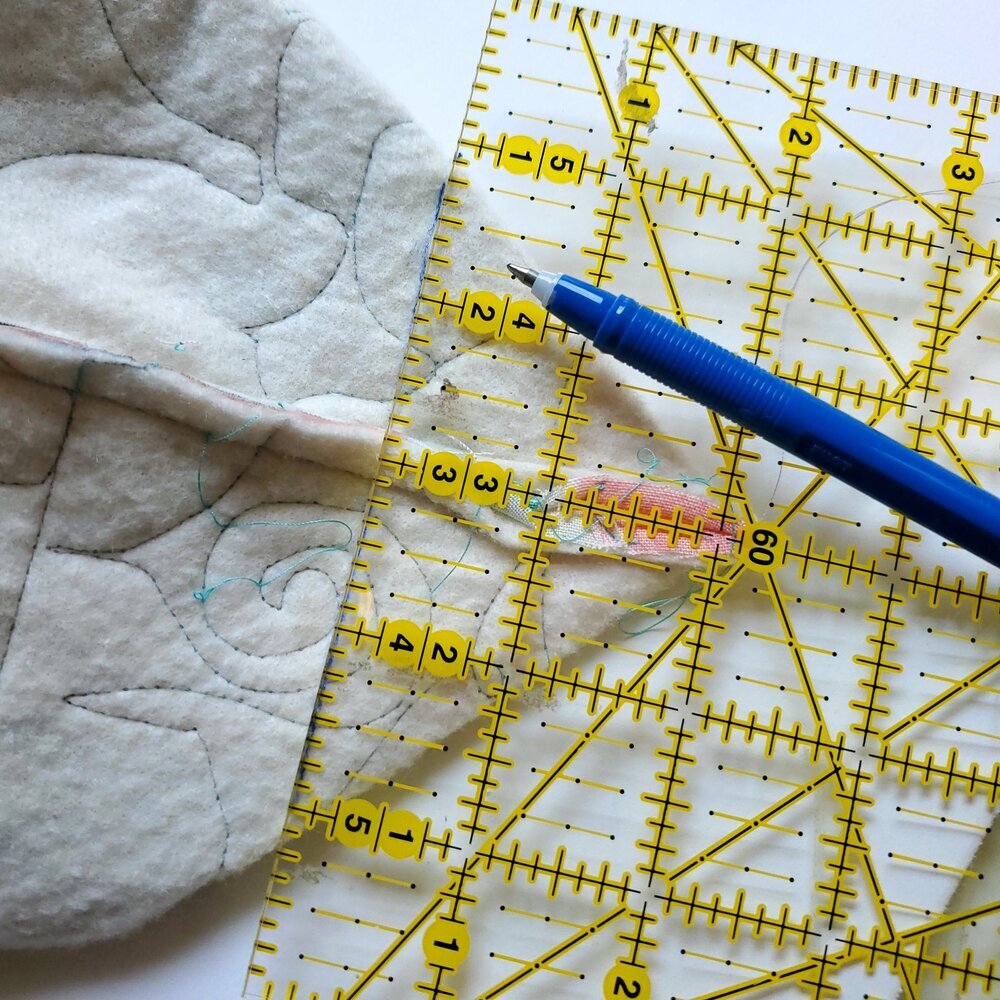
Sew on the line, and trim the seam to about ¼”. You will repeat on the other corner of the bag.
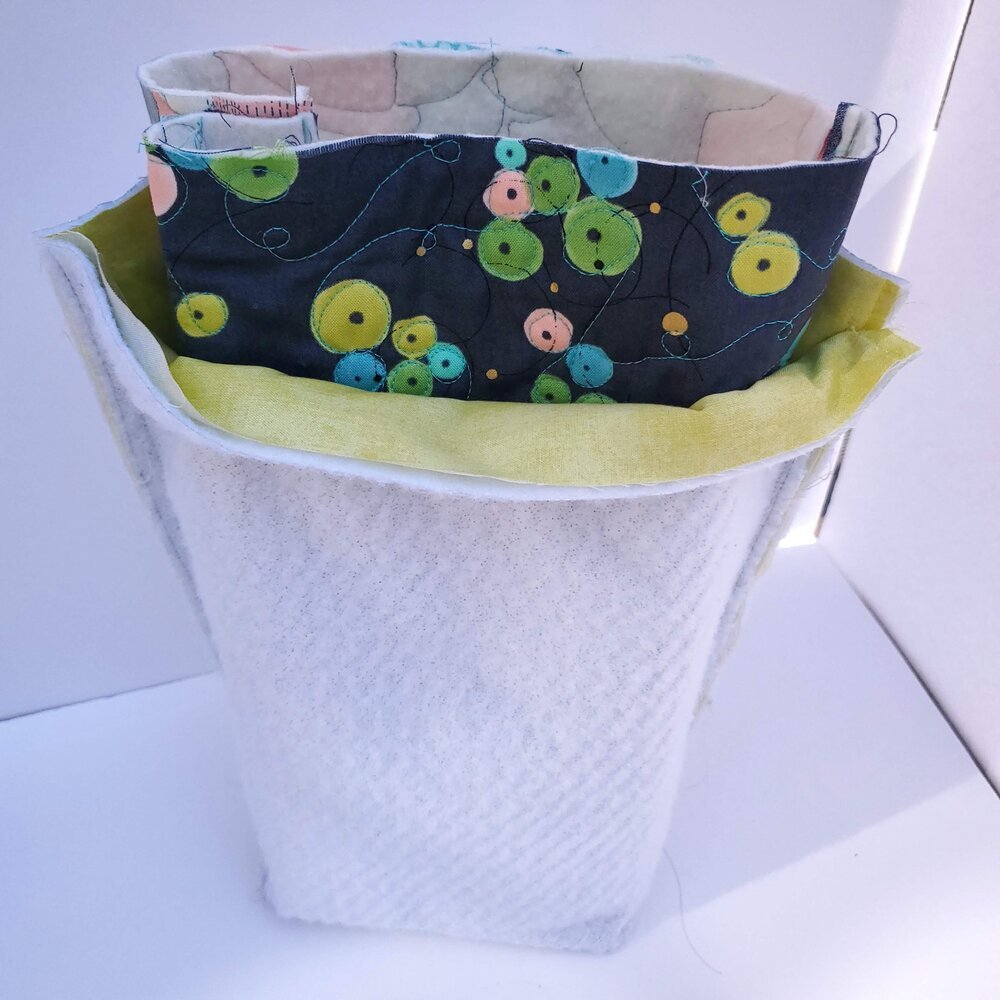
Set aside the outer bag. For the lining to be insulated, you will cut the lining fabric and Pellon Insul-Bright the same size as the outer bag. I find it helpful to take a minute to stitch the lining and Insul-Bright pieces together with about ⅛” seam, using a long stitch length to keep them properly aligned in the next step.
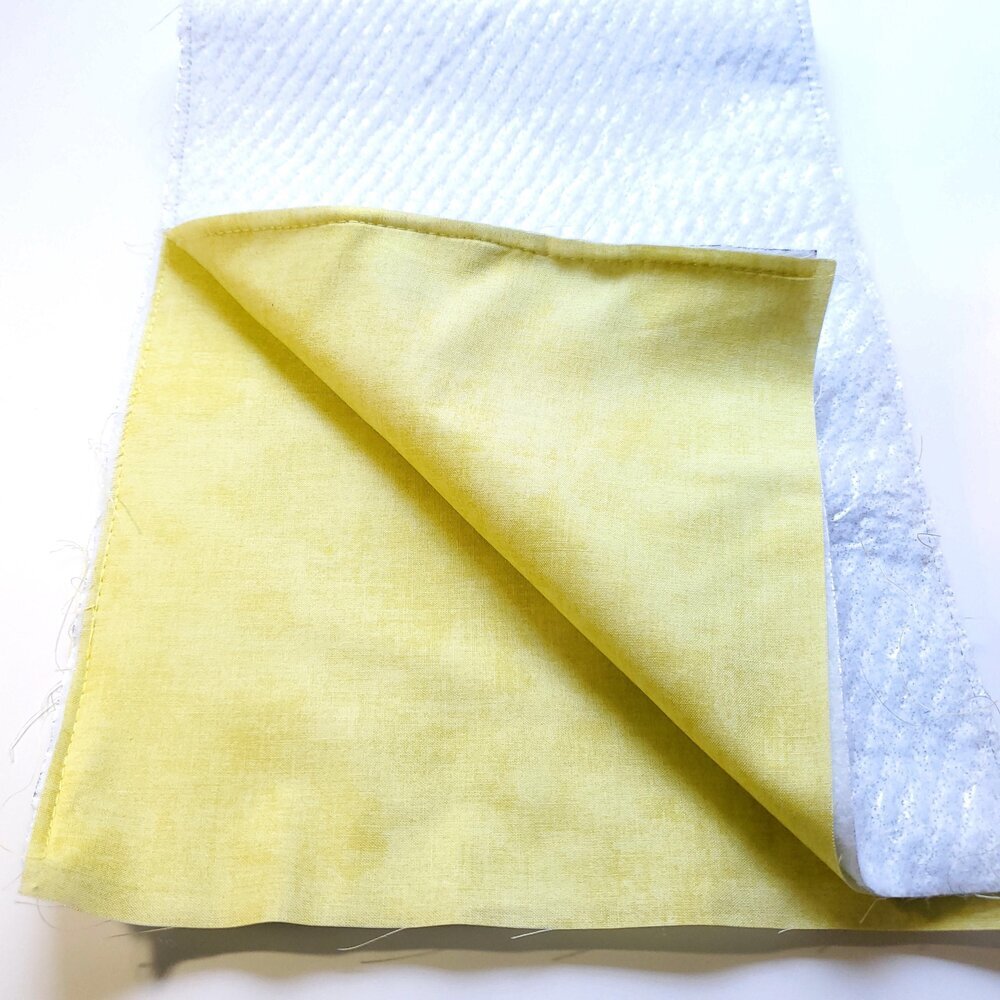
Fold the lining piece in half and sew the same way as you did for the outer piece. Do not iron the Pellon Insul-Bright side because the polyester will melt on your iron.
Insert the outer bag into the lining with the right sides together. Be sure to align the side seams and clip in place.
Remember to leave about a 3” opening to turn the bag.
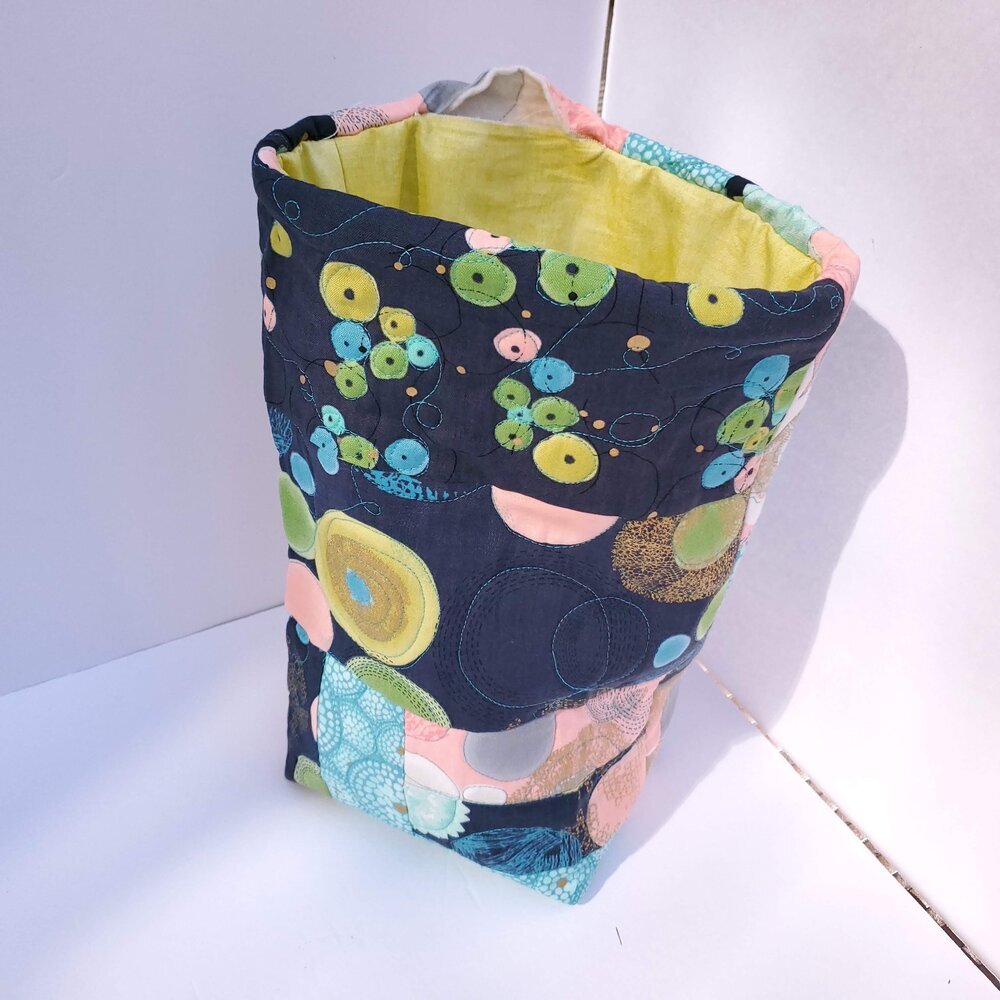
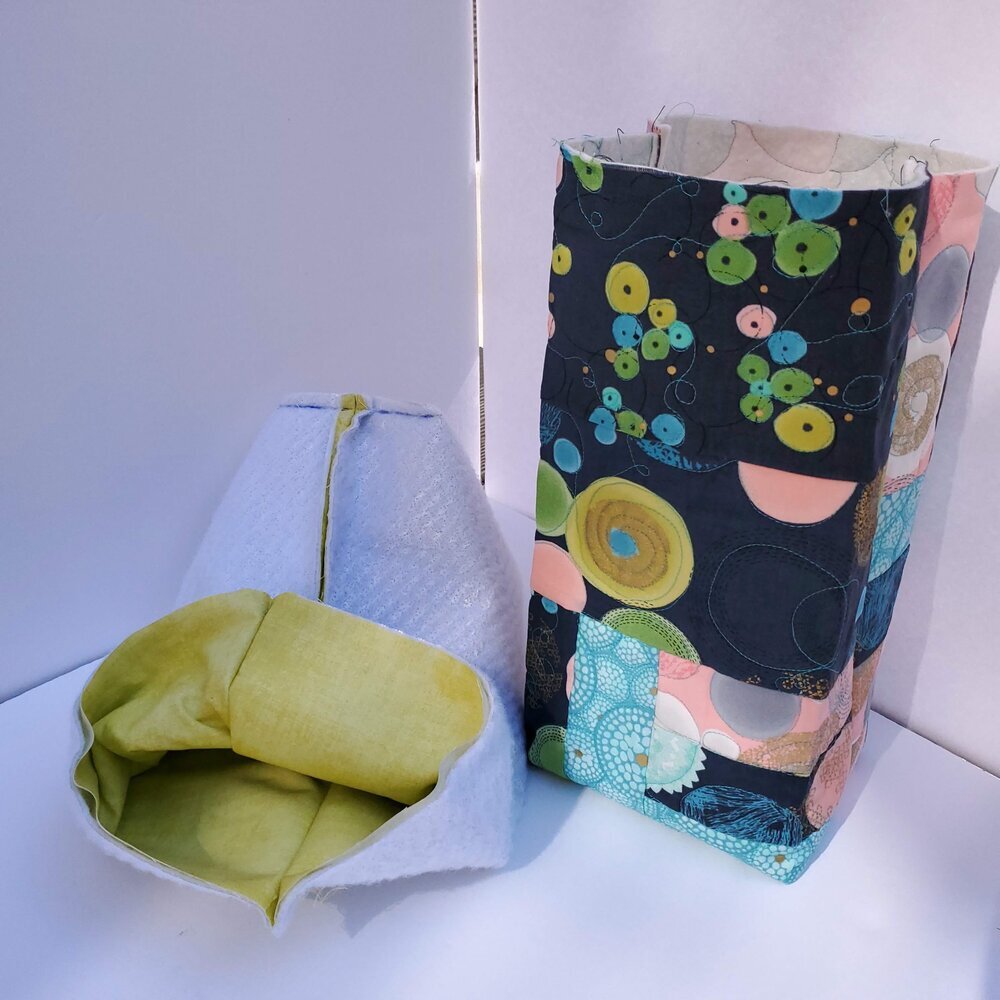
Turn the bag right side out and press the edge carefully to prepare for topstitching ⅛” from the edge of the bag, closing the opening. It looks nice to use a coordinating thread and lengthen the stitch length. Give the bag a final steam press on all the seams to give it a professional finished look. Decide where you want the bag to fold over on the top and press in place with steam. Add the purse hardware or Velcro to close your lunch bag.
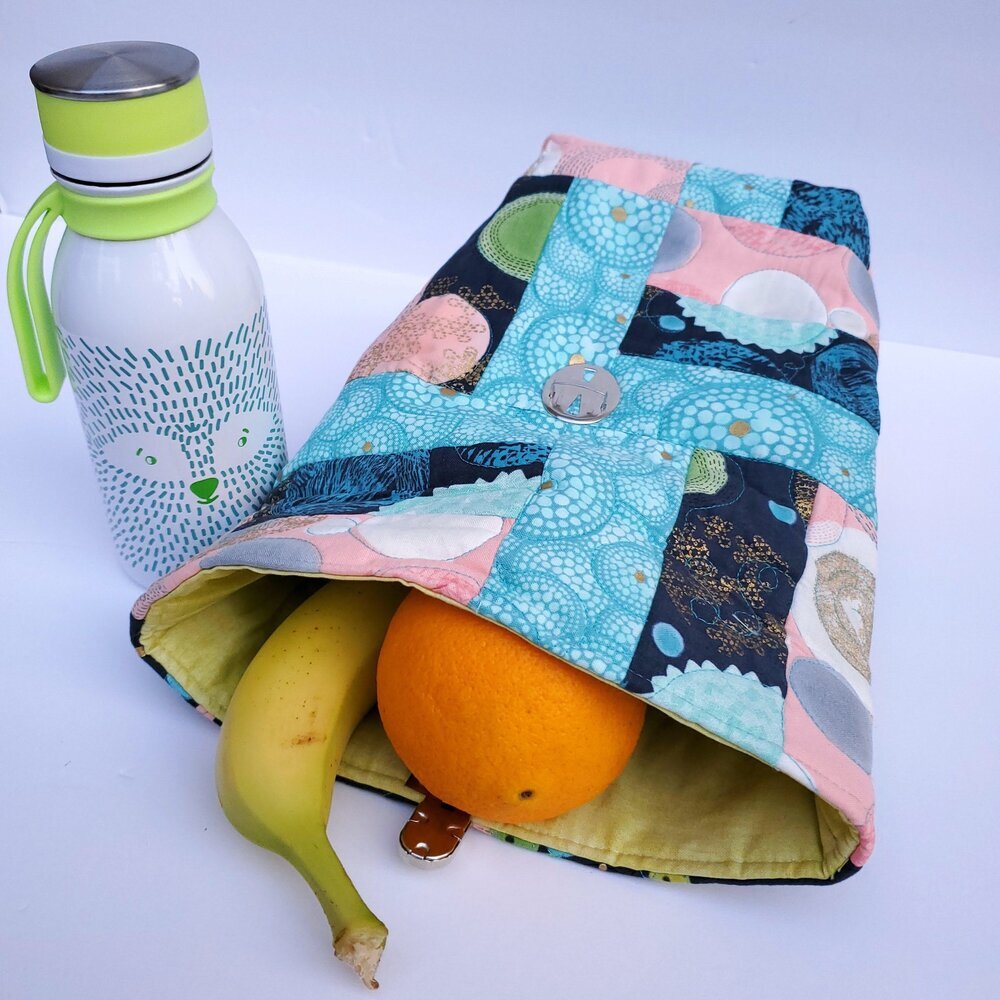
This will be a great gift for anyone going back to school or to replace the boring “brown bag” lunch sack many people take to work with some fun fabrics keeping lunch cool with the insulted layers.