

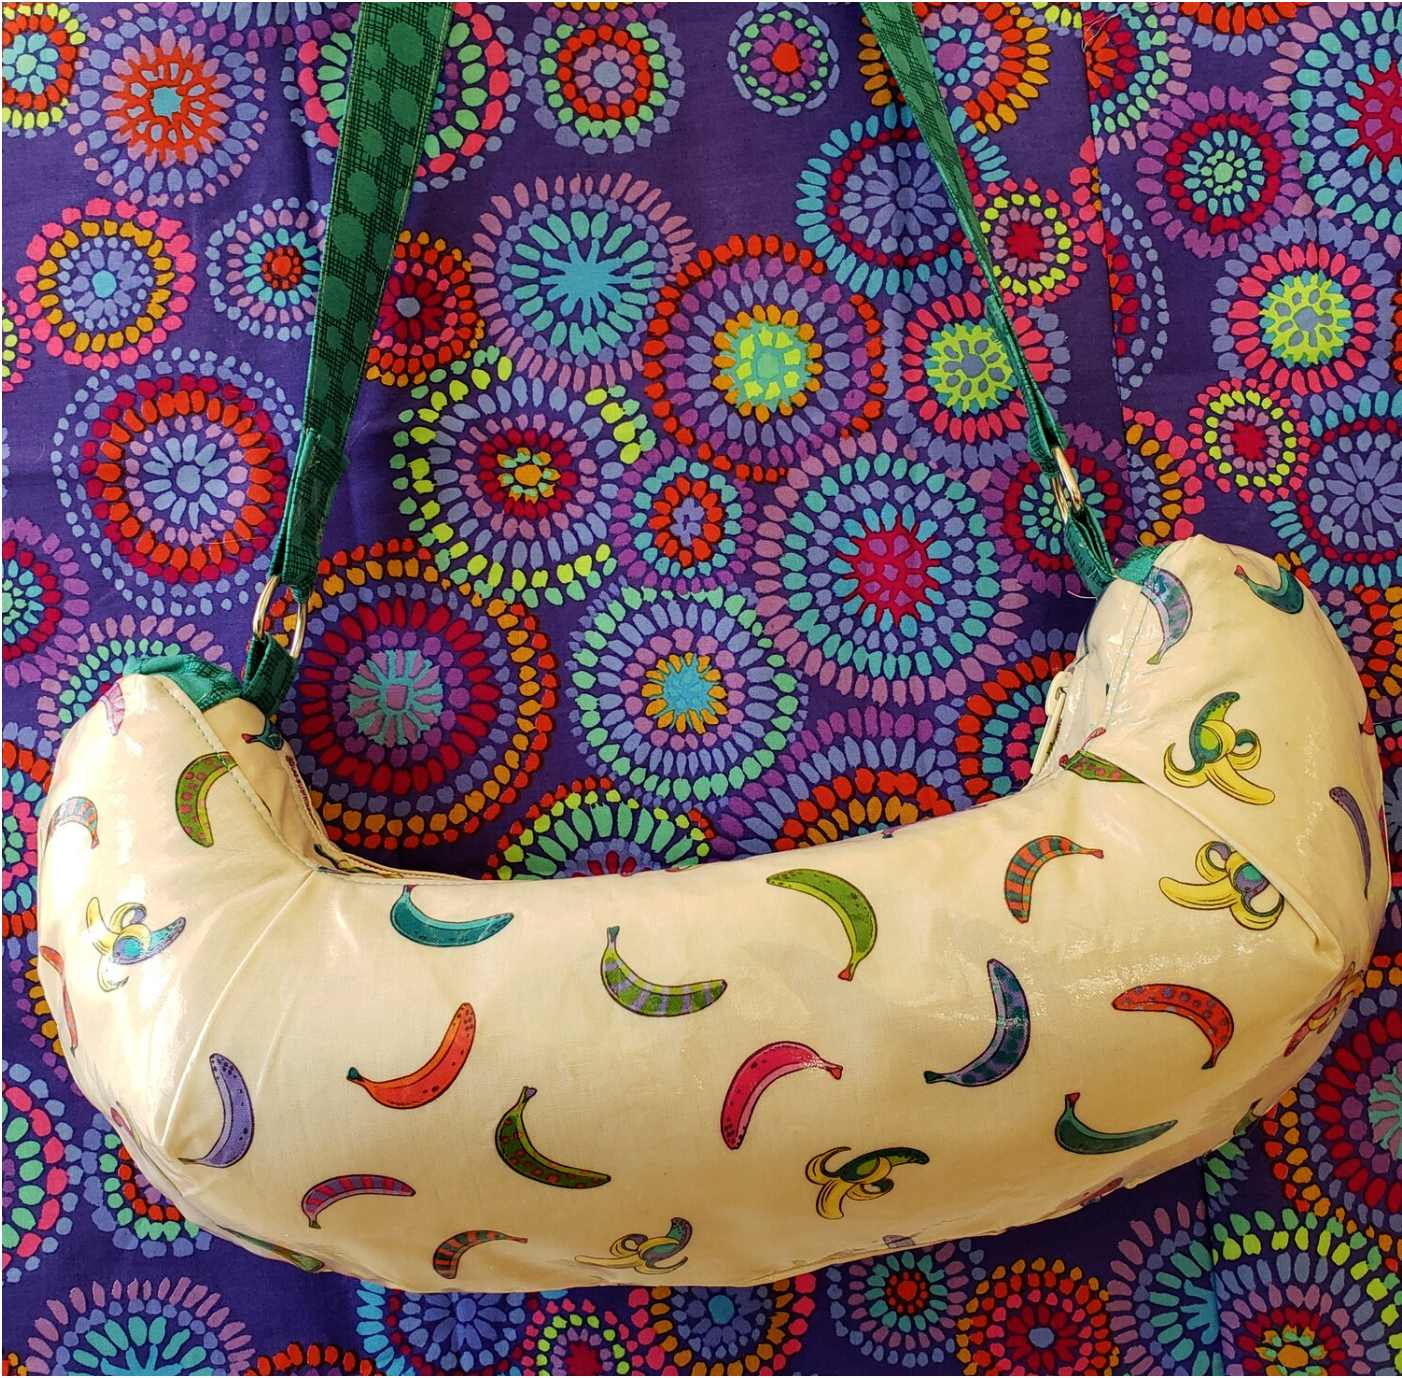
The Banana Bag
11th Mar 2021
Spring break and Summer vacations are just around the corner and this fun and funky bag will be a great accessory for your summer outfit! This banana bag from Sew Hungry Hippie is an easy beginner project with lots of purse-onality featuring Tula Pink’s Monkey wrench banana fabric from the Spring 2020 Puzzle Mystery Quilt. This week, I am trying a new technique using fusible vinyl from Pellon. MADE Everyday gives us a great tutorial on how to use this product on fabric.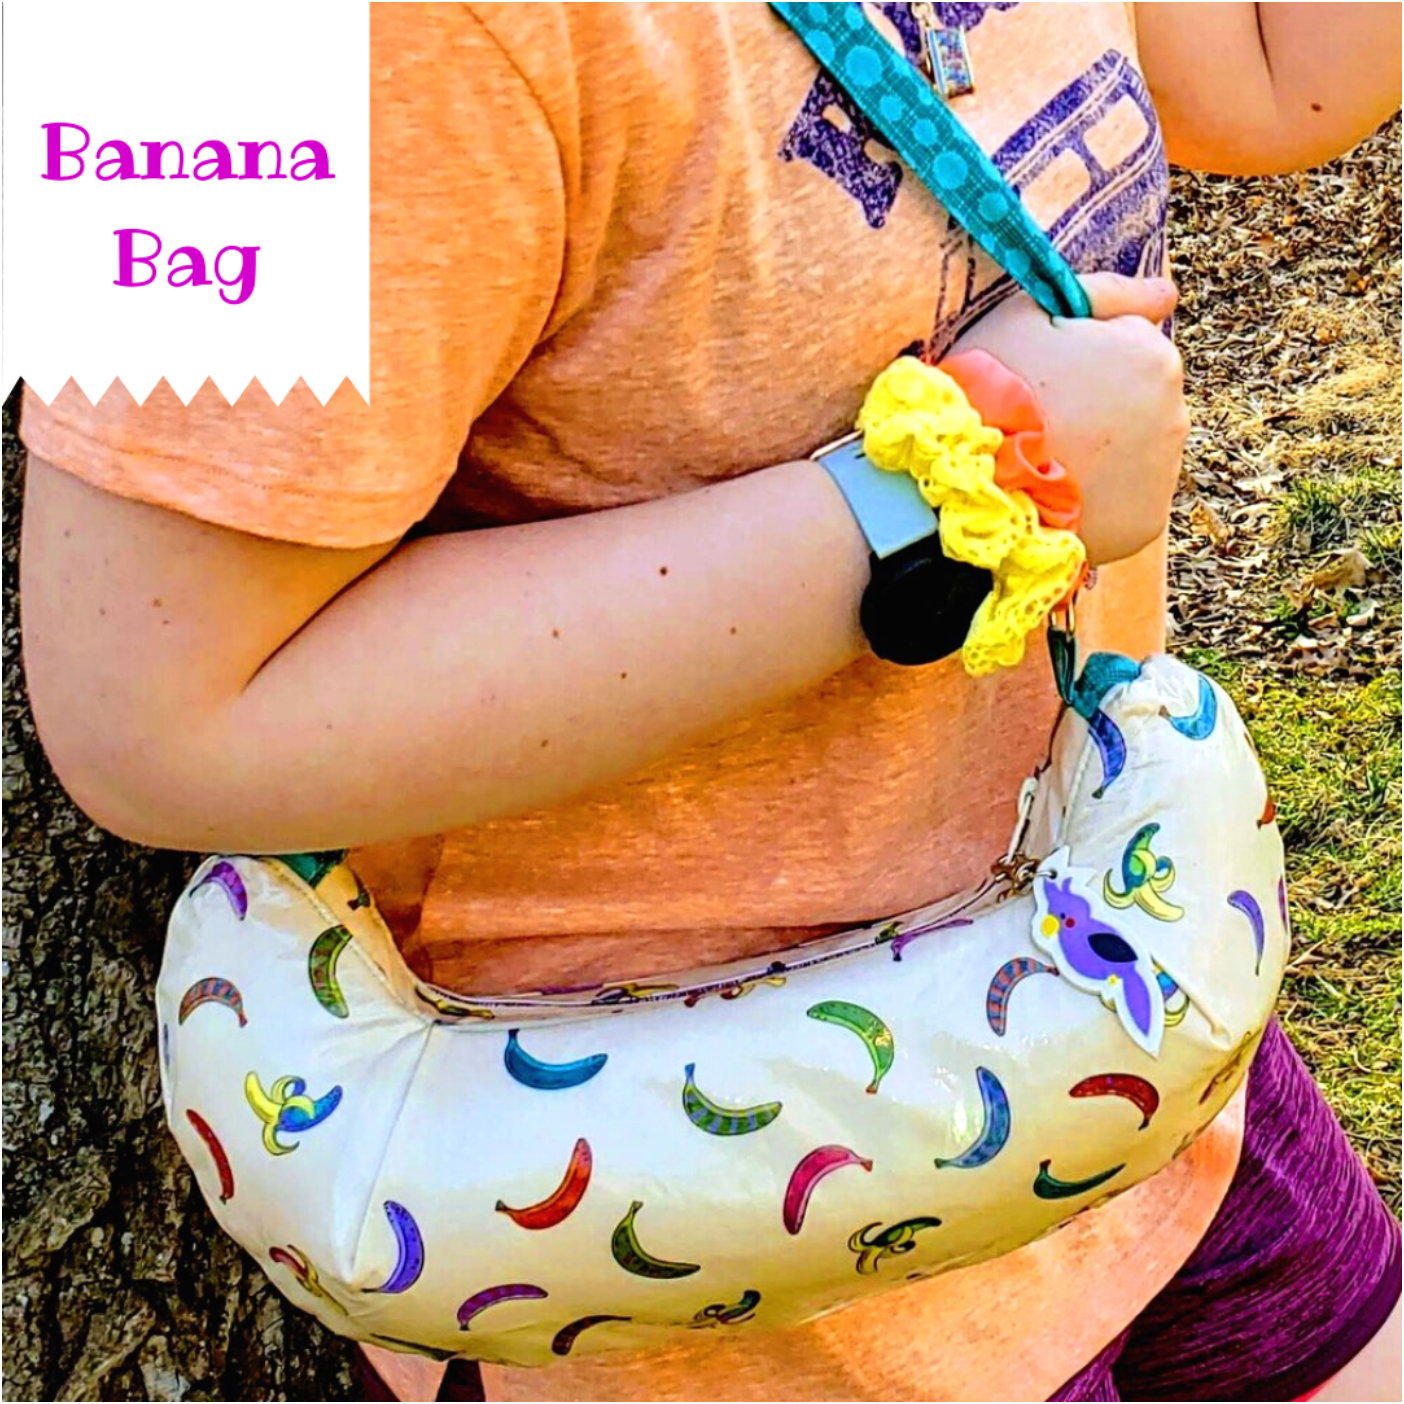
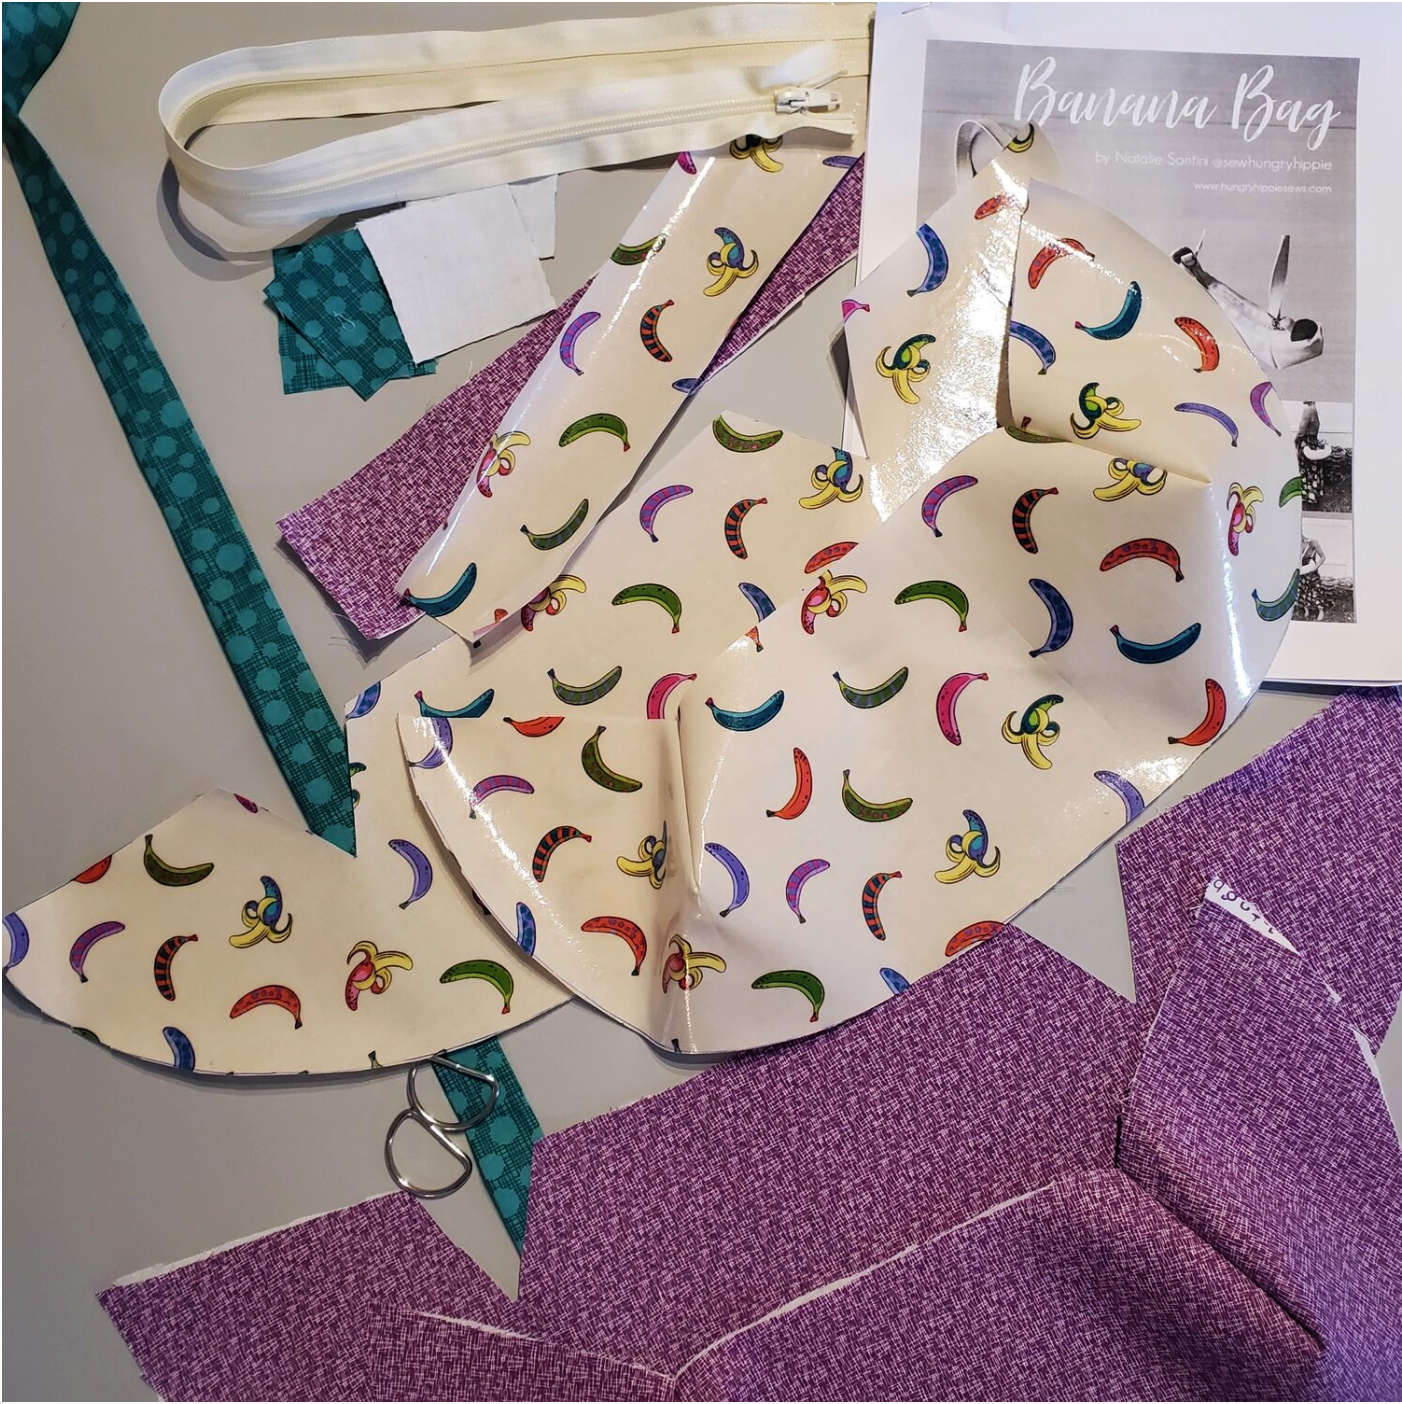 Materials needed:
Fat Quarter for exterior fabric
Fat Quarter for lining fabric
4” wide cut WOF for purse handle
¾ yard of Pellon SF 101 fusible interfacing
Pellon Vinyl Fuse
12” coordinating zipper
Two 1”D rings
Coordinating Aurifil thread from our Chroma membership
Natalie put together this tutorial on YouTube for reference during construction.
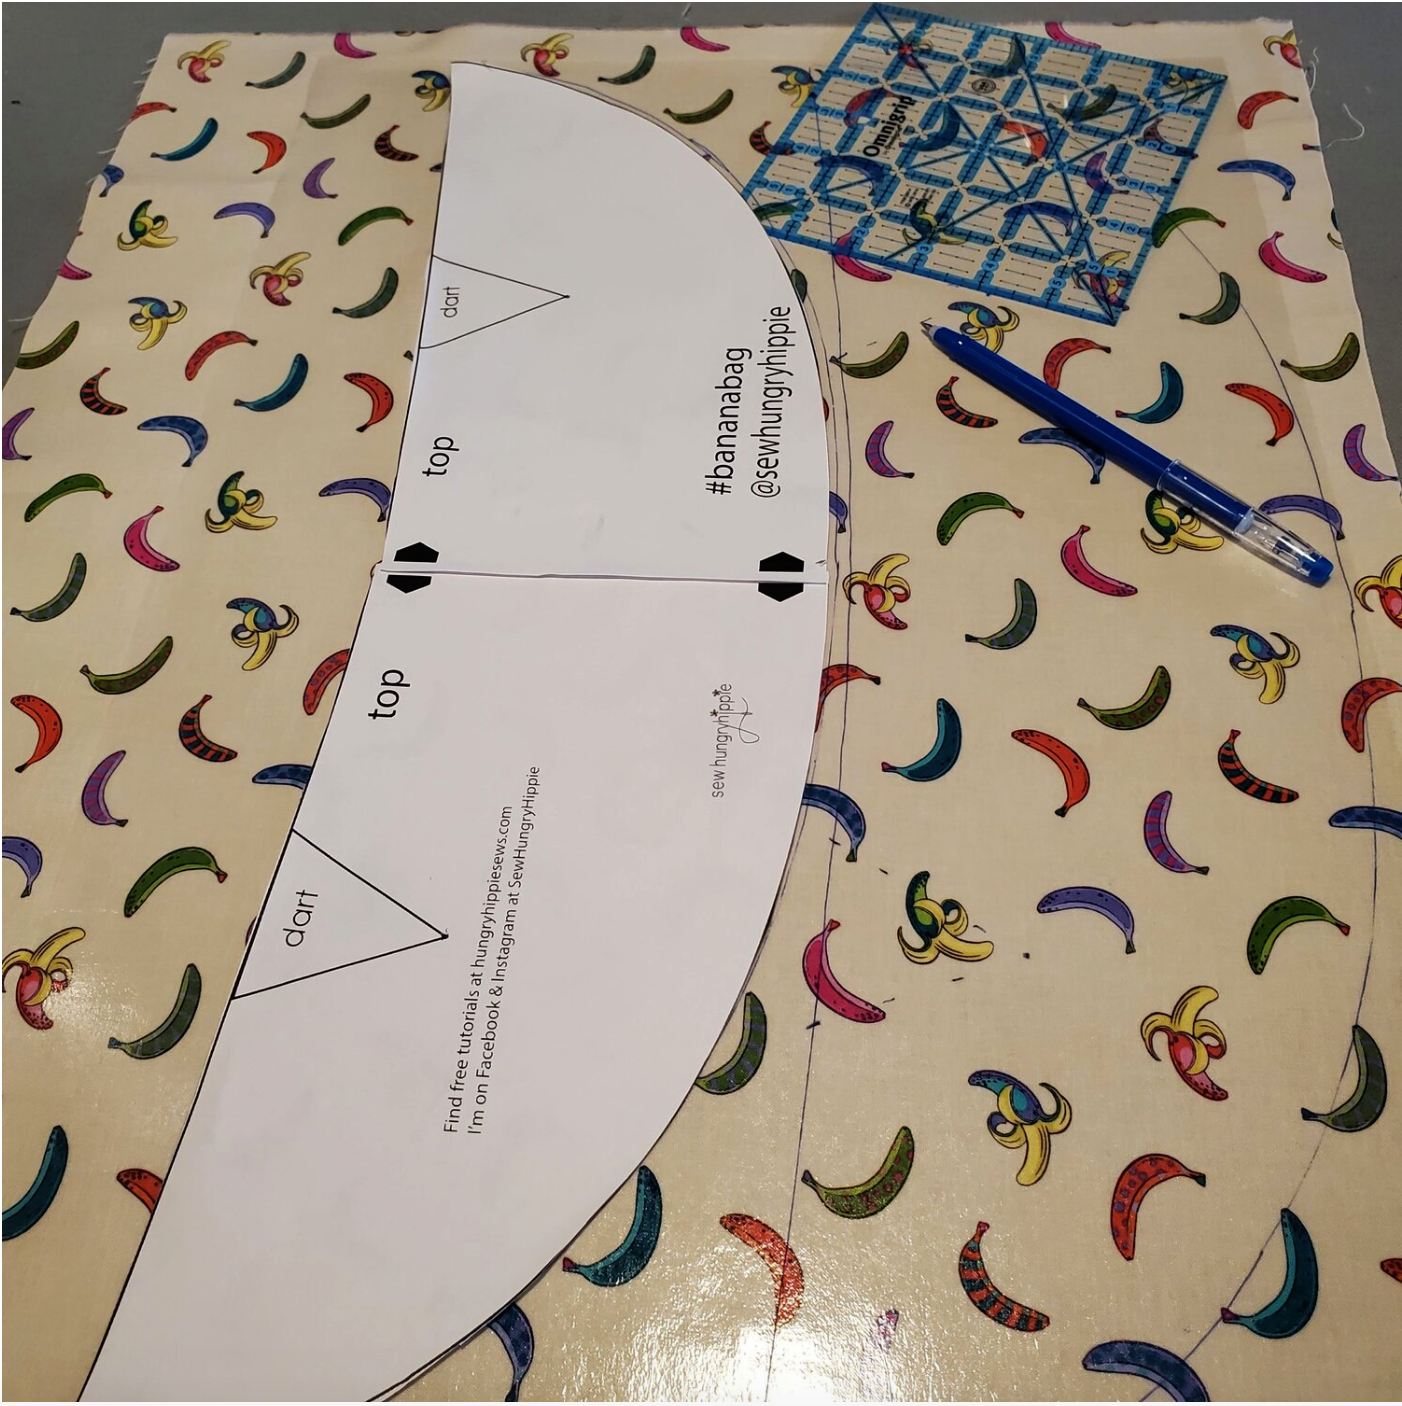
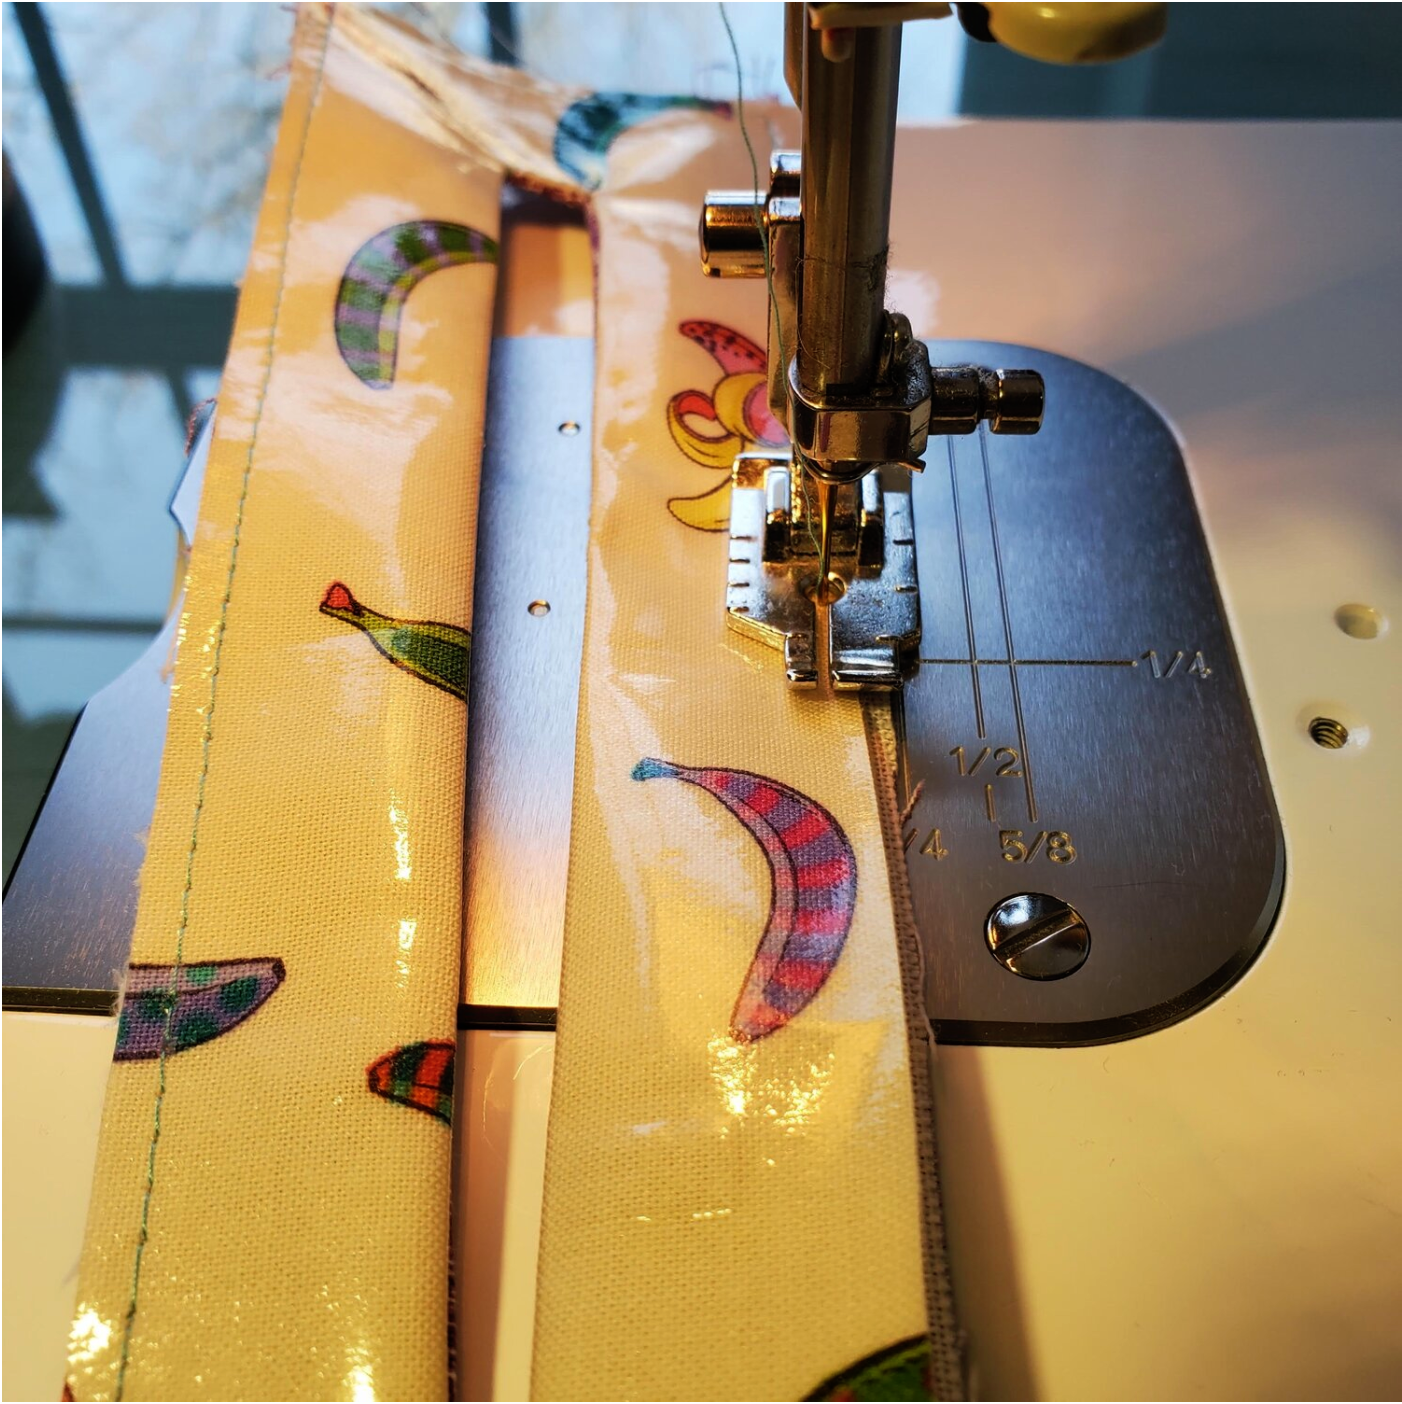
First, you’ll want to purchase and print out the Banana Bag pattern. Using the templates, cut out the exterior and lining fabrics for the purse. I found that it is easier if you iron on the Pellon clear vinyl to the fat quarter before cutting out the shape. Iron the Pellon shape flex fusible interfacing to the fat quarter for the lining pieces, then cut the shape. Mark and cut out the triangle dart on all four pieces. You will also cut the zipper panel pieces and purse handle according to the pattern dimensions. All the seams will be ¼” for this project.
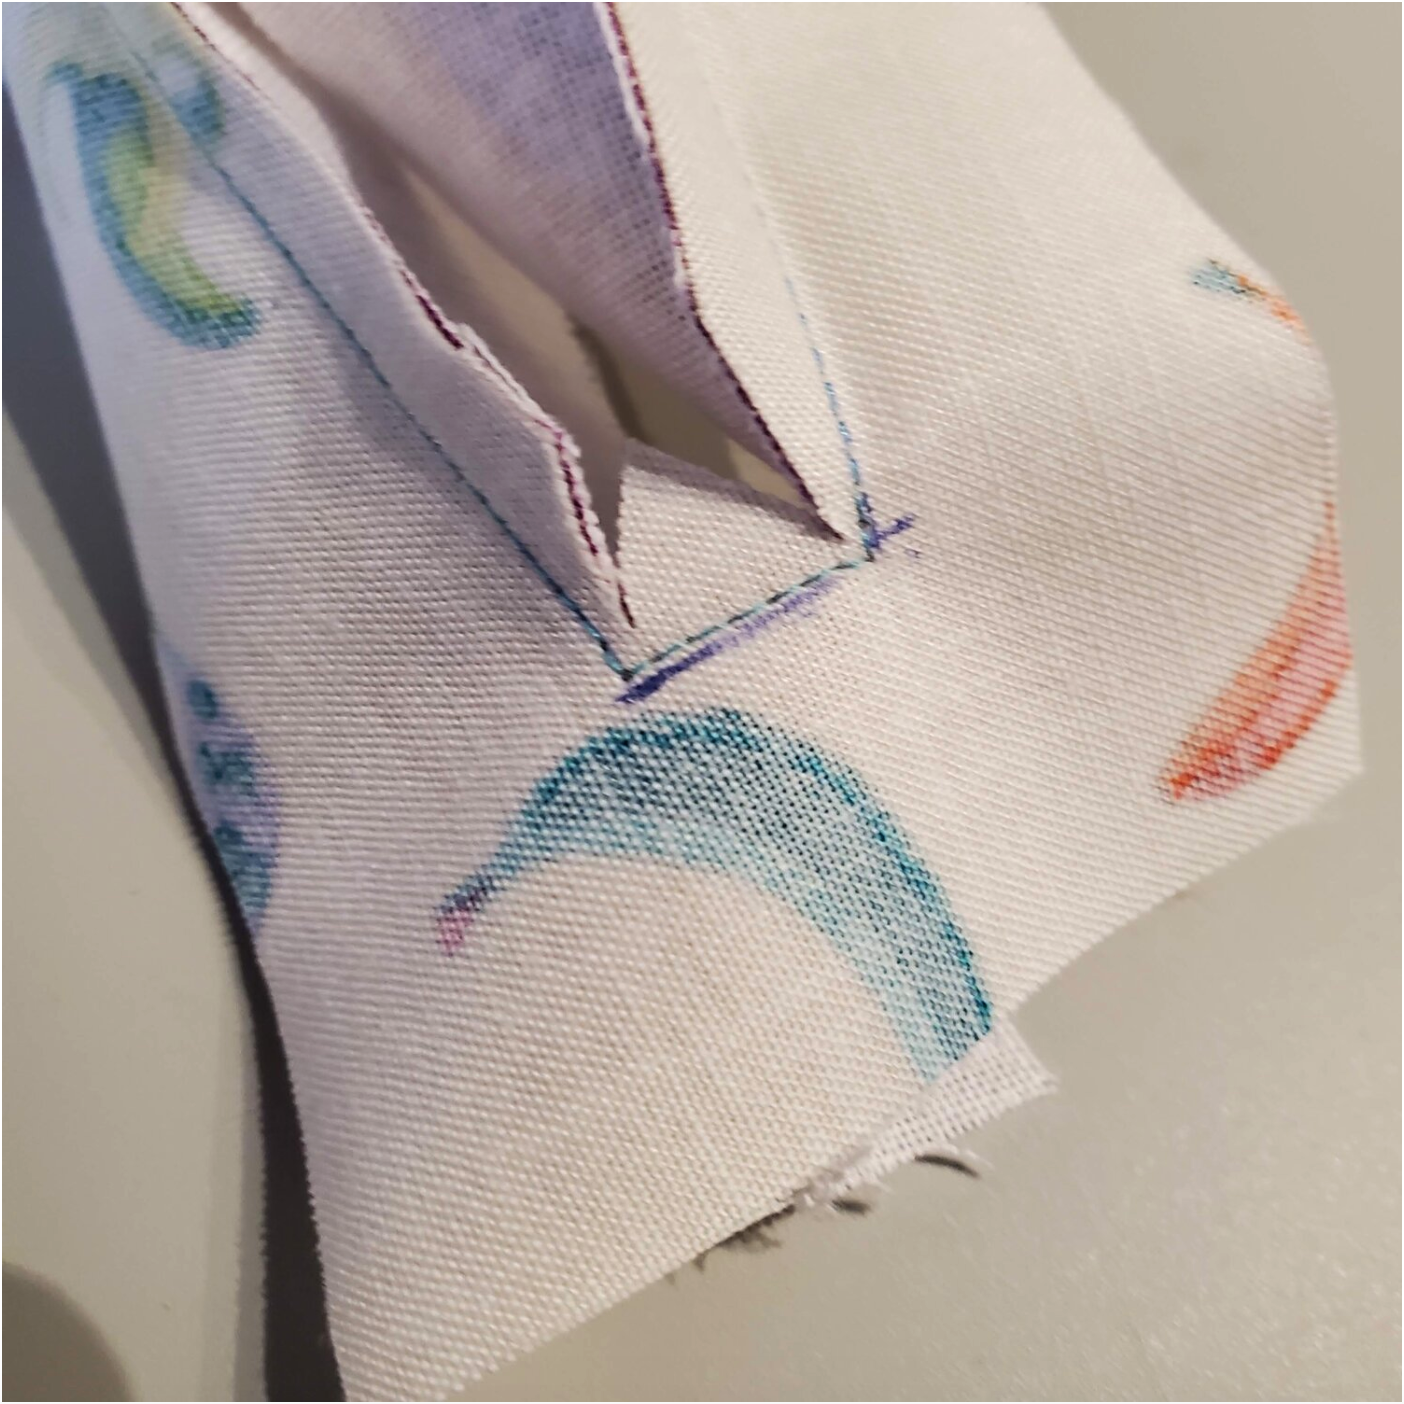
Sew the darts on all four pieces starting at the bottom point sewing to the top edge. Finger press the vinyl darts and iron the lining darts. Next with right sides together, matchup and clip (pins will leave holes in the vinyl) the exterior and lining zipper panel pieces together. You will need to mark the lines for zipper placement. Take a clear ruler and mark 1” from the long bottom edge starting and stopping ½” from the ends creating an 11” long line. Do the same thing ½” above that line creating an 11”x ½” rectangle in the center of the piece. Sew directly on that line to make the zipper opening. Cut a line down the center stopping ¼” from the ends. Cut each end as pictured.
Turn fabric right sides out through the zipper opening and carefully press the opening. Baste ⅛” from the edge around the outer edge to keep the fabric aligned properly.
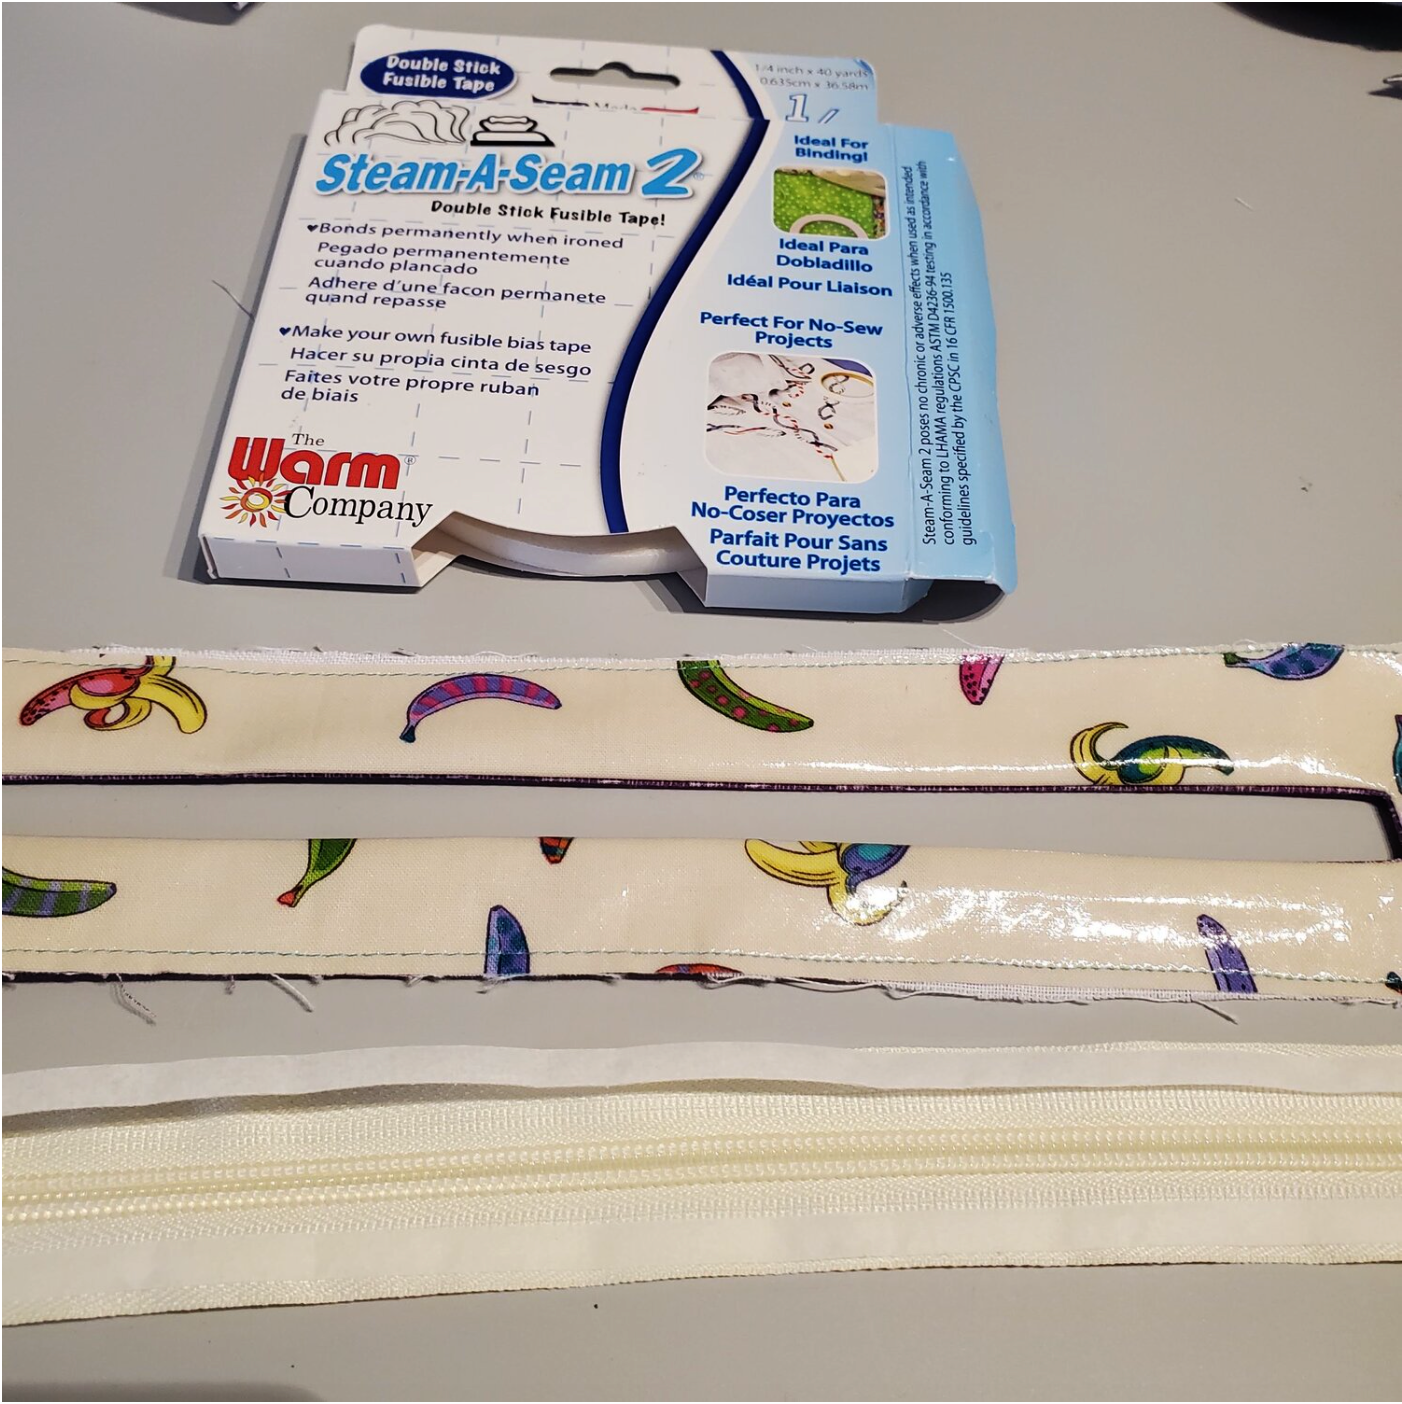
Now it is time to add the zipper. I like to use ¼” Steam a seam to hold the zipper in place along the edges as I topstitch.
Topstitch the zipper in place with a coordinating thread and set aside.
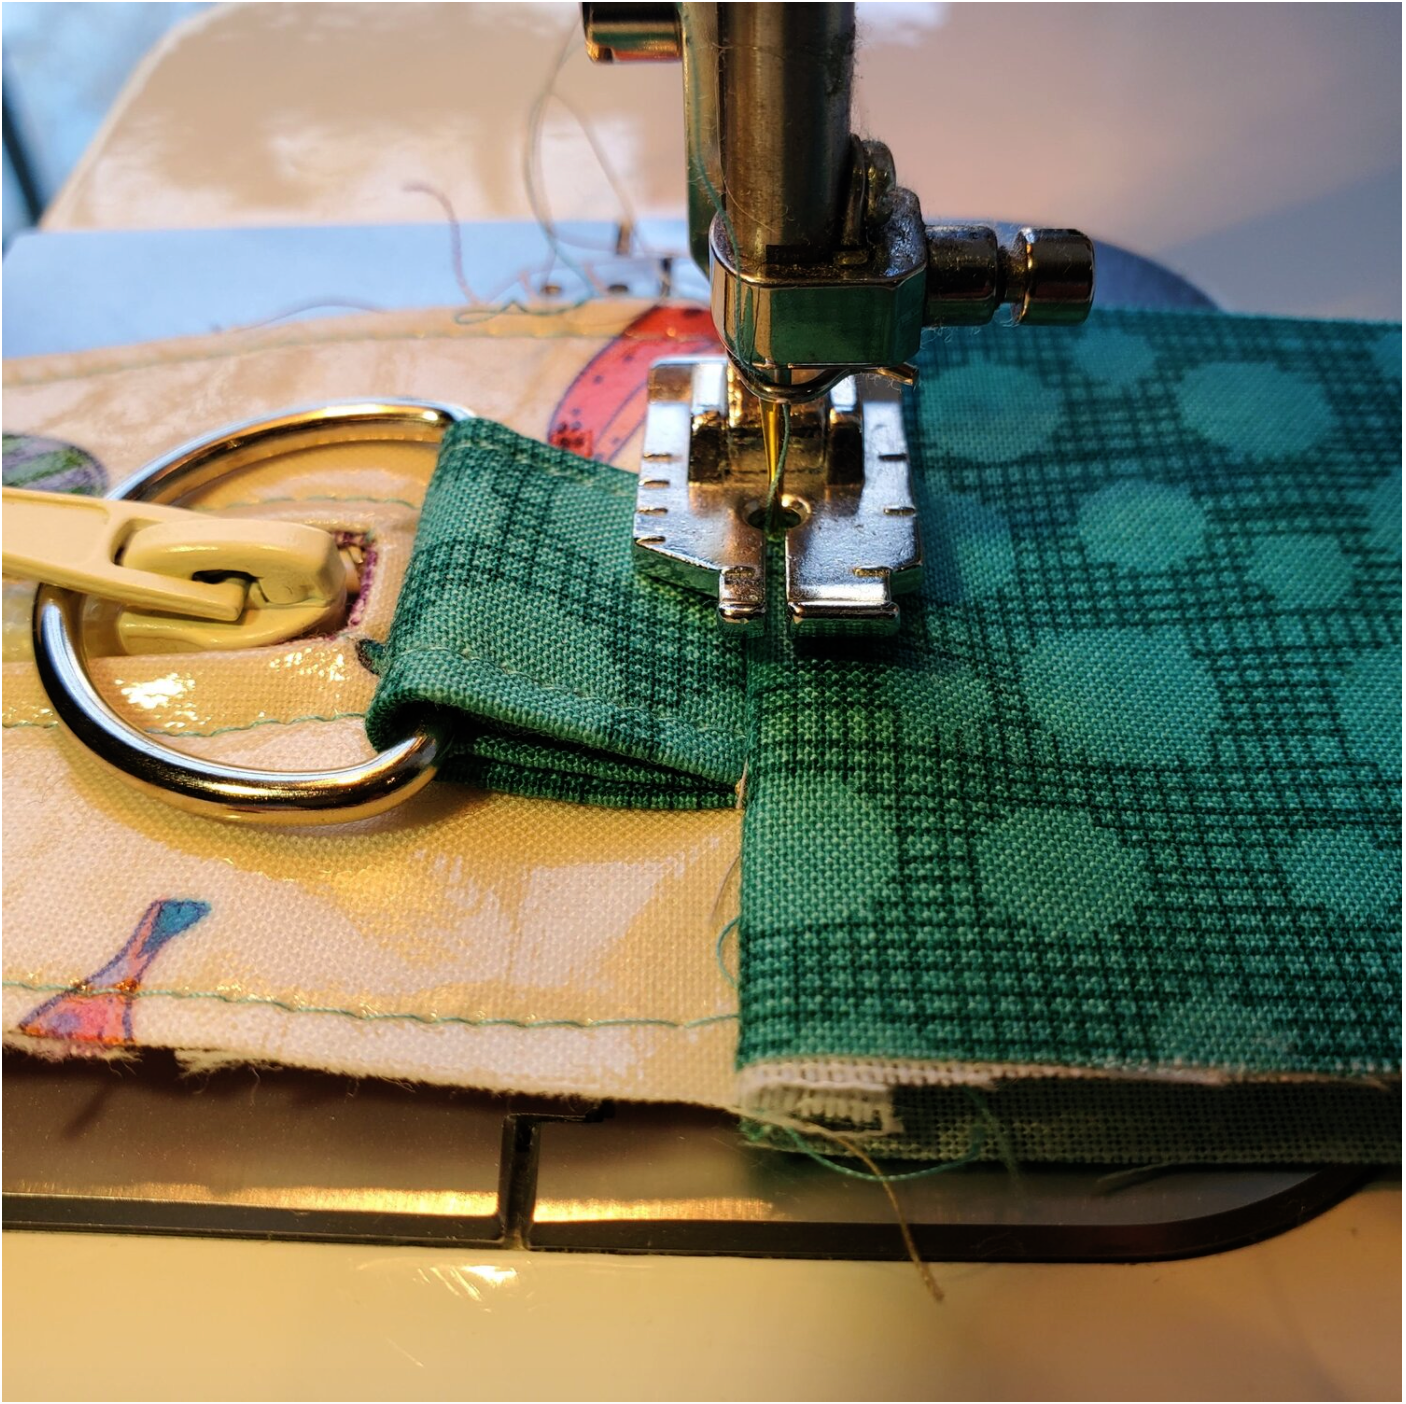
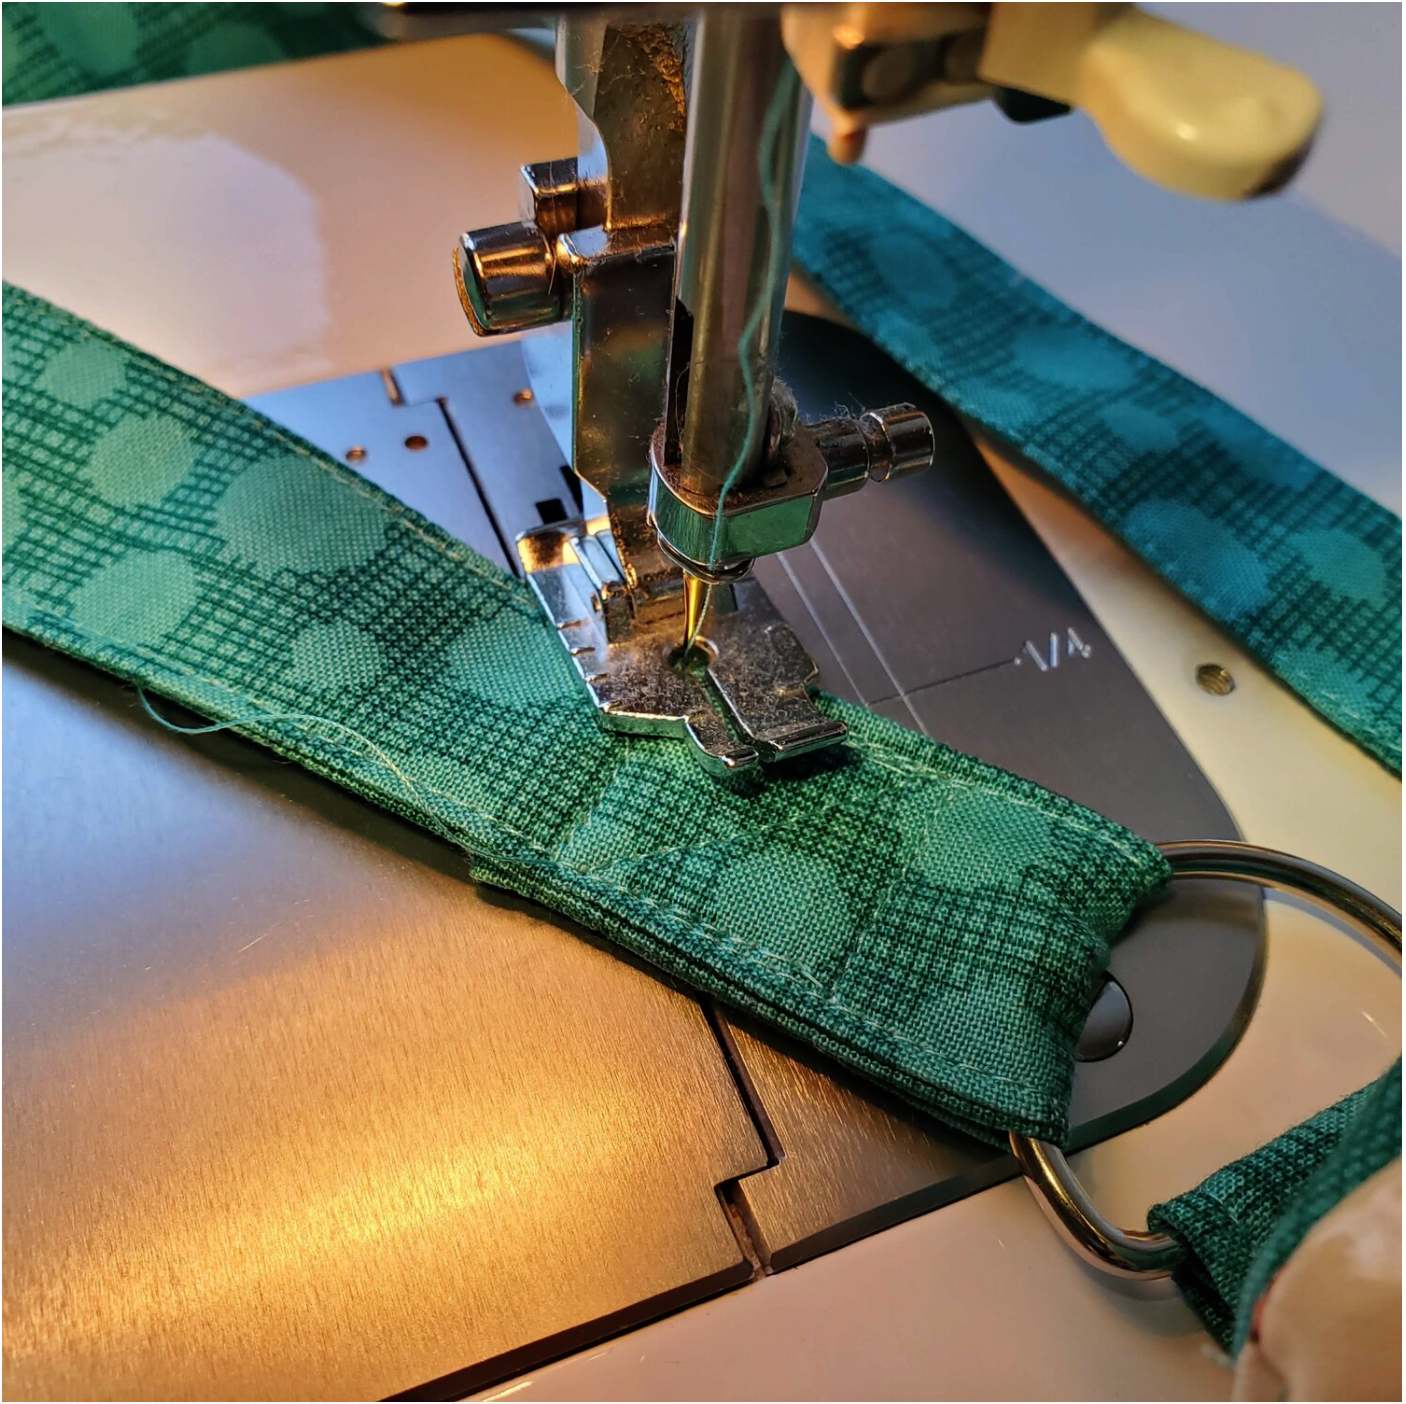
Take the handle piece of fabric and trim off the selvage edges, then iron on the fusible interfacing. Fold the long edges in half and press in place. Open up the fold and fold the outer edges to the ironed mark, pressing as you go along. Fold on the original line and press in place. The raw edges should be enclosed in the fold and ready to take to the machine to top stitch ⅛” from all the edges. I then cut two 2” pieces from the end to use as a loop to attach the D ring to the zipper panel ends. You will need to prepare two of the squares with fusible interfacing one for each side paired with a plain one.
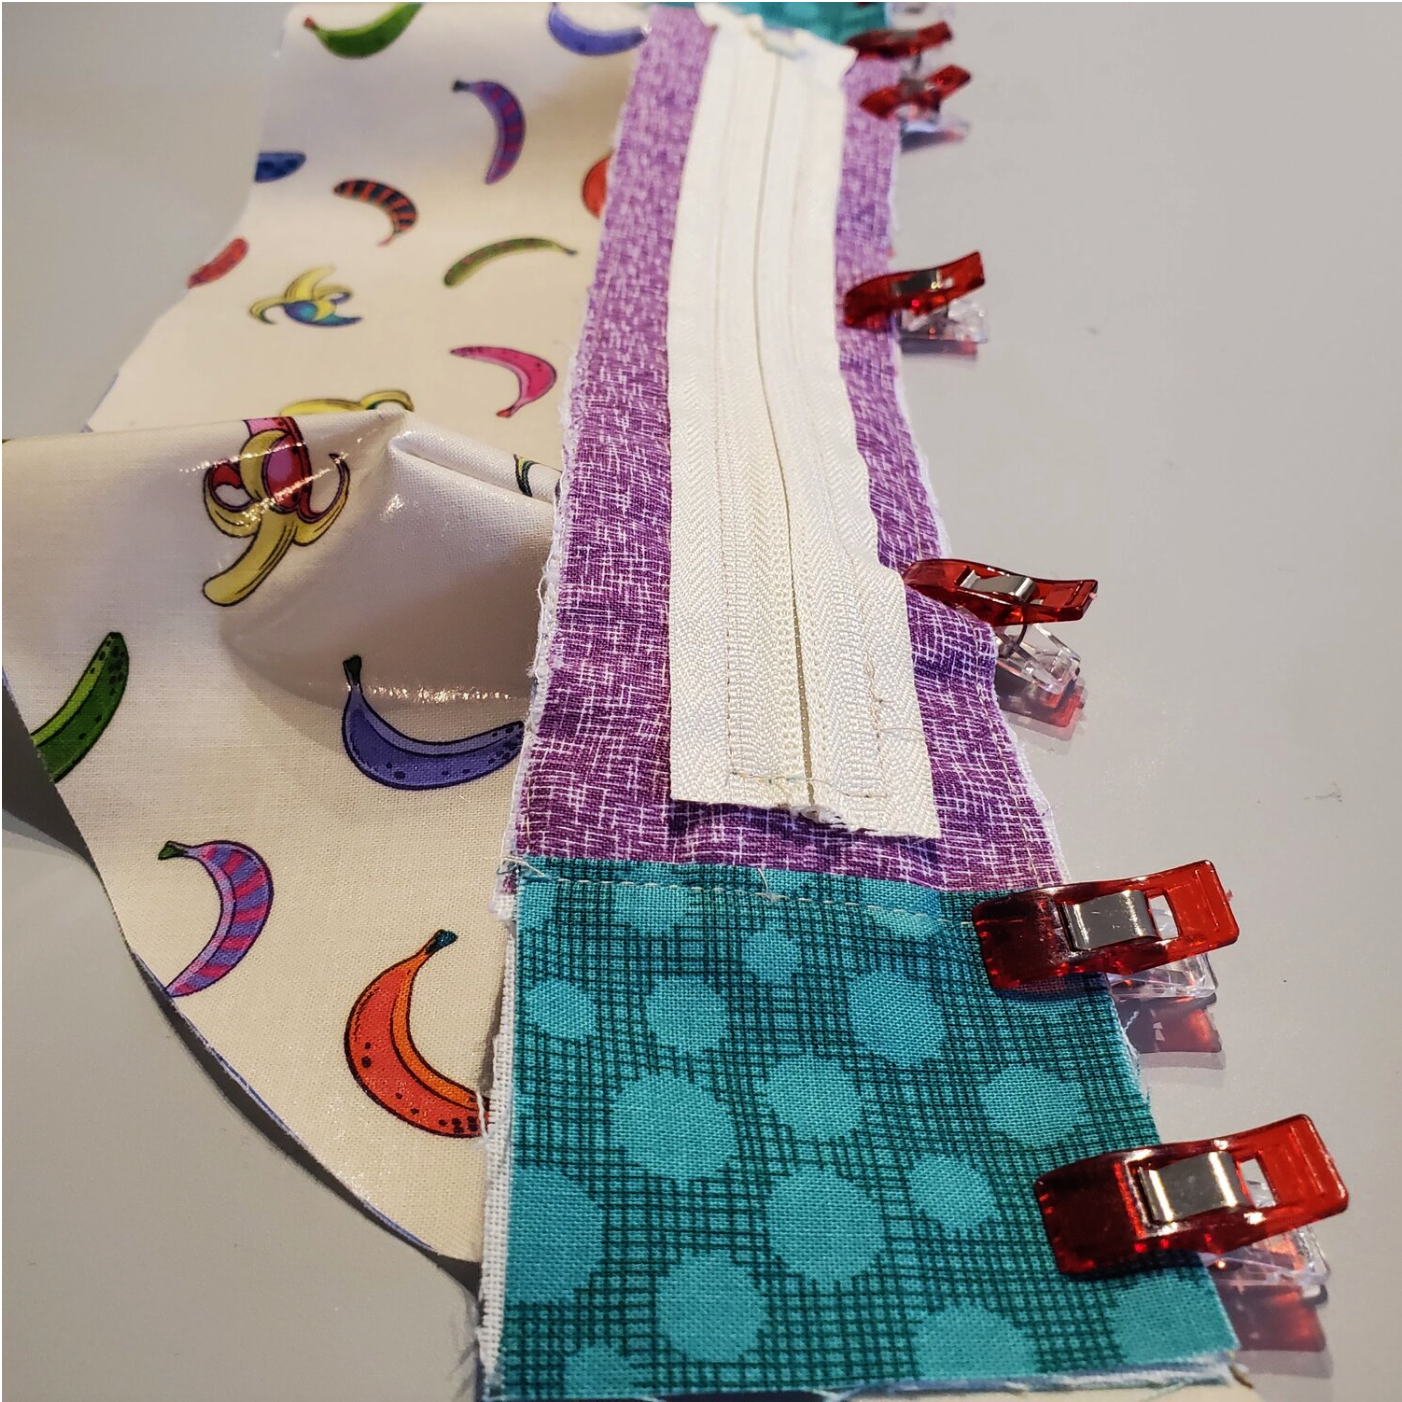
Sandwich the interfaced square right side down on the zipper panel with the 2” loop holding the D ring and matching square on the back. Clip in place and sew. Fold back and top stitch ⅛” from the edge. Repeat on the other end of the zipper panel.
Next, you will construct the body of the purse. With right sides together, using the exterior fabric piece and the zipper panel, align the pieces and clip in place. Using a long stitch baste in place ⅛” from the edge.

Repeat the process with the lining piece this time sewing the ¼” seam. Turn the right side out and press carefully. Top stitch ⅛” from the edge with coordinating thread.
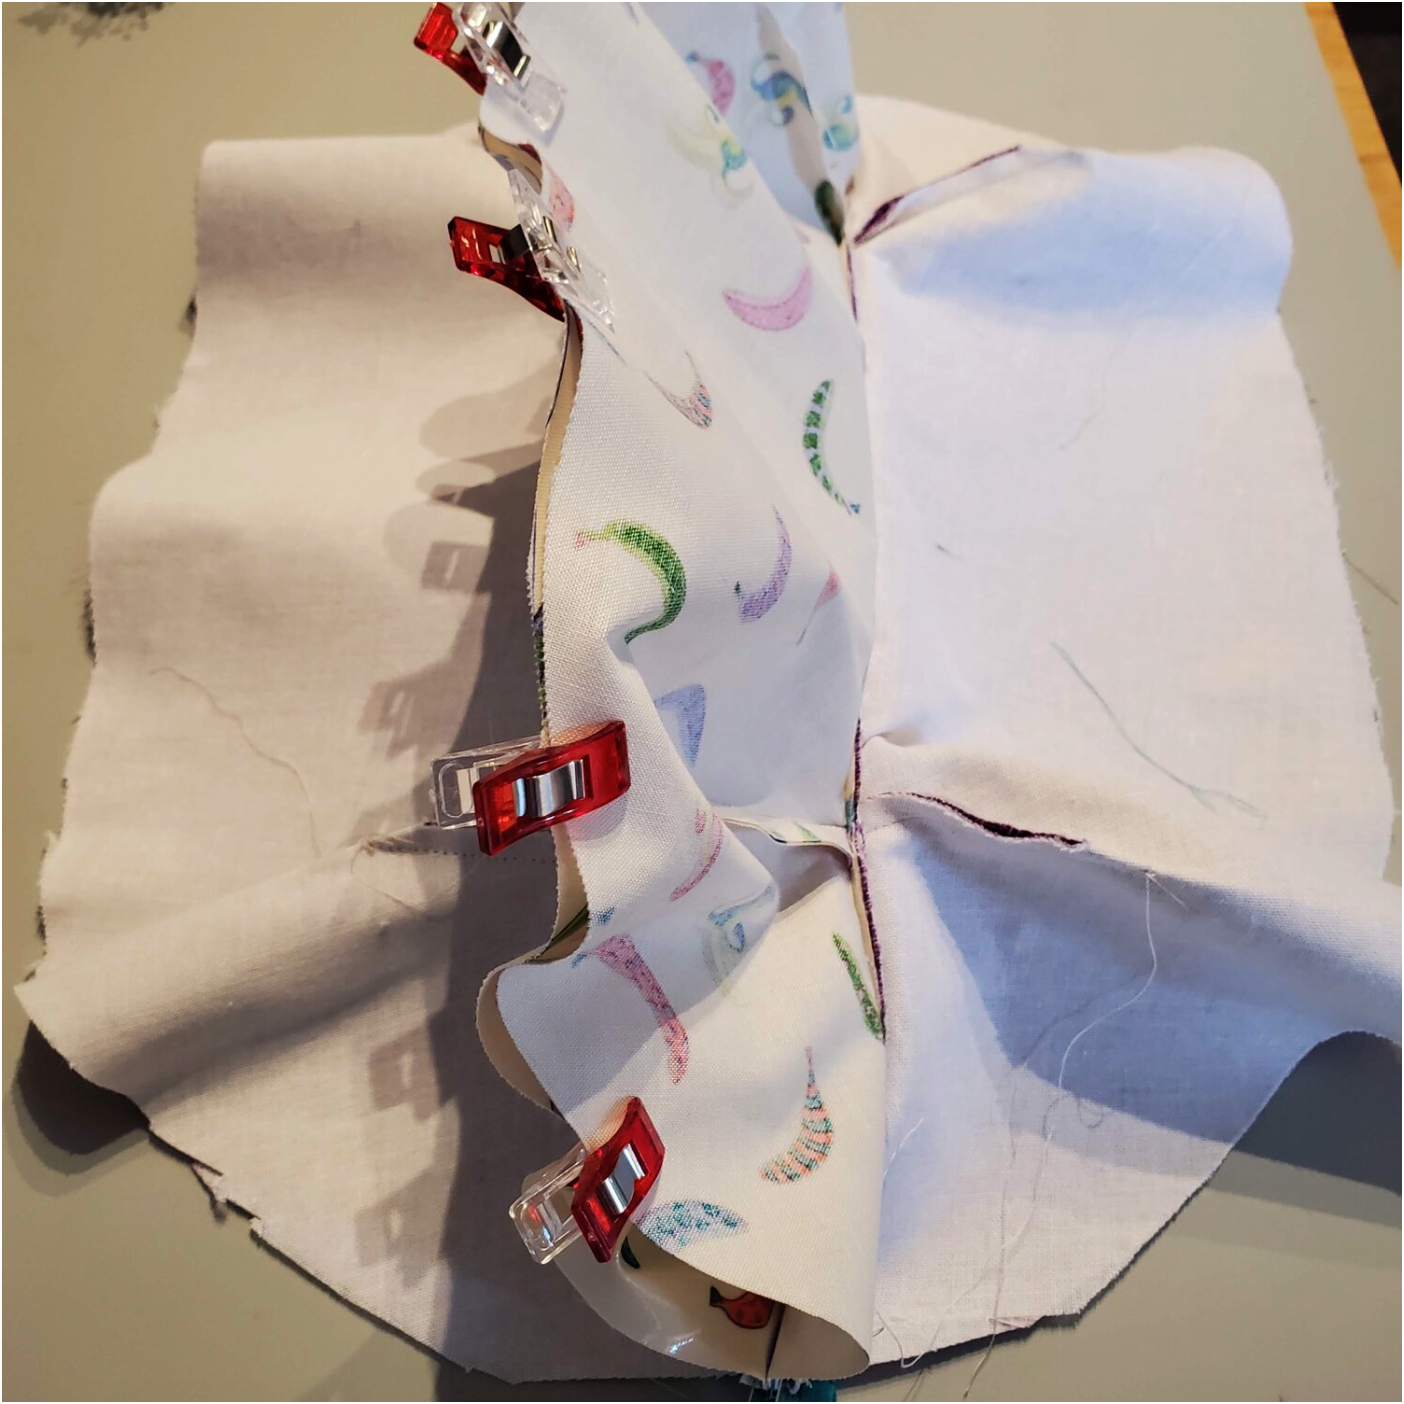
Repeat the process on the other half of the purse. In the next step it is very important to remember to OPEN the zipper before moving on. Take the bottom of the exterior fabric pieces bringing the right sides together matching the darts and clip in place. Do the same with the lining using pins to hold it together.
Sew starting in the middle of the bottom edge of the lining sewing all the way around the oval shape stopping 5” before you get to where you started the stitching leaving an opening for turning in the lining.
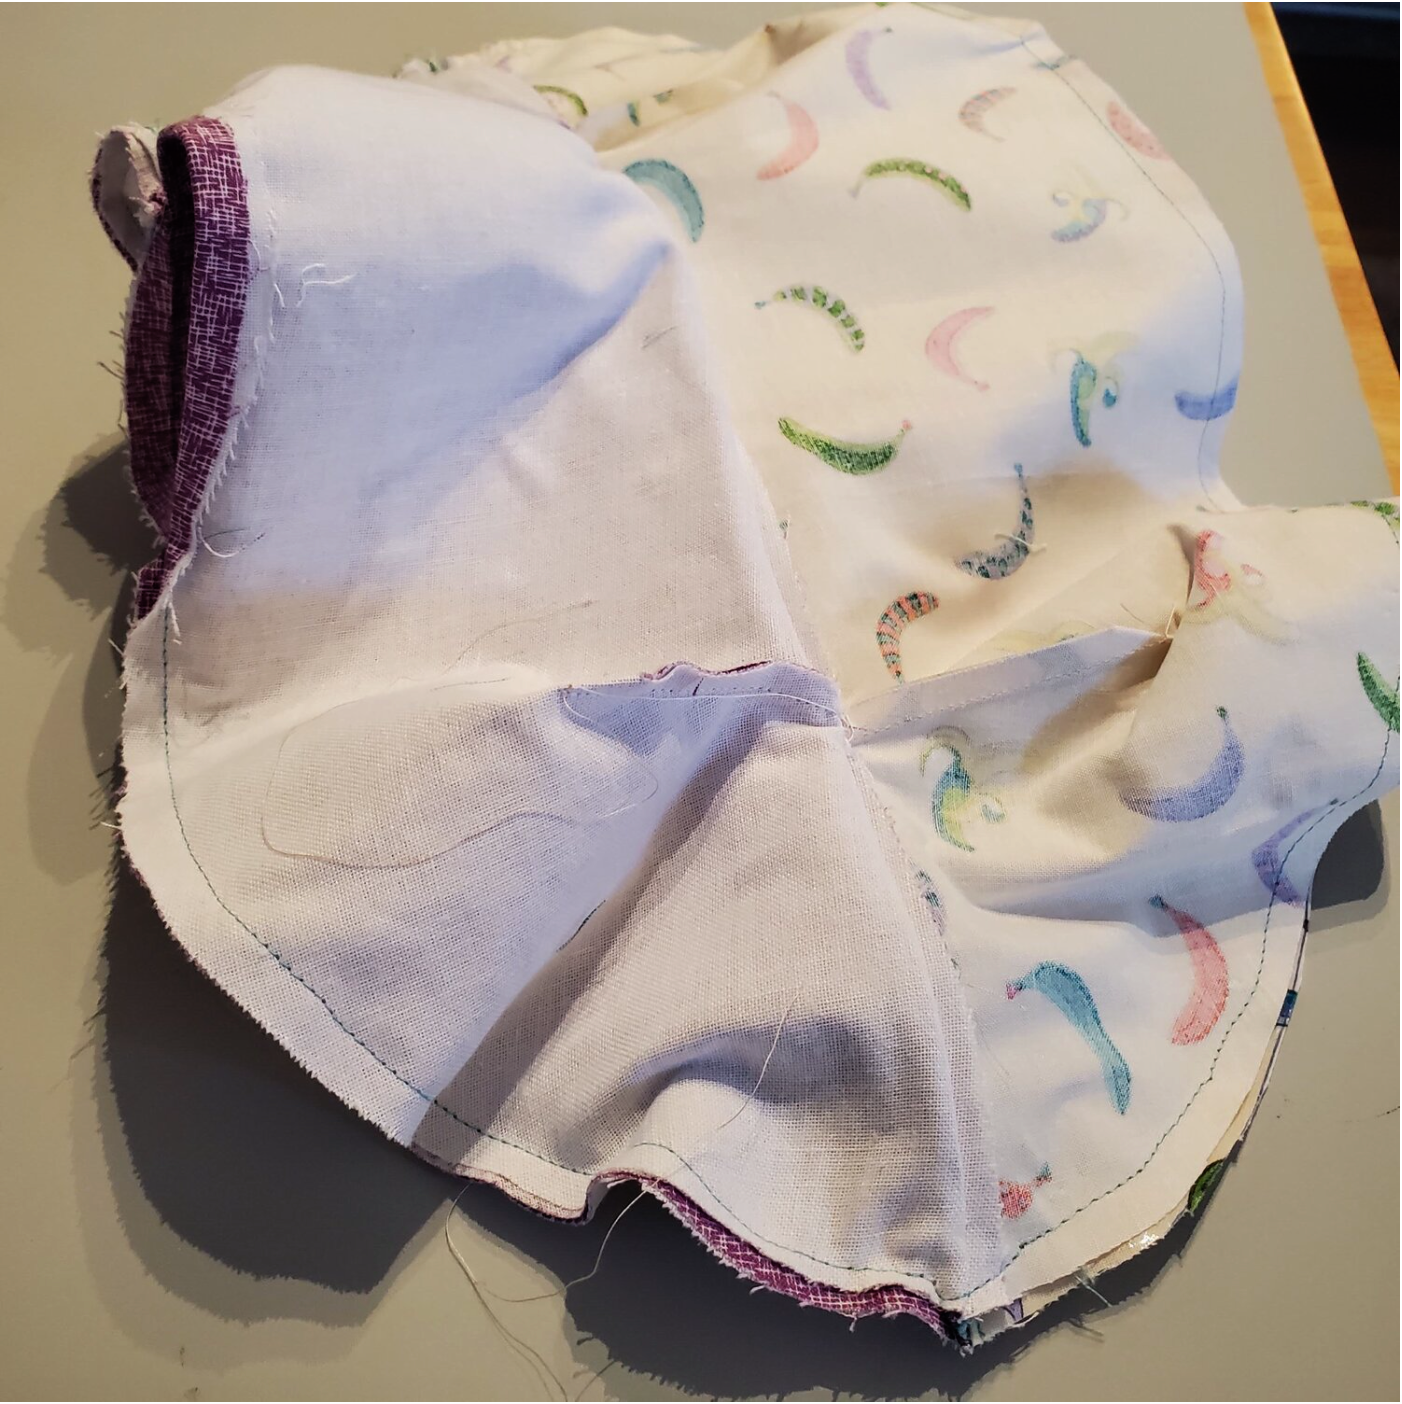
The ends where the lining meets the exterior fabric will need to be boxed by matching up the seams on the upper corners and pinching them together. Sew a line across ½” from the point. Trim off the excess fabric so it lays nice. Turn the right sides out and press. You will sew the opening in the lining closed by top stitching the seam. It helps to stuff the purse with a towel to press it into the final shape. Use a Teflon sheet or pressing cloth to protect the vinyl from the hot iron. I found the vinyl was a little wrinkled after turning and the warm iron smoothed it out nicely.
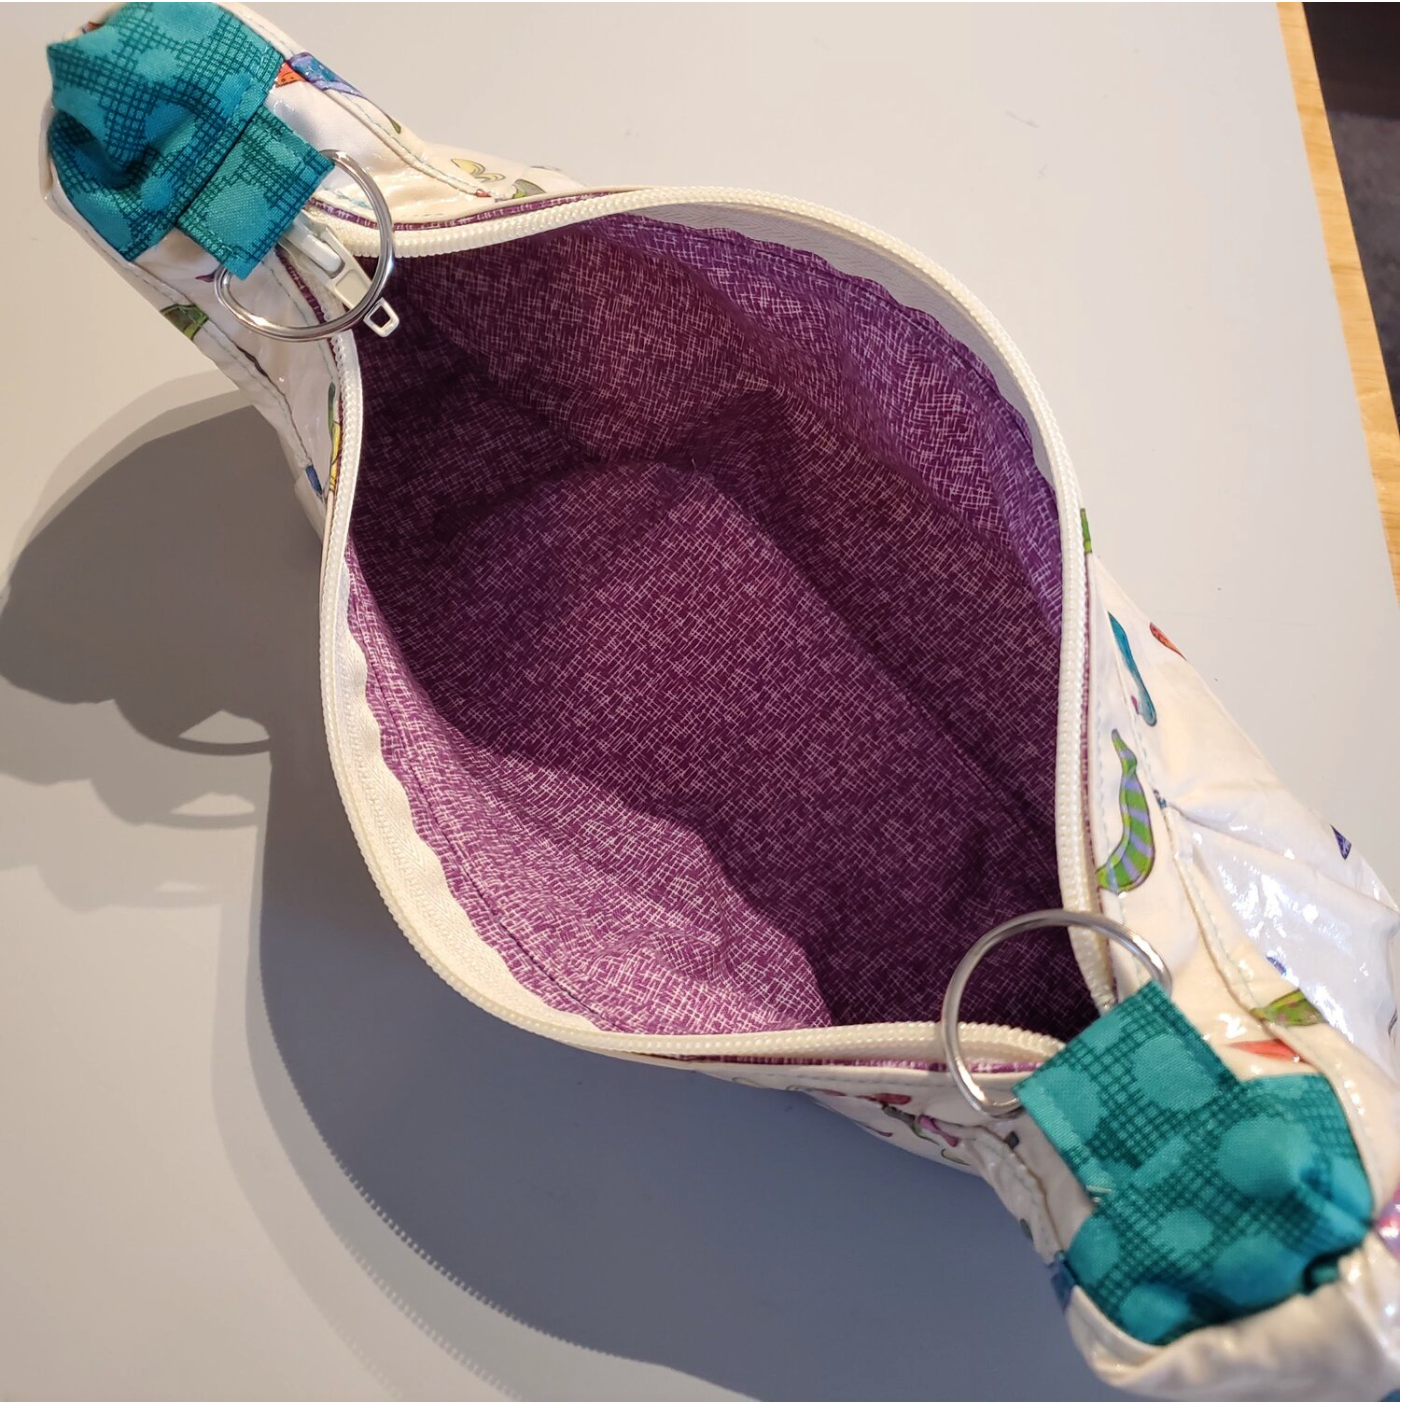
The final step is to add the handle on the purse. Loop the fabric handle through the D ring about 1 ½” and top stitch a square with an X in the middle on both sides.
Give the purse a final press. Now you are ready for some fun in the sun at the beach!

Do you love this background fabric? It’s from the newest Kaffe Fassett collection and it will be featured in our March Classic and Mini Pop boxes. It’s not too late to join!