

Sampler Collar with Jaszmine Howard
14th Feb 2022
Over the last couple of years I have found that fashion is a feeling in many of the same ways that quilting GIVES those feelings. Fashion allows us to express how we feel on a day to day basis and we can switch it up within seconds and as a garment sewist that is Fat and Black, it has been such a liberating feeling to create clothes that express who I am and what I like to do as I have been limited in the past.
Quilting is the same in that we are able to add that special element that sets the tone for a room, wall, or even your car (If you don’t have a car quilt, you should definitely should). It is also something that can be easily shared and given to help others feel the fun and love this form of art has to offer. I’m sure you may be asking yourself why I am bringing up fashion and sewing my own clothes on a quilting blog. Weird right? Why is this important? It’s because today, we are combining the two worlds!
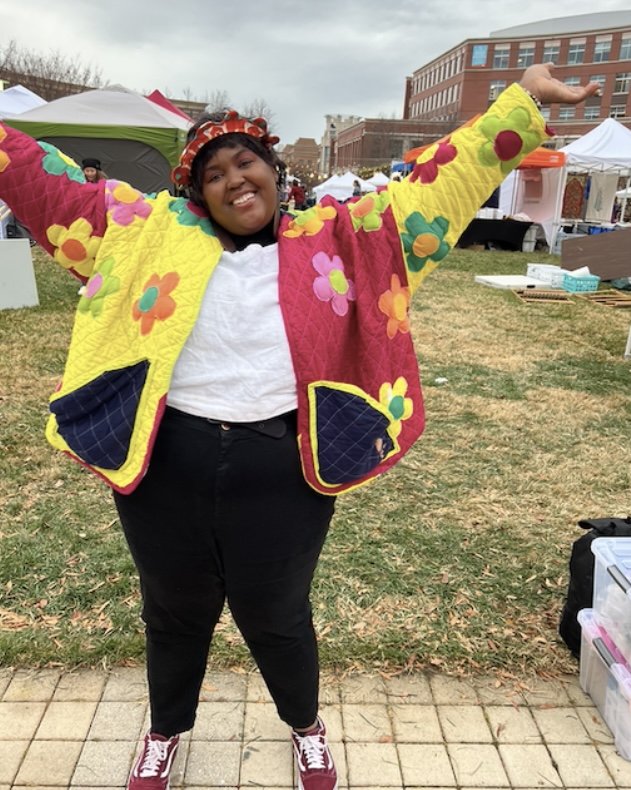
Don’t close your laptop! I promise that I will hold your hand on this journey and it’s going to be a fun ride. Today we will combine the worlds of quilting and garment making by making an easy and simple detachable collar. However, because we quilt, we have a whole bunch of stuff we can do to make this the coolest, most unique piece you’ve ever worn. Don’t believe me? Check out this quilt coat I made in November.
Why a detachable collar?
A Detachable collar is a Great project to work with for many reasons. Here are a few.
Detachable collars come in many sizes. Anyone can wear them from babies to adults.
You can practice SO MANY techniques that may can be a bit overwhelming if it were on a quilt. You can practice piecing techniques, quilt as you go, needle turn applique, machine applique, hand embroidery, machine embroidery and even beading if you would like. The possibilities are truly endless.
Construction takes minimal time once you have completed the design.
The collars have two sides! Which means you have even more room to play
Great for using up scraps and you probably have what you need already
You get to keep your precious ¼” seam allowance. No need for new seam allowances.
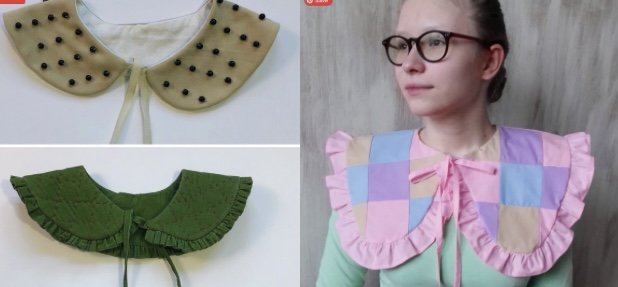
This tutorial will show you how to do Machine applique and trapunto/stuffed work as the main focus but remember, you can do any combination of things you would like!
Supplies:
Detachable collar Pattern- I enjoy using my friend, Hillarie’s pattern. It is Free and can be found HERE.
Batting
Fabric
Base Fabrics- one for the top, and one for the bottom. Remember, You can make these reversible too! Please Follow the fabric requirements on your pattern.
Applique fabrics- I like to use scraps if possible or select a range of eighth yard
Yard cuts.
Fabric for tying strings
Rotary cutter and mat
Paper scissors
Fabric scissors
Marking tool ( chalk, pencil, frxion pen)
Poly-fil or similar stuffing
Thread
Pins
Optional items
Wax paper
Glue stick
Basting spray
Hand sewing needle (if slipstitching your hole closed later)
Preparing the Pattern and Applique
Pattern preparation:
You will tape the pattern together and cut out the pattern pieces. If you have never done this before you can find a video HERE.
Cut out your Fabric and batting pieces.
IMPORTANT: If you are quilting your pieces, please cut your fabric a bit larger than your pattern piece, quilt ,then trim it down to the proper size.
Applique Preparation:
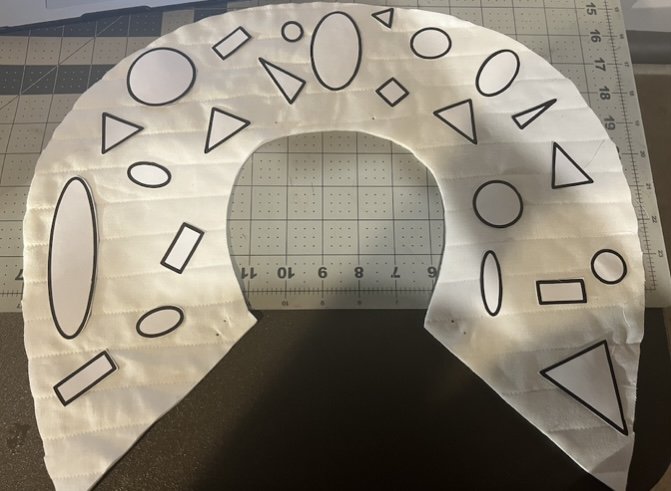
Find shapes that you like and you can draw them out. However, if we share qualities and struggle with drawing there is no shame in printing out the shapes you enjoy.
Once you have your shape drawn (or printed) I like to iron freezer paper to the page then cut it out. This will add some support and make your pieces less flimsy.
Optional: use a plastic template, poster board, or cardboard to achieve the same effect.
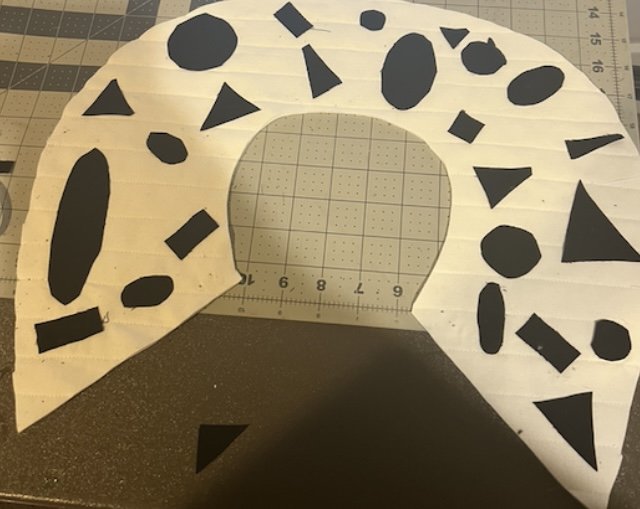
Trace your applique pieces onto your fabric and cut out. Place aside.
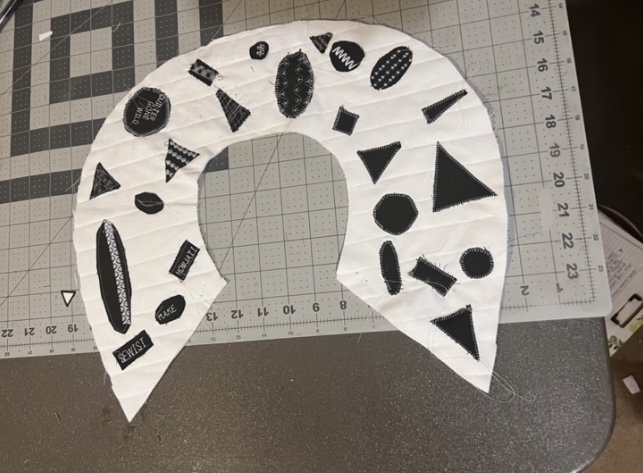
*Note: Lay your paper applique pieces onto the collar to see if you like the size before continuing. Adjust size of pieces if needed. It also helps to take a picture so you can remember the placement
Construction!
Take your quilted piece, place and place your applique pieces on the collar as desired. Use pins to keep in place. You can also use a glue stick or even basting spray
Use machine applique foot and applique stitches to attach your pieces. Leave a hole about a finger width wide. Repeat this step for all of your pieces.
If you do not have an applique foot, or stitches, zig zag works well also!
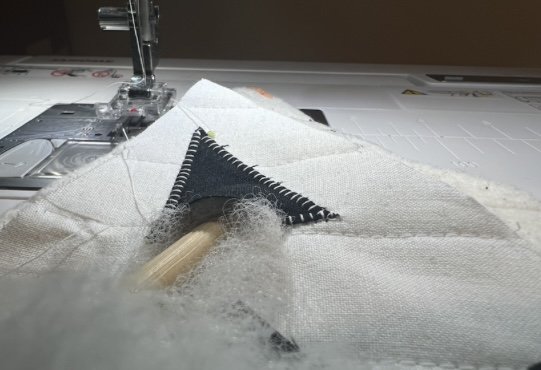
Take stuffing and separate to make it softer and easier to manage.I tend to grab a large pinch ( if my hand were a claw machine, the stuffing would be grabbed by the tips only)
Time to Stuff! Insert stuffing into the hole. I like to use a chopstick or awl to assist. Even a pencil will do. I suggest not over-stuffing as it will make it a bit harder to close. Repeat for the other shapes.
Close up the holes! You close up that small hole with more applique stitches and TA-DA! Your design is complete!
You will see that I took the opportunity to make this collar the place for trying out various techniques and to test out some decorative stitches that I have not used before and was even able to put some fun words as though they were badges on it. Make this project YOURS.
Finishing up !
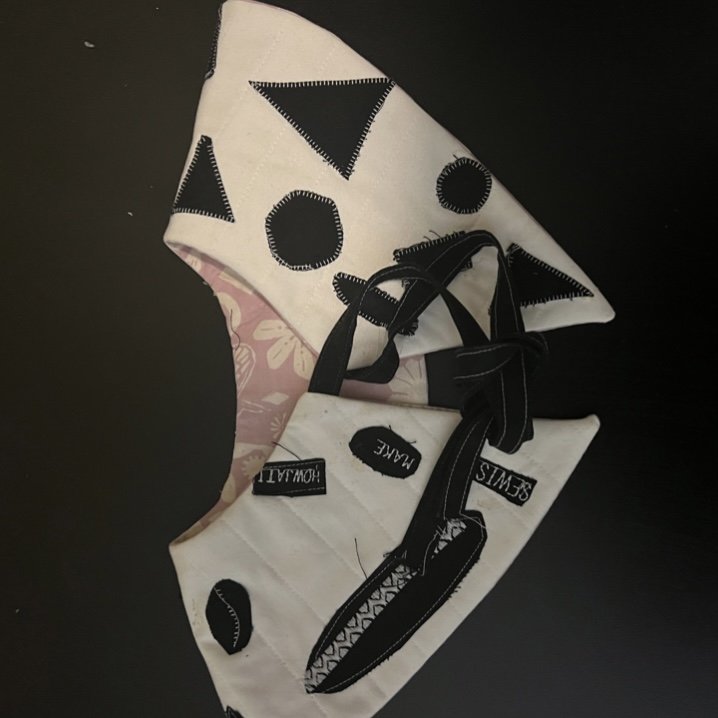
You will finish constructing your collar based on your patterns instructions but generally you will place your collar right sides together, stitching the inside of the collar (small curve), leaving a 2’’ hole in the middle.
You will place your ties between those pieces and stitch around the outside of the collar (large curve)
Turn it right sides out, press and slipstitch the hole closed. You can also topstitch the hole closed if you would like.
CONGRATULATIONS! YOU NOW HAVE A DETACHABLE COLLAR!
Thank you so much for reading this post. If you would like to follow me on Instagram, you can @jaszminehoward. If you would like to follow my adventures in all things quilting, sewing, and bagmaking, you can at Howjati.com! Happy sewing everyone !