Reverse Appliqué Halloween Pillow
1st Sep 2022
As the calendar turns to September it is time to start sewing some fall projects! I found this new technique to try in the Art Gallery Lookbook recently and decided it would be perfect to use with the Free Spirit Scaredy Cat fabric by Rachel Hauer from the recent Classic Membership box. I started my quilting journey four years ago so I am still exploring new ways to make quilt blocks and this one piqued my interest with so many possibilities once I master the technique.
Materials Needed:
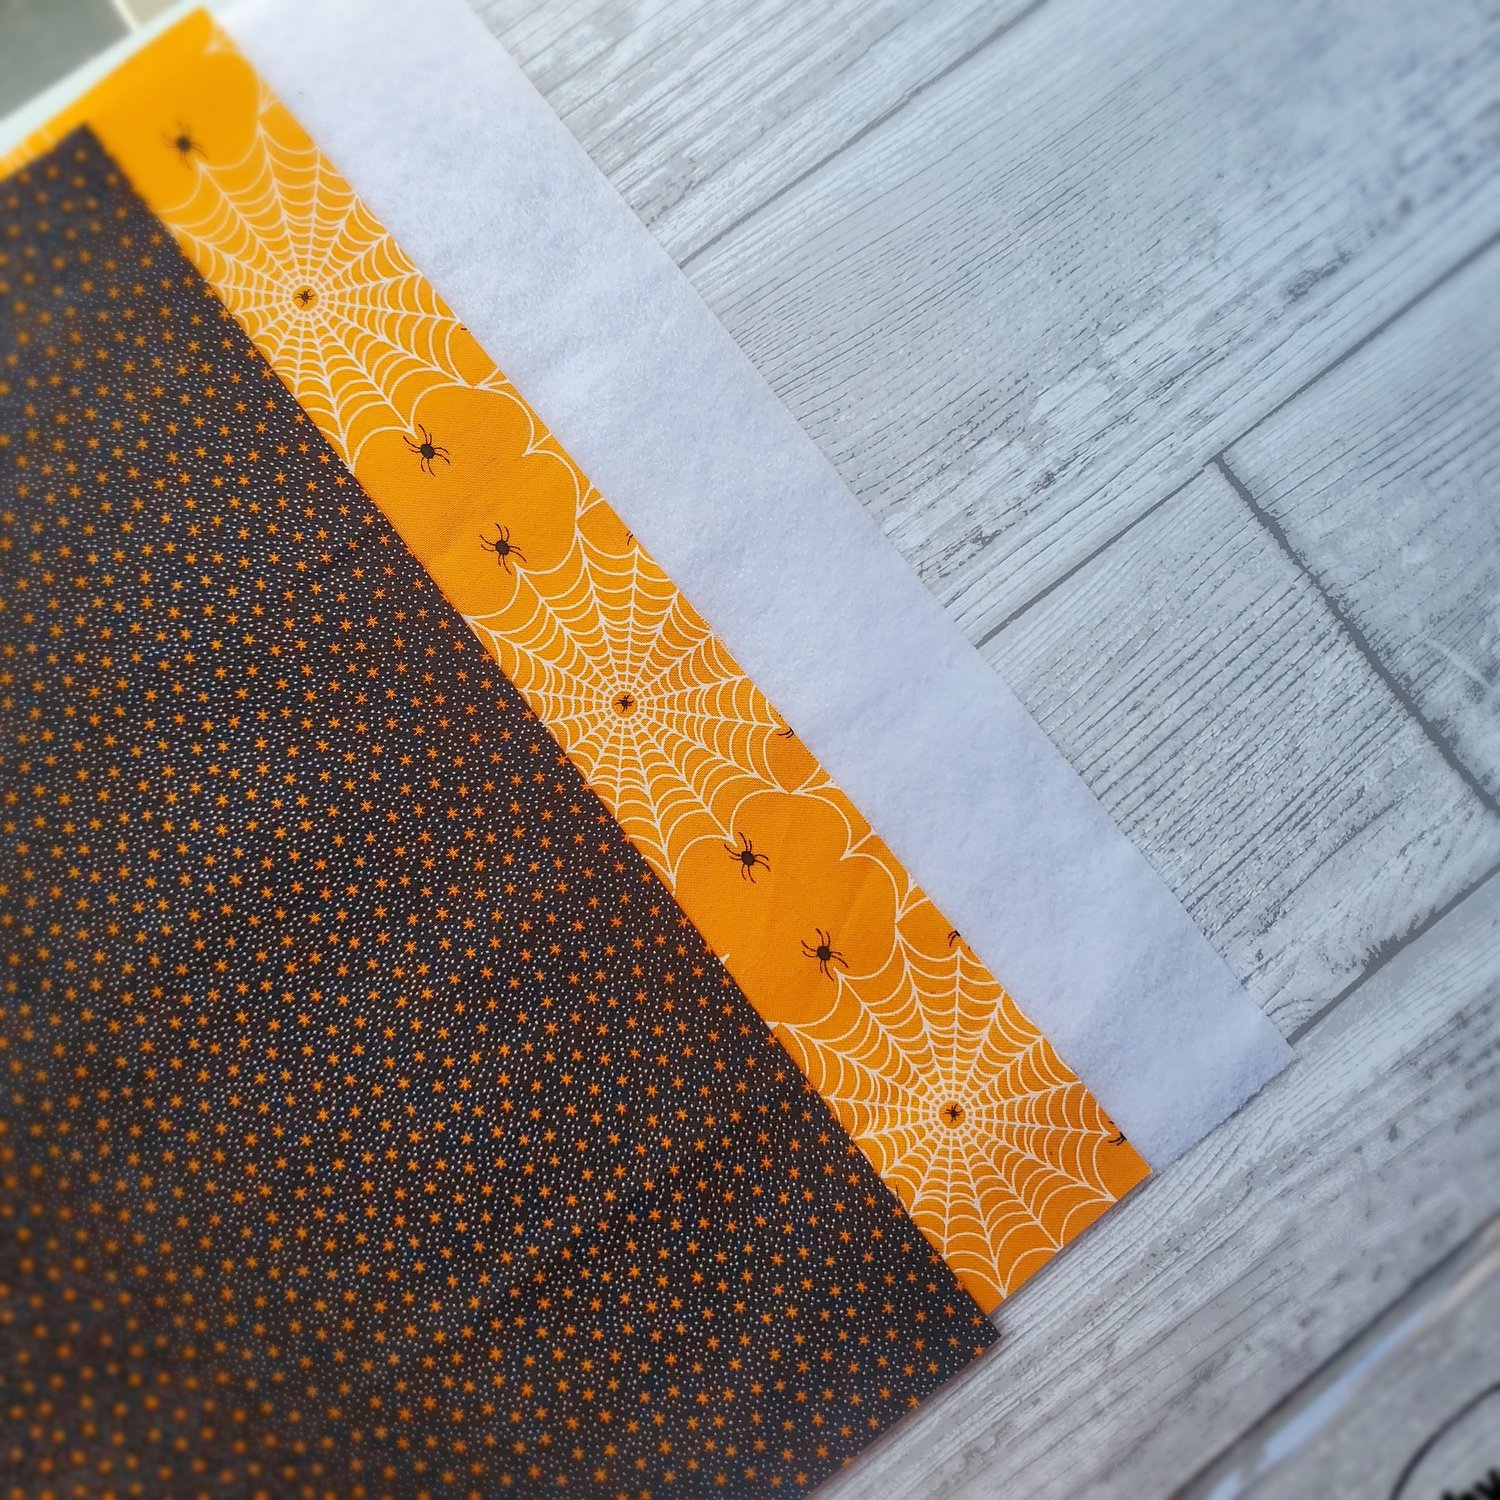
Three Fat quarters from the Mini Pop Membership
Coordinating Aurifil thread from the Chroma Membership
12.5 square of batting or fusible fleece
9” zipper
18” square pillow form
To get started you will need to print out the spider web paper Template. I used copy paper but I think it would be easy to use freezer paper. If you print on the matte side of the freezer paper then you can easily iron it in place on top of your fabric.
Cut out a 12.5” square of the black fabric and one of the orange fabric. I think it helps to press and starch the fabric so it lays really flat. Iron on the fusible fleece to the wrong side of the orange fabric. Fold the black square of fabric in half and in half again and press to make four equal quadrants to easily align the web pieces. Stitch together all three layers about ⅛” from the raw edges on all four sides.
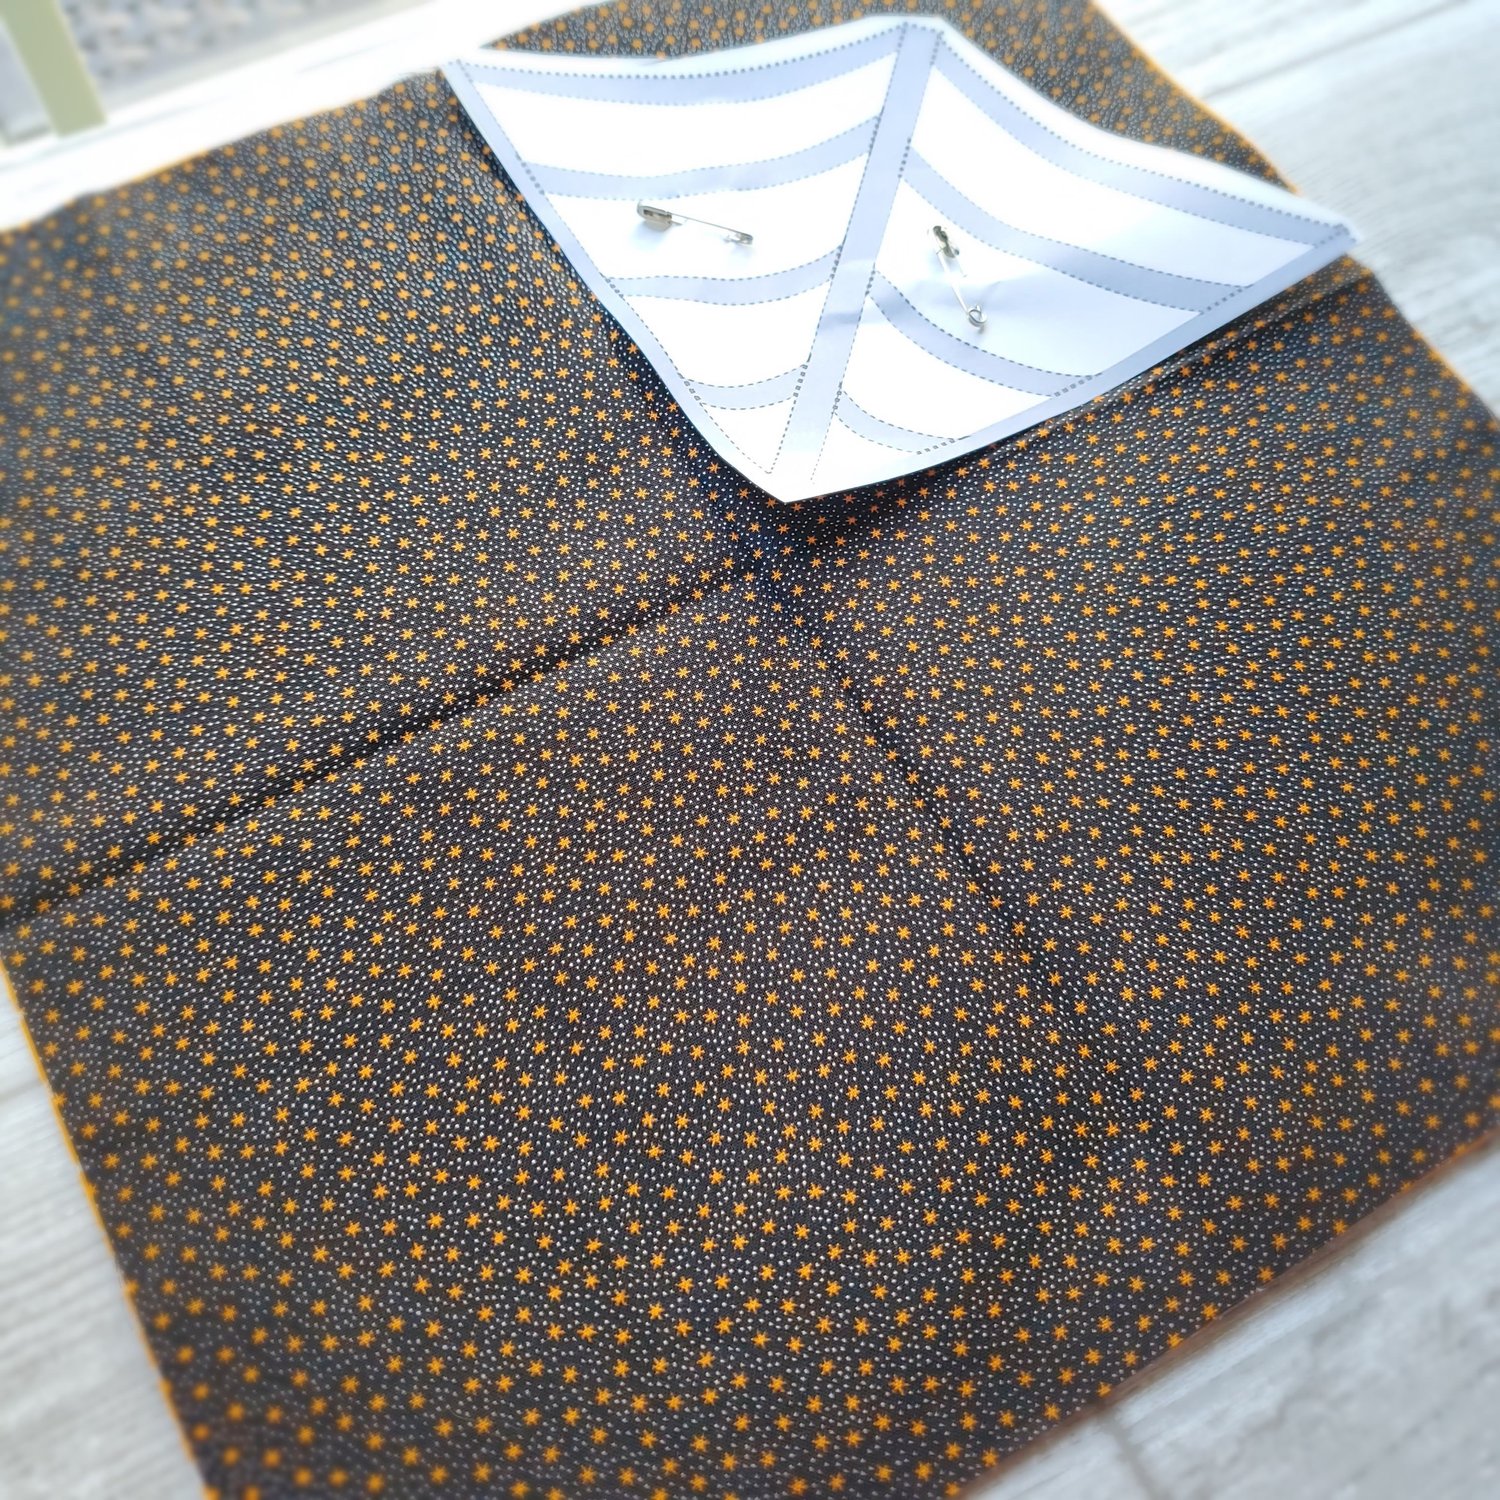
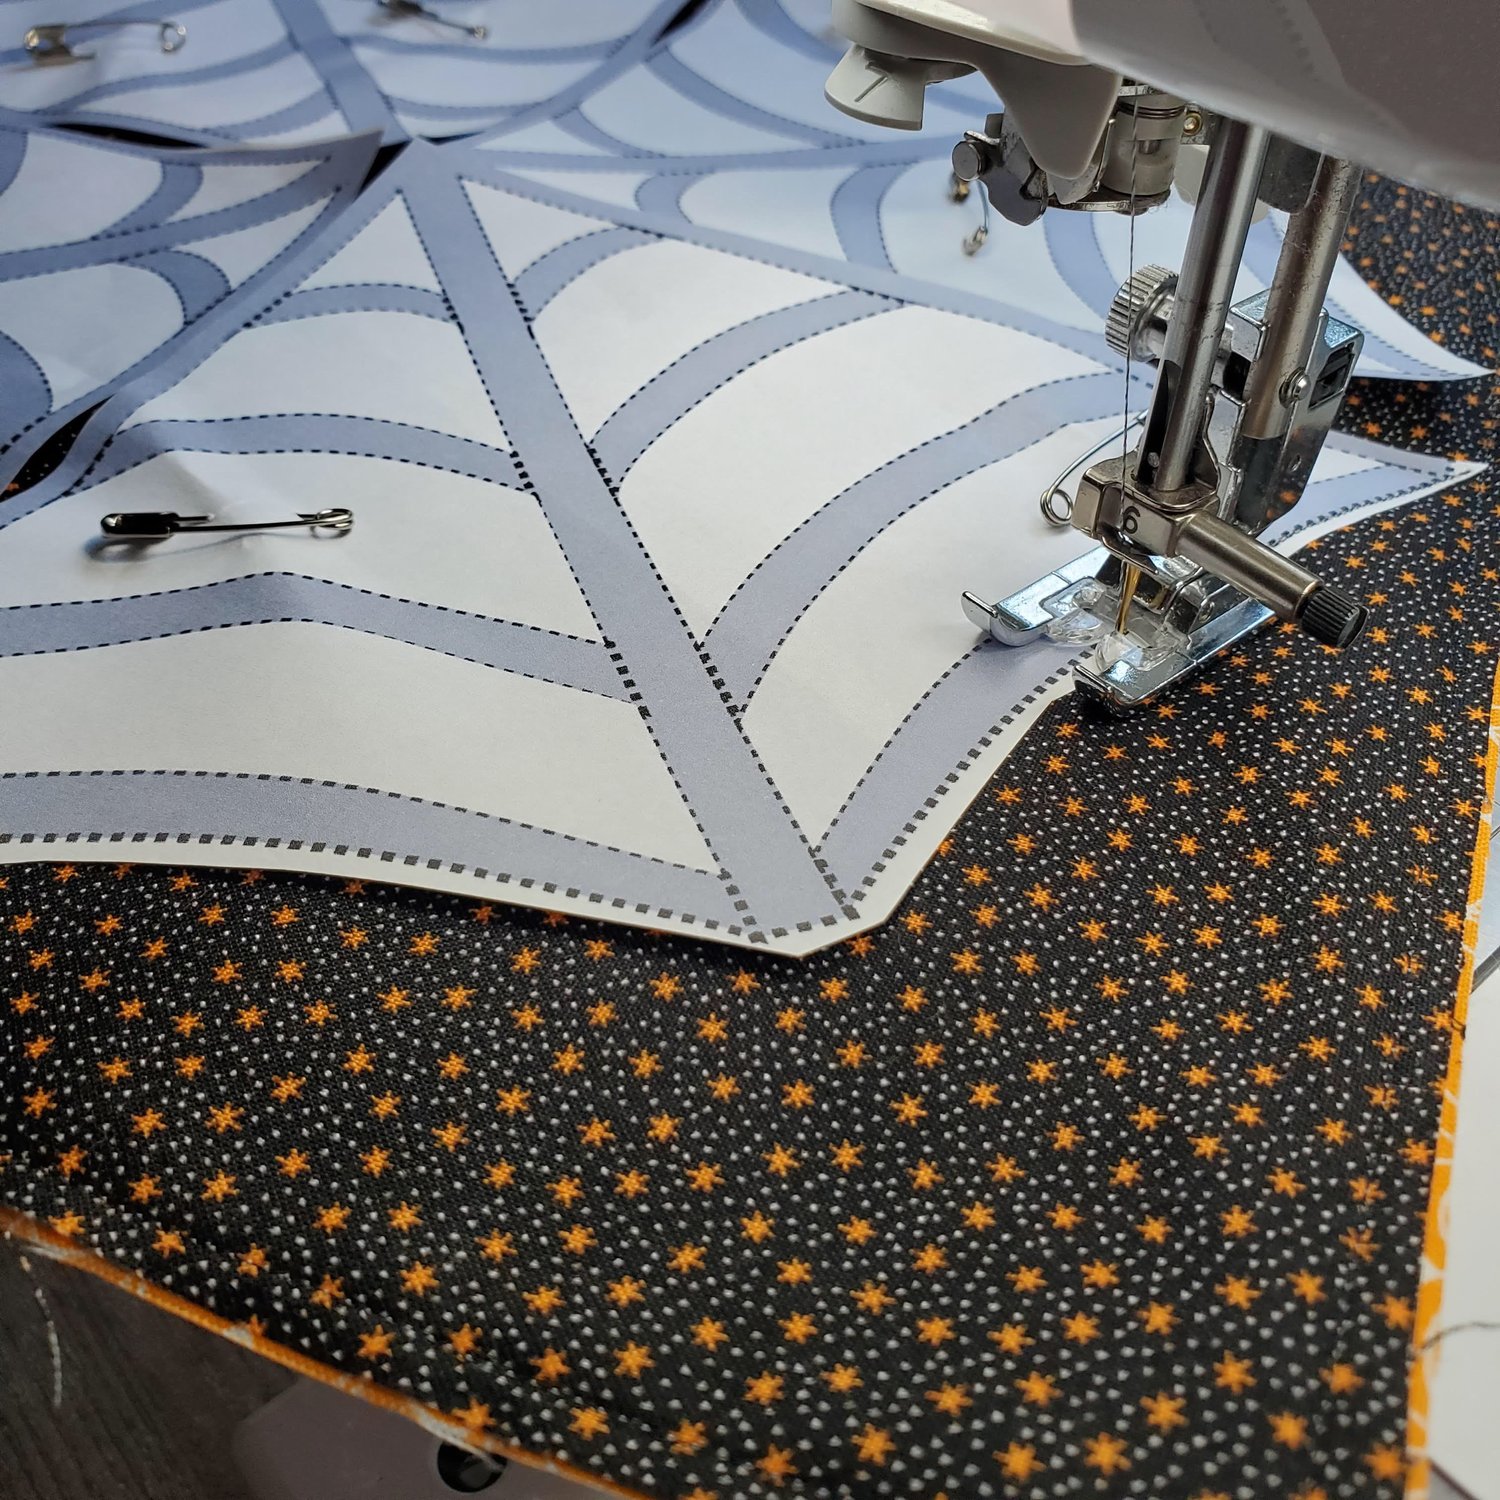
Place the four printed web pieces on top of the black fabric. Be sure it is centered and the lines are connecting between the pieces. Pin in place with safety pins. (this is where I thought that the freezer paper would be a good option)
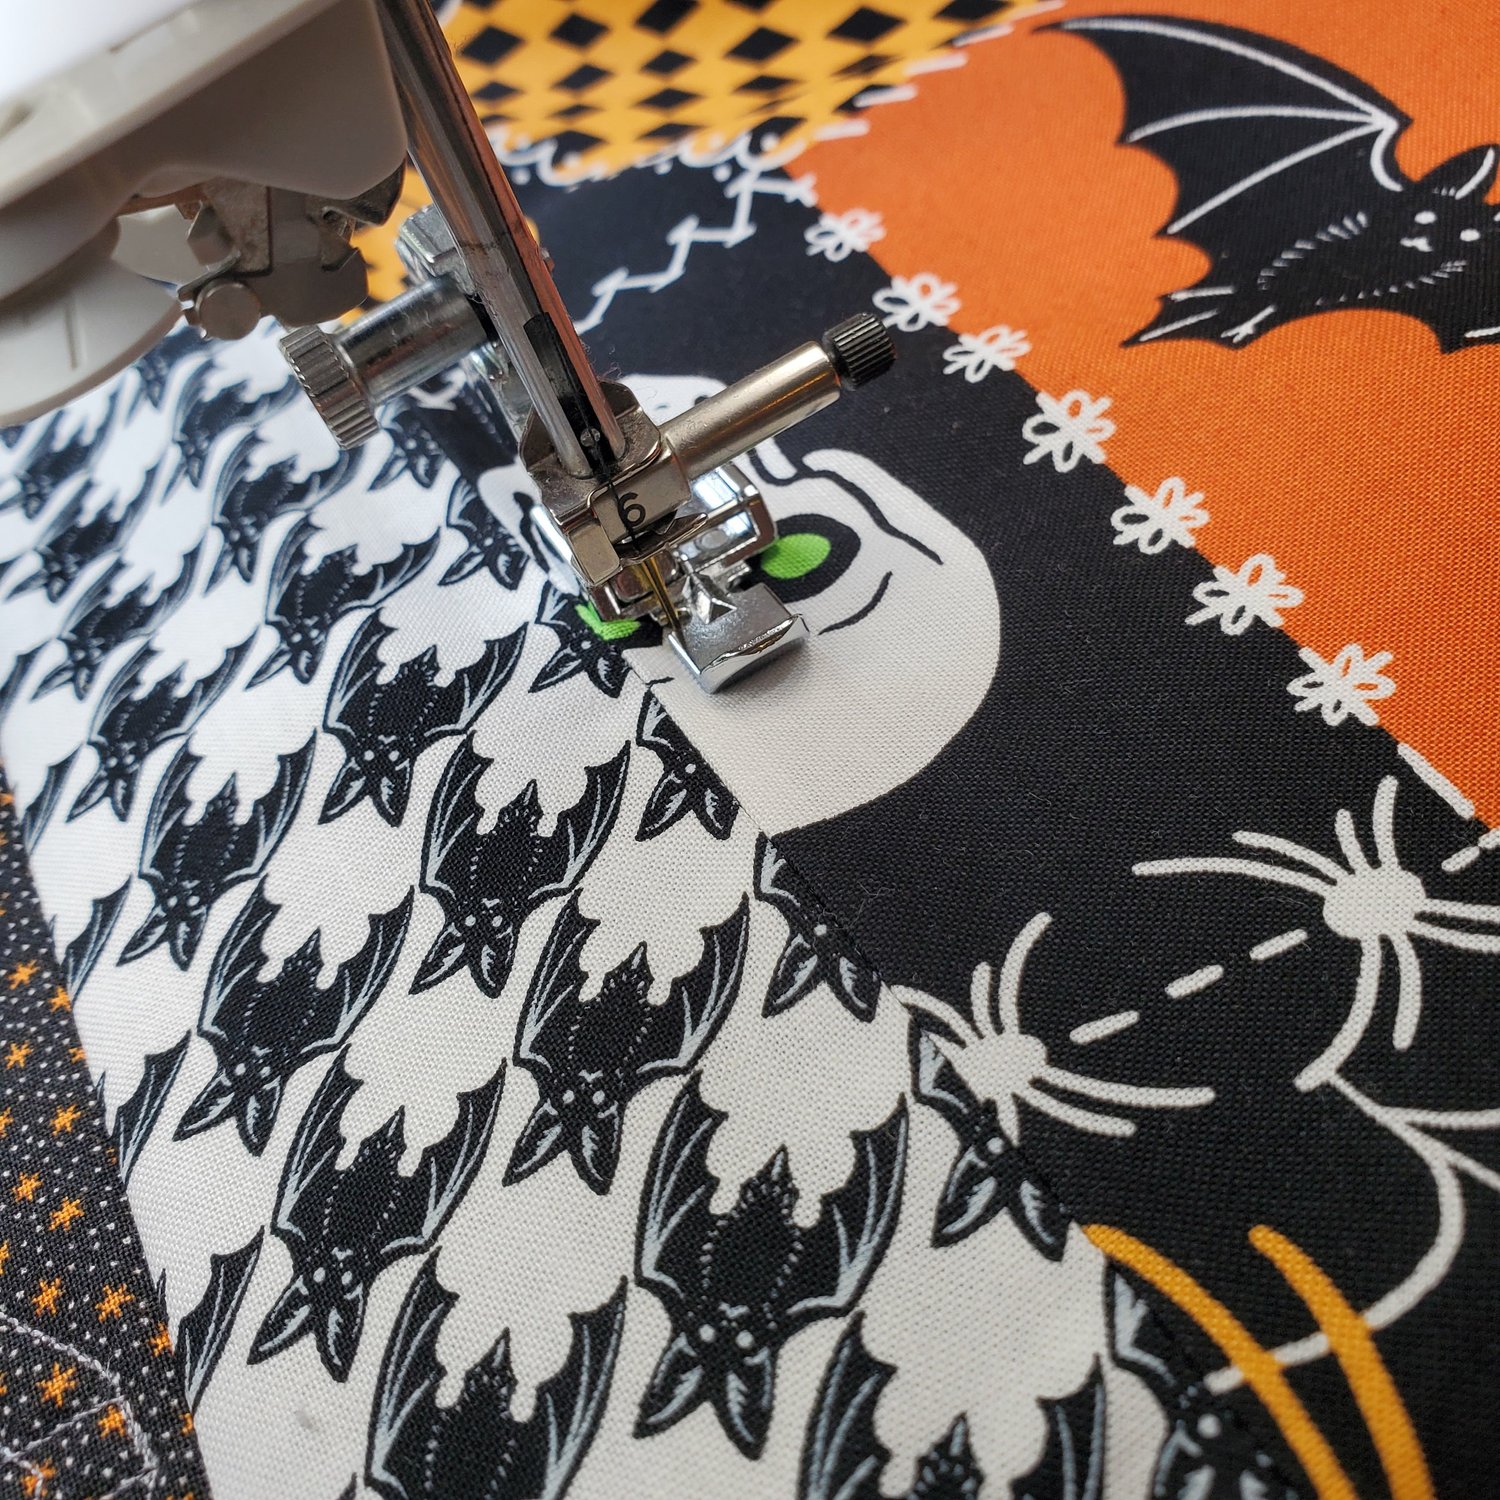
With a coordinating thread stitch around all the spider web lines. It is really helpful to set the stitch length smaller at about 1.6mm to make it easier to remove the paper. I used my regular sewing foot. Depending on your machine it may work better with the three layers to use the walking foot to keep the stitching even.
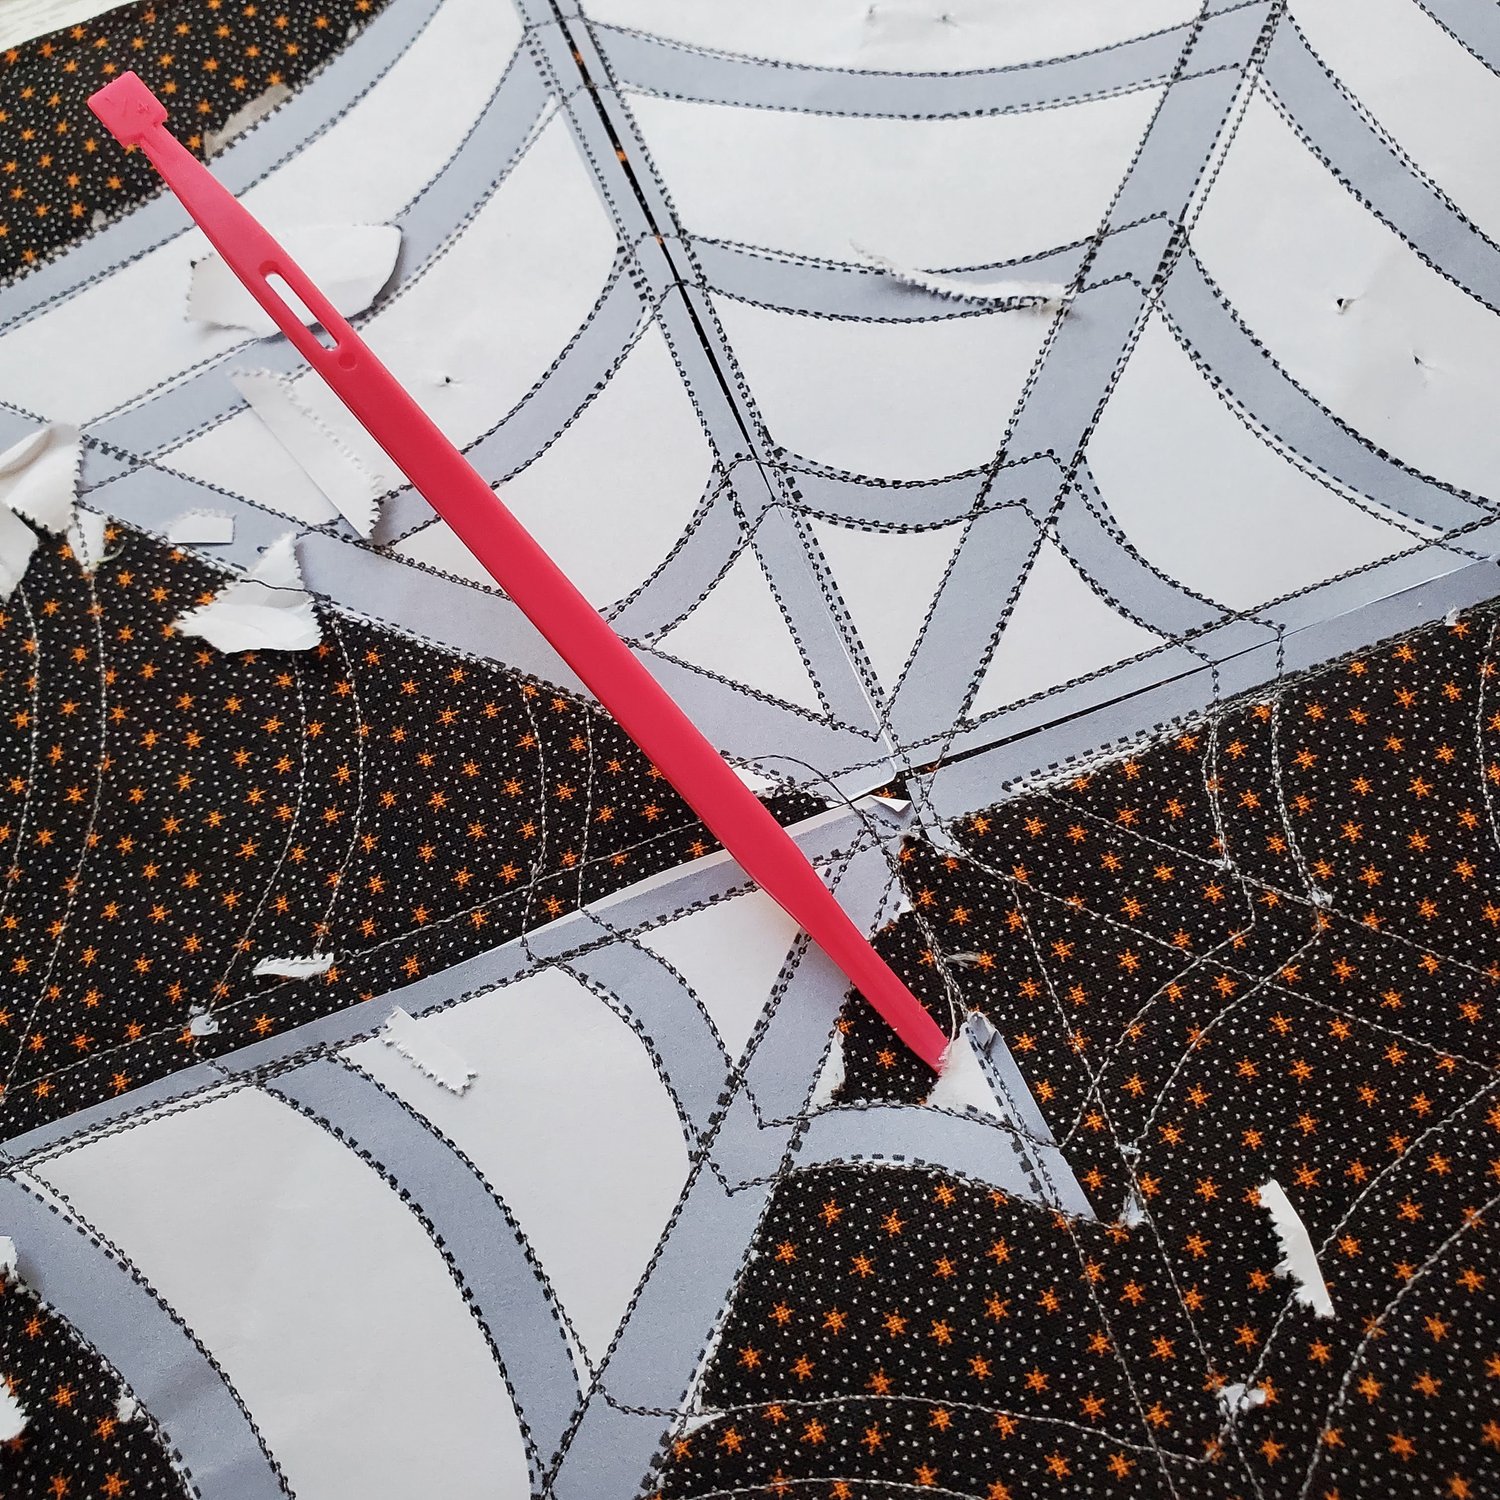
Double check to be sure you stitched on all the dotted lines. Remove the paper template. I found it helpful to use “That Purple Thang” (my generic one is actually pink) to get under the paper to pull it away from the stitches.
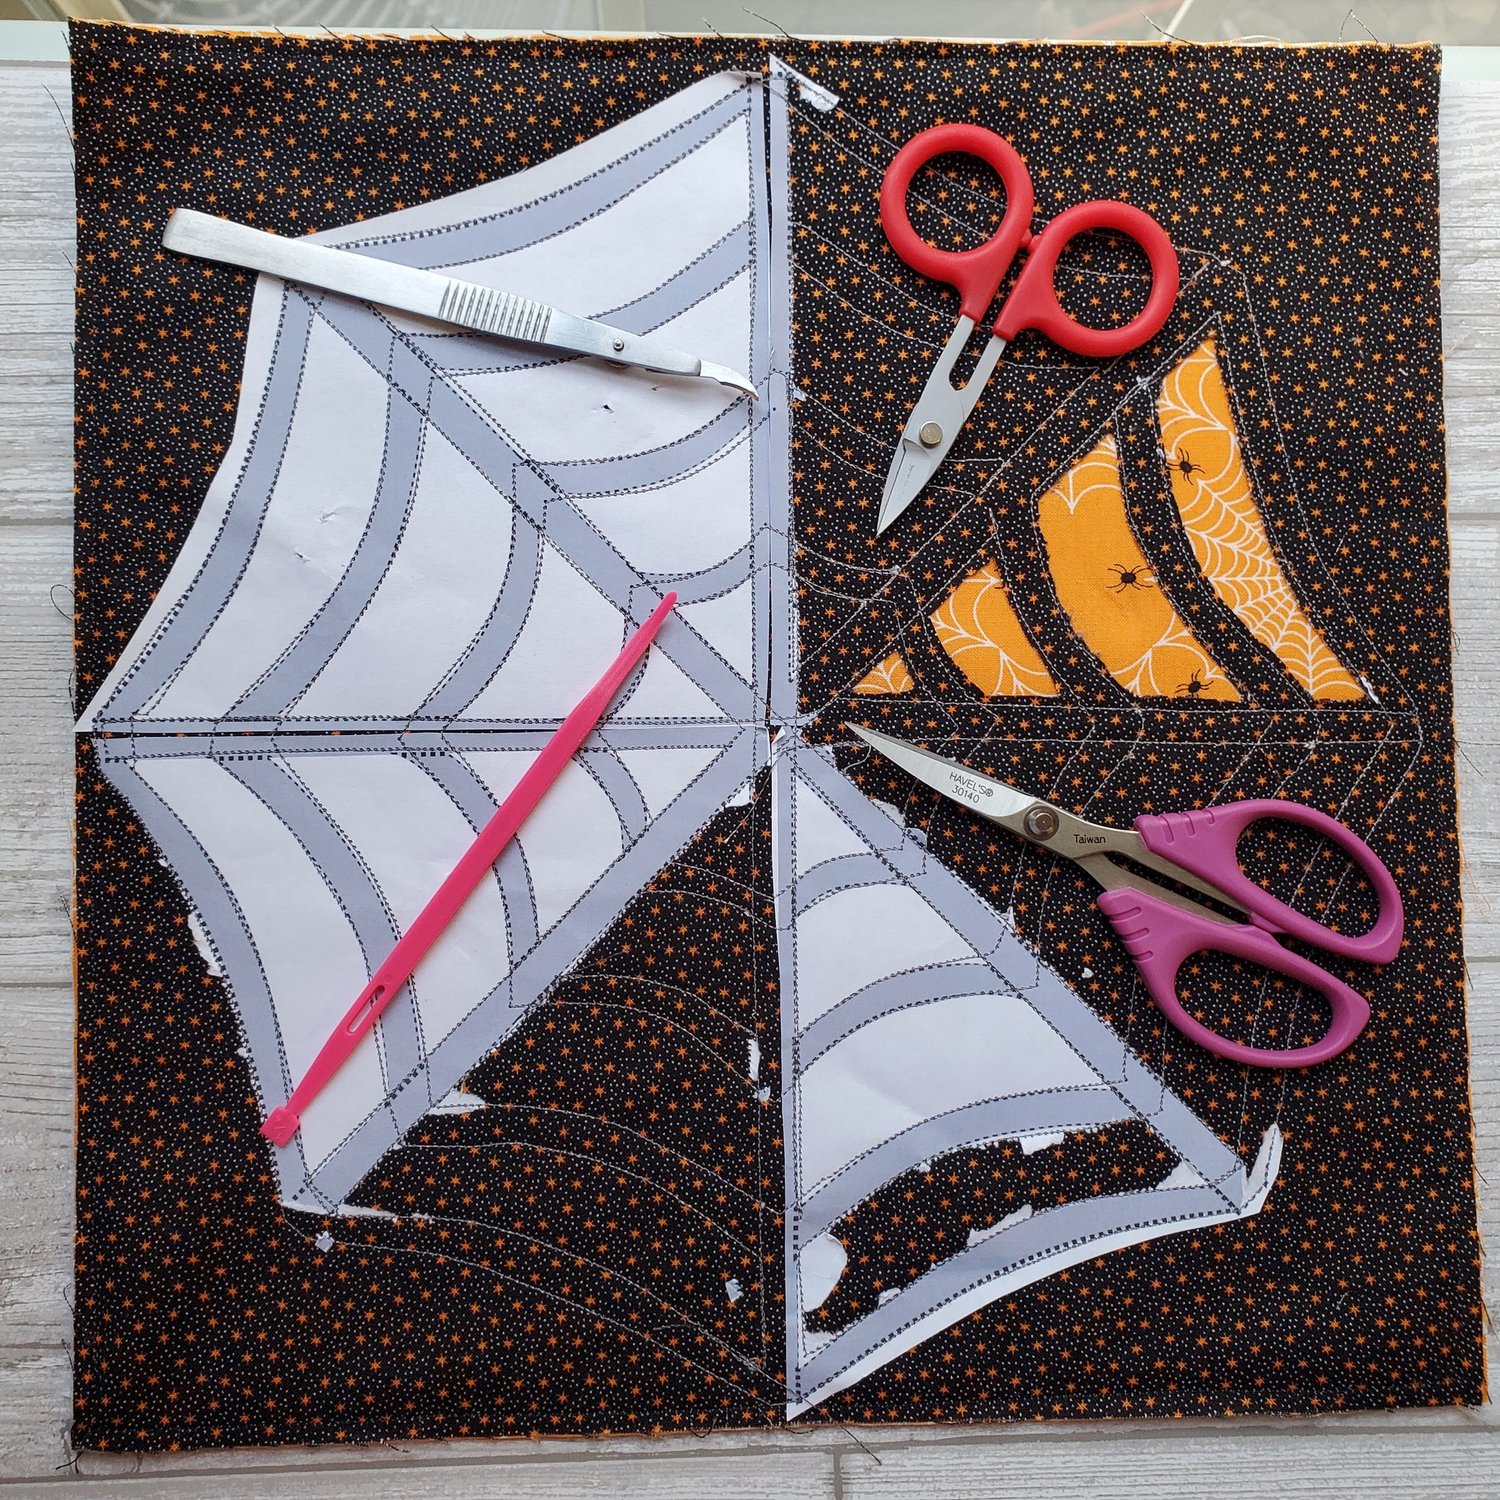
Once the paper is all removed you are ready to start cutting away the excess fabric to reveal the spider web design. The most important thing is to be sure you are only cutting the top black layer of fabric.

You want to cut the top black fabric about ⅛” from the stitching lines.I tried a few different tools to see what worked best for this technique. The curved scissors were definitely very helpful to get between the layers. A scissors with a sharp point was the easiest way to cut away the fabric.
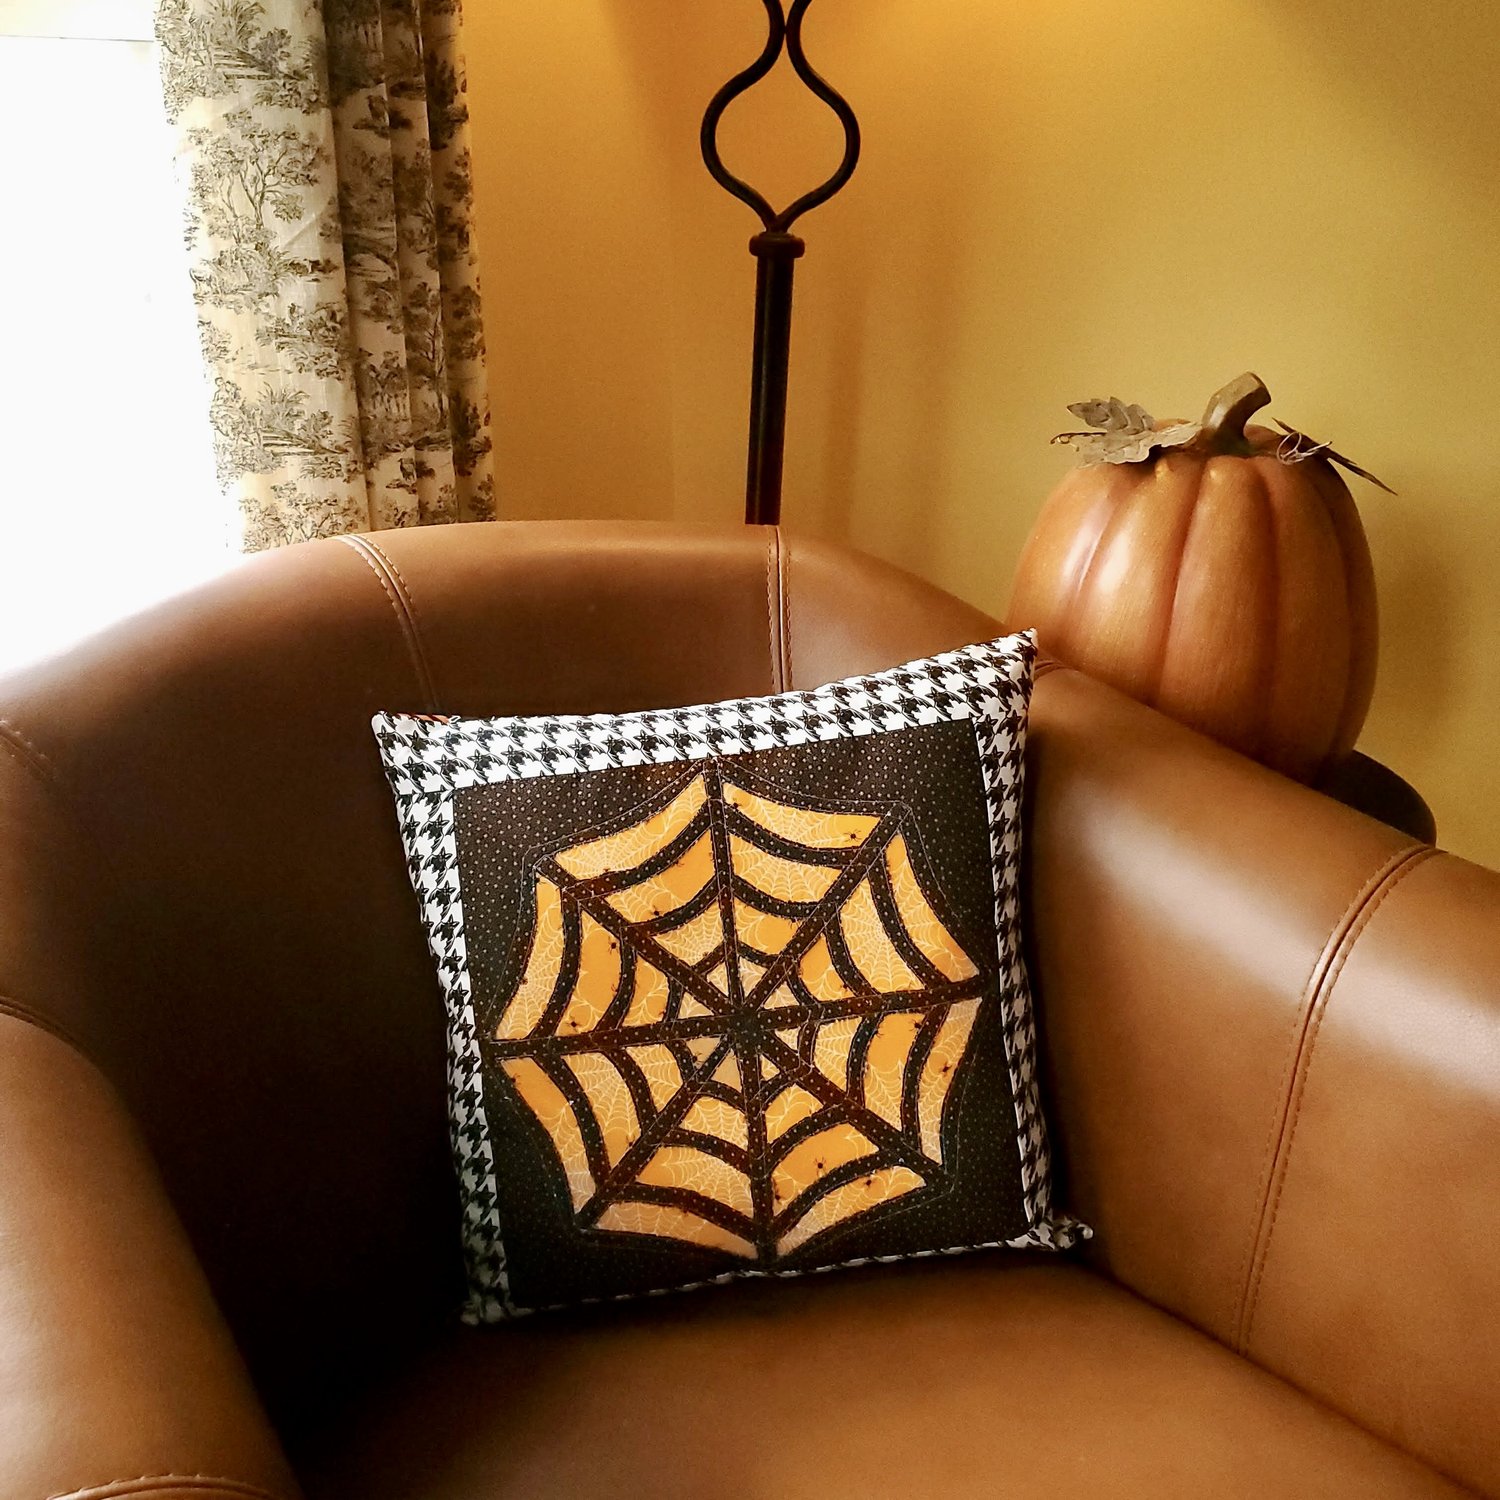
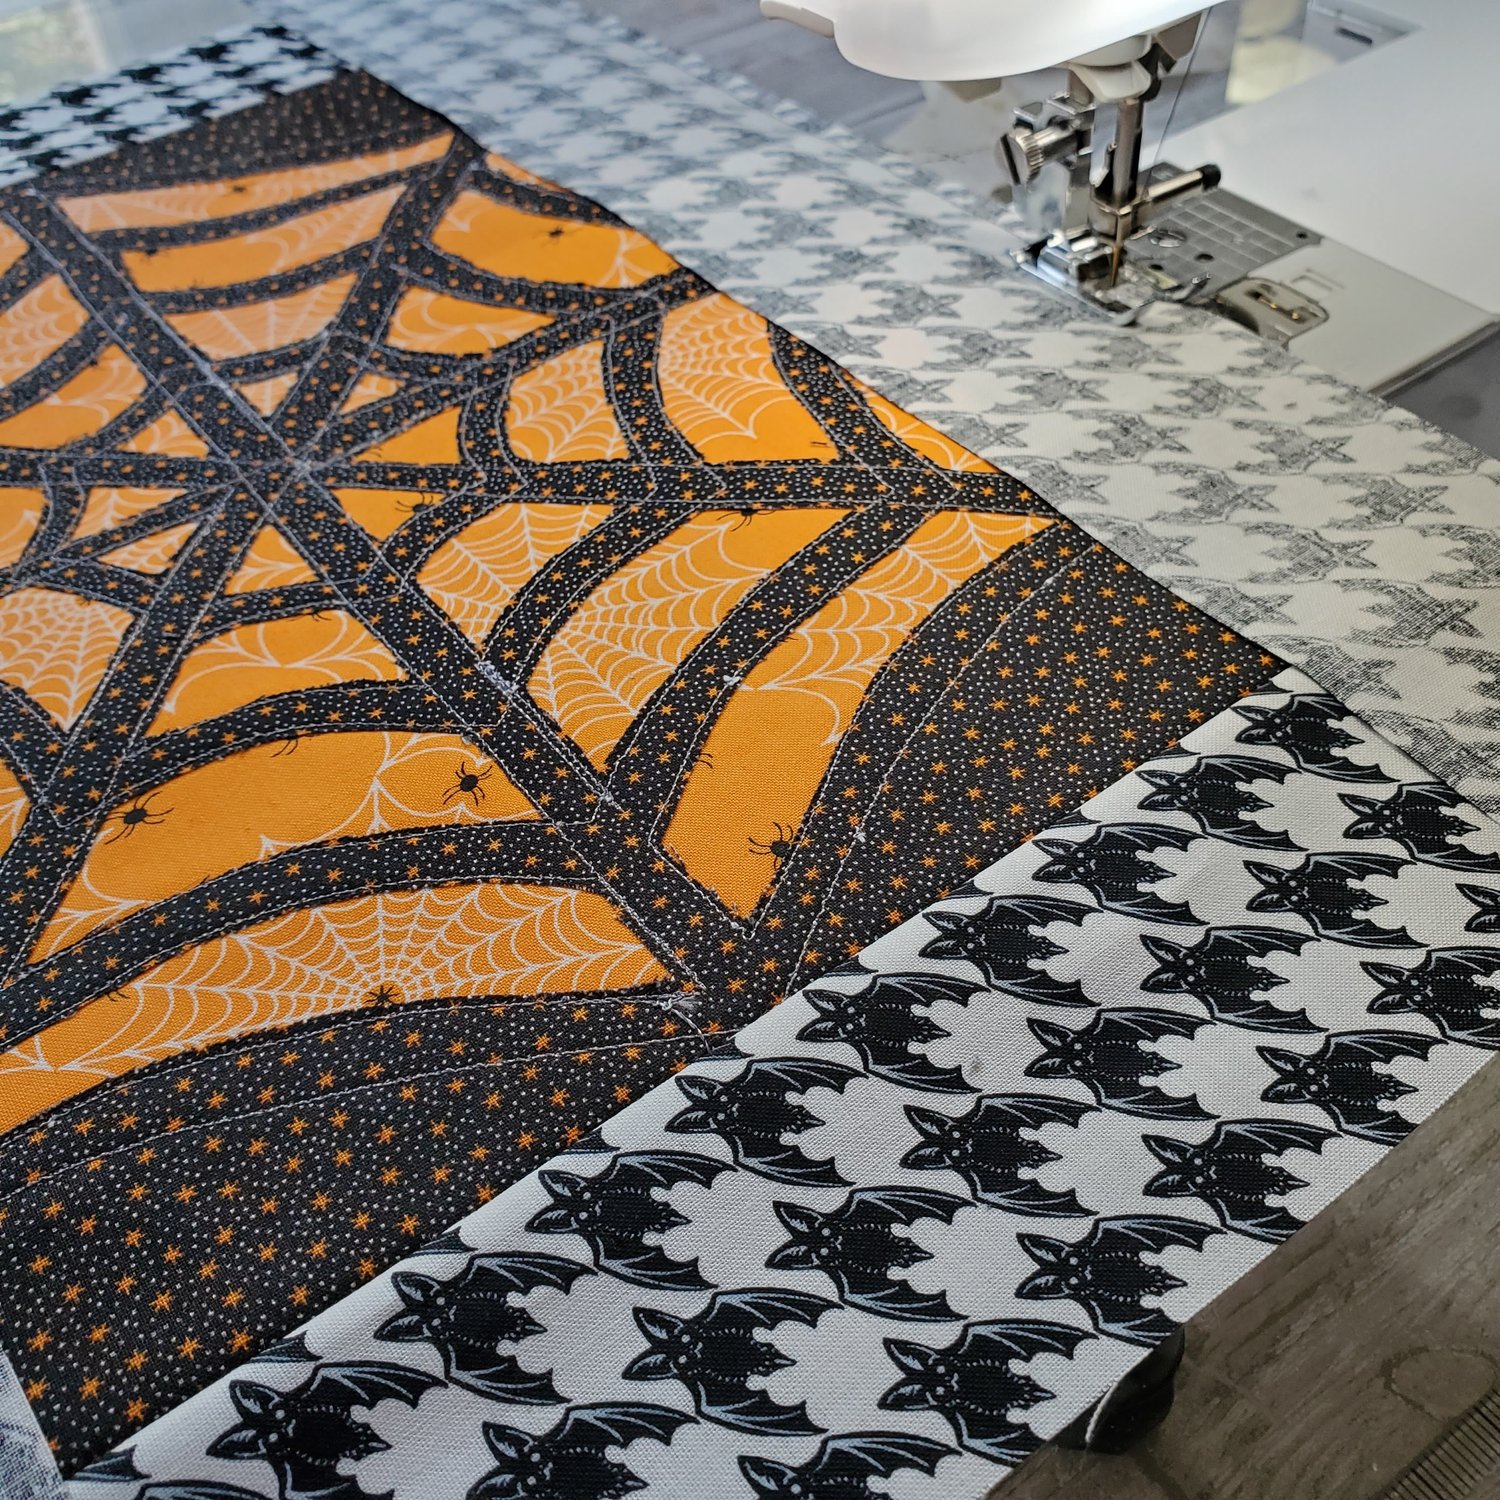
After the complete spider web was revealed I decided to add a 2.5” border around the block to make the pillow. If the fabric you are using is directional keep that in mind as you add the borders. I usually add the sides first. Sew the 2.5” strip to each side with a ¼” seam allowance. Press the seam to the dark side. Trim to keep the edges square. Then add the top and bottom strip with the same ¼” seam allowance. Press.
Cut a 12.5” square of fabric for the back of the pillow. Lay it on top of the spider web block with the right sides together. Sew one ½” seam along the bottom edge. Ideally if you use a 9” zipper you will have about 1.5” from each corner that you sew normally with a 2.5mm stitch length to start, then set the stitch length to 4mm and sew where the zipper will be, then reduce the stitch length back to 2.5 to complete the seam. Press the seam open. I like to use ¼’ Steam-a-seam double sided fusible tape on the edges of the zipper tape. Lay the zipper centered on the seam with the right side of the zipper on top of the seam allowance. Press in place.
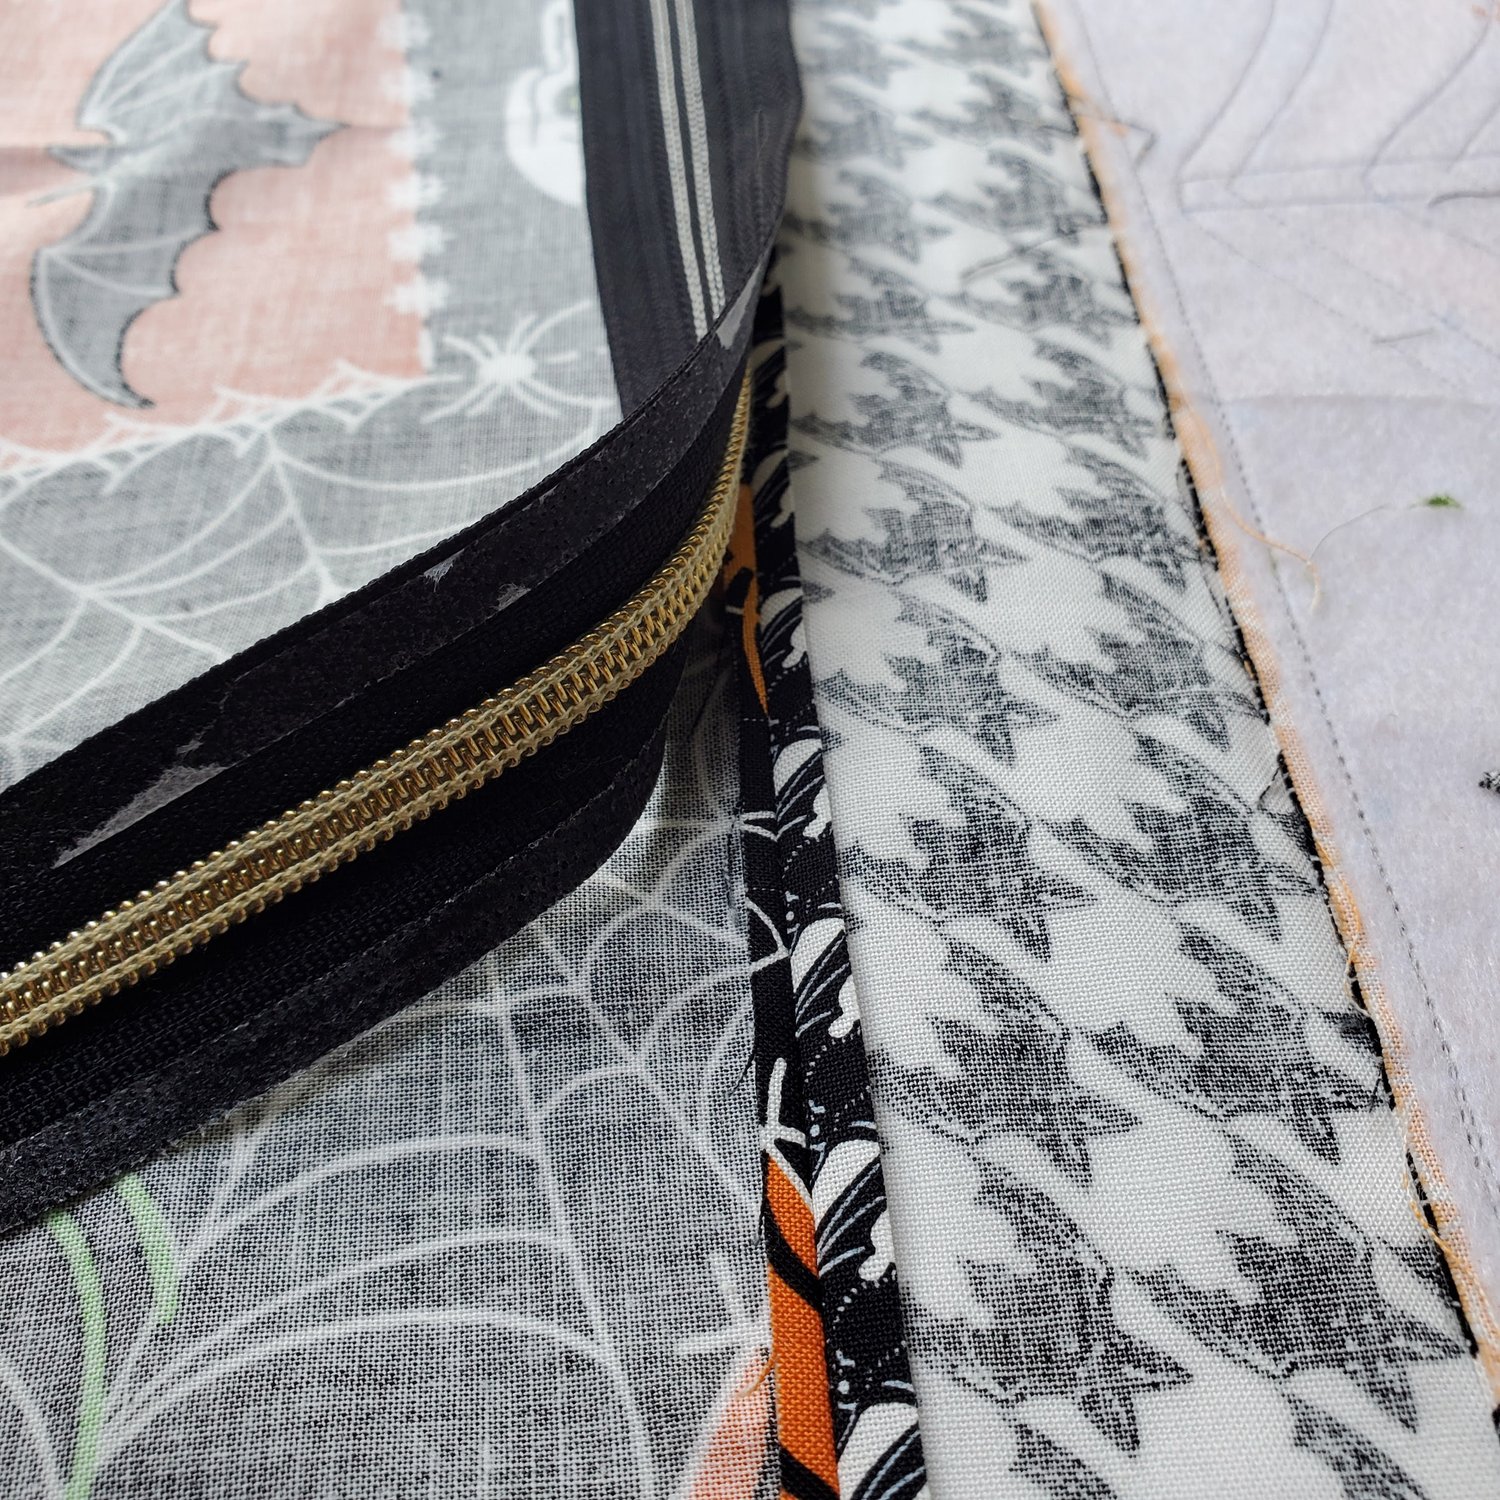
With the zipper foot, sew around the zipper with a coordinating Aurifil thread, topstitching on the right side of the fabric. This method keeps the zipper in place as you sew with the help of the fusible tape.
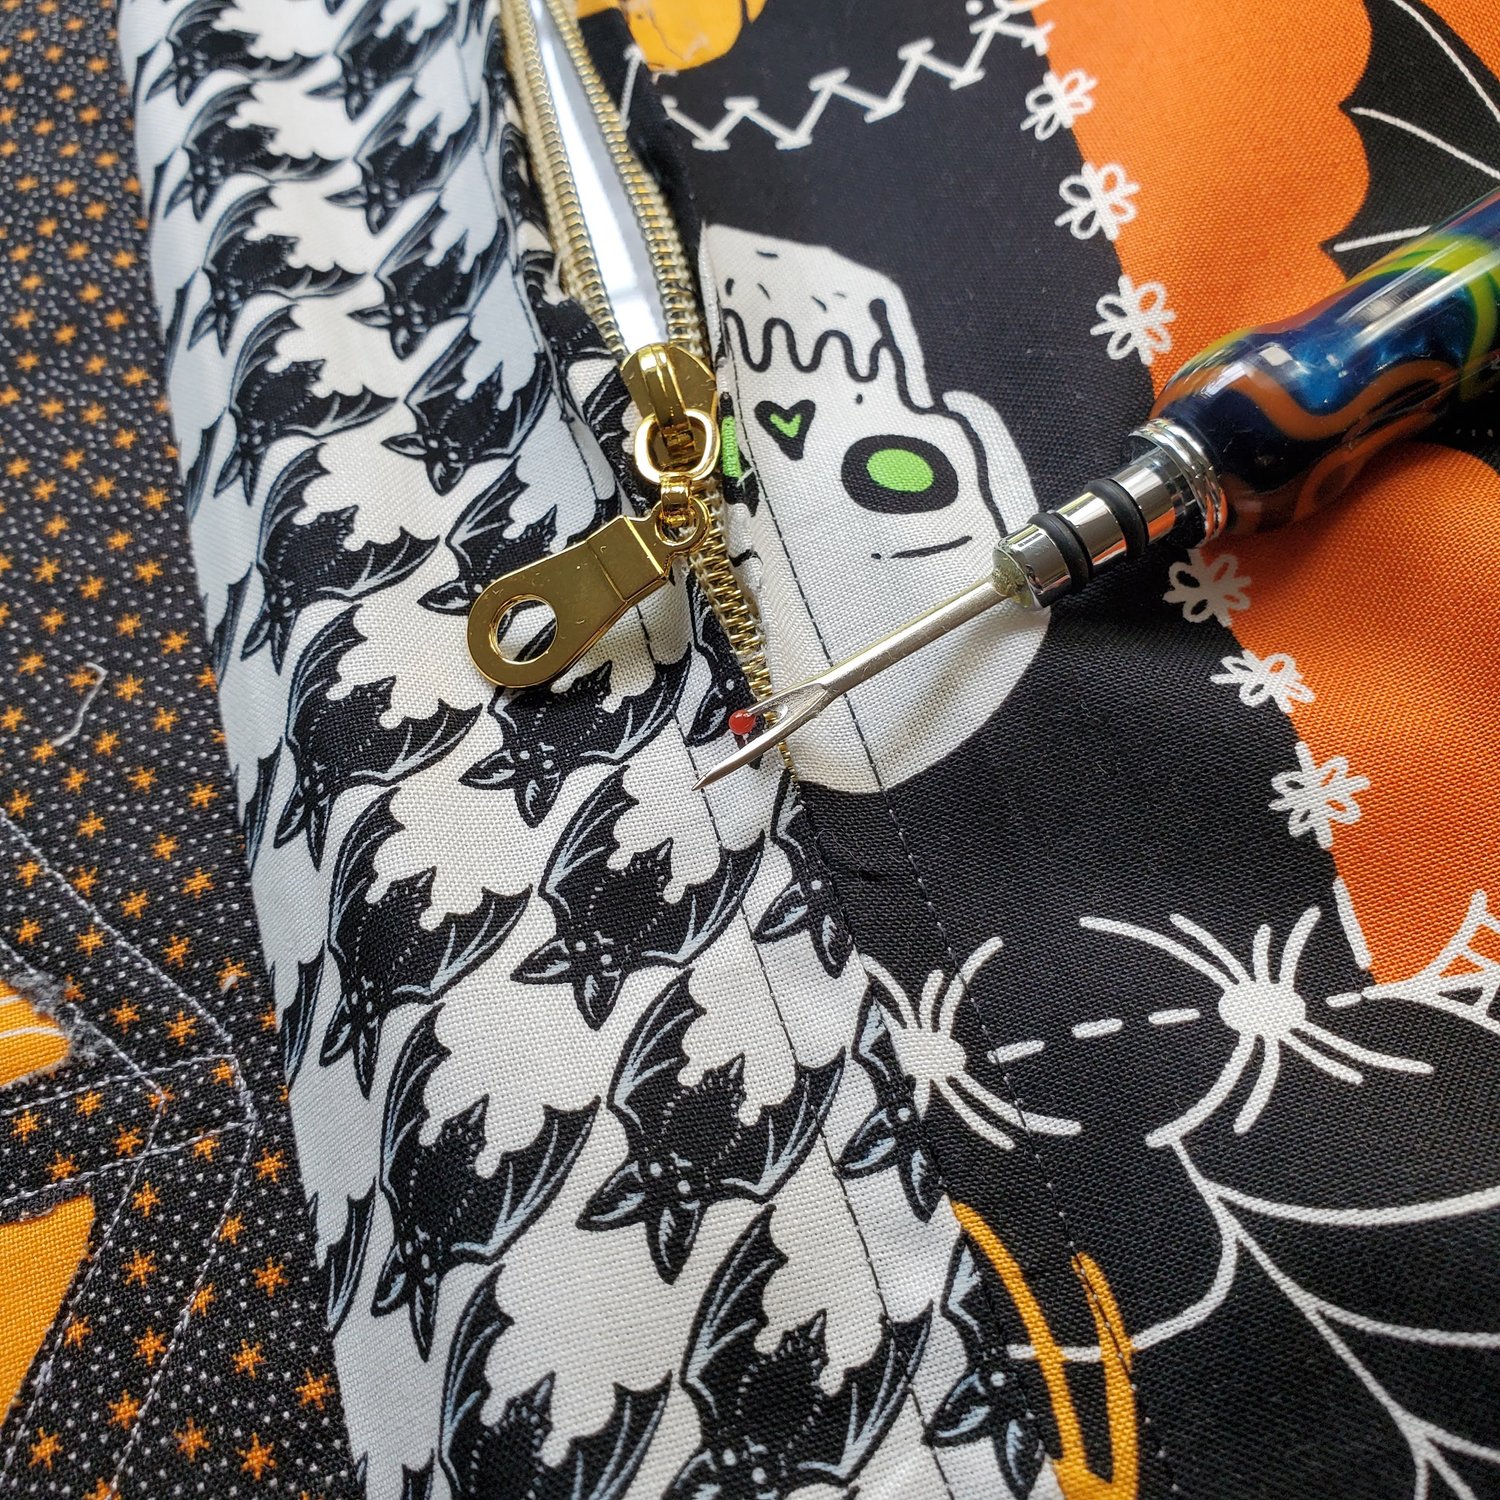
Next, take a seam ripper and gently slide it along the seam to reveal the zipper. This is where it was stitched using the 4mm basting stitch. Take a minute to remove all the little threads and give it a quick press.
Open the zipper about 5 inches. Align the remaining three sides with the right sides together and sew ¼” seam to close the pillow. Trim the corners and turn the pillow right sides out through the open zipper. Be sure to fully push out the corners. Give it a final press and add the pillow insert. I usually make about the same size pillows for seasonal use so I can just change out the outer cover as the season changes. I like to use a coordinating fabric for the reverse side to give a different look to the pillow.
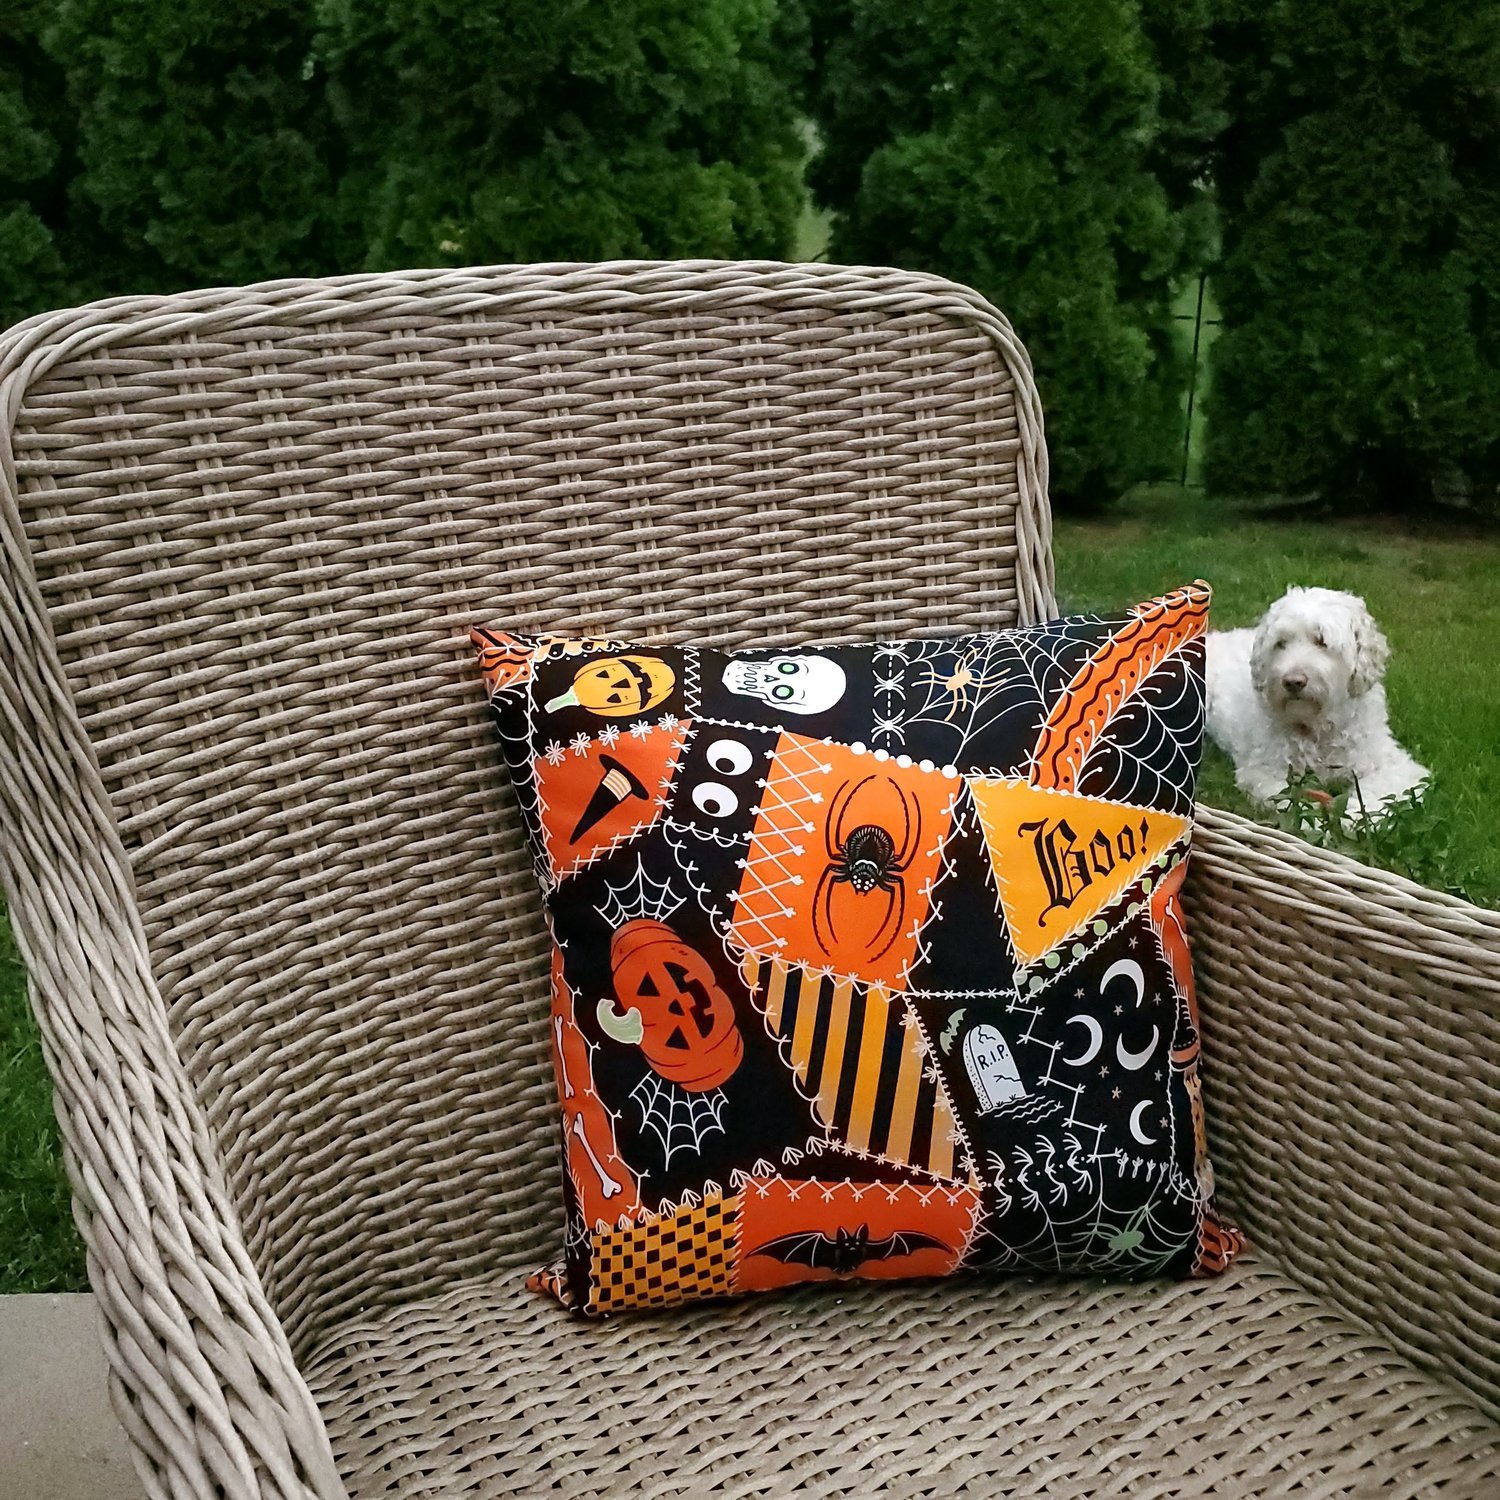
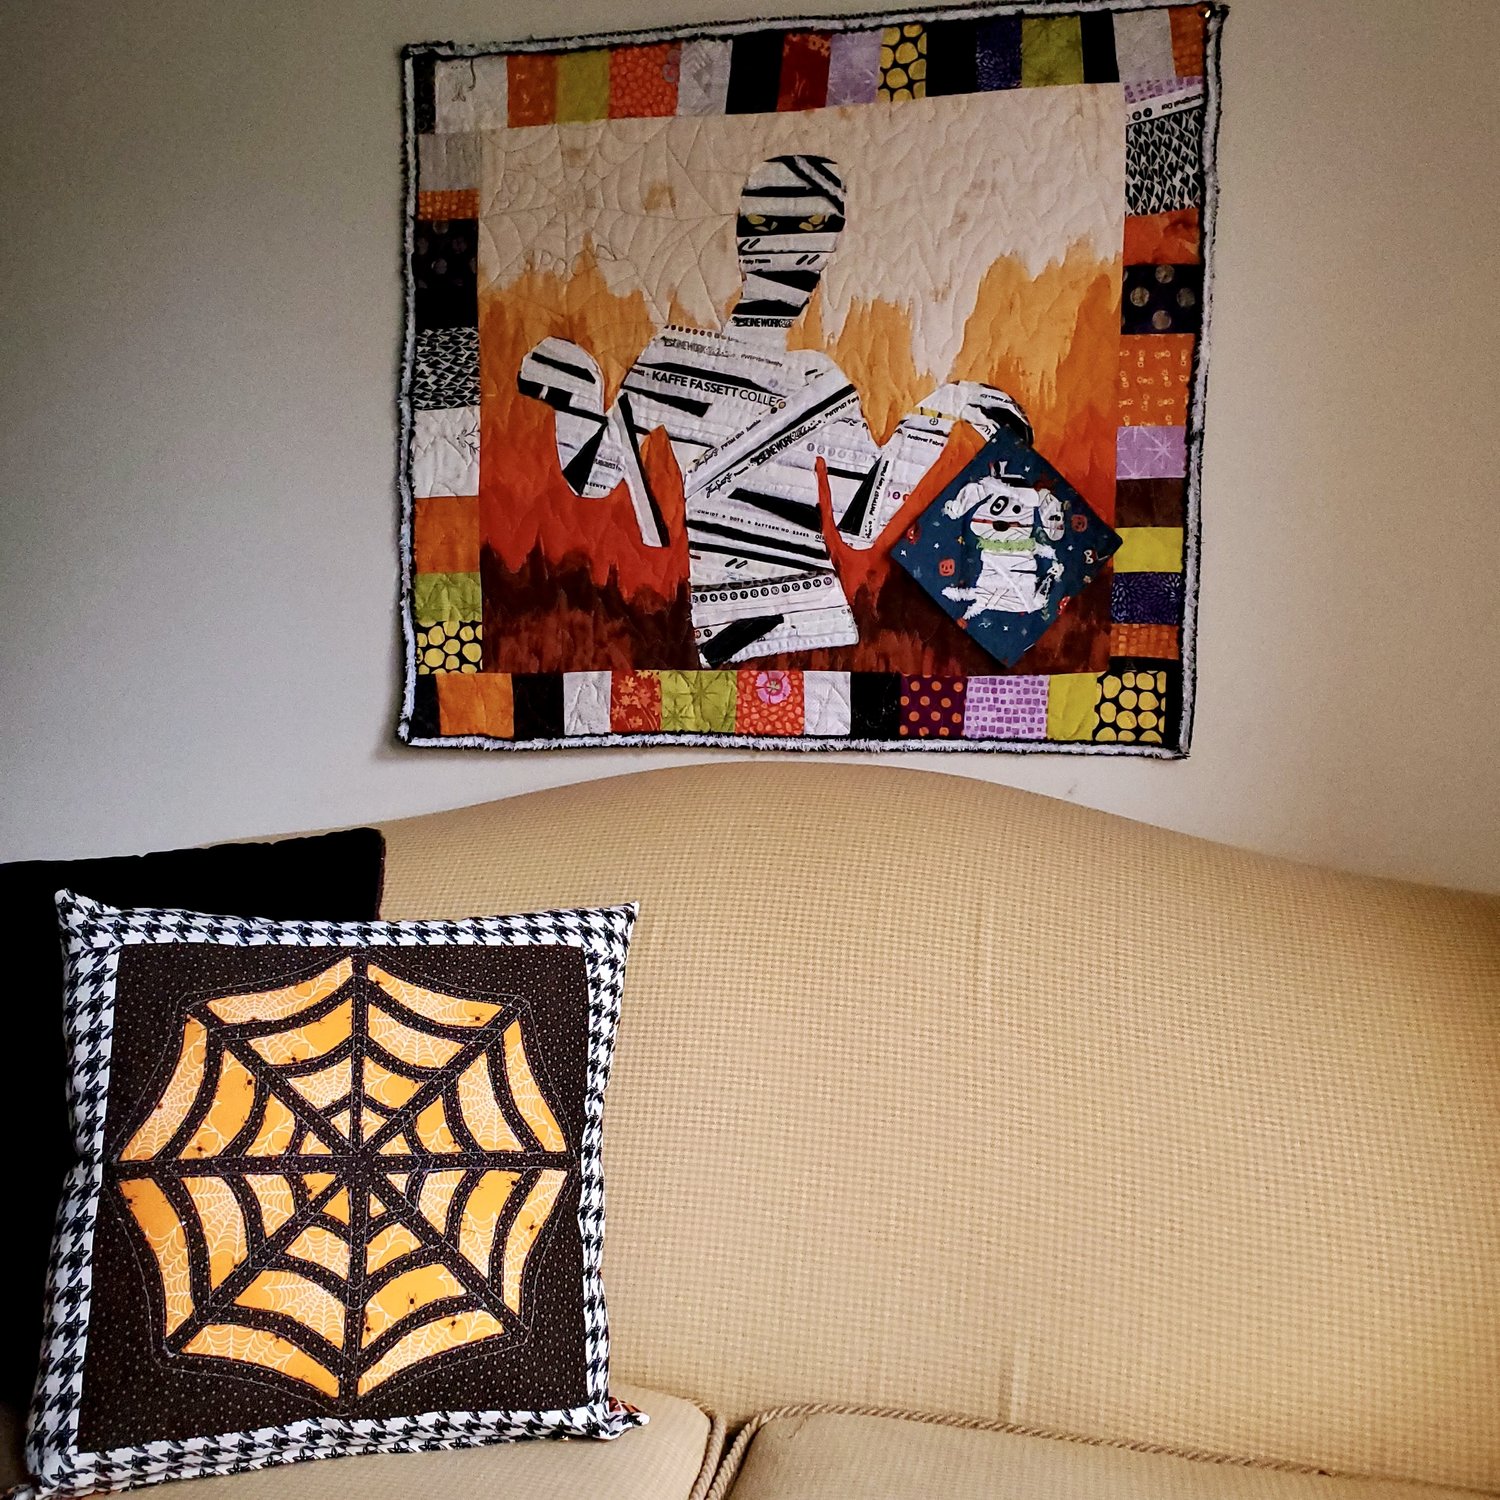
This will definitely add a bit of spooky fun to your decor. Check out my blog series to make this Mummy Quilt by trying out some improv quilting using your fabric selvages!