

Preparing Your Quilt for Longarm Quilting
15th Apr 2021
Are you ready for the big reveal? The last clue for the Fall 2020 Are You Game Puzzle Mystery Quilt will be shipping on April 30th. Be sure to keep an eye on our Cotton Cuts Facebook page for the live reveal on April 30th.
As you finish your quilt top, it is time to start planning for how you want it quilted. Many quilters chose to send their quilt to the professionals for longarm quilting.
I talked with Lilo from Trace Creek Quilting and she offered some insight from the Longarm quilter perspective. She suggested doing some research by looking at pictures of completed quilts to find a compatible look and esthetic for your vision of the finished quilt. It is somewhat similar to choosing a hairdresser, finding someone you can communicate your ideas and building trust to make it a reality. A good place to start might be with friends that have a good relationship with their quilter. Talk to them about their experience and look at the finished quilt. The most important first step will be good communication between you and the longarm quilter to determine the details of the quilted design and thread color.
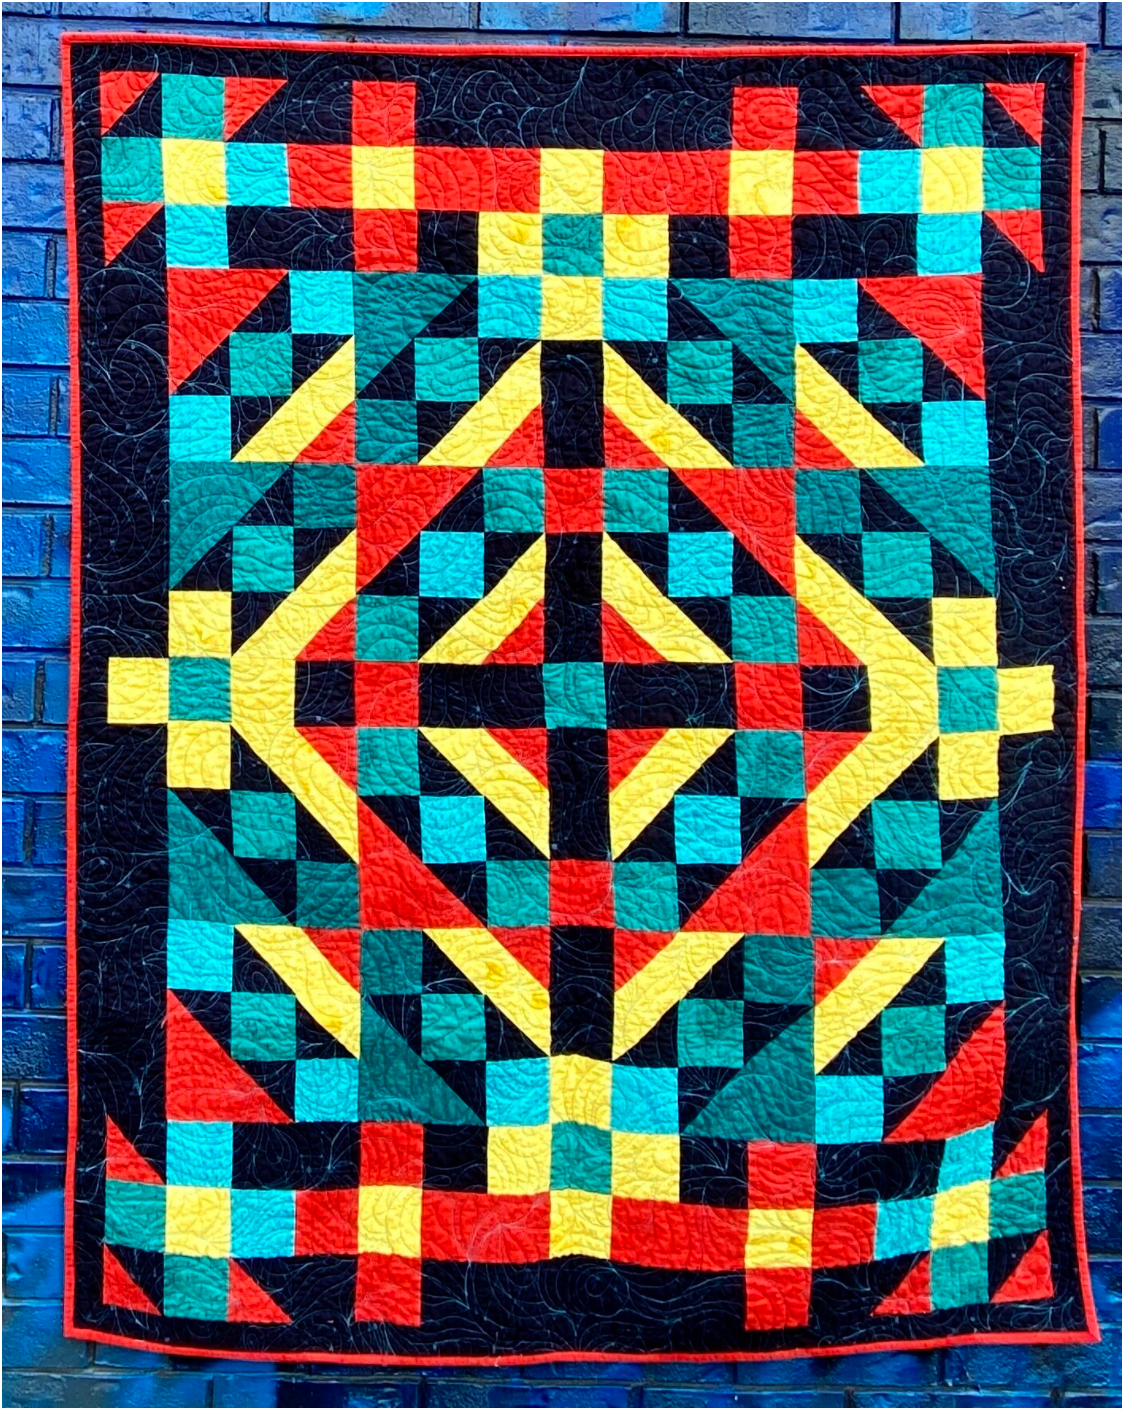
It is amazing how different the quilt looks after quilting as seen in this Cotton Cuts charity raffle quilt from the Spring 2020 Name of the Rose Puzzle Mystery Quilt.


Quilting gives so much texture and personality to the quilt. Be familiar with the order form and ask questions to clarify to prevent any misunderstanding. This lighthearted YouTube video from American Patchwork and Quilting gives a short overview of things to do before sending your finished top for quilting.
Here is a suggested list of how to prepare your quilt top for longarm quilting:
Press the quilt top checking to be sure seams are flat and going the same direction. Check to be sure seams are ¼”. If you have a section that is ⅛” or less when the quilt is put on the frame the tension can pull the seam apart at the weak point. It is much easier to fix before quilting!
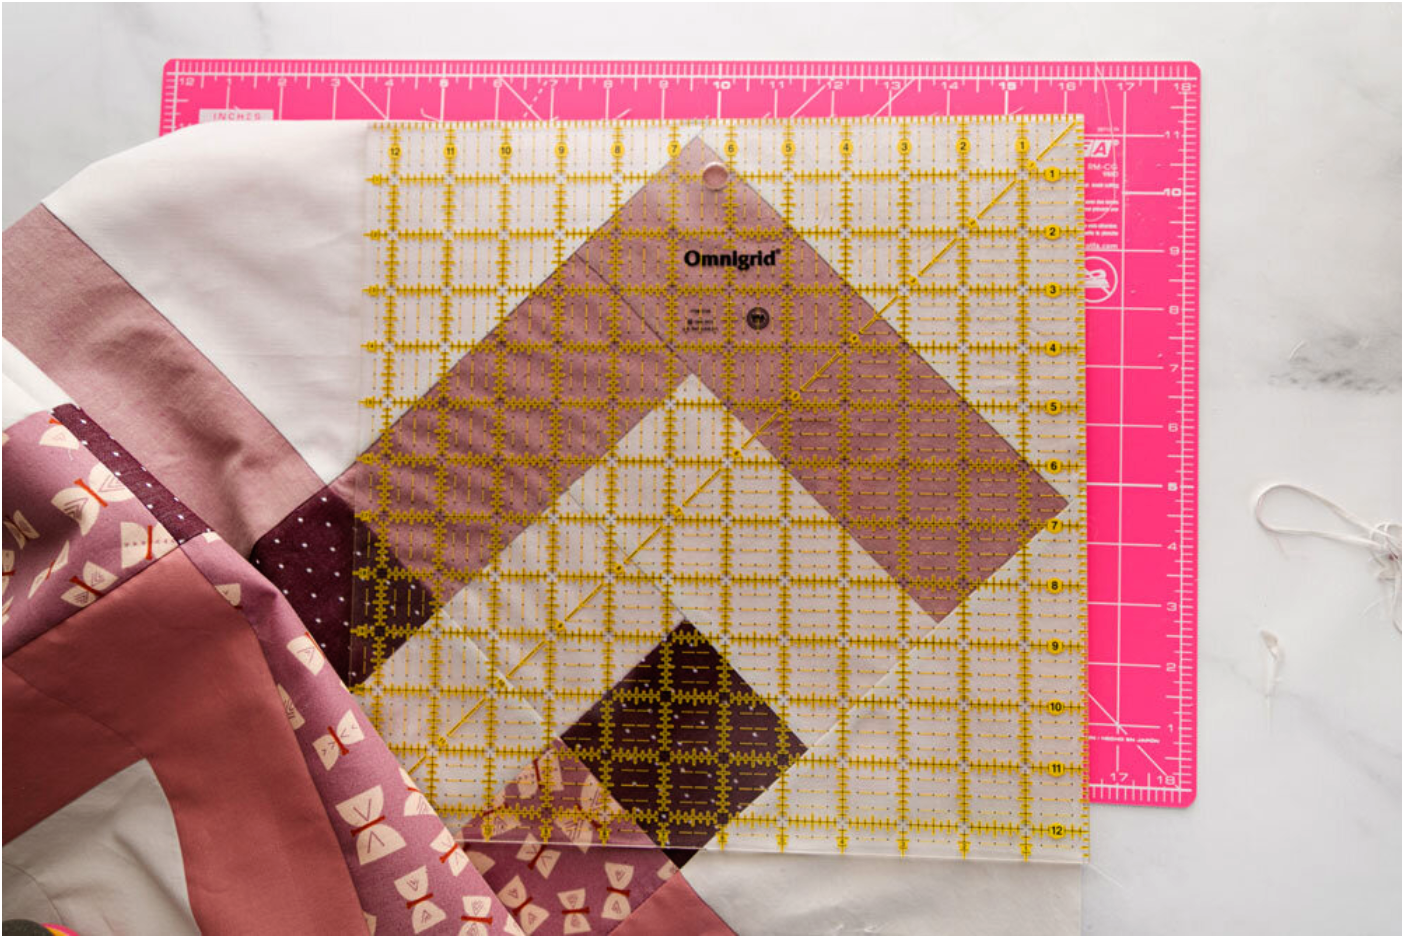
Square up the quilt top. You will want to use a square ruler on top of the cutting mat allowing ¼” from any points. It is a similar method used to square up fabric before cutting strips for borders or binding. Chasing Cottons quilt designs has a great tutorial. Also check out Suzy Quilts tutorial in her sew along showing how to position the ruler correctly on the corners.
Carefully clip all threads. This is especially important if you have a white or light color fabric next to a darker fabric. The threads will show through in the final quilt. This will take some time but worth your time in the completed quilt.
To keep the quilt square and to keep your seams from pulling apart you can staystitch ⅛” from the edge of the quilt top on all sides. This is a quick process that will yield good results.
Safety pin a square of fabric marked “Top” on the quilt top and backing to be sure the orientation is correct, especially important on directional fabric. Post it notes can fall off or be torn.
Carefully fold the quilt with the seams to the inside to keep them protected. Fold in half lengthwise twice and then place on a hanger or if mailing continue to fold to fit in the box. Fold quilt top and backing separately.
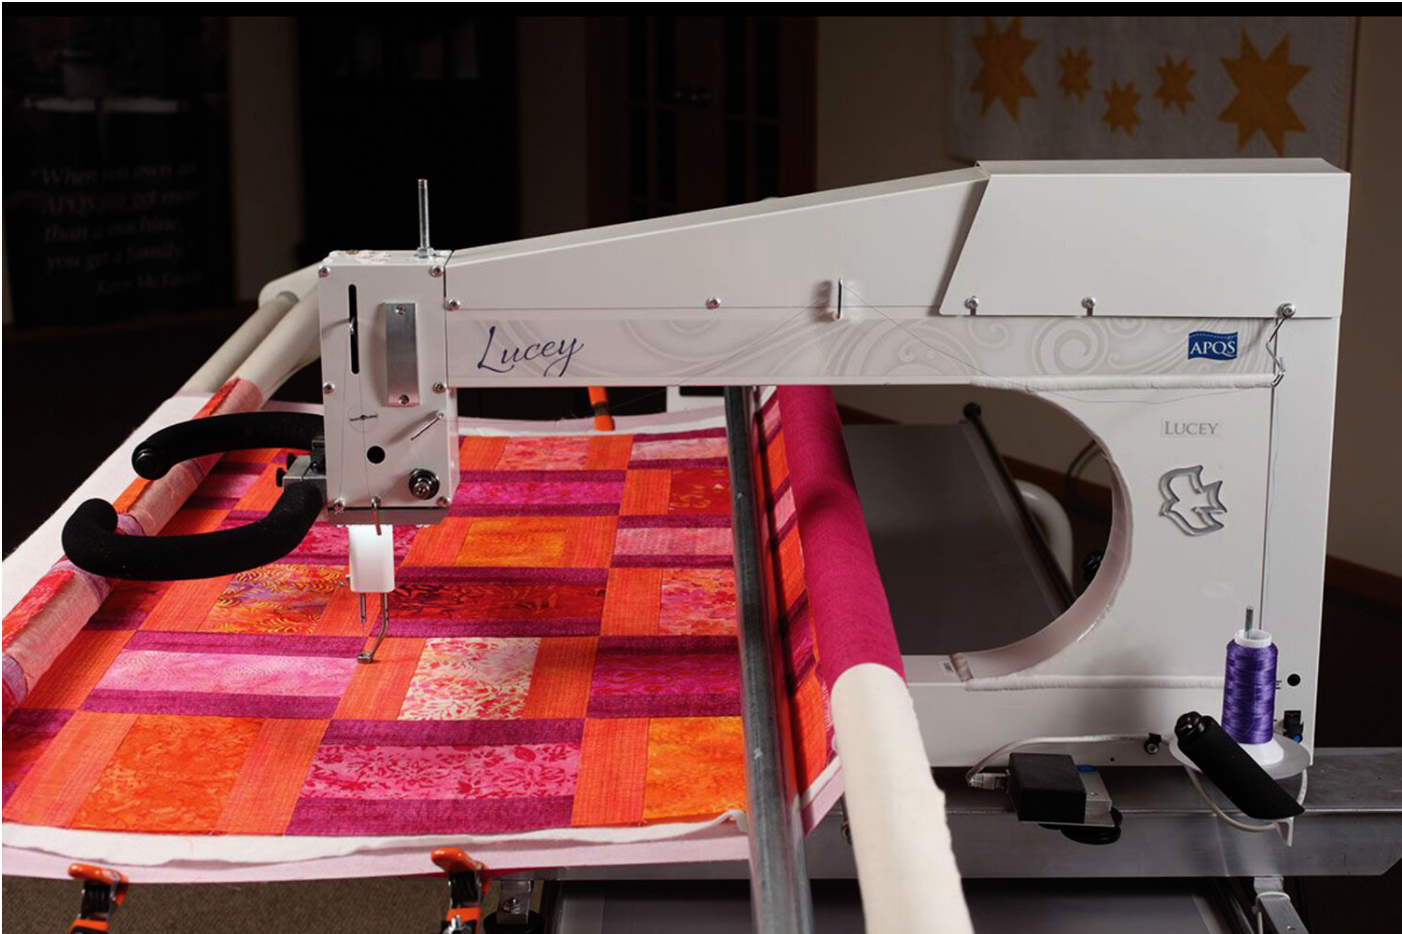
Backing fabric needs to be 4” bigger on all four sides. If the top is 50x60 then the back is cut 58x68. Be sure to remove the selvage edge and square up the piece. The extra fabric is needed to attach the quilt to the frame as shown in this picture from the APQS website.
If you need to piece the back the seam should be ½” and pressed open. If possible have the seam run horizontal across the back. It will help keep the quilt flat as it is loaded on the longarm machine.
Be sure you understand what kind of batting you order since it can affect the look of the quilt. If you have white fabric you may request white batting since the color will show through if it is off white or speckled causing the white fabric to appear dingy.
If you are adding borders be sure to square up the top first and then measure for the borders to keep it square to avoid puckering as it is quilted. In this tutorial Running Sticth Quilts explains the process.
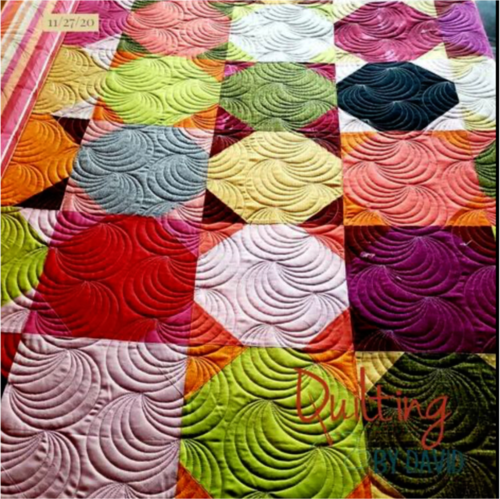
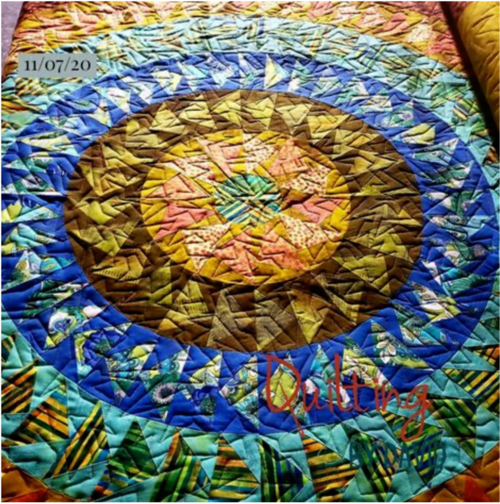
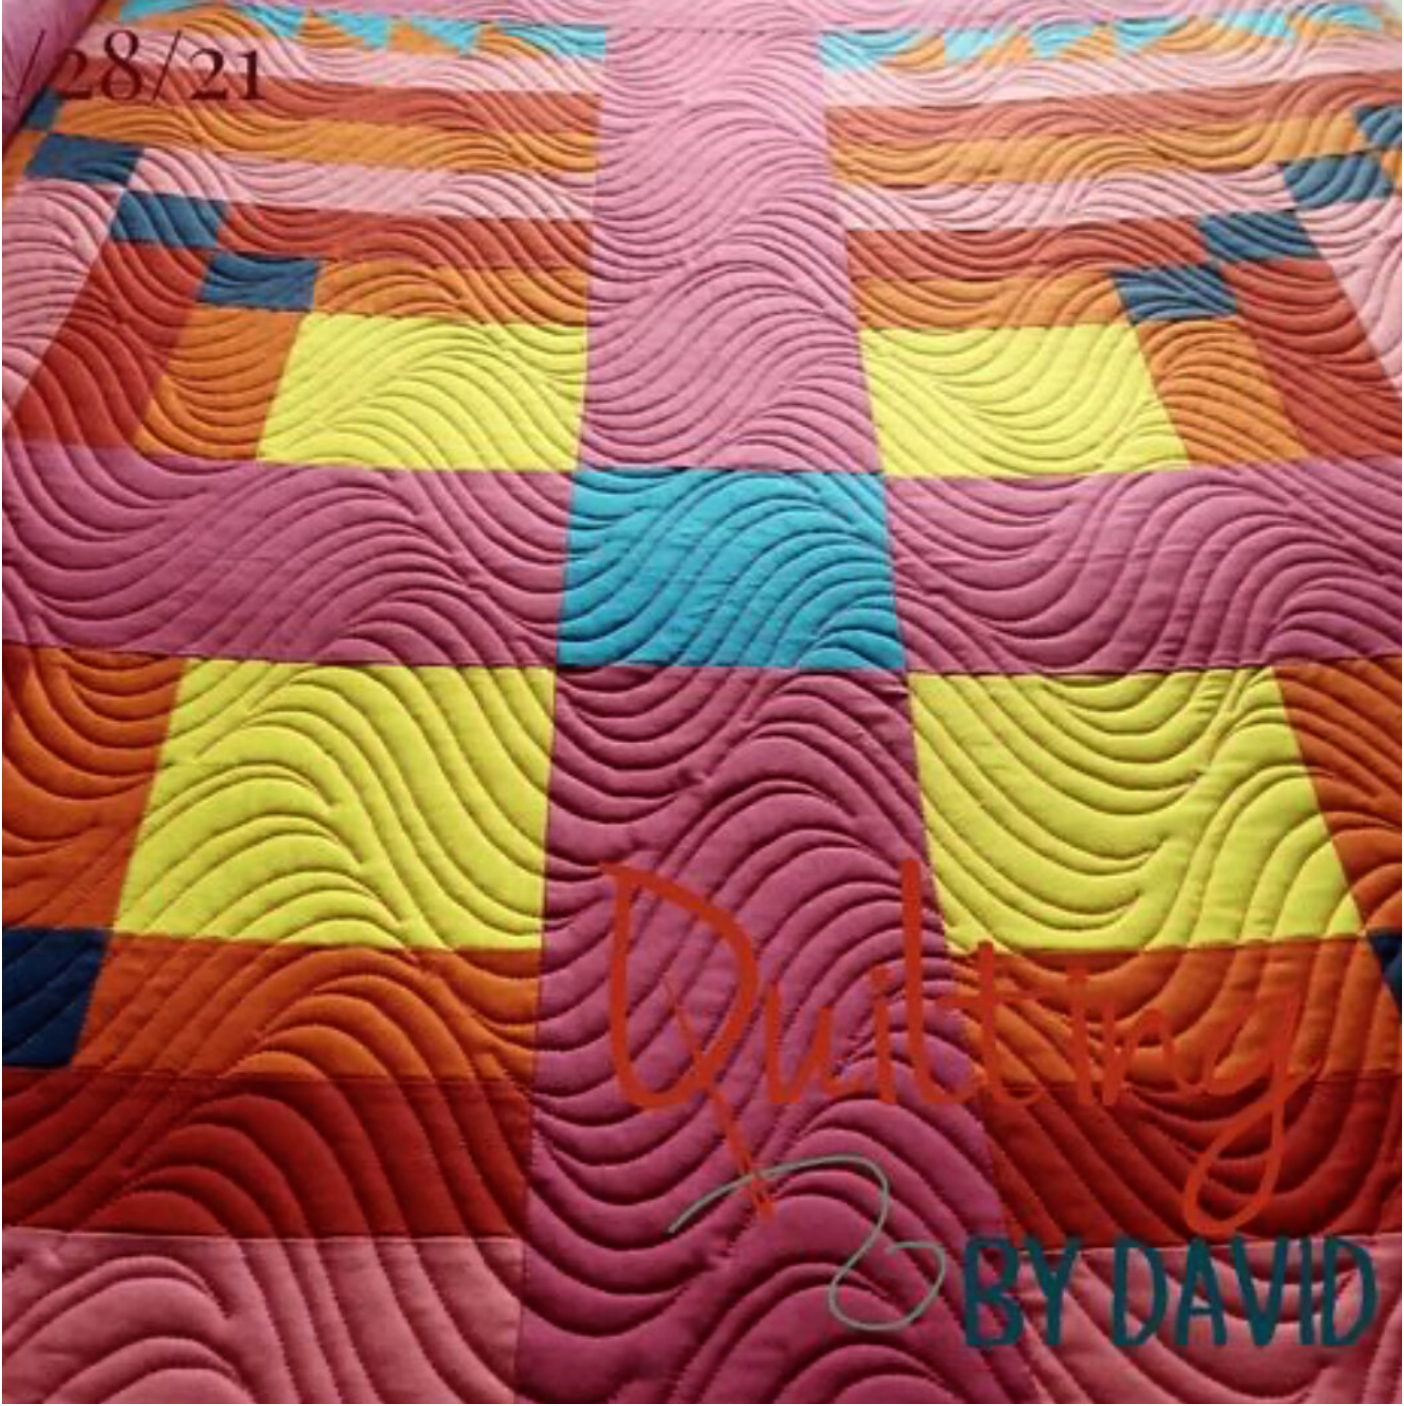
Check out these quilts done by longarm quilter - Quilting By David. His pictures show amazing detail!
 As we are all in different places on our quilting journey, I hope this helps you be prepared for the next step of quilting your quilt and to avoid some common mistakes. I have only made two quilts that were sent to the longarm quilter so I am still a beginner learning as I go along. It is very fulfilling and exciting to finish a quilt that will be enjoyed for years!