DIY Ombre Totes
15th Oct 2020
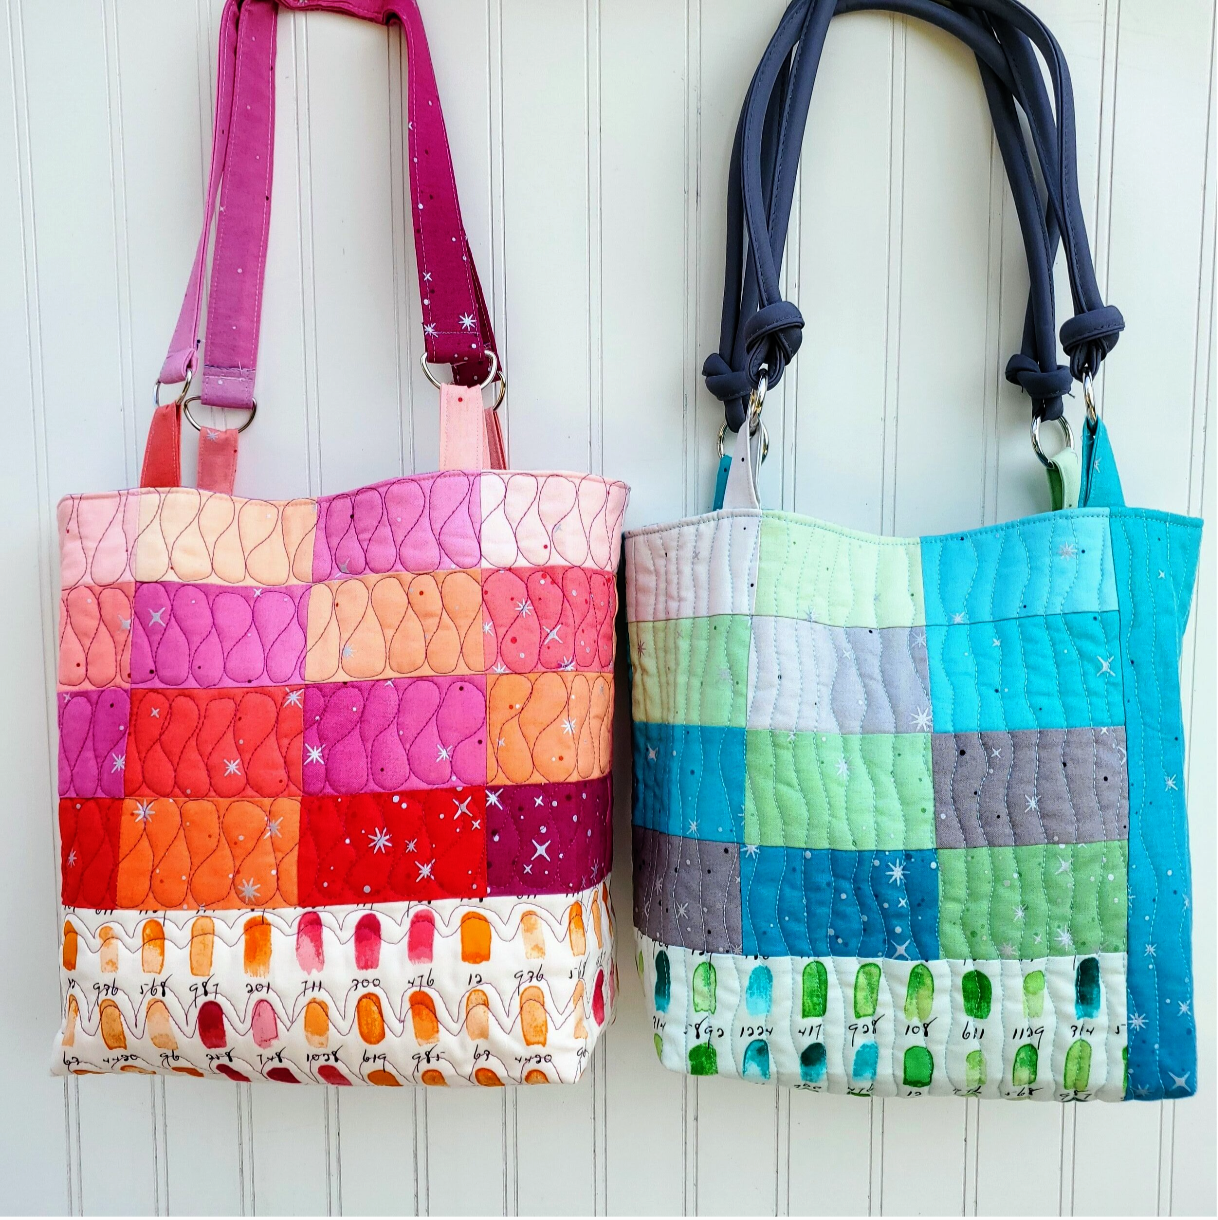
When I first received these beautiful fabrics I thought I wanted to make something to show off this fabric line. I like to use a fun tote to carry sewing projects or books from the library and using it just brightens up my day! Fabric has a way of bringing joy to everyone! I did not use a particular pattern instead relying on serendipity. You can easily find patterns on Pinterest to guide you.
Materials needed
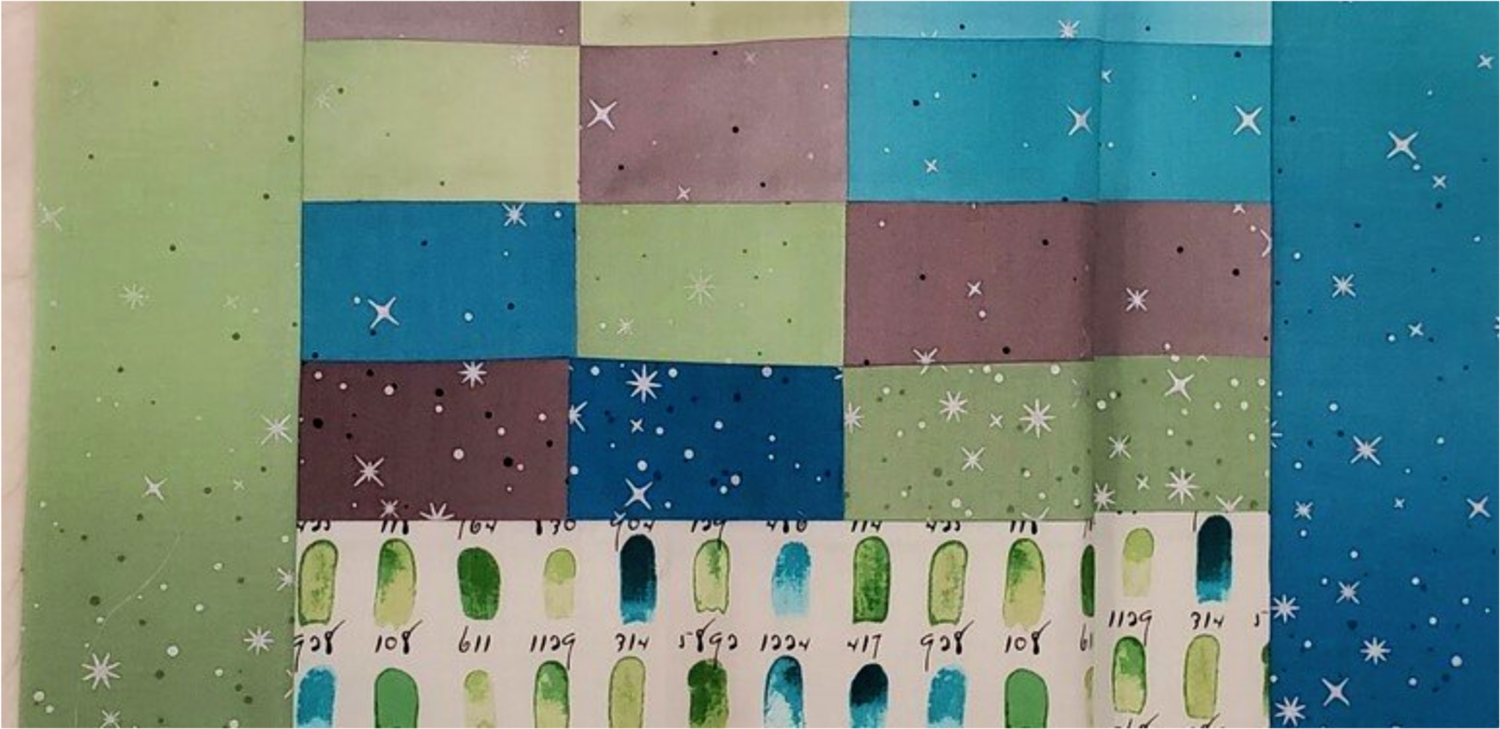
Ombré Fairy Dust fabrics from this month’s Cotton Cuts Classic box (it’s not too late to order your October box)
Coordinating thread
Fabric for tote lining
Optional purse hardware and handles
Quilt batting
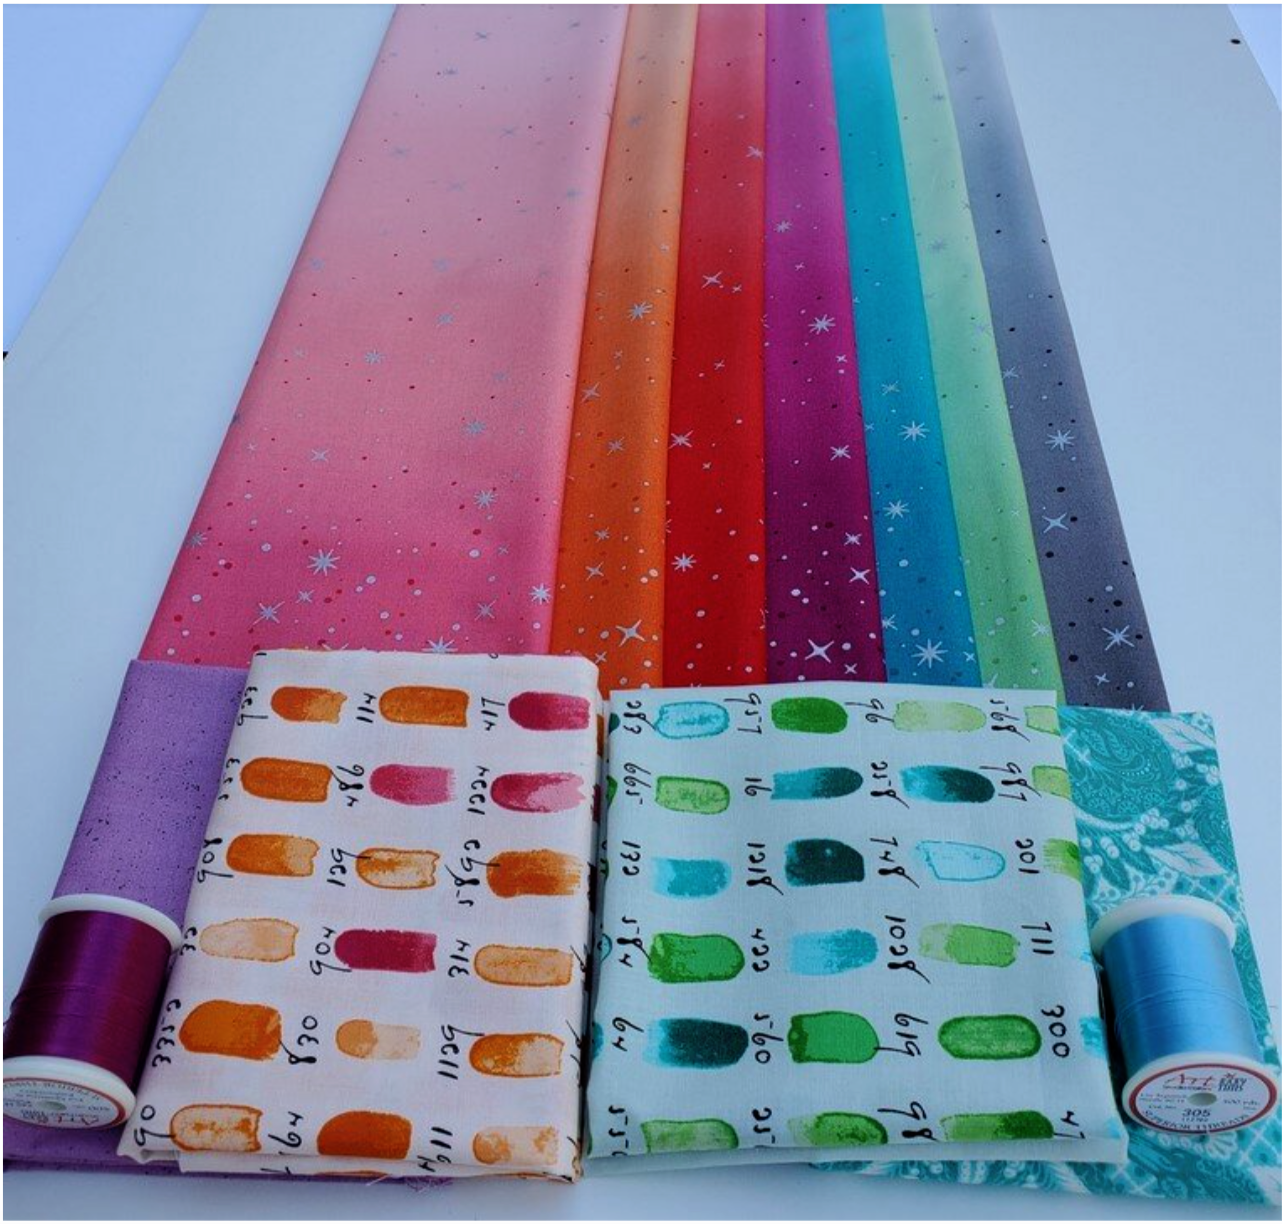
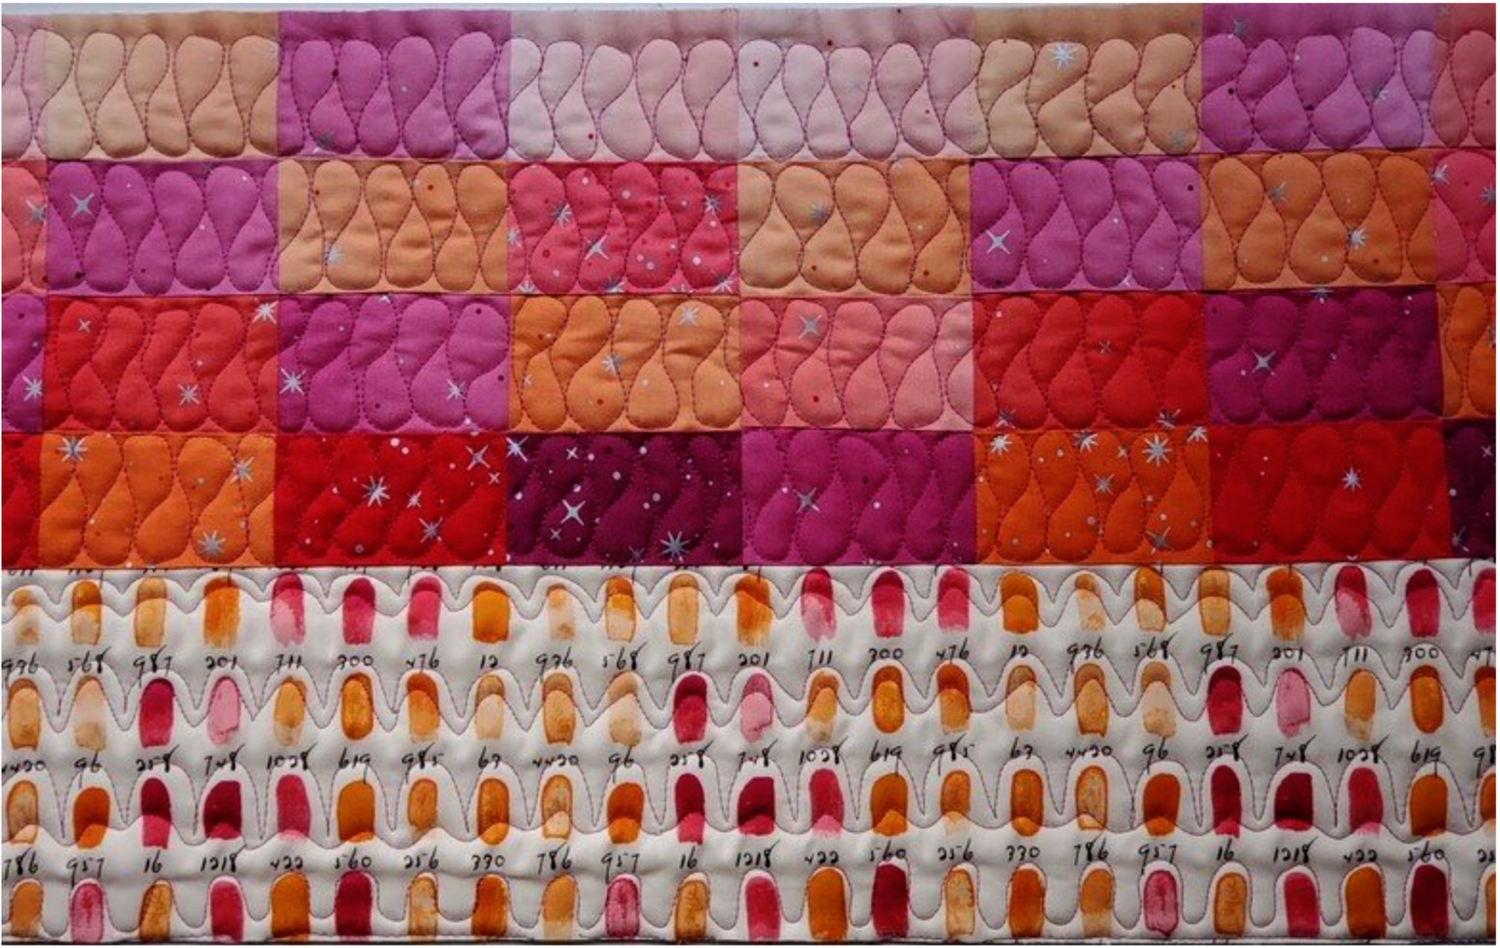
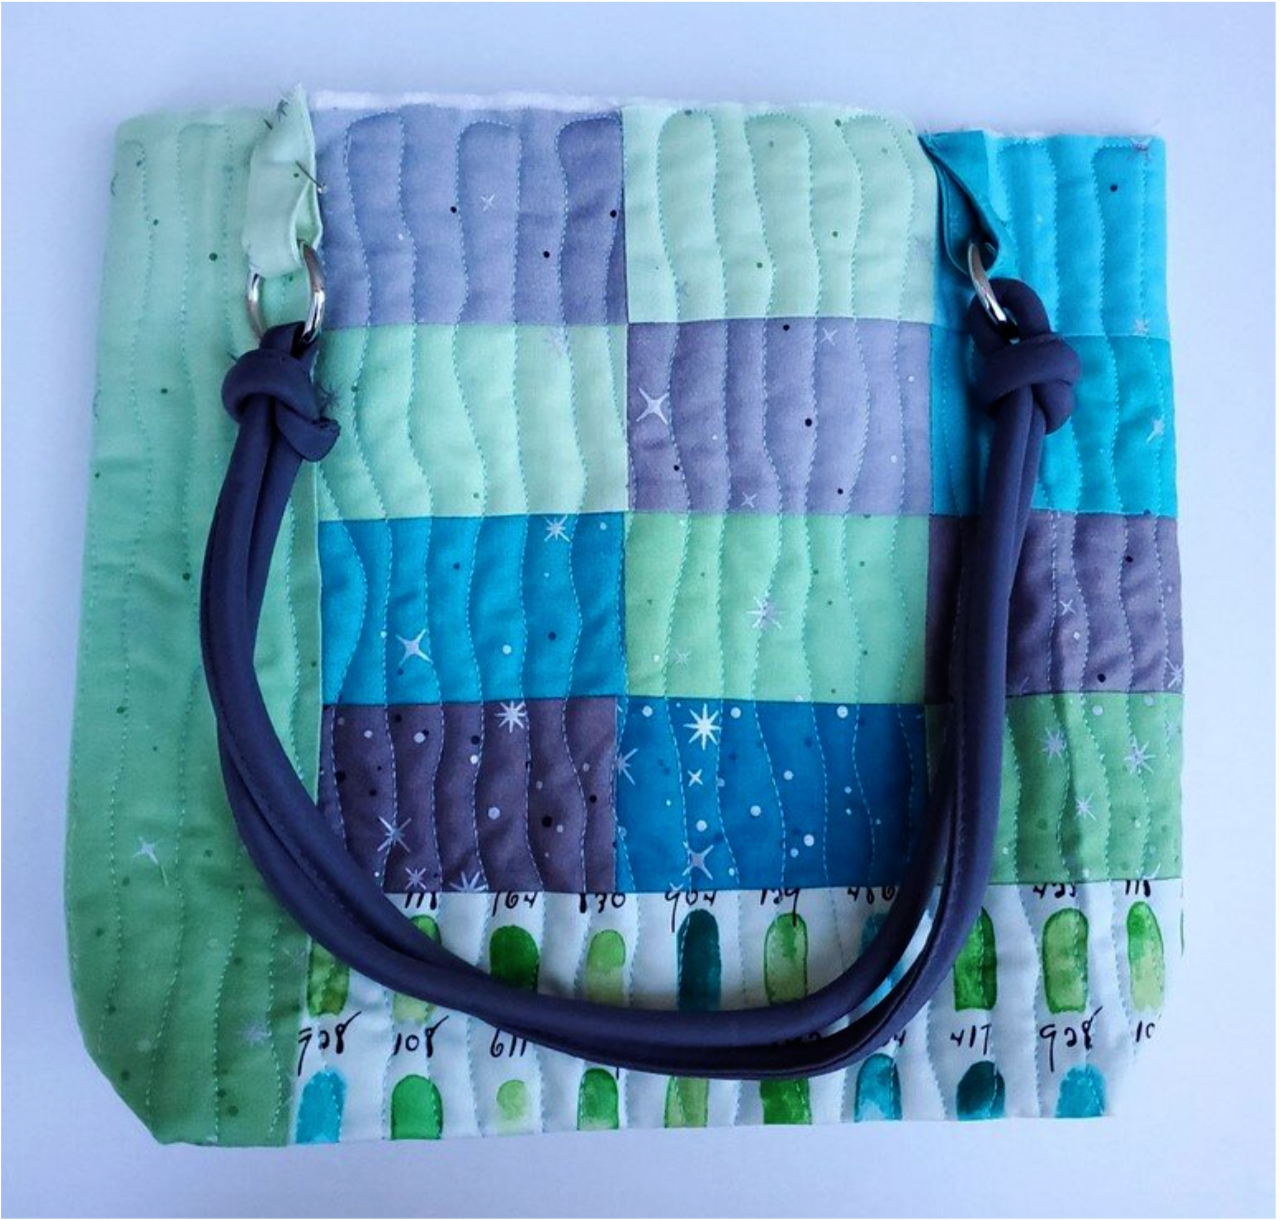
Like most of the projects I make for the blog, I had so much fun making the first one that I had to make a second one! With such a great variety of colors in this V&Co. fabric, I was inspired to make one in cool colors and one in warm tones. I used the Giucy Giuce Prism fabrics from July’s Modern Maker box to add an extra pop to the tote bag. Cotton Cuts does such a great job of providing a variety of fabrics and threads that coordinate well with each other in the monthly subscription boxes.
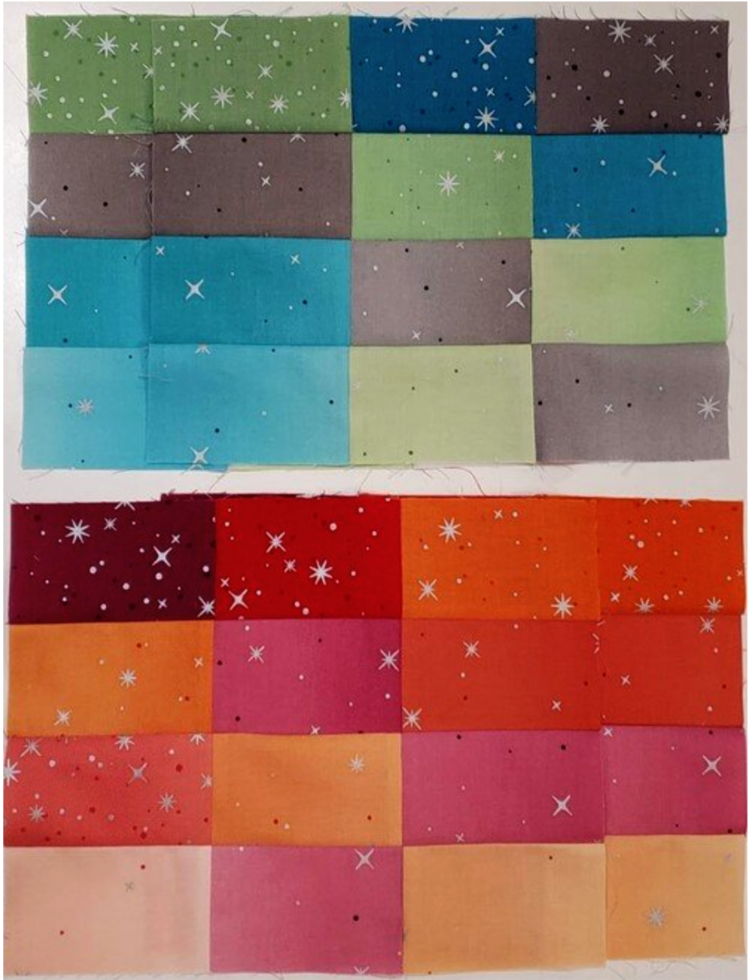
To get started, I cut 2 ½” WOF strips of my ombré fabrics to get the full color range. Sub-cut into 4” rectangles arranging the pieces in a pleasing way. Chain piece the rectangles together to form a bigger rectangle 3 wide by 4 tall. Make two.
Sew the two bigger rectangles together. For the cool color tote I decided to add one strip of the paint chips fabric along the bottom edge and finish it off with blue and green on each end of the rectangle. Cut to fit the rectangles. On the warm color one I added an extra row of color rectangles so the blocks ended up in 4 x 4 rows. I then added the paint chips fabric strip along the bottom.
This big rectangle ended up being approximately 14” x 28”. In the next step, I made a quilt sandwich using white muslin as a backing, cotton batting and the top then spray basting the layers together.
This past year I have been learning to free motion quilt and these smaller projects are a perfect way to improve my skills and try new ideas. I have watched several videos on Craftsy to learn and in particular Angela Walters 28 Days to Better Free-Motion Quilting. I encourage you to give it a try as you can see it really adds some texture and interest to the tote. Be sure to trim and square up the excess batting and backing fabric.
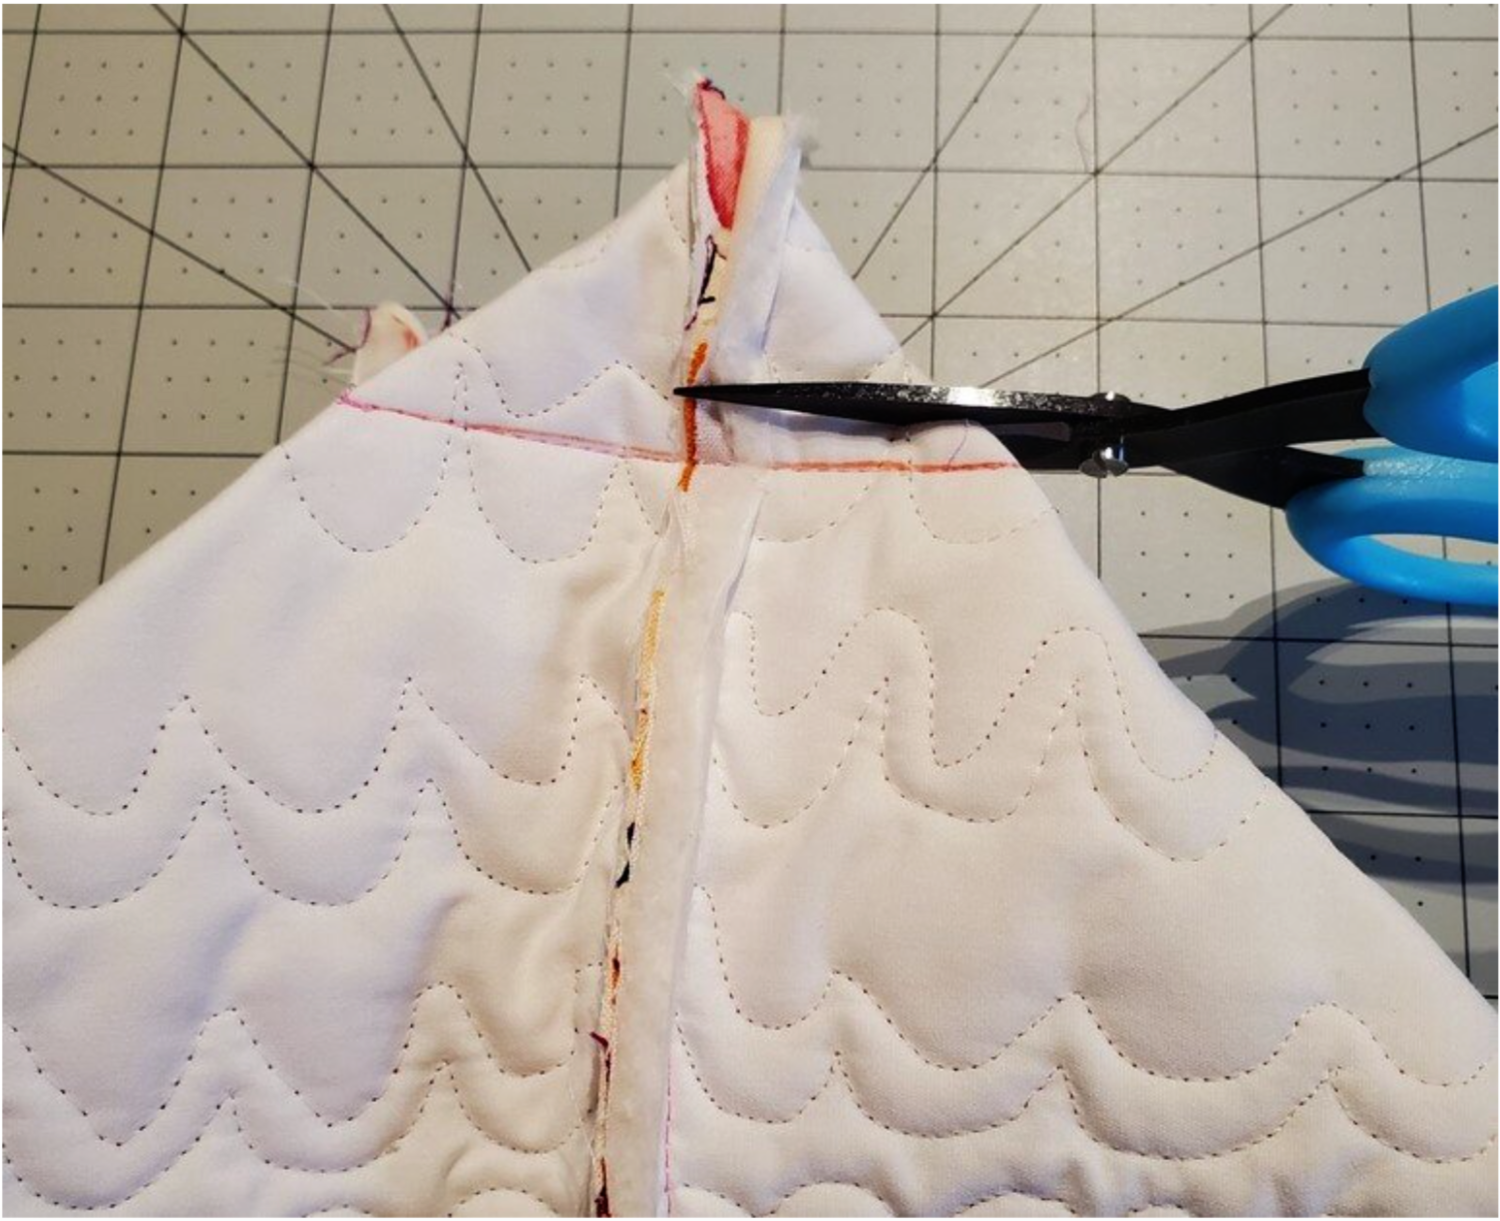
Next, sew the bottom edge and side seams together with right sides together and a ¼” seam. Box the corners by lining up the seams and marking 1 ½” from the corner. Sew on the line and trim to ¼” seam.
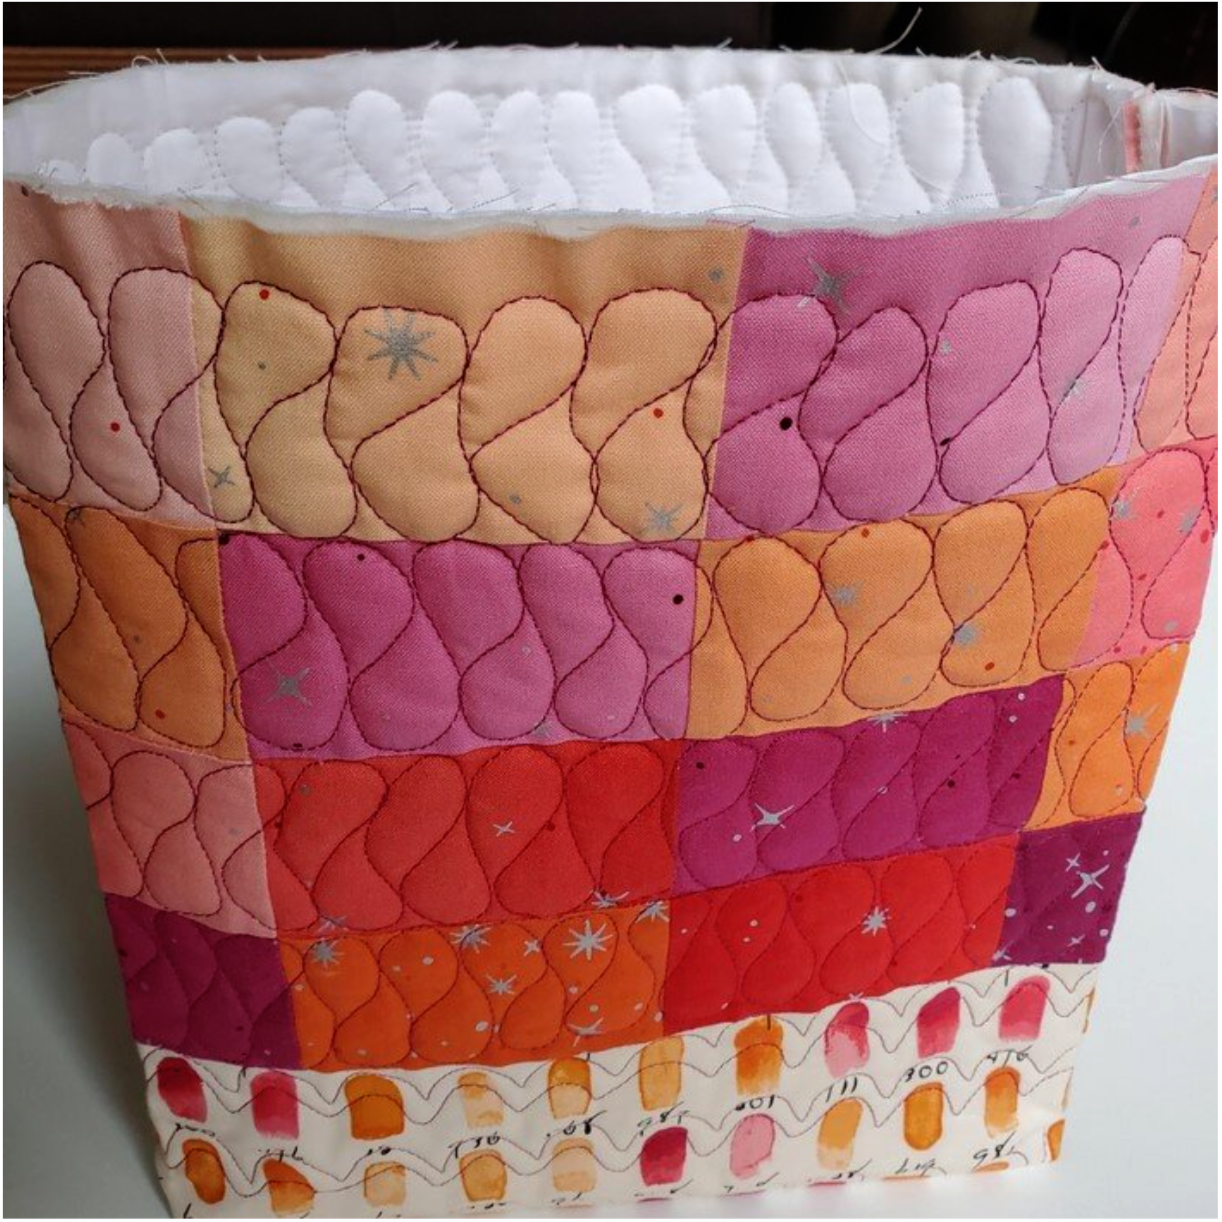
Cut a piece of the lining fabric to match the size of your exterior quilted rectangle. Sew the side seam and the bottom leave a 4” opening to turn the tote after you sew it to the exterior. Press the seams on the lining and exterior bag. It is helpful to press in the shape of the tote following the line from the bottom of the boxed corner to the top edge of the bag so the bag stands upright on its own.
Now you’re ready to make handles. For the cool colors I had purchased a set of gray handles that complemented the design. I made tabs from the extra rectangles by folding in the raw edges and top stitching. I usually baste these in place to be sure they are exactly where they should be. You will loop the tab through the D ring checking to be sure the handles are facing the right way.
On the warm color tote I decided to make straps using a 3” wide WOF cut, fold in half and stitch ⅜” seam along the long side. Turn right side out. Use this fabric casing to cover 1” wide polyester webbing to create the straps. Cut into two equal pieces. I learned to be careful with the polyester webbing when trimming on the ironing board. When the hot iron comes in direct contact it melts and makes a mess on your iron and pressing surface! I would recommend using a Teflon sheet to press.
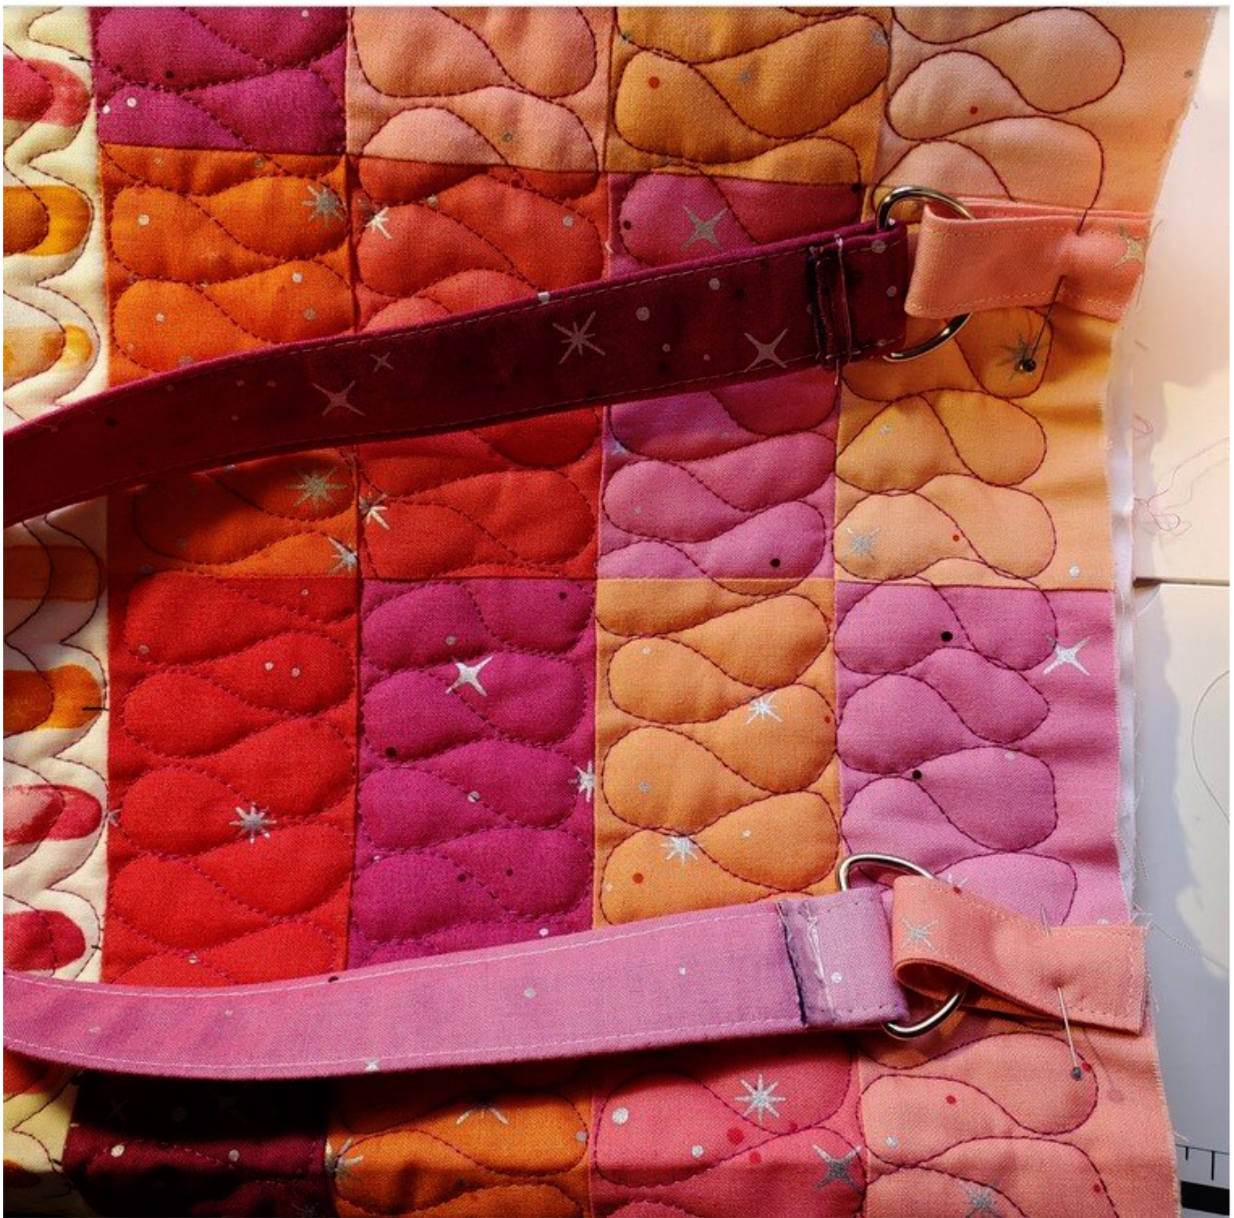
I used the same method of the tabs and D rings to attach the straps. It is an inexpensive way to give the tote a more professional look.
We are almost finished. It is time to sew the lining to the exterior. With the right sides together, placing the exterior of the bag inside the lining fabric sew a ¼” seam around the top edge of the tote. If your machine has a walking foot it will be helpful to manage all the layers. Turn right sides out pulling through the opening left in the lining fabric. Press the lining and take care to fold the seam allowance inward to top stitch the opening closed.
Press the top edge of the tote to prepare for the final step of top stitching about ⅛” from the edge along the top of the tote. Depending on the style of the bag you may want a thread that stands out or blends in with the fabric. Give this gorgeous bag a final press and admire your work!