What Can I Do With A Stitch-It Box?
Posted by Becca Shifflett on 21st Nov 2022
This fall, Cotton Cuts launched a new subscription service 'Stitch It' - that features a large volume of their common die cut pieces - from triangles, to squares, to rectangles! The entire box is designed to spark your inner creativity as it's provided to you without a pattern. So, I thought this would be a great opportunity to offer up a potential block you could make using some of the pieces from your Stitch It box!
This month, I decided to use some small triangles and large triangles of two different prints to build a block that kind of looks like one print bleeding into another. I'm sure someone out there has designed this block before, but for me...I like to call this my 'Yin & Yang' block! Let me walk you through, with pictures, what you need to do step-by-step (anyone else singing a New Kids on the Block song when I say that?).
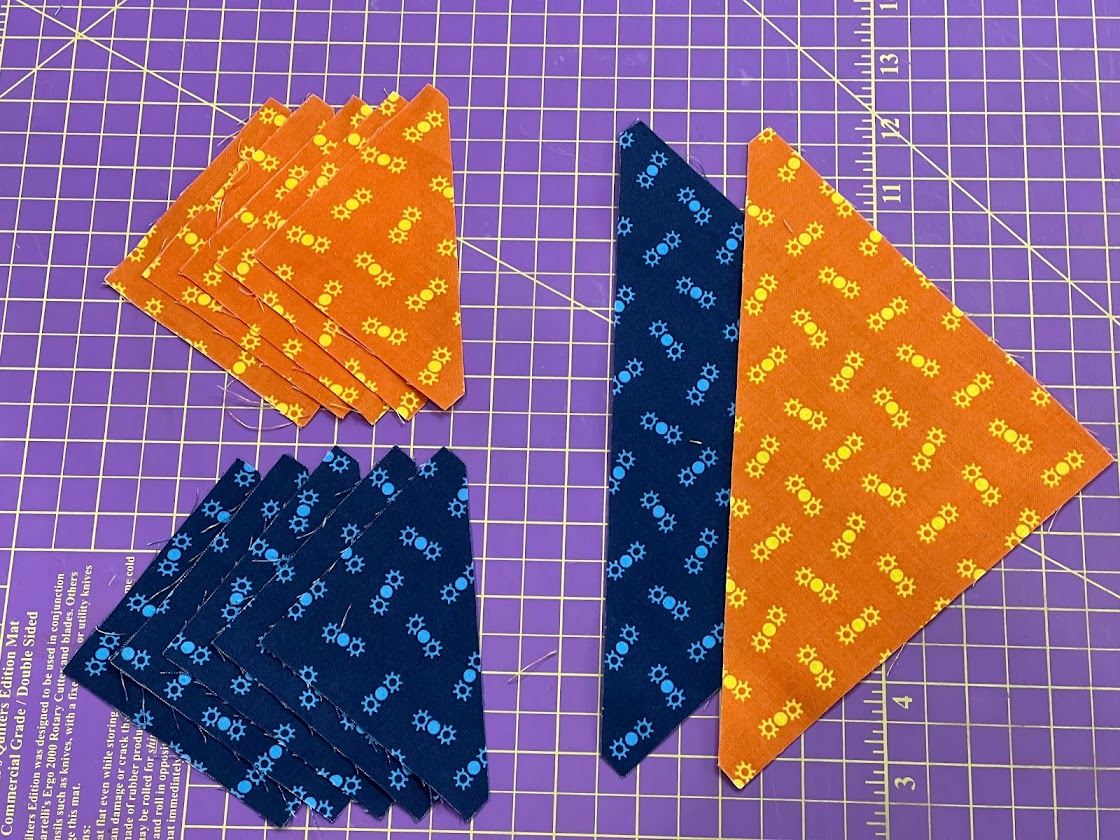
Step 1: Gather your materials.
You'll need to pick 2 prints you want to work with. From each of those prints, grab 5 small triangles and 1 large triangle.
Step 2: Make 3 Half-Square Triangles
Use Fabric A and Fabric B to create 3 half square triangle units together. To do this, you'll grab a small triangle of Fabric A and a small triangle of Fabric B and put them right sides together with the long (& stretchy!) edge matched up. You'll stitch just a 1/4" away from that long edge and once completed, you'll press those seams open so that the block lays nice and flat. You can, if you like, press to one side - but I found pressing the seam open for these blocks will help reduce bulk later in the project.
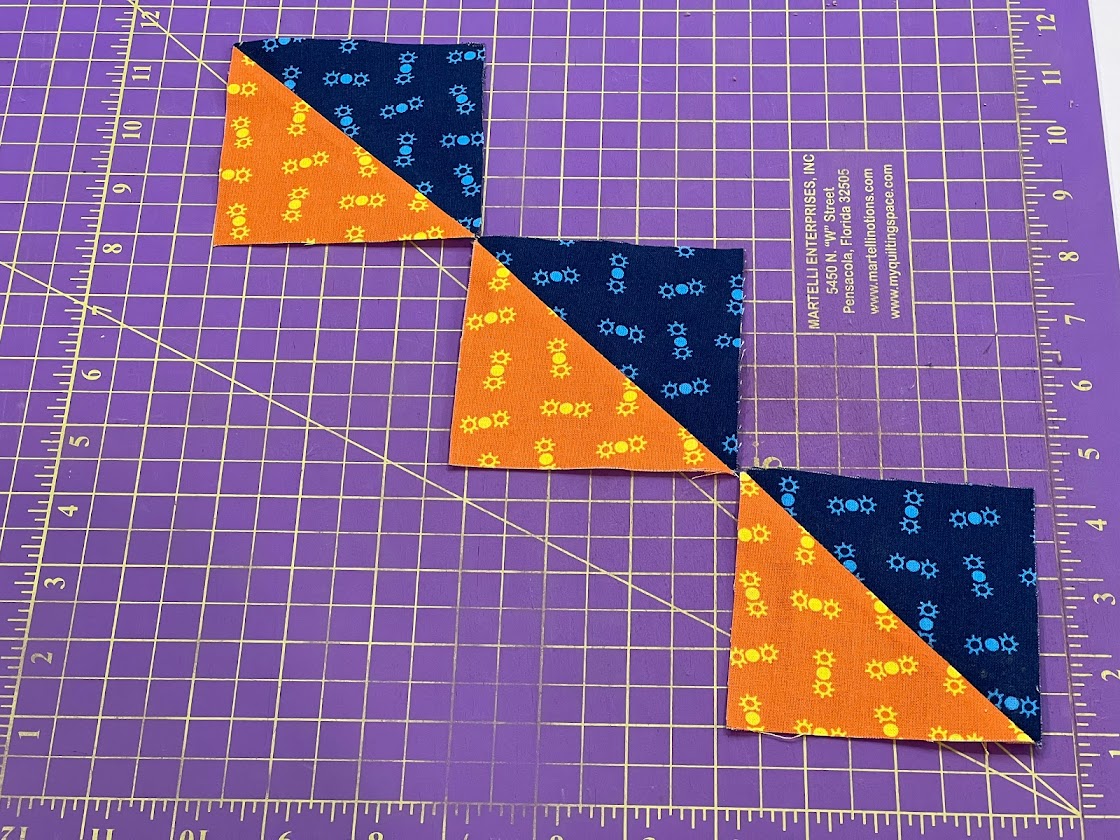
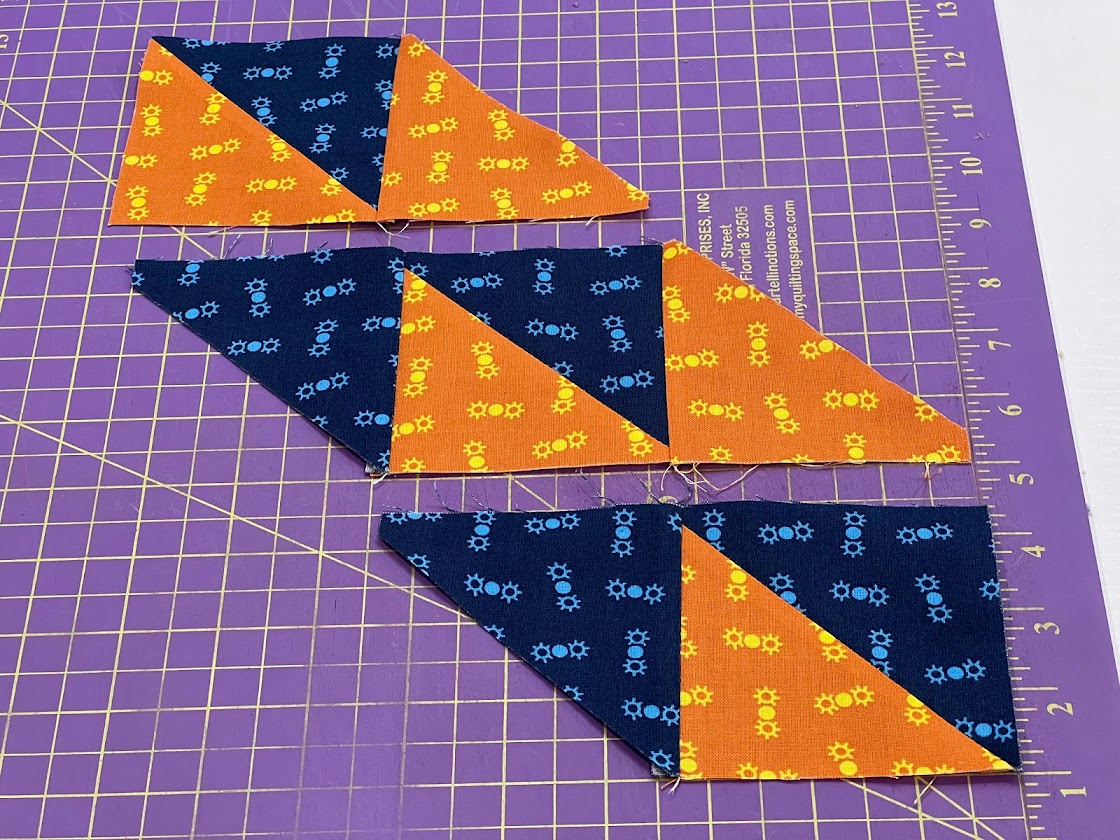
Step 3: Stagger the Half-Square Triangles
Use the remaining 2 triangles from Fabric A and Fabric B and attach them to the squares you just made. This is a little hard to explain in words - so the picture should really help. You'll want to make sure that first all of your HSTs are going in the same direction, then you'll use the opposite Fabric triangle to touch each edge. On the top HST, you'll attach to the right, the middle will have one on either side, and the bottom will have one attached to the left. The trick in this case is to always sew the short side of your triangle to the half-square triangle - which will result in a diagonal edge on your row. Don't panic - that's right! When you're done sewing, press the seams towards the triangles (away from the half square triangles)
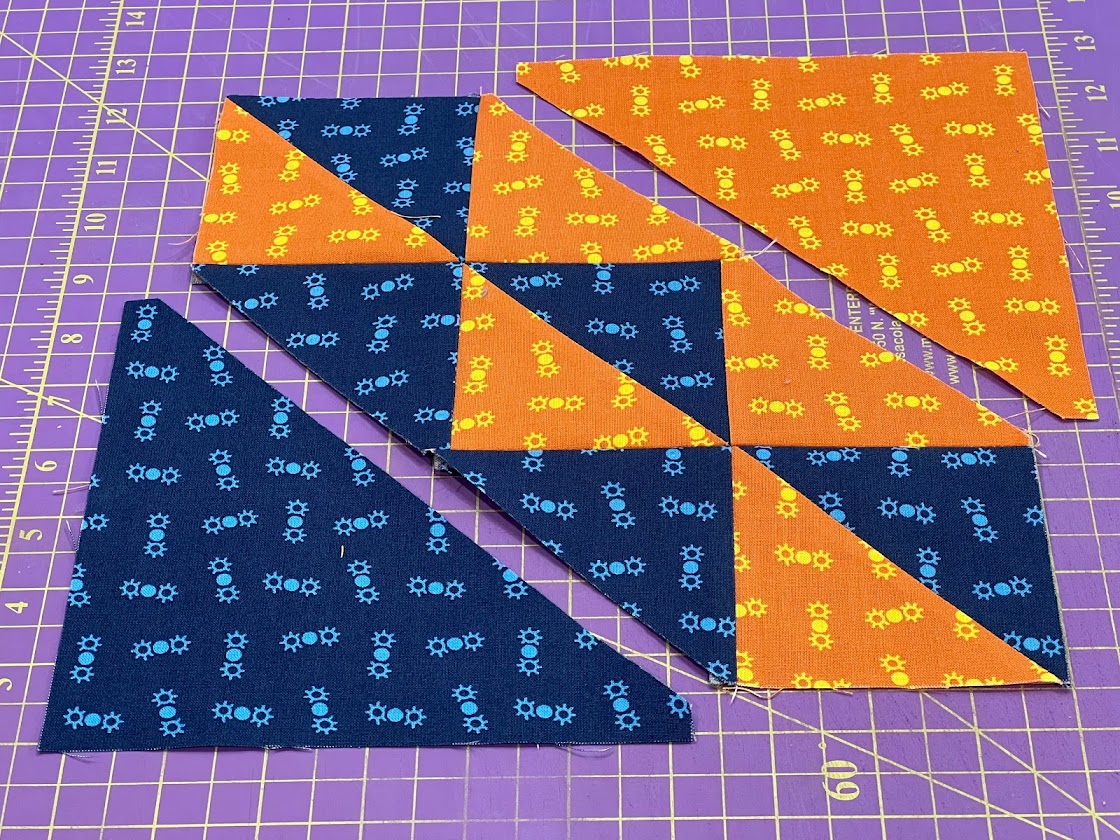
Step 4: Sew Center Row Together
Now that you have your center row together, position the fabric so that you're you're lining up the 'offsetting' triangle from each row directly above the half square triangle that's below the block. The goal is to make a strip - not a block - so don't worry about having square sides - you should be continuing to build out the long diagonal edge! Again, super thankful for technology here because the picture explains this SO much better than my words do.
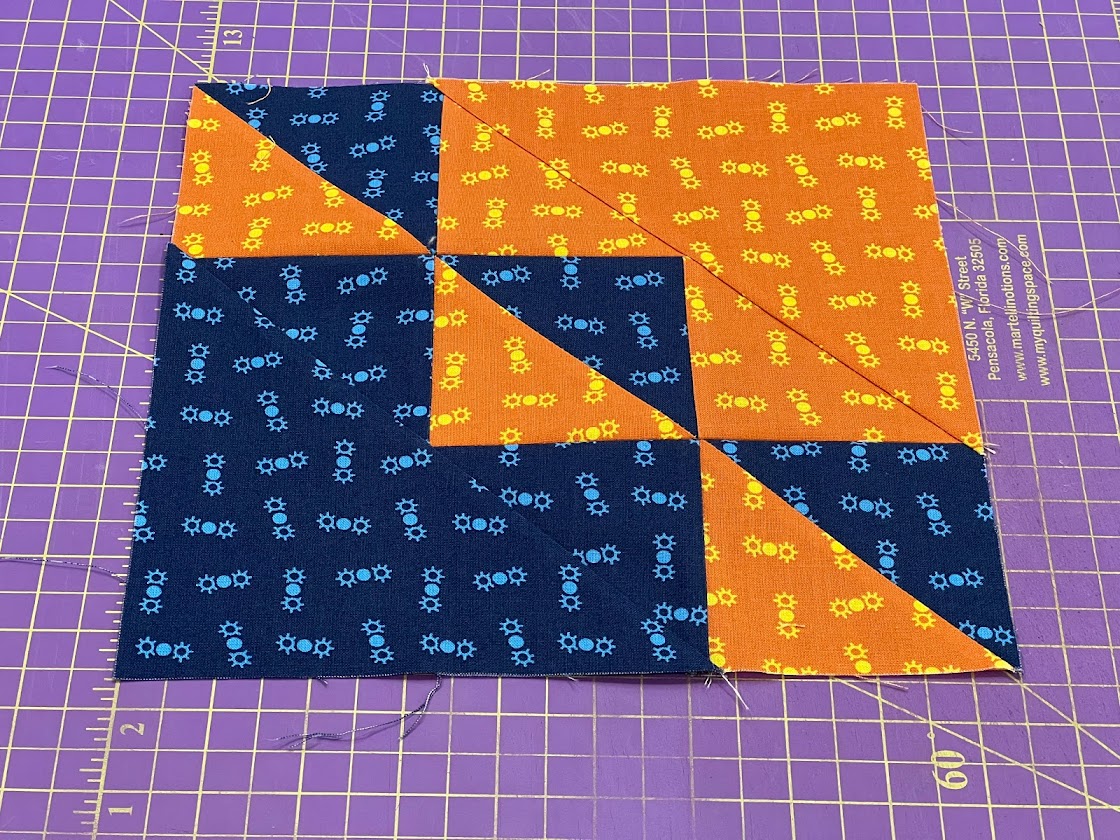
Step 5: Add the large triangles
All that's left to do is sew the large triangles onto each long edge that we just created so that we square up the block. Match up the long edge of the triangle to the long edge of the center strip that you created and sew (carefully!) 1/4" all the way down. For my block, I matched the large triangle to the offsetting smaller triangles (so Fabric A touched Fabric A; Fabric B touched Fabric B).