

Stitch-It Boxes
Posted by Becca Shifflett on 13th Oct 2022
Last month, Cotton Cuts launched a new product that's SUPER exciting! It's an assortment of die cut pieces including squares, half-square triangles, quarter square triangles, and rectangles. Each of the die cut pieces features one of 4 coordinated prints - so no matter how you put them together, the fabric should still play quite nicely together. The Stitch-It box comes in two sizes: the small offers 250 pre-cut pieces, and the large offers 400 pre-cut pieces. And...each box launches on the 15th of the month, so if you missed this in September, October's boxes are RIGHT around the corner!
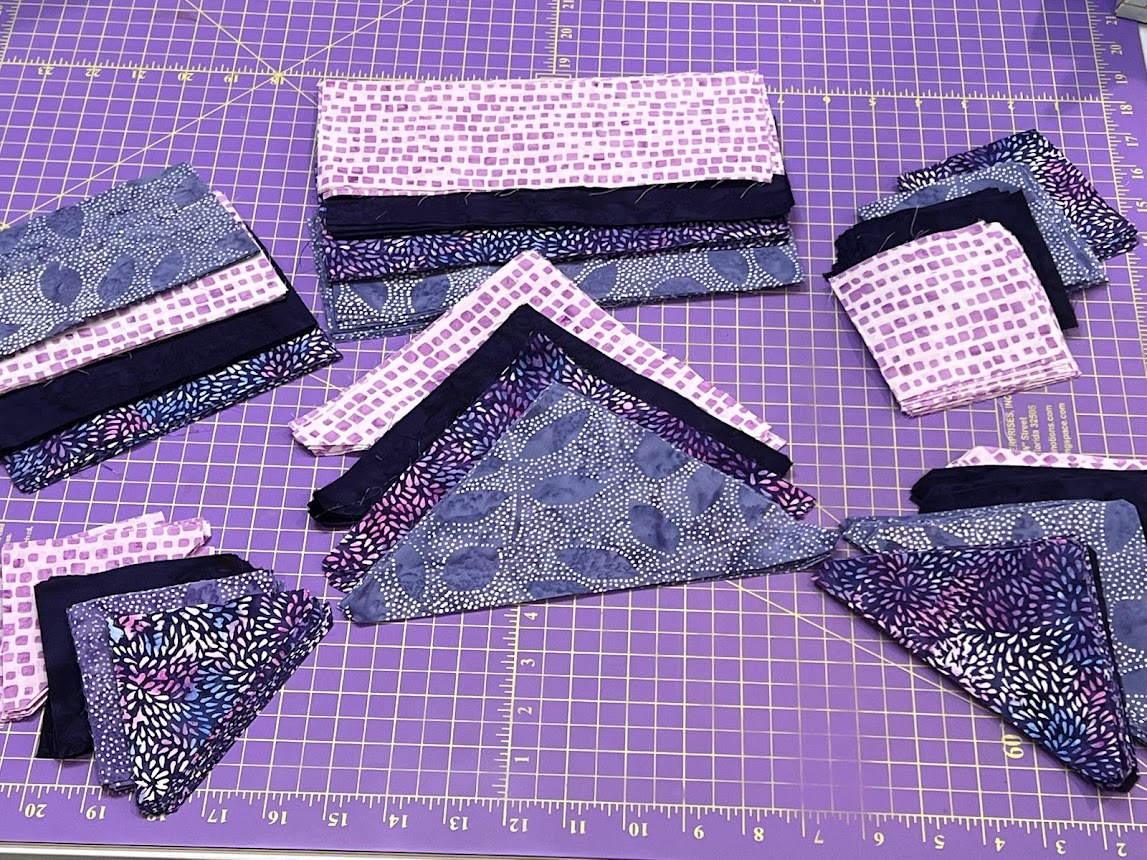
The boxes are shipped without a pattern - so in today's blog post, I want to share a few blocks I was able to make with my box from September. I'm not sure how I'll put them all together just yet - I'm just focused on making pretty blocks, and I'll figure it all out at the end!
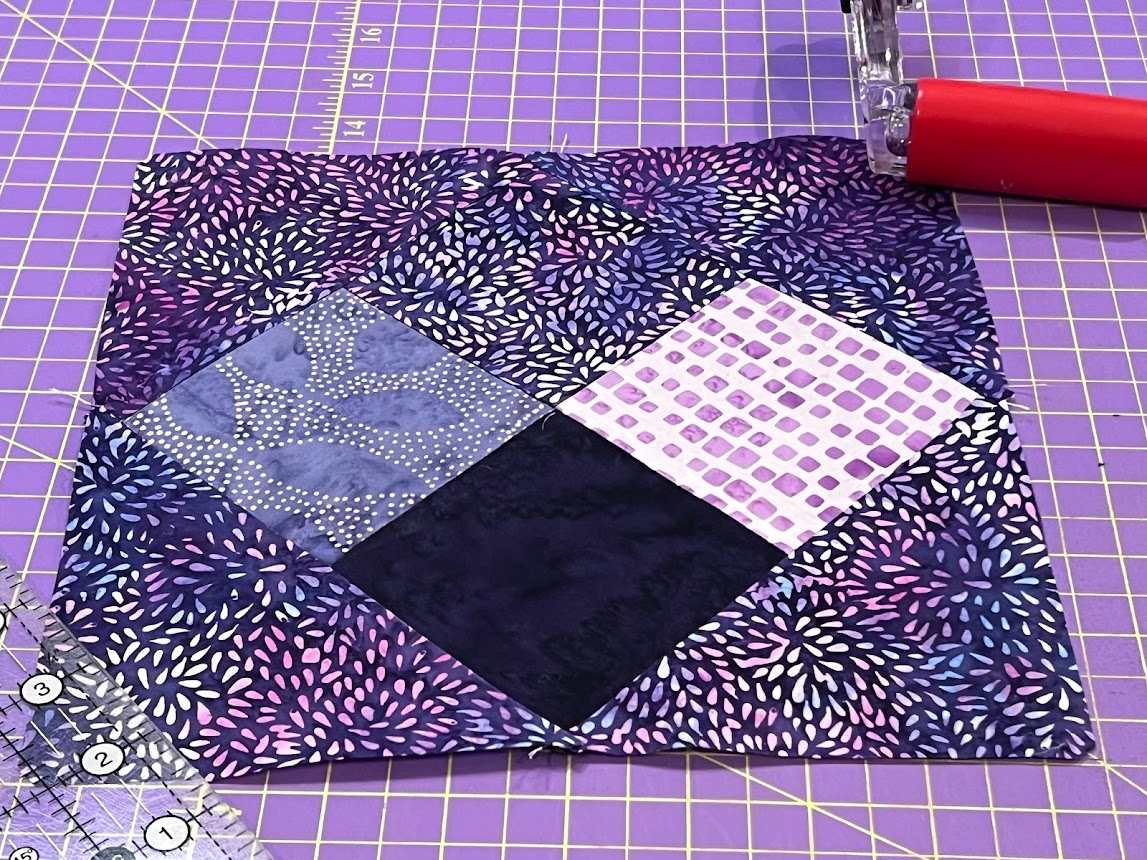
Block 1: Heart Block
For this block, I grabbed a square of each of the 4 prints, 4 quarter-square triangles (medium triangles) of a background print. To make the block, I sewed the 4 squares into a traditional four-patch, and then set it on-point by sewing the long edge of the quarter-square triangles to each side of the 4-patch. Since one of the squares matches the background print, it helps pop the blocky heart shape!
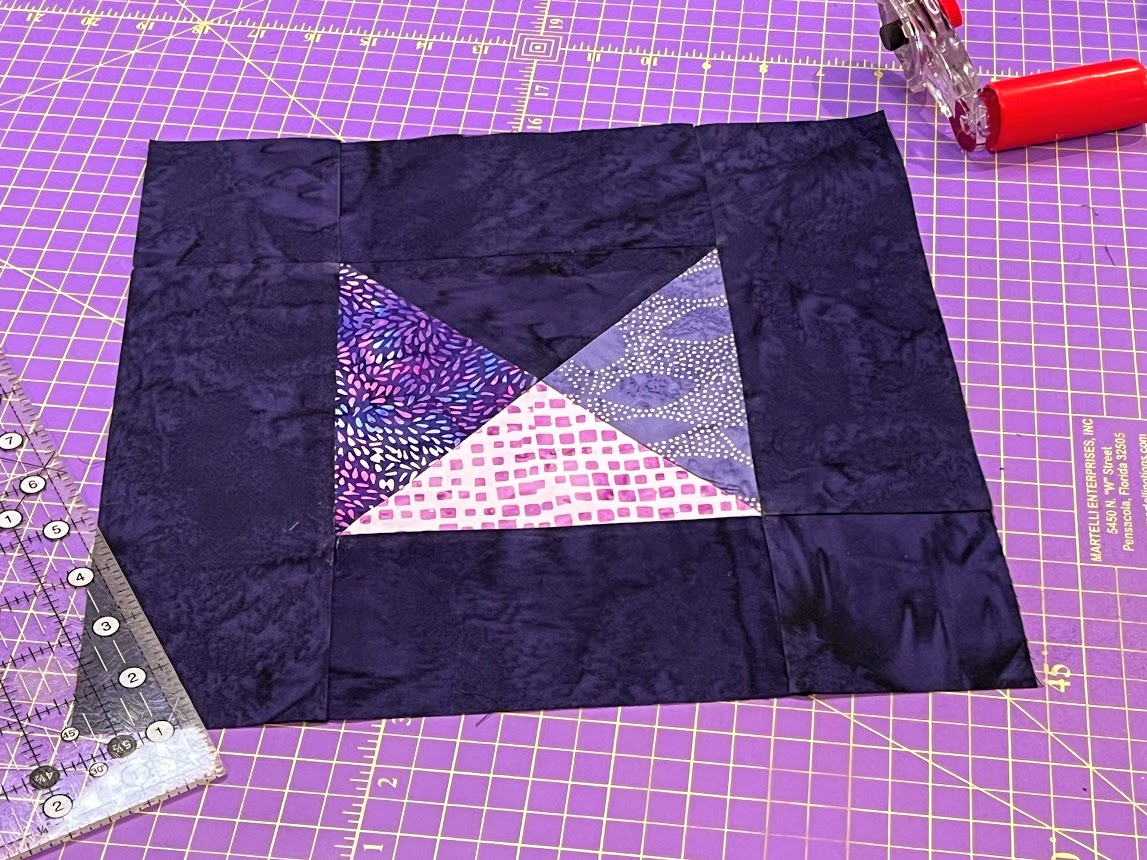
Block 2: Bordered Envelope
I love the negative space in this block! You'll need 1 quarter-square triangle of each print, then pick a fabric you want to be the background and pull 2 small rectangle prints and 2 large rectangle prints. I sewed the quarter-square triangles into a block by sewing along the short edge of each triangle. Then, I bordered the entire block with the rectangular strips - first sewing on the short ones to the top and bottom of my new block then sewing the long ones onto the left and right side.
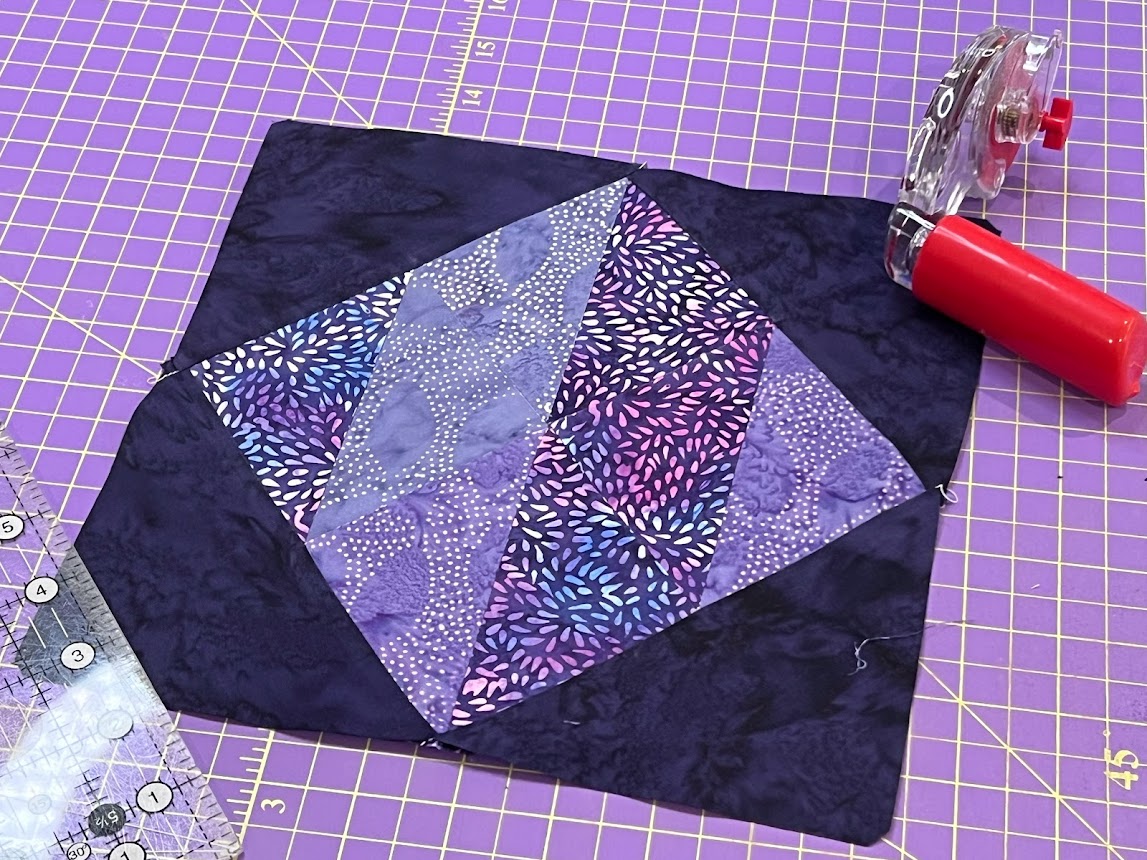
Block 3: On-Point Stripes
This one may look like I just took the long rectangular strips and sewed them on point (and you can totally do that) - but if you look closely, you'll see that's not the case! To make this one, I grabbed some of the small triangles: 4 from print 1 and 4 from print 2 and I made 4 half-square triangle. Then, I arranged them to look like I made a strip set and sewed them together as a four patch. Next, I grabbed 4 medium triangles from a print that isn't included in the 4-patch and set the entire thing on point by sewing the long edge of the medium triangle to each side of the newly formed 4-patch.
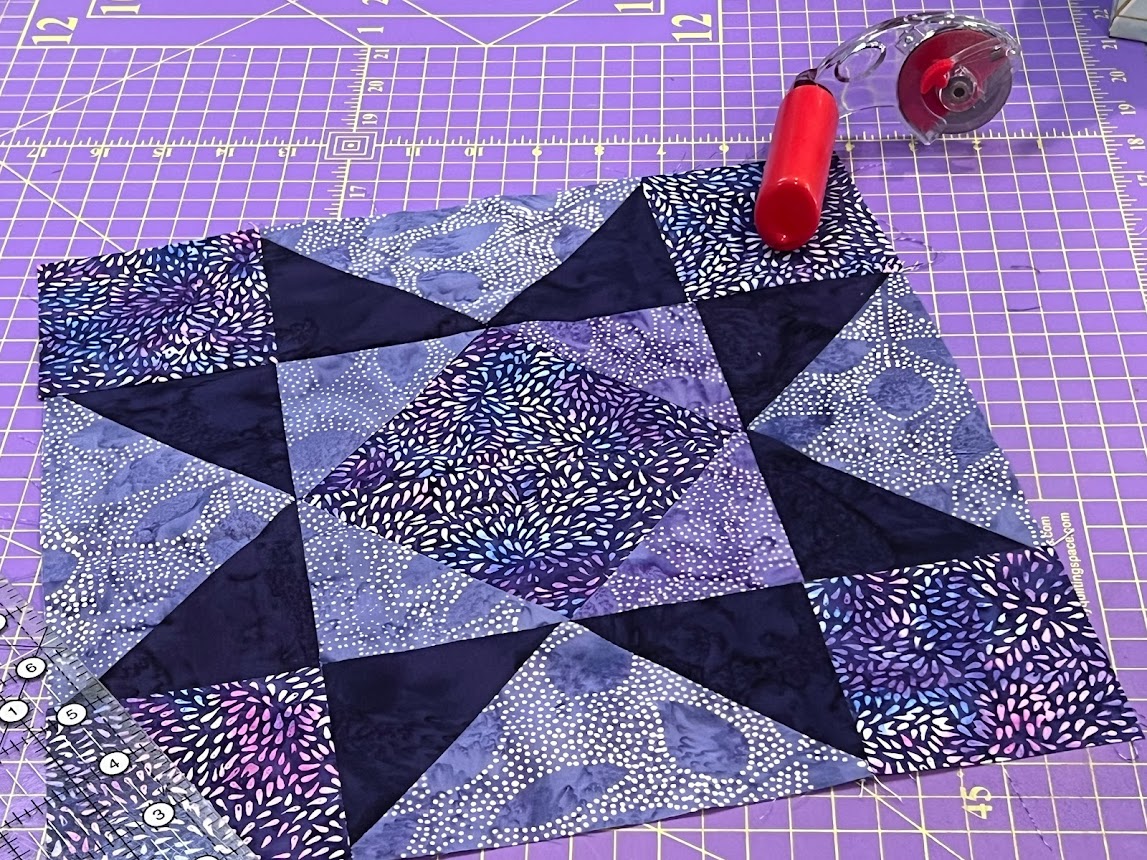
Block 4: Star Block
I absolutely love a star block - and this is an easy one to make! First, I made 4 of the same half-square triangle units using 4 of the small triangles from print 1 and print 2 - and sewed those into a four patch so that all of one print was in the center. The result is basically an economy square - or a square on point in another square. That is lovely by itself - but, I decided to go big and add star legs. I decided which fabric would be my 'background' and grabbed 8 small triangles and 4 squares of that fabric. Then, I grabbed 8 more small triangles for the fabric that's featured in the center of the block. I took all 8 of the triangles from each print and made 8 half-square triangle units! All that was left to do is layout the star legs and corner blocks and sew everything together!
With the Stitch-It box, your imagination is really the only limitation. If you take the 'Stitch-It' challenge this month, I'd love to see what you make in the Cotton Cuts Fabric Facebook group!