

Making Pom Poms
Posted by Jaszmine Howard on 5th Dec 2022
It’s tool time! Today, I bring you a tutorial on a product that can bring something new to your practice and get the family involved (if you choose to let them touch your precious fabrics). That product is the Clover Pom Pom Maker! Adding pom poms has been such a fun way for me to add texture to my projects while using up loose yarn scraps and giving a new life to them. Attach them to bags, clothes, quilts, holiday stockings, and so much more!
Let’s gather up some things to get you started!
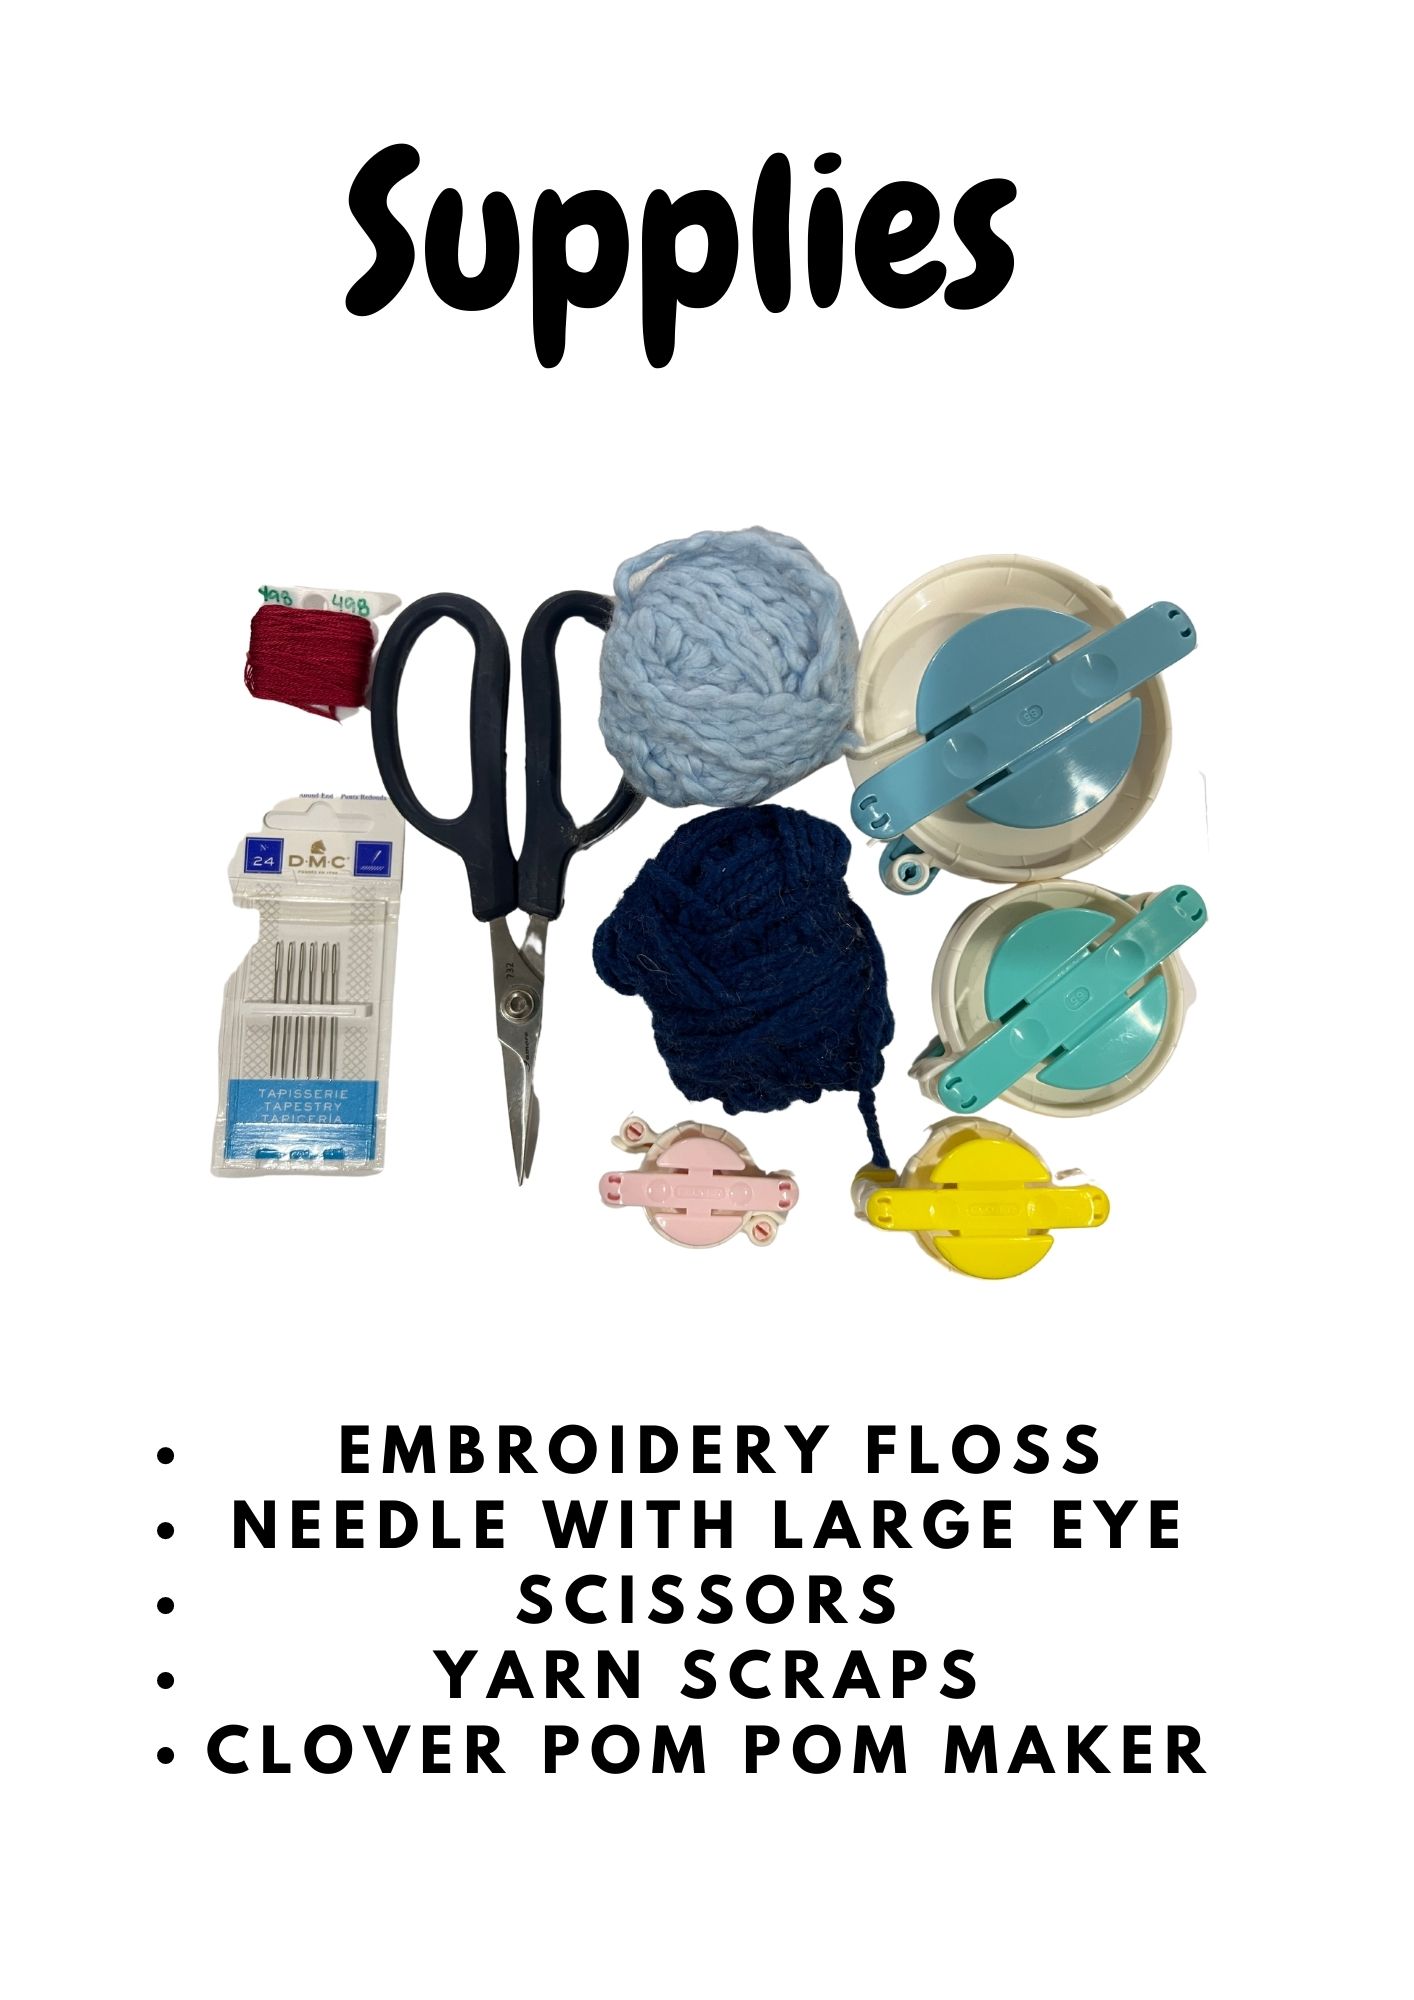
Embroidery Floss: I Like DMC embroidery floss but you can use what you have. I use all six strands for extra security.
Needle: I like DMC needles as well but what is more important is that the eye can accommodate all six strands of the floss.
Yarn: I find this to be a great time to use any type, different weights and fiber types will affect the look of the pom but all are lovely.
Scissors: Make sure they are sharp as they’ll need to cut through some thickness. I enjoy these Famore scissors because of the wide handles on them.
Clover pom-pom maker: There are many options and a few sizes. You can get them HERE.
Making the Pom! This part is so much fun. You can use this time to mix colors, textures, and weights, and really create a custom look for your project. Today I opted for blue as it’s my favorite color and wraps around fast.
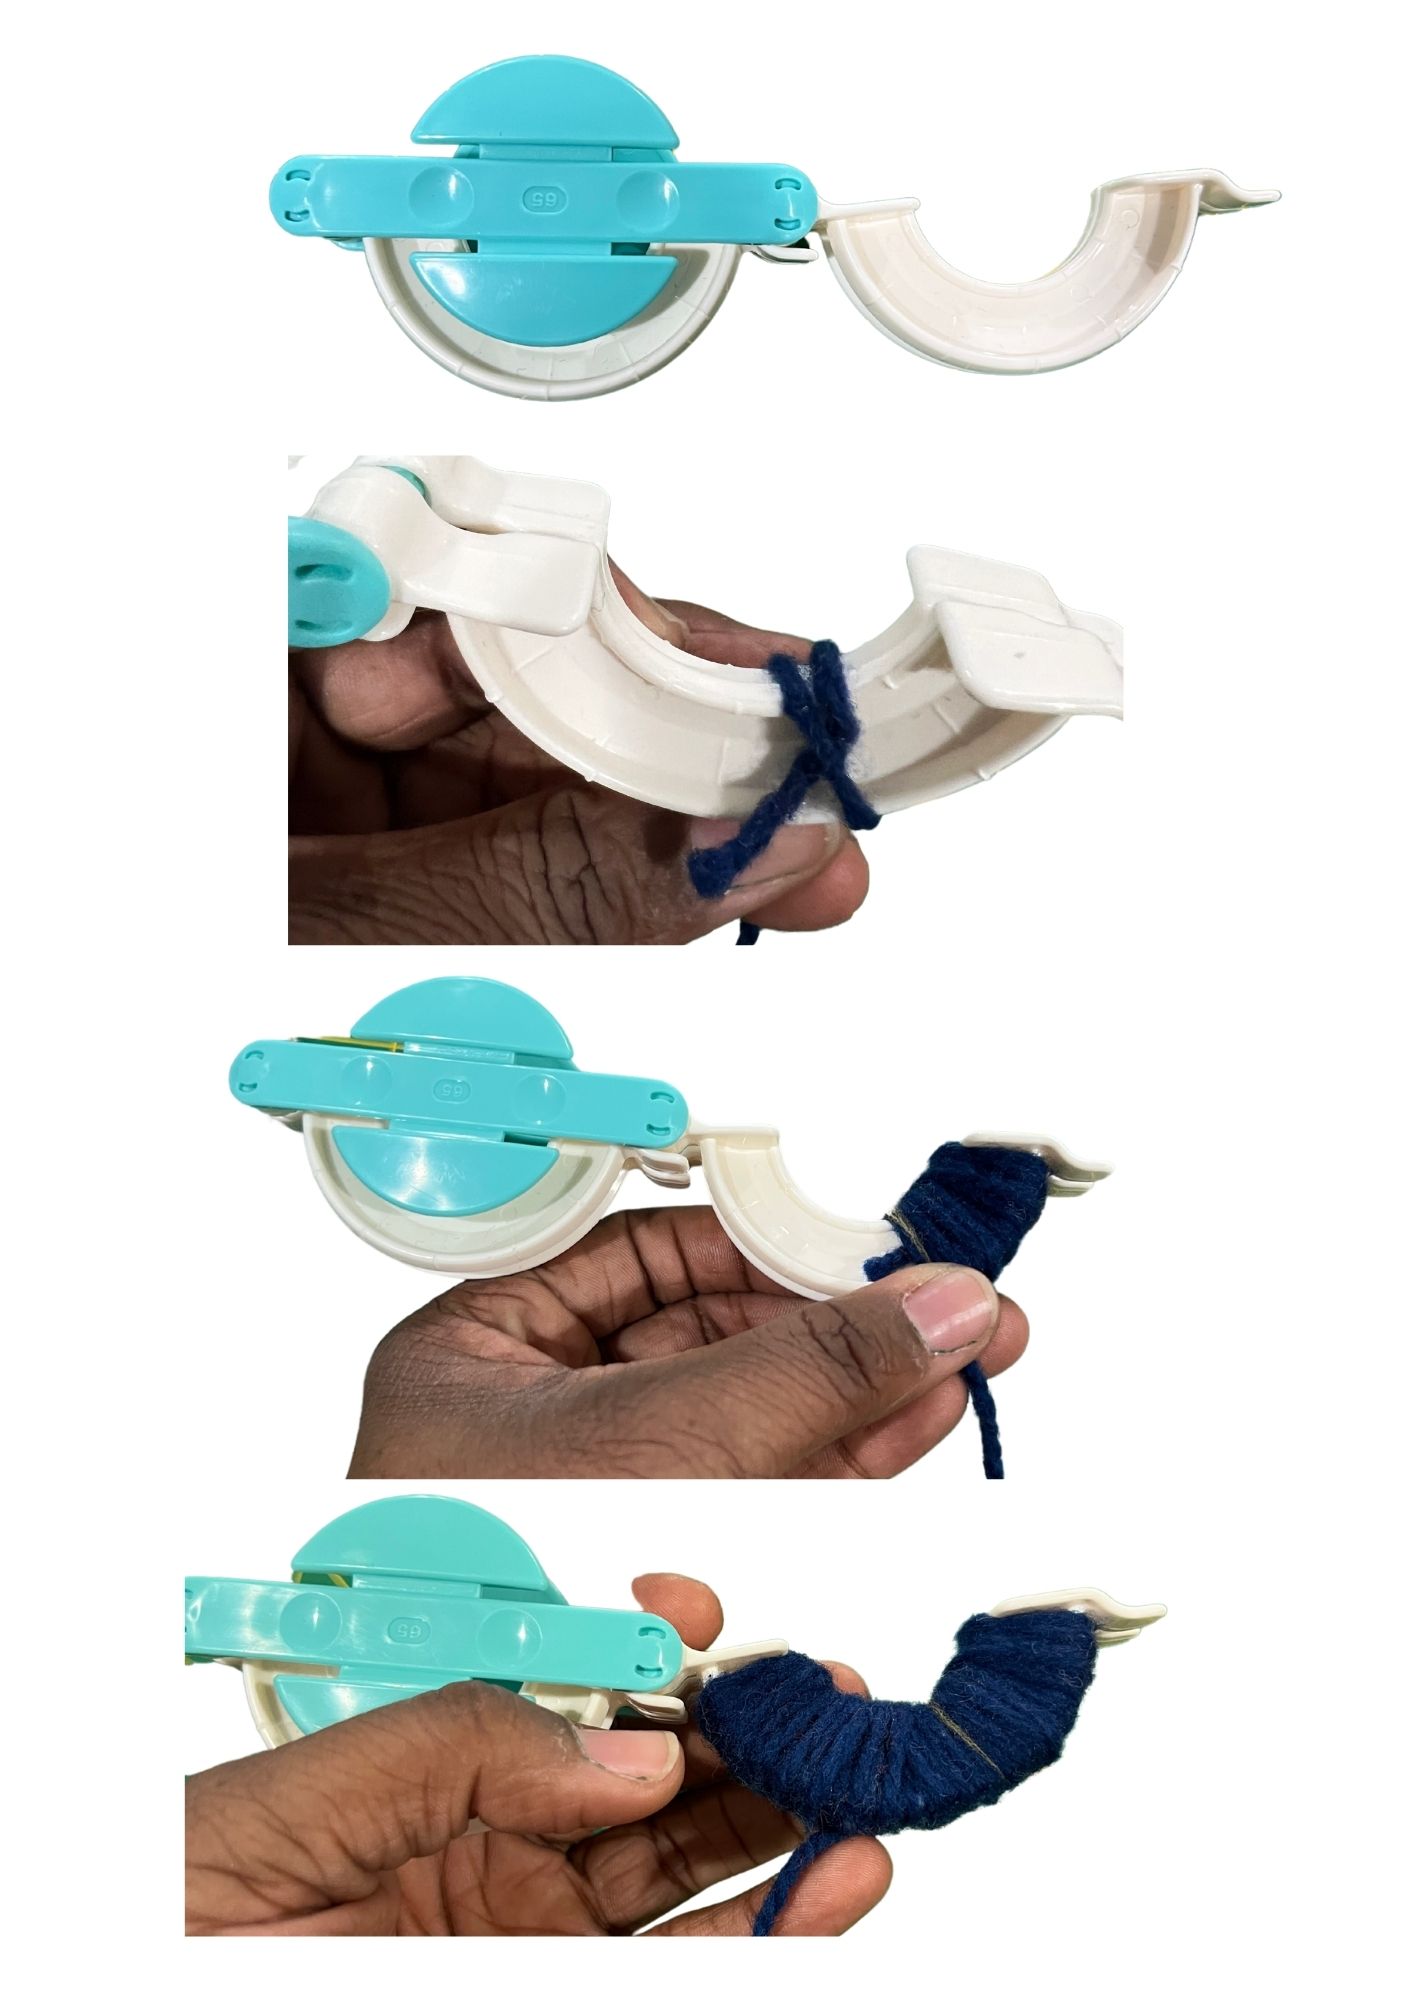
Wrapping the yarn:
- Open the pom pom maker on one side. There will be two “U” shaped pieces per side. I like to keep one side closed as I feel like it is easier to manage.
- Begin wrapping your yarn. I like to start in the middle, creating an “X” shape at the beginning by holding the yarn in the middle and crossing over it. This will hold the yarn in place as you move in both directions while wrapping the yarn.
- I find that my perfect pom is created by filling in the U- shape until it is even with the top.
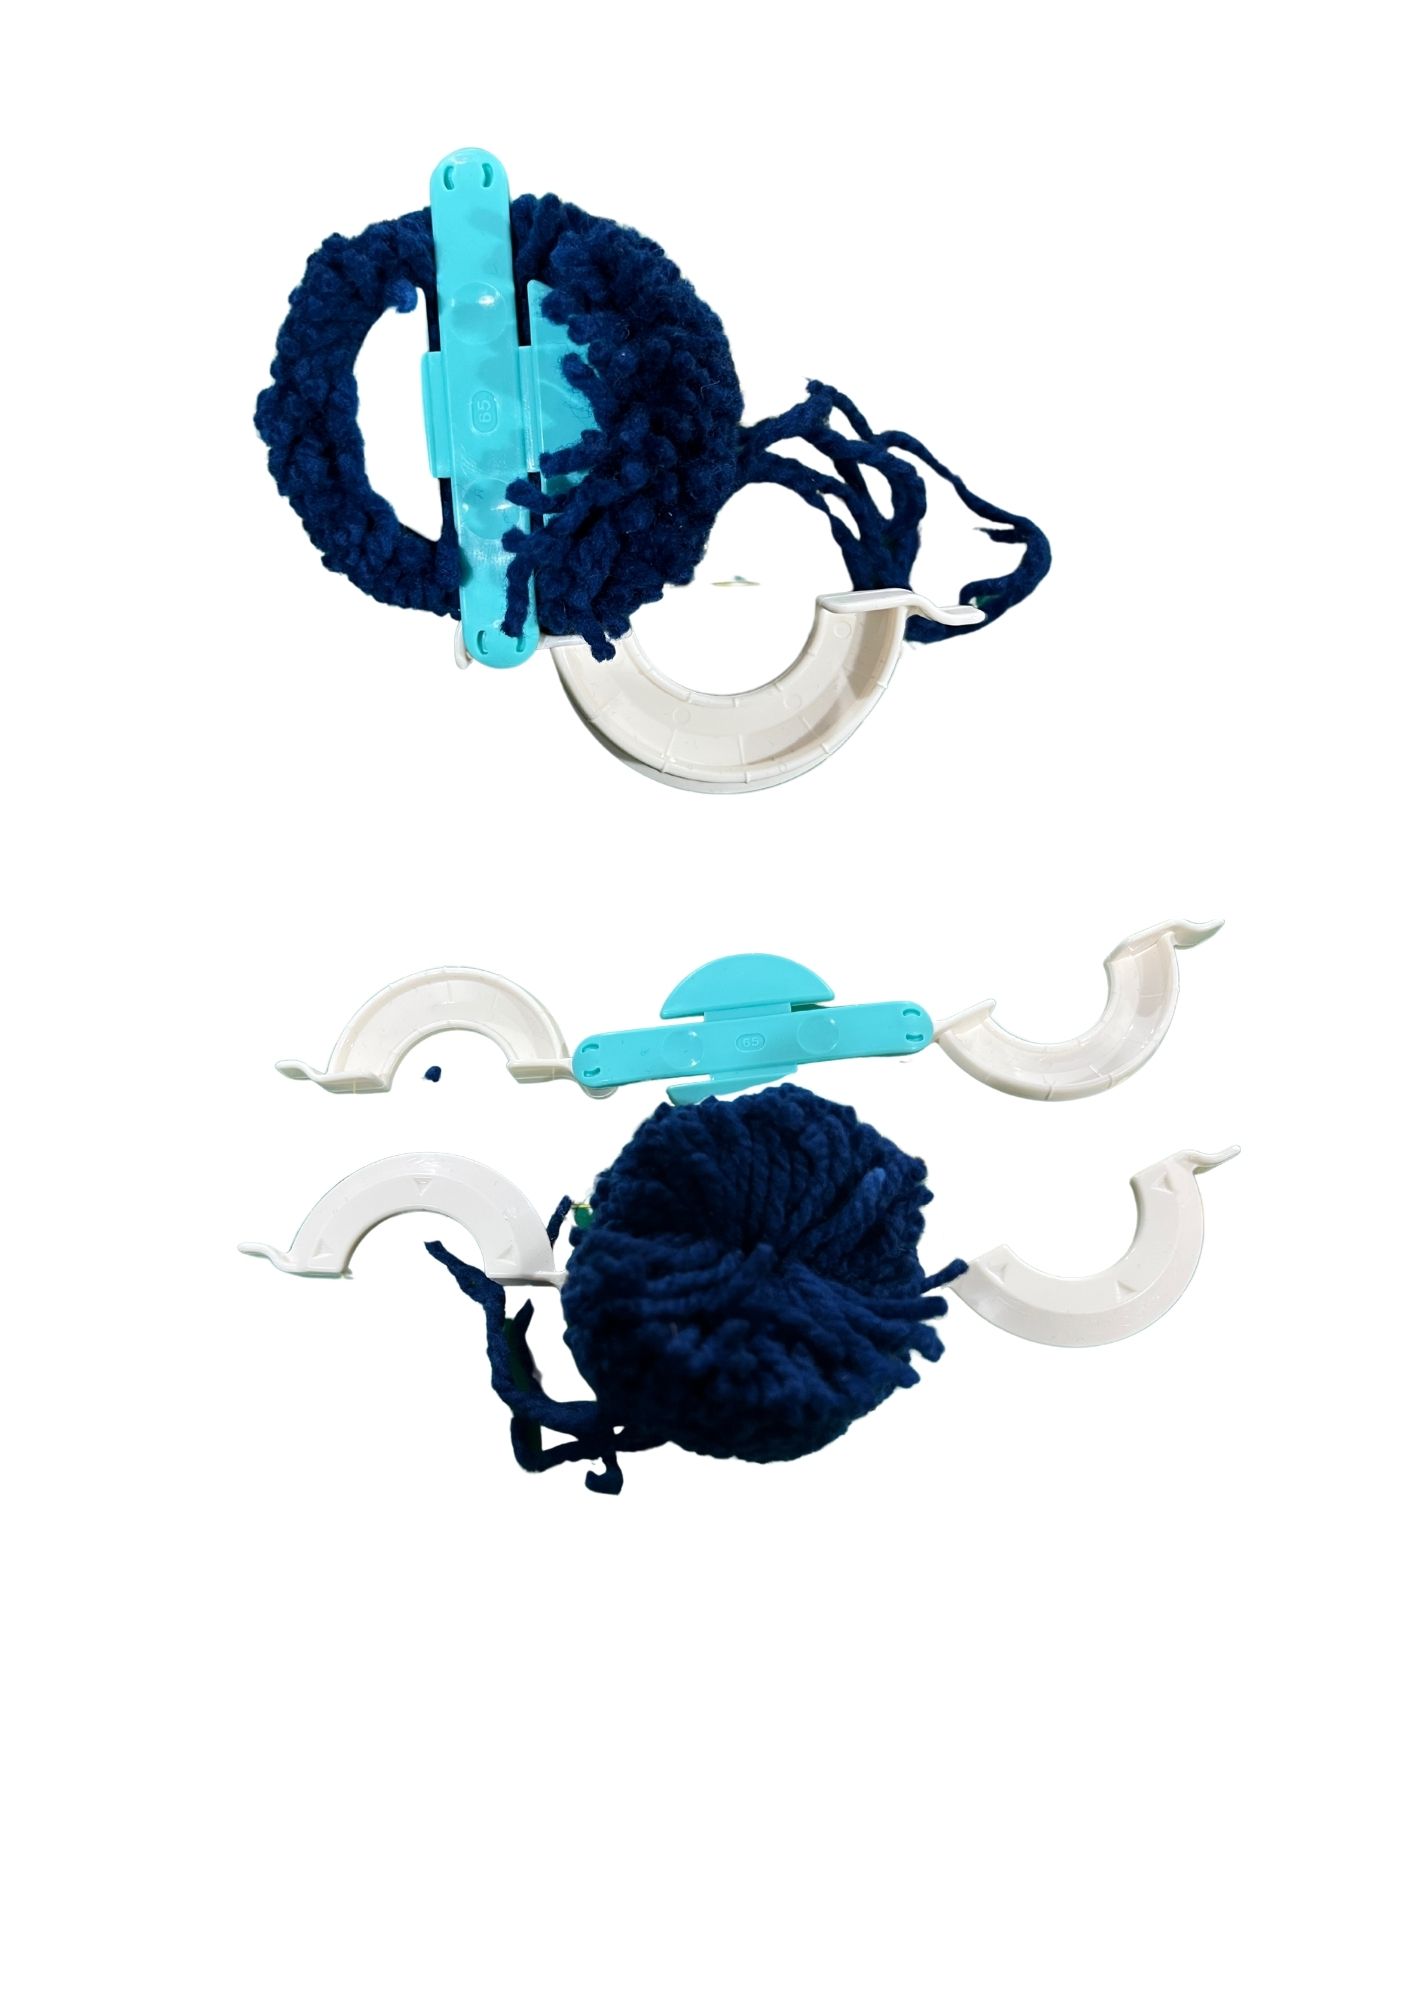
Cutting and Tying your Pom
- Once you are done wrapping the yarn, you will close the side. Then you will snip the yarn and repeat with the other side of the pom pom maker.
- With both sides closed, you will take your scissors and cut down the line where the two U-shaped pieces meet.
- After cutting, You will cut a length of the yarn that will leave a tail. I would suggest a forearm length or less. Depending on your yarn, you may need to double up or use another yarn to help provide stability. This is what will hold your pom pom together.
- Using the guide you used to cut, you will slide the yarn through and tie a knot, be sure to pull taut!
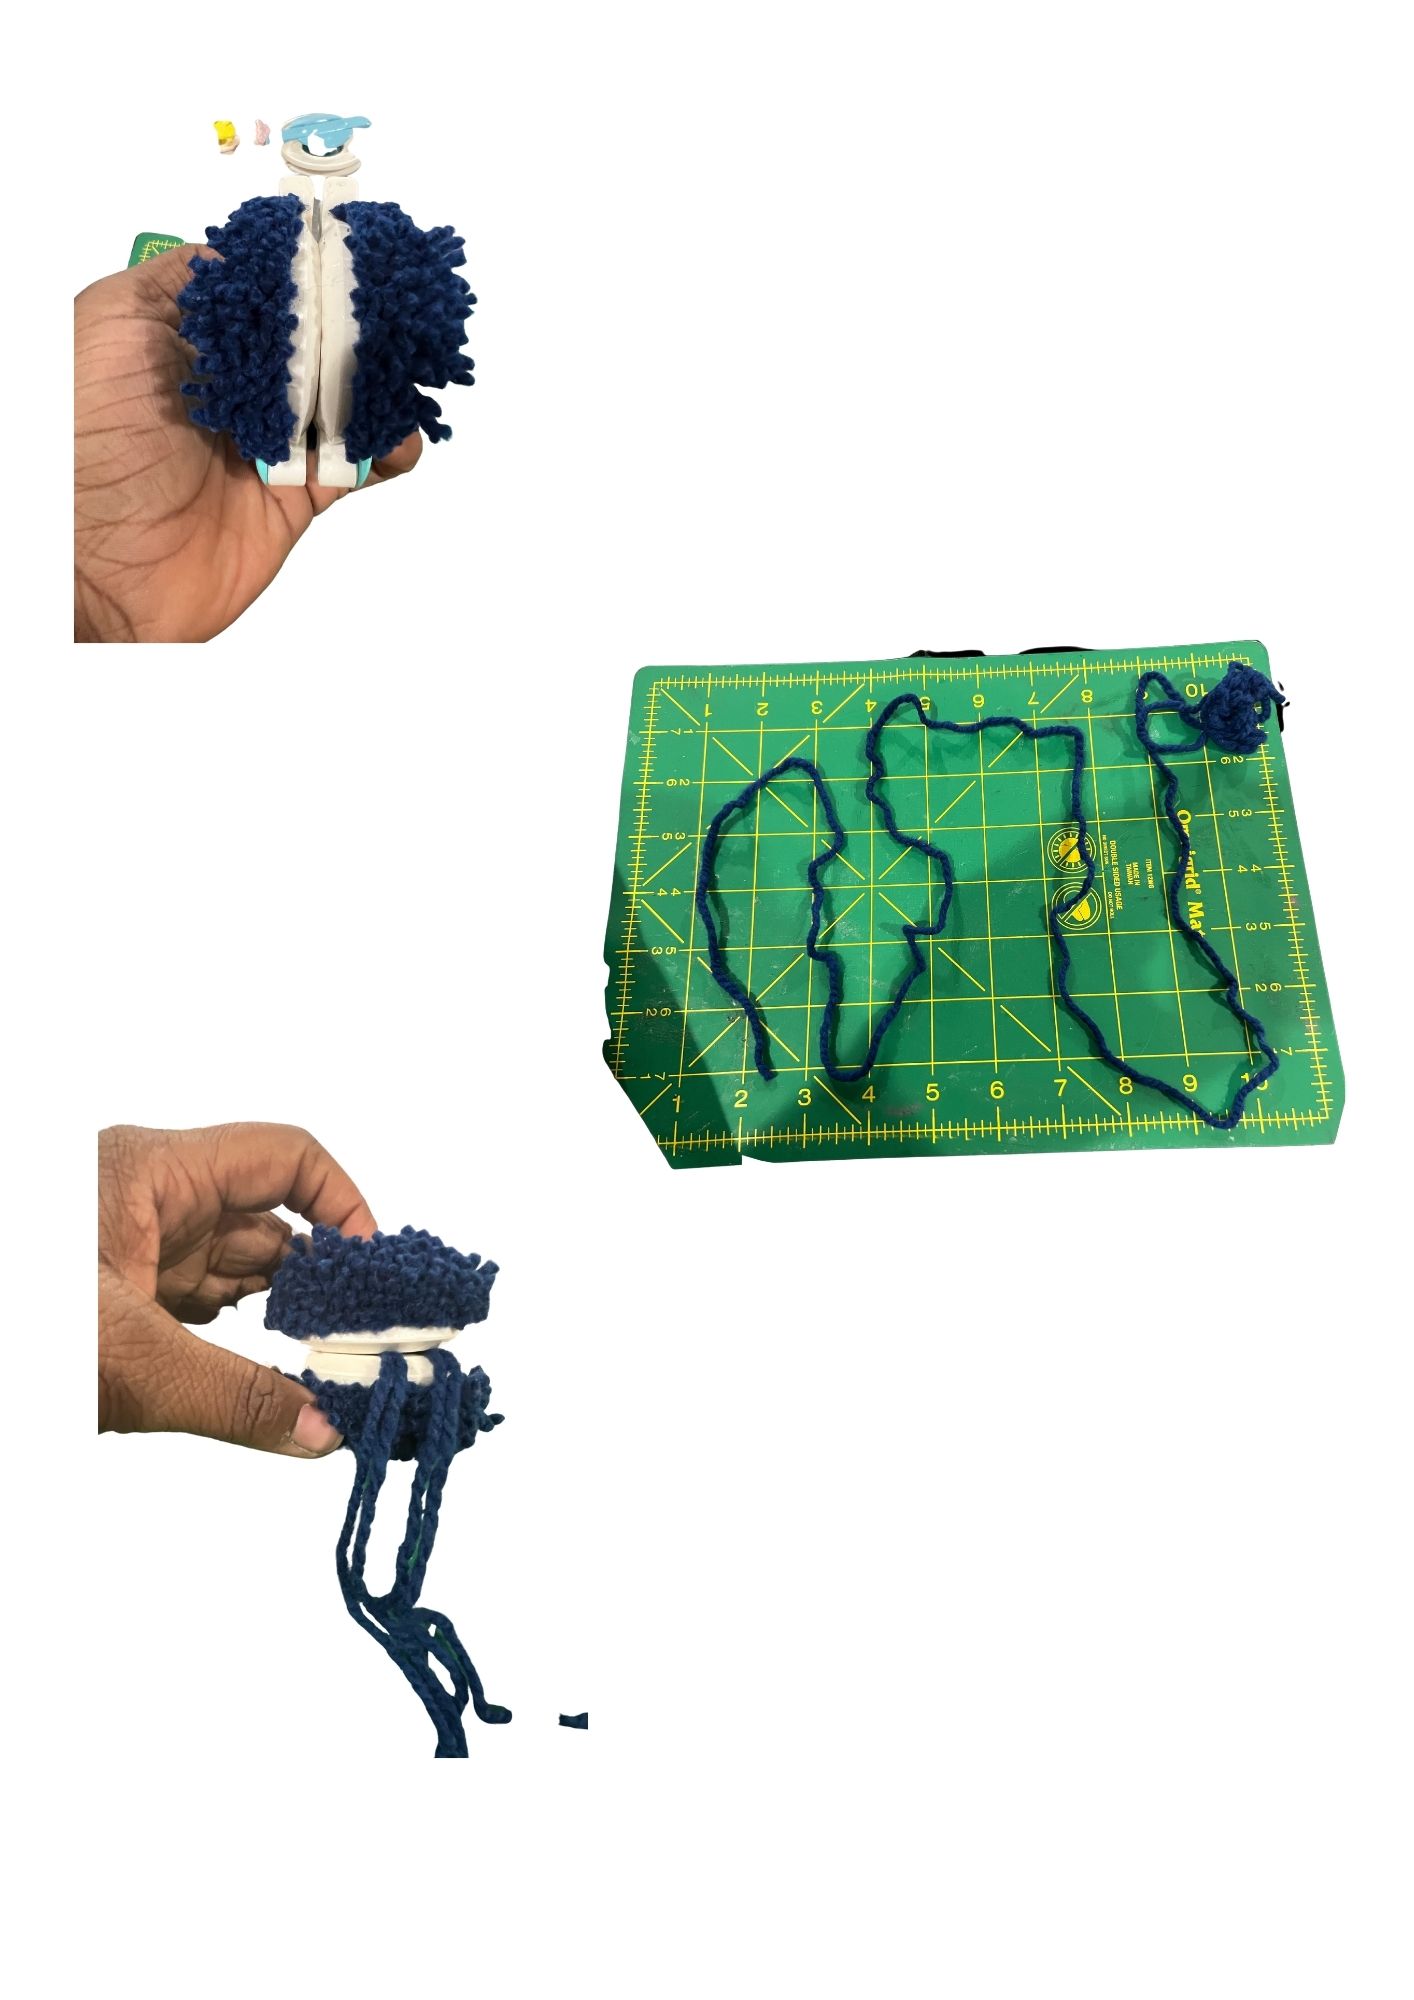
Releasing your pom
- Pull the U-shaped pieces away from the center.
- Separate the top and bottom sections.
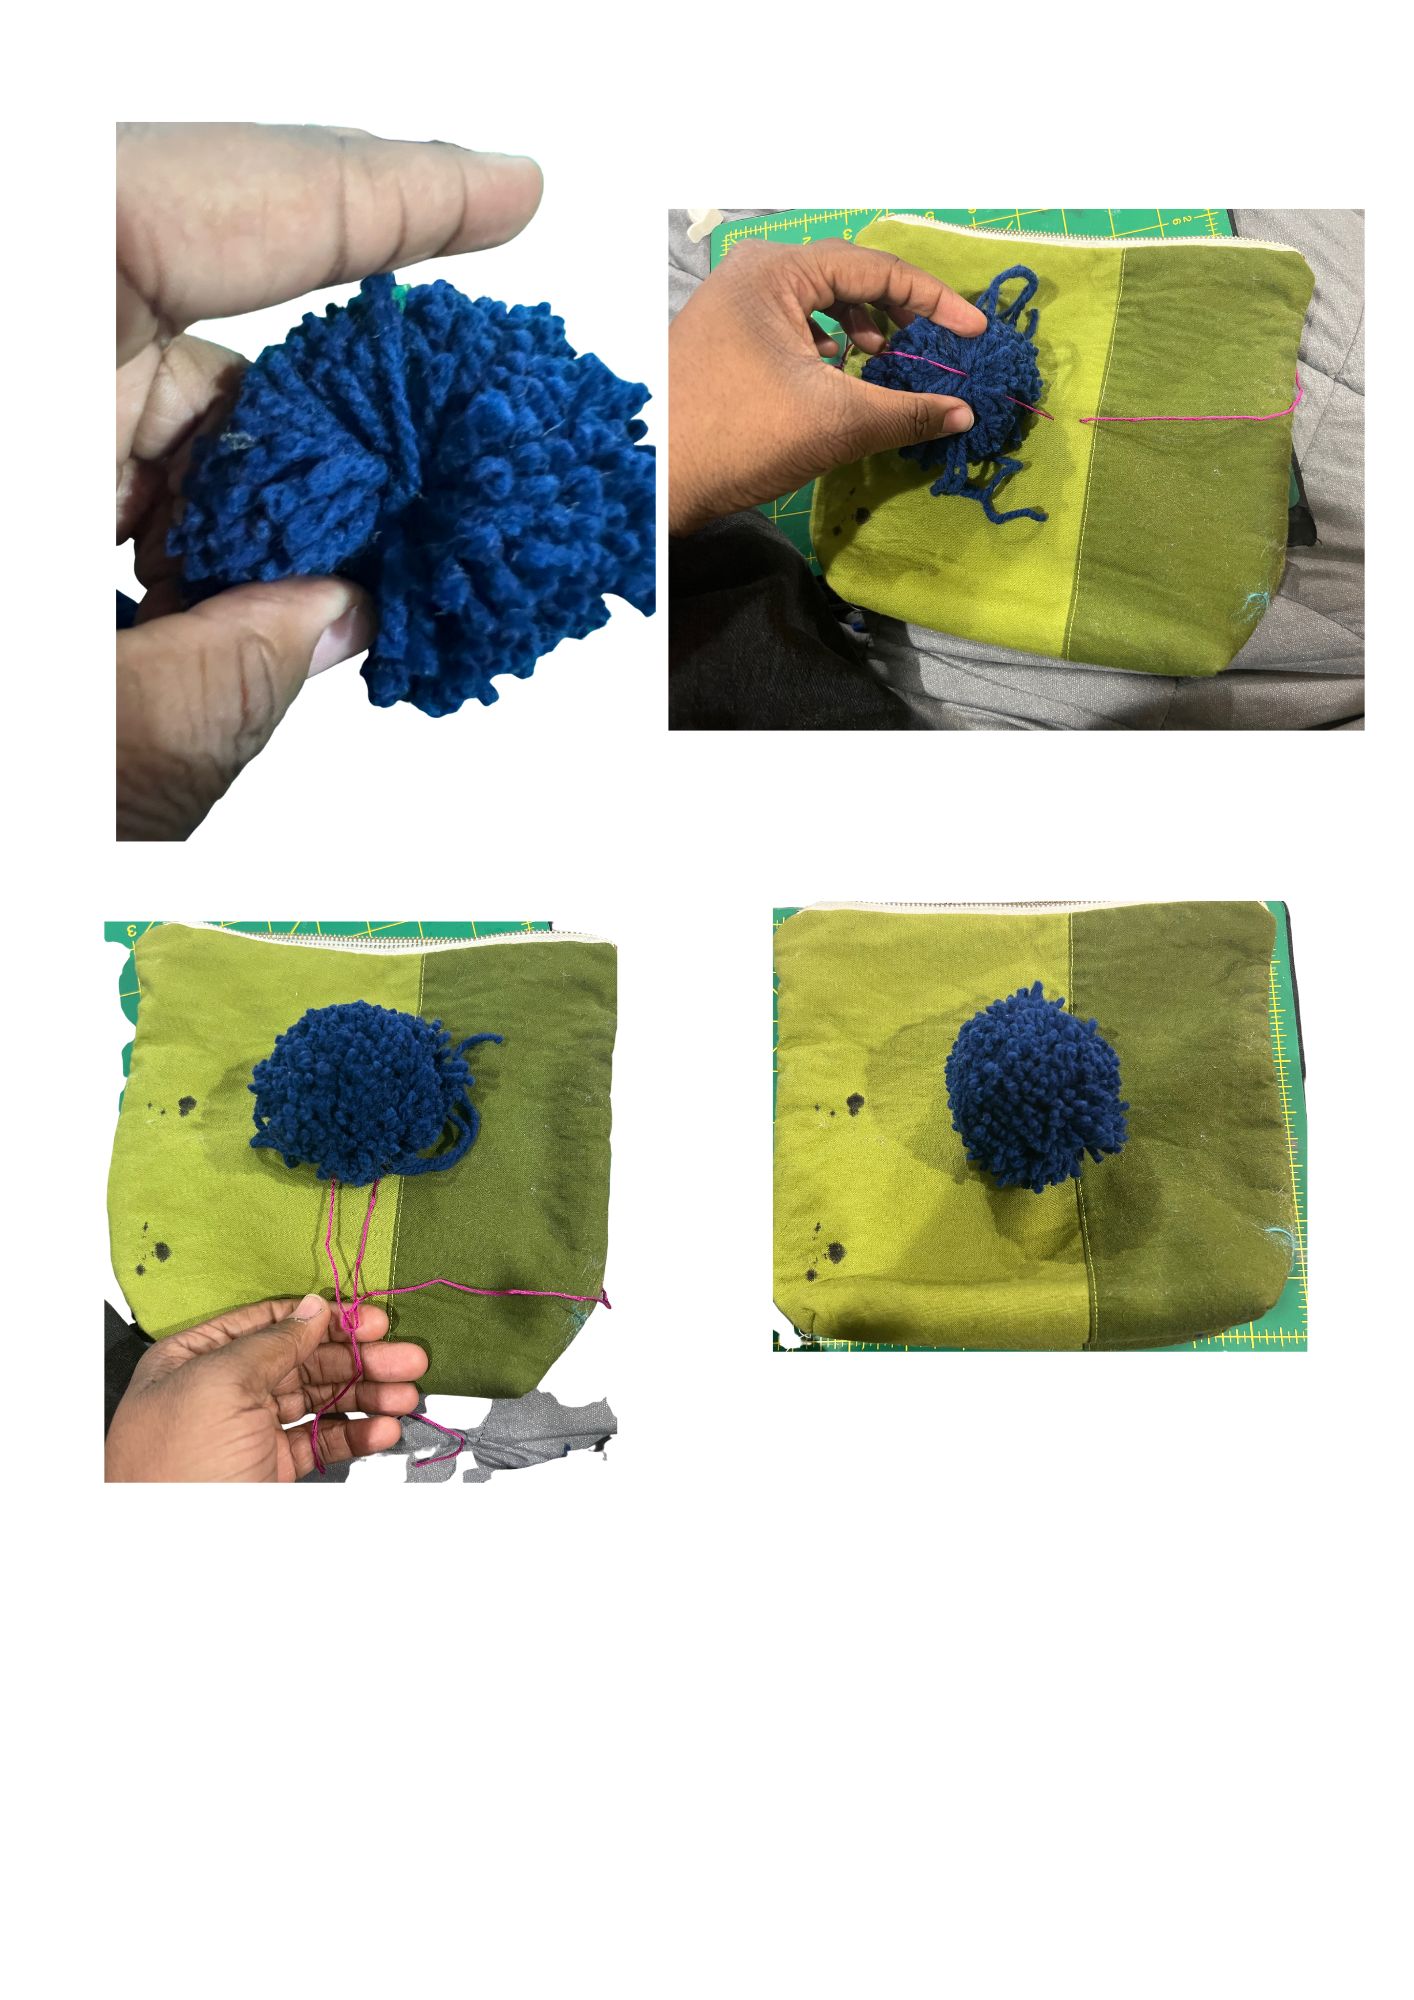
- Fluff your pom pom!

Attaching it to your project
- Thread your needle with embroidery floss.
- Insert the needle so that the thread has two exits.
- Use tails to locate the knot on the pom pom and slide the needle through there.
- Tie the embroidery floss into a knot, securing the pom pom.
- Clip the threads.
You’re all done! I hope you enjoyed this quick tutorial and will give this a go in the future.