

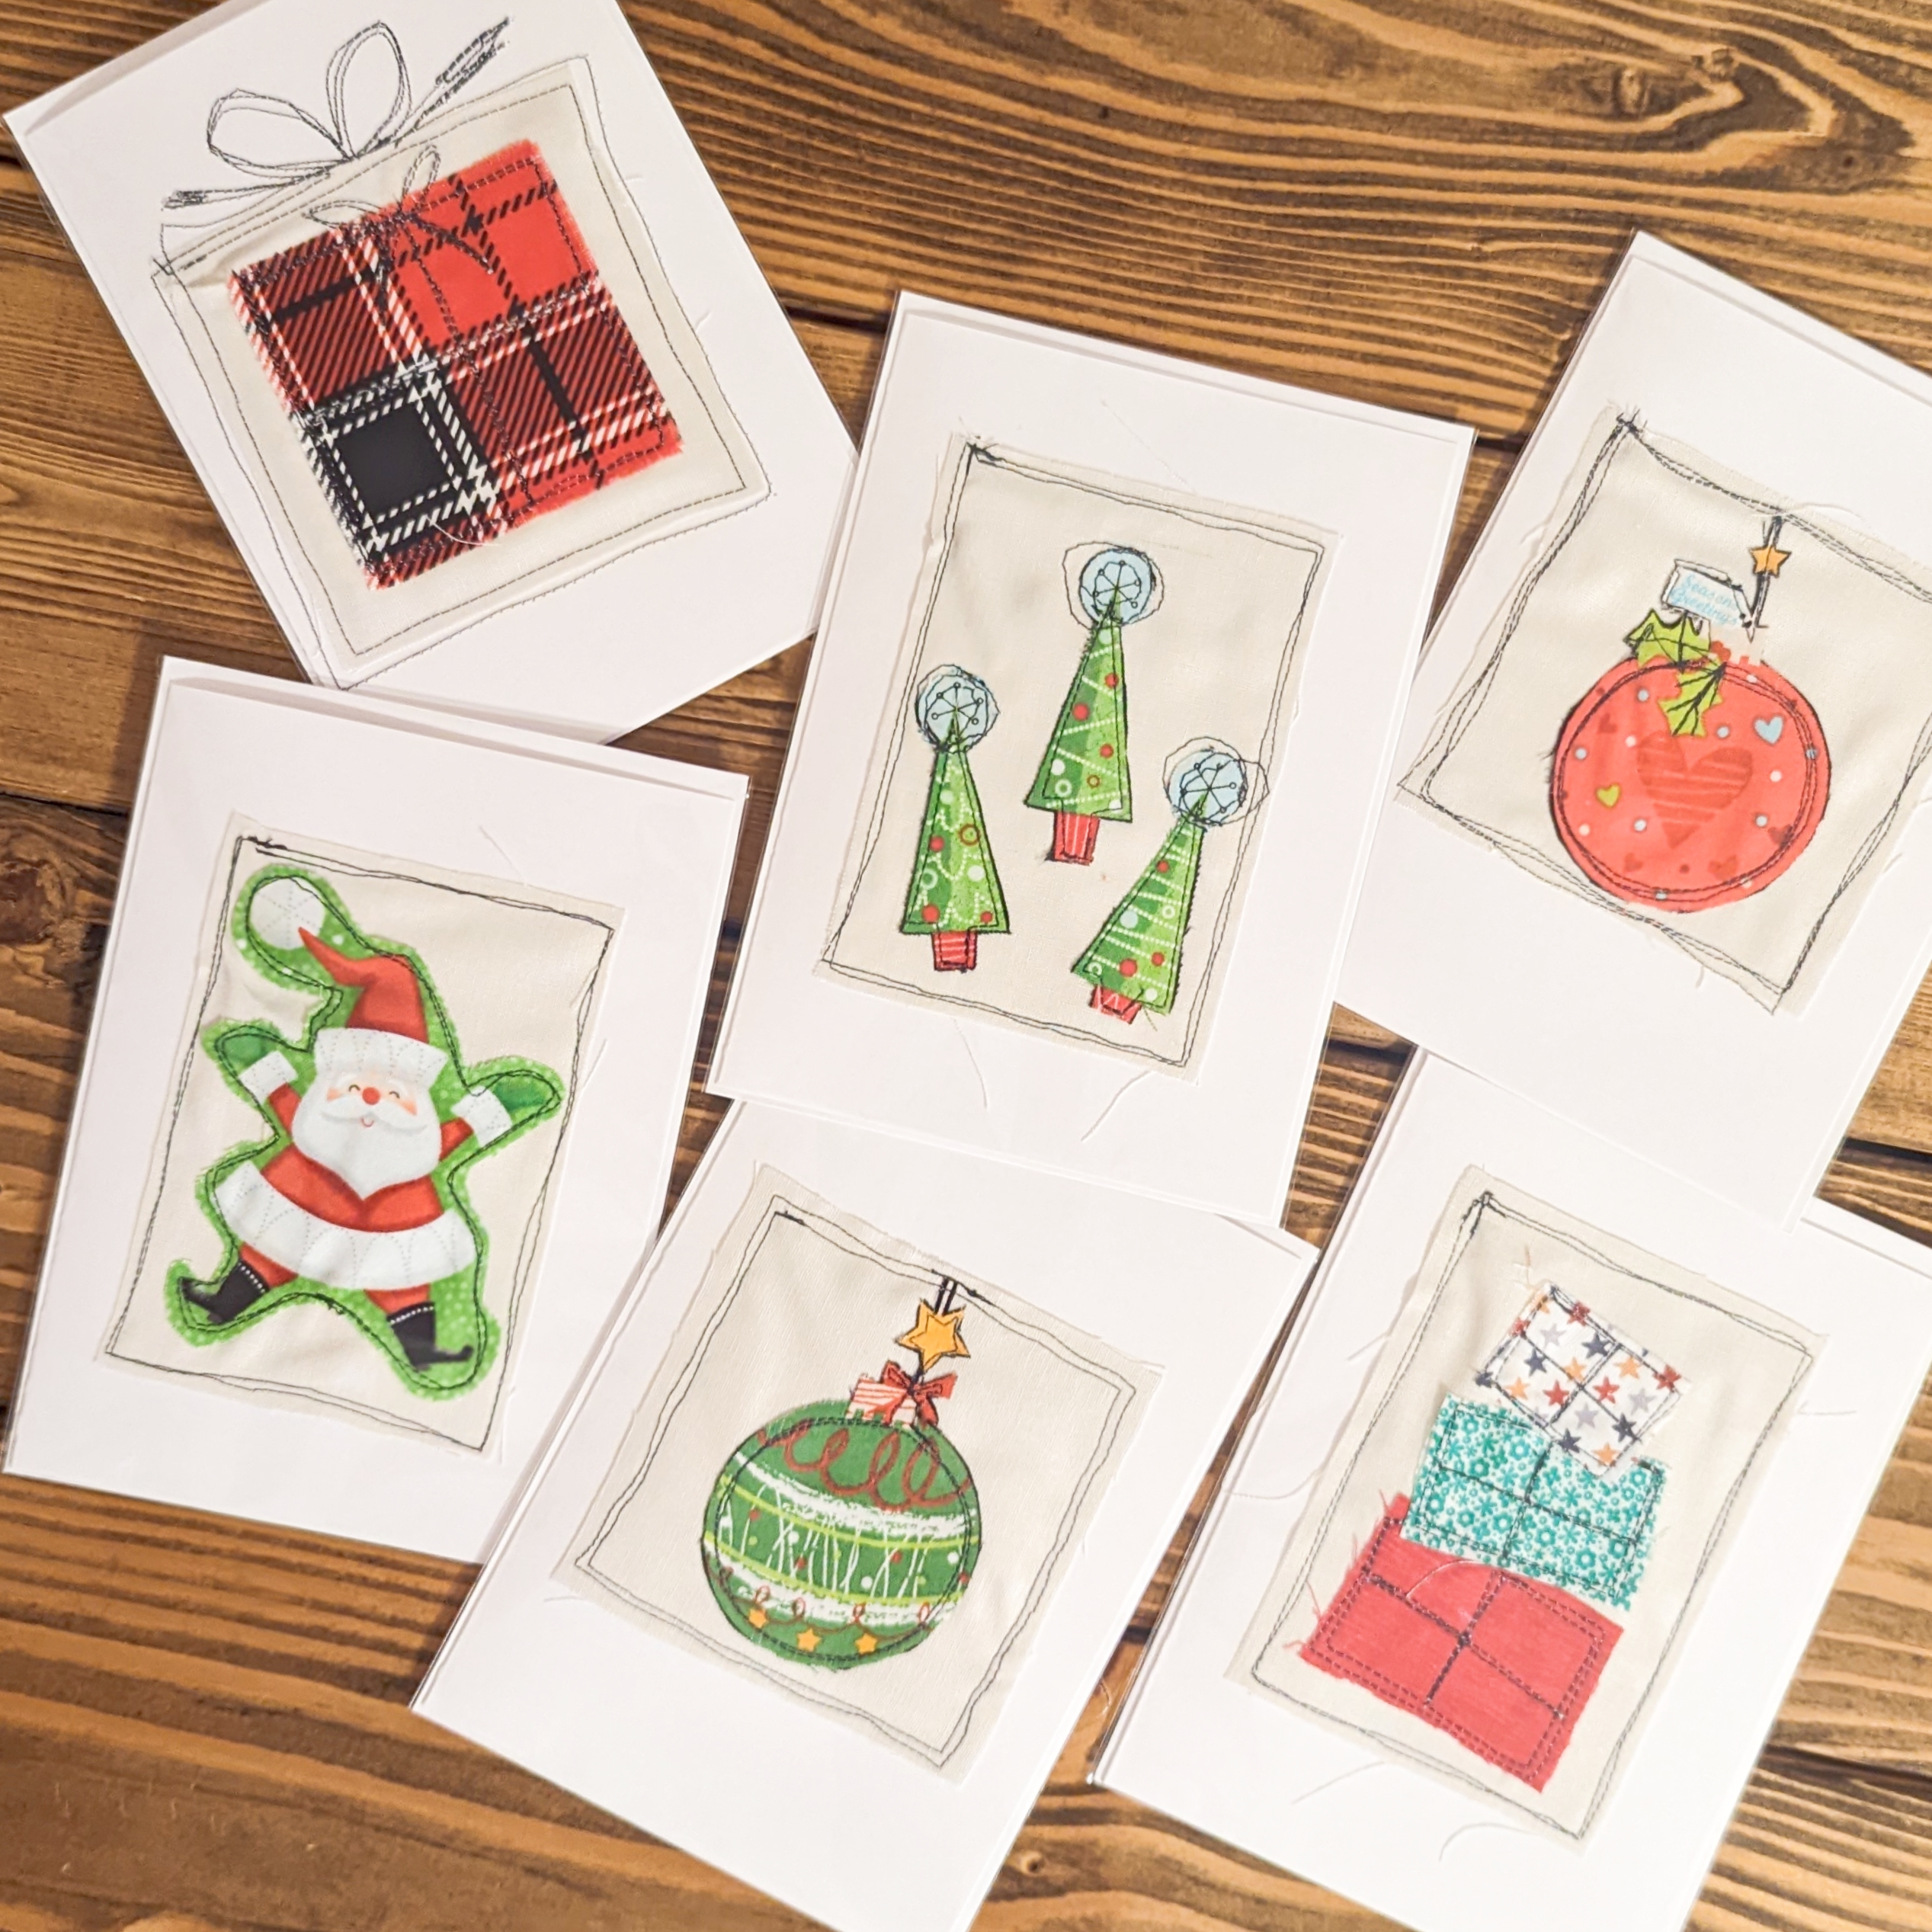
Easy Raw Edge Applique Christmas Cards
Posted by Daisi Toegel on 25th Nov 2022
We love making handmade gifts for our friends and family every year, but what about the cards?
Why not make them too? Cards are fun and easy to make, and there are many ways and techniques to work on but today let’s make some easy raw edge applique cards!!!
Let’s get started!
Materials:
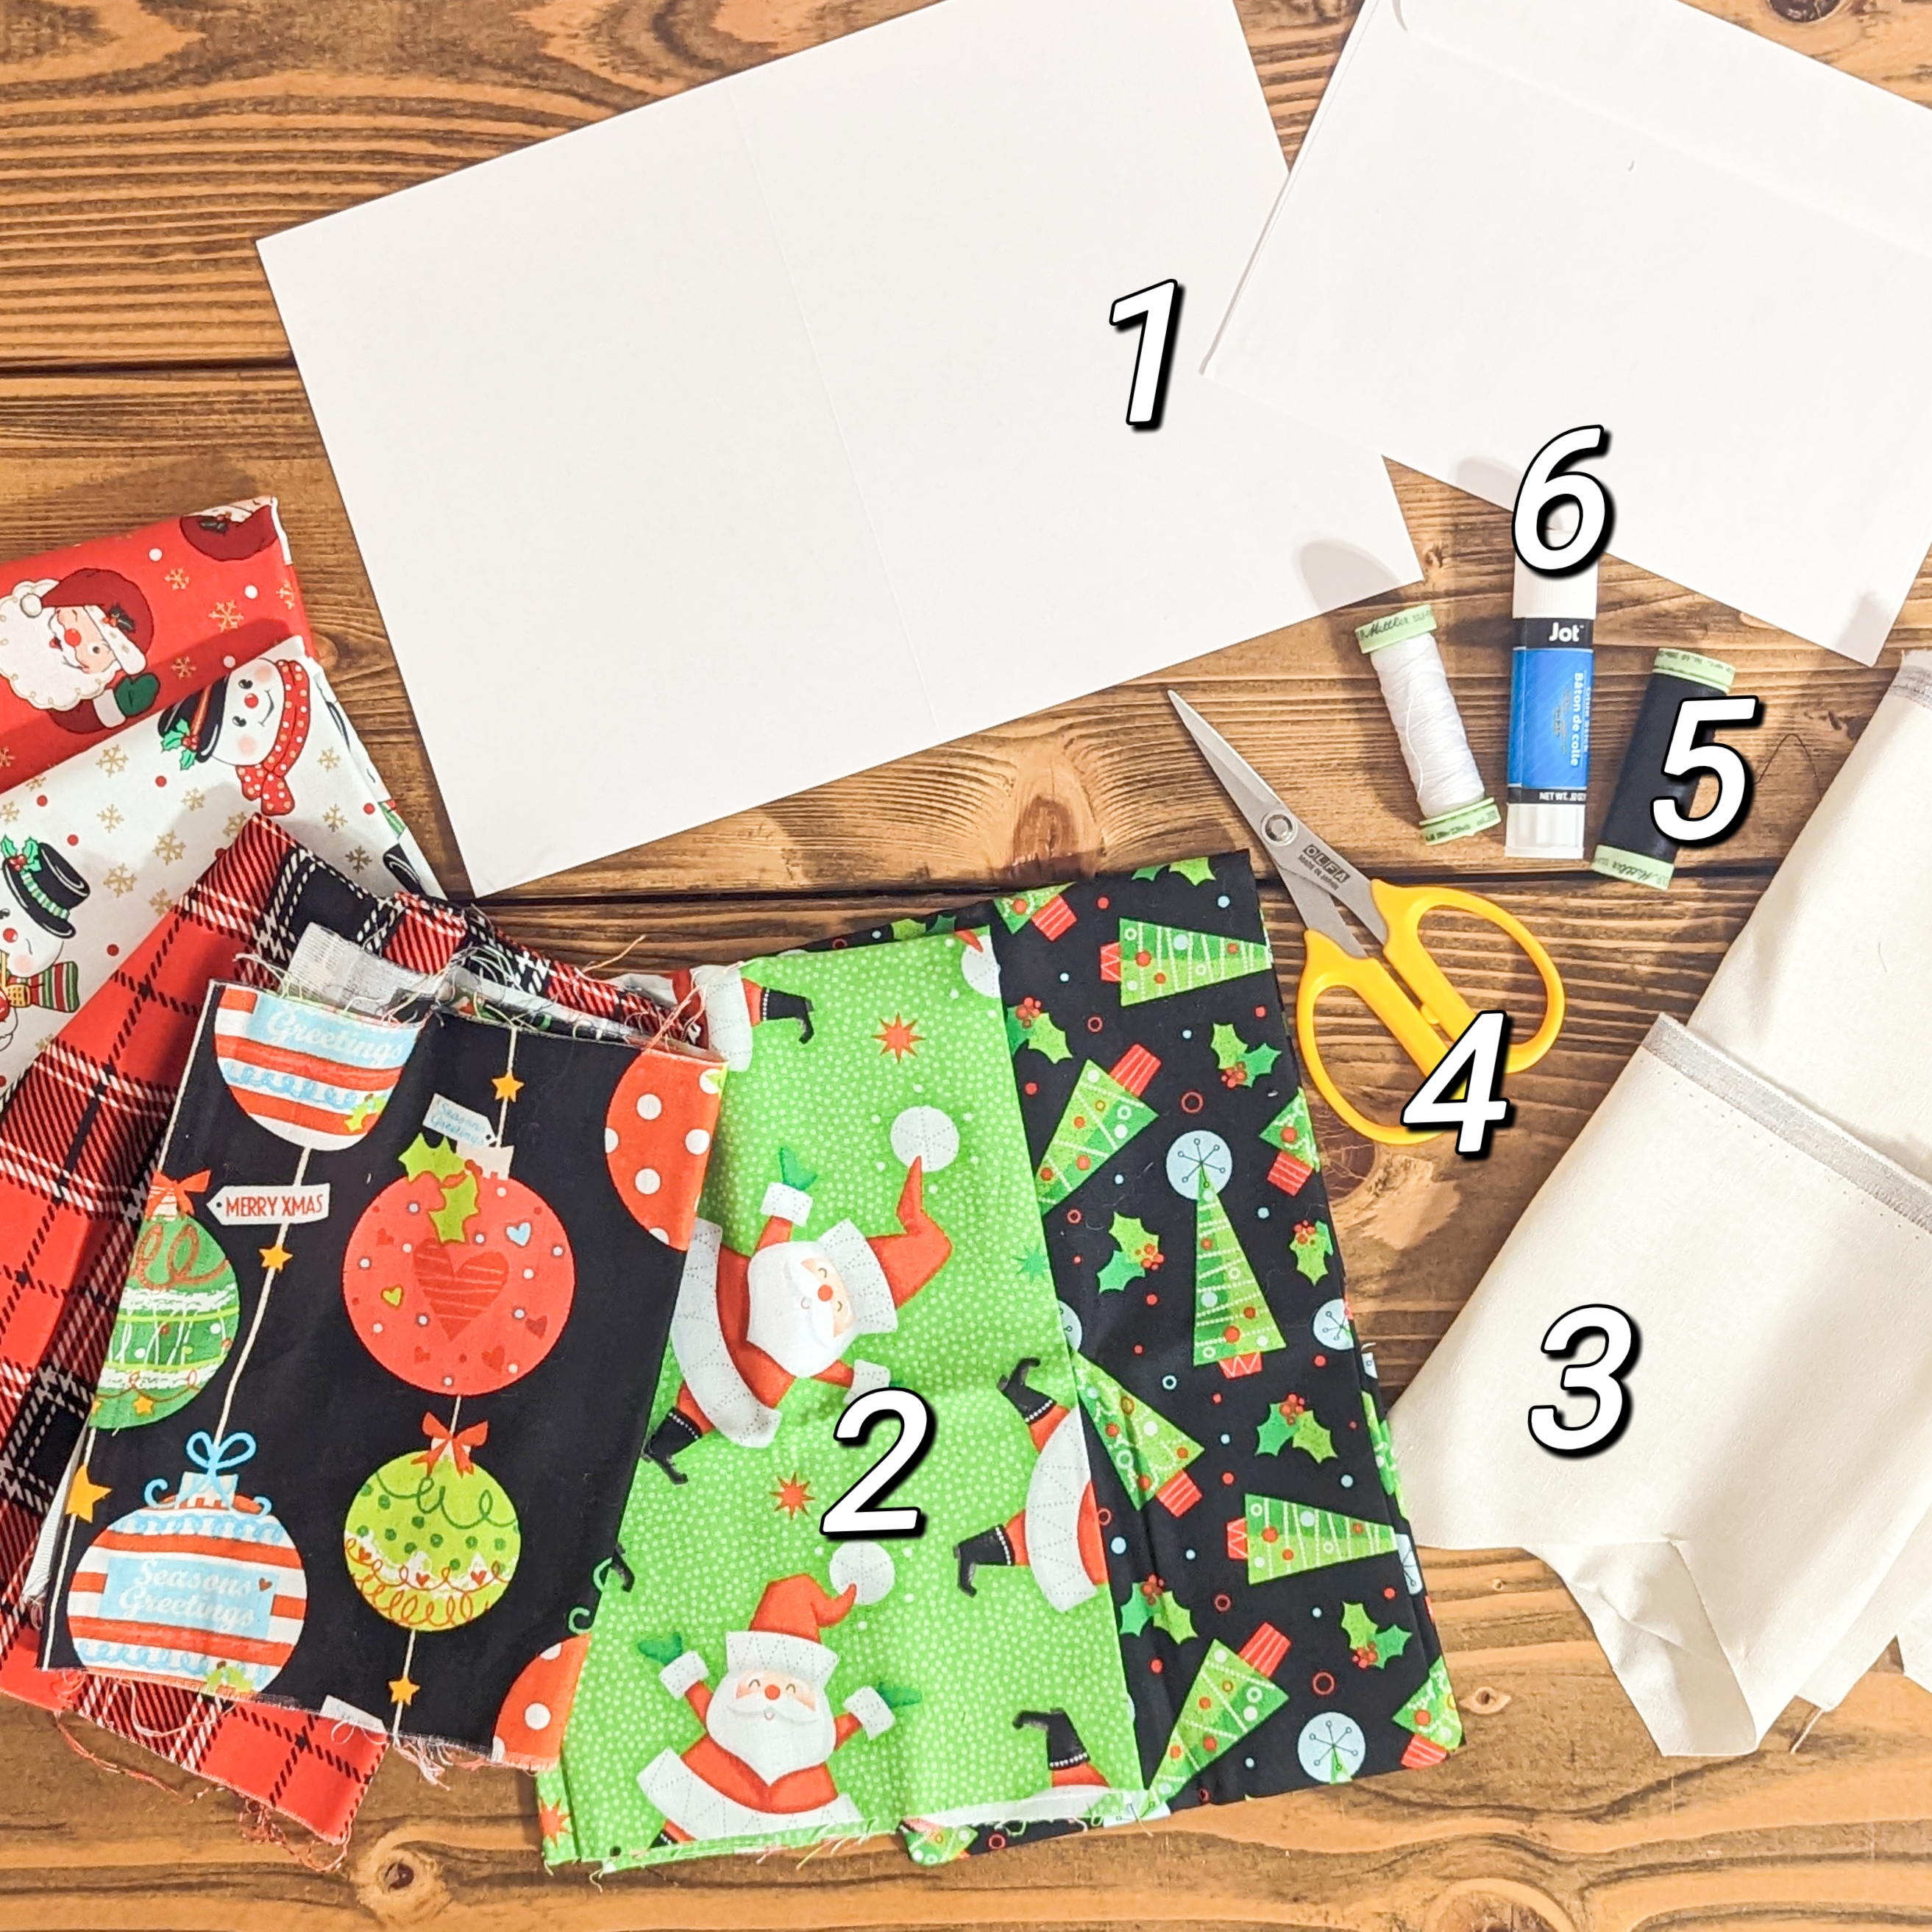
1) Cardstock paper, or blank cards.
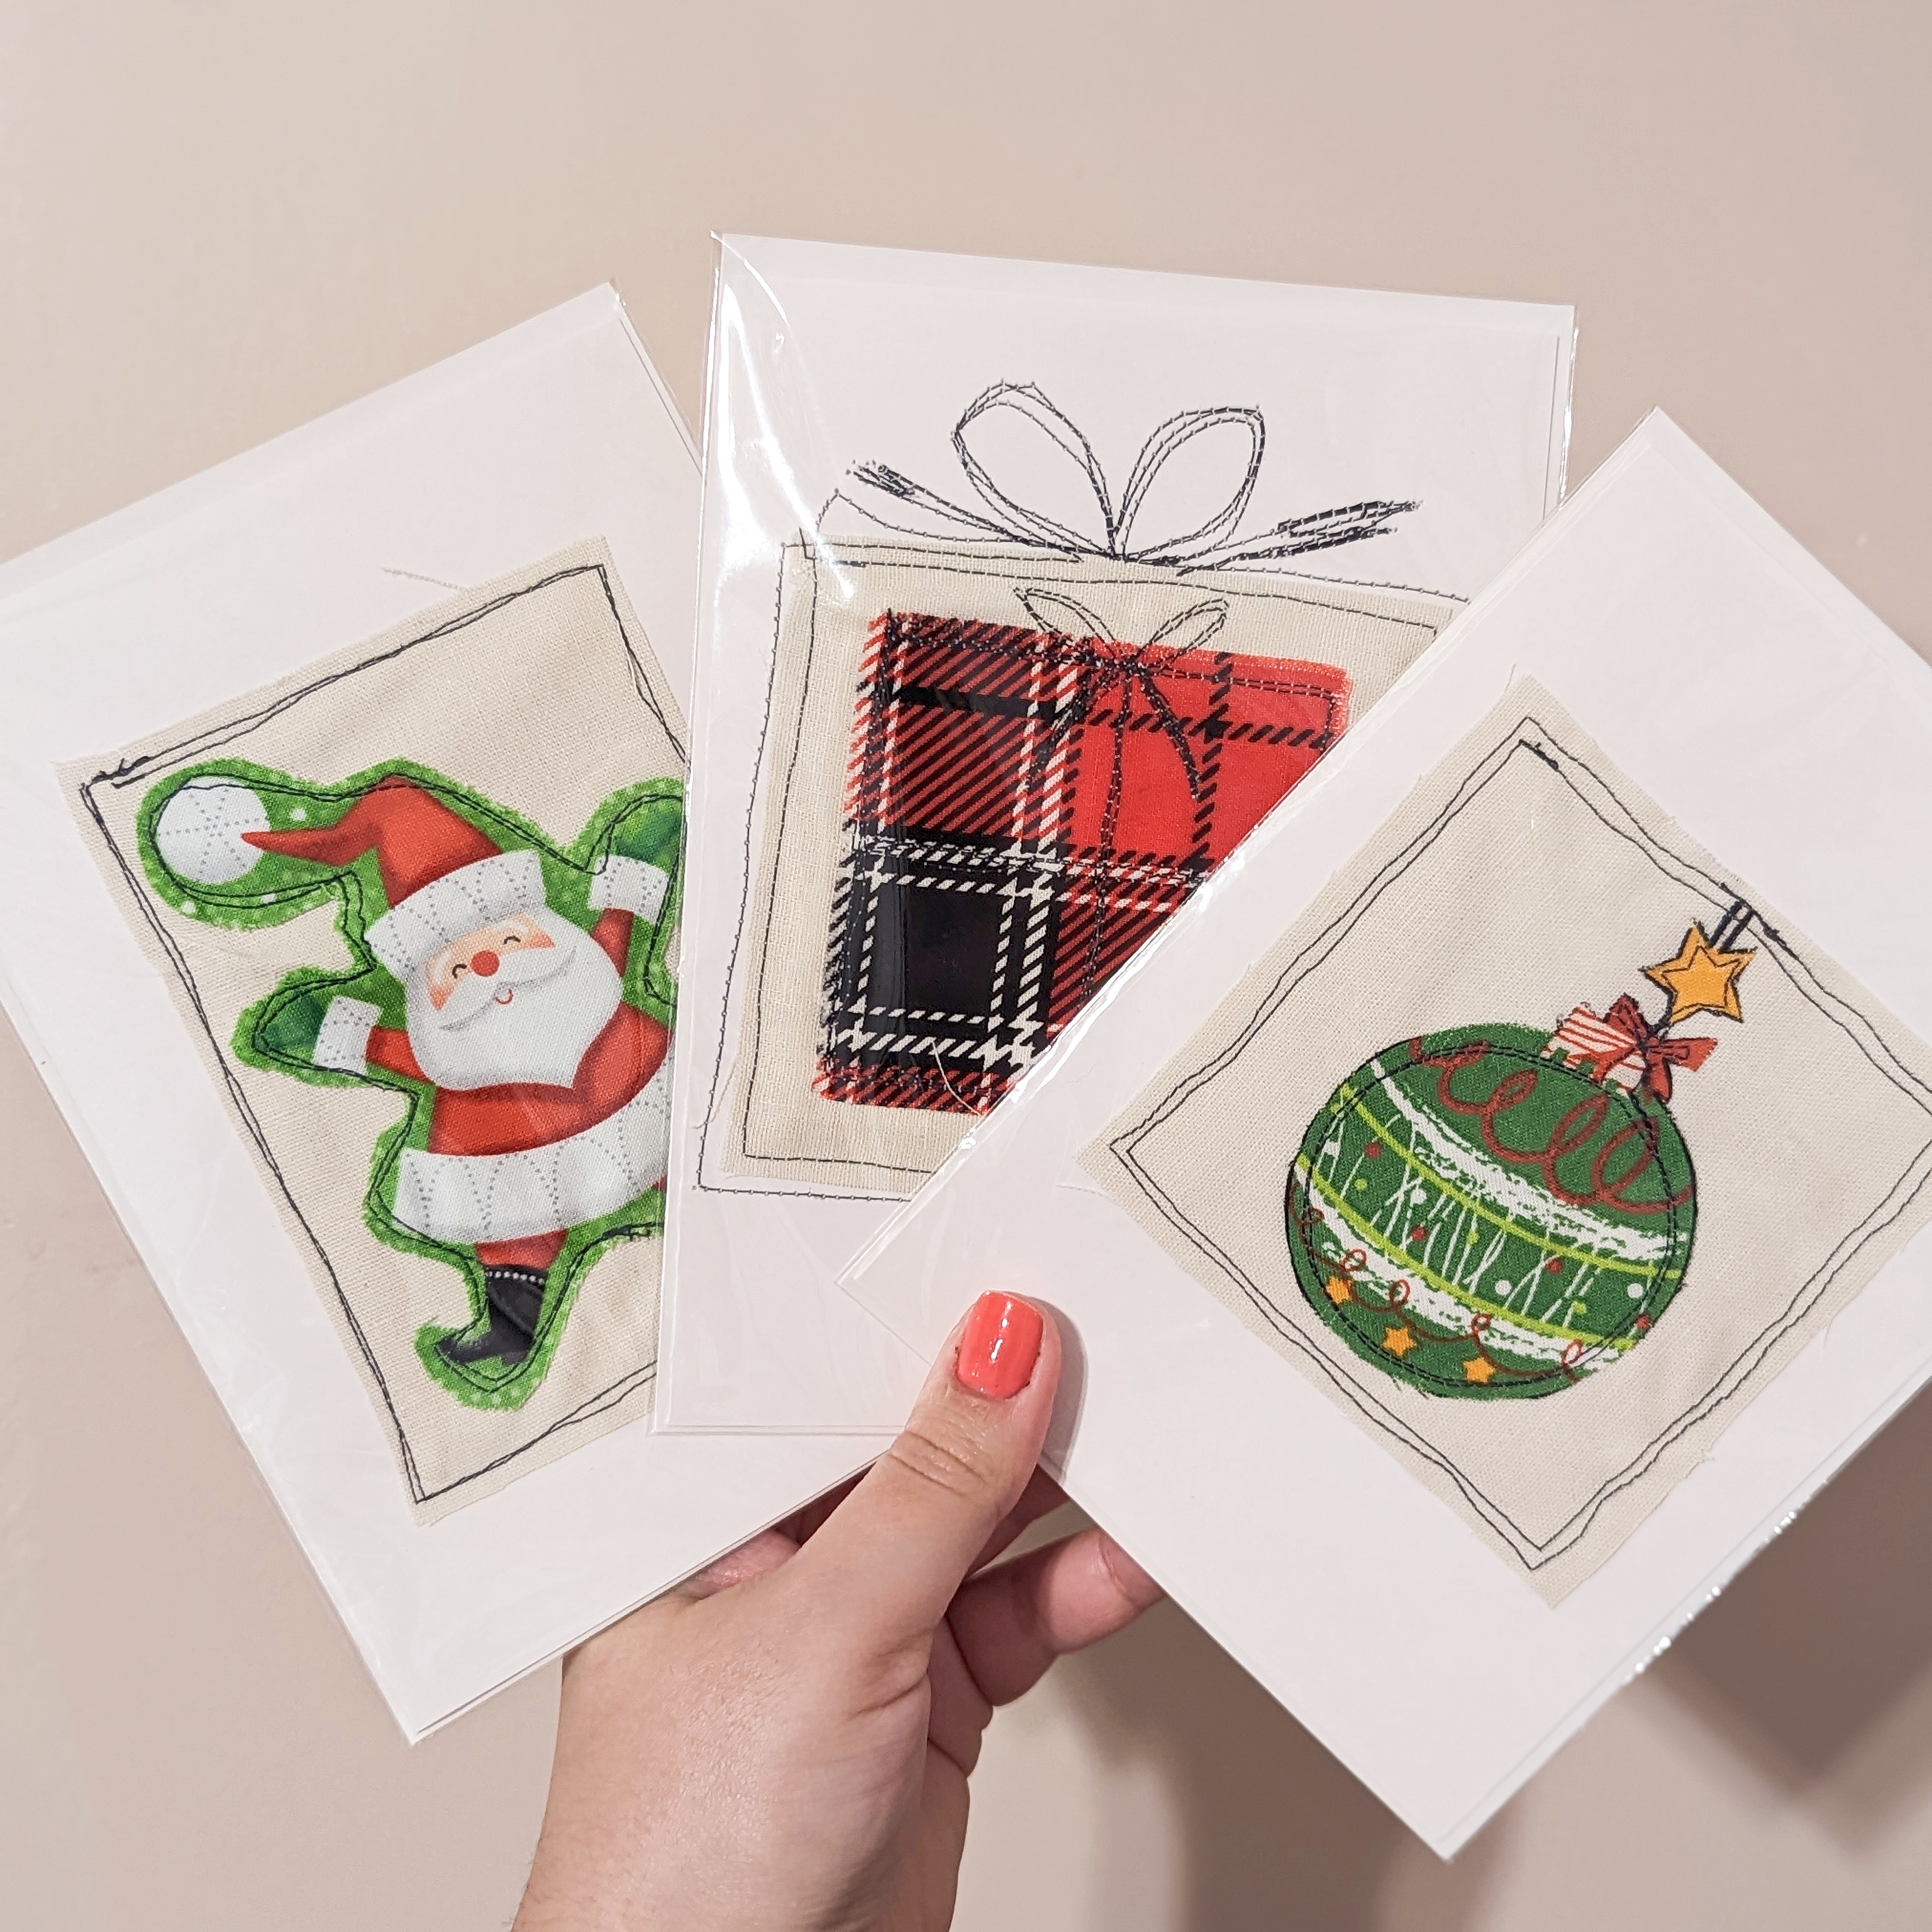
In this tutorial I’m using 5”x7” blank cards.
2) Christmas fabrics.
Give preference to large prints as we’ll be cutting them.
3) 100% Natural raw cotton, OR canvas fabric, OR muslin fabric, etc.
I am using 100% Natural raw cotton in this tutorial.
4) Scissors.
5) Thread.
I like using black or white for this project.
6) Glue stick.
STEP 1:
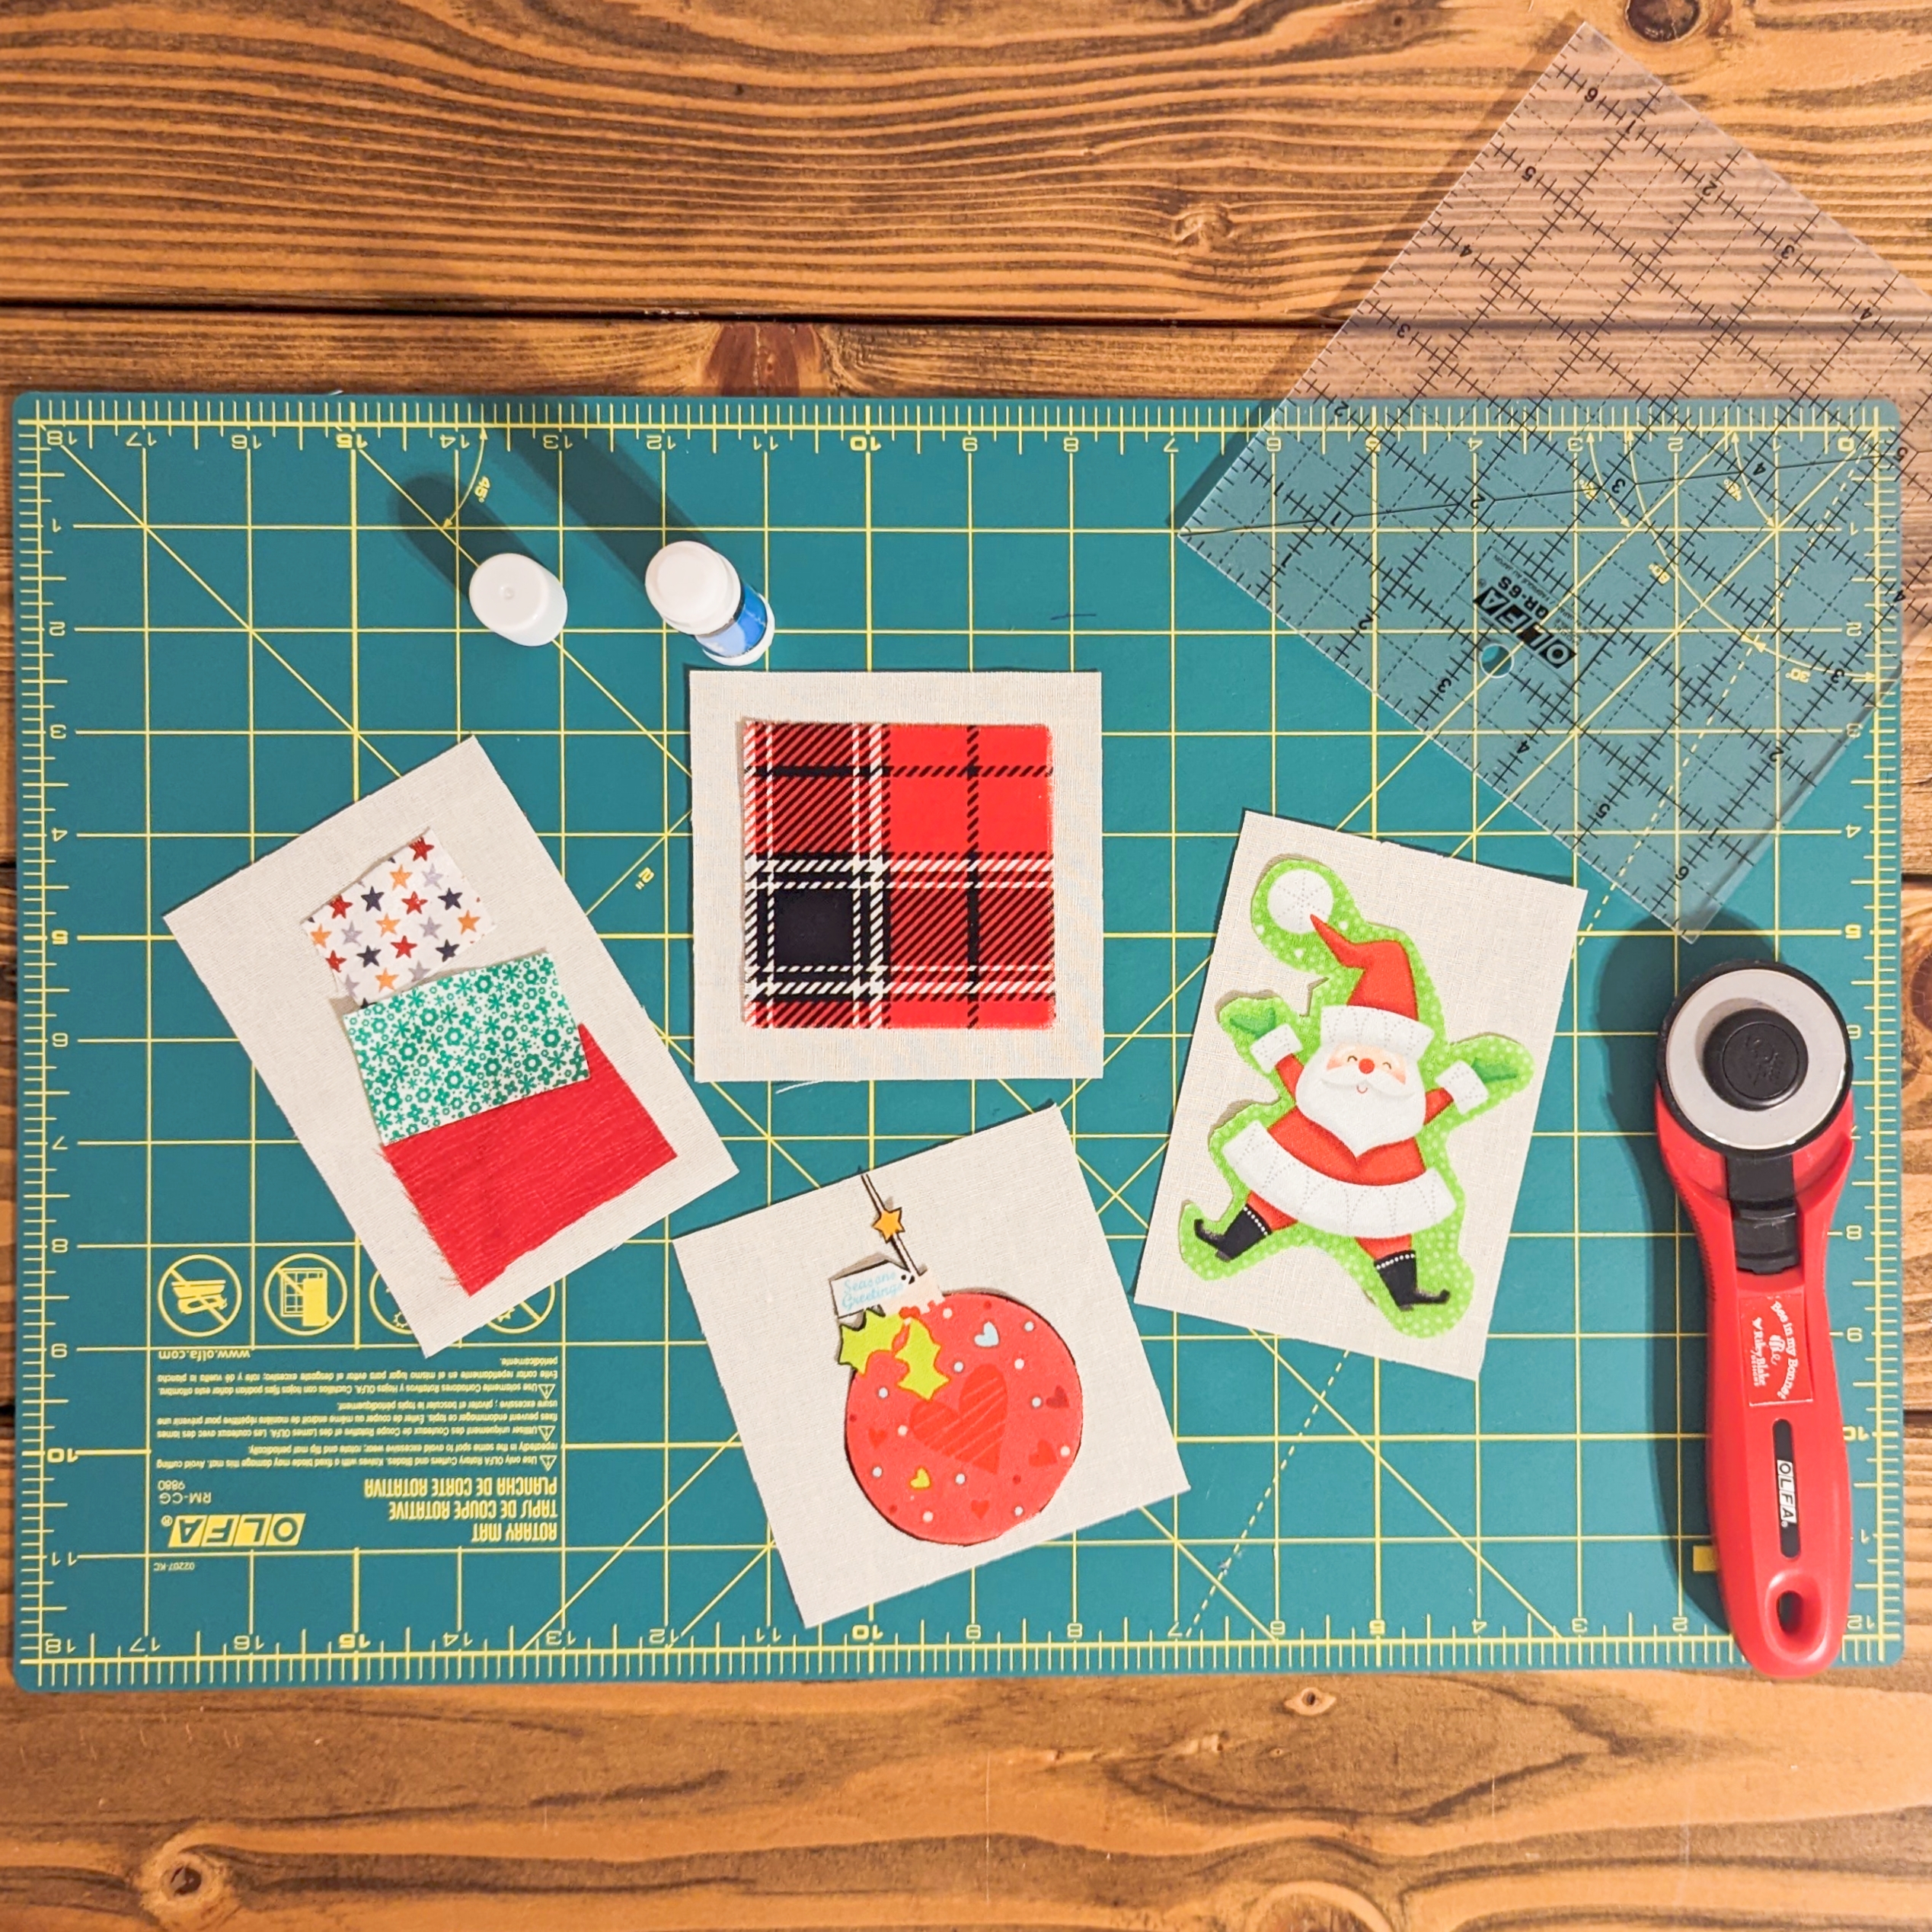
First cut the background from the 100% Natural raw cotton, OR canvas fabric, OR muslin fabric, etc. I used squares (3.5”) and rectangles (3.5”x5”).
Then cut out all figures or shapes that you will use on your themed card. You can cut squares or irregular squares and rectangles to make gift boxes, you can cut around the figures leaving a margin from the fabric original background, and you can also cut out the exact figures without any margin. Keep in mind these shapes need to fit inside the background fabric that was cut first.
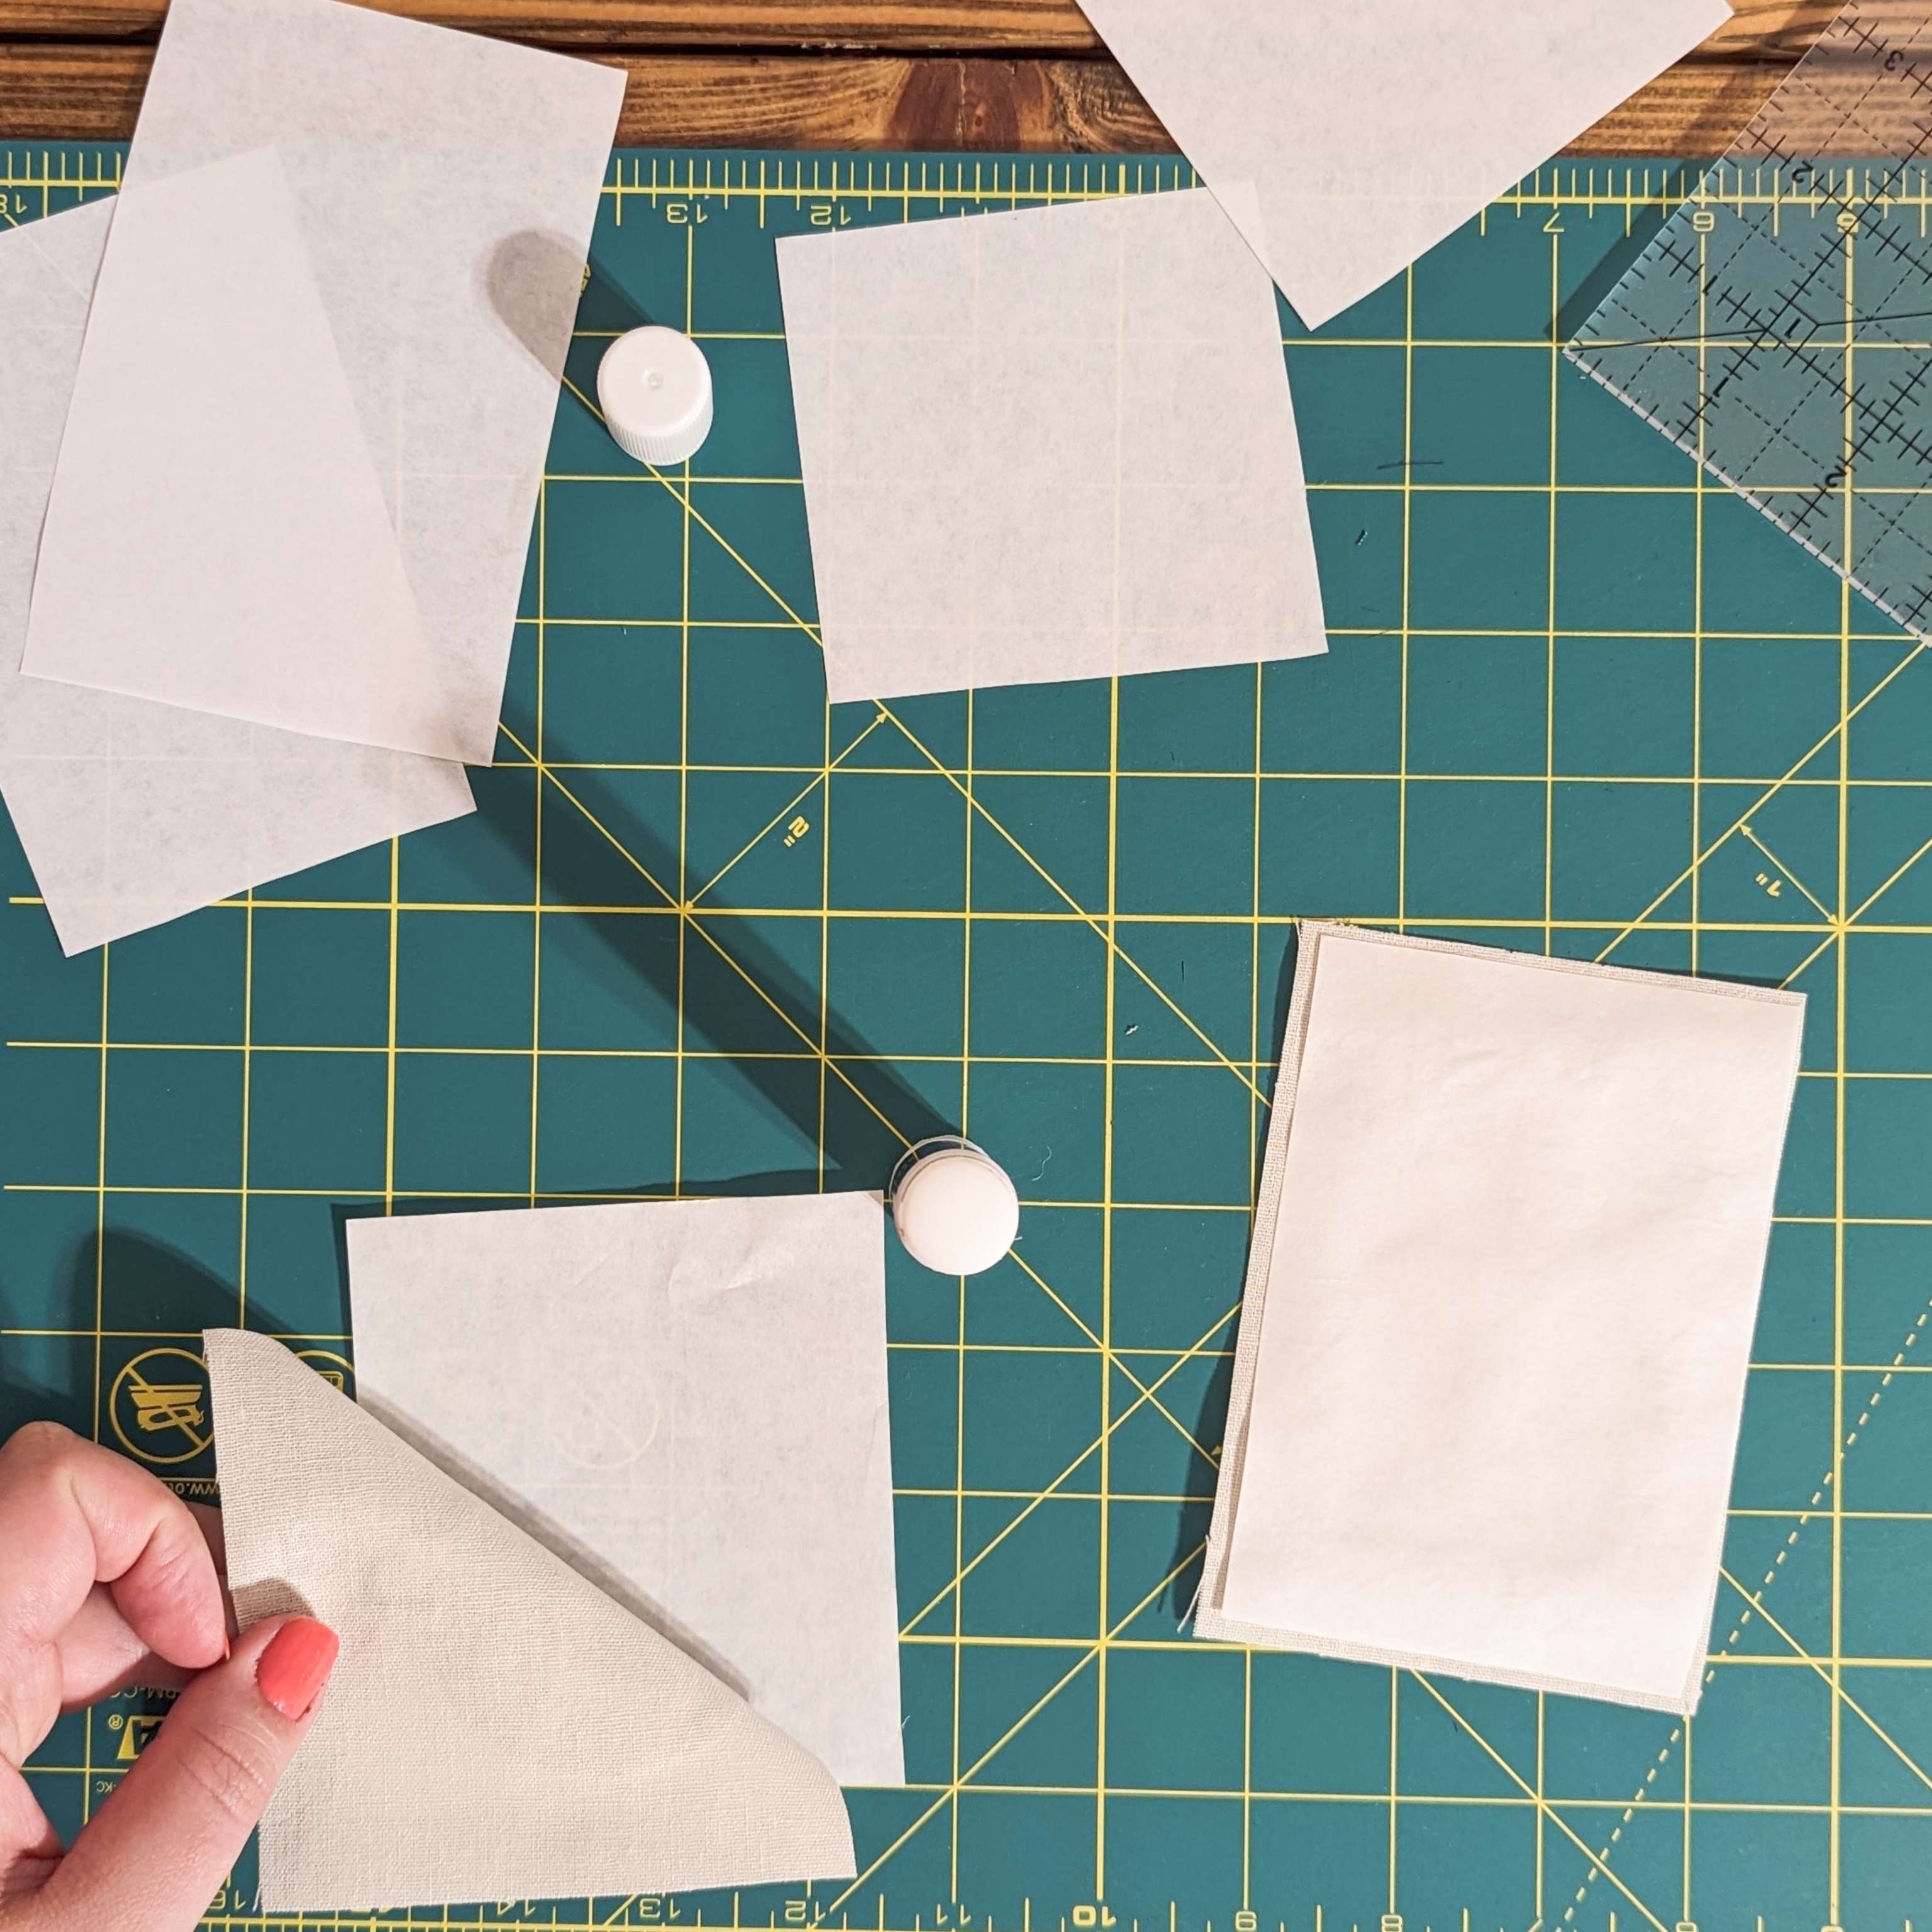
Lastly and totally optional (but recommended) is to cut a piece of paper in the same size as the fabric background that was cut first, this piece of paper will work as stabilizer. This will prevent the fabrics from stretching and it doesn’t need to be removed after sewing, since the project won’t be washed, it will be hidden and ok to keep on the back of the fabric that will be sewn on the cardstock paper.
STEP 2:
Use the glue baste to attach the paper (if using) to the back of the background fabric piece and the cut out shapes on top of the background fabric piece.
STEP 3:
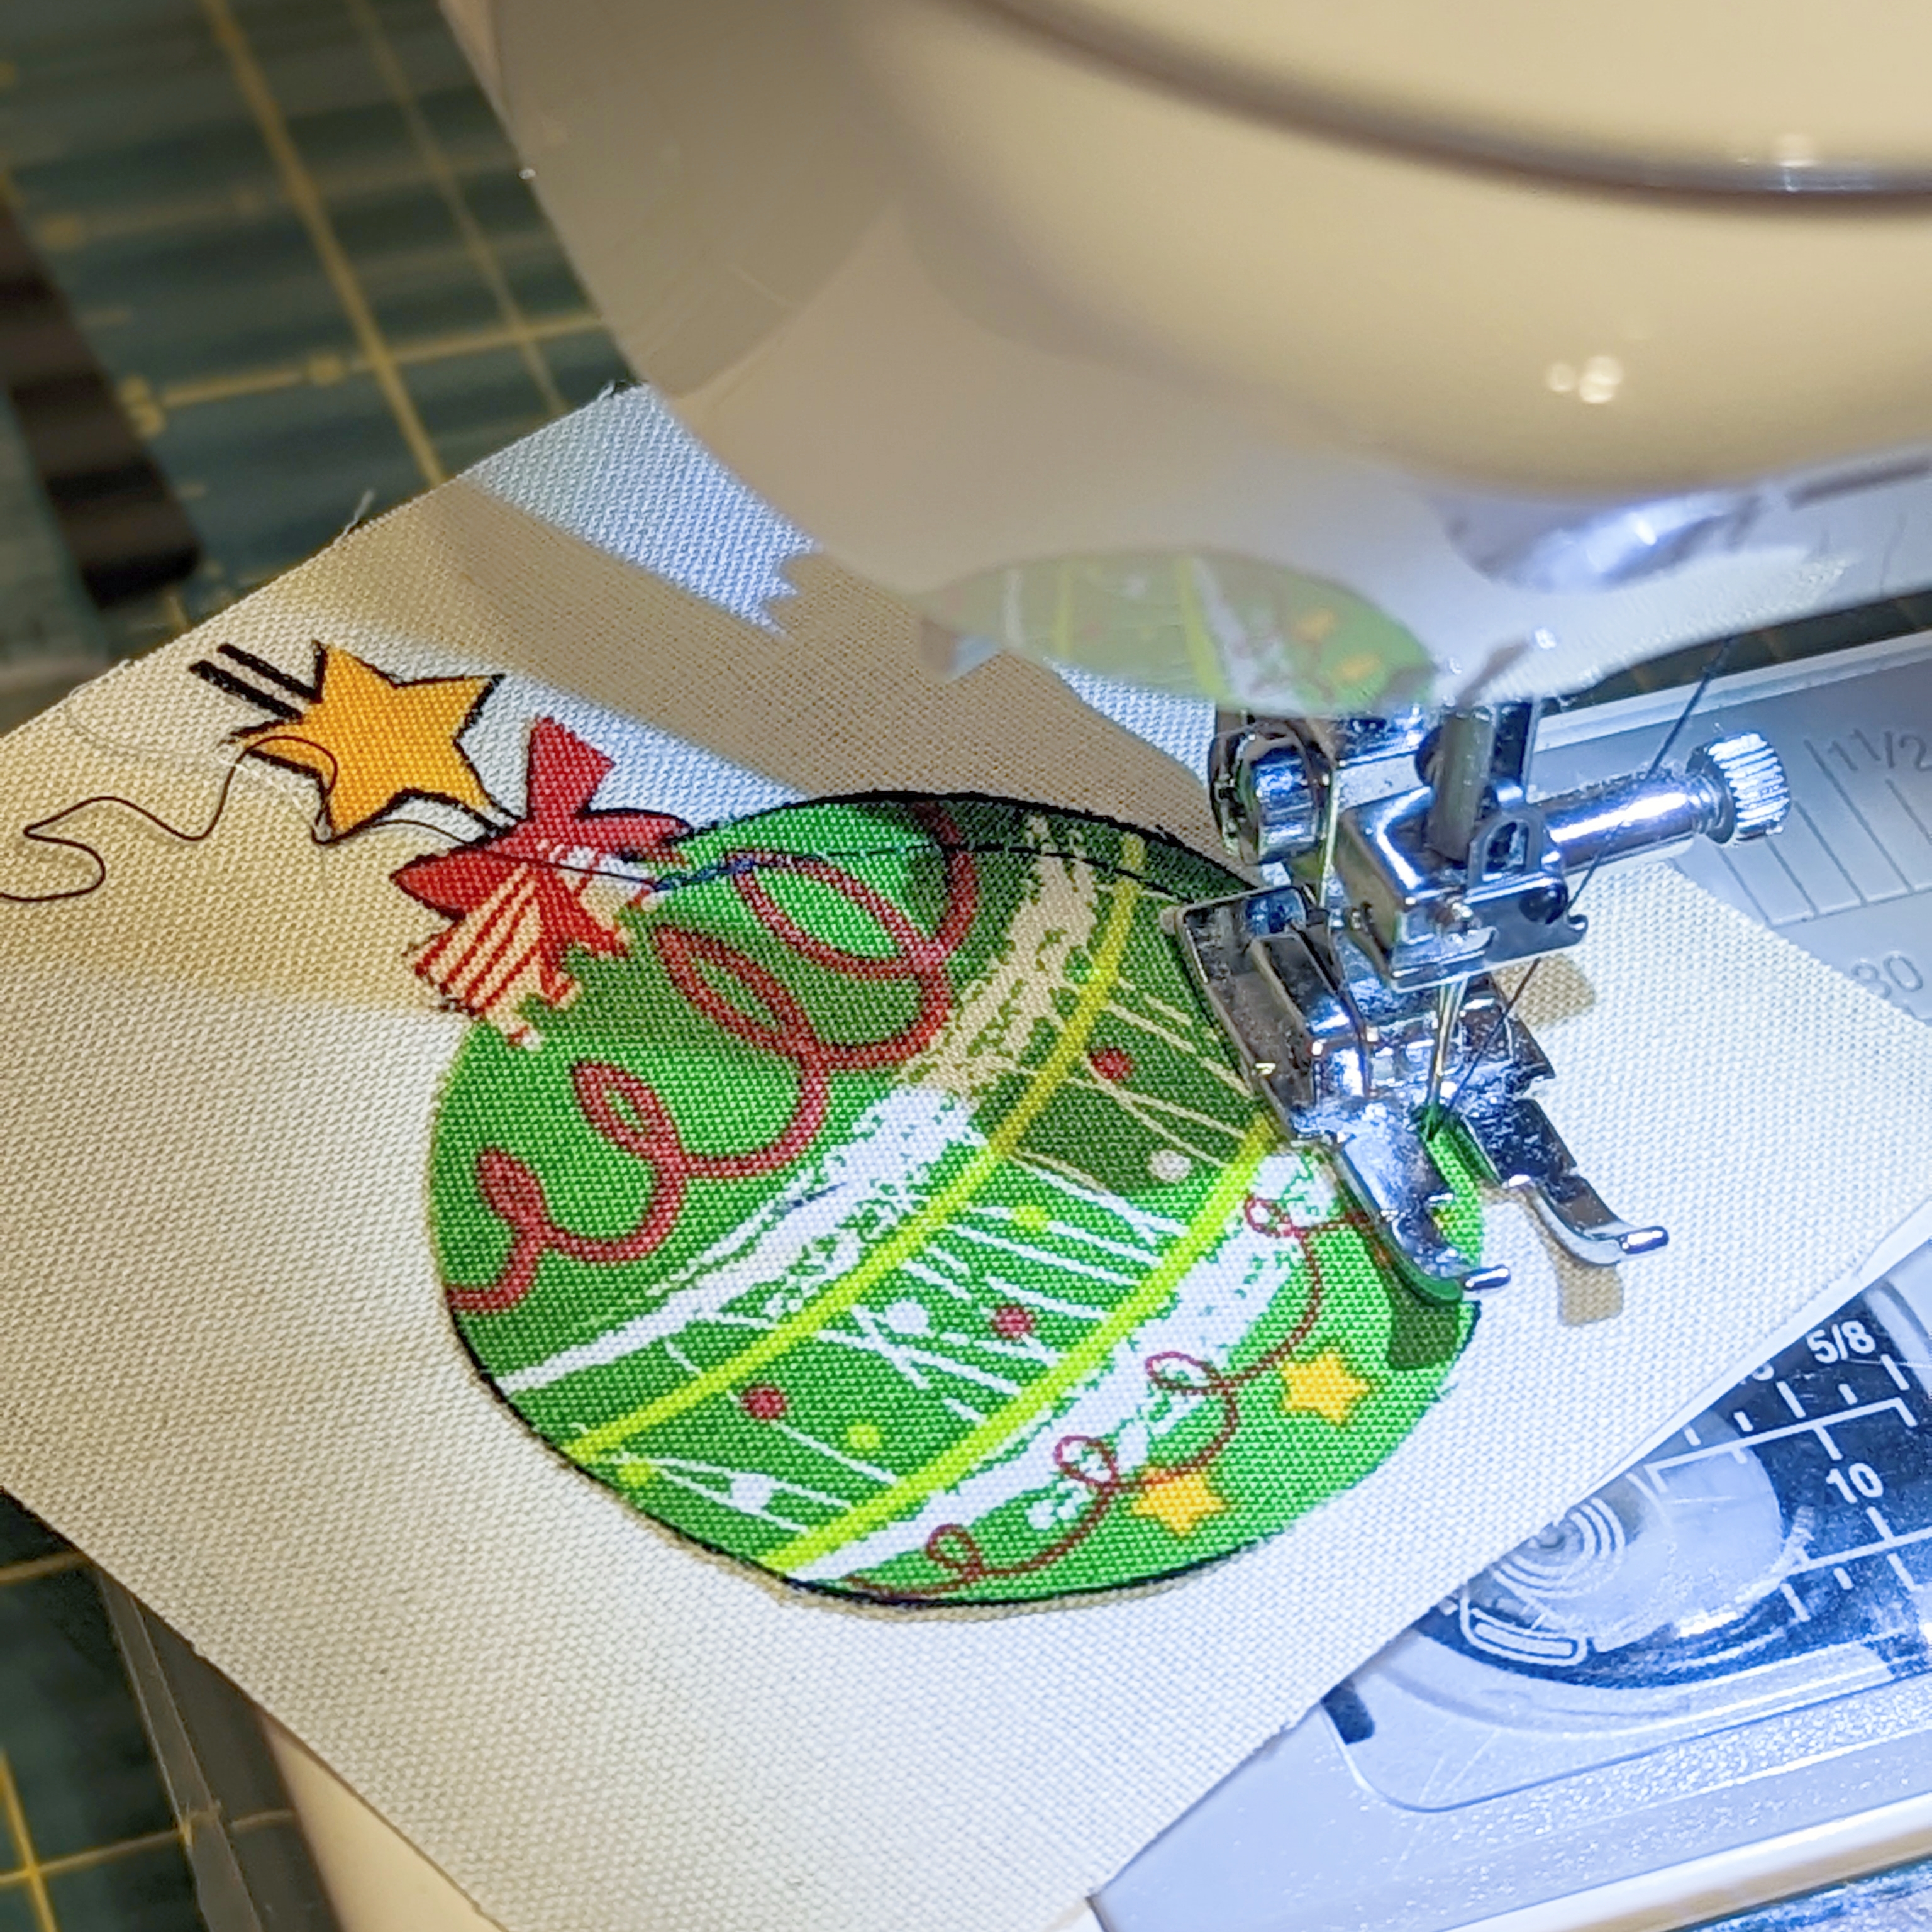
Using only the fabric set that was previously basted, not the cardstock paper yet, start sewing around the shape with a 1/8” distance from the shape’s margin. Repeat the stitching as many times as you want, play with the styles and design you choose. I used irregular straight stitching along the shapes making two rounds.
STEP 4:
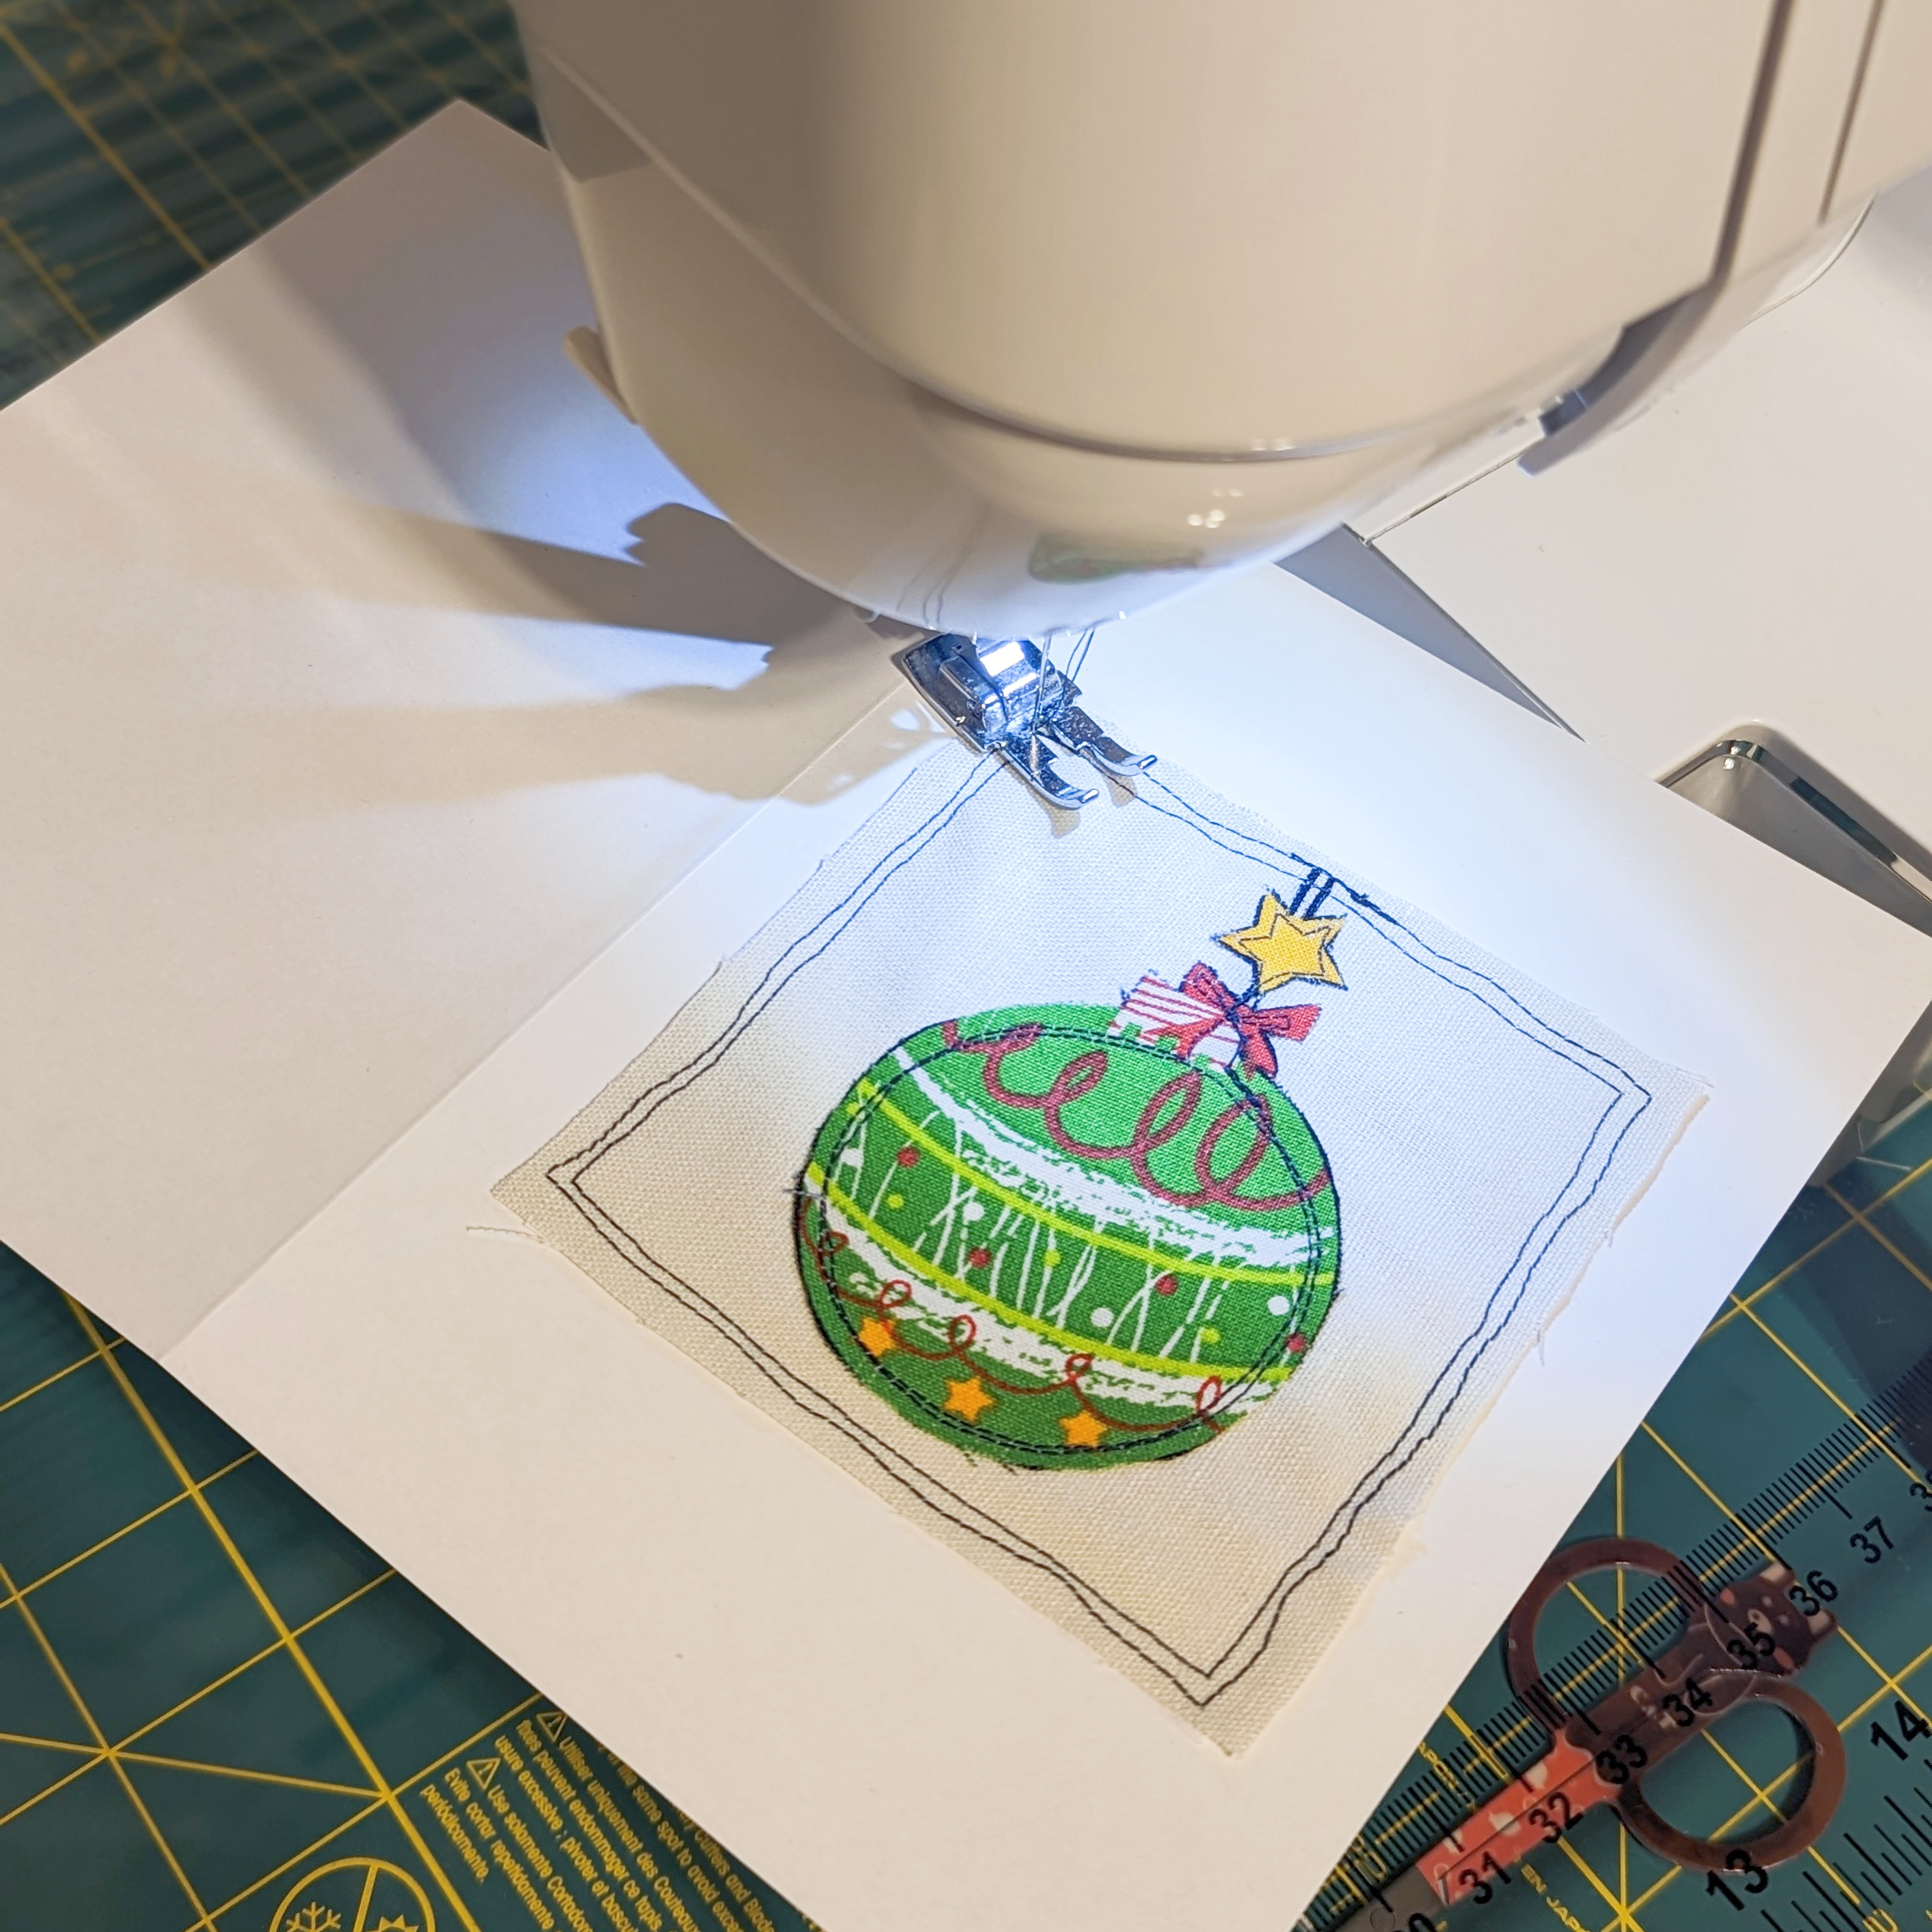
Place the whole piece previously sewn on top of the front of the card, laying the card open on the machine plate, sew along the edge of the background fabric. I used the same type of stitching, straight and irregular on two rounds, but you can use decorative stitches, zig zag, straight, etc.
Trim all thread excesses as you go.
STEP 5:
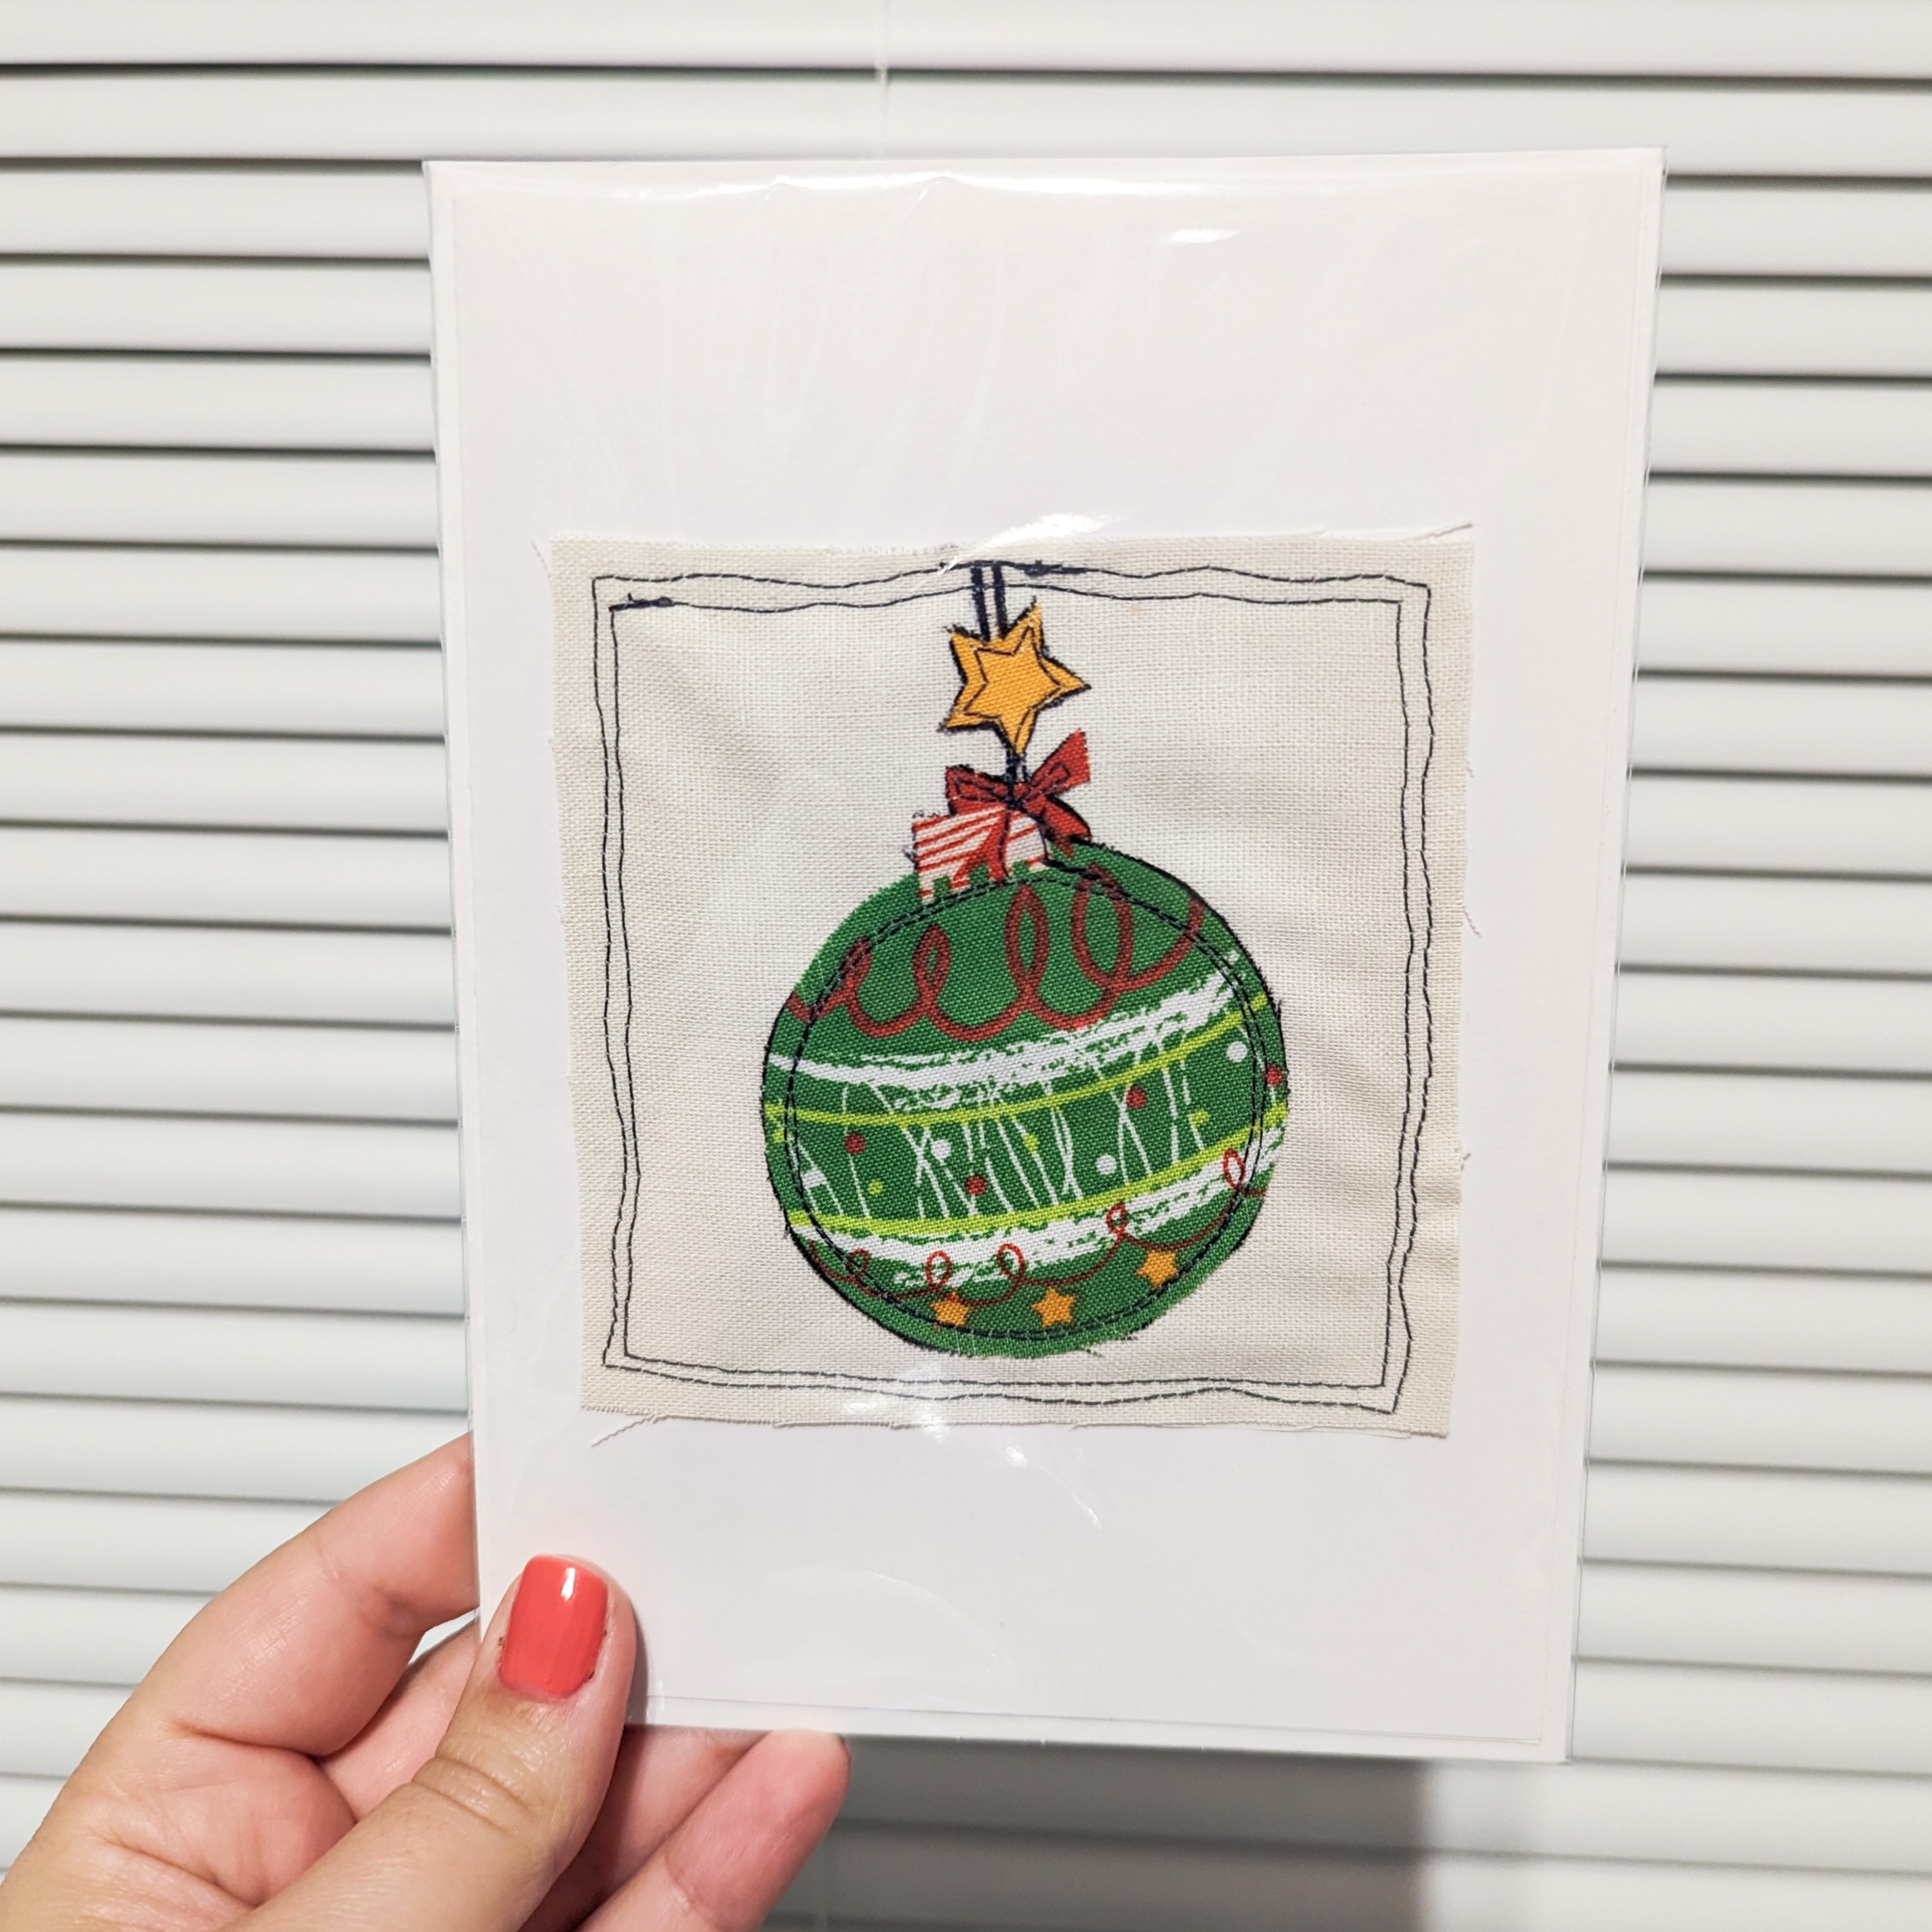
Use clear sealable plastic bags to insert the cards and envelope to protect them, it makes a beautiful item for selling and gifting.
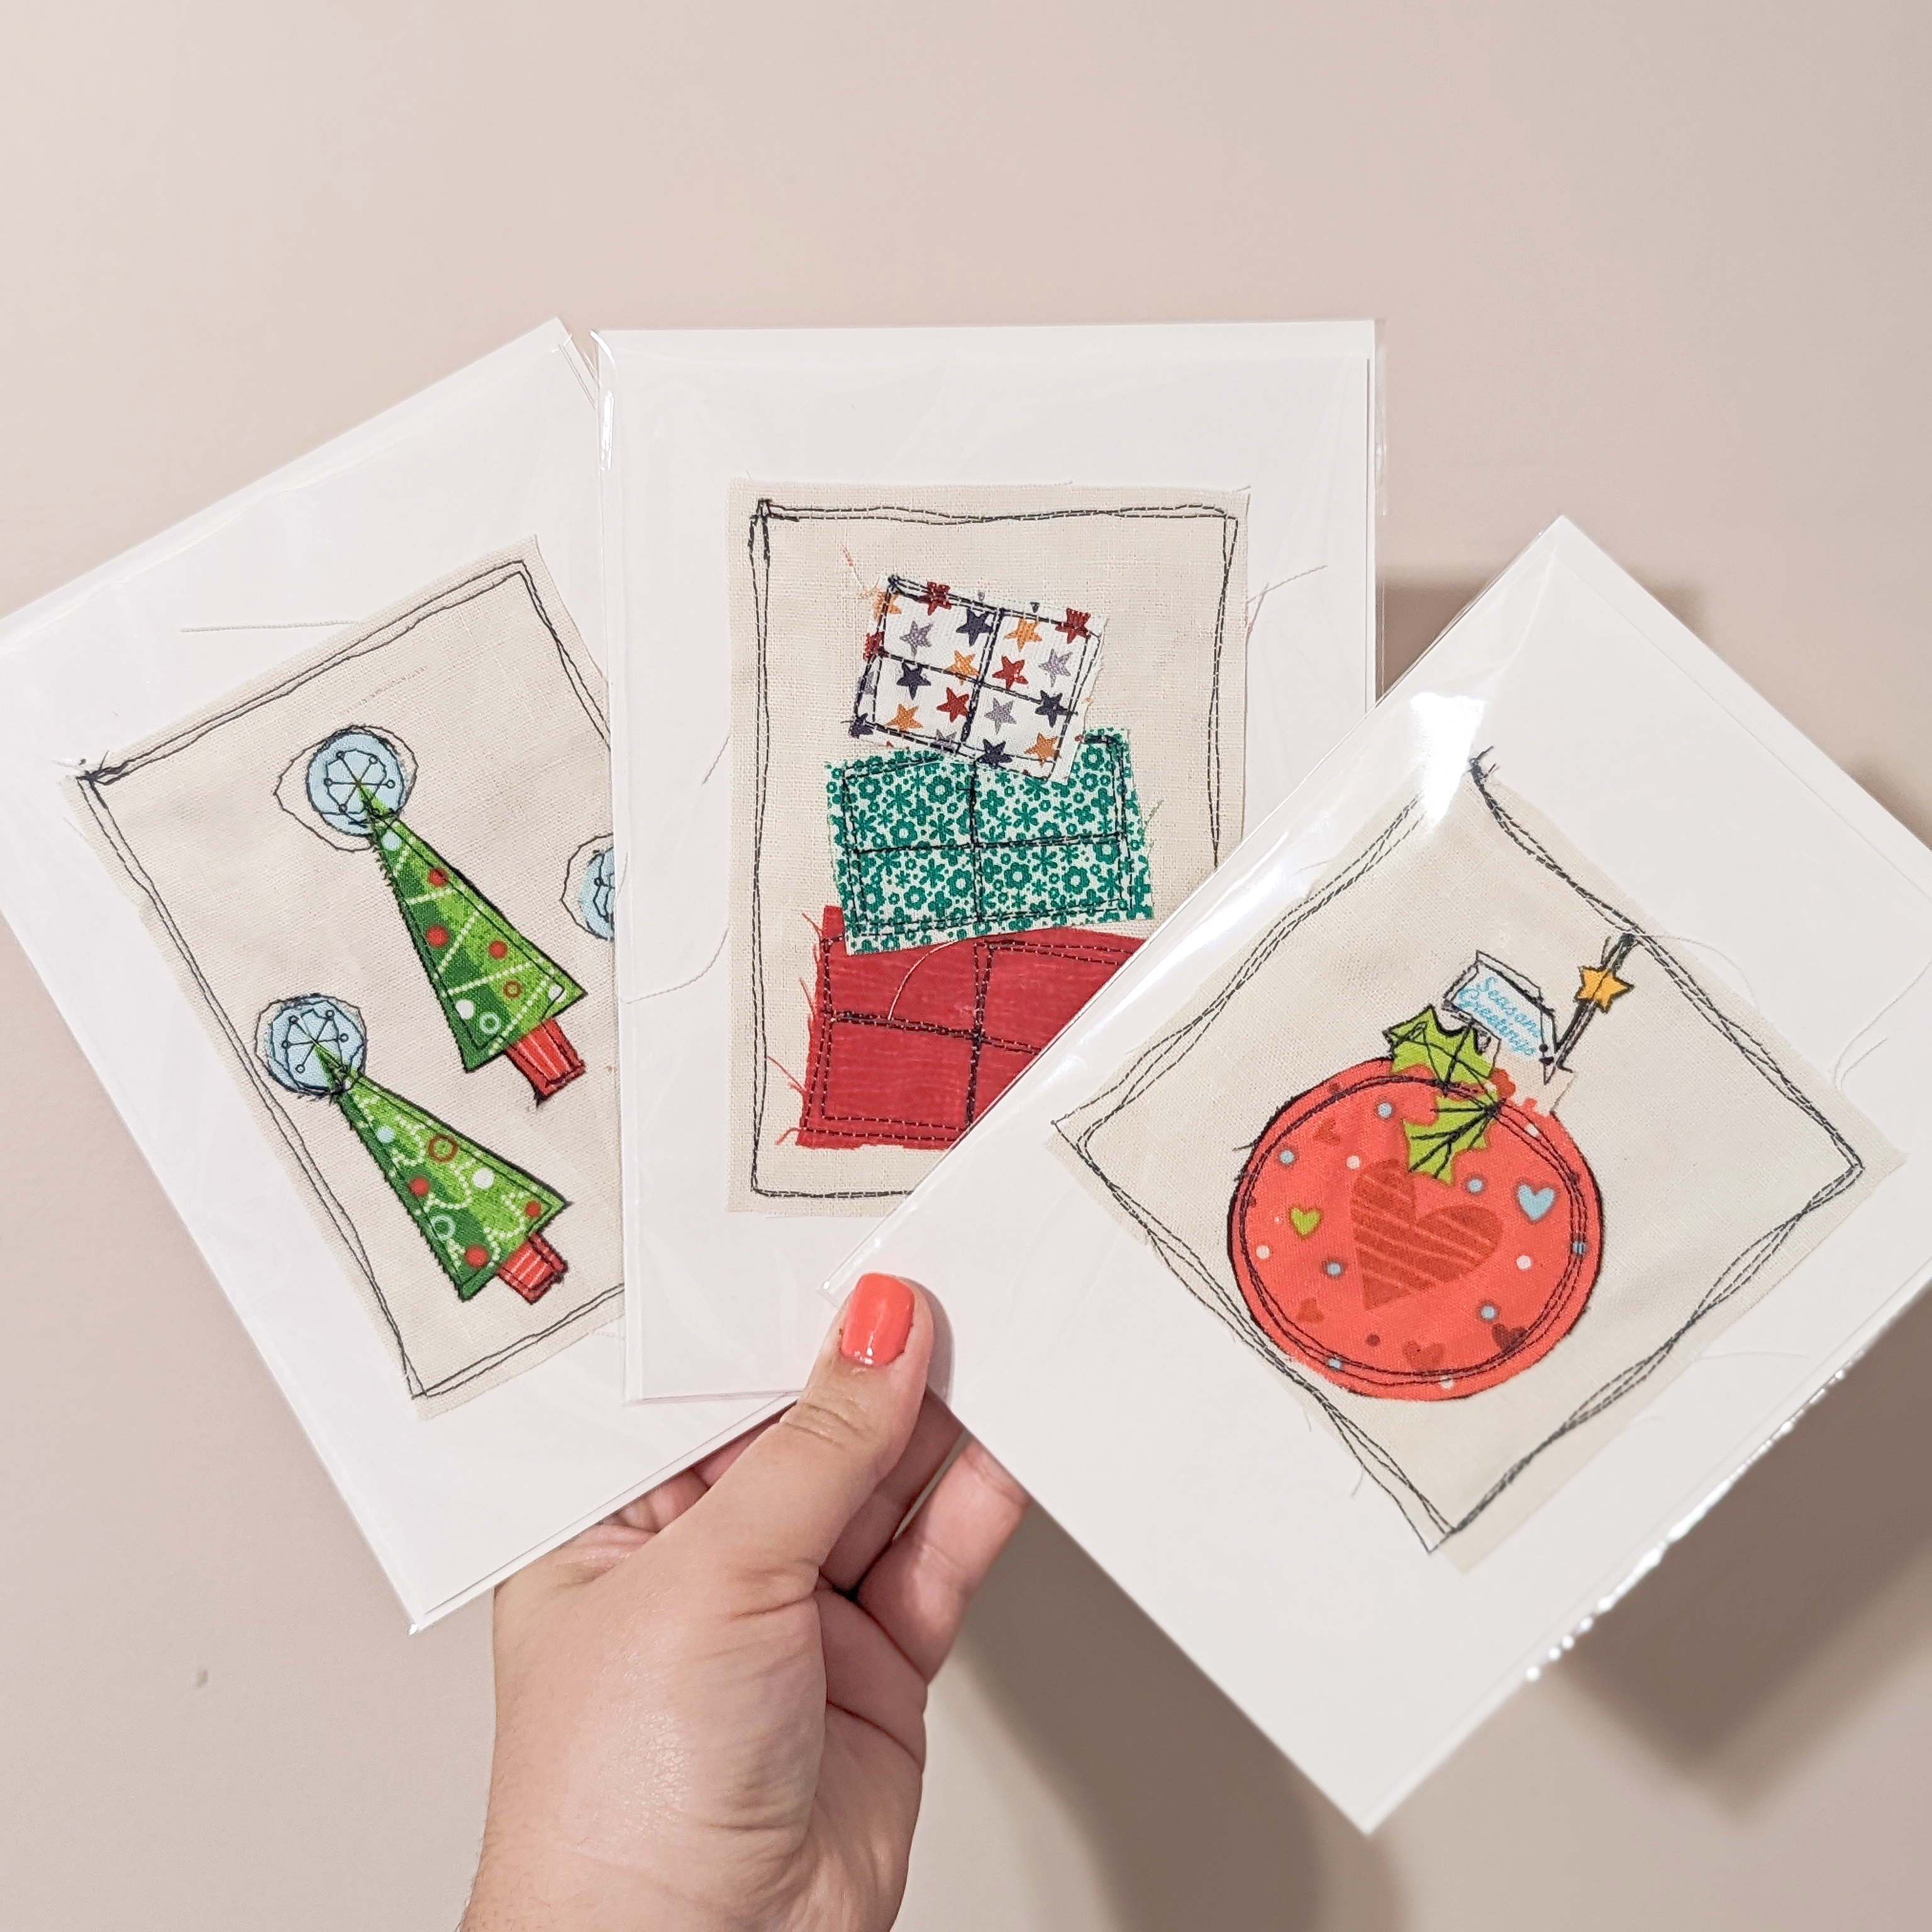
Enjoy your cards!!! Play with all beautiful prints on your stash and use your creativity to make all sorts of themes using this same technique.
Daisi Toegel
@daisitoegel
www.flowersew.com