

Puffy Quilts
Posted by Karen Hermach on 10th May 2025
Puffy Quilts: The New Weighted Blanket
Looking for my next project, I turned to social media for inspiration, and I noticed I was liking and saving many posts about puffy quilts. I start to think “it’s like making a bunch of little pillows and sewing them together. I could definitely do that!”
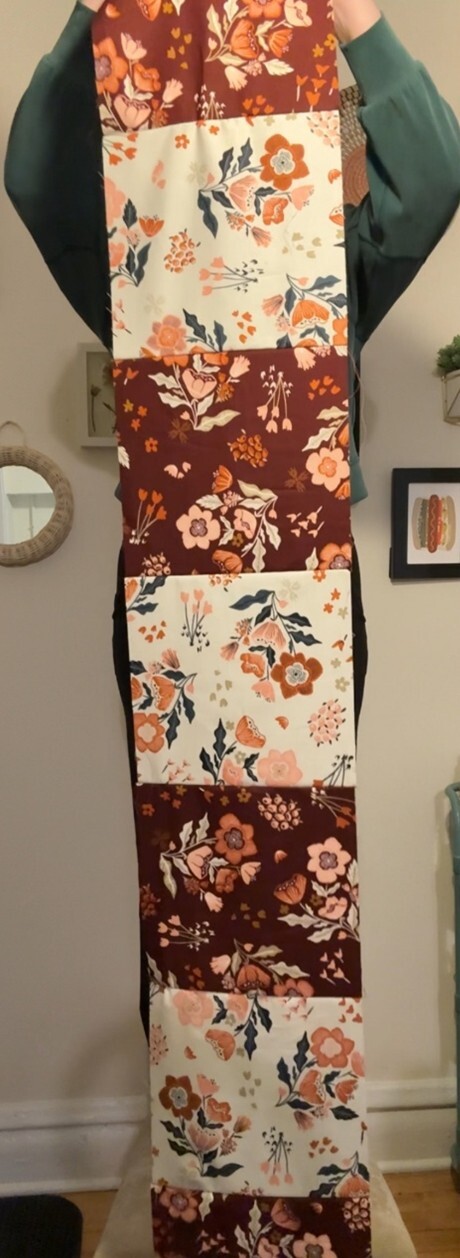
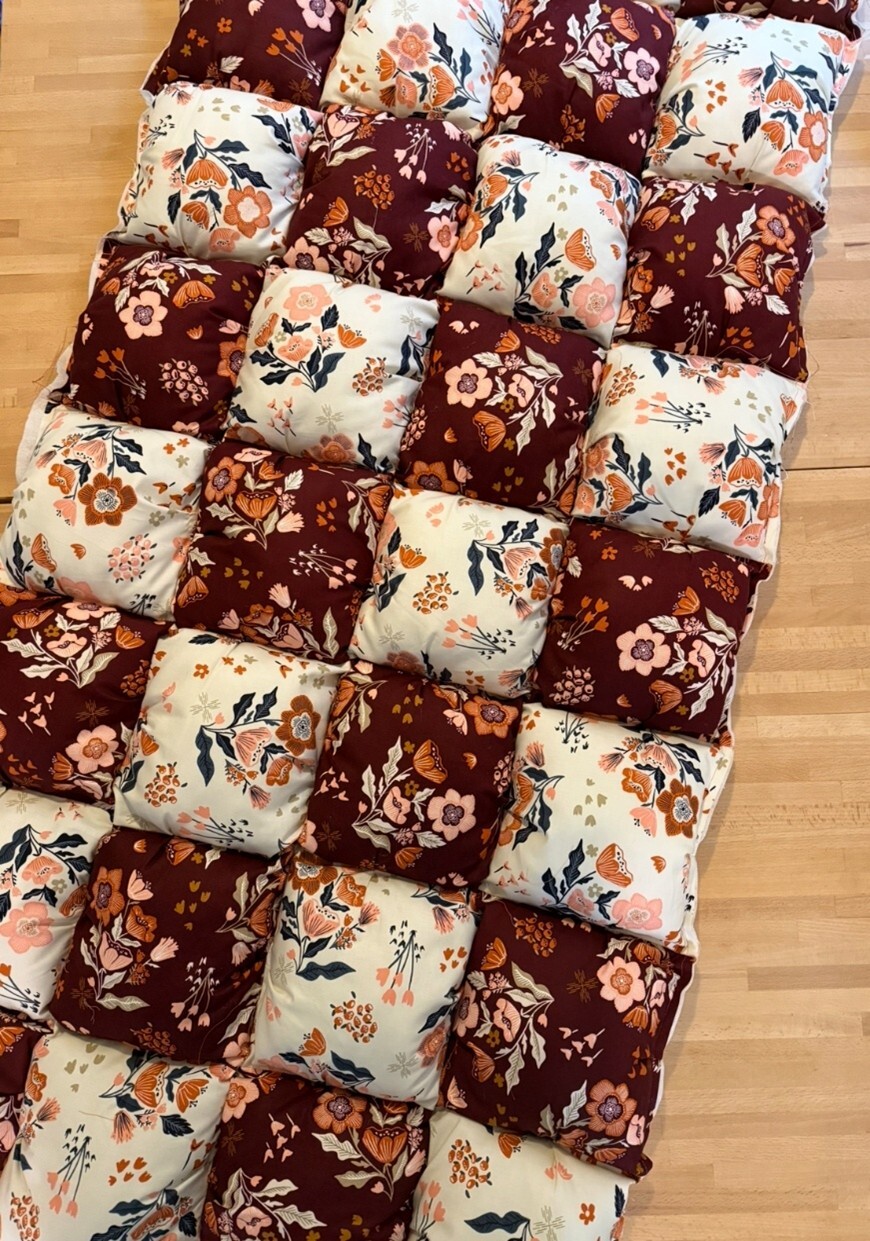
I decided that doing a checkered pattern would be the easiest way to try out my first puffy quilt. I started by looking on cottoncuts.com at their amazing selections of fabric by the yard and I found many fabrics I absolutely loved, then narrowed it down to the options that were the same pattern but different colors. I decided on this beautiful fabric by Moda Fabrics - Folk & Lore by Fancy That Design House, by Stephanie Sliwinski. Initially, I was hoping to make a puffy quilt comforter for a queen size bed, so I ordered 4
yards of each. I cut them into 10 & ½ inch squares which will become 10-inch squares when I sewed it using a ¼ inch seam allowance.Once all the squares were cut and ready, it was time to lay them out. I chose to do 9 squares in a row and the plan (in the beginning) was to do 10 rows.
I started by laying out each row.
Then it was time to start sewing. I started by sewing the squares together to make each row.
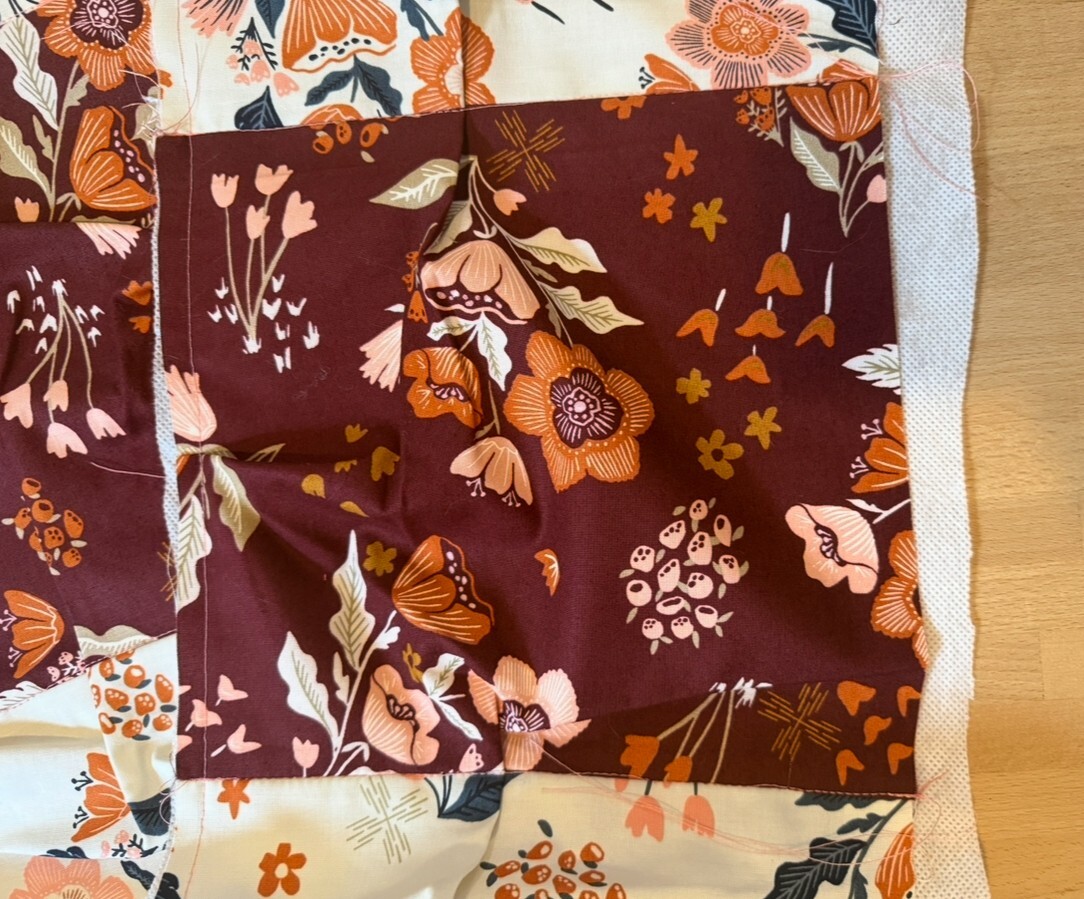
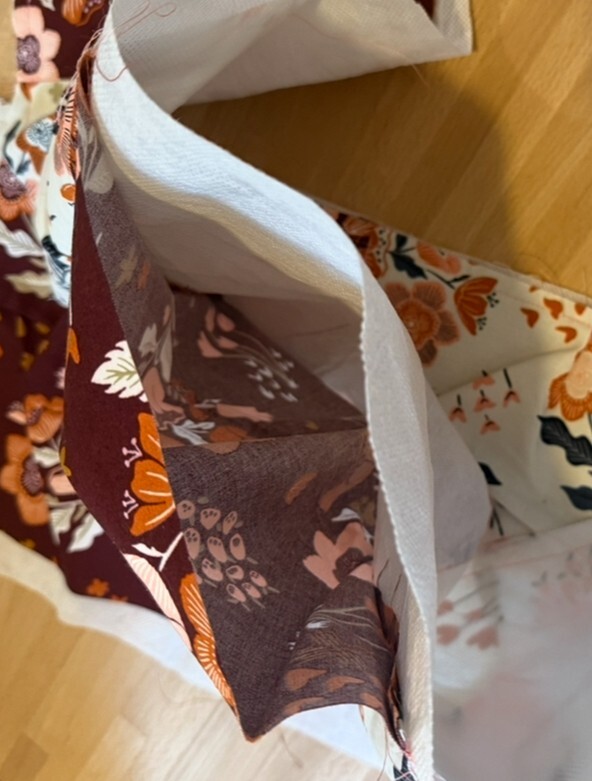
Once all the rows were together, I used old fabric I found in my scraps (that was large & long enough to use for each row) and I cut them the size of each row. Next I sewed the scrap fabric rows to the main rows by sewing horizontally across the top, then vertically down the long side, then horizontally across the bottom leaving one vertical side completely open. Then I sewed horizontally on each seam which is what created the “pockets” for each square.
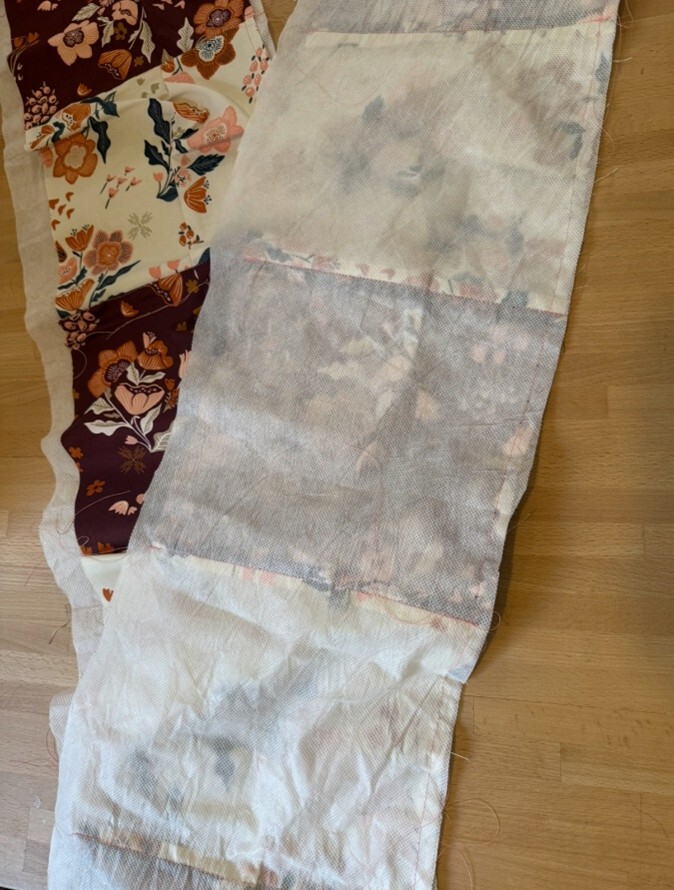
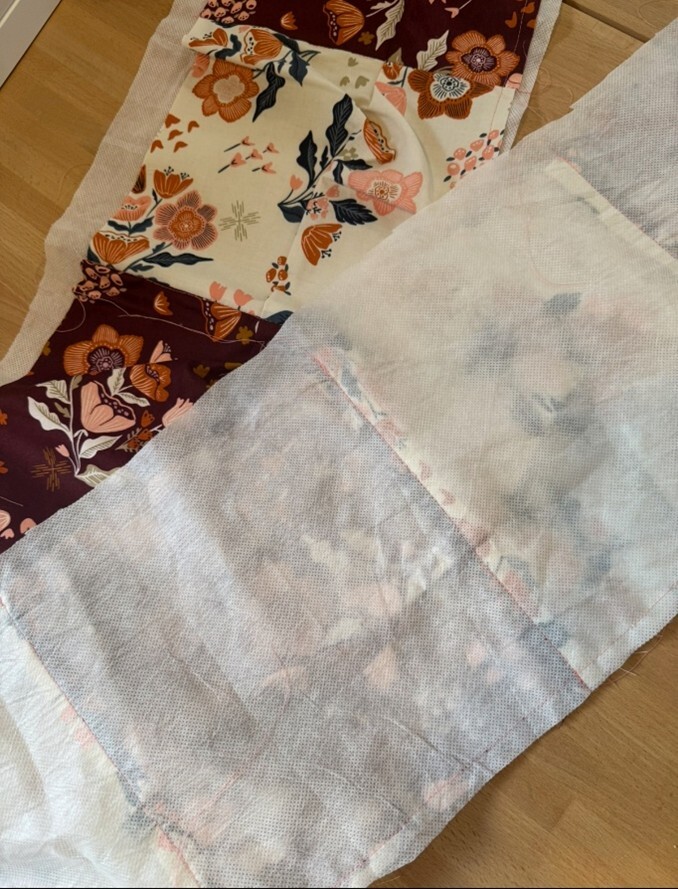
*IMPORTANT STEP* make sure to add a pleat on every side of each square! This will create space for the stuffing.
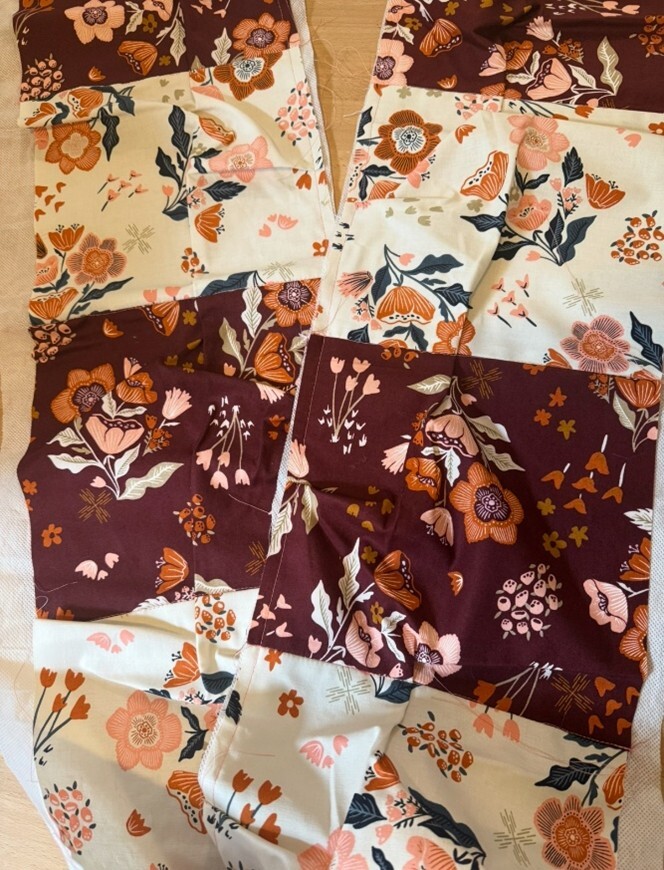
Next it was time to stuff each square. I used poly-fil to stuff mine and if I am completely honest, I added way too much stuffing because I wanted it to be extra fluffy. I tried to fill mine as much as possible which made it harder to sew. If you want the next sewingsteps to be easier, I recommend adding less filling. Once the rows were stuffed, I sewed it closed, then sewed two rows together at a time.
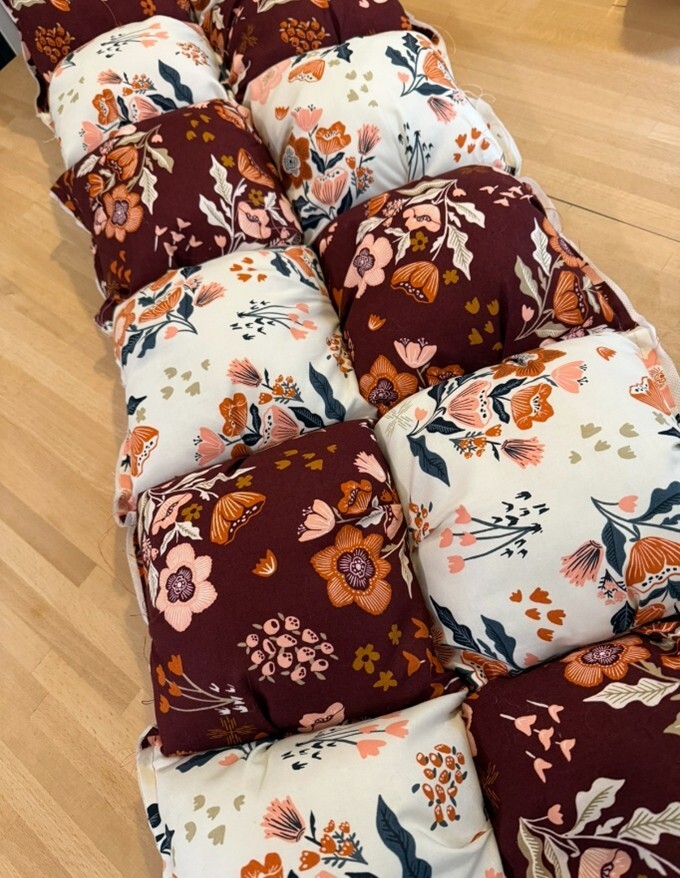
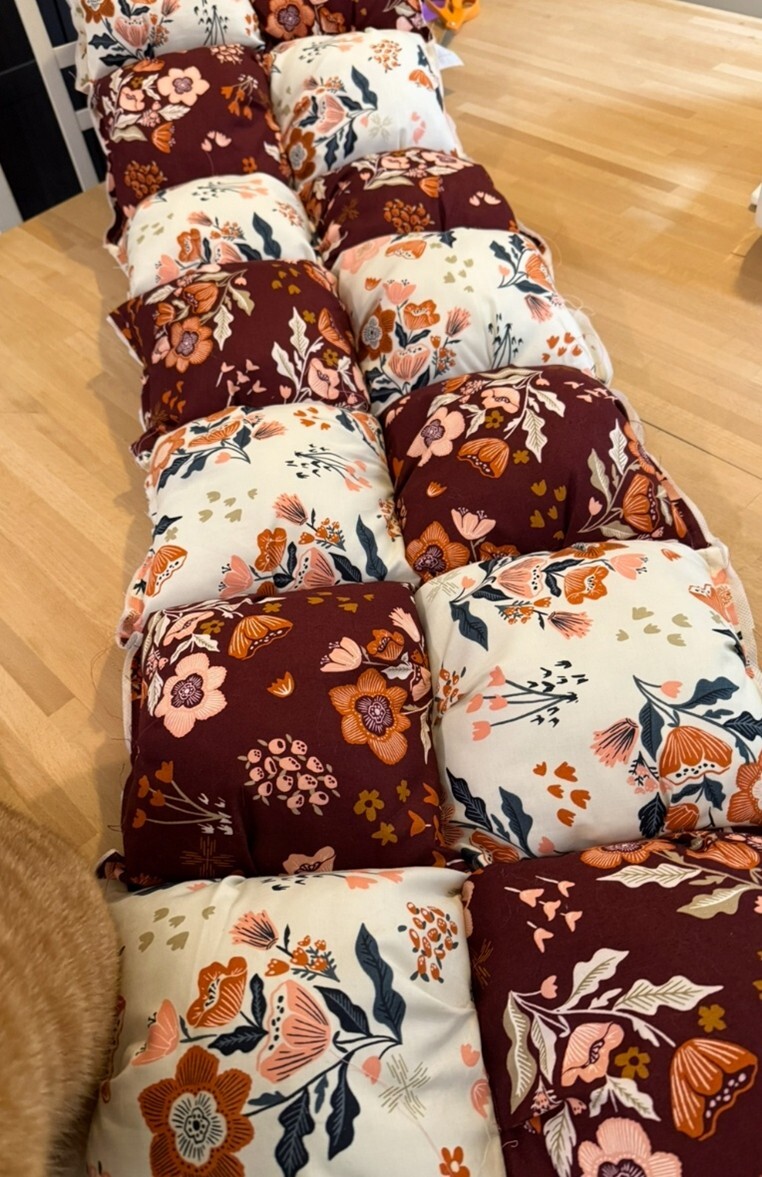
Once I had two rows of two puffy rows sewn together, I sewed those together. This created 4 rows.
I added 2 more puffed rows, then evaluated the size and decided to add one more row for a total of 7 rows. I decided to finish the project early (doing 7 rows instead of 10) for a few reasons.
- Since I stuffed each square to the max, it was heavy, and it took tons of muscle power to sew the rows together and feed it through the machine.
- The size of it was already pretty big and I thought I would be a little too warm and heavy to use as a comforter every night.
- Again, since it is so puffy and large, I am not confident that it will fit in my washing machine, so I did not want to use it regularly. (I am still unsure how I am going to clean it).
Ultimately, I decided to use it as an extra-large throw blanket which is now our go to blanket when relaxing on the couch.
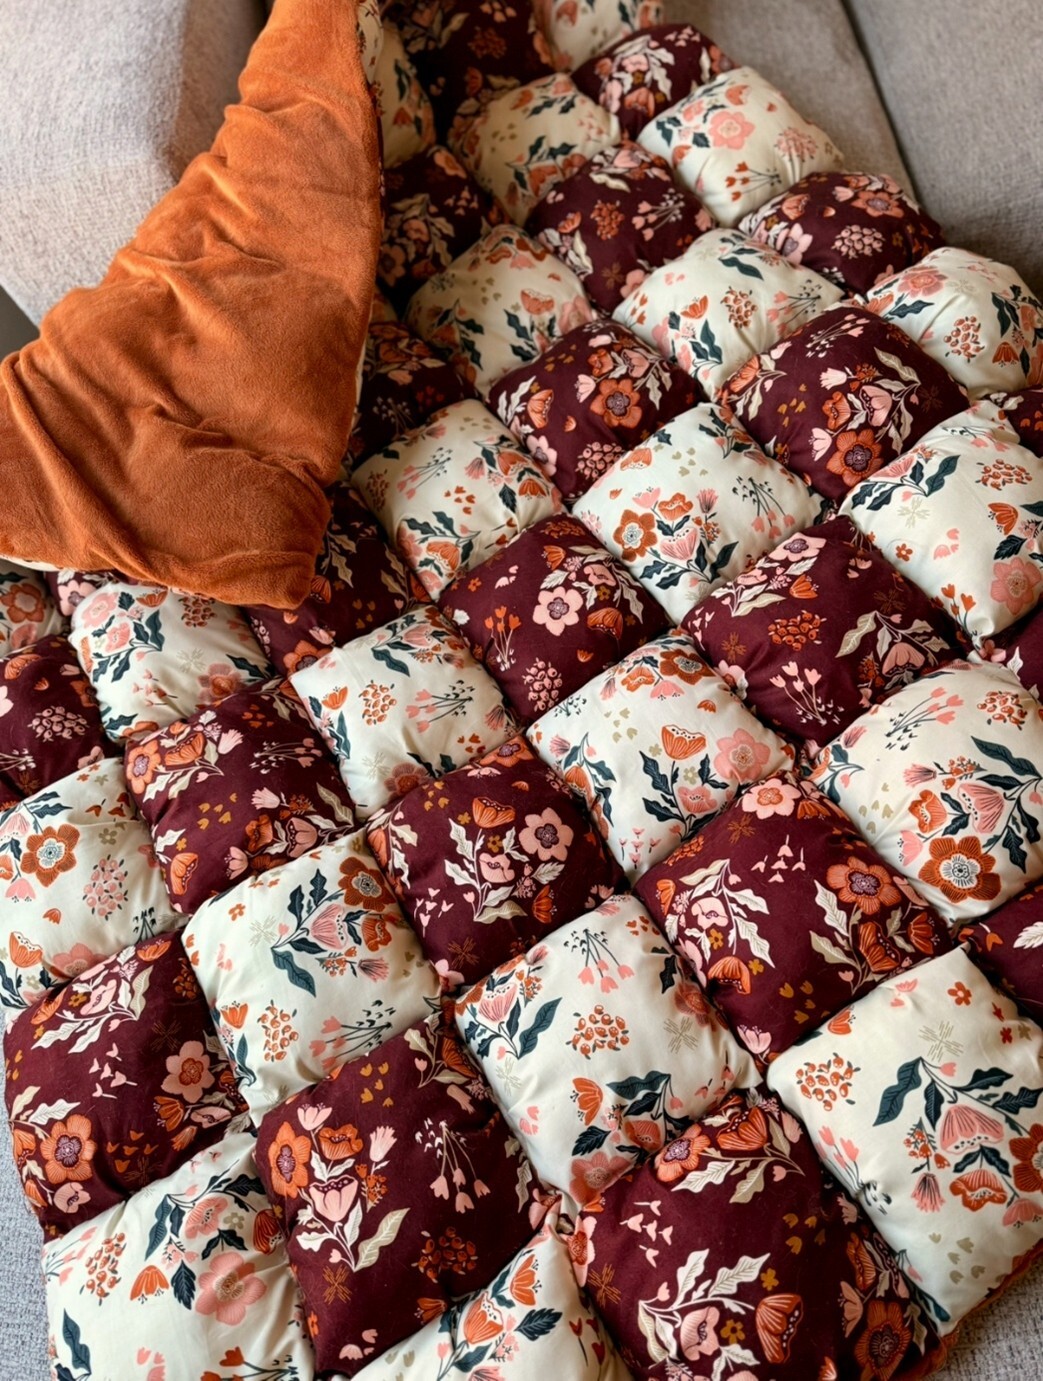
The final step to finish the puffy quilt was adding cuddle fabric for the backing. To do this I sewed the whole blanket like a pillow. I cut the fabric the same size as the blanket, then faced the cuddle fabric with the soft part facing the top of the puffy quilt and sewed the edges leaving an opening to flip it right side out. Once I flipped it right side out, I hand sewed the opening closed to secure the final edge. Finally, I tacked the cuddle fabric to the quilt by hand stitching a few stitches in each corner where each square meets.
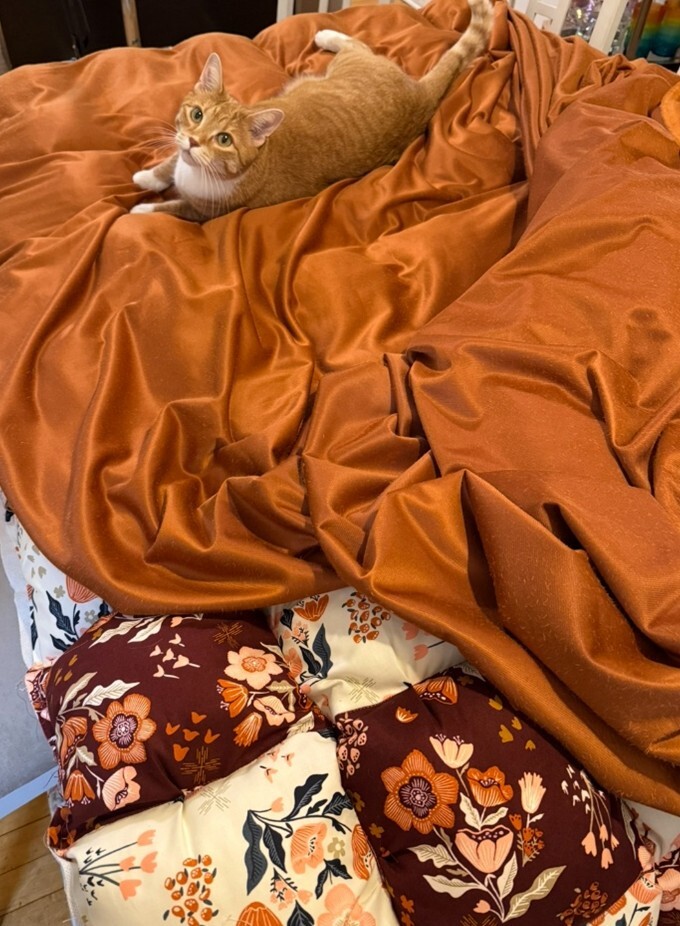
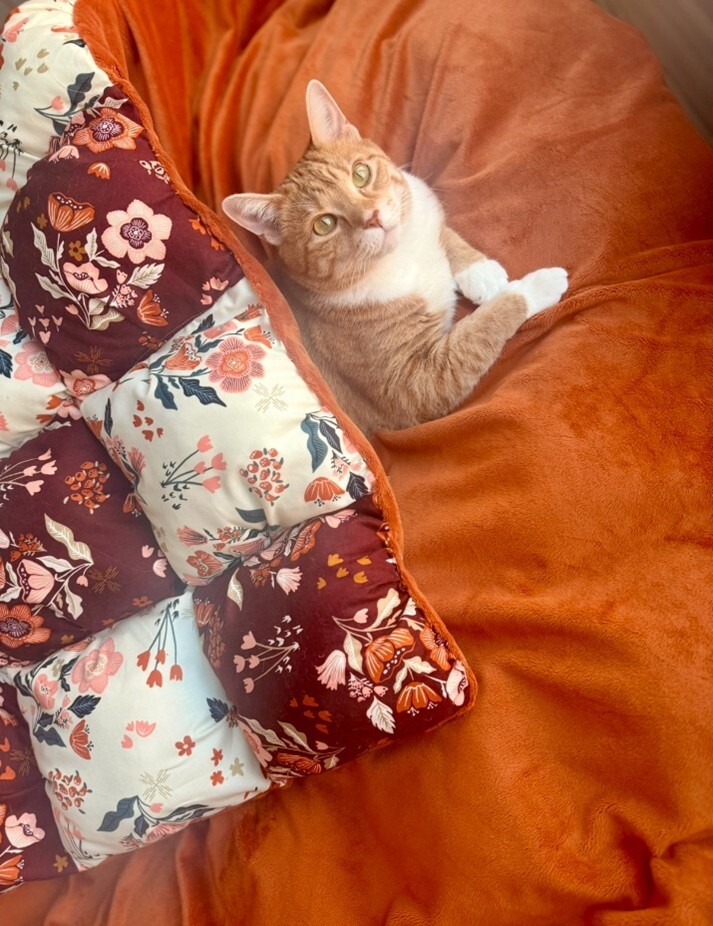
You can see who really enjoys the puffy quilt (even before it was finished)
Here is the final quilt!
Since it is so puffy and filled with so much stuffing, it is heavy like a weighted blanket, but it has an extra element of comfort because of the fluff. It does feel like a bunch of mini pillows on top of you!
Puffy quilts are the new COMFY weighted blankets!