

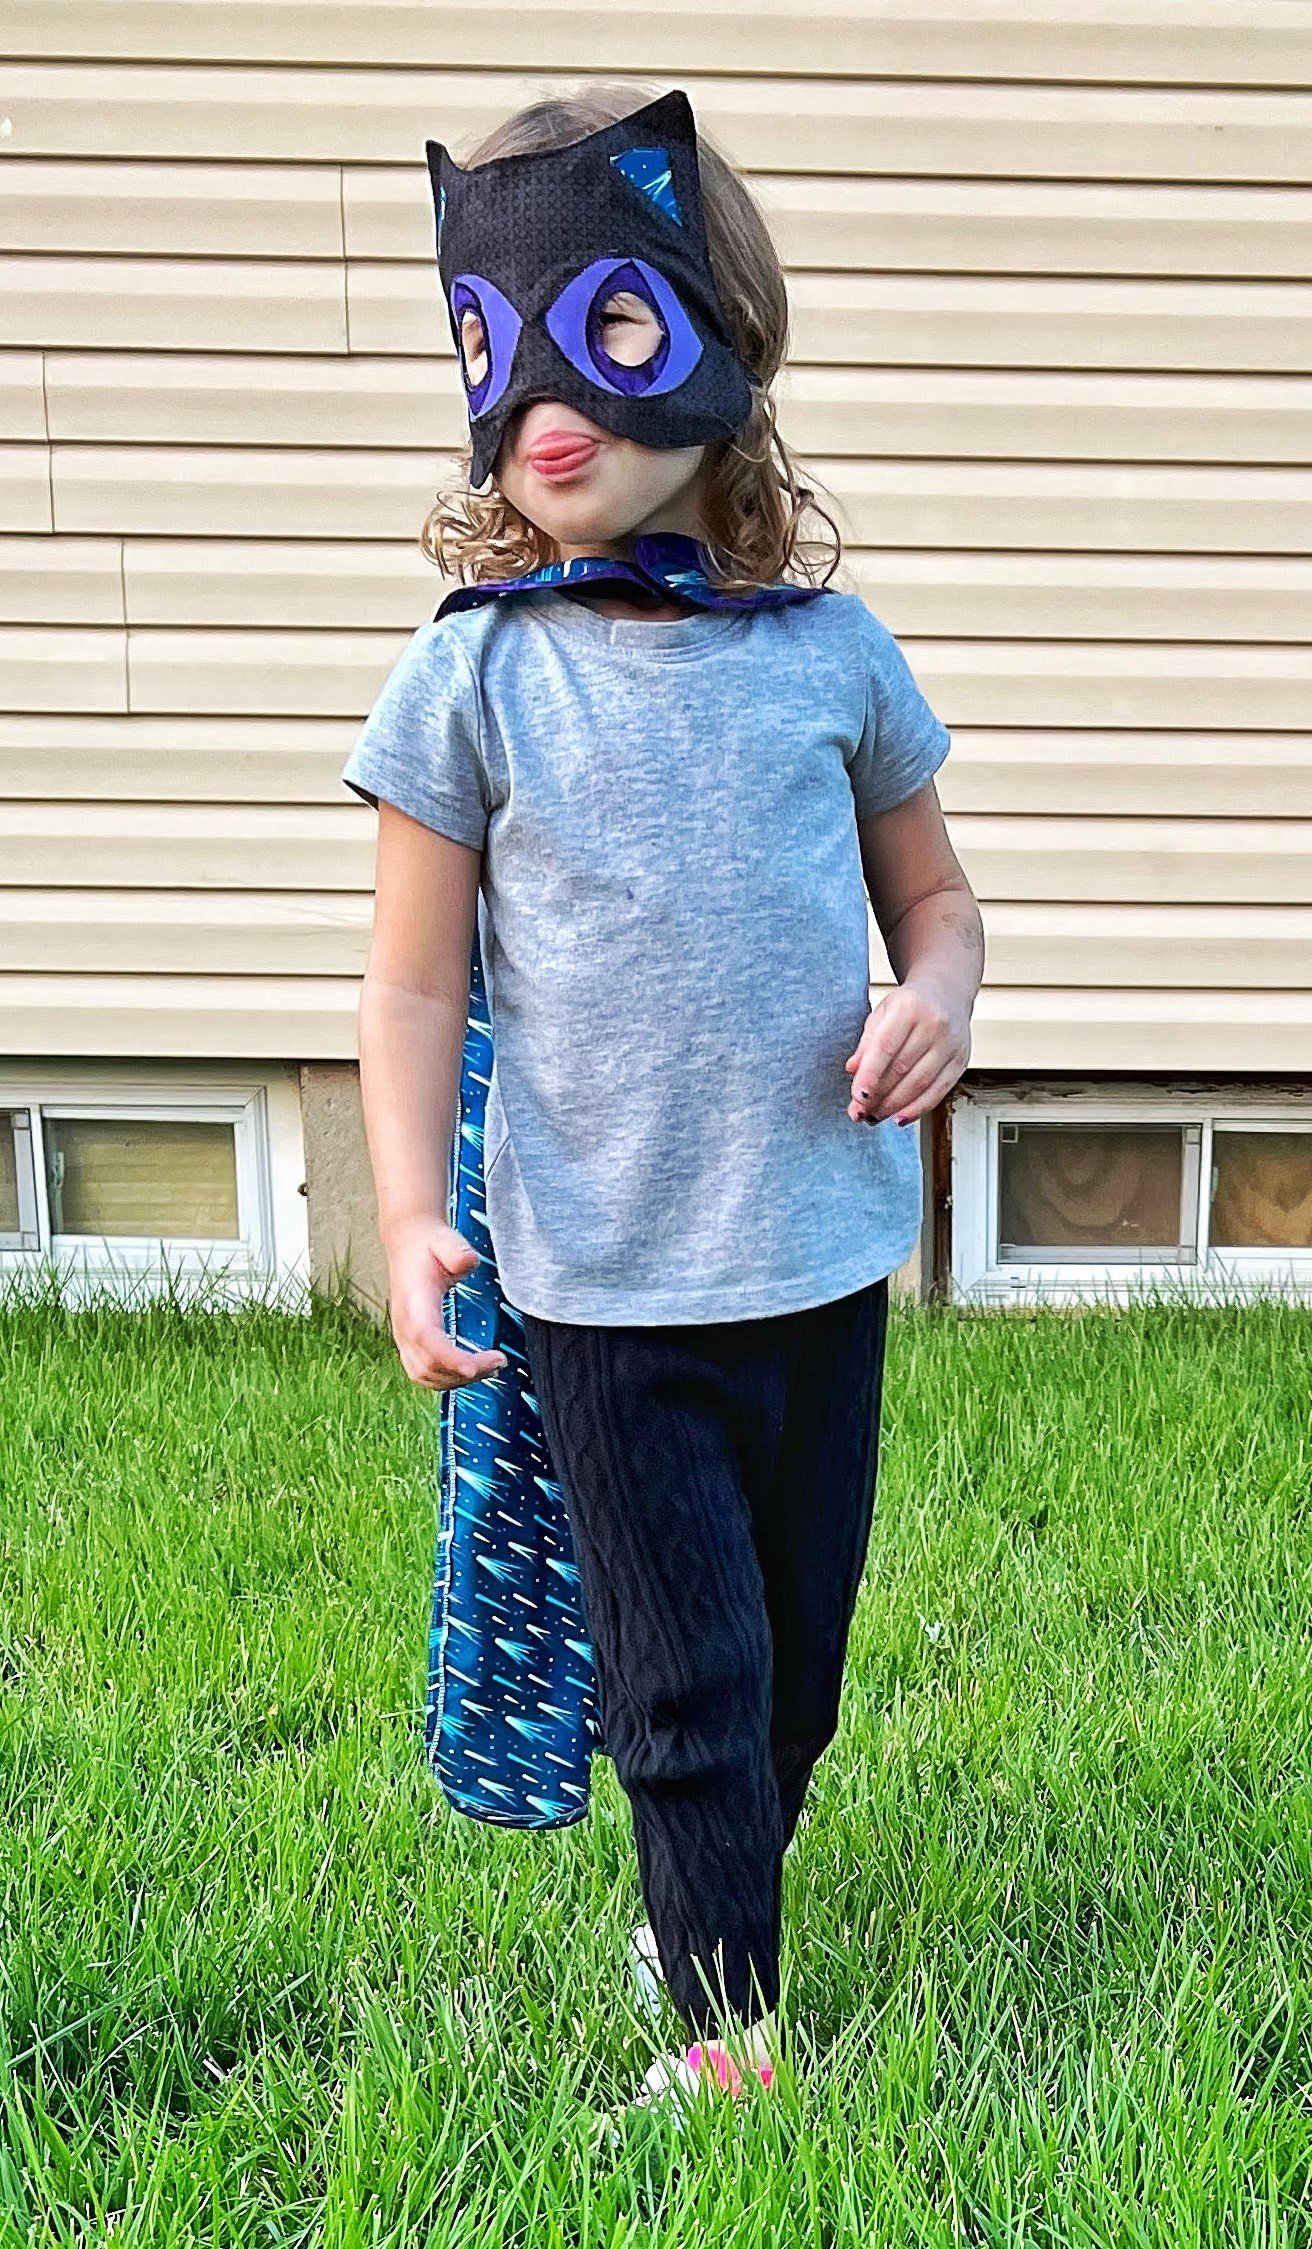
Halloween Mask and Cape
15th Sep 2022
Fall is in the air! Here in the Midwest I am starting to see a few Maple leaves starting their transformation into the vibrant reds and orange of the Fall season. Halloween decorations are in every store, it is the perfect time to sew these adorable masks and cape costumes for the little goblins in your life. For the cat I used this magical fabric from Robert Kaufman Fabrics - Planetarium by Elizabeth Hartman. For the pumpkin this Workshop by Libs Elliot fabric from FIGO fabrics has the perfect orange color.
Materials needed:
- 1 yd of orange Workshop fabric from the Modern Maker Membership
- 1 yard of Planetarium fabric for magical cat cape
- Assorted Mystery Bundle Fat Quarters for the cat mask and eyes and ears
- ¼” wide elastic
- Coordinating Aurifil thread from the Chroma Membership
- Optional packaged ½” double fold bias tape for single fabric layer cape
- Heat-n-Bond
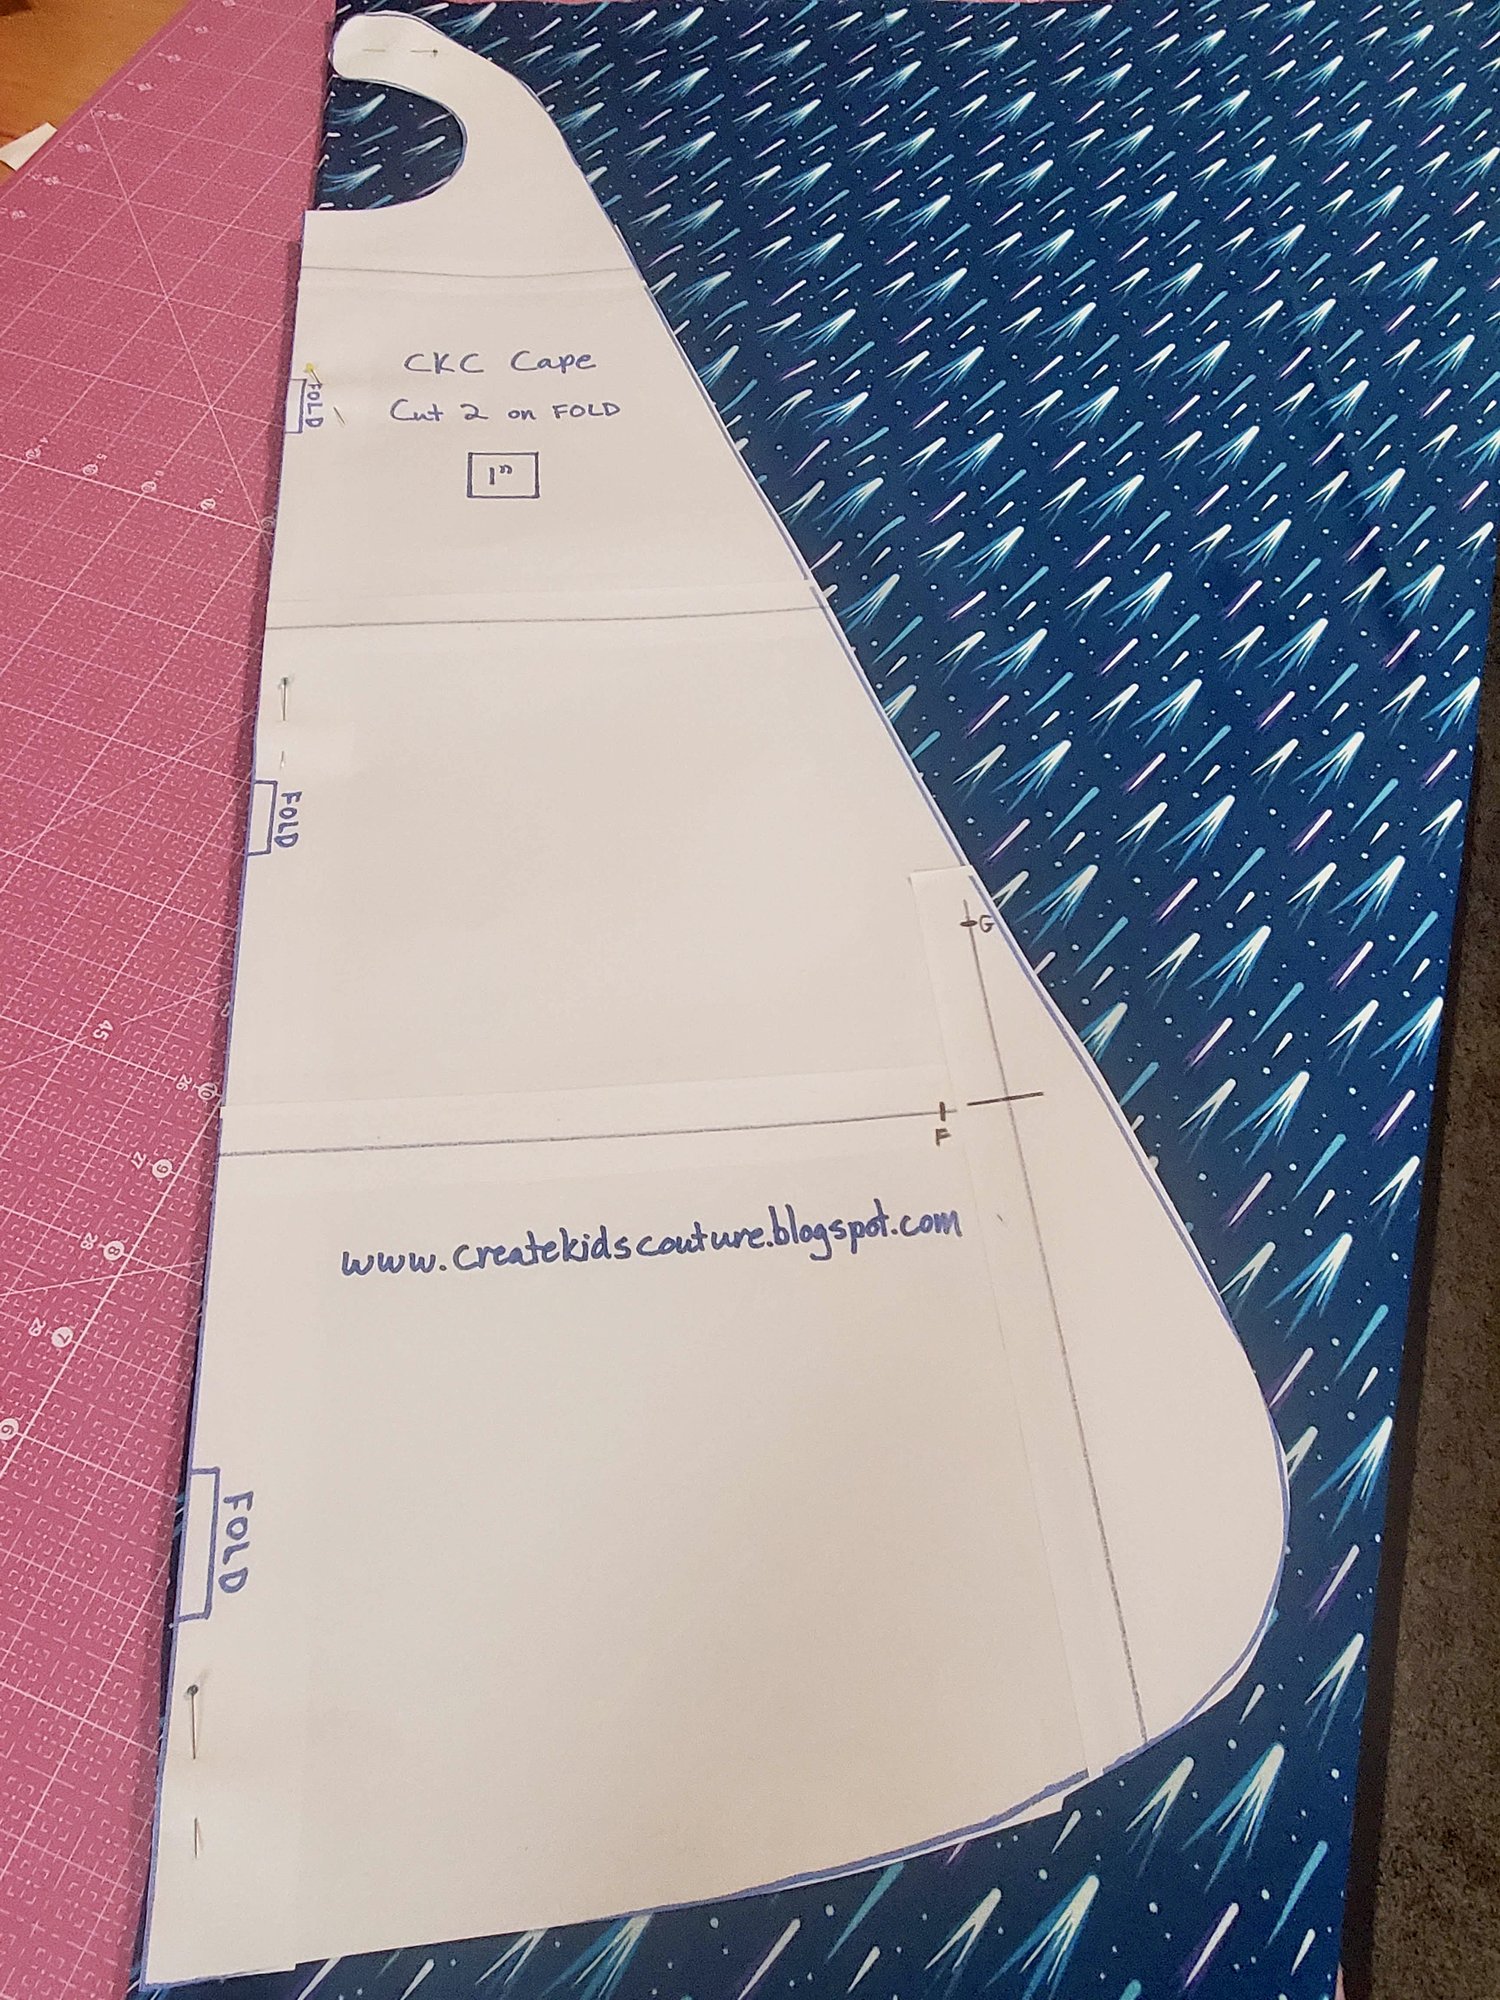
To get started download and print the free mask from the Art Gallery lookbook and cape from CKC Patterns.
For the cape construction I will show you two different ways to sew, I will start with using a single layer of fabric. Lay the pattern on the fold and pin in place. I like to use a ruler and rotary cutter on the long straight edge. Then finish cutting along the curved pattern with a pair of scissors. Set this piece aside.
Next you will prepare bias binding in a contrasting fabric. You could use packaged ½” double fold bias tape. I used a fat quarter trimmed to an 18” square. Cut a strip 1.75” on the diagonal from corner to corner. Cut a second strip in the same manner.
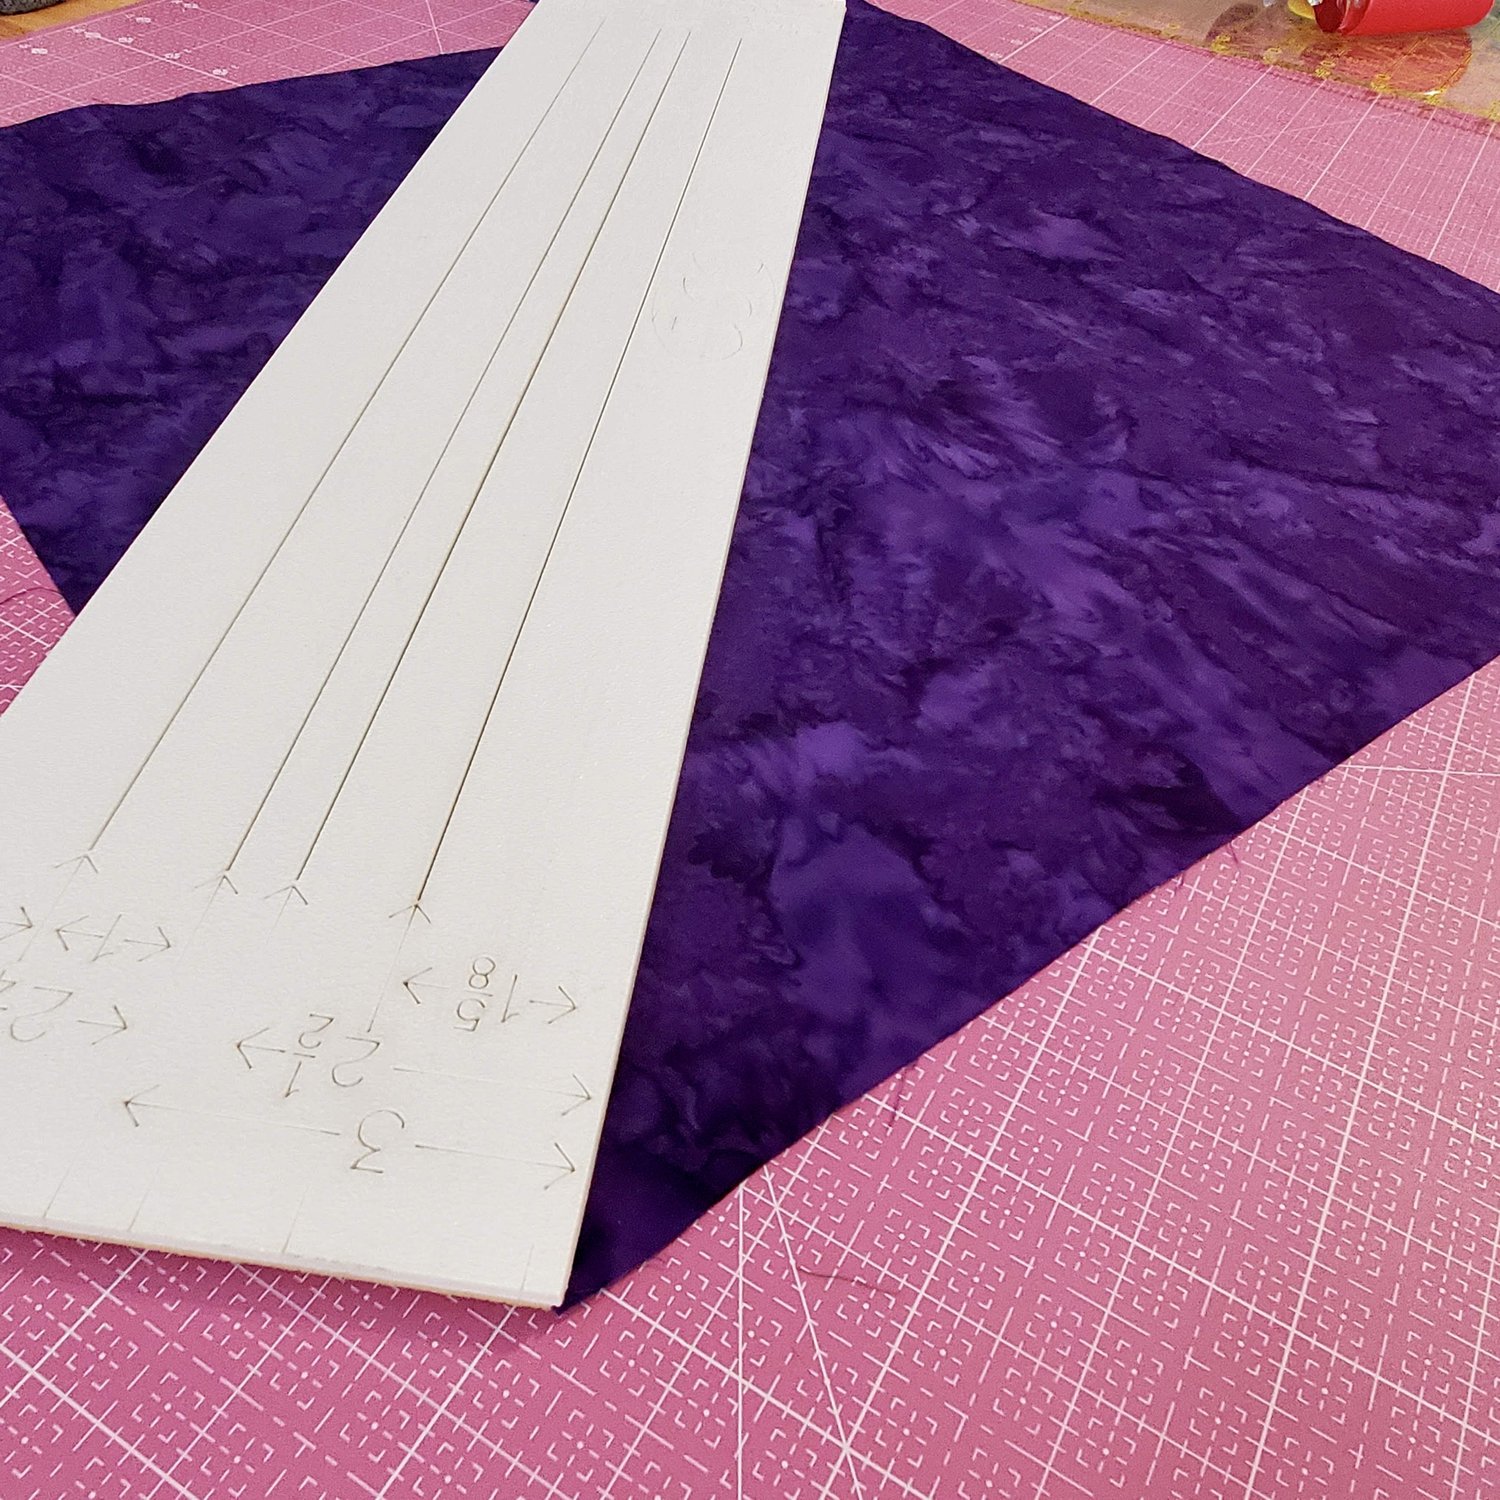
Two strips will give you a long enough piece to go around all of the curves on the neck portion of the cape. Trim the ends of the strips straight to line up in a “L” shape. Sew the two strips with right sides together from corner to corner.
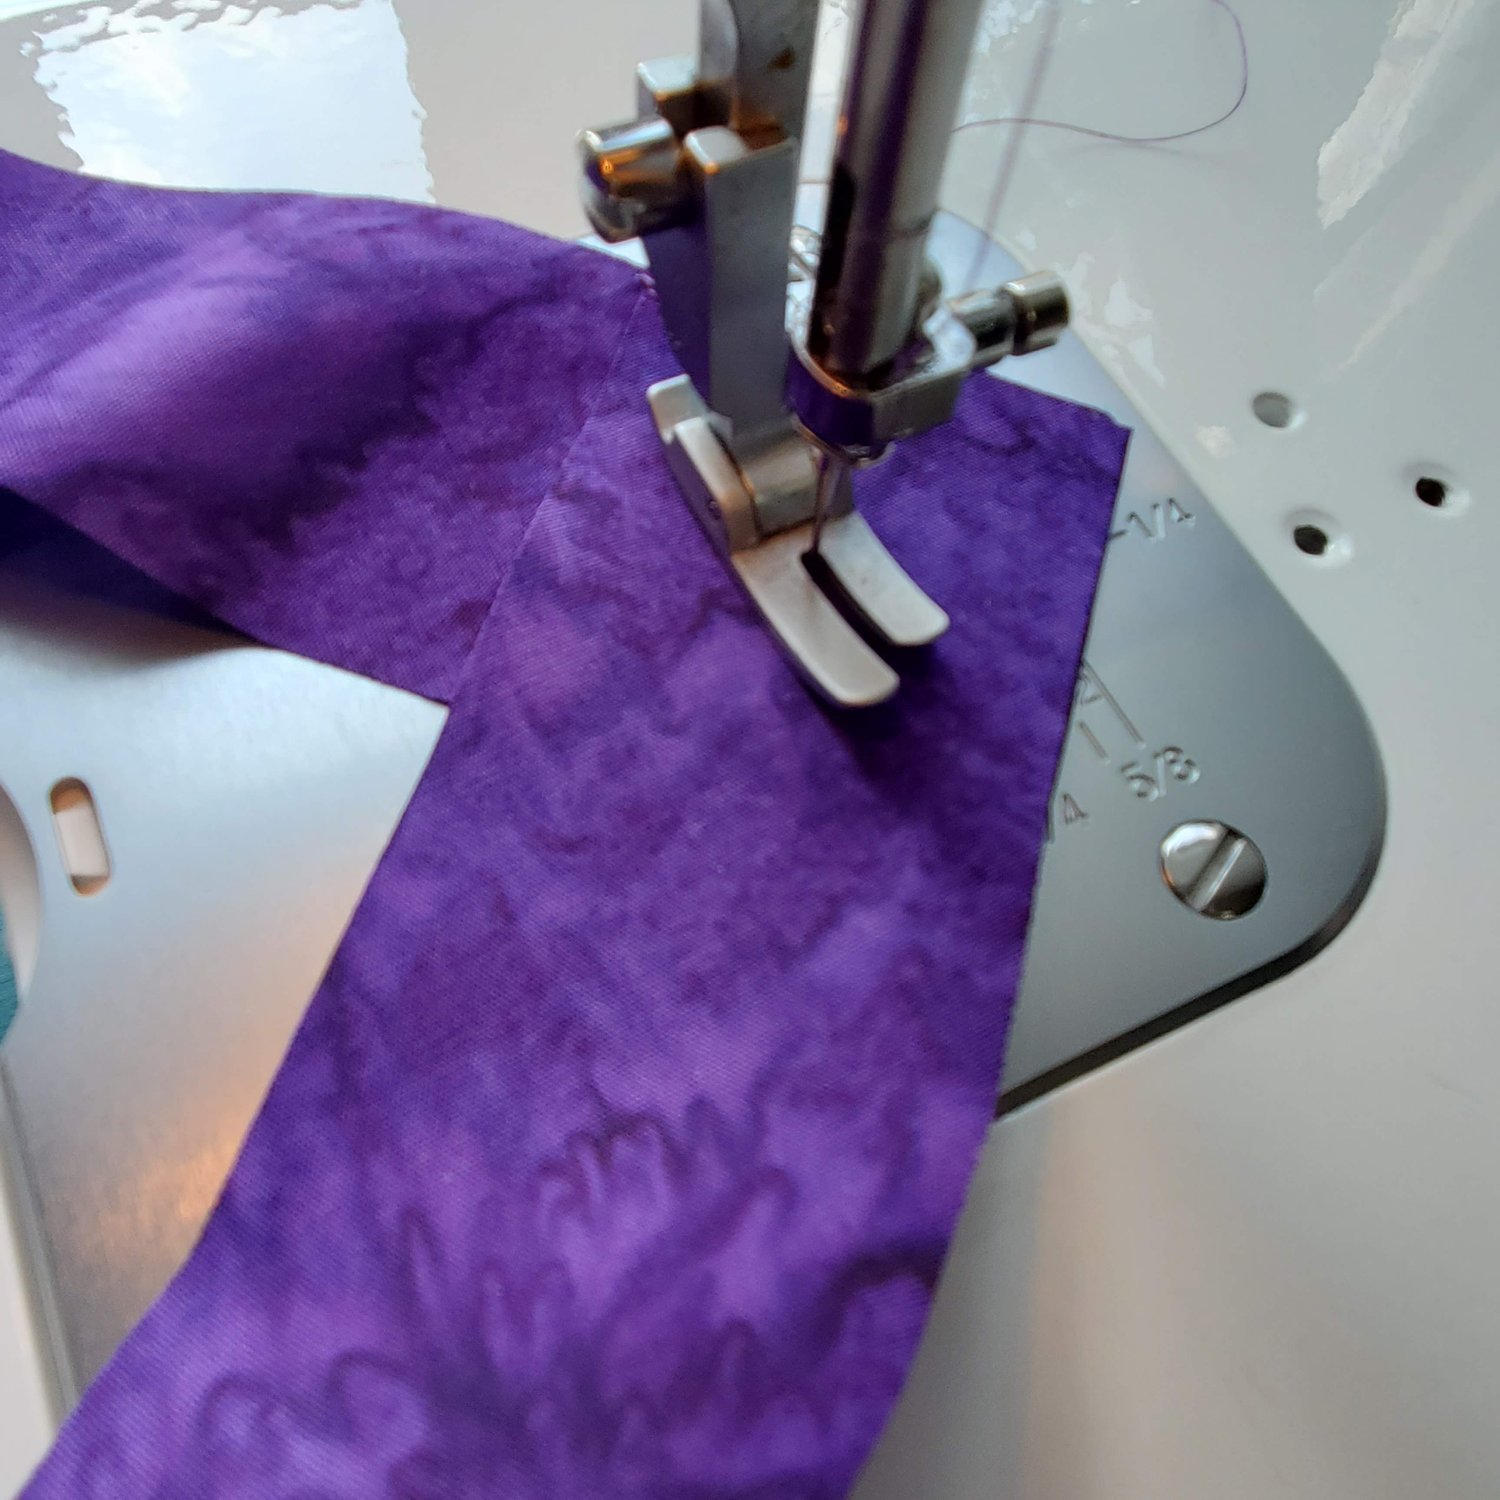
Trim the seam to ¼”. Press the long strip in half, open up and press the raw edges to the crease you just made. This will give you a double fold bias tape to sew around the curves. I like to pin or clip in place and sew about ⅛” from the edge in a coordinating thread color.
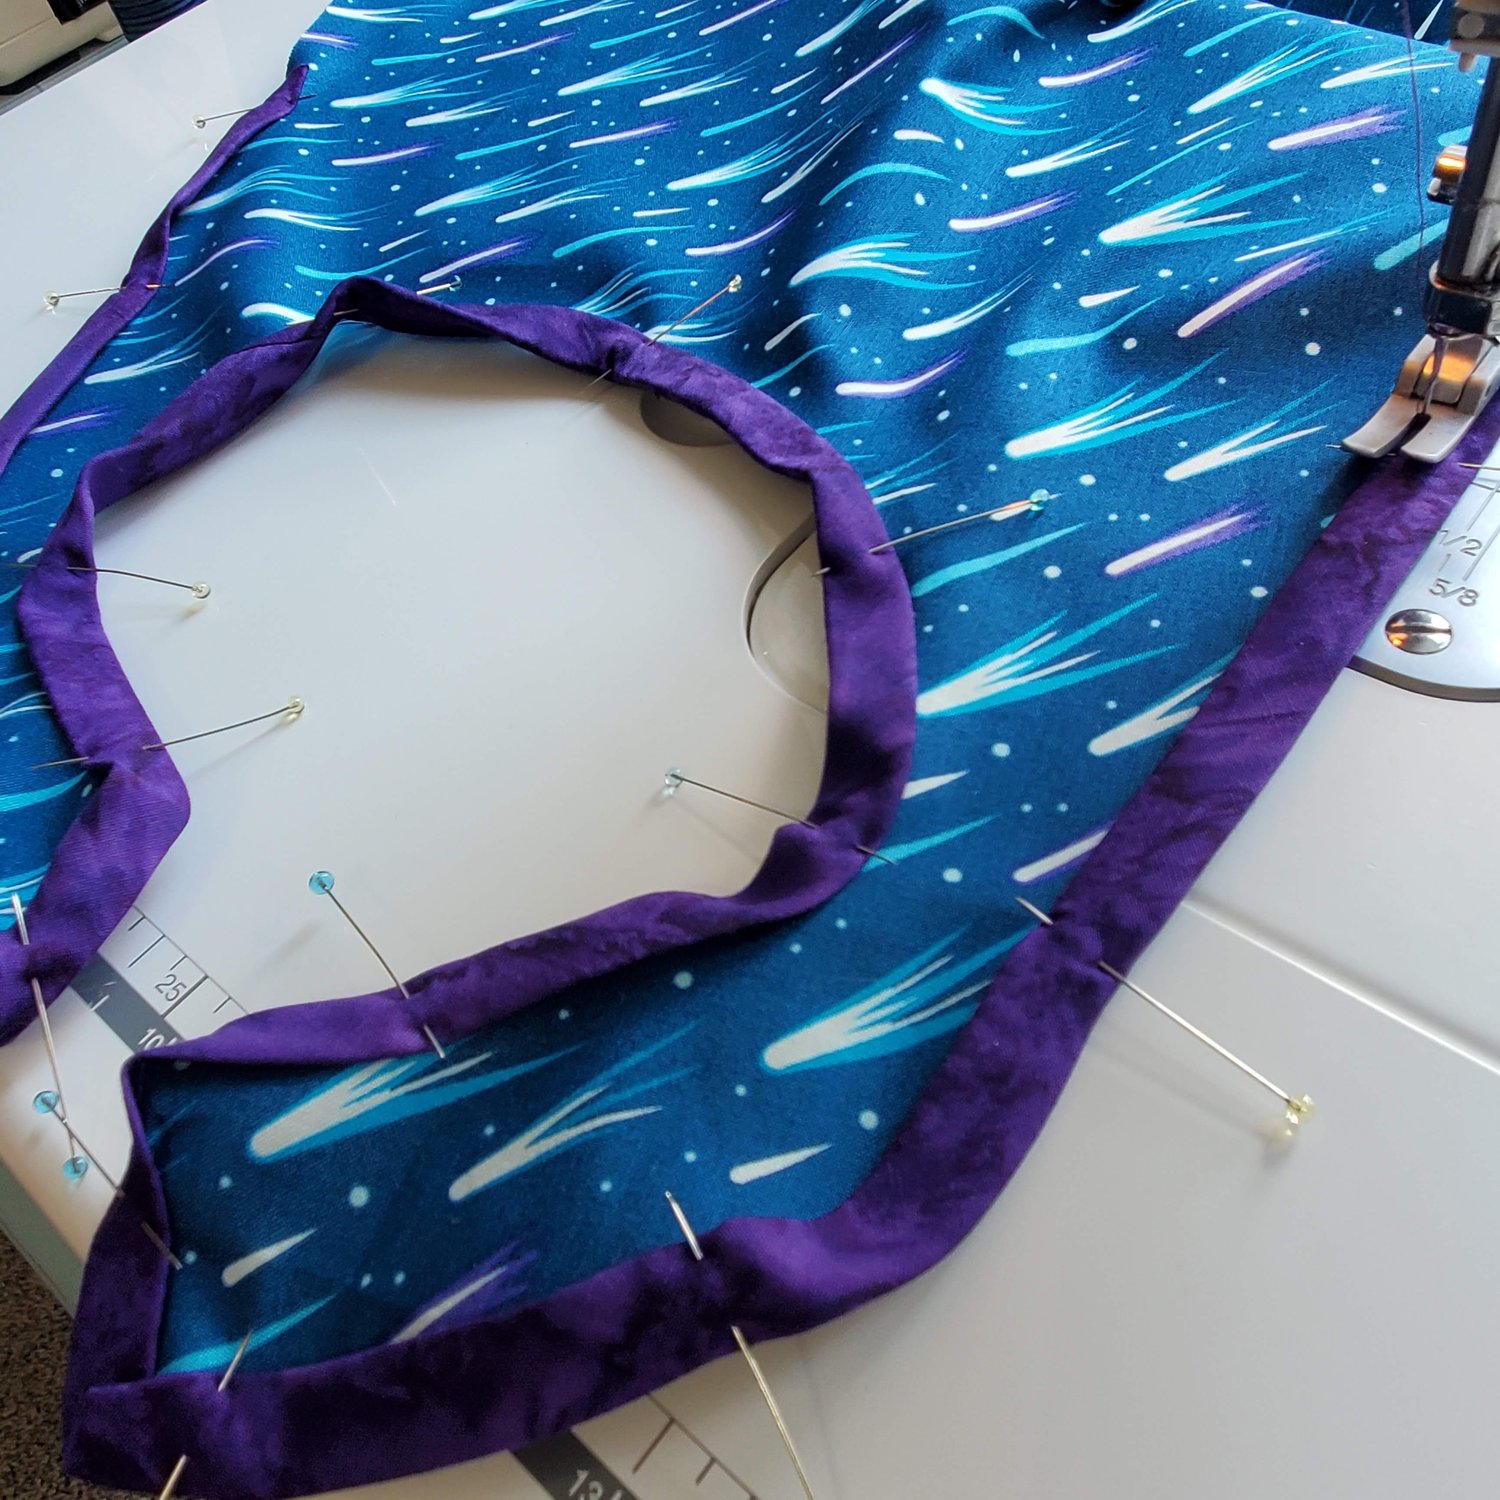
You will need to make some small folds in the bias tape as you sew it around the tight curves. The binding starts and stops a few inches past the center curve. If you prefer you could cut a few more strips of bias to make enough binding to go around the entire cape.
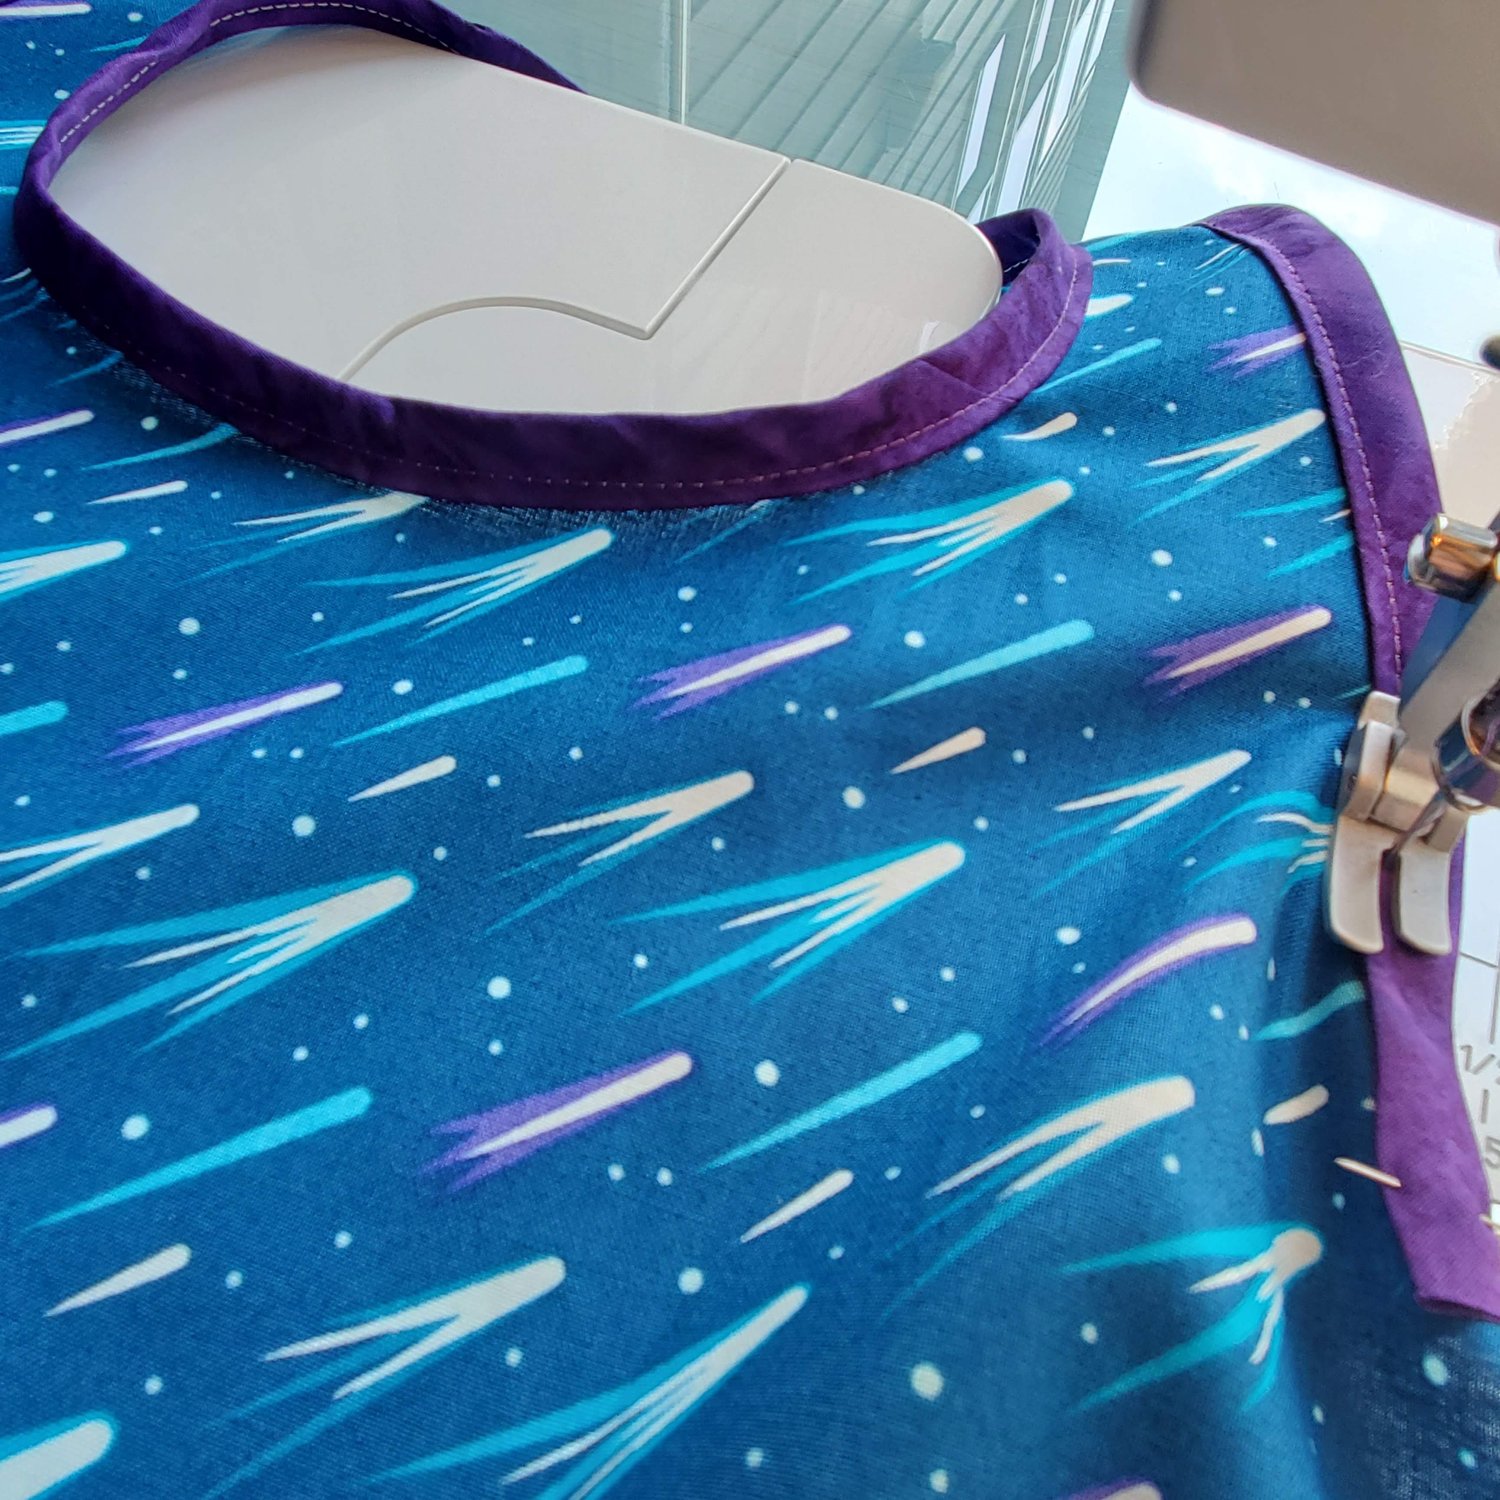
To finish the raw edges on the bottom ⅔ ‘s of the cape I used a serger and pressed the edges under about ¼”. You can also use an overlock stitch on your sewing machine or pinking shears to limit the fraying. Topstitch with a coordinating thread about ⅛” from the edges. I added sew on Velcro, topstitched to the curved ends for an easy closure at the neck.
Give it a press and the cape is complete. You could easily add iron on designs from your Cricut or Embroidery machine to personalize the cape.
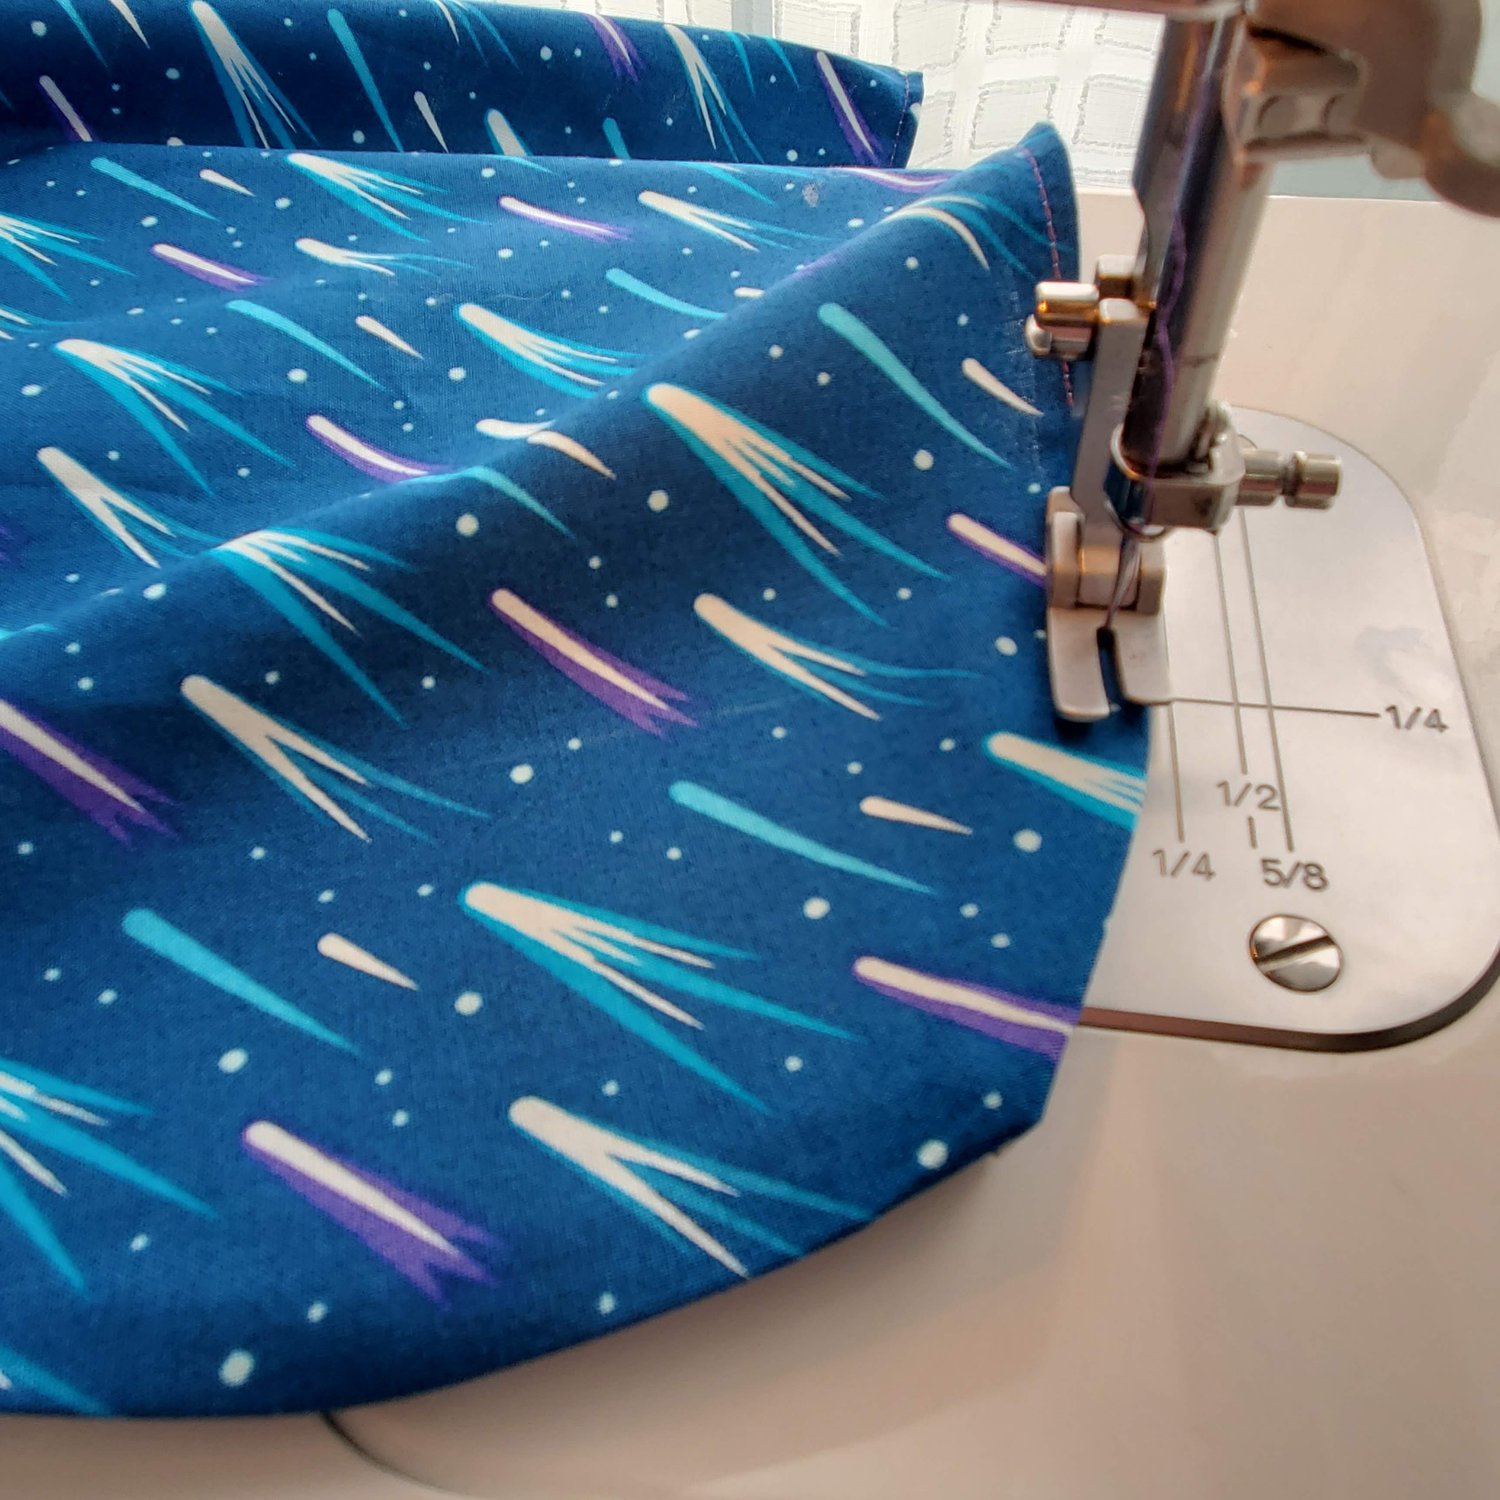
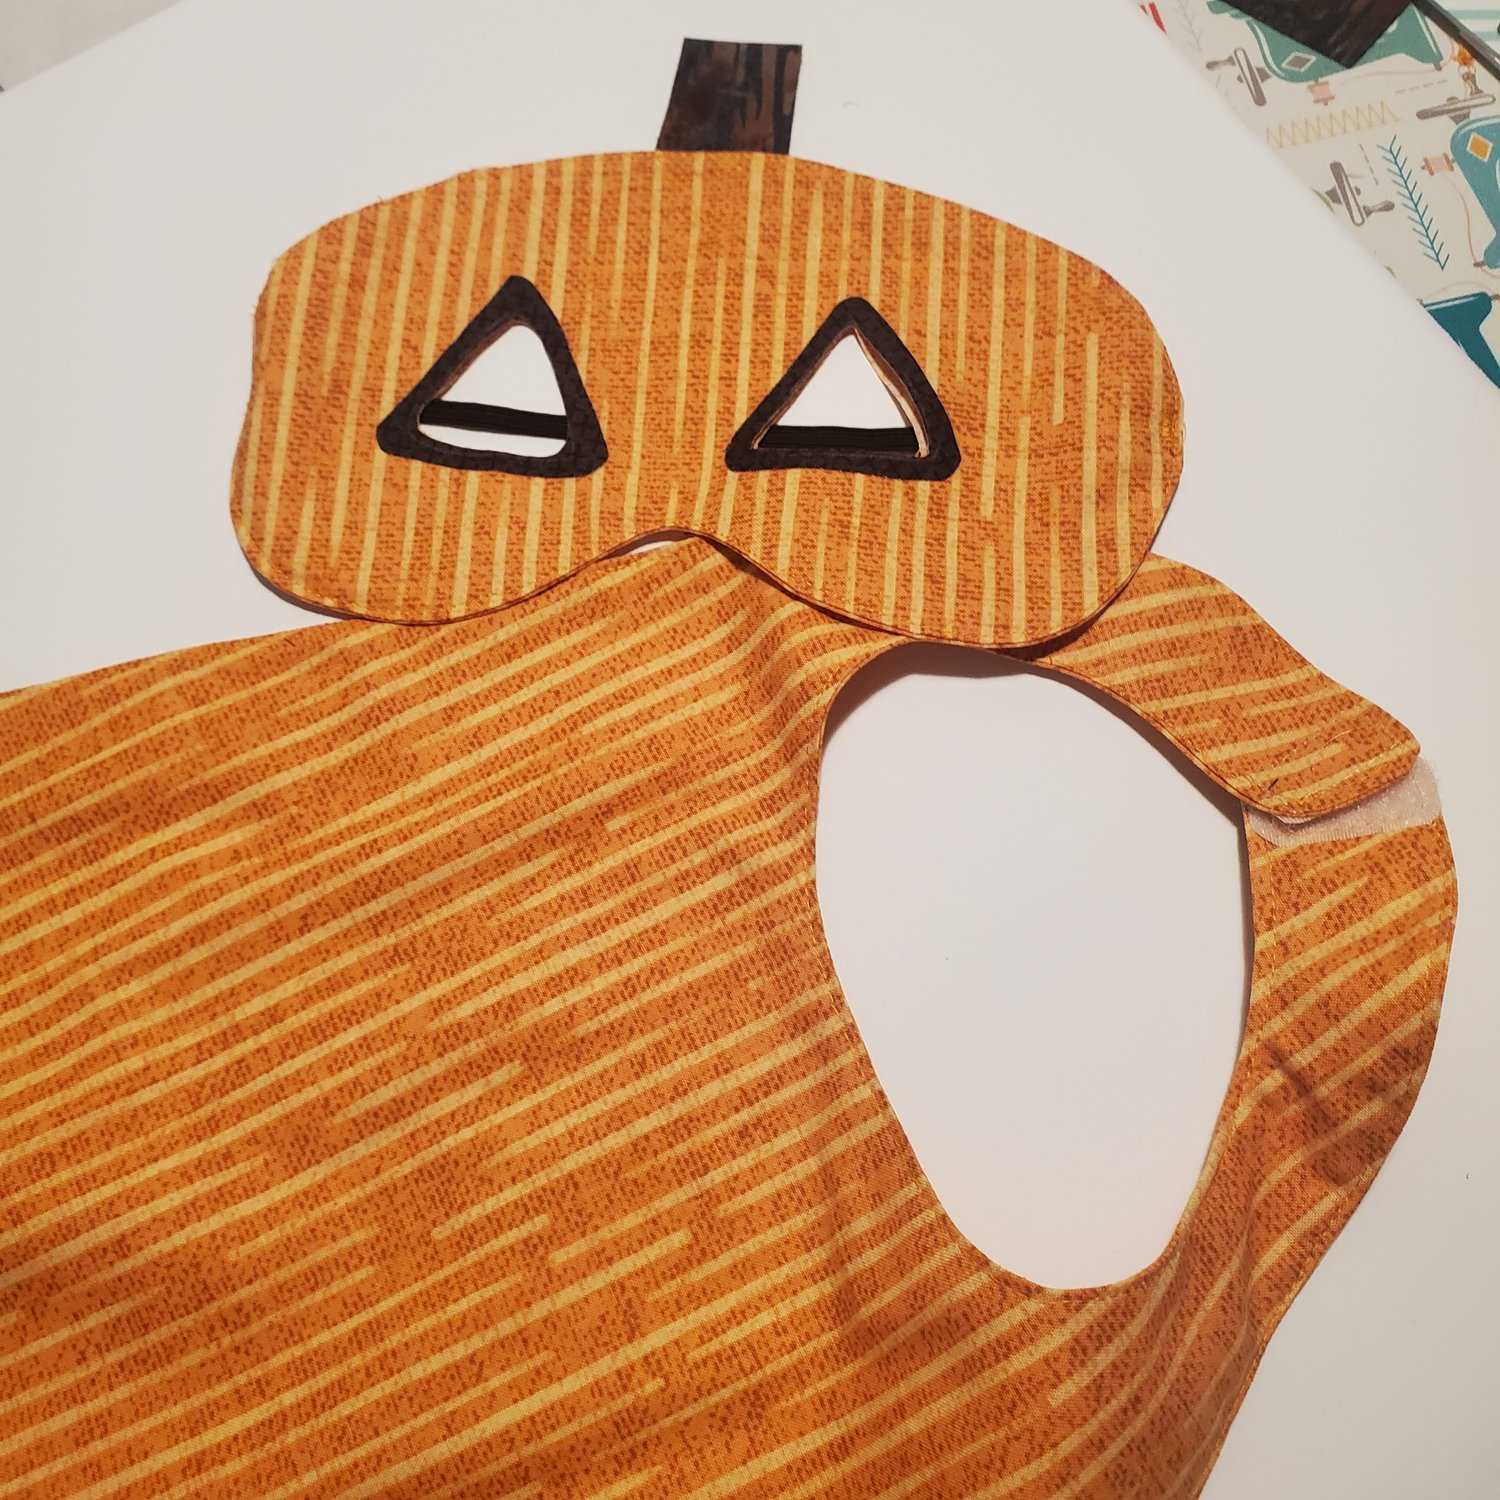
The pumpkin cape was made by sewing two pattern pieces together with right sides together with a ¼” seam allowance. Leave about a 3” opening along the bottom edge for turning. Clip or use pinking shears around the circle of the neck so that it lays flat.
Turn right sides out and use a chopstick to fully push out the curved ends. Press, aligning the edges of the seam so that they are even. Turn the raw edges of the opening under a quarter inch and press. Topstitch all around ⅛” from the edges and add the sew in Velcro for the closure. This method used more fabric and gave the cape a bit more weight and structure to hold up longer.
Mask Construction:
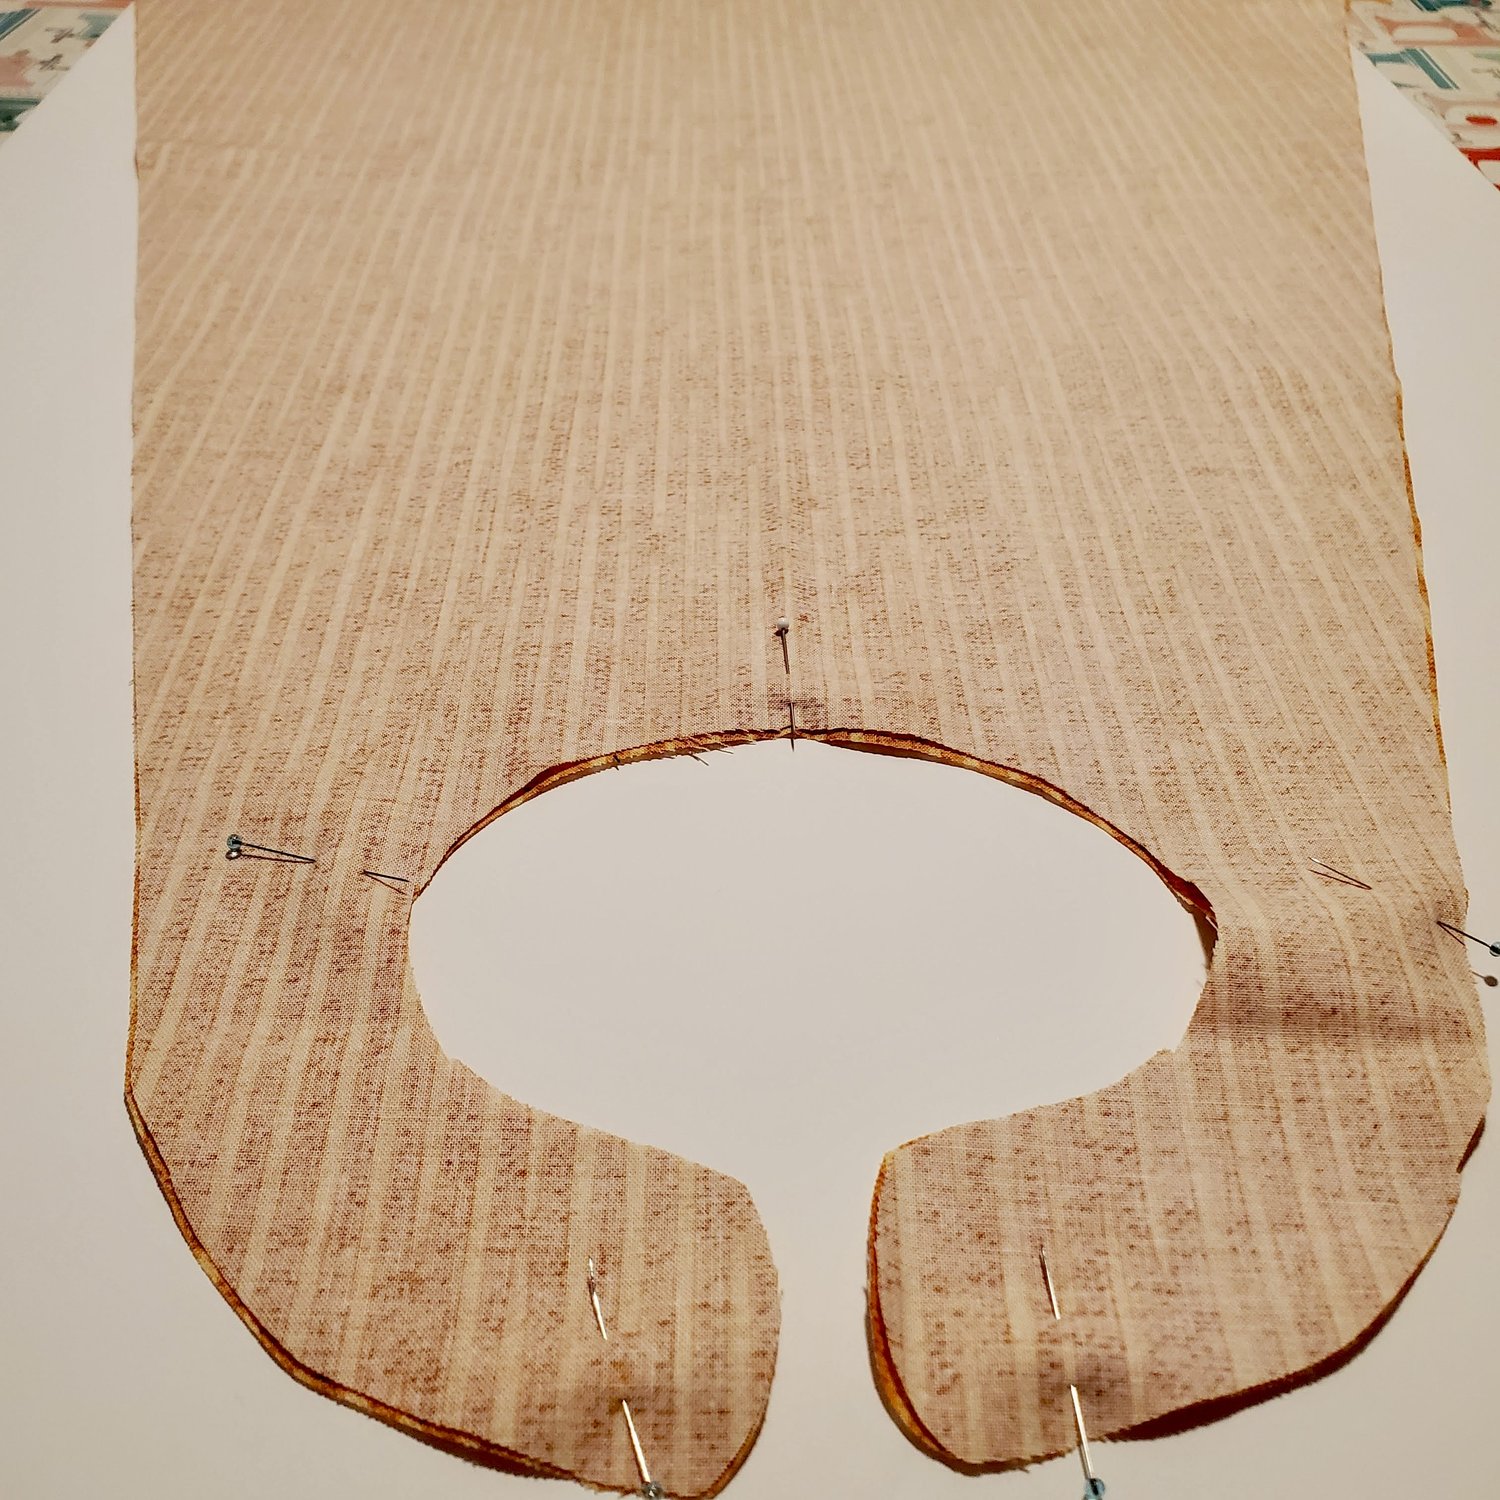
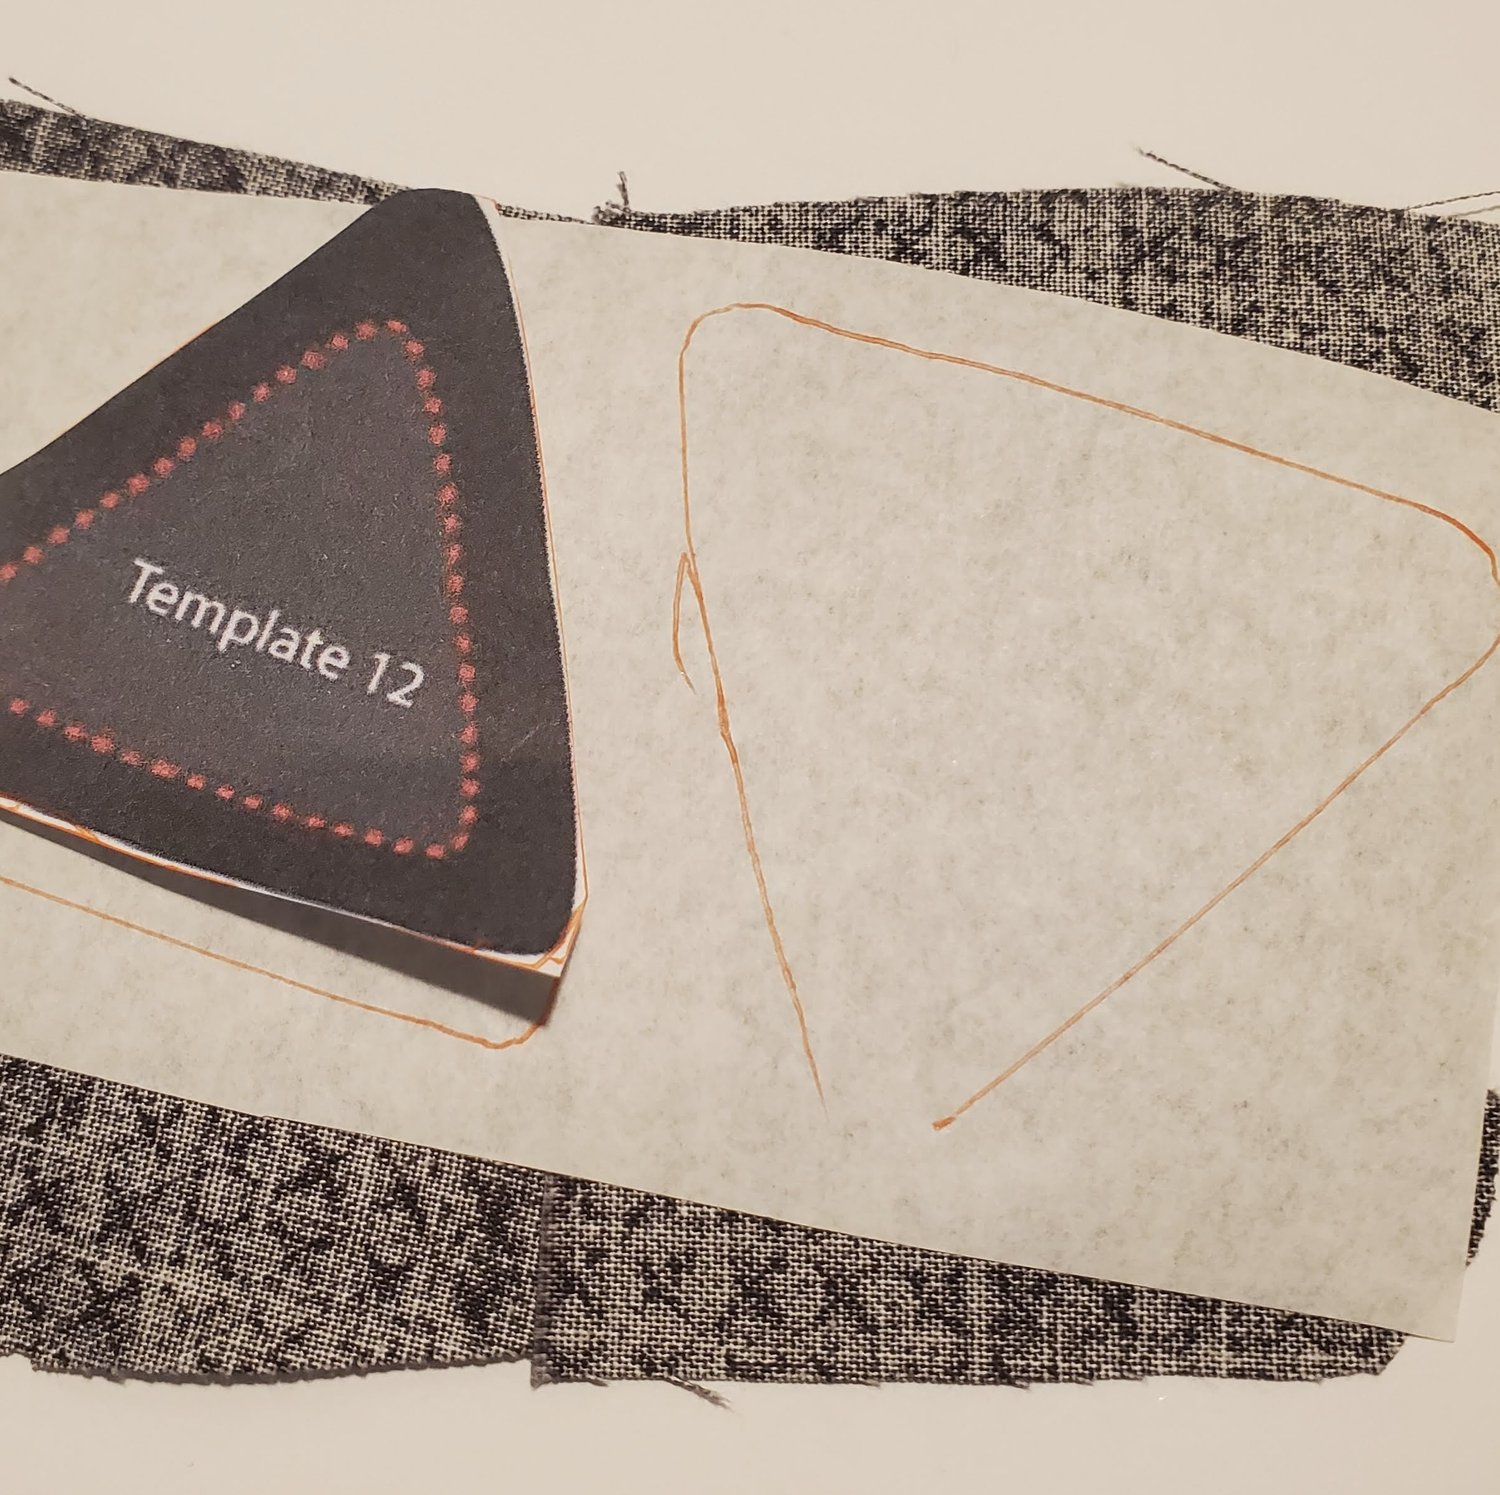
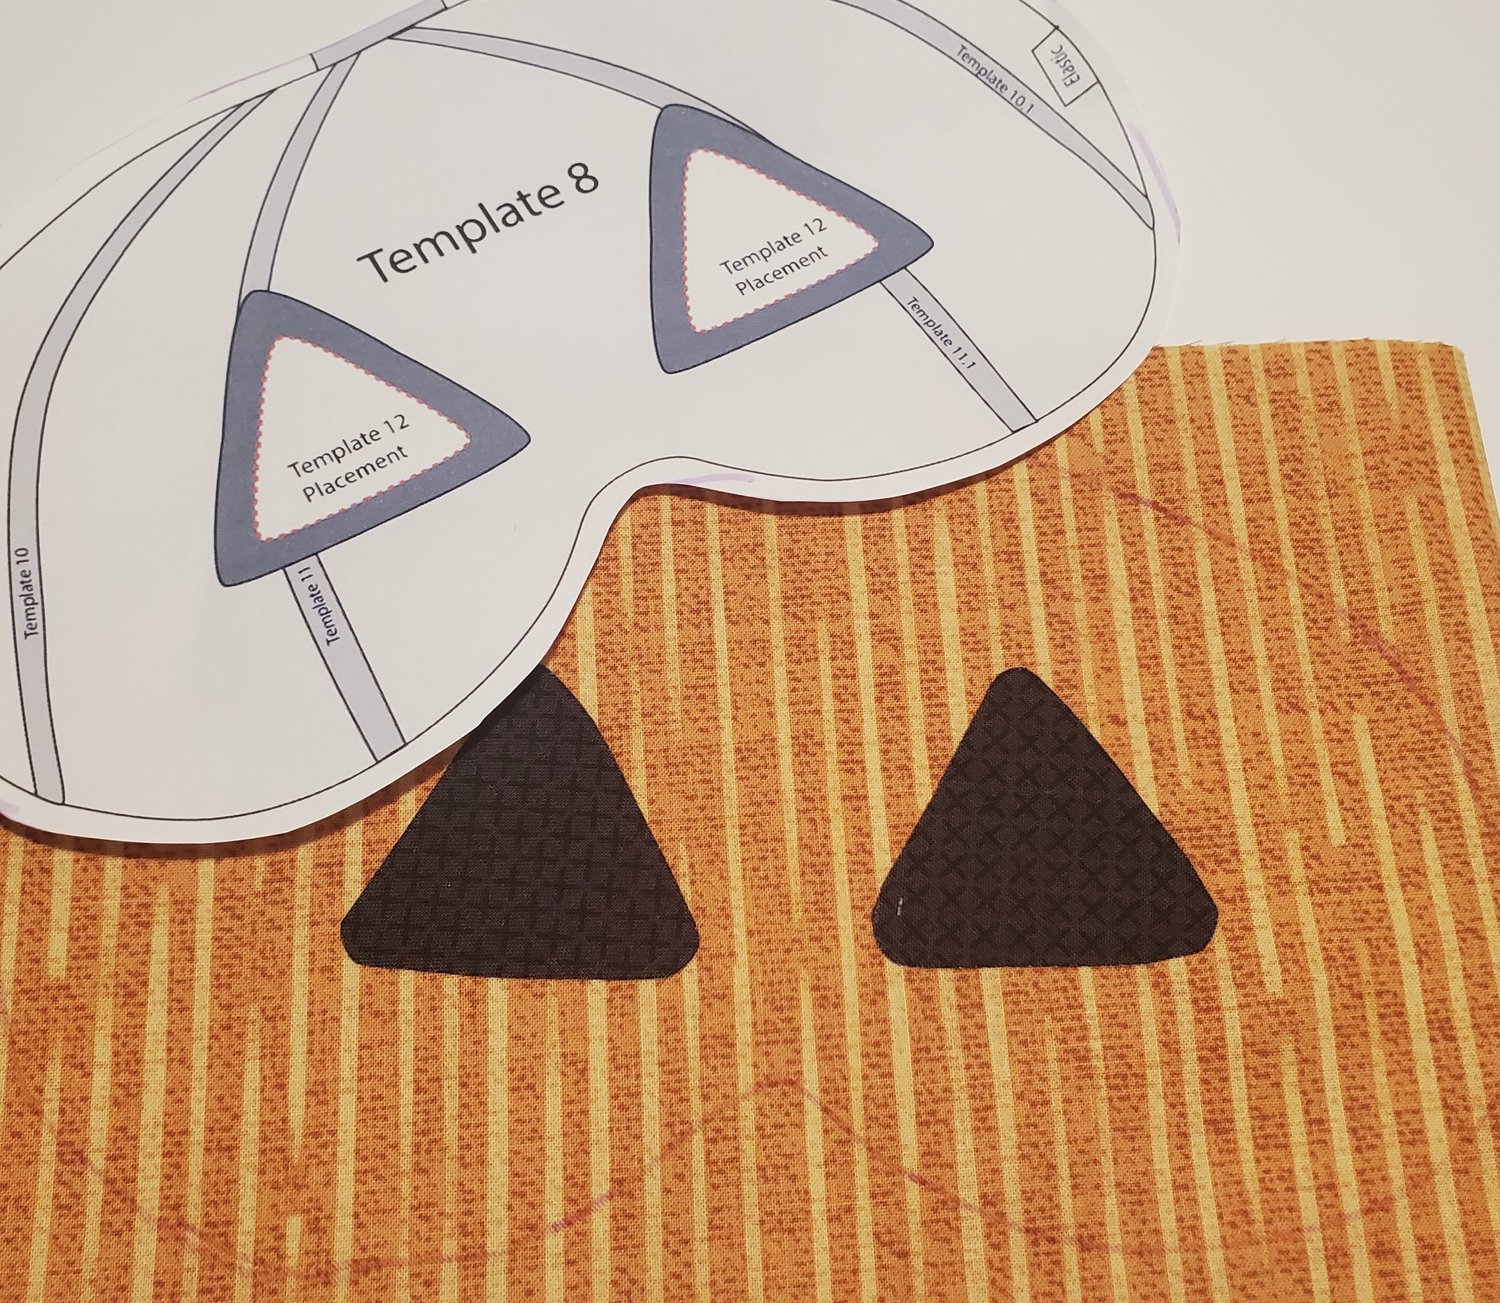
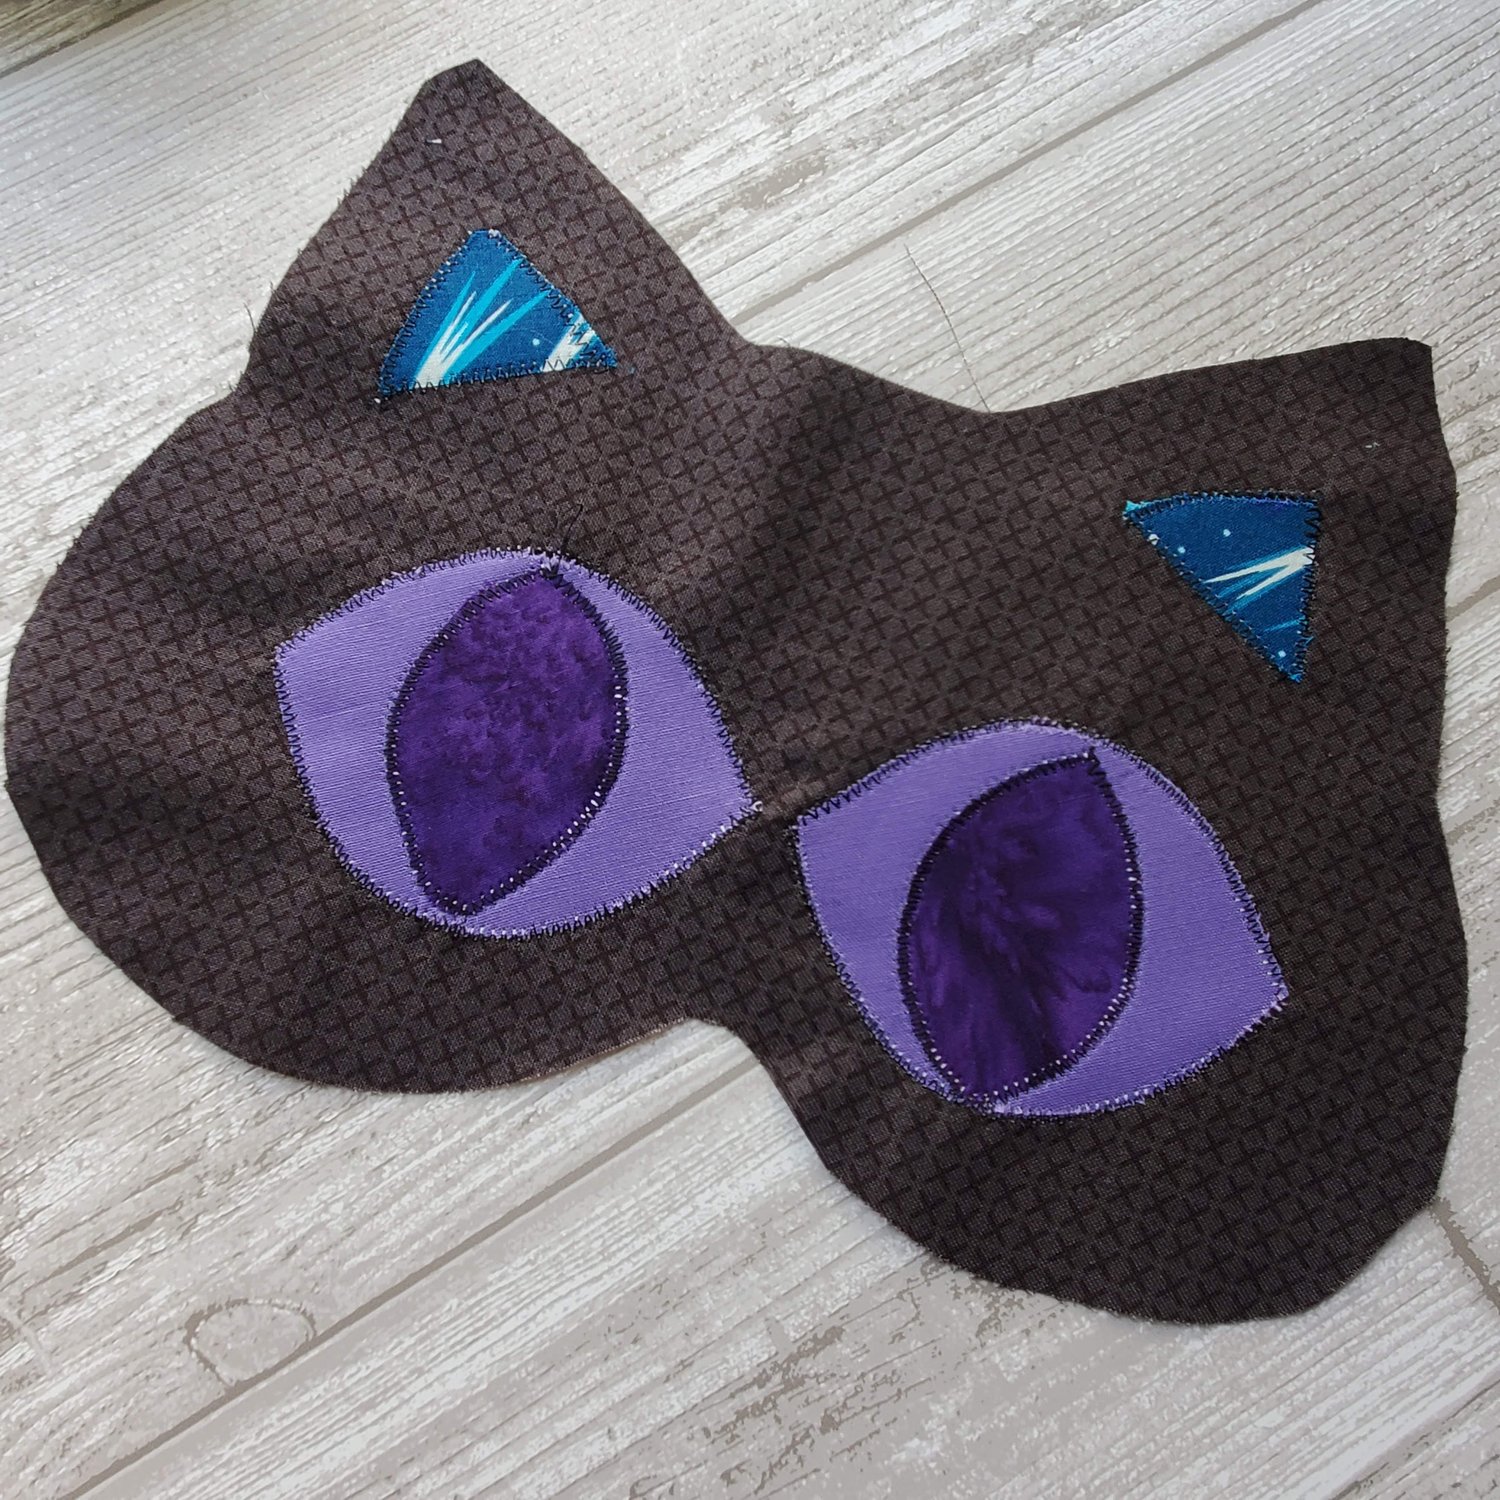
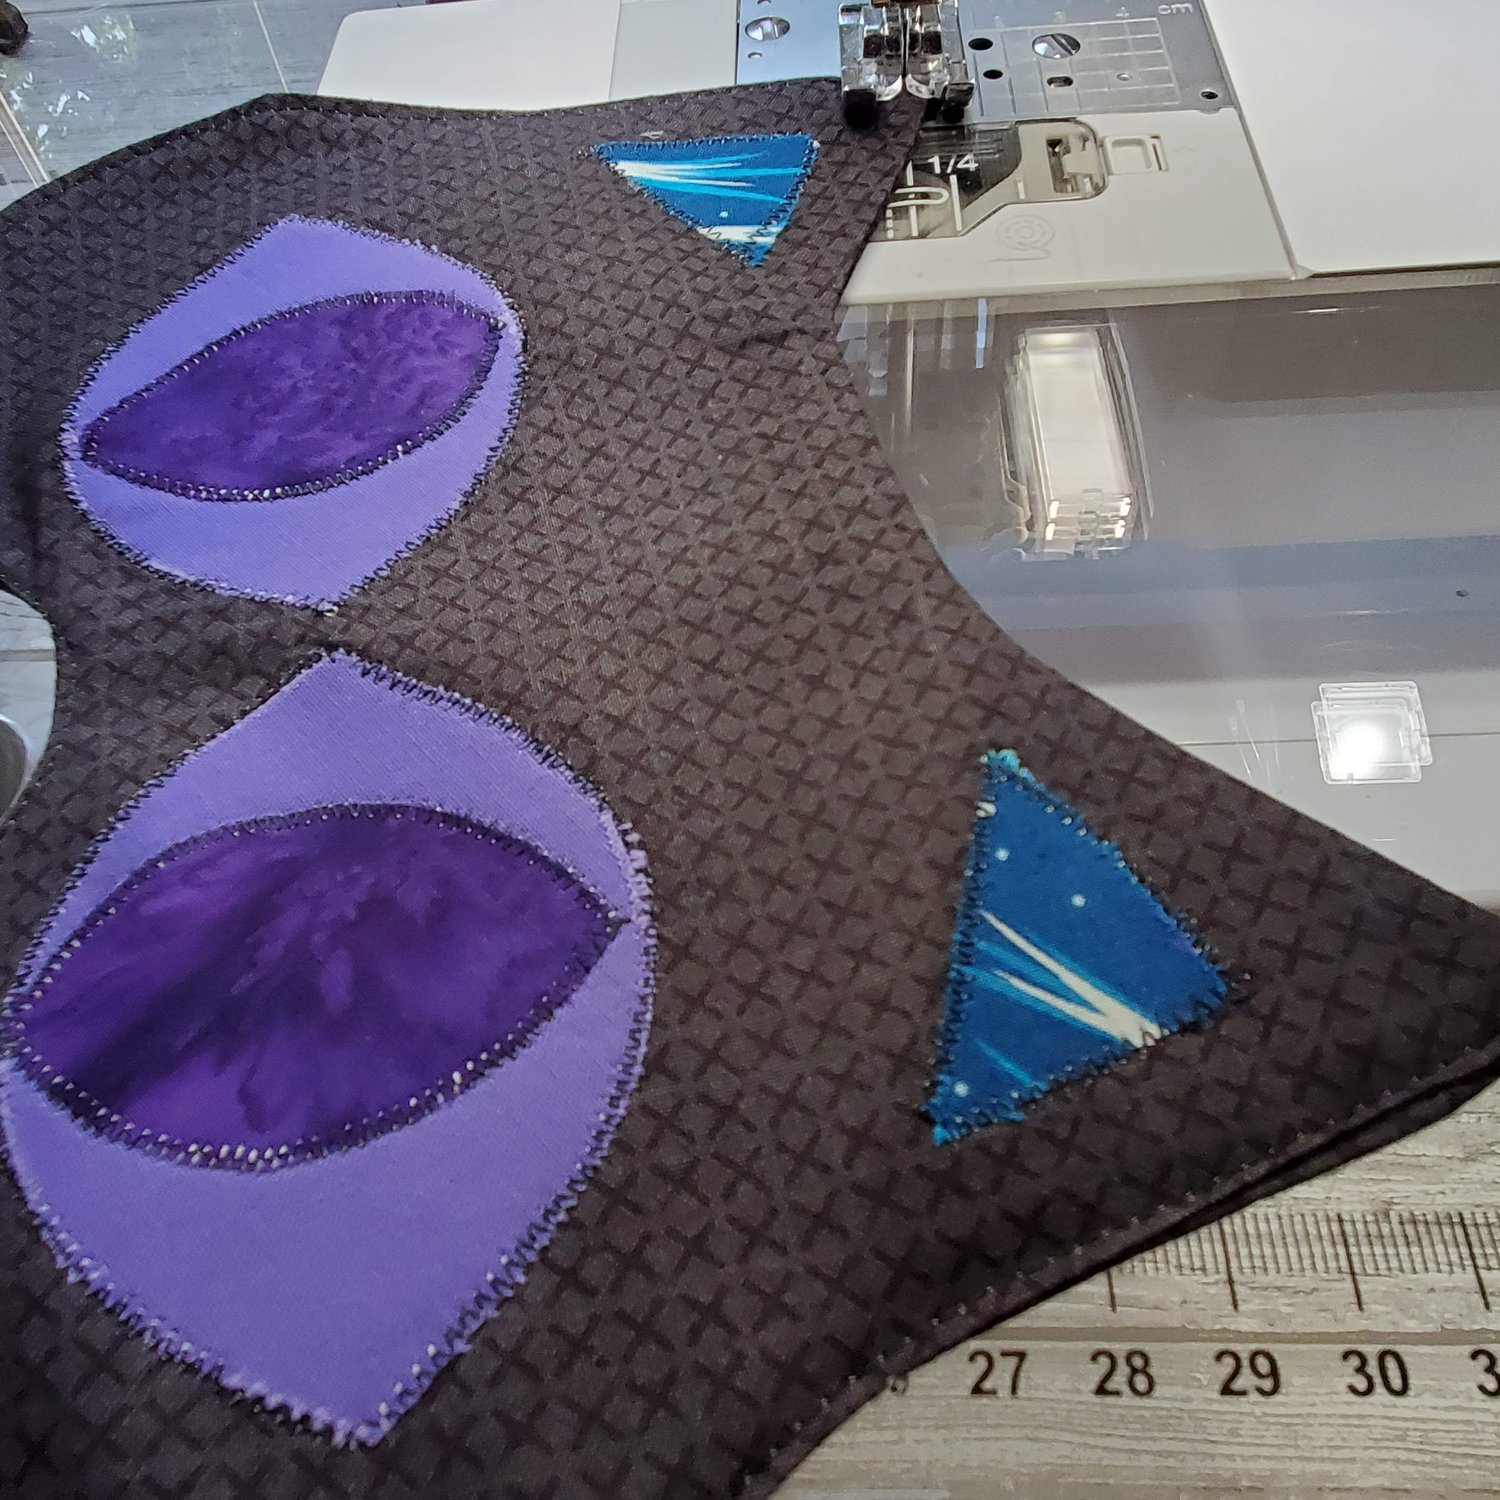
The two masks are made very similar. If you are making a mask for a young toddler you will want to adjust the eye opening to be closer together. It would be helpful to try on the paper template mask to determine the proper placement for the eye opening. To make the cat/pumpkin mask cut the main face template ¼” larger to allow for the seam. Cut two from the black/orange fabric. Next iron on some assorted fabrics to be used to cut out two of the cat’s inner ear and the eye template pieces onto Heat-n-Bond. Trace the shapes and cut out the pieces.
Using the template line up the pieces for the face and iron in place.
You can leave it like this or zig zag stitch around the pieces to secure in place.
After you have the face pieces adhered, place right sides together and sew with a ¼” seam leaving about a 2” opening for turning.
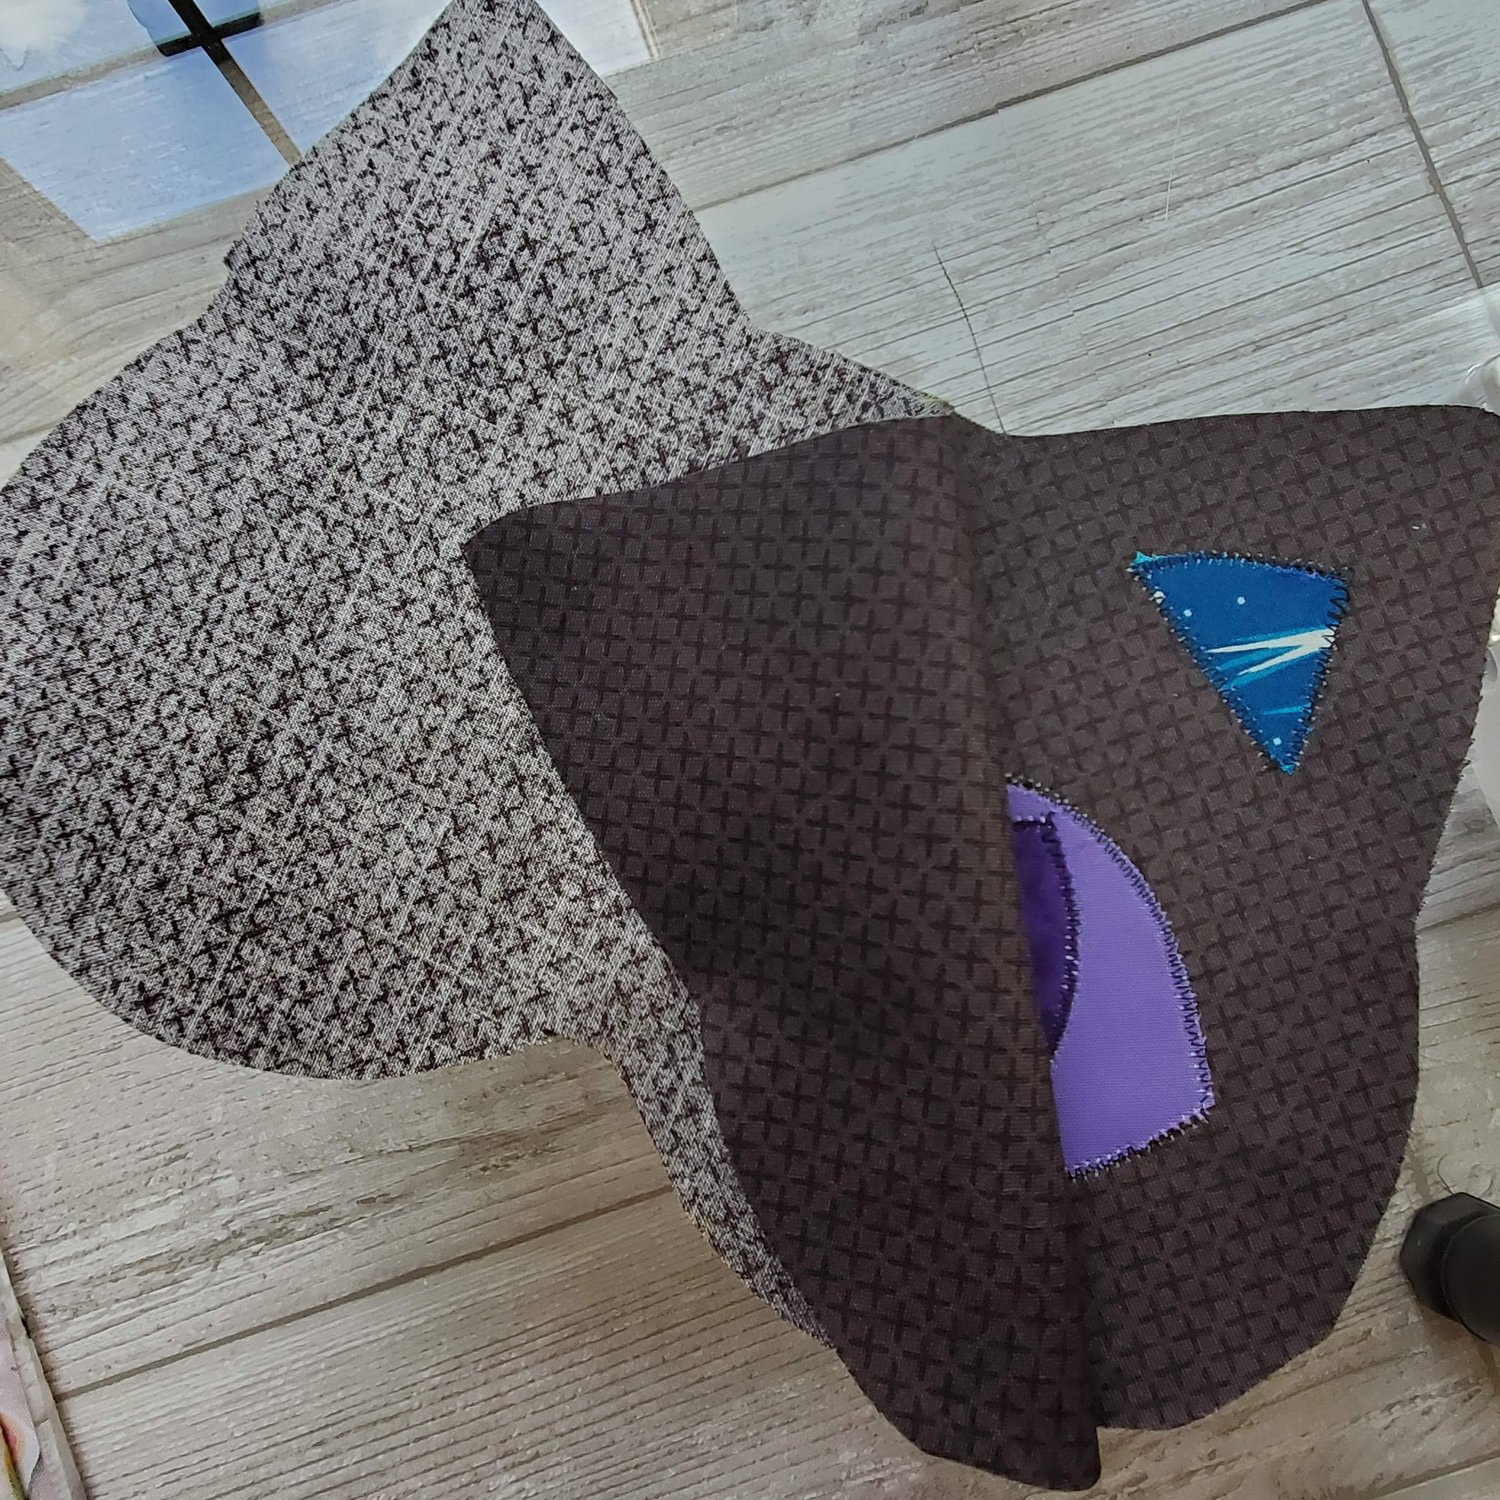
Clip the curves carefully or use pinking shears taking care not to cut into your stitching line. Turn right sides out and press. Turn under the raw edges about ¼” and press. Topstitch about ⅛” from the edges in a matching thread.
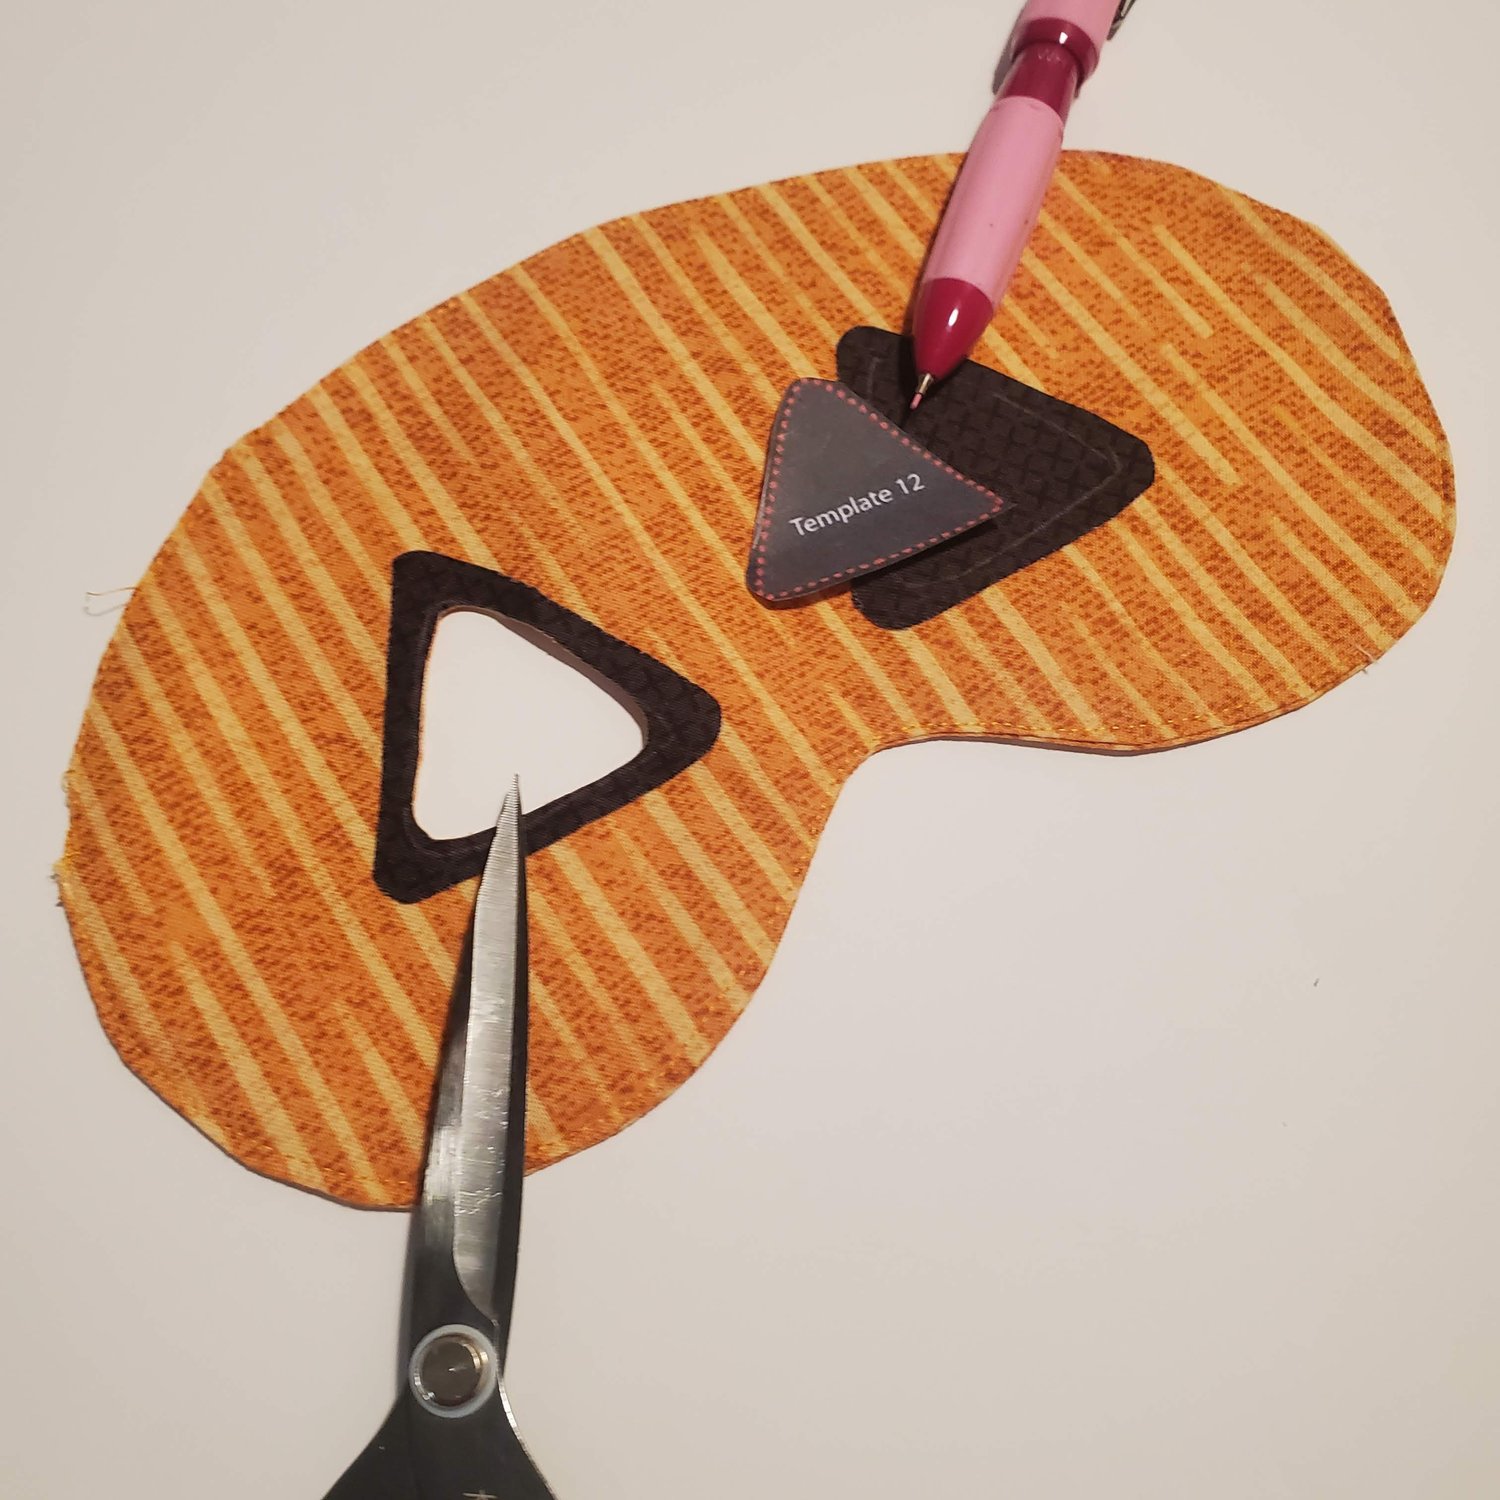
Take your template and draw the circle cut lines and sew around the line to secure. With a sharp pointed scissors trim close to the stitching line through all fabric layers.
Measure and cut an appropriate length of ¼” elastic to fit the child’s head. Using the template mark the placement for the elastic. Fold over the elastic to enclose the raw edges and zig zag stitch to the edges of the mask on both sides. For the pumpkin stem I used a small scrap of brown batik from our Java membership box fused to a small piece of Pellon Peltex stiff interfacing and double stitched it to the top edge of the pumpkin mask.
These are great costumes for school events since they are easy on and off and the basic pattern could be further customized to create your child’s favorite characters. When my kids were growing up we kept a box of costumes with the toys for year round dress up playtime. If you are interested in sewing for a charity, these types of capes are often gifted to young Superheroes fighting childhood cancer. For older adults you can enlarge the neck opening turning them around to be a clothing protector during meals.