

DIY Spring Tulips
3rd Mar 2022
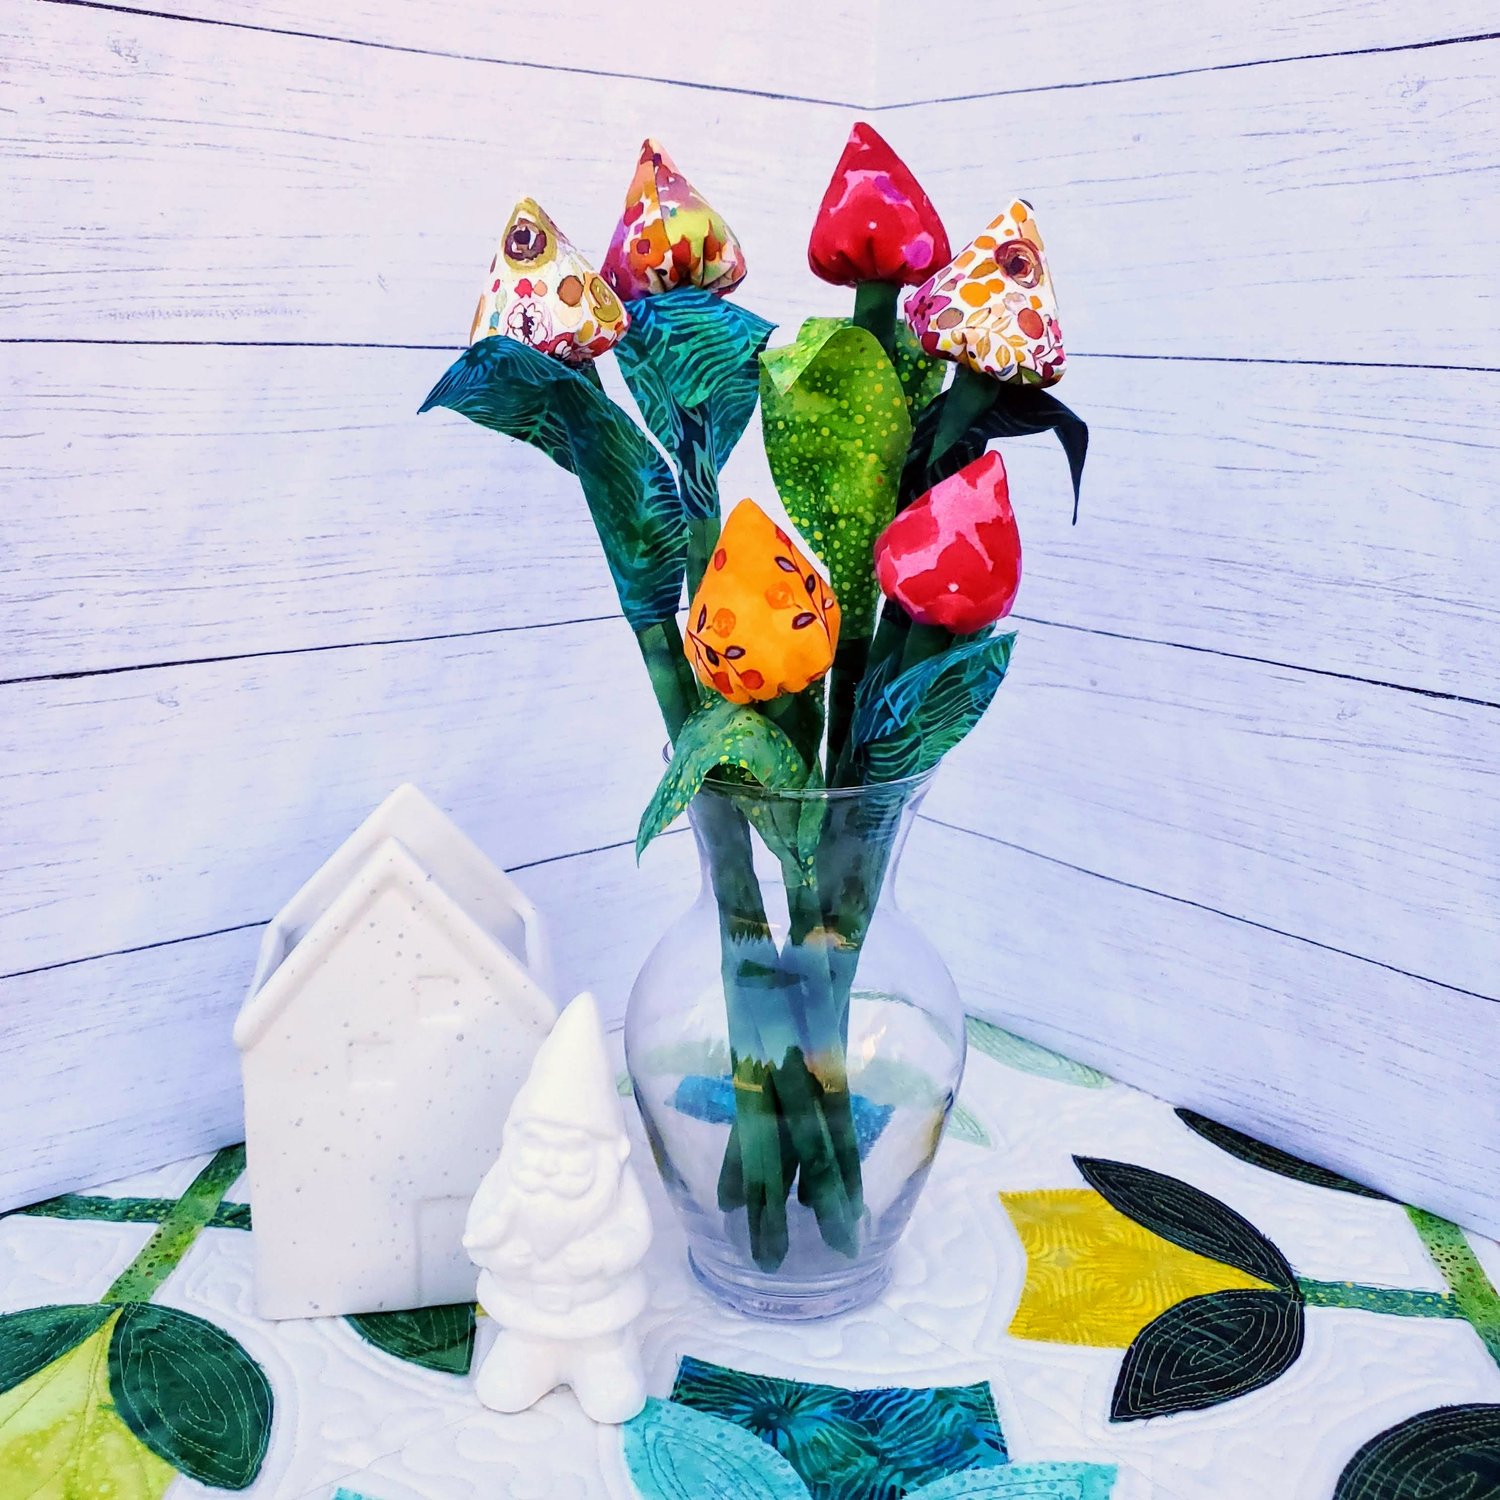
The arrival of March gives promise to the fact that Spring is just around the corner after a cold and blustery February here in the Midwest. Tulips are one of my favorite flowers made even better out of some beautiful fabrics that will never wilt and fade away! These are a quick and easy project to make and share to bring a smile to everyone that receives one. This is a wonderful way to use the Classic Mini Pop fat quarter fabrics. I was inspired by this Therm O Web blog with a great tutorial. I made a few modifications using the beautiful assortment of green batiks available in the March Java membership and Printed Patchwork by Sug Zipkin for Clothworks fabric line.
Materials Needed:
Assorted fat quarters for flowers, stems and leaves
Smoothie plastic straws
Pellon Fusible Fleece
Hot Glue gun
12wt and 50wt Aurifil thread from the Chroma membership
Poly-Fil stuffing
To get started take a few 9” straws and insert one inside another to create different lengths to vary the height of the tulips for a more interesting arrangement. Use a bit of glue or tape the connection to hold it in place.
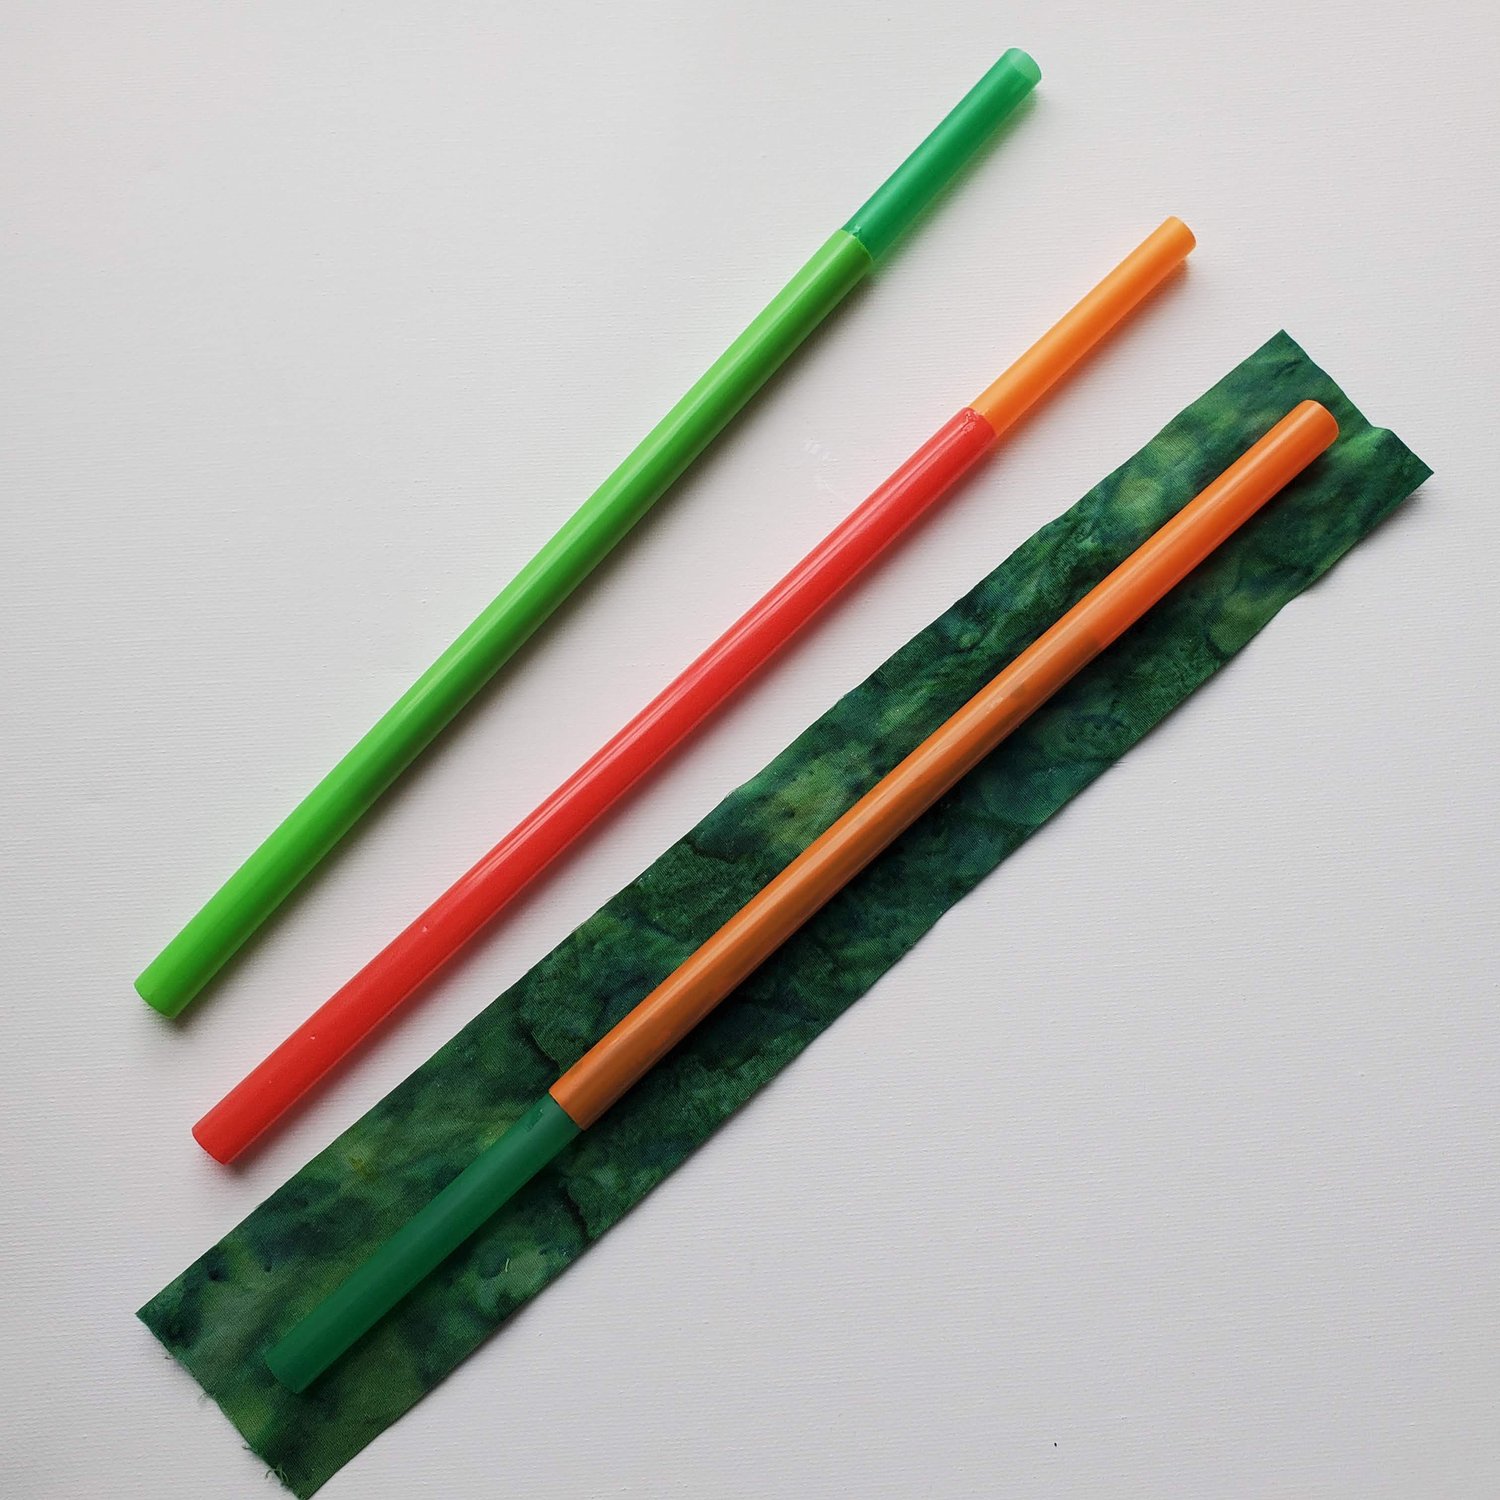
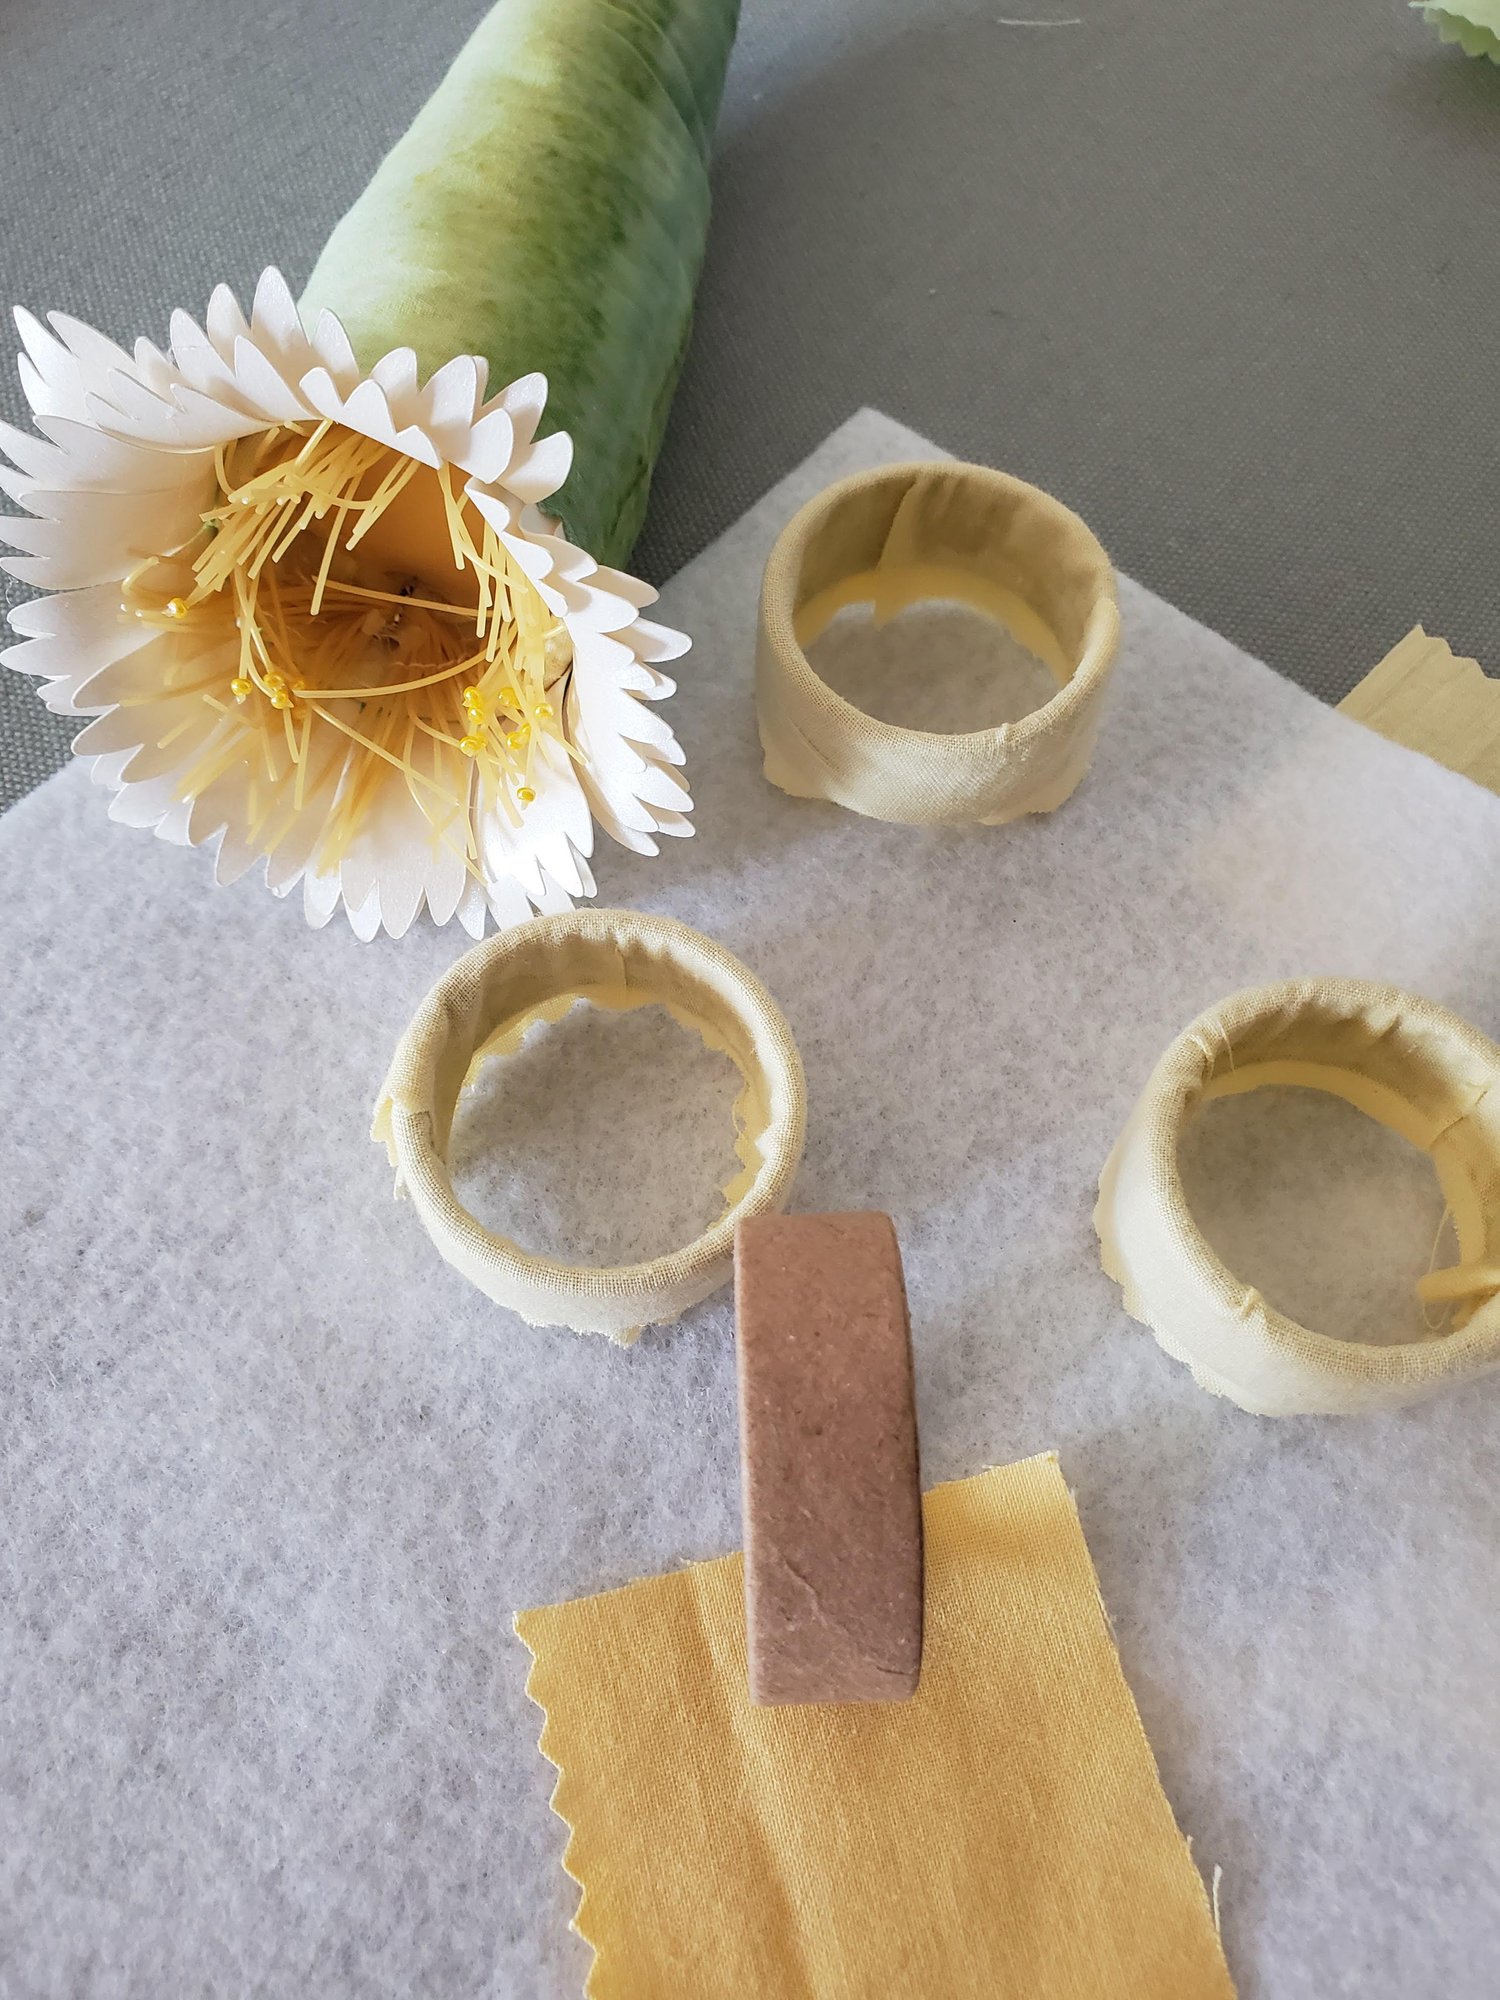
For my stems I used the wide opening smoothie straws and cut the width of the fabric 2” to fit around the straw with a ¼” seam allowance. Measure the straw length and cut with about ¾” extra to allow for seam allowance on the bottom edge and a little extra at the top to cover the straw.
Sew a ¼” seam along the bottom edge and along the long edge. To turn the right sides out you can use a piece of regular size straw with a chopstick as seen in this You Tube Video (32 second mark). The video gives three different ways to turn a skinny tube.
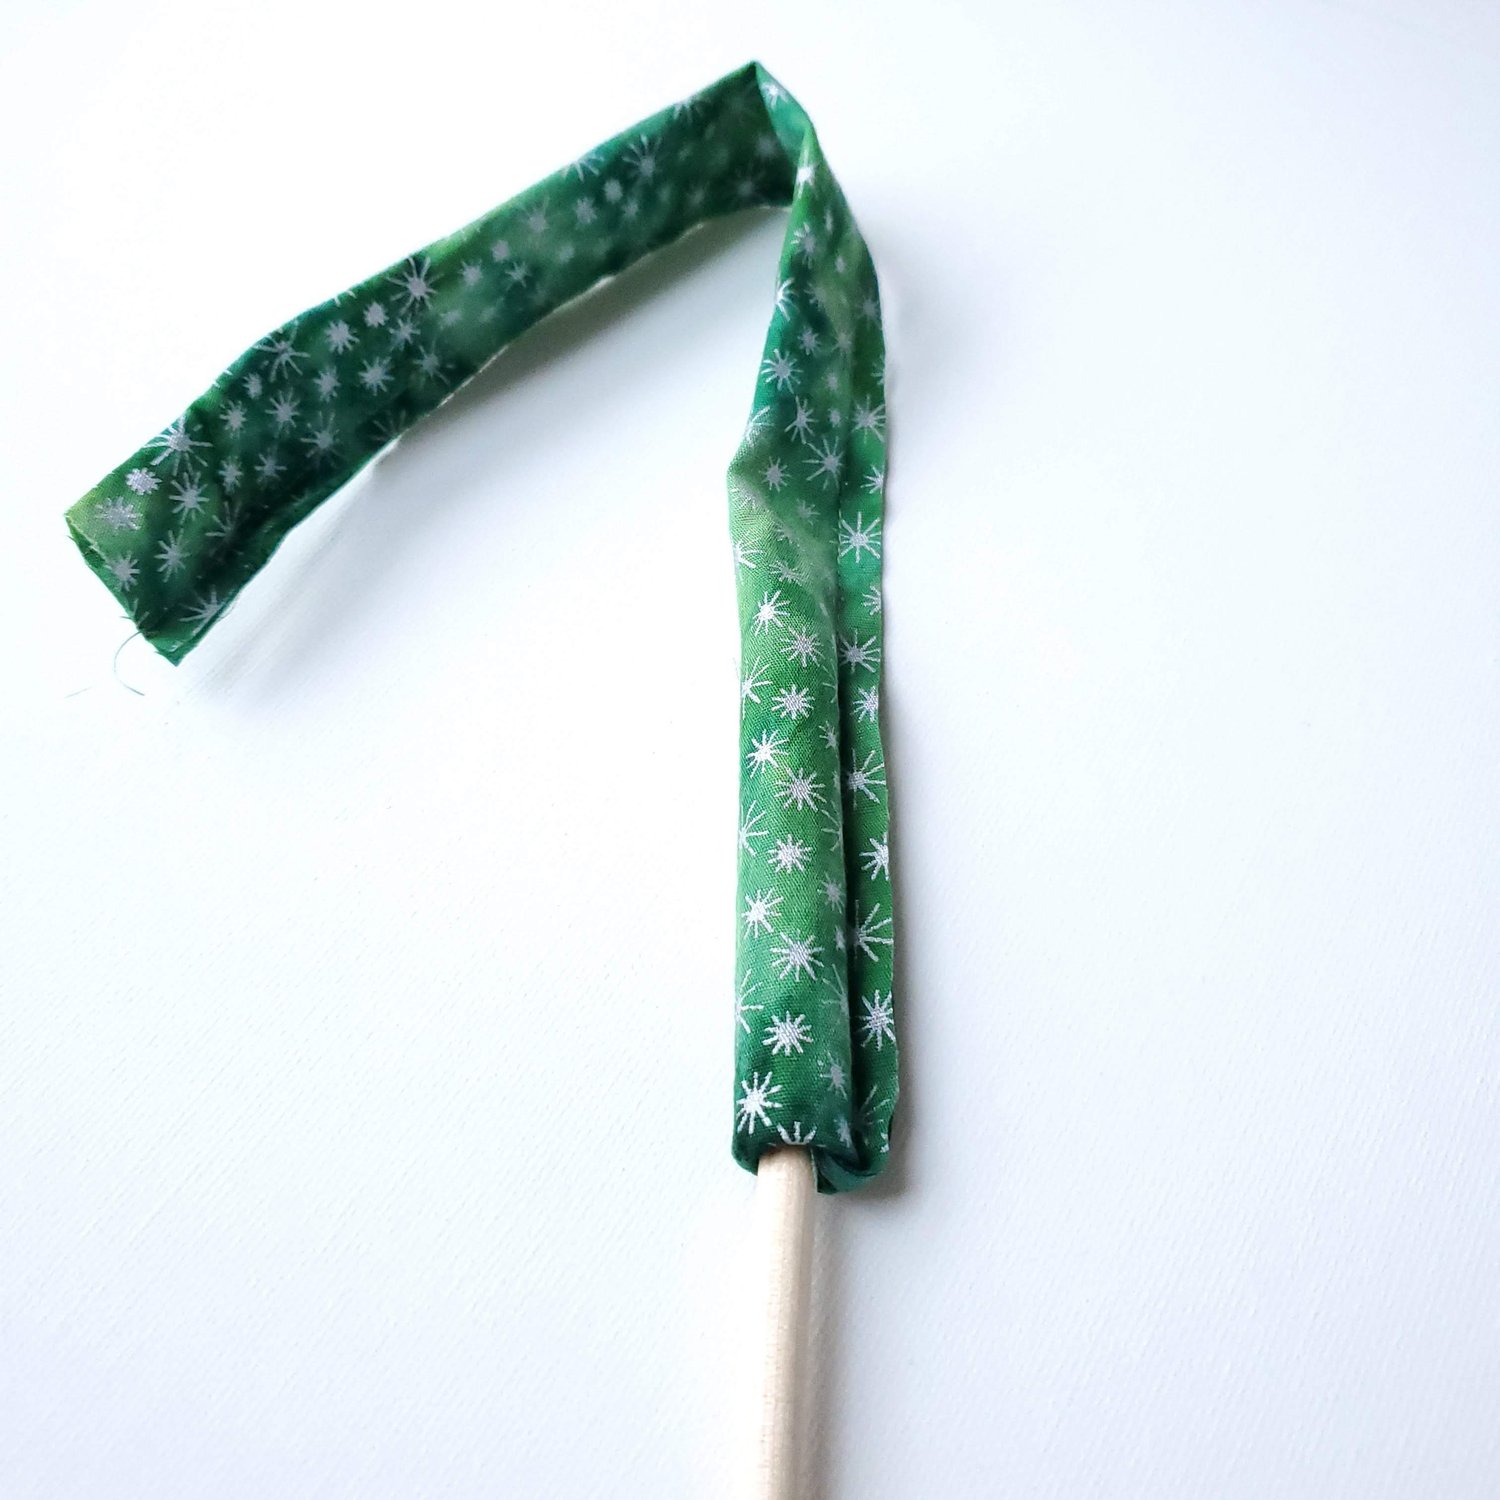
Slide the prepared straw inside the fabric to create the stem and set aside.
Next, for the tulips you will need a 6” circle template. You can trace around a plate or bowl or Google search and print the pattern. Cut a few 6 ½” fabric squares for the tulips and iron the fusible fleece on the wrong side. Trace the 6” circle and cut out the shapes.
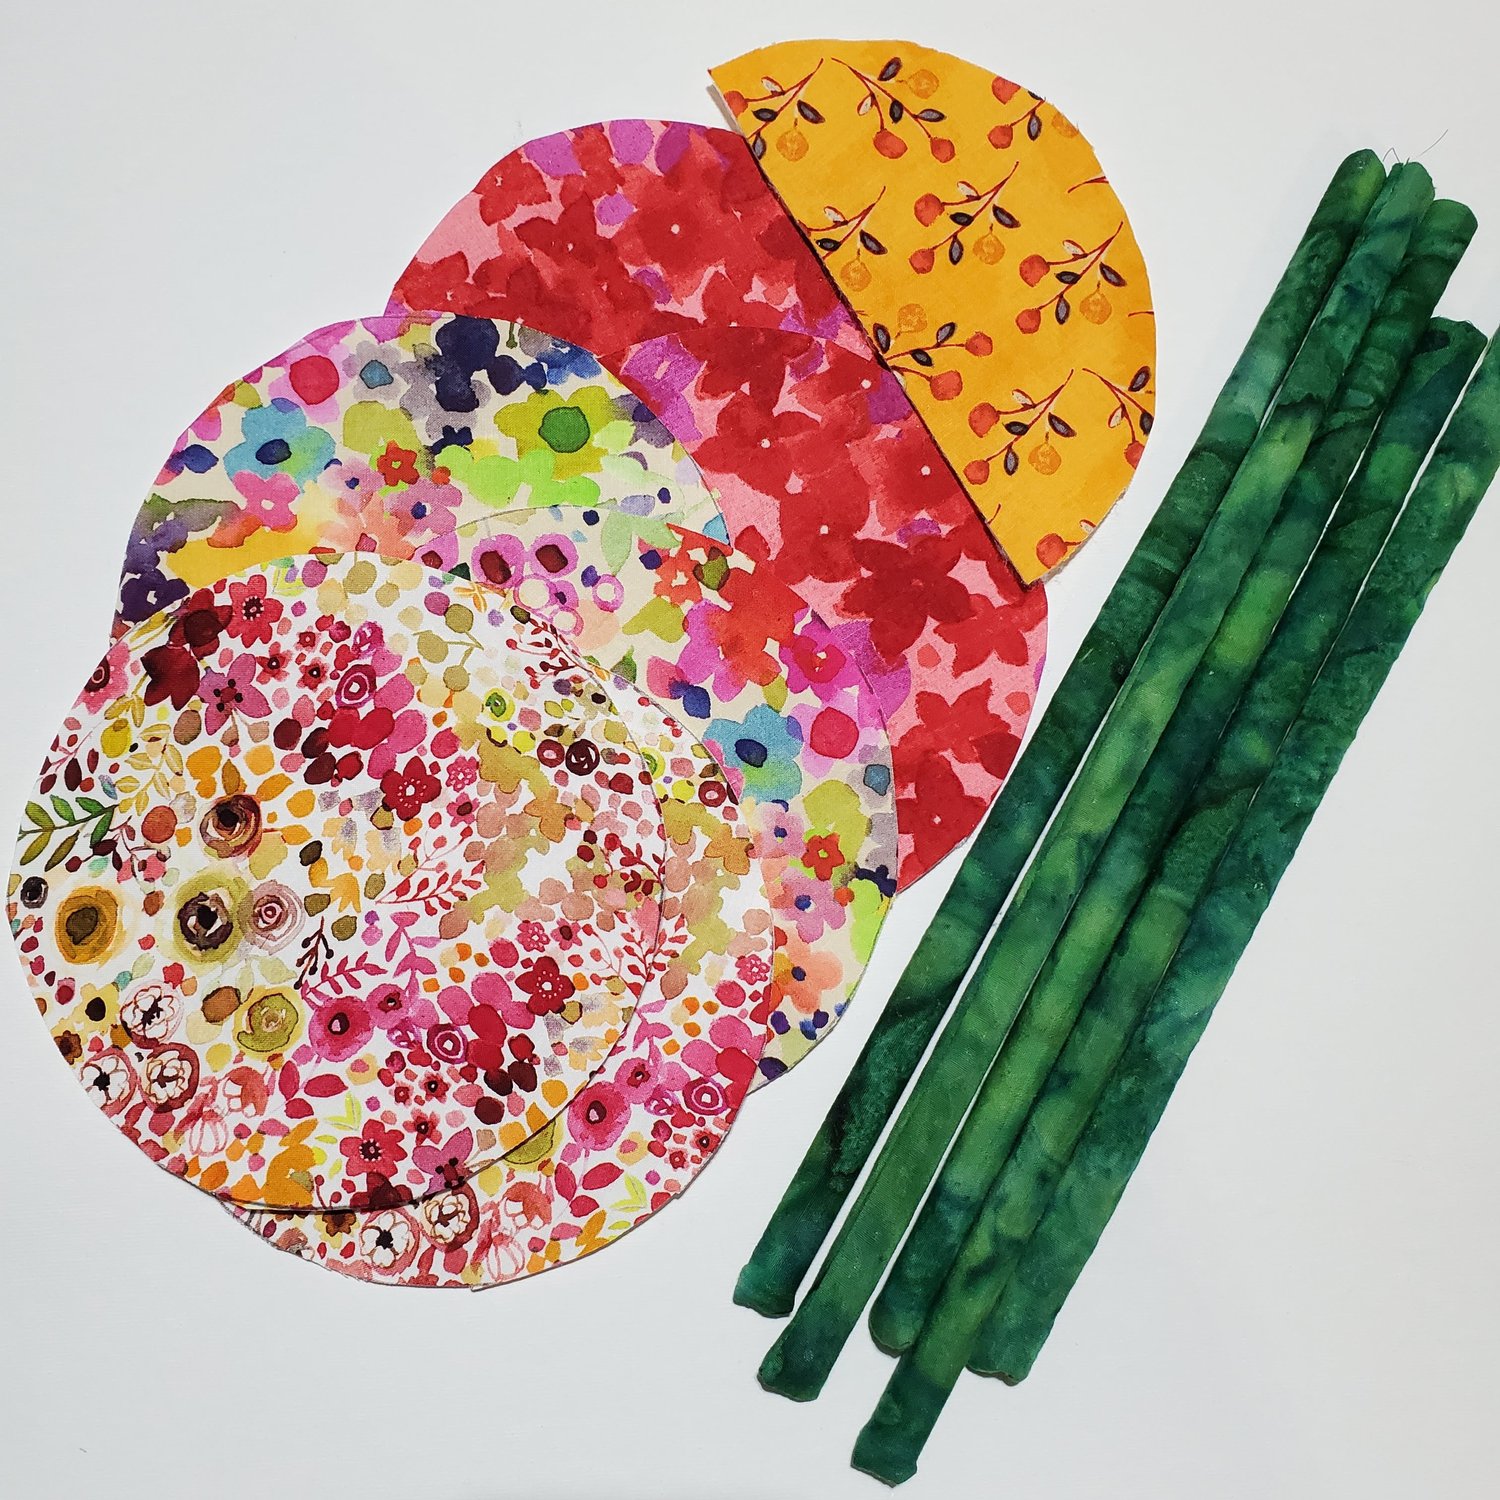
Fold the circle in half and cut along the line creating two tulip tops per 6” circle. Fold in half with the right sides together and sew matching the straight edges together. It is a great time saver to line up the tulips and chain piece the short seams all at once.

Turn right sides out taking time to get the point at the top pushed out fully. Take an embroidery needle and some 12 wt Aurifil thread ( the thicker thread will not break so easily) and sew a line to gather the edge of the fabric around the base of the tulip.
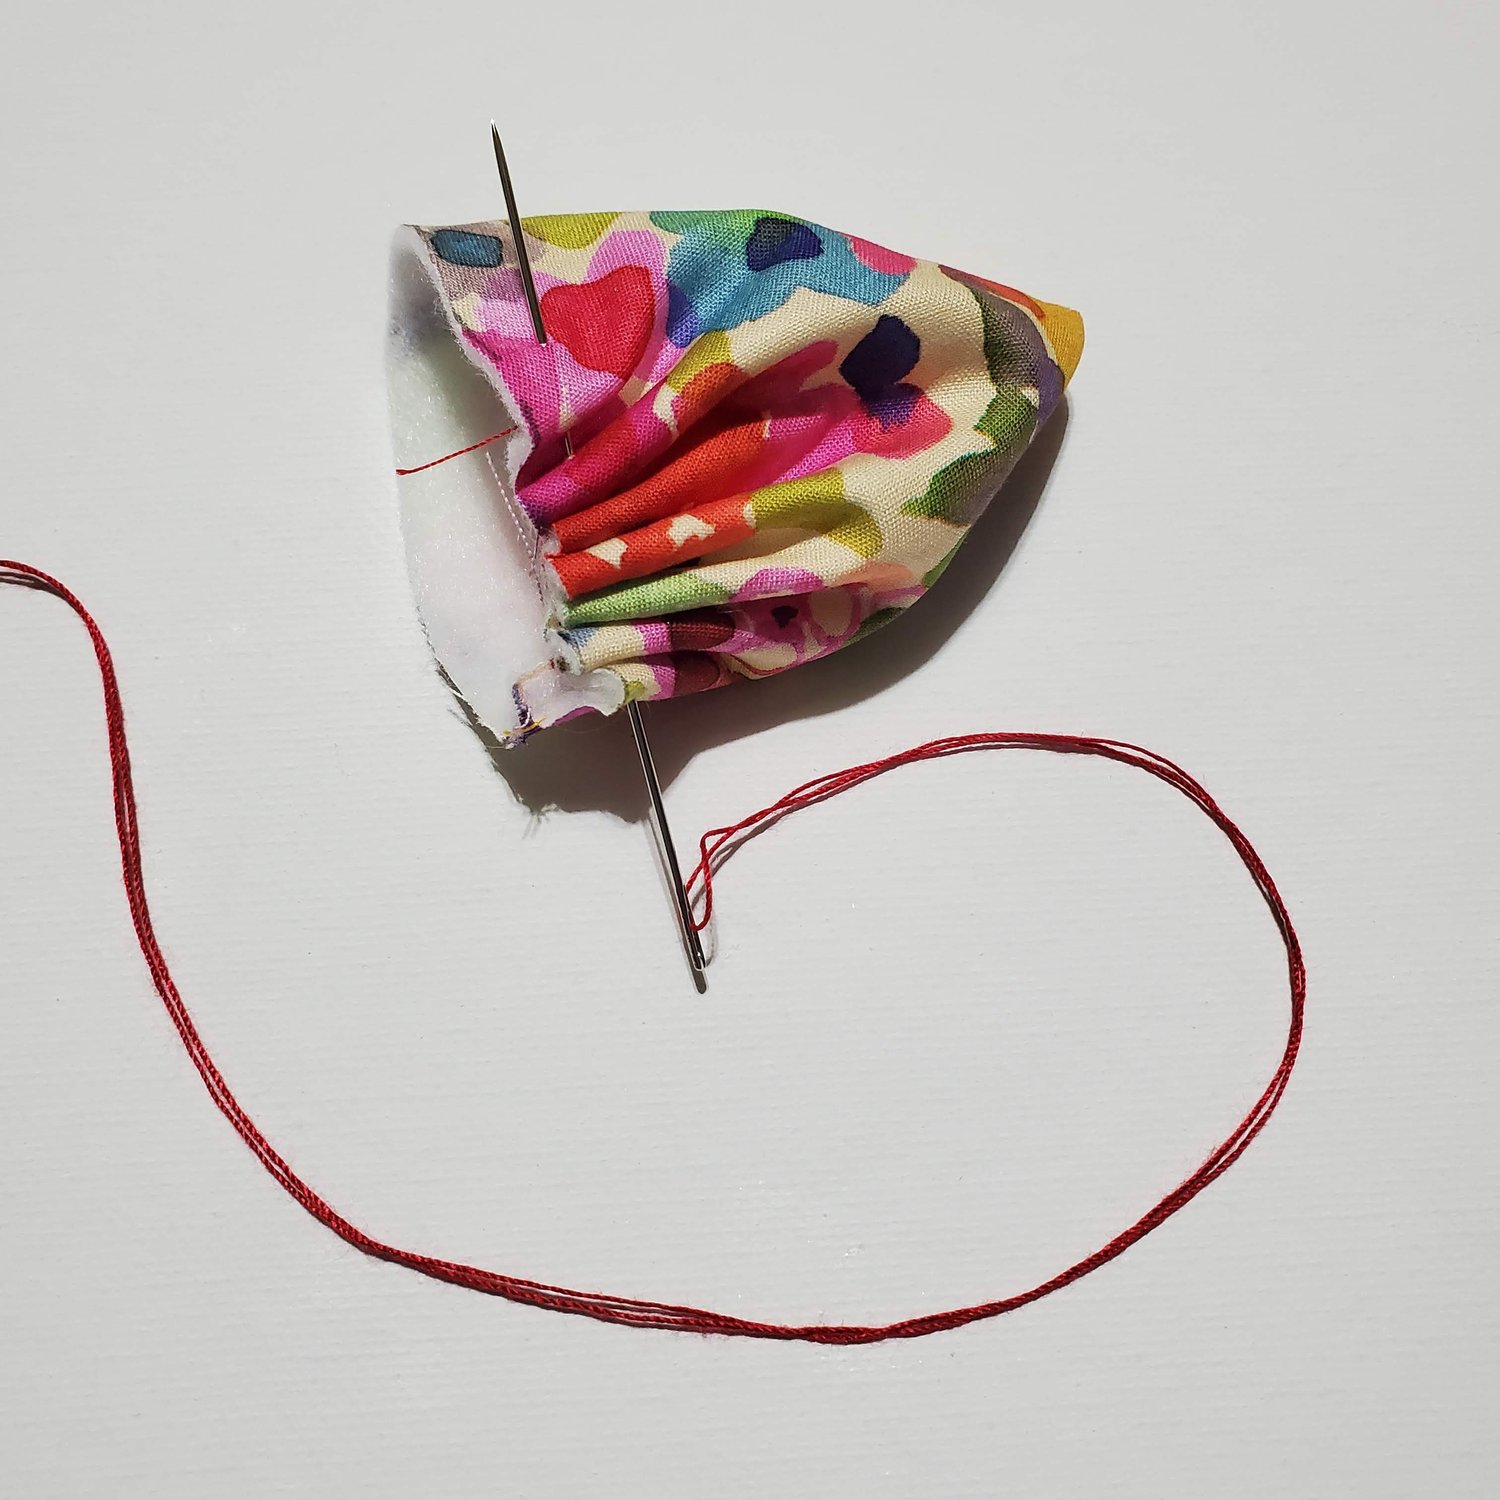
Before pulling the threads, add some Poly-Fil stuffing. Gather the fabric tightly and tie a knot with the 12wt thread to hold it closed.
The final part to prepare will be the tulip leaves. The leaves are a 5” oval with one side flattened for the leaf base. I found the Java batik fabric works the best for this element since it is the exactly same on both sides and it is less likely to fray than regular quilting cotton. I planned two leaves for most of the stems but decided to vary the final look with just one leaf on a few stems.
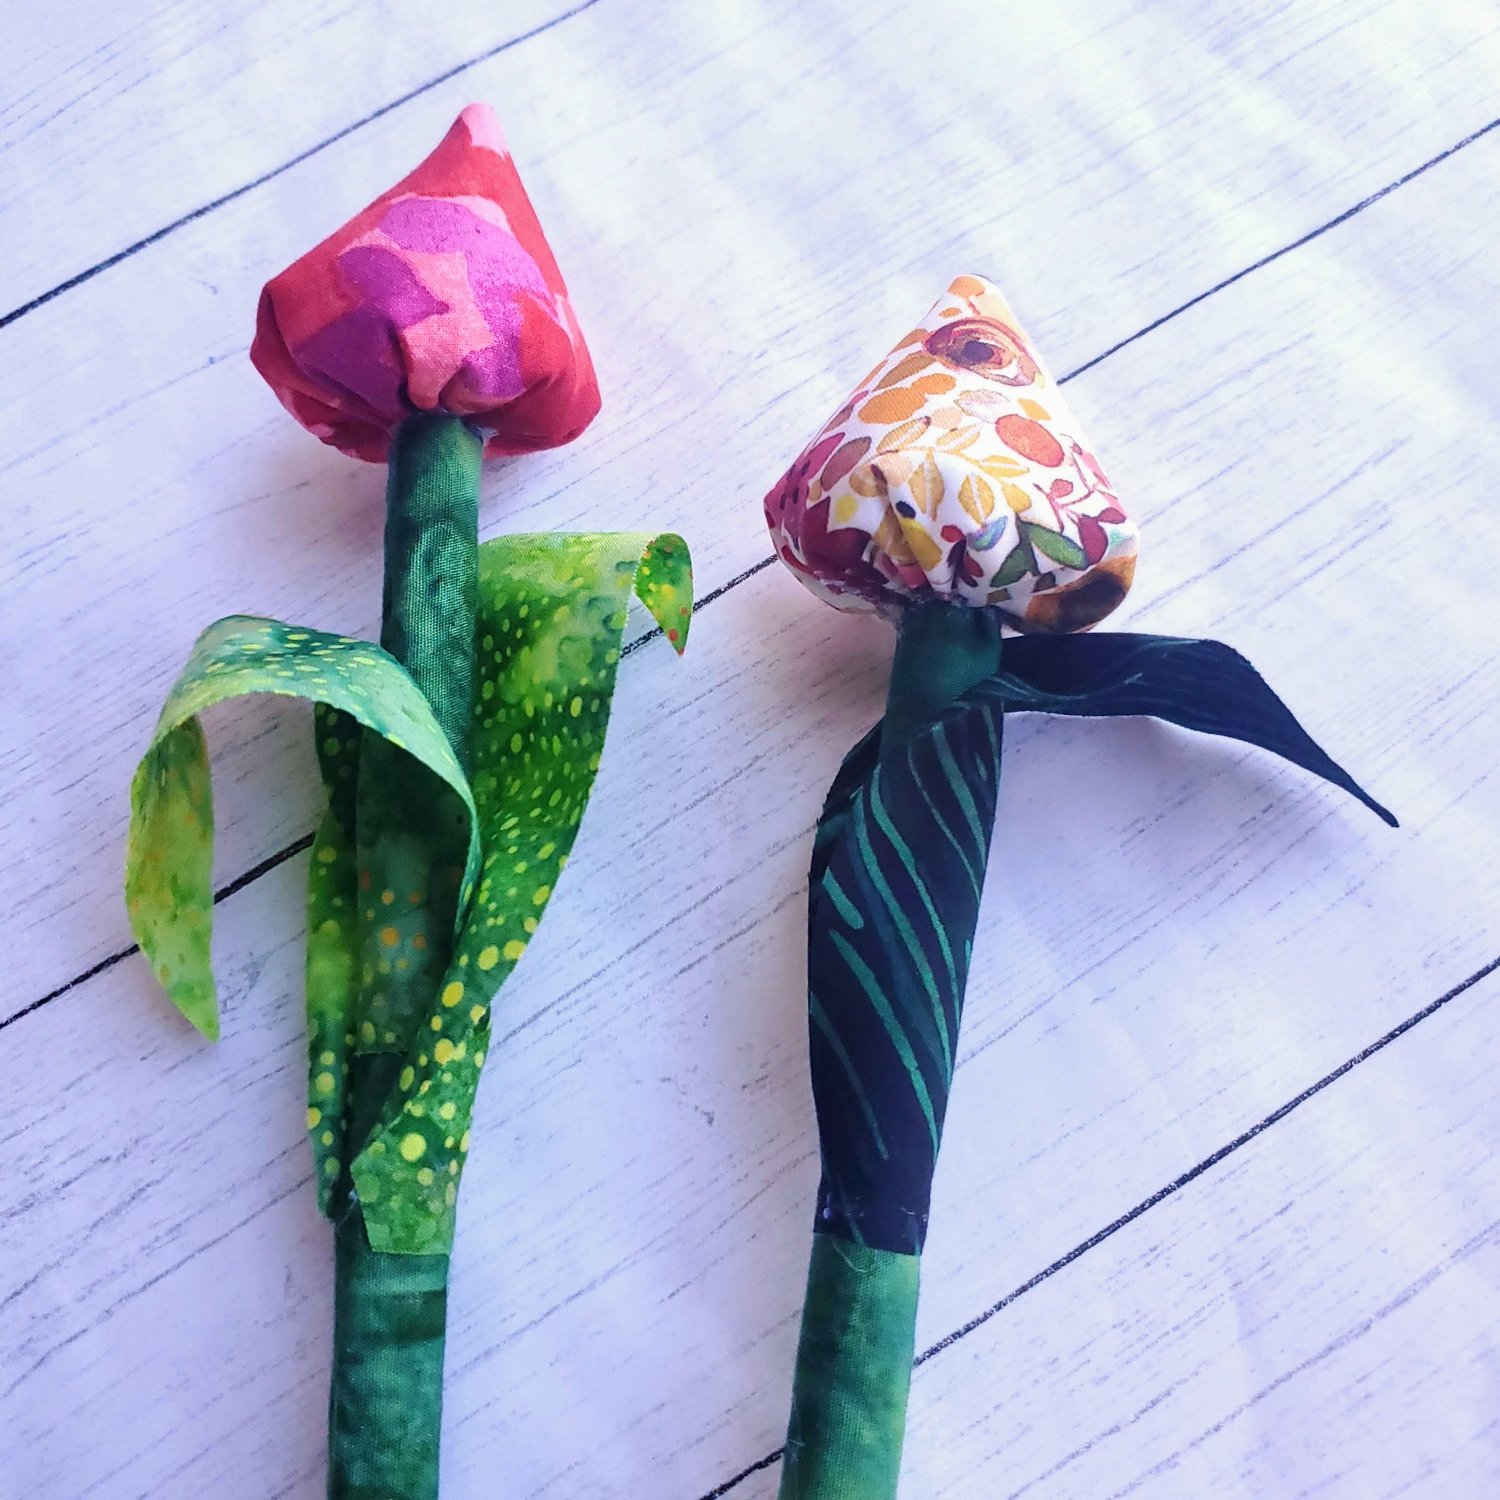
To assemble the tulip, I used a hot glue gun and added a drop to the top of the stem, pressing the raw edges of the stem fabric inside the straw. Then add hot glue to the bottom center of the tulip and press it in place on top of the straw stem. I added the leaves about 3” from the top, overlapping the two leaves slightly. It may help to starch the leaf fabric to hold it upright and slightly curved to look more realistic.
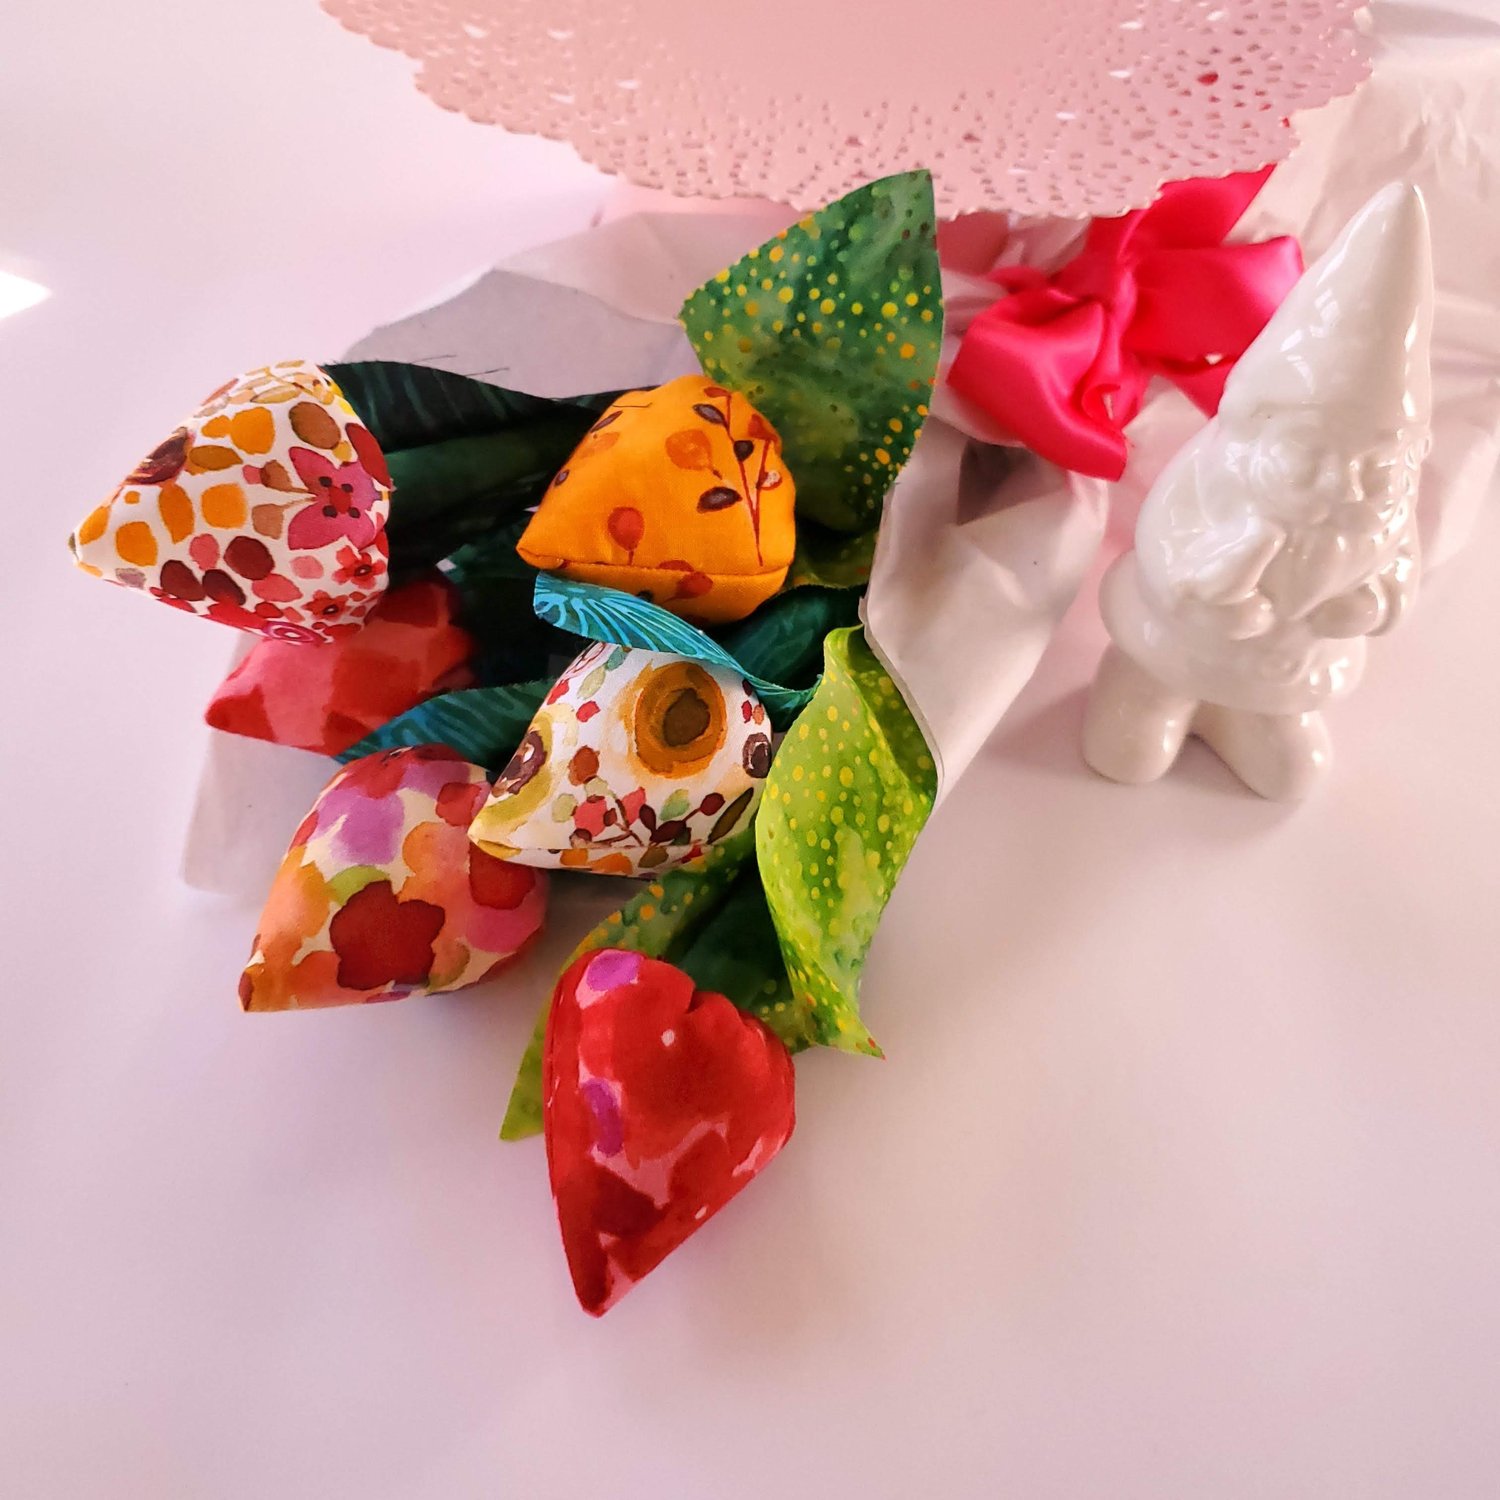
Wrap your flowers in some tissue paper and add a bow making a beautiful bouquet of fabric tulips to brighten someone’s day!