Splashed Mini Quilt
17th Jun 2021
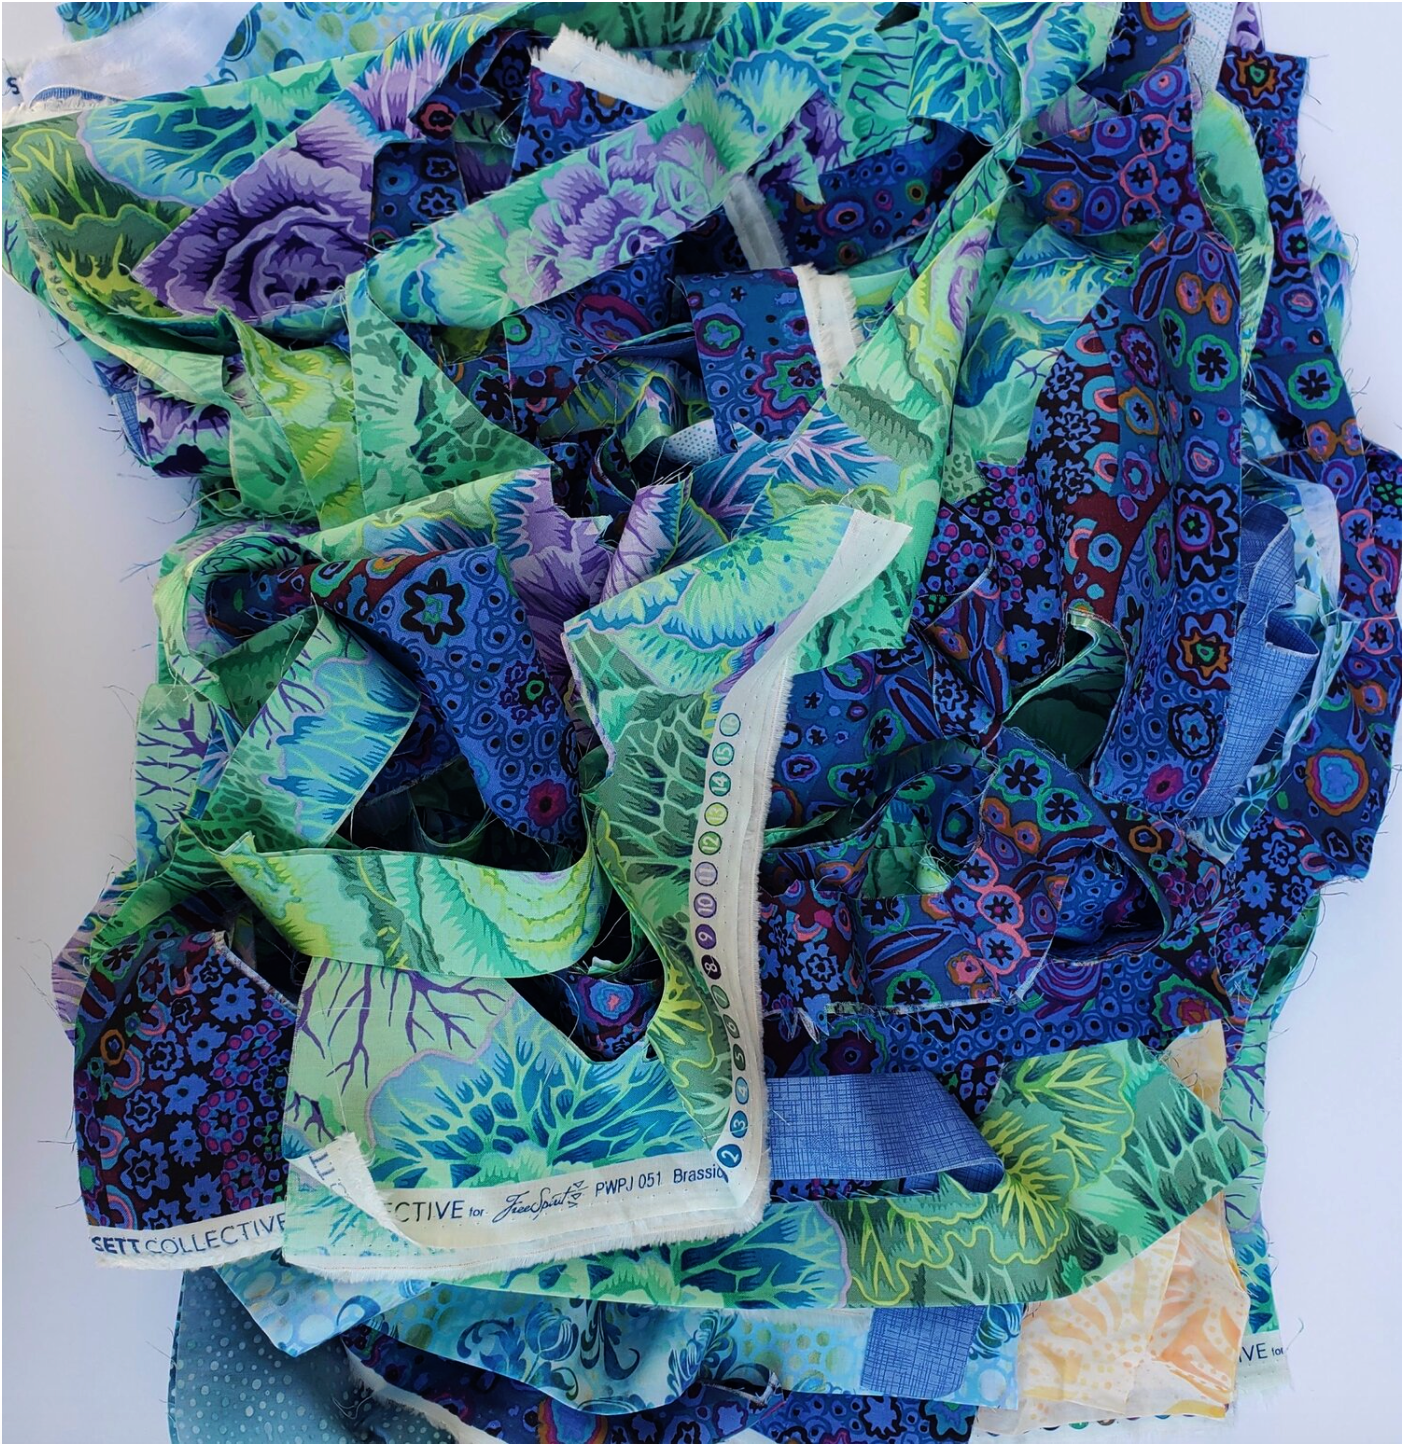
Scrap quilting is a wonderful opportunity to use a wide variety of beautiful fabrics stitched together to create a unique functional piece of art. With a quick search on Pinterest, you will find lots of ideas of how to use up your scraps. My favorite artist to follow is Bonnie K. Hunter when it comes to creating with scraps. I was inspired to make this mini quilt using the Cotton Cuts Snippet membership scrap bag. This was the perfect pattern since it uses 1 ¼” strips to construct the blocks. There was enough fabric to make at least two 18” squares that could be a mini quilt, a pillow, placemat or table runner to brighten the kitchen. It was fun to see what fabrics were in the bag and create a one of a kind scrappy project.
Materials needed:
Snippet bag or scraps at least 1 ¼” wide
Coordinating Aurifil thread from Chroma membership
18” square of backing fabric and batting
Art Gallery Fabrics Splashed pattern
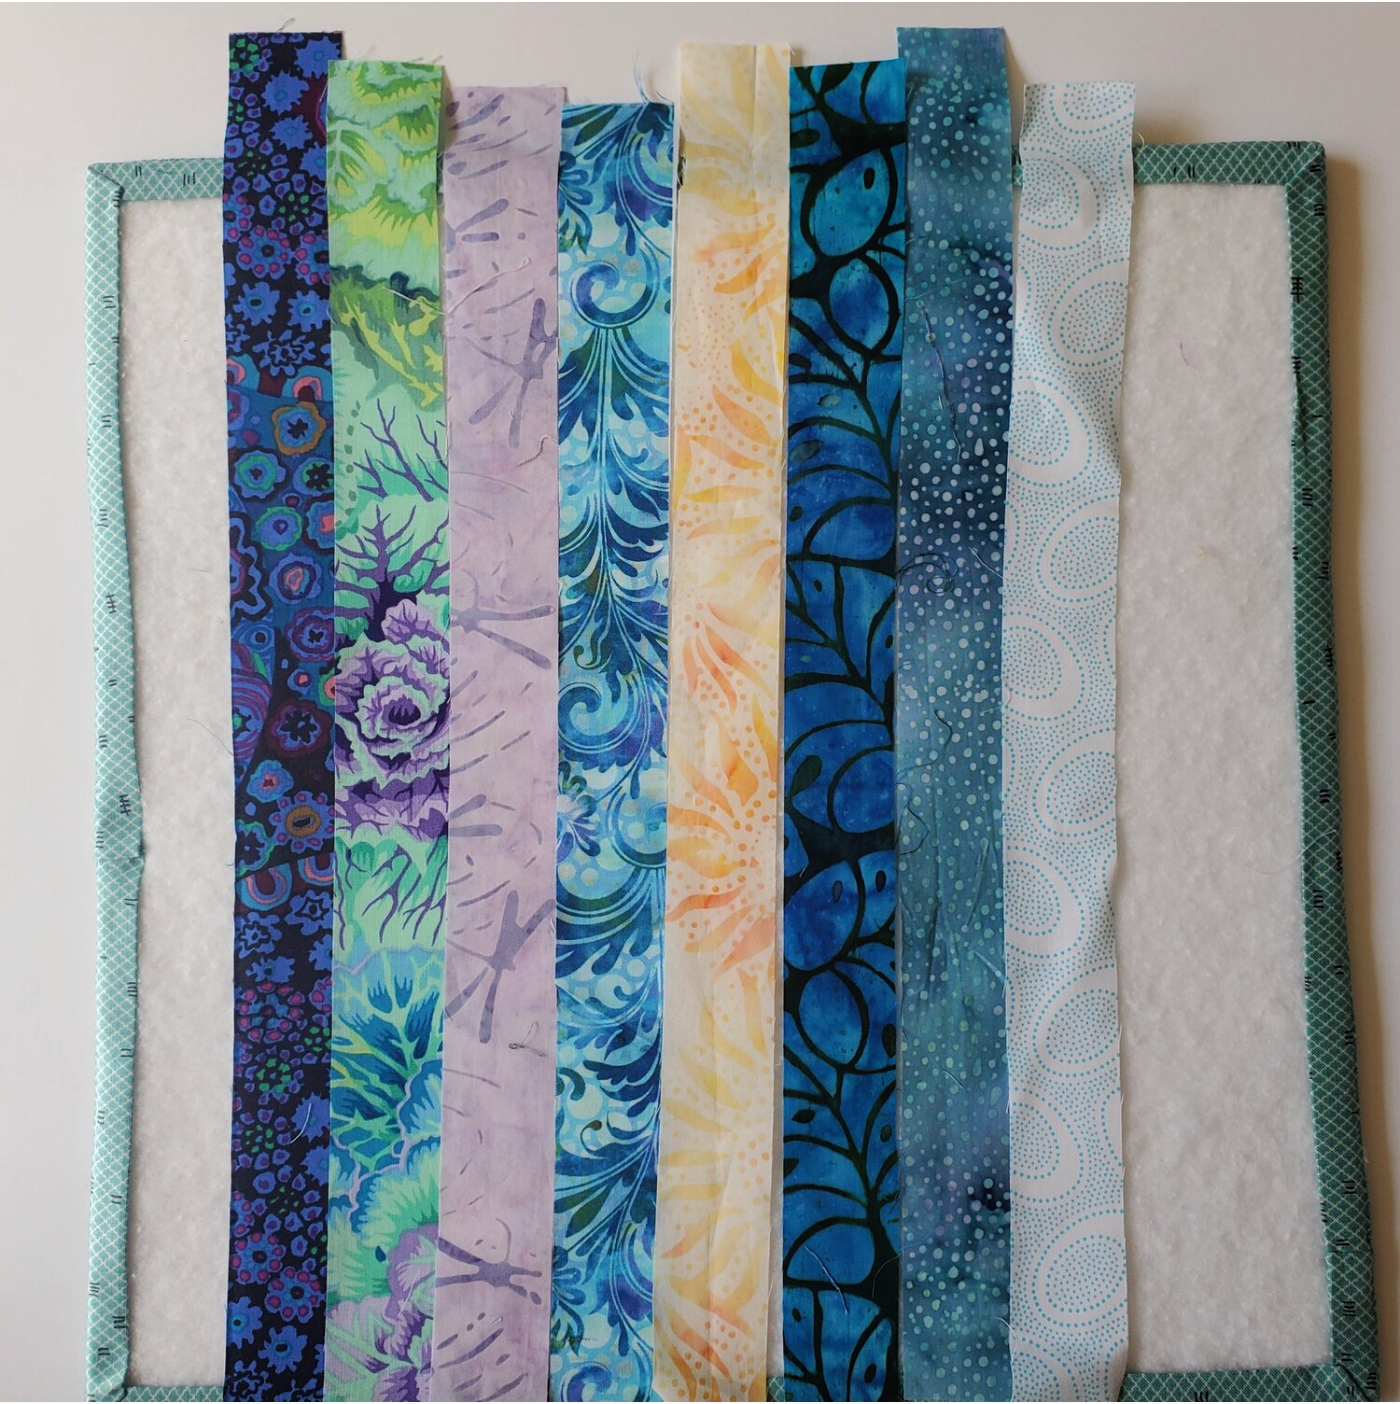
To get started, I separated the bag of scraps to pick out 8 different fabrics to use in the design. Since I was working with assorted scraps I was limited to about 14” length for each piece.
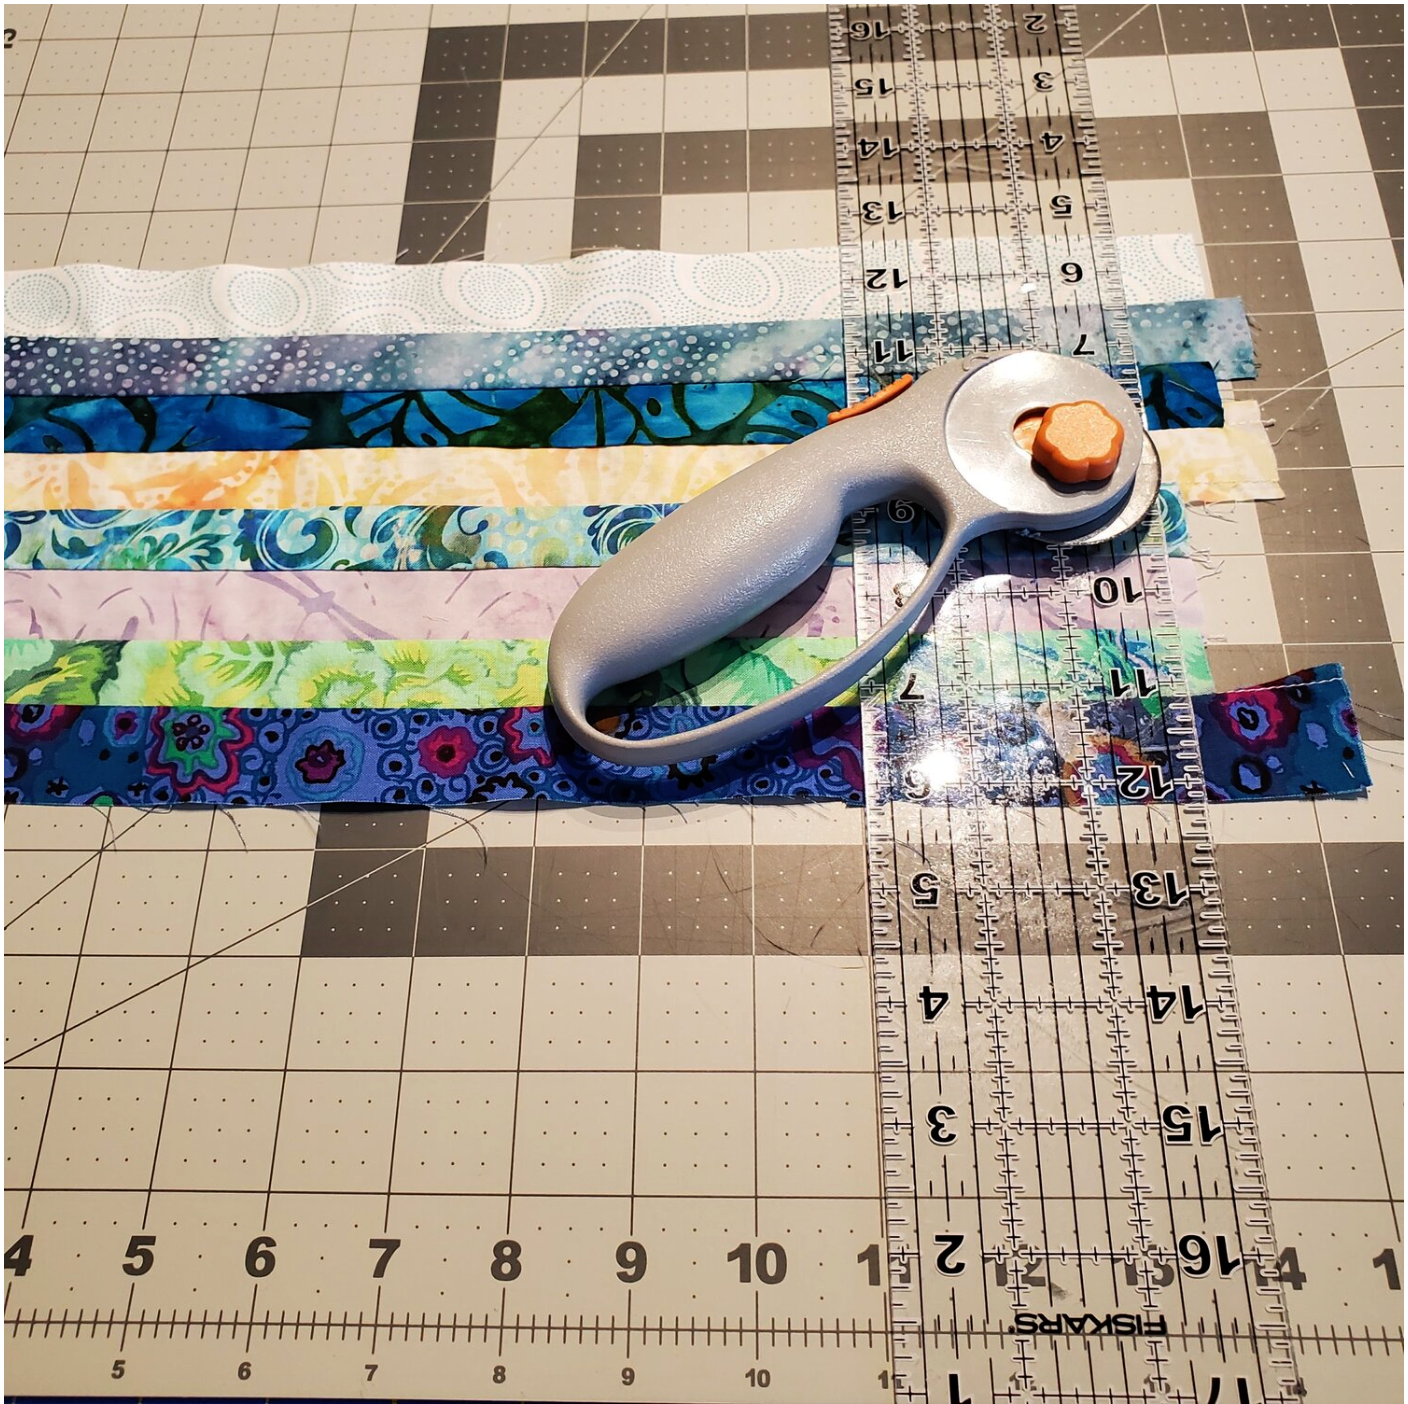
I found it was easier to carefully press the scraps before cutting the 1 ¼” strips. It was helpful that the selvage was intact to help keep it on the straight of grain as I trimmed the pieces.
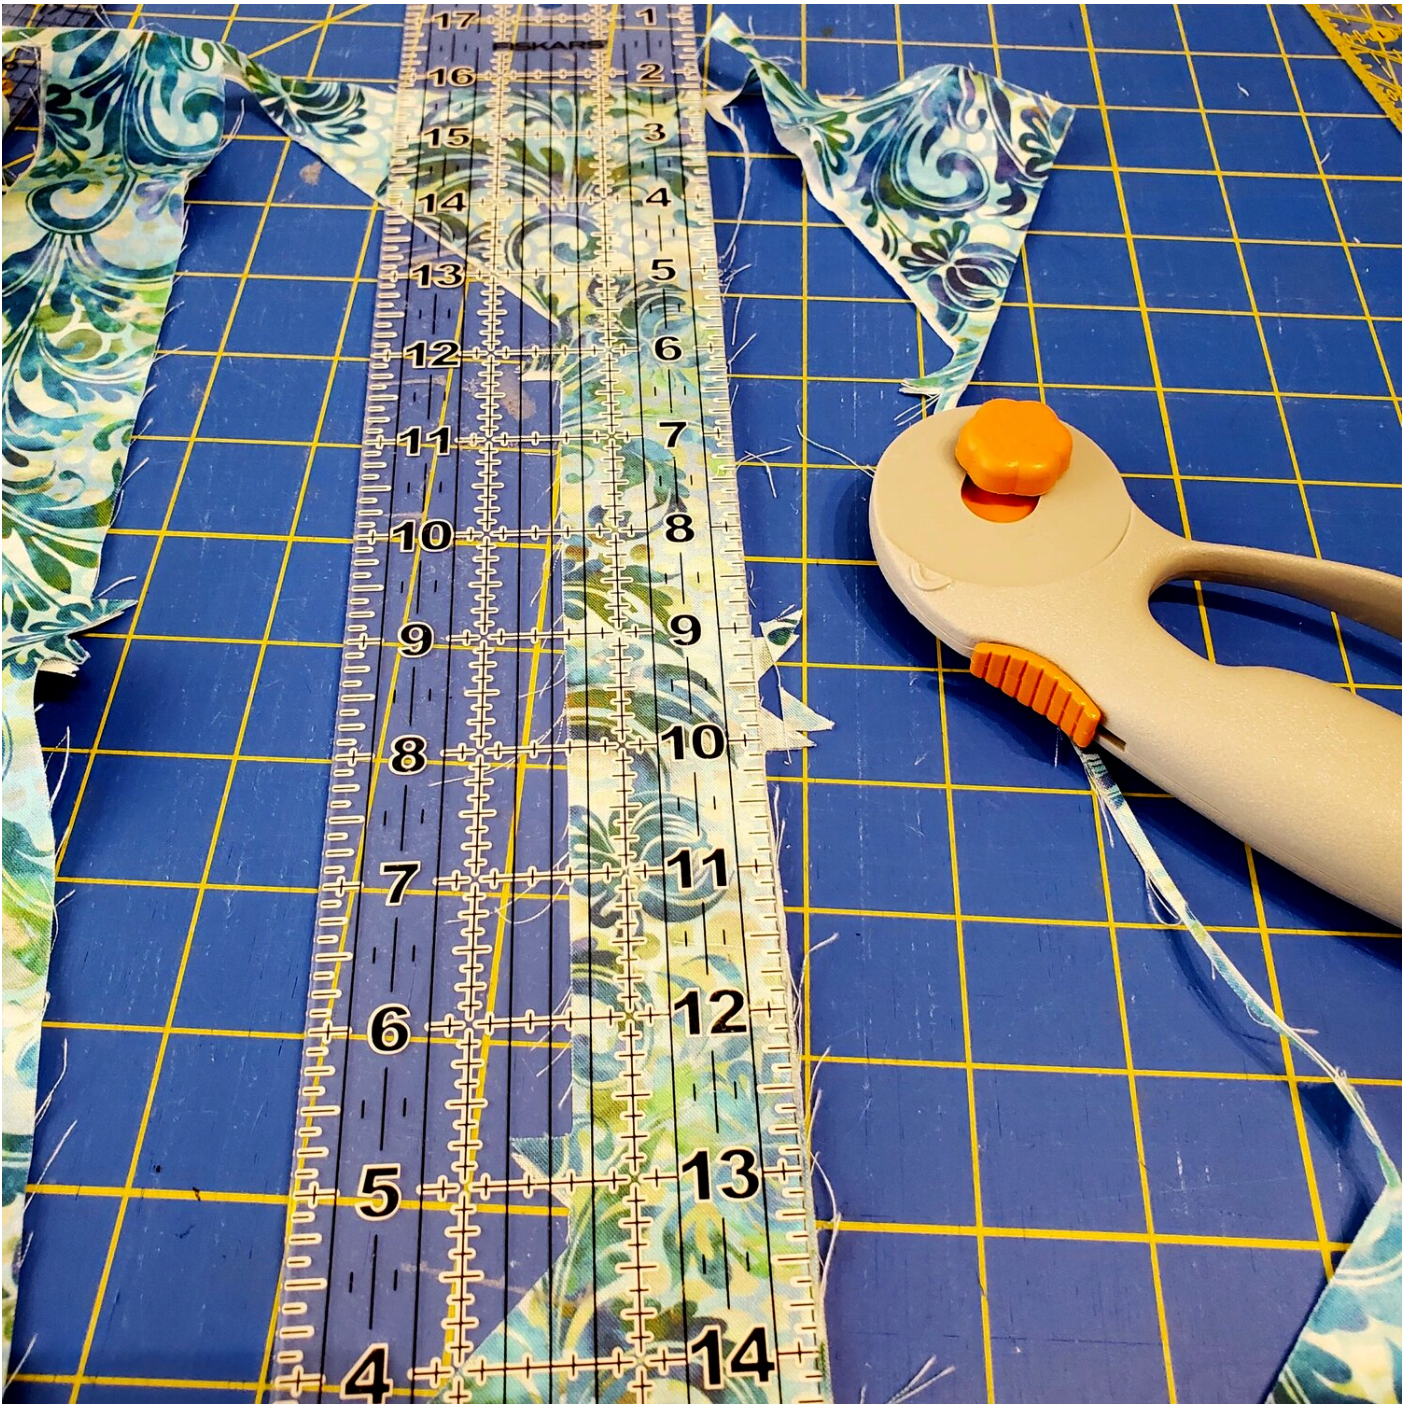
Since I was challenging myself to work strictly from the scrap bag for this project I needed to make some changes to accommodate for the limited strip length. To do this with any pattern you can use a Quilters Assistant Proportional Scale to help you easily adjust your pattern. You can also do some math to figure out how much to reduce your pattern. The original pattern stated strips were to be cut at 20.5” and I had only 14” strips from the scrap bag. I figured it was about 25% smaller so I made the following changes. From the 8 different fabrics you will cut 8 strips approximately 14” long, you will square up the pieces later.
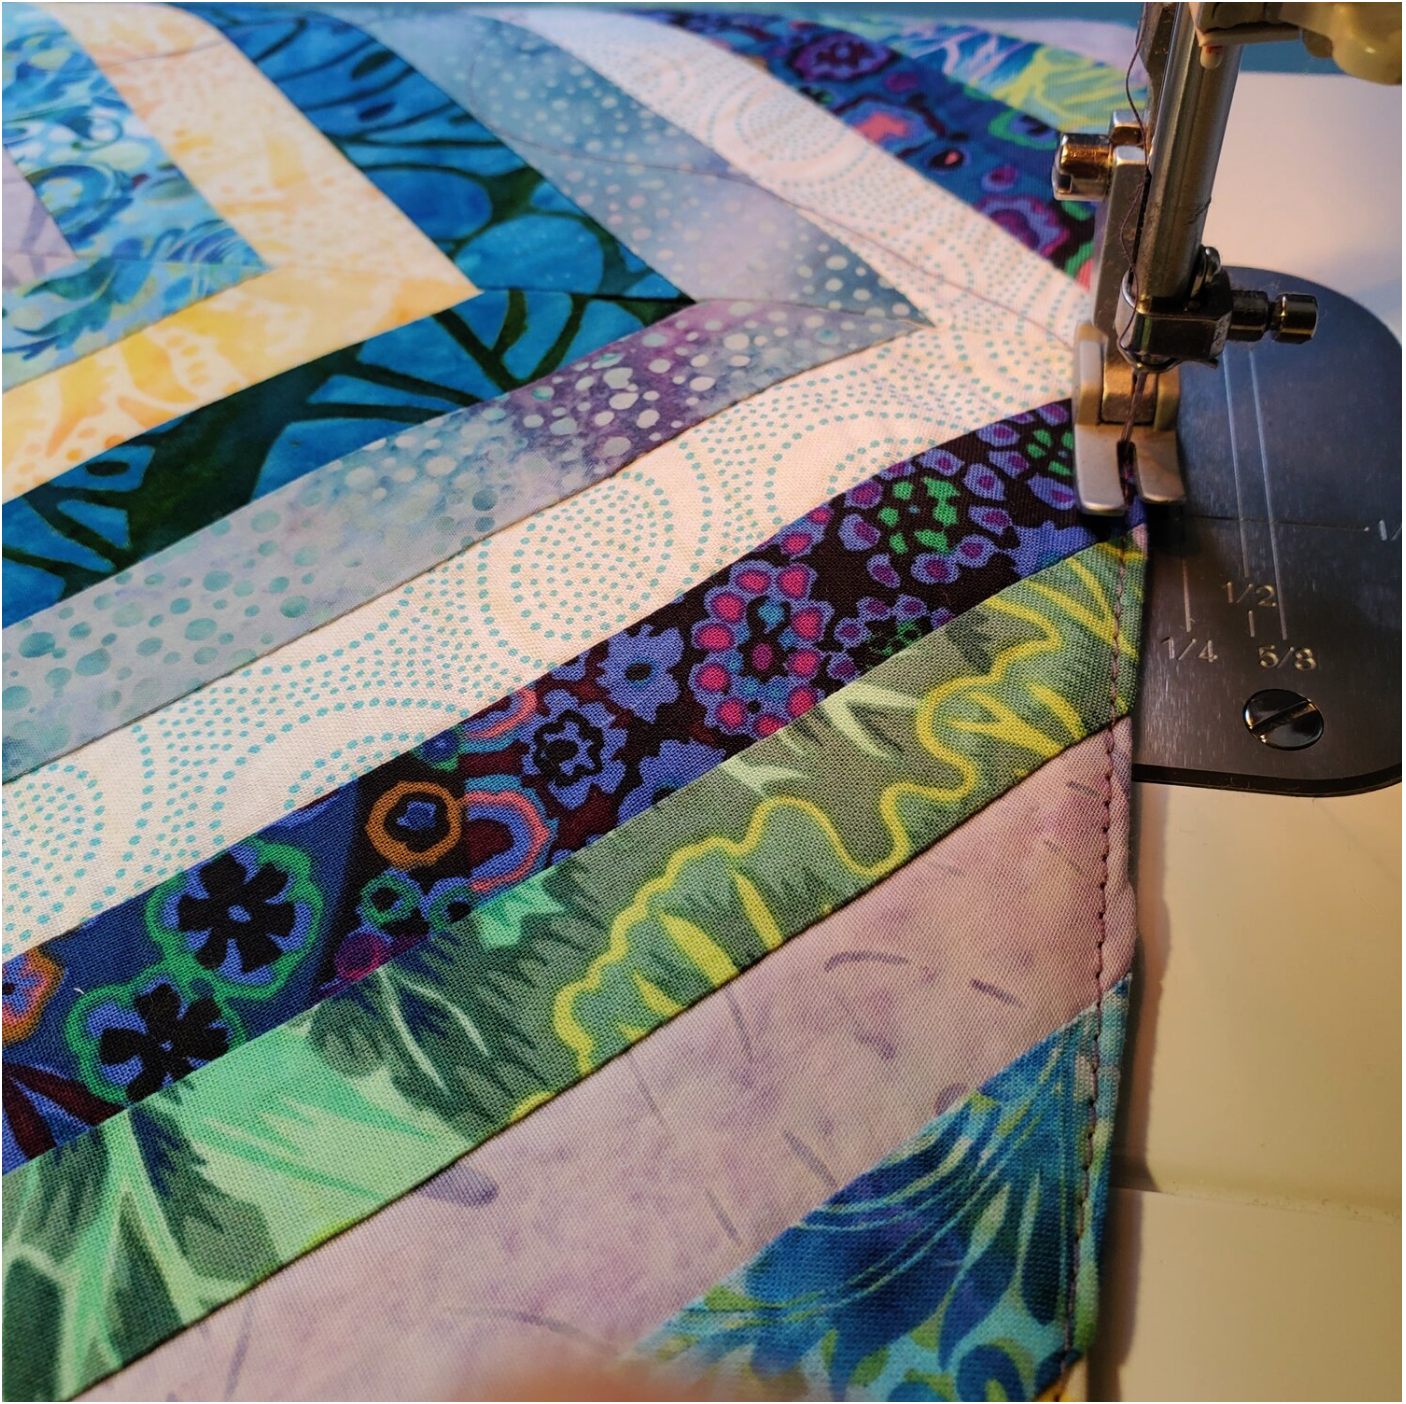
I laid out the strips in different orders till I found a pleasing arrangement of fabrics. Sew the pieces together in pairs. I found it faster to chain piece the strips. Press the seams to the dark side. Sew the pairs together to make a complete block with 8 strips of fabric. Press and square up the blocks to 14” in length.
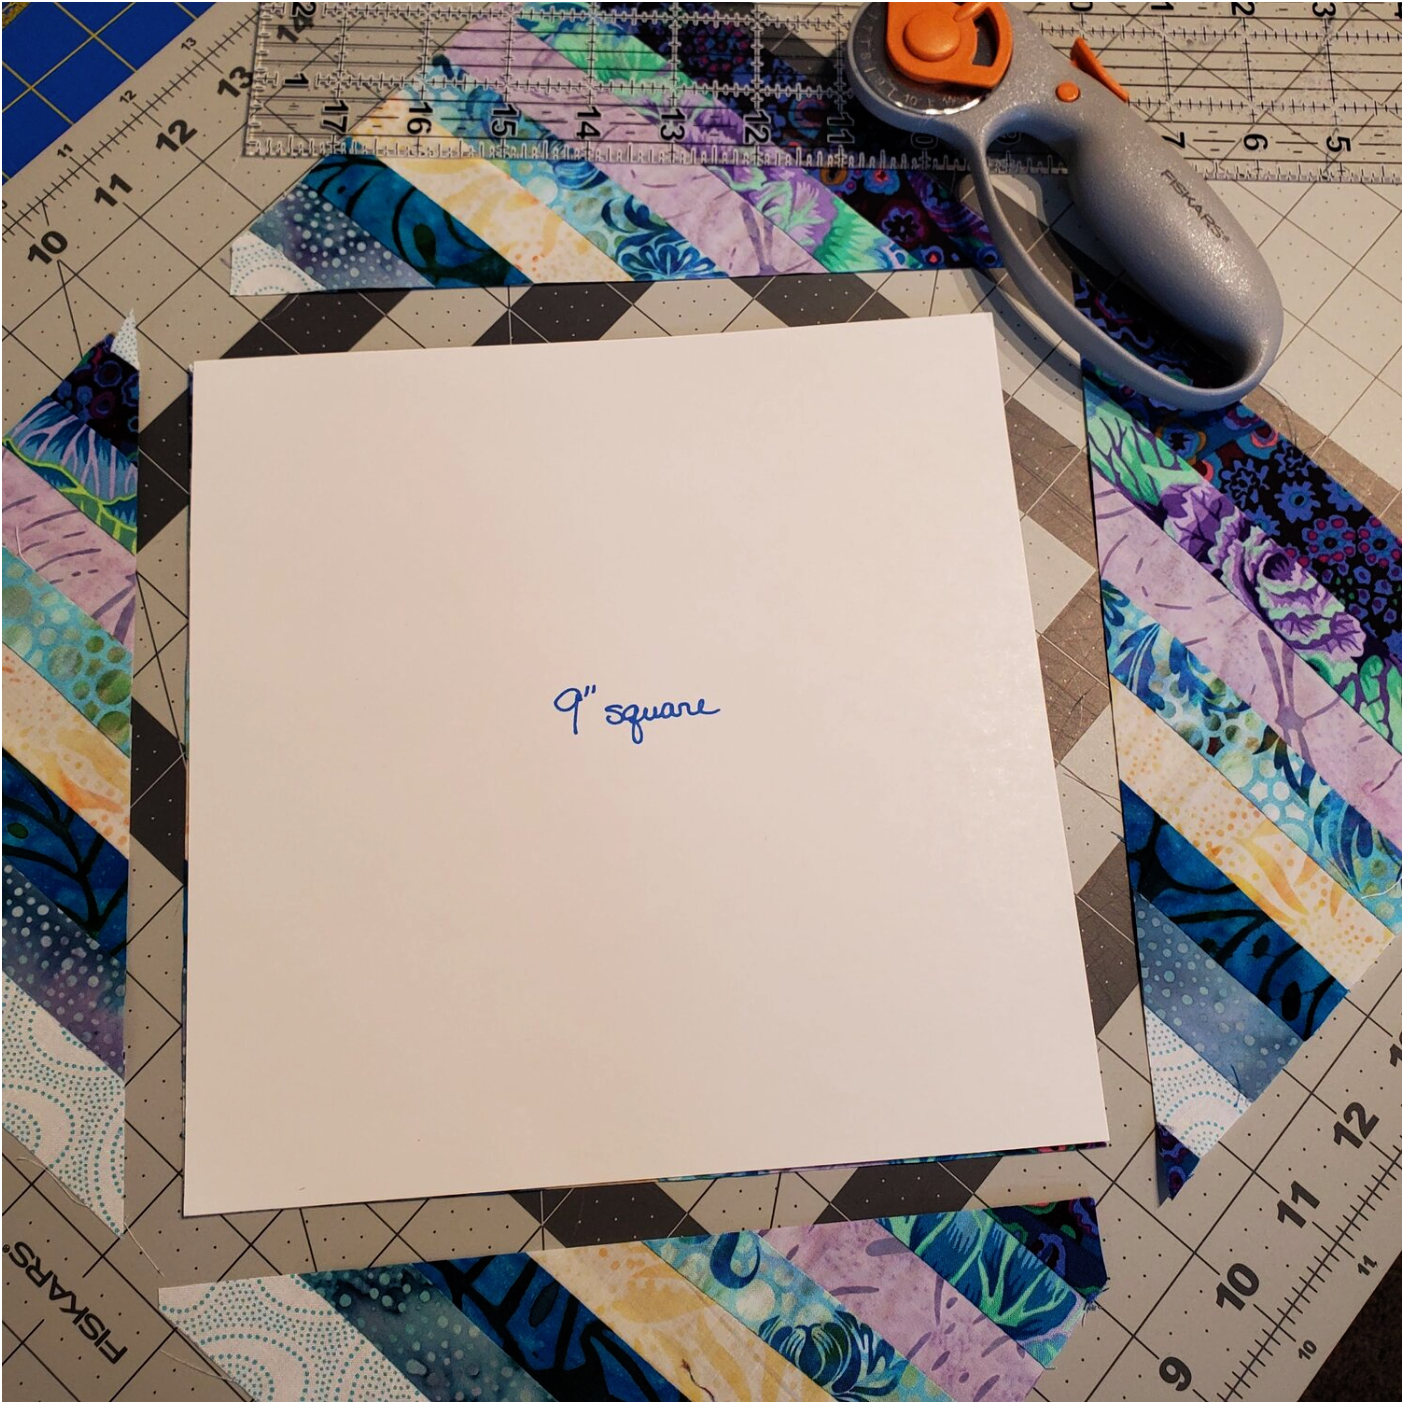
You will make 8 blocks containing the 8 different fabrics and then sew 2 of these together in the same fashion each time making 4 identical blocks. You will need to cut a 9” square paper template for the next step. Lay the template in the middle of the block, align the corners with a seam to keep all the blocks cut the same so they line up in the next step. Use a ruler to cut away the excess fabric.
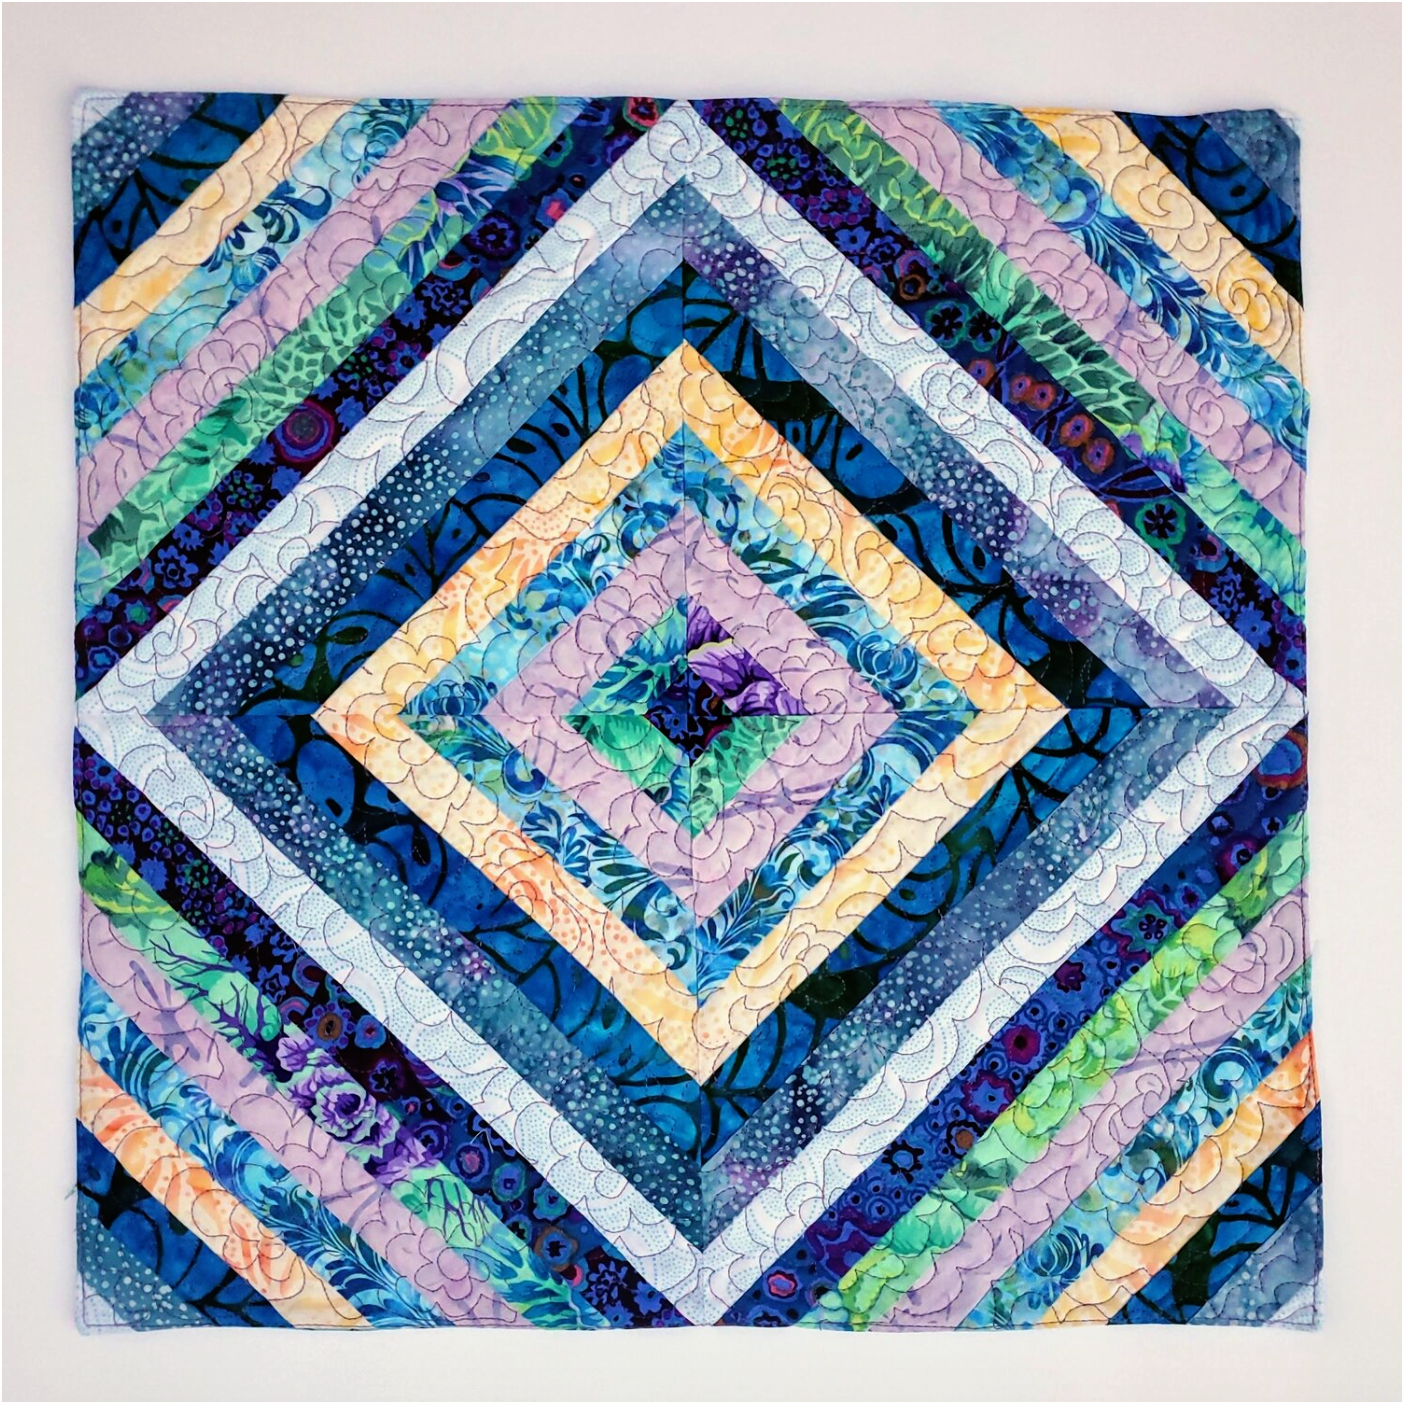
 Repeat this for all four blocks. Lay out the blocks to create the pattern and then carefully pin in place with the right sides together. These pieces are now cut on the bias and can become distorted, so handle very carefully and as little as possible. The goal is to line up the seams to create the look of squares set on the diagonal.
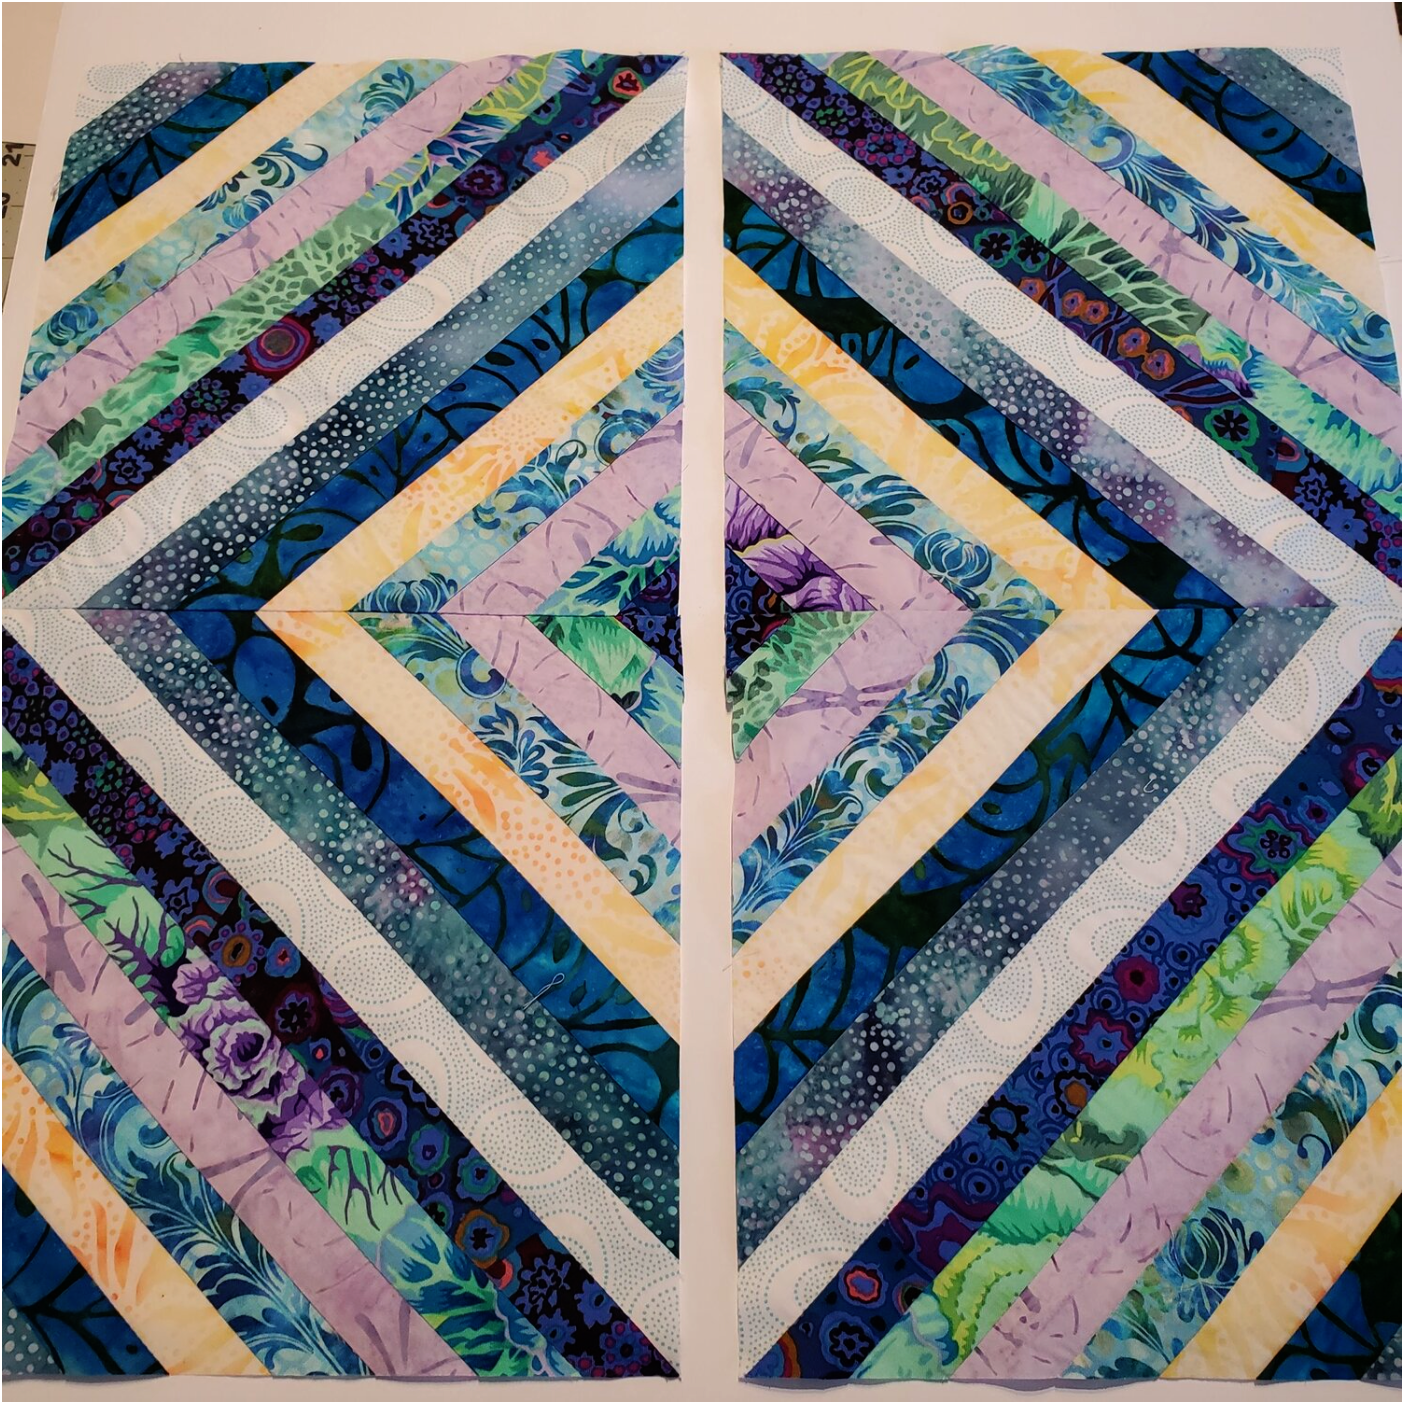
There may be some areas that don’t line up perfectly but the overall look in the end with some quilting will camouflage a slight mismatch. After you have all four blocks sewn together it is time to make a quilt sandwich. I cut my quilt top, backing fabric and batting all the same size. With right sides together, layer the quilt block then backing fabric with the batting on the bottom. Sew around all four sides leaving about a 3” opening to turn right sides out. Press aligning the edges and turn under the opening ¼” to prepare for topstitching. Topstitch ⅛” from the edge sewing the opening closed. I have used this quick method on placemats to avoid adding binding.
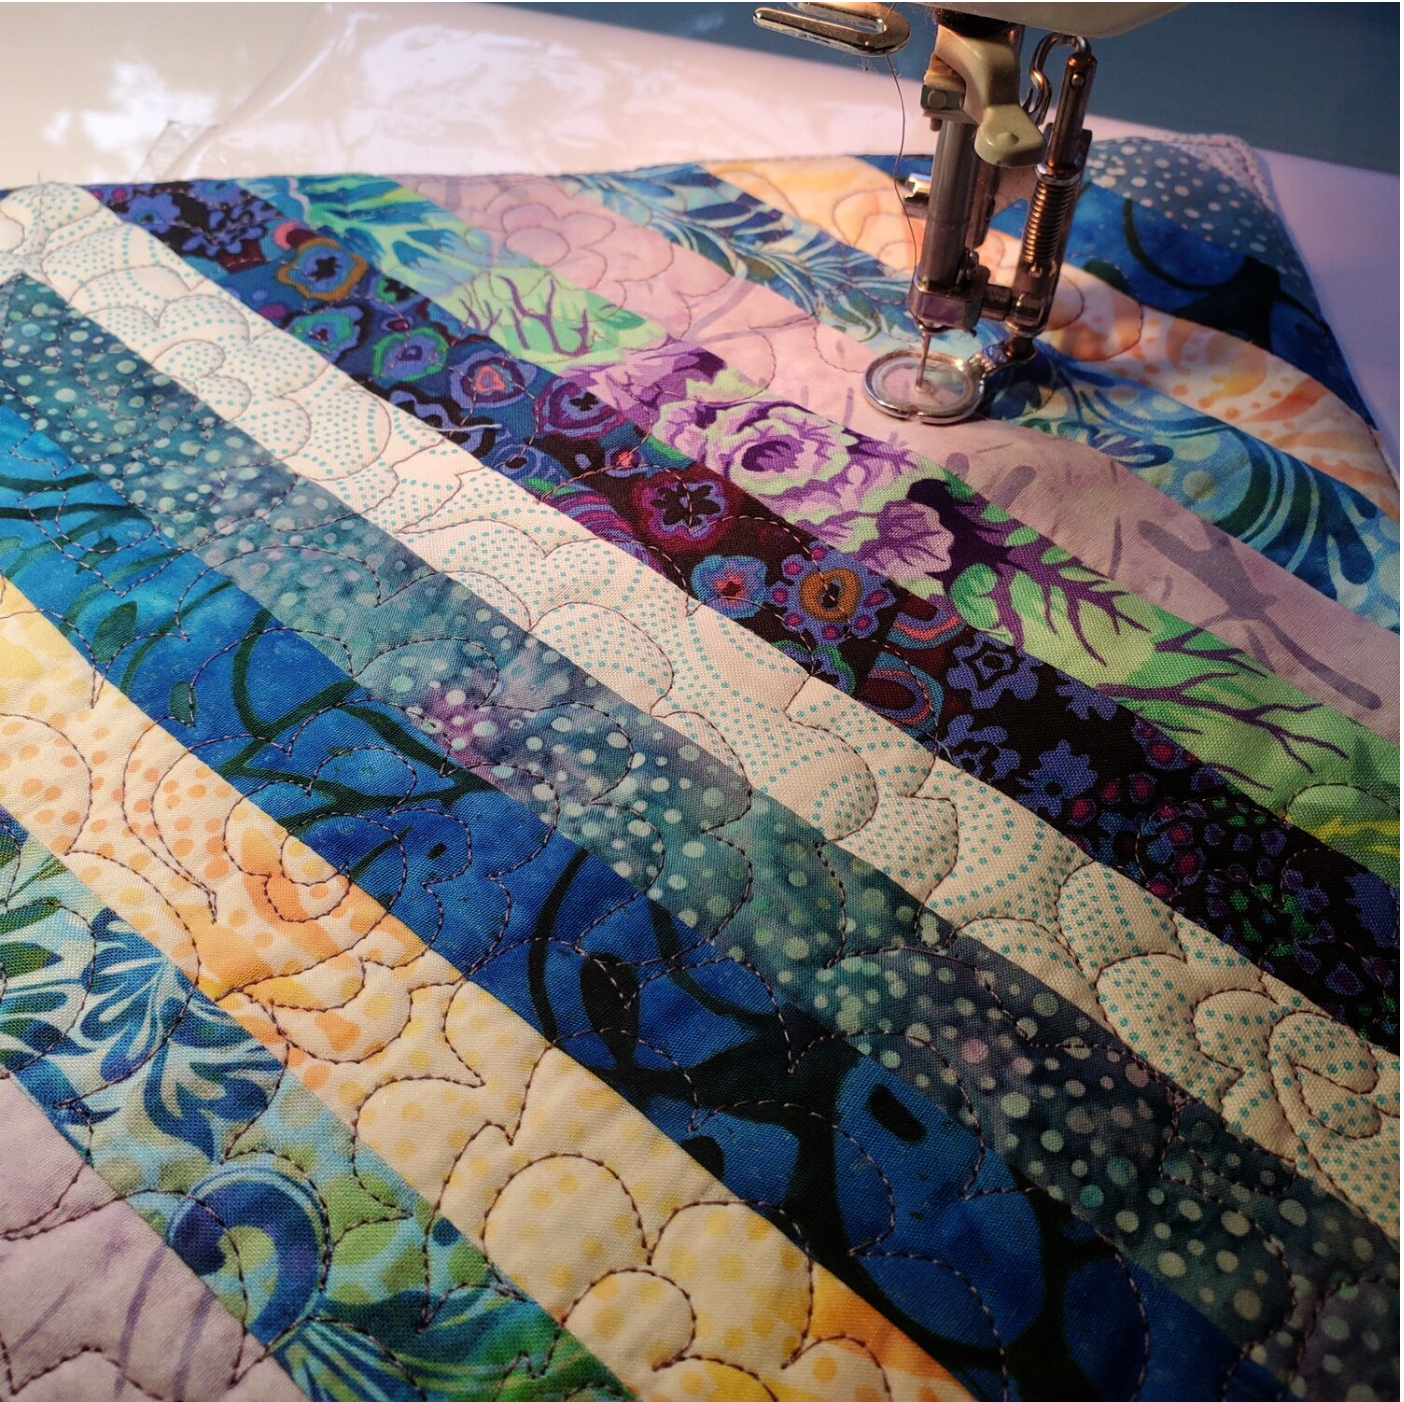
For the next step you could use the walking foot and stitch in the ditch or use this small project to practice a free motion quilting design. I did an all over design to add some interest and texture to the piece. I find that Angela Walters has some very helpful and informative videos to help explain the designs and how to go about quilting it on your project.
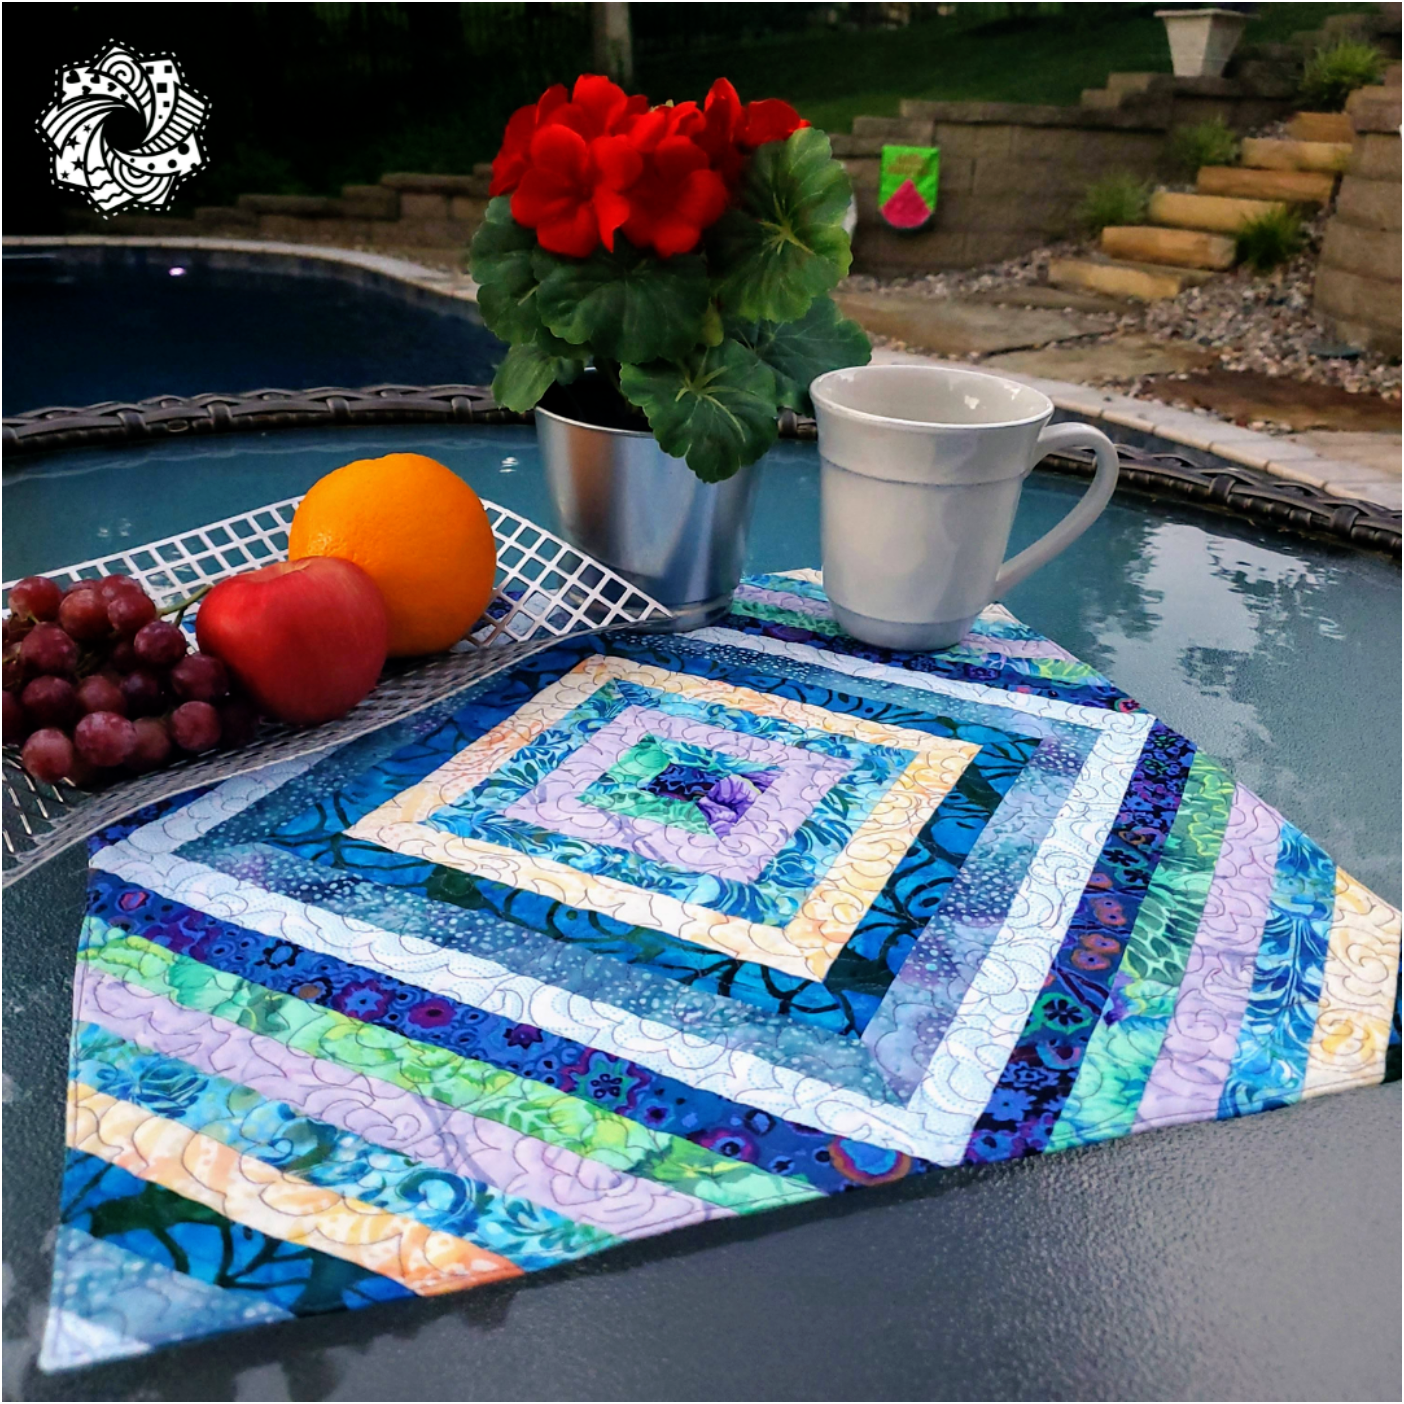
This is a nice size mini wall quilt to hang on the wall for the winter months to brighten your days and then bring it outside in the Summer as a table topper to add a splash of color for a pool side lunch.