

Butterfly Mini Quilt
4th Mar 2021
This Butterfly mini quilt is a fun beginner level sewing project to work on as you await the arrival of Spring. The fabric appropriately named Faith, Hope and Love by Sue Daley for Riley Blake Designs in the March Modern Maker Box are perfect for this project. Here is a link to the free quilt pattern Petite Butterflies by Ariga Mahmoudlou for Robert Kaufman fabrics. This pattern was for a lap quilt that I was able to downsize to the wall hanging by making six of the butterfly blocks.

Materials needed
¾ yard of background fabric
¾ yard of backing fabric
⅓ yard binding fabric
29” x 25” piece of batting
Coordinating thread (I used Aurifil from the Cotton Cuts Chroma Membership)
Assorted fabric from Modern Maker box and the Easter Mystery Fat Quarters for the butterfly wings
To get started you will need to cut some strips of fabric from the assorted fabrics.
From the light colored background fabric cut:
1 WOF cut 3 ½” wide. Subcut into 12 squares 3 ½”
1 WOF cut 2” wide. Subcut into 12 squares 2”
1 WOF cut 1 ½” wide. Subcut into 1 ½” x 3 ½” strips
2 WOF cut 1 ½’ wide. Subcut into 36 squares 1 ½”
1 WOF cut 1” wide. Subcut into six 1x3” strips and six 1 x 1 ½’ strips
5 WOF cut 2 ½” for sashing and borders
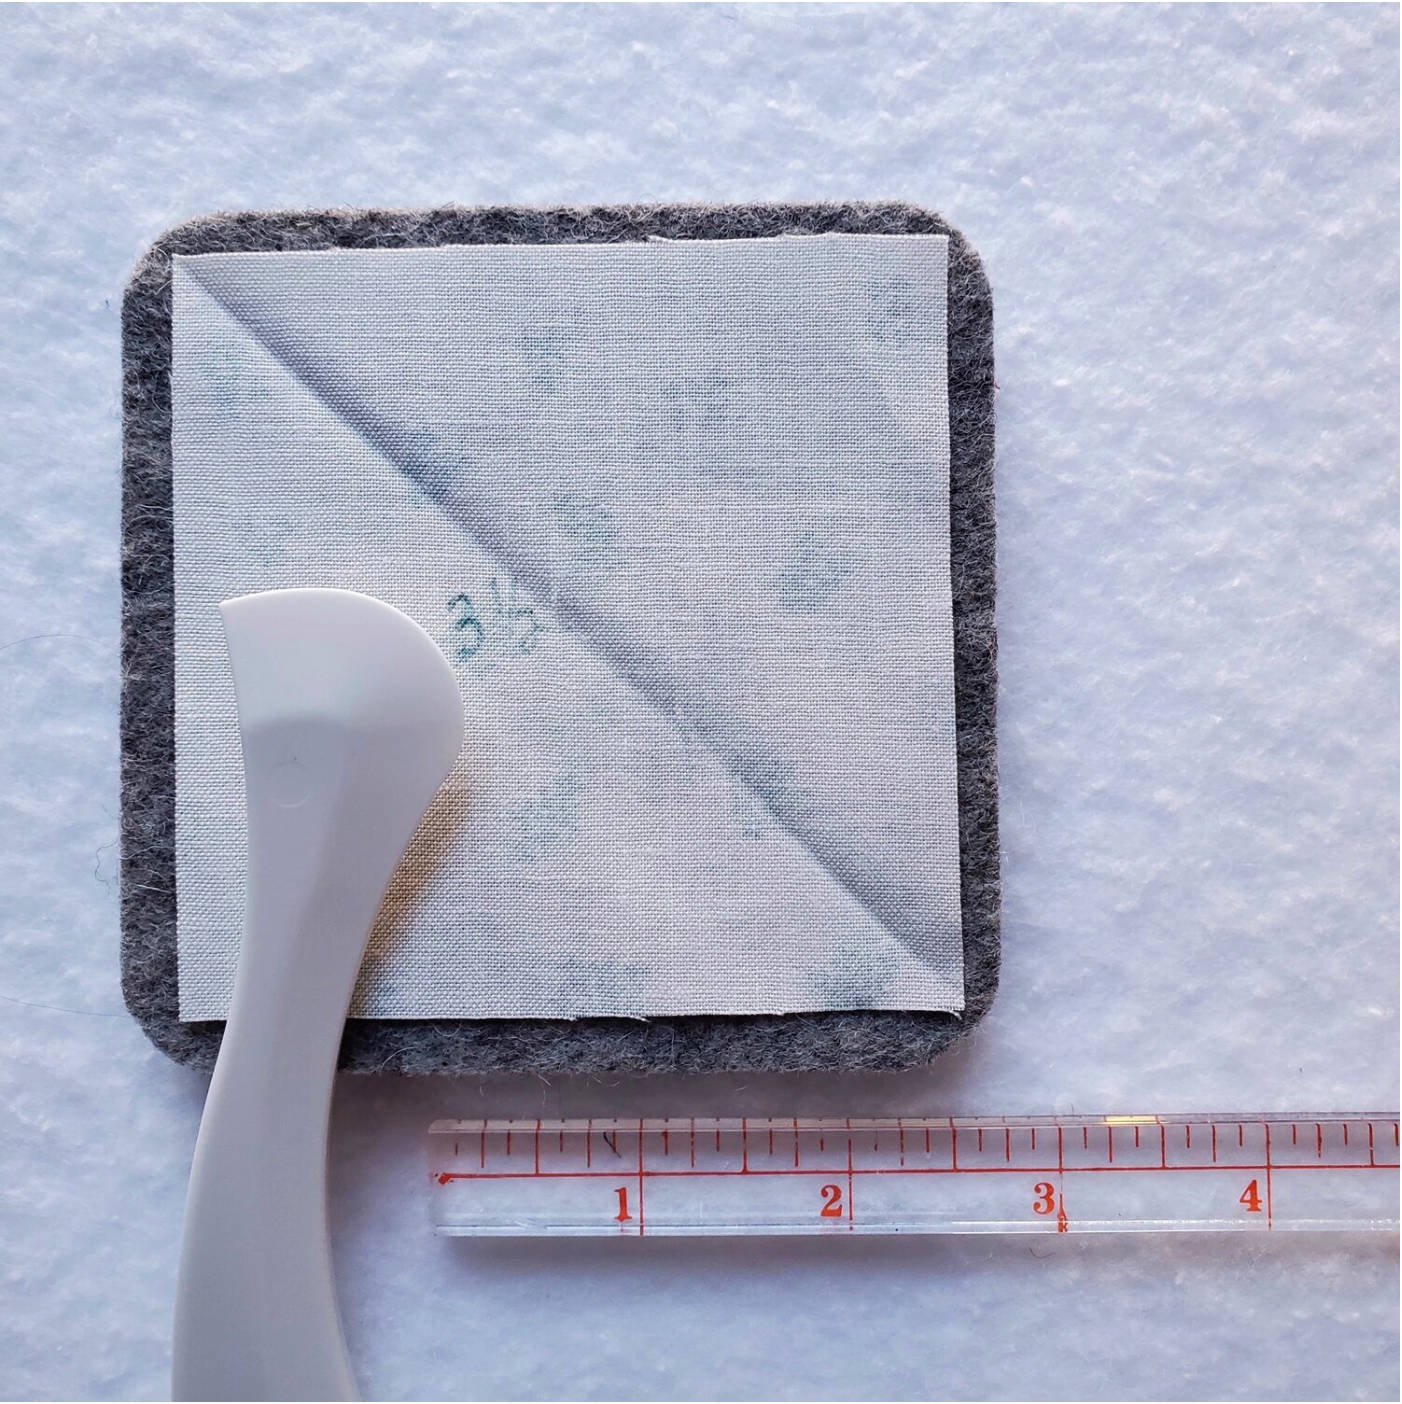
I used a Hera marker on the 1 ½”, 2” and 3 ½” squares to mark the diagonal sewing line.
For the butterfly, cut from assorted fabrics from the Moden Maker and Classic Box
12 squares 4 ½”
12 squares 3 ½”
6 rectangles 1”x 4” for butterfly center
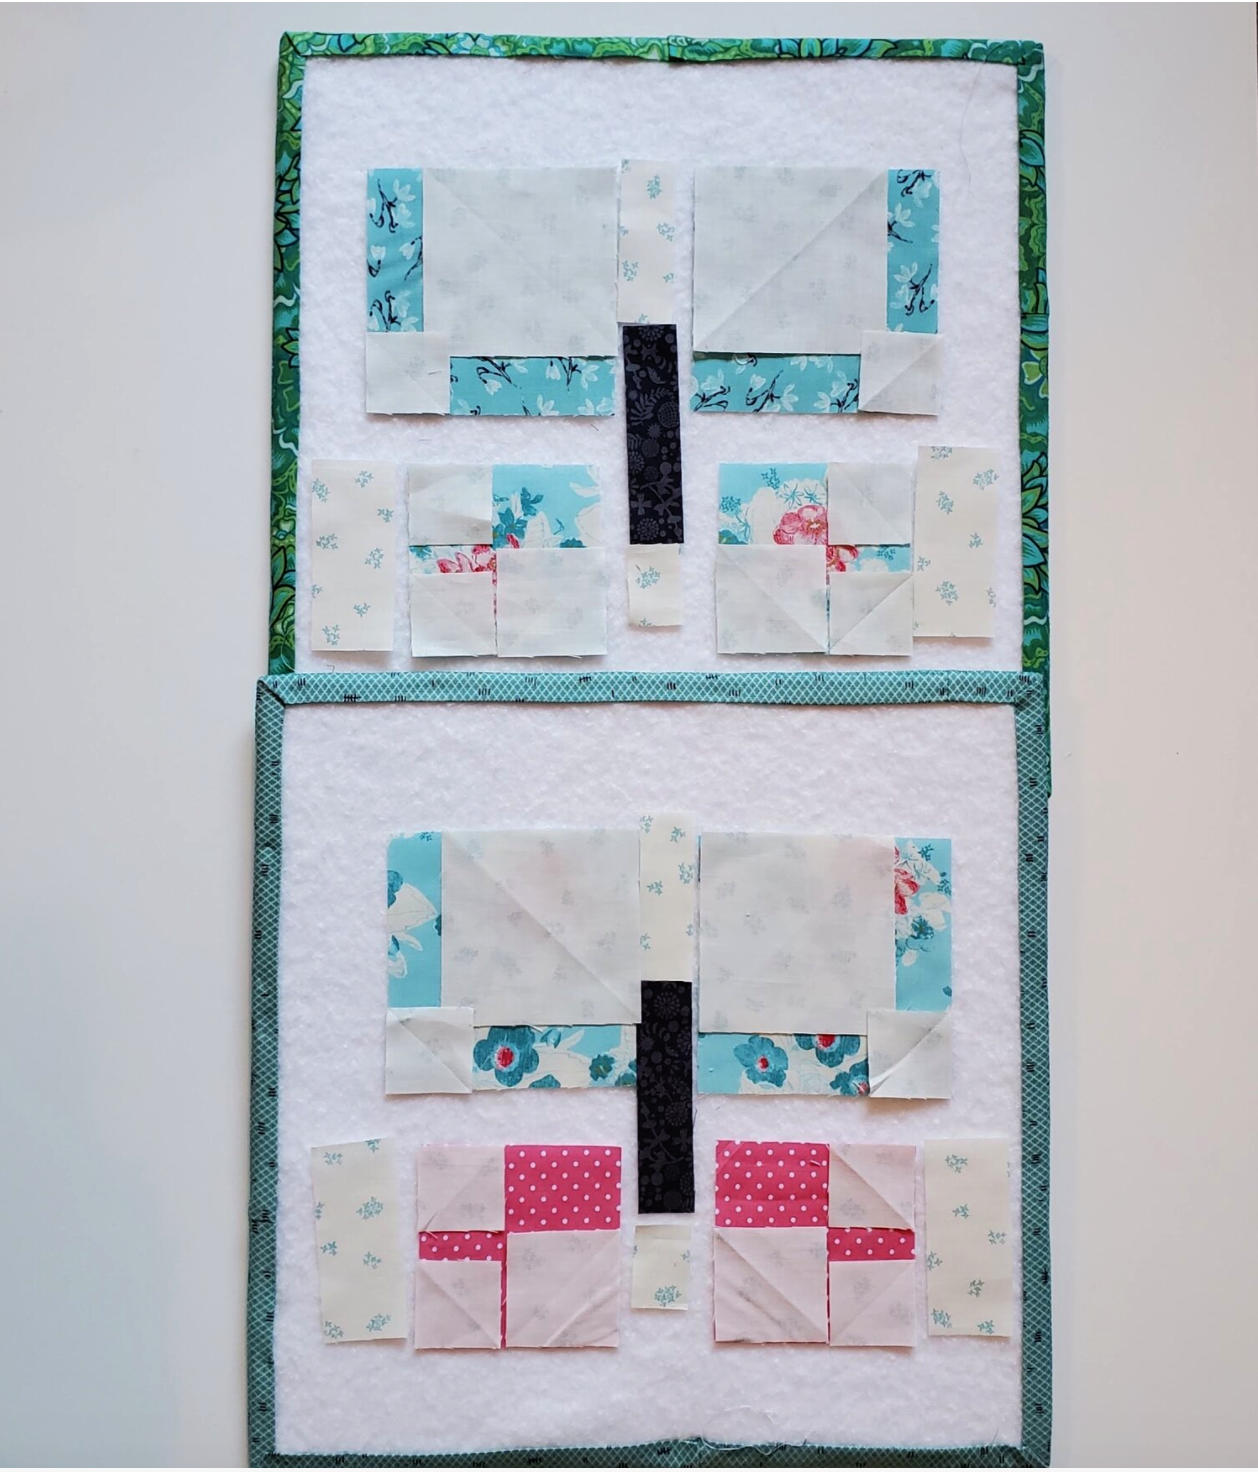
To prepare the blocks I like to use these Lori Holt design boards to organize the pieces for each block.
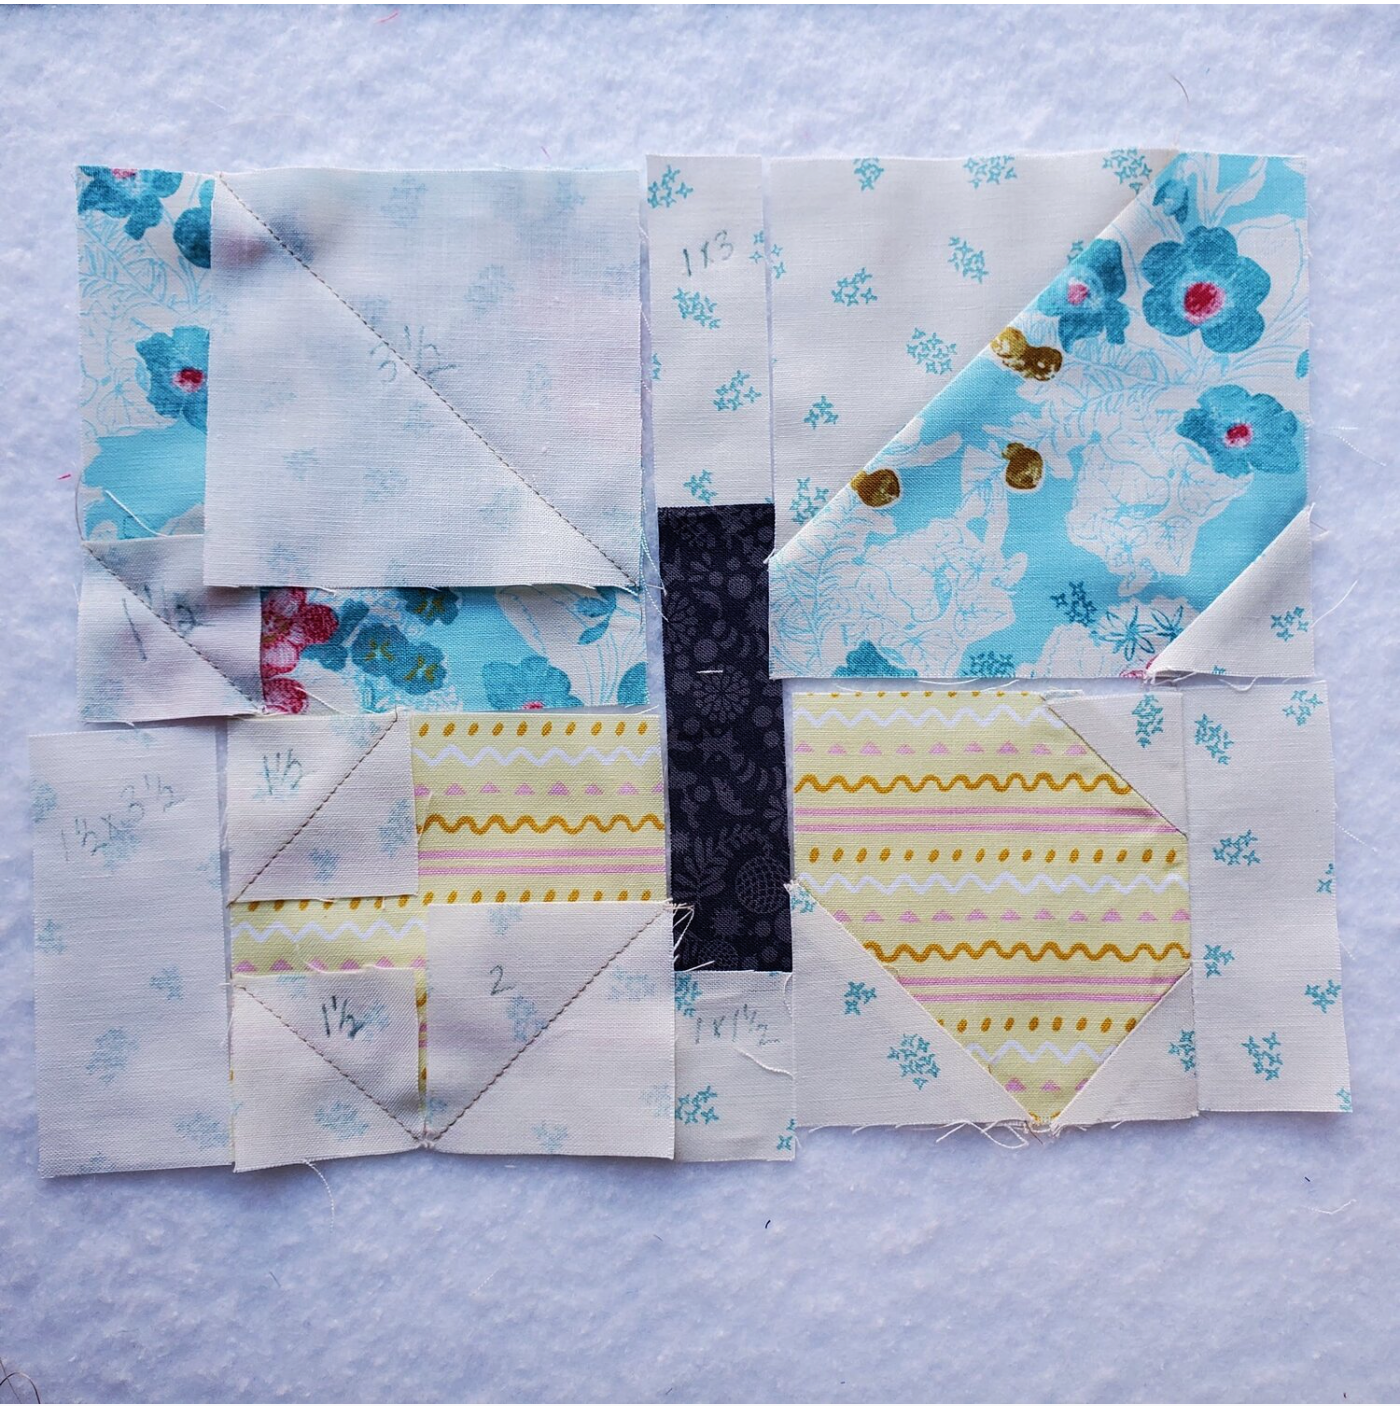
This helped me decide ahead of time on the color placement for the wings of the butterfly. Carefully pick up each section and sew the diagonal seams first. Take note that the upper wings are the 4 ¼” squares and the lower are the 3 ½” squares of butterfly fabric. Here is one with the square sizes marked for clarity as you assemble the block. The left side shows the seams before trimming to ¼”, the right side is completed.
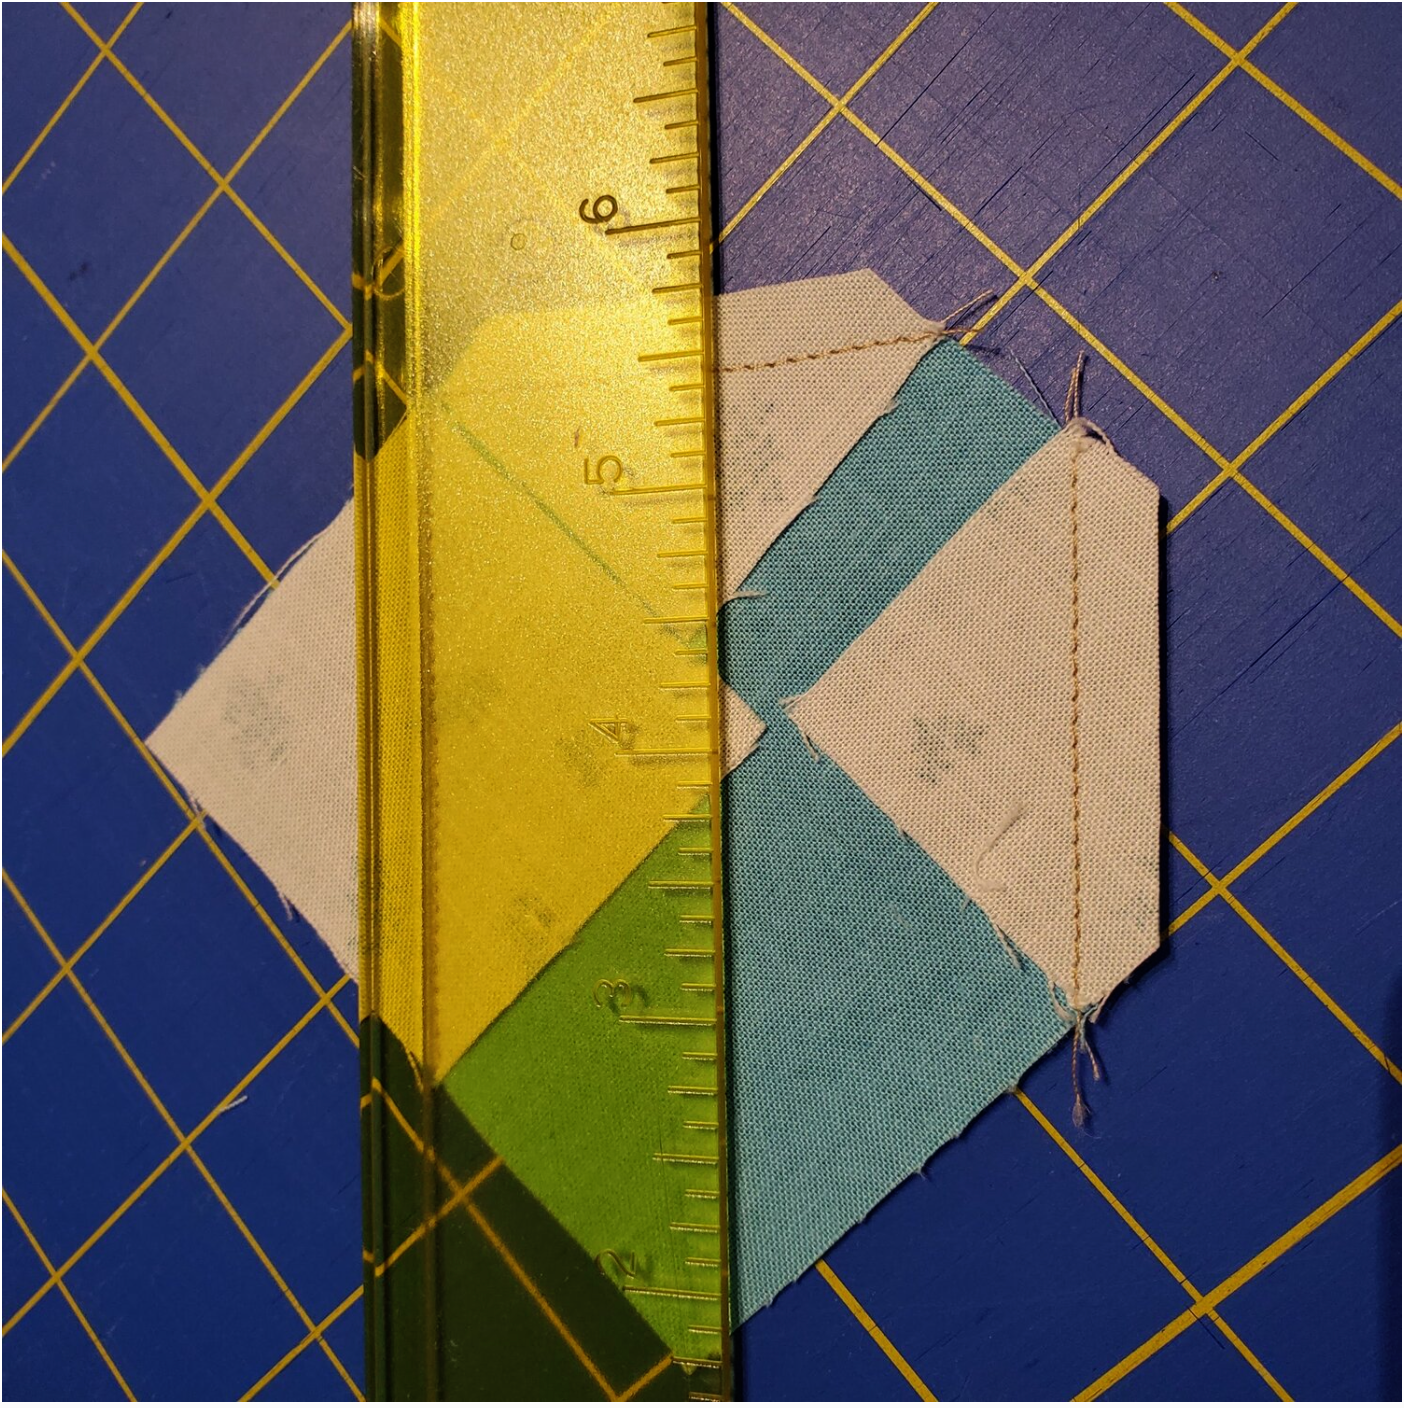
Sew all the wing blocks, then trim and press the seams. I find the Add a Quarter plus Ruler helpful to use to trim the pieces accurately.
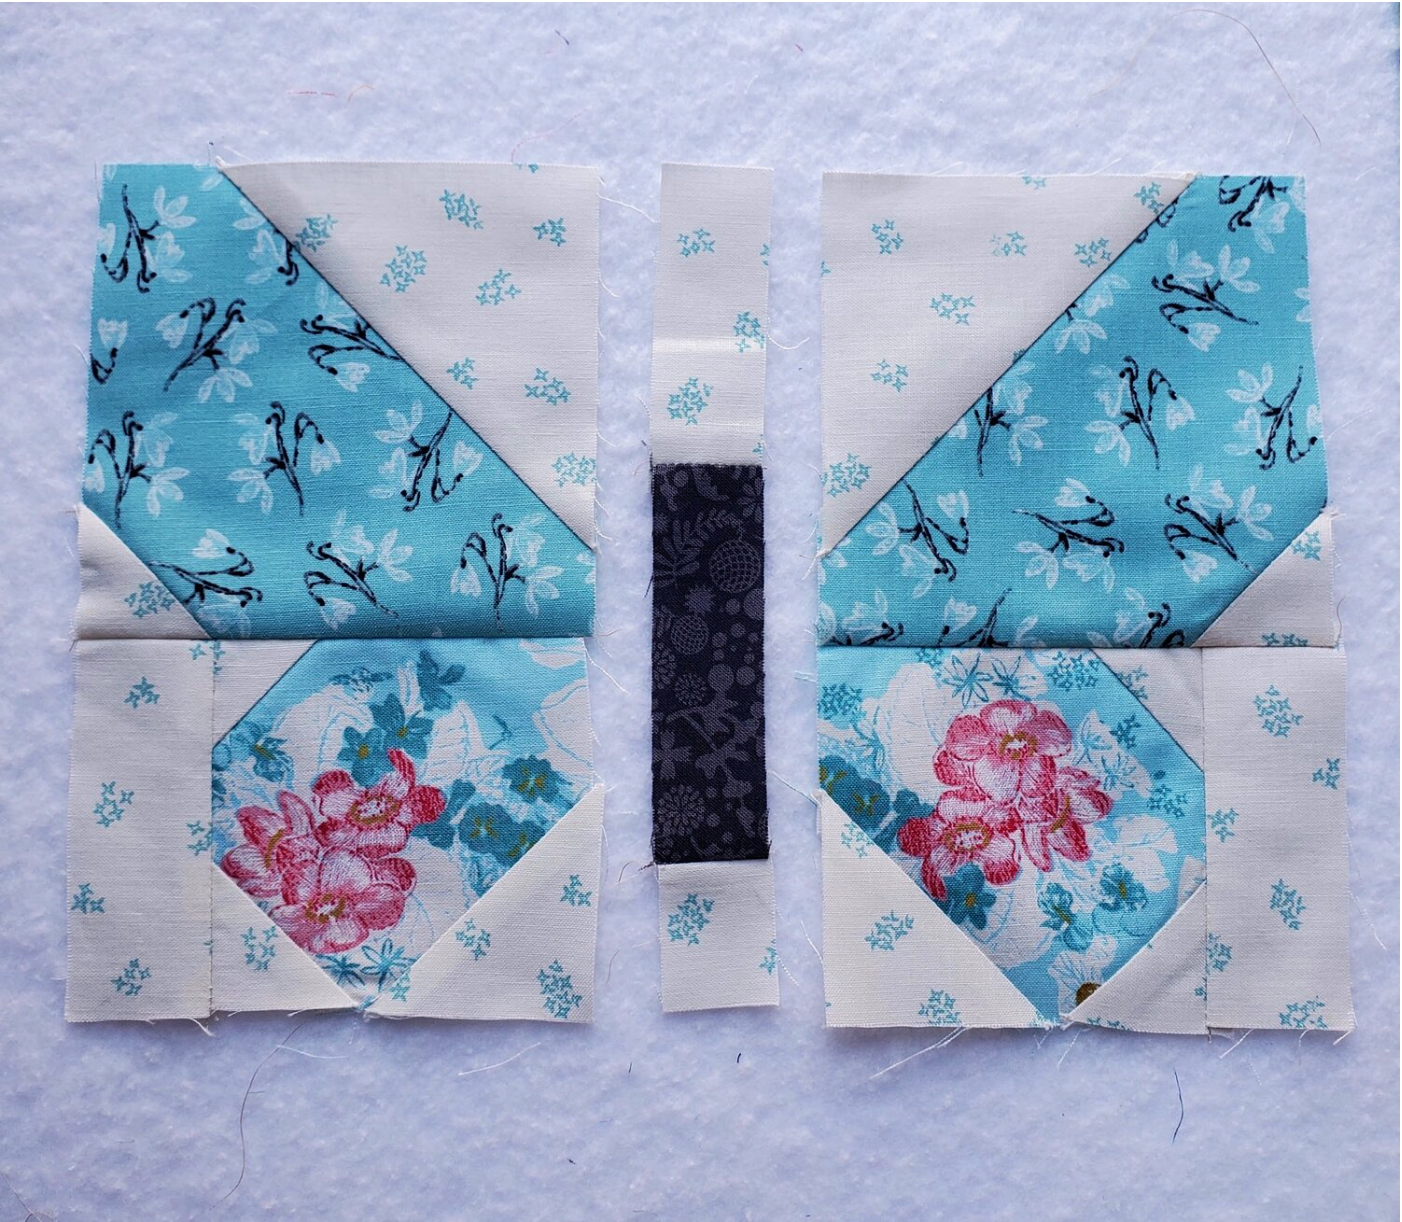
Next sew the 1 ½” x 3 ½” background fabric rectangle to the lower wing and press the seam. Sew the lower wing to the upper wing on all the pieces and press. Sew all the 1” wide butterfly center sections for the six blocks. The final step to the block is to sew the wings to the center butterfly piece.
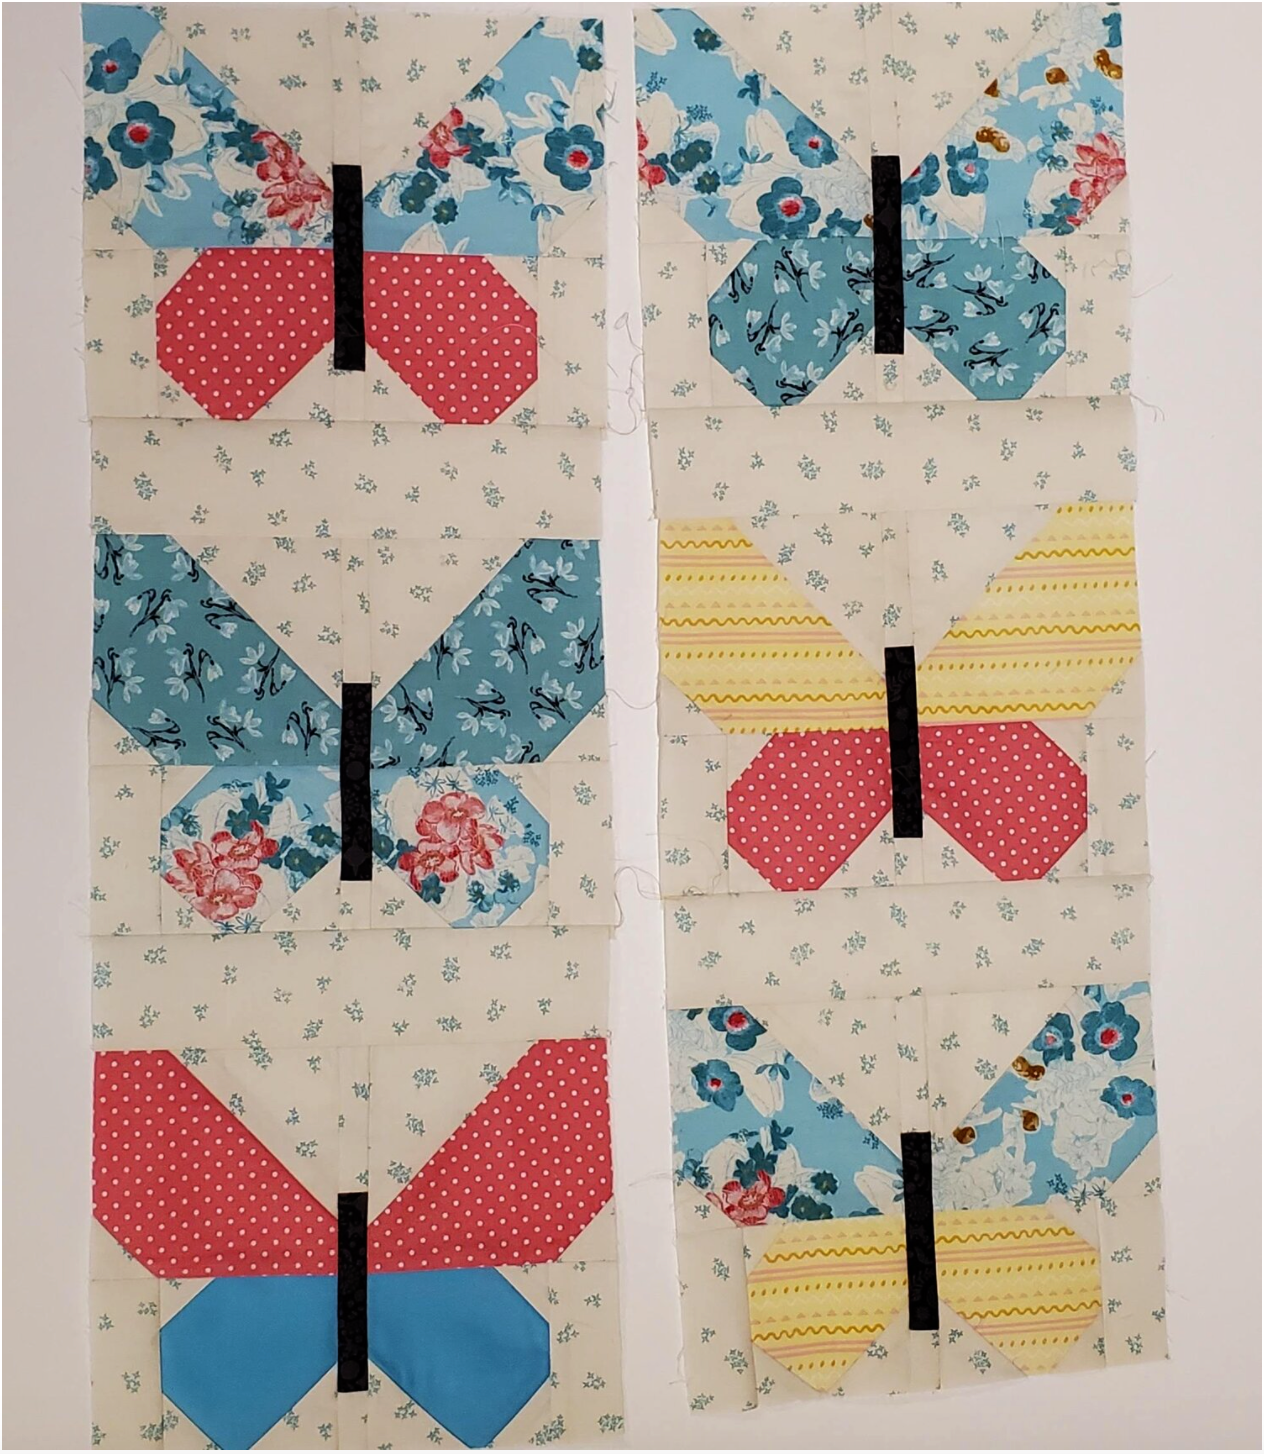
Now that the six blocks are complete they should measure approximately 8 ¼” x 7”. Lay out the blocks to determine the placement. It is time to add the 2 ½” sashing pieces to the blocks as pictured.
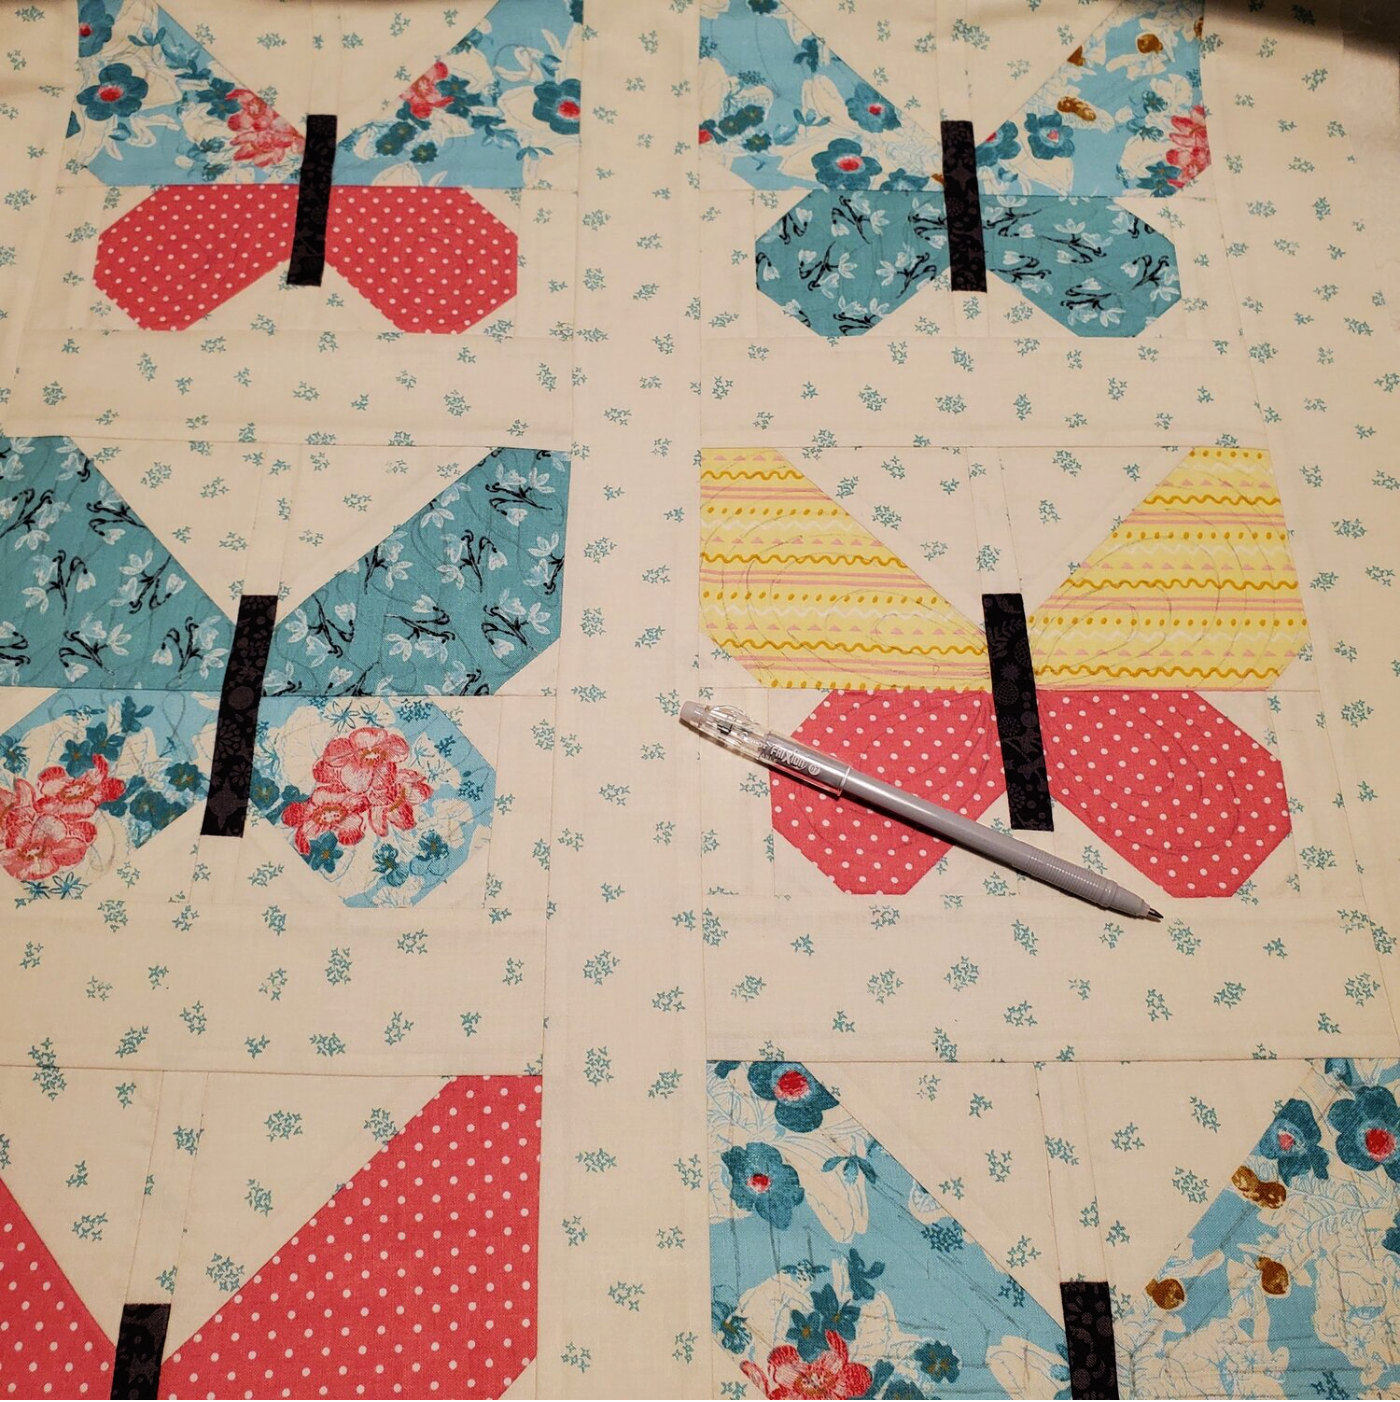
Now sew 2 ½” sashing piece to the center. Sew the 2 ½” borders to the vertical sides then the horizontal sides of the quilt. Cut your batting and backing to make your quilt sandwich using your preferred method of basting. I used a Frixion pen to make some general guidelines for free motion quilting on each butterfly. The ink disappears with the heat of the iron. (Be sure to test this on your fabric first)
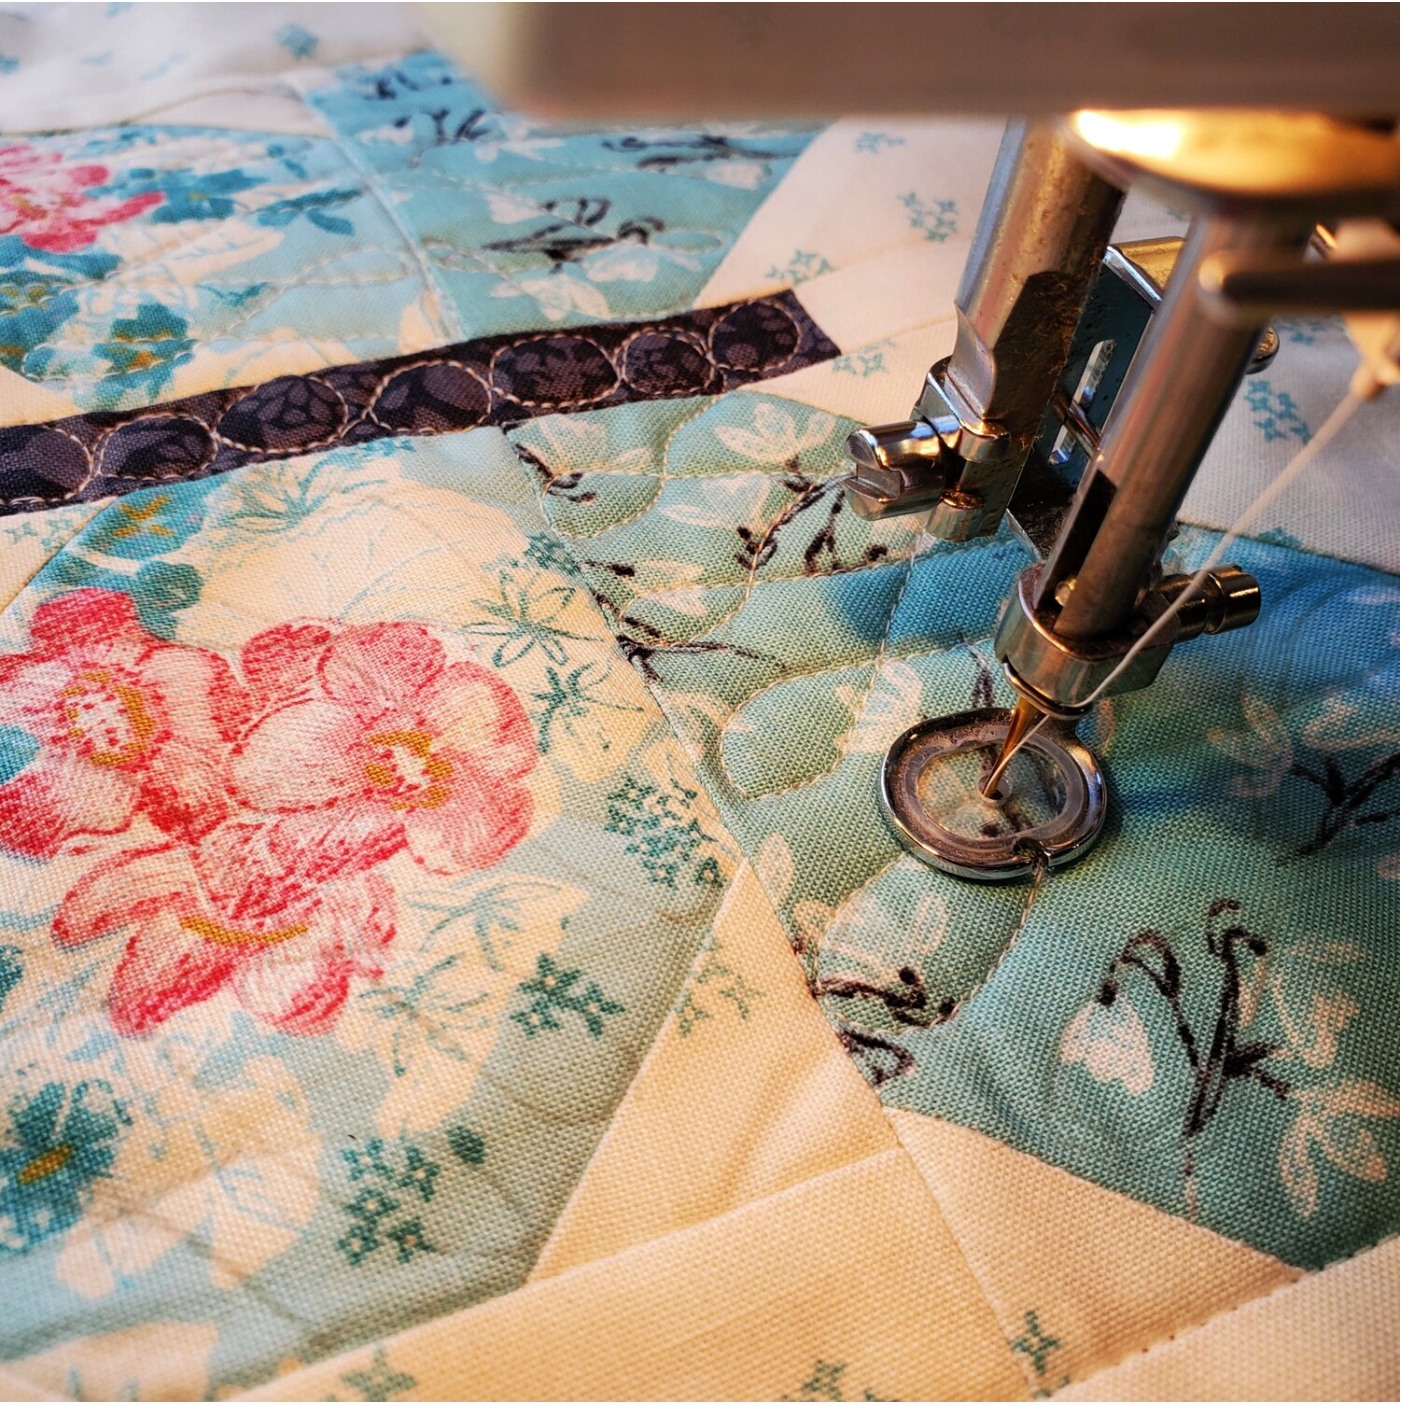
I am still learning free motion quilting and these small projects are a great way to practice without feeling overwhelmed by a large quilt. I decided do a different design in each block.
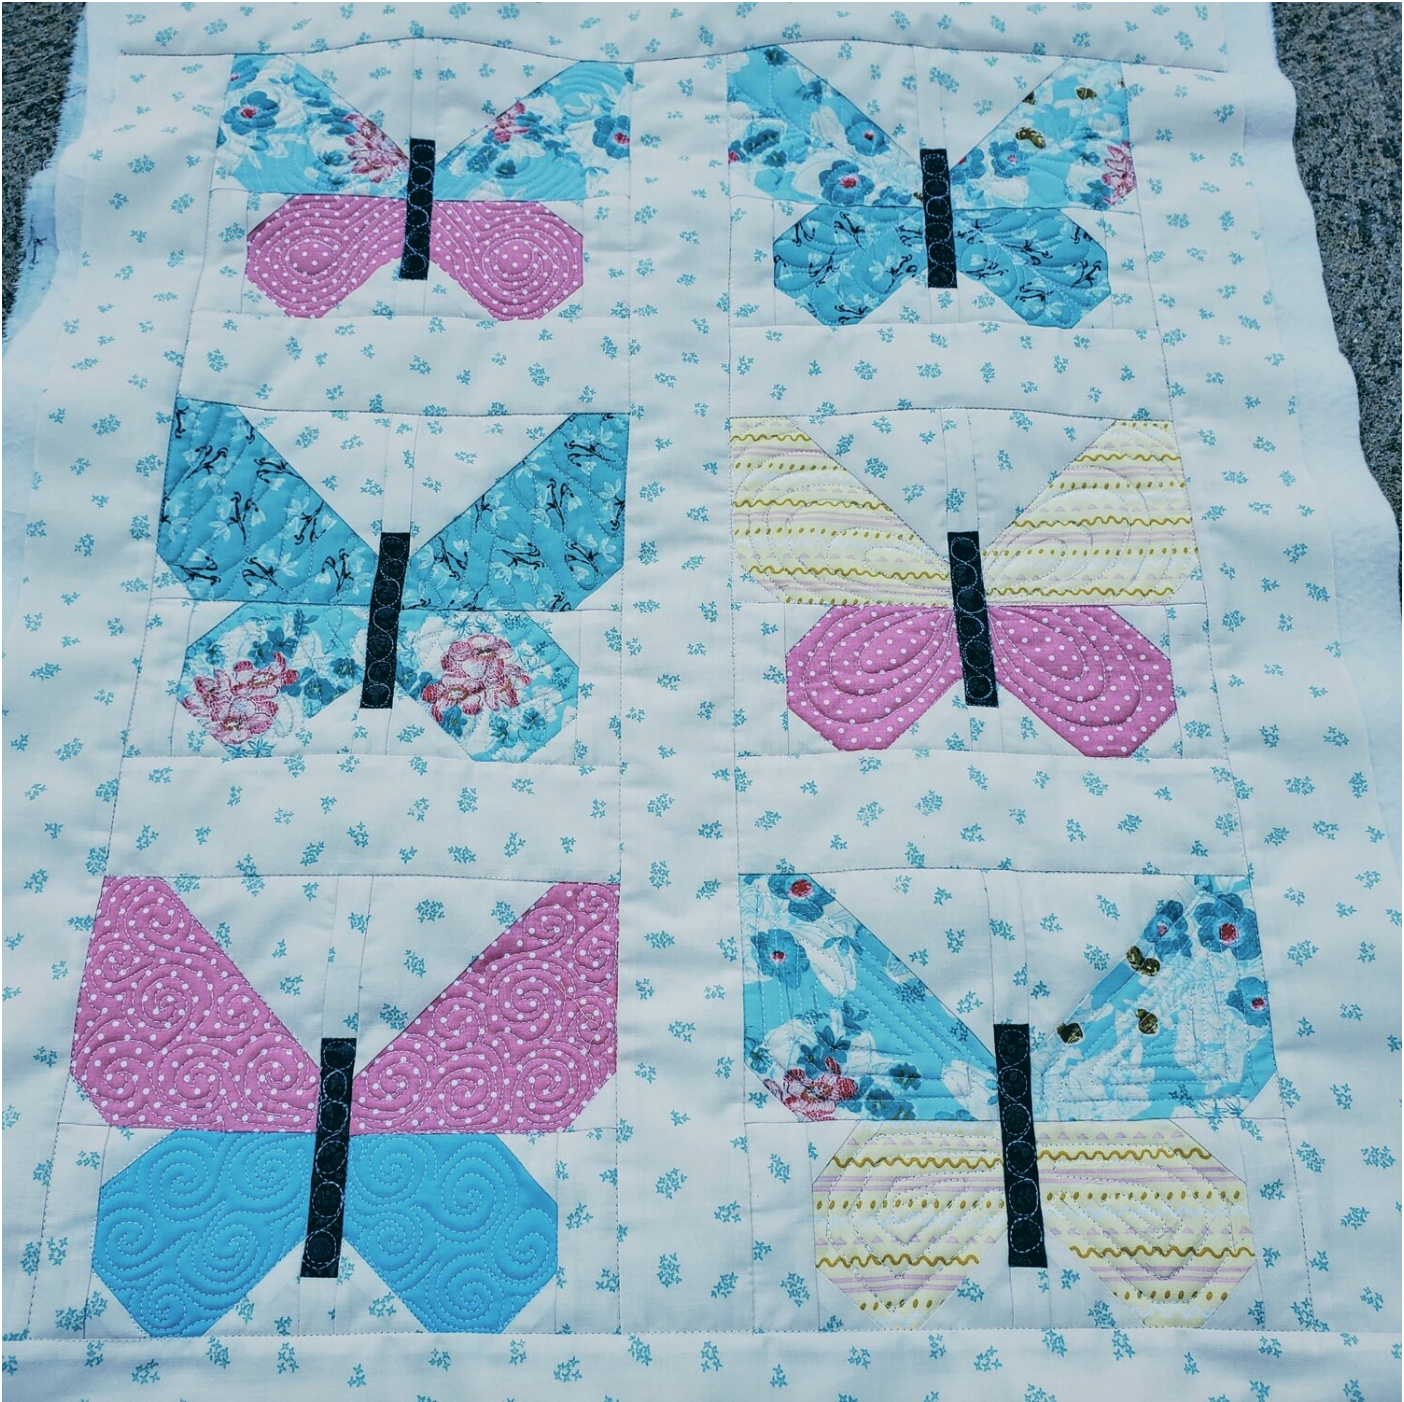
Drawing the lines ahead of time gives me the confidence to tackle new designs in the butterfly wings. Here is what it looked like after only quilting the butterflies.
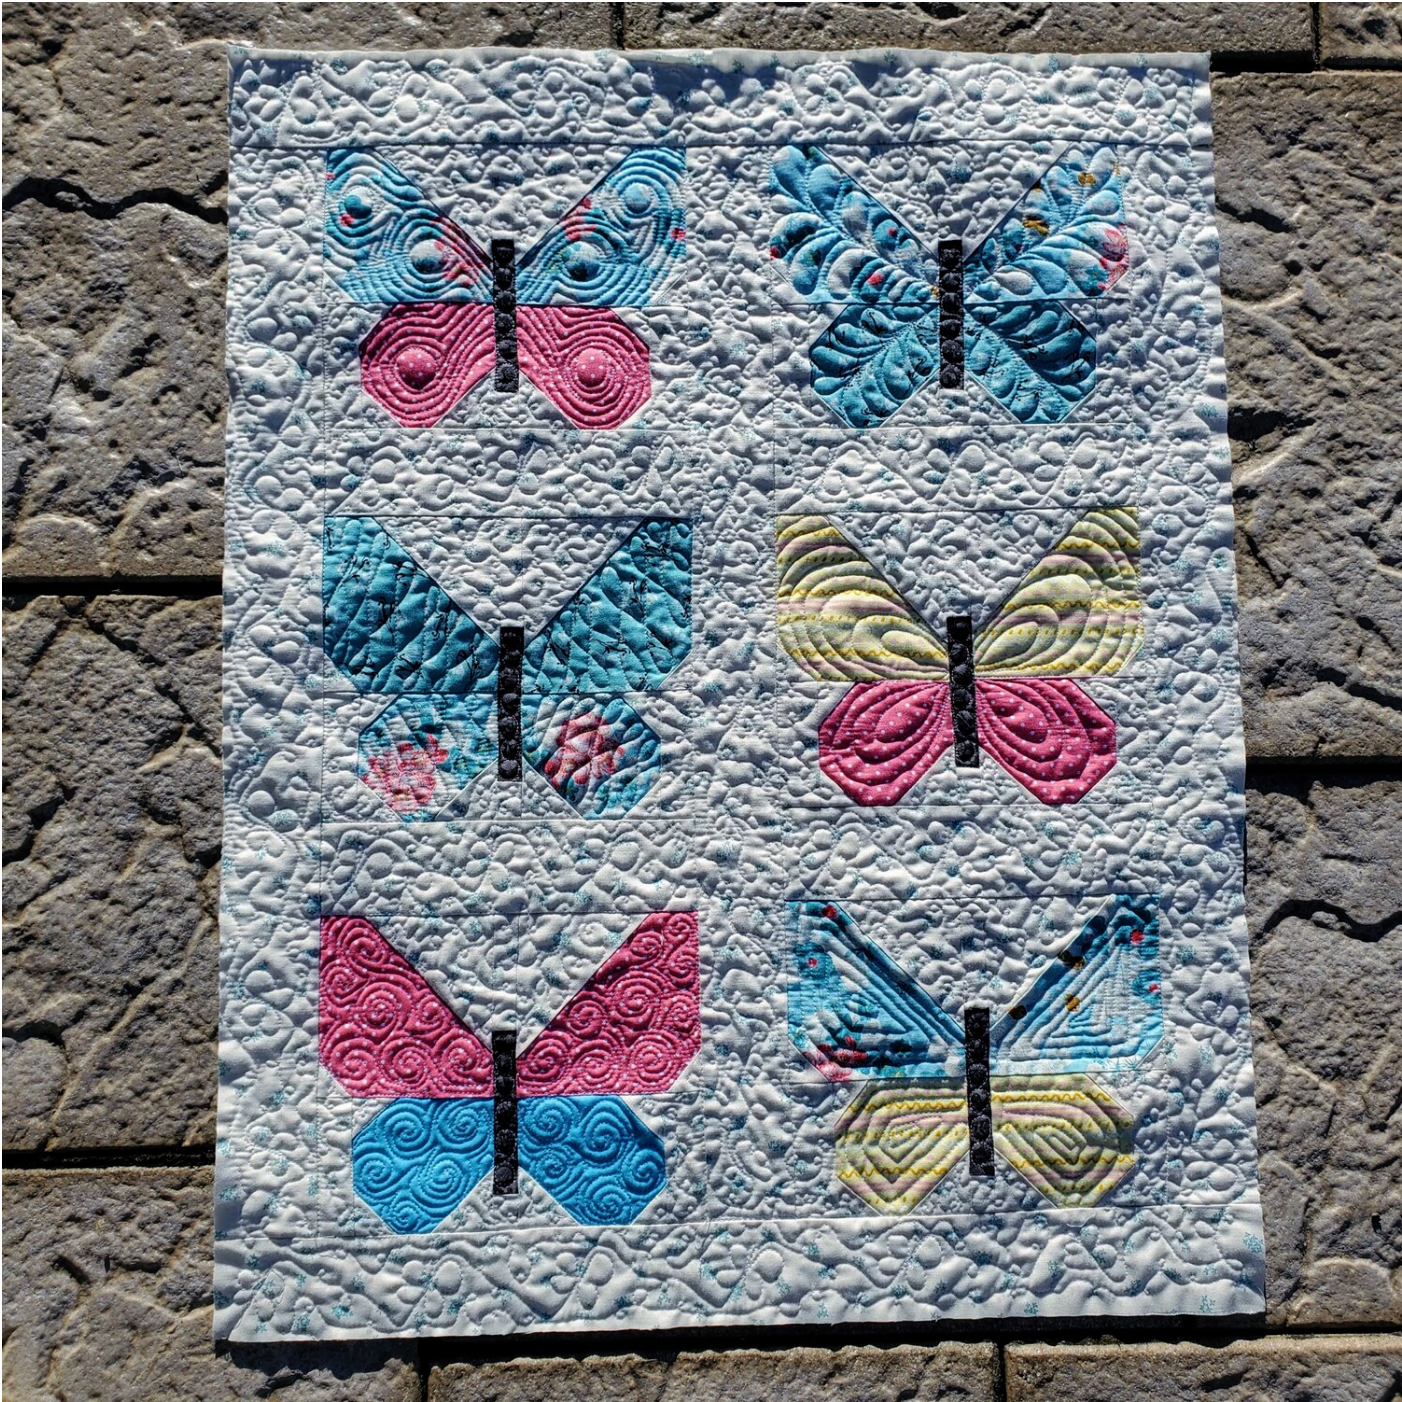
Next I did an all over meander design with some smaller butterflies floating through the design as I worked my way around the quilt filling in the space as evenly as possible. This picture with the sun shining on it amplifies the quilting lines. It is often referred to as the sunshine and shadow of the quilt where the un-quilted areas pop up to catch the light of the sun and the more densely quilted part creates shadows. The right proportion gives the quilt some interest, dimension and texture.
You will want to square it up and sew the binding in place. If you want to do a wall hanging you could do an Easy Quilt Facing as described in this Bernina tutorial.
Try making some spring butterflies to brighten the days until it is warm enough for the real ones to be fluttering about outside!