

Using 'Stitch It' to make a Floating Geese
Posted by Becca Shifflett on 29th Dec 2022
When my Stitch-It box comes every month, it can be a little bit like playing tetris. I have all these shapes in my box - and I have to figure out how to arrange them to make something pretty! This can be a little tricky as my brain immediately wants everything to match perfectly. Well, this month - I gave myself the freedom to cut (or piece) to make the sizes I need! Once I told myself that was ok - the creativity started flowing! The block I want to walk you through this month is called a 'Floating Geese". Basically, it's a Flying Geese with a border around it to build some negative space! Let me show you how I did it!
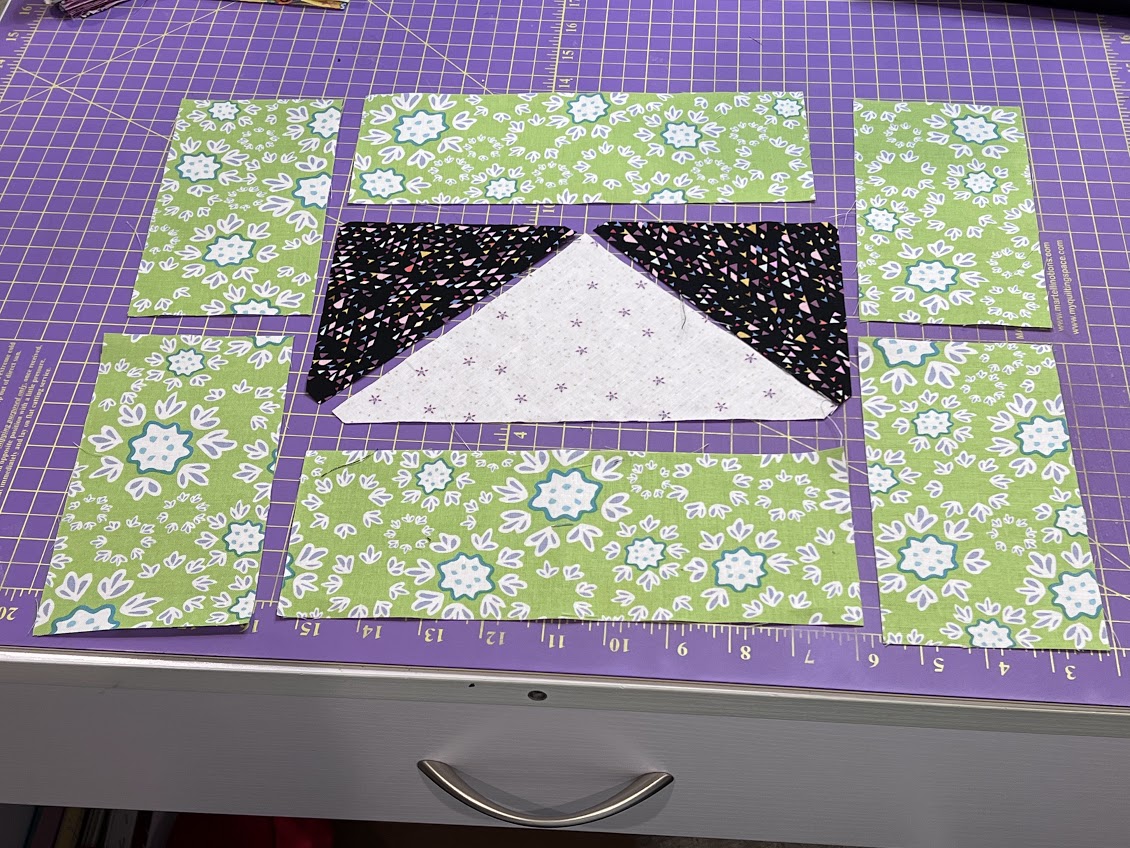
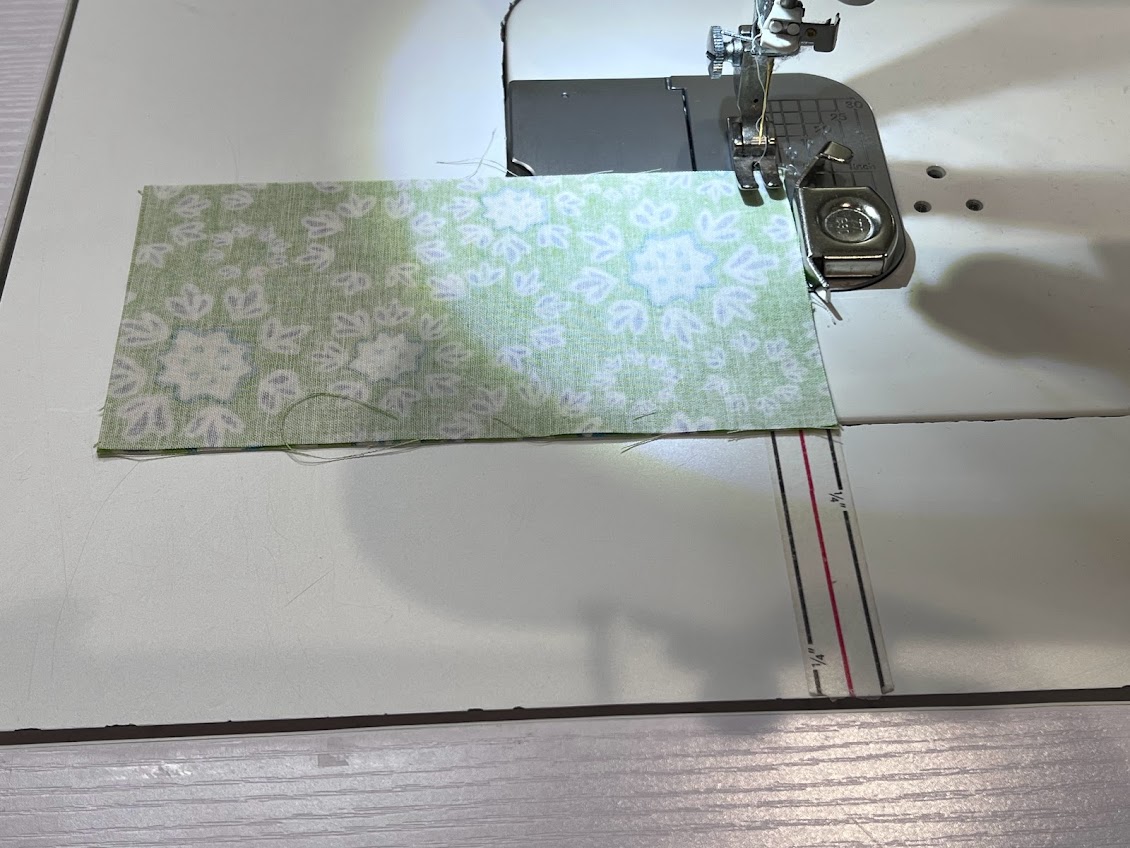
Step 1: Gather your materials
For this block, I grabbed a large triangle of Print A; 2 medium triangles of Print B; 2 large rectangles of Print C and 2 small rectangles of Print C.
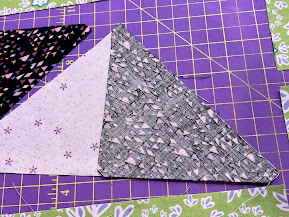
Step 2: Build your flying geese
To build the flying geese, you'll take the large triangle and assemble each of the medium triangles on either side so that when the block is sewn together you have a rectangular piece of fabric. To do this, you need to line up the long edge of the medium triangle to the short edge of the large triangle! Make sure to sew & press one side before you do the next one!
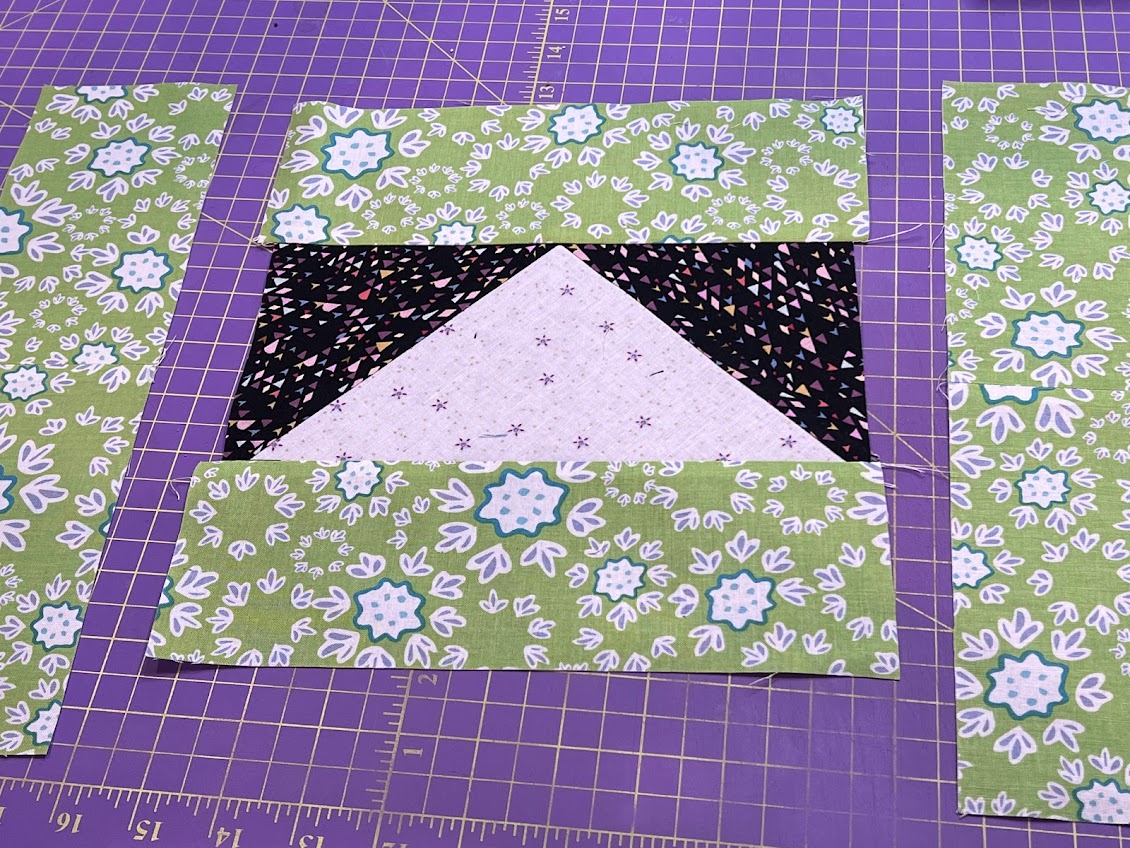
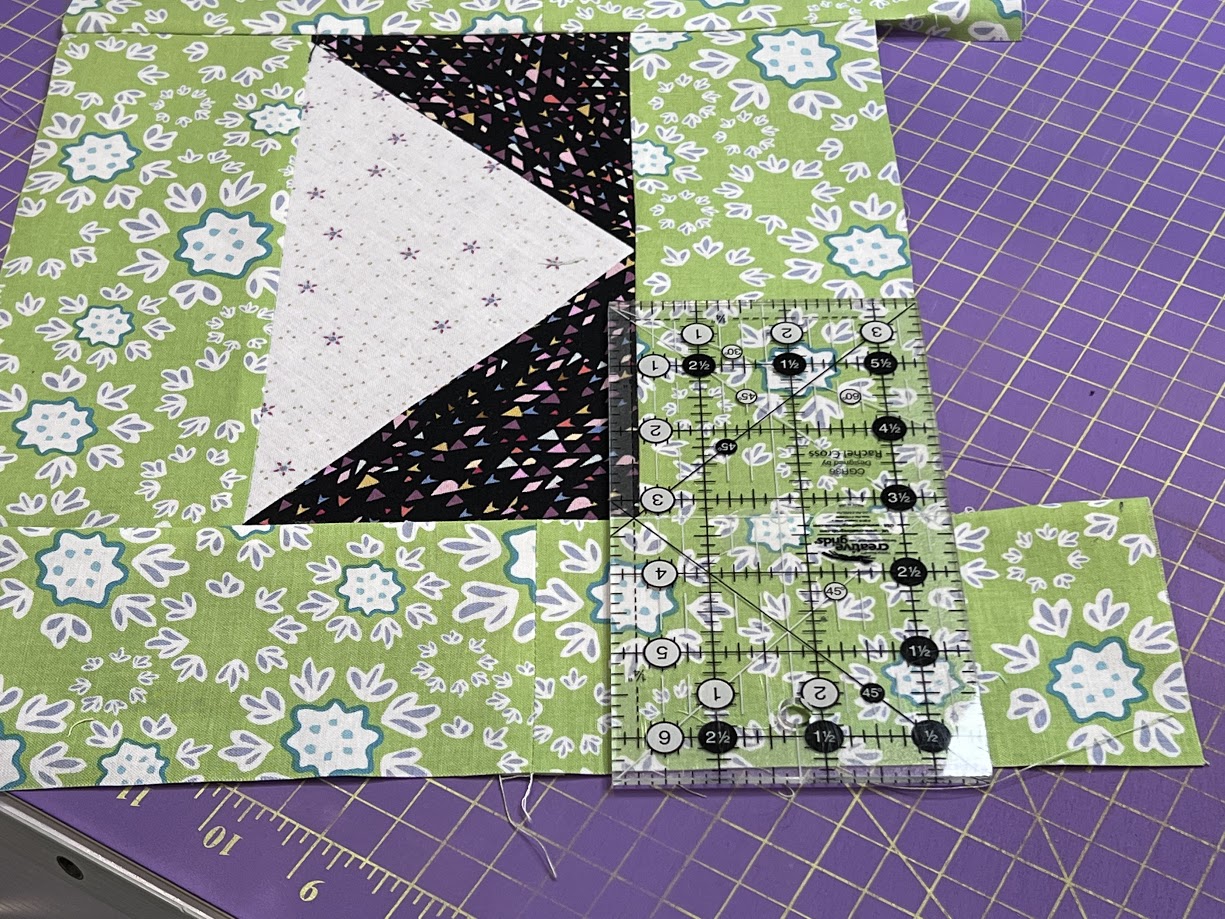
Step 3: Add top & bottom borders
The long rectangles were just a smidge wider than the width of my flying geese units, so I knew they'd fit perfectly. I sewed along the long edge of each of the Print C long rectangles to the top and bottom of the flying geese unit. Once sewn together, I cleaned up the sides by trimming the top and bottom borders so that they were as wide as my flying geese unit. (Side note: you could totally just measure the width of your flying geese unit and then cut your long rectangle units down before sewing.)
Step 4: Build side borders
Once sewn together, my flying geese measured 9" wide by 4.5" tall. The - so I knew I could use those for the top and the bottom border. The side borders needed a bit of piecing...this is where the smaller rectangles came in! I sewed two of the smaller rectangles together along the short edge creating 2 units. Admittedly, these are probably longer than I needed - but, I made it work in the end. I think if I would have chosen a Print that had a square and a large rectangle, that combination might have been a little closer to what I needed. To help this unit lay super flat (and act as close as possible to single piece of fabric) - I did press the seam open. :)
Step 5: Add left & right borders
Once the side borders are built - it's time to sew them onto the left and right sides of the block. Once they're attached, they will be taller than the height of the block so - you guessed it - you're going to trim those borders down! You'll line up your ruler so it's flush against the top (or bottom) border and trim the sides so they're flush with the rest of the block!
Step 6: Rinse, later & repeat
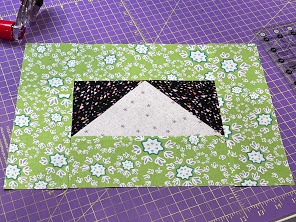
This was a lovely block that measures 15" wide by 10.5" tall - and honestly, I think would be a great size for a nice keyboard mat, oversized mousepad, gigantic mug rug, or even a small placemat. Shoot, you could add another border to make it a bit bigger if you needed. Or, you can just have fun with this make a bunch of the blocks and toss them all together in - dare I say it - a quilt?! --
Becca Shifflett