Teaching Kids to Sew - Pillowcases
21st May 2020
Hello everyone - Theresa here! I’m back today with an awesome, kid-friendly project that I’d like to share with you. Pillowcases!
These pillowcases are one of our most popular projects in our Kids Beginning Learn to Sew class. It’s neat to see all the fun and funky combos the kids end up choosing. In this blog post, I’m going to walk you through step-by-step so you can make your own pillowcase at home!
Now don’t be fooled, although it says we’ll be using the burrito method, there is no Mexican food involved (unless you want to order Chipotle and get yourself some grub). As you’ll see, the burrito method is a magical way to make a pillowcase easily. So let’s get started!
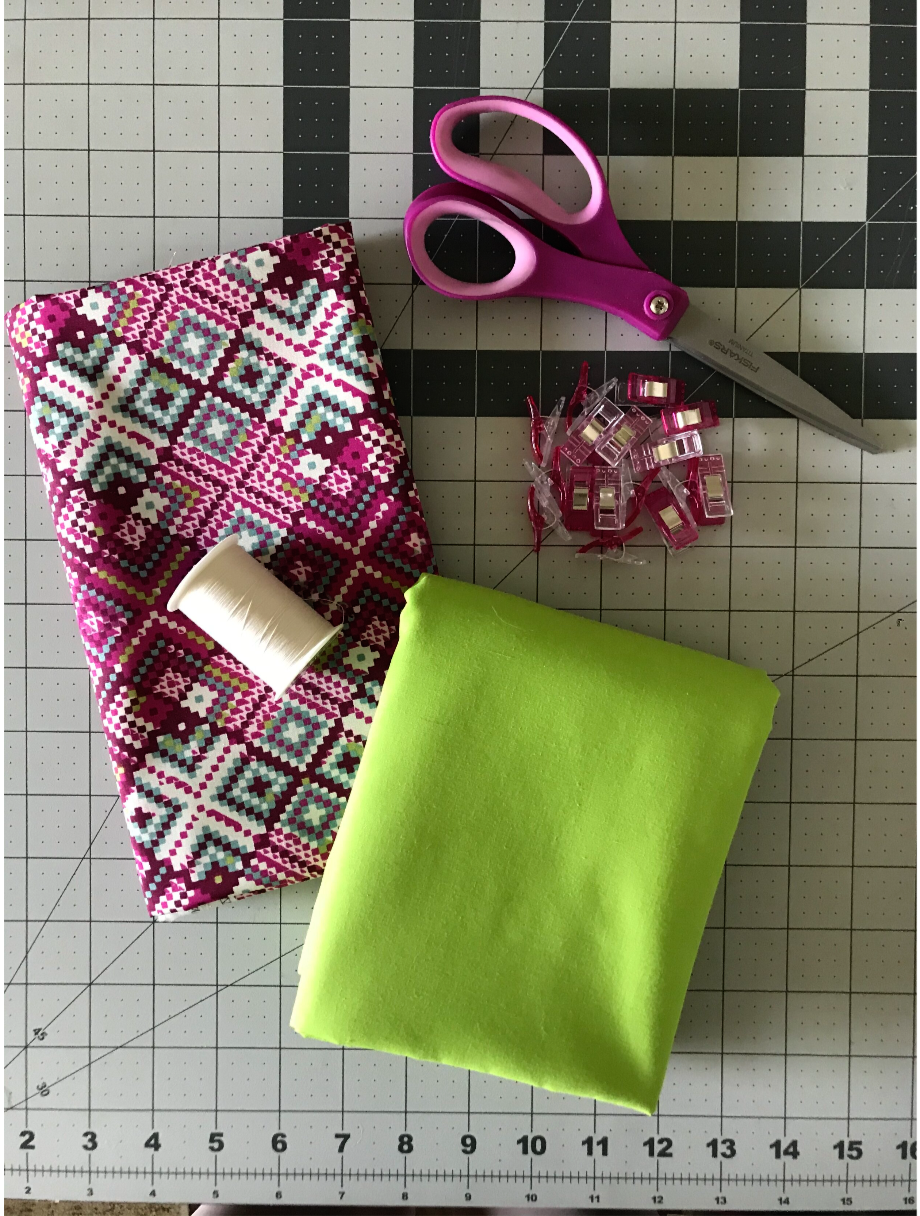
To make each pillowcase you’ll need:
2 different fabrics—1 for the pillowcase body and 1 for the cuff
Main body fabric 1 yard
Cuff fabric 1/3 yard
All-purpose thread in a coordinating color
Scissors
Pinking shears (optional)
Iron
Straight pins or fabric clips
I’m going to be using fabric clips instead of pins. We use clips in all our in-shop classes. They are easier for little fingers so kids don’t accidentally poke themselves. A common question we get in class is where to buy these. You can purchase the Clover Wonder Clips here.
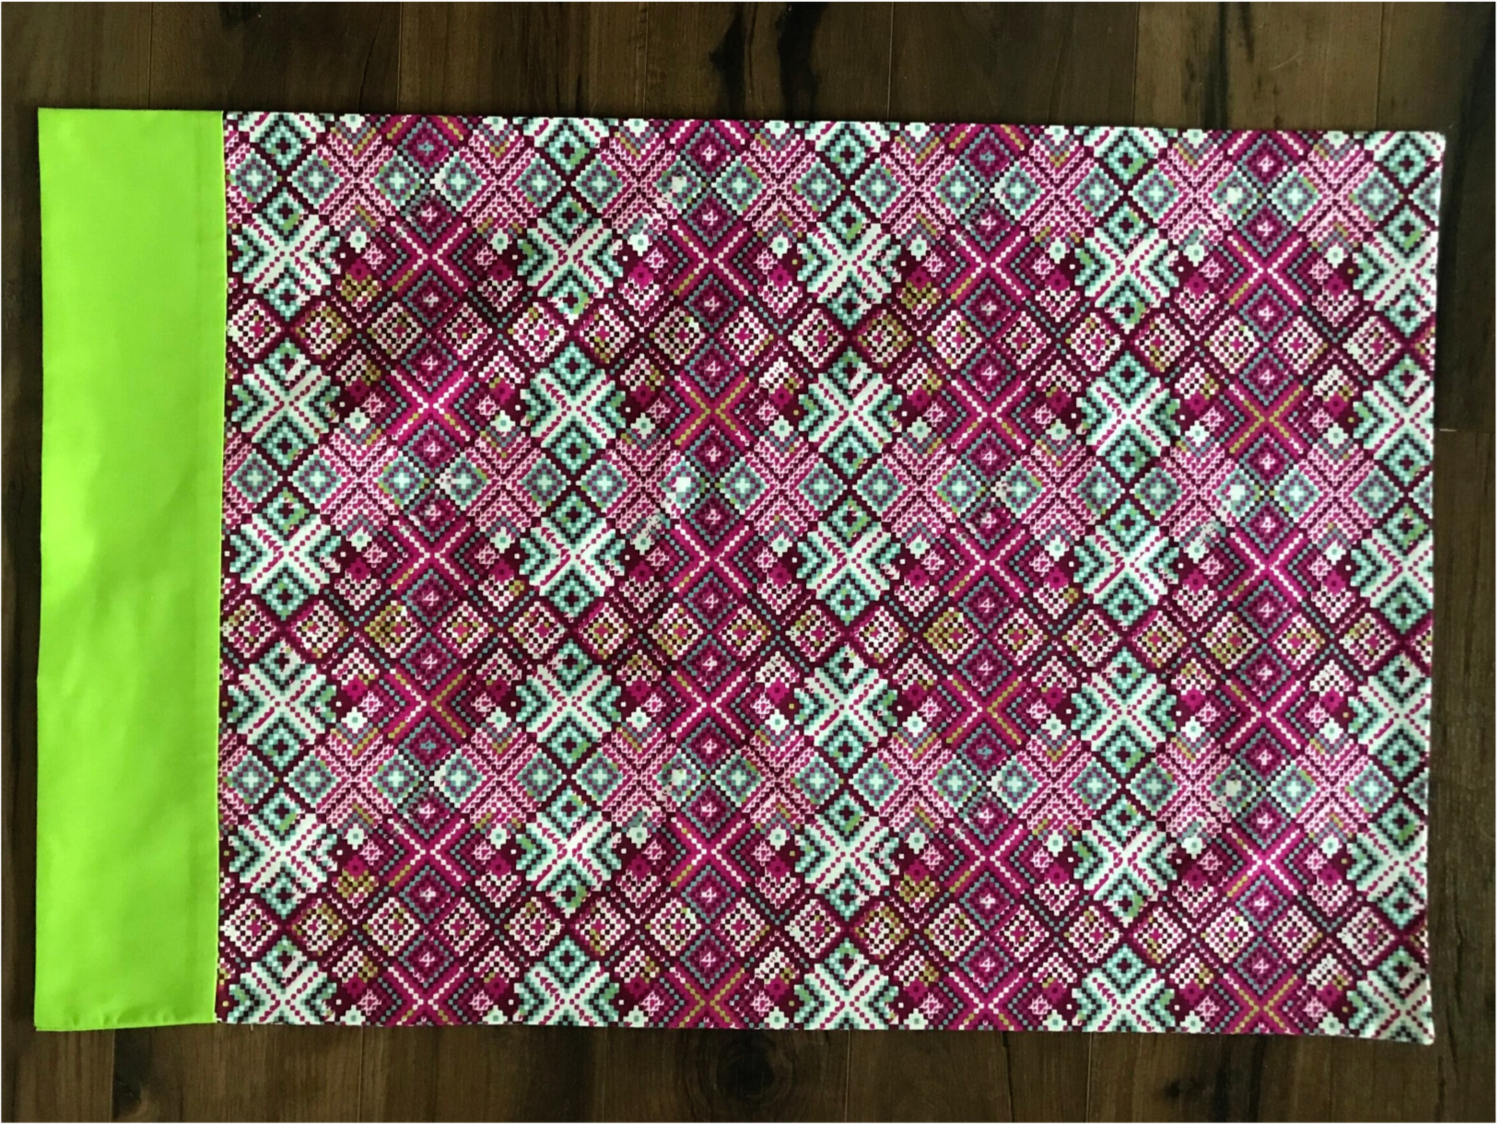
Step 1: First, you need to cut your fabric to size. The Main Fabric is the Pillowcase Body. From main fabric, cut 1 piece that is 27” x 40”. The Coordinating Fabric is the Cuff and will wrap around the pillowcase body, kind of like a burrito. From coordinating fabric, cut 1 piece that is 9” x 40”. For both of your fabrics, try not to choose something that is directional, or the design only going one way. Yes, I’ve learned this the hard way several times. Most directional fabrics are printed long-ways on the fabric, so if you use this type of print, the pattern will end up sideways on your finished pillowcase.
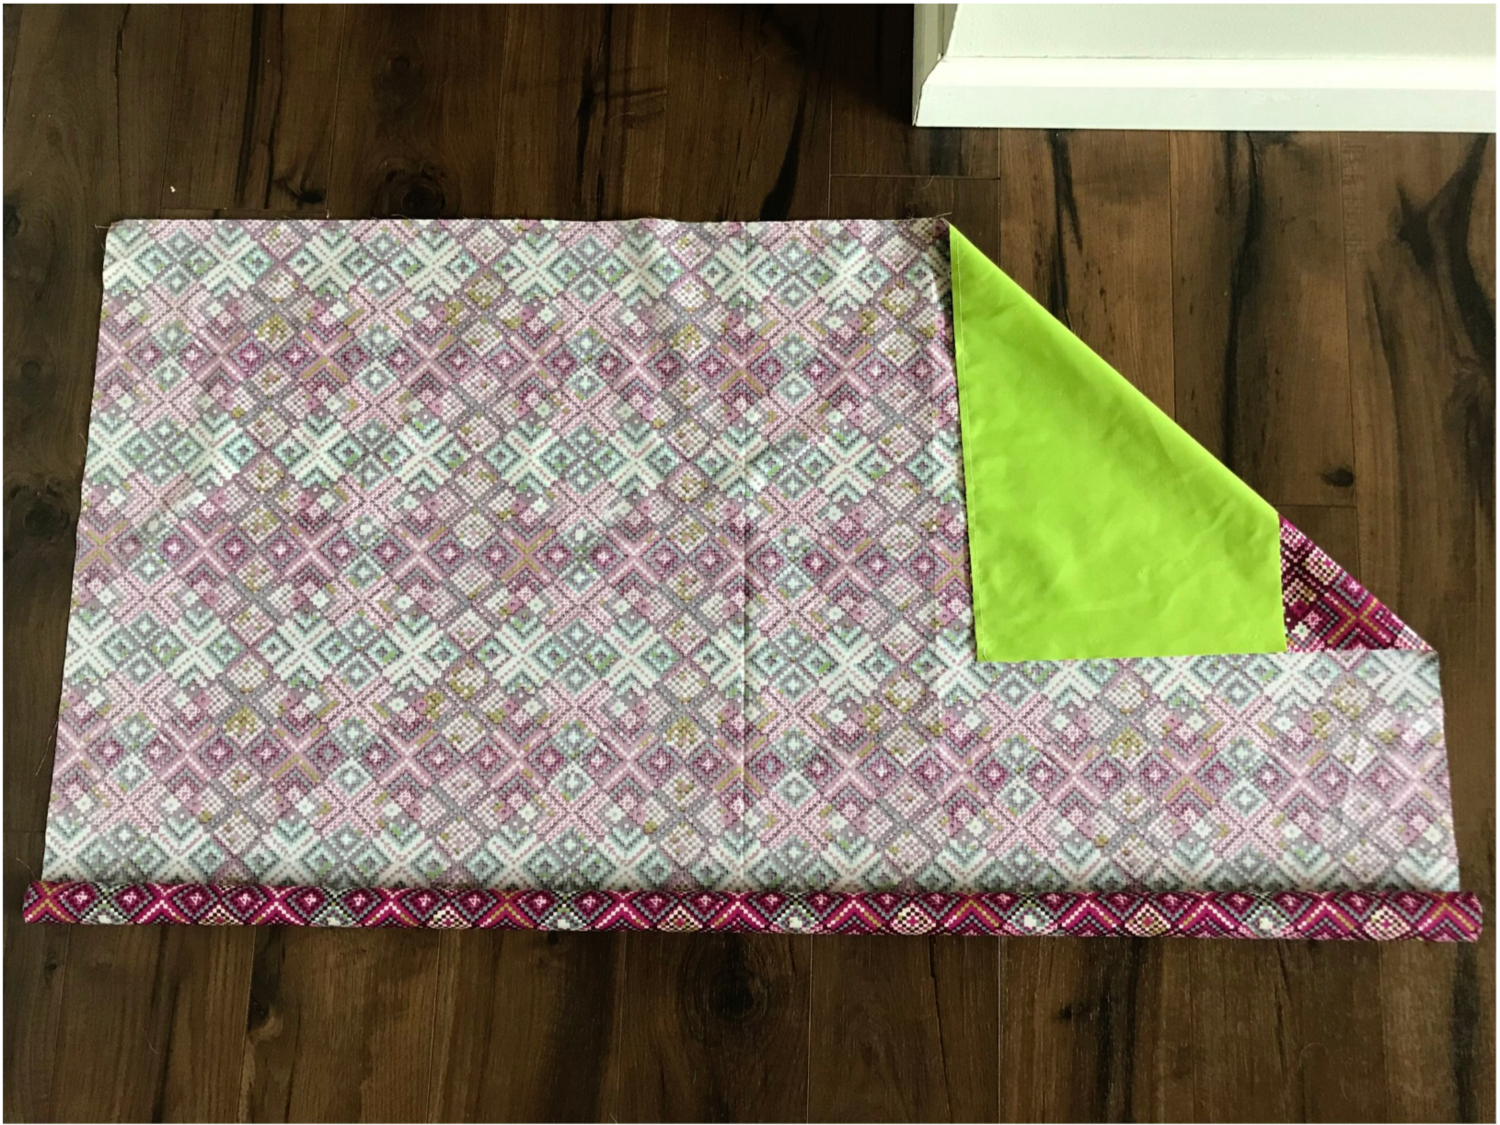
Step 2: Lay your pillowcase body piece out flat with the right side facing up. Place the cuff on top of the pillowcase body with right sides together and pin or clip together. Try your best to get your edges to line up as evenly as possible. Your fabric is going to take up a lot of space here, so if it doesn’t fit on a table, feel free to spread it out on the floor.
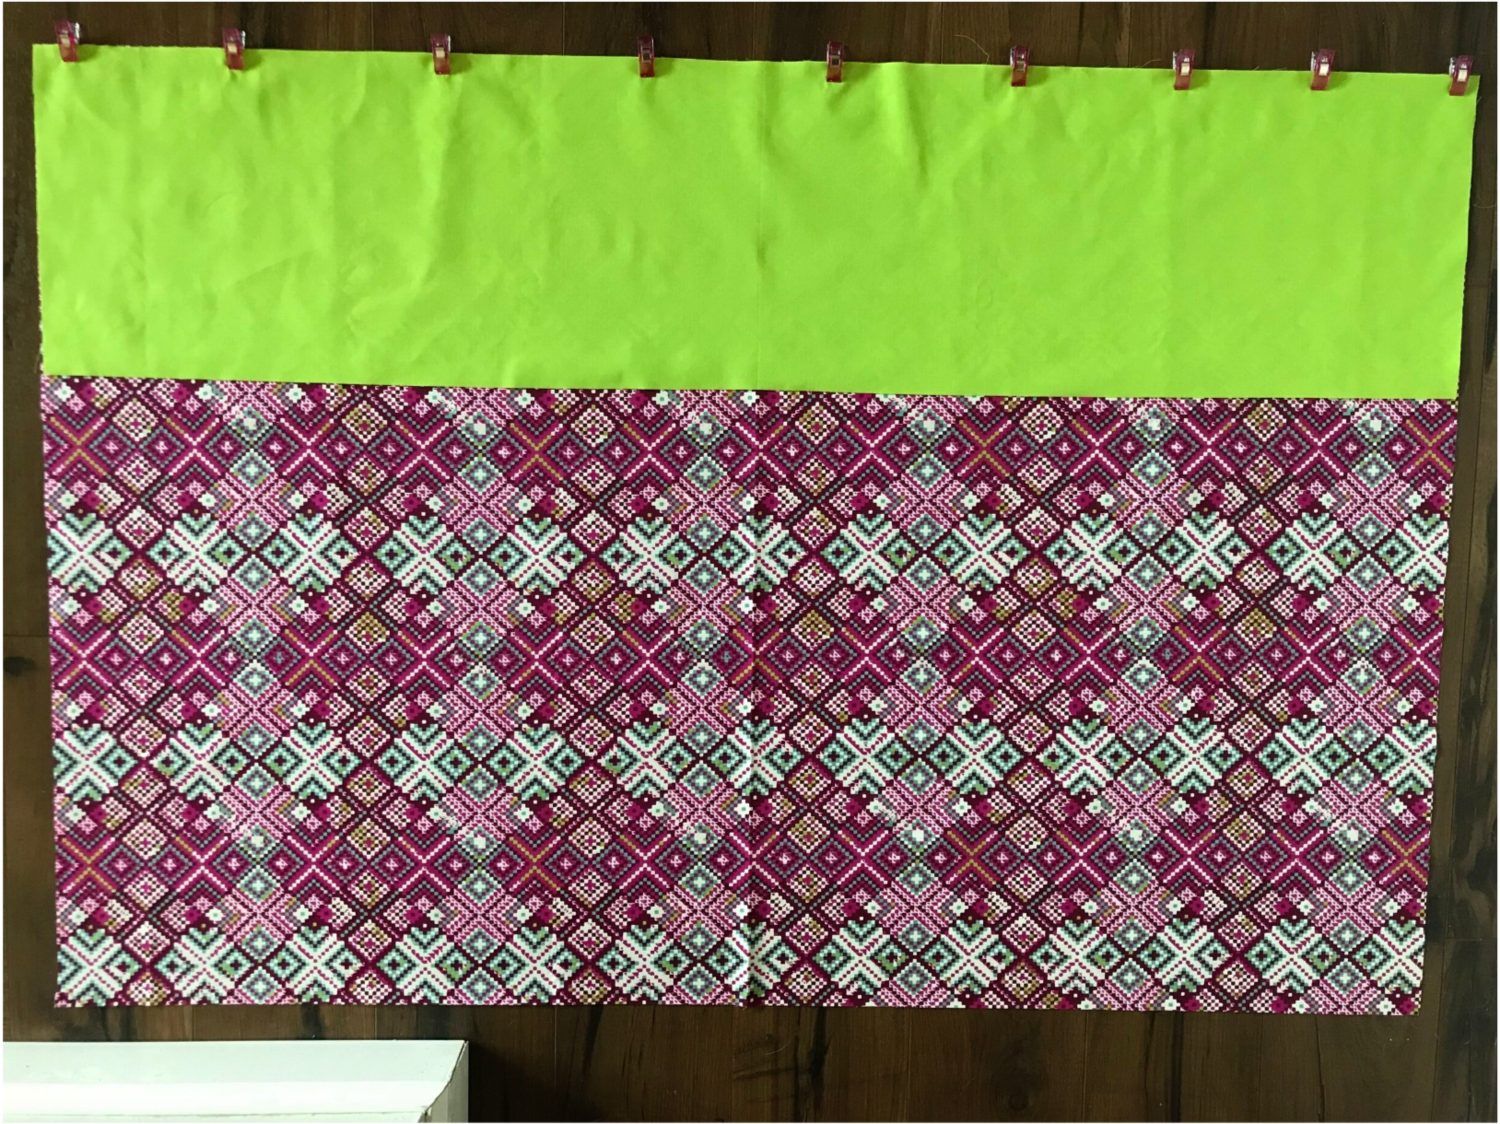
Step 3: Now you’re going to sew a straight line along that top edge where you just pinned/clipped, backstitching at the beginning and end. Sew with a 1/2” seam allowance. Once you’ve done this, it’s back to the floor or tabletop so you can spread out again. Lay your fabric face down so that the cuff is not visible.
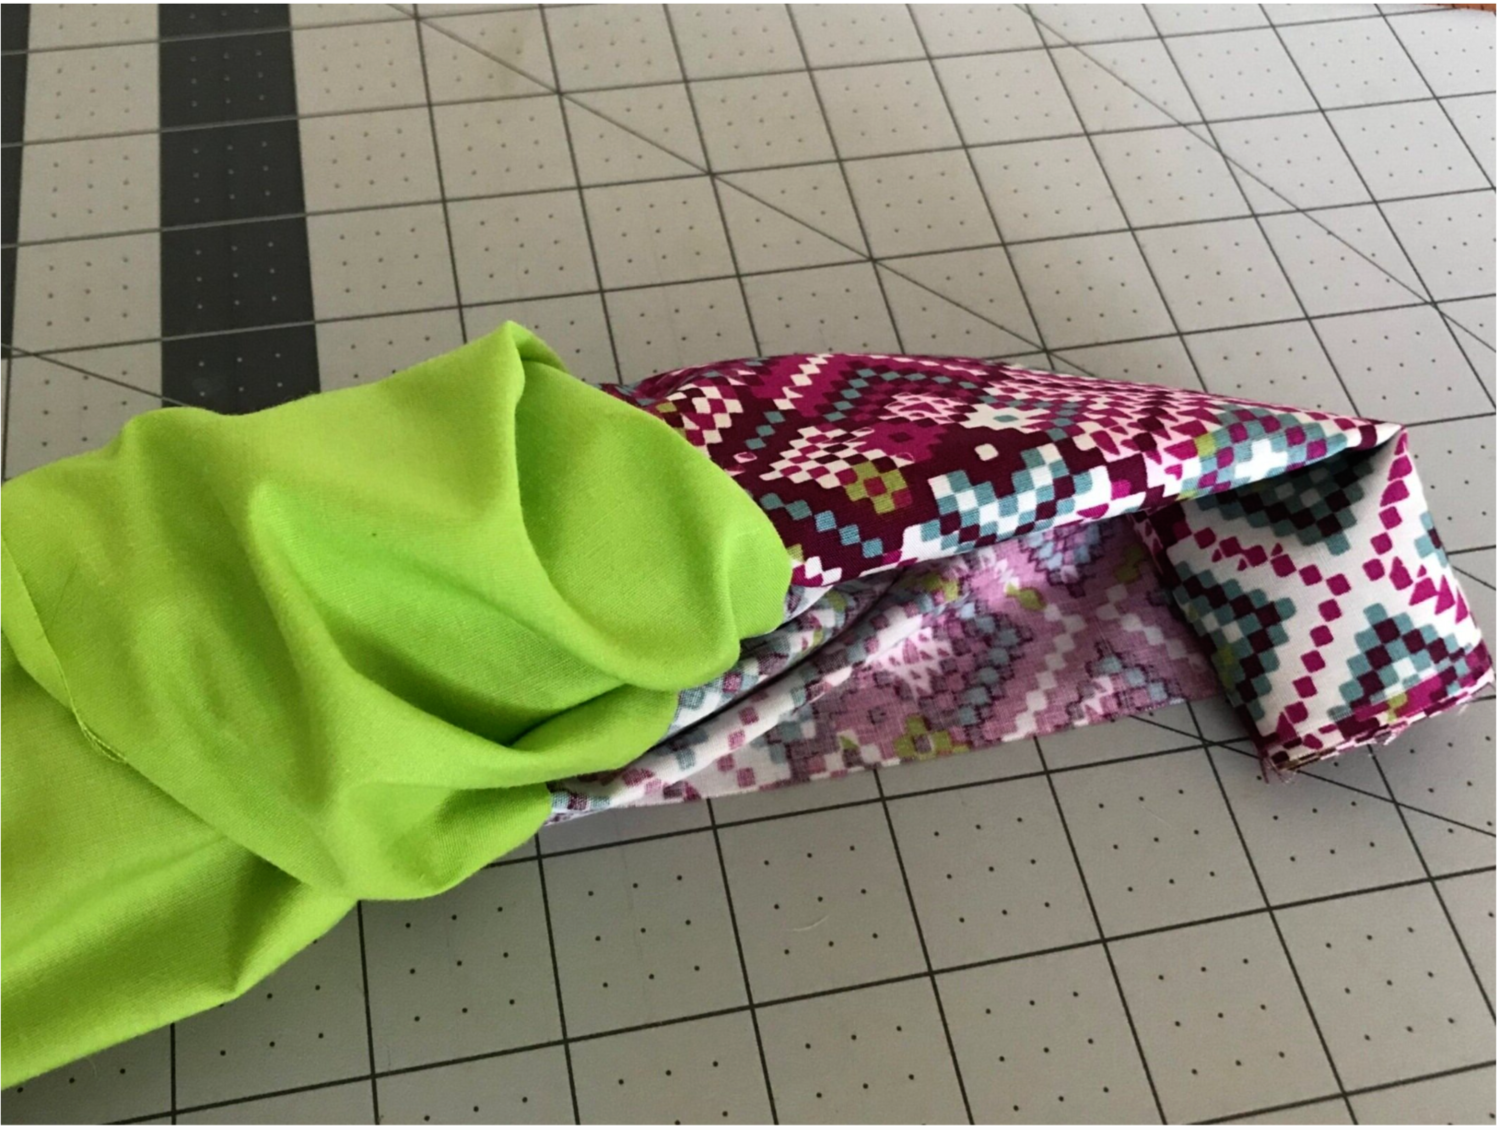
Step 4: Ok, this is where the magic begins to happen, and why it’s called a burrito. Starting at the bottom of the pillowcase body, begin rolling the fabric towards the top edge. Try to keep the roll tight, and continue to roll up the pillowcase body until it is a few inches from the top edge. Only roll the body fabric, not the cuff when you get to it.
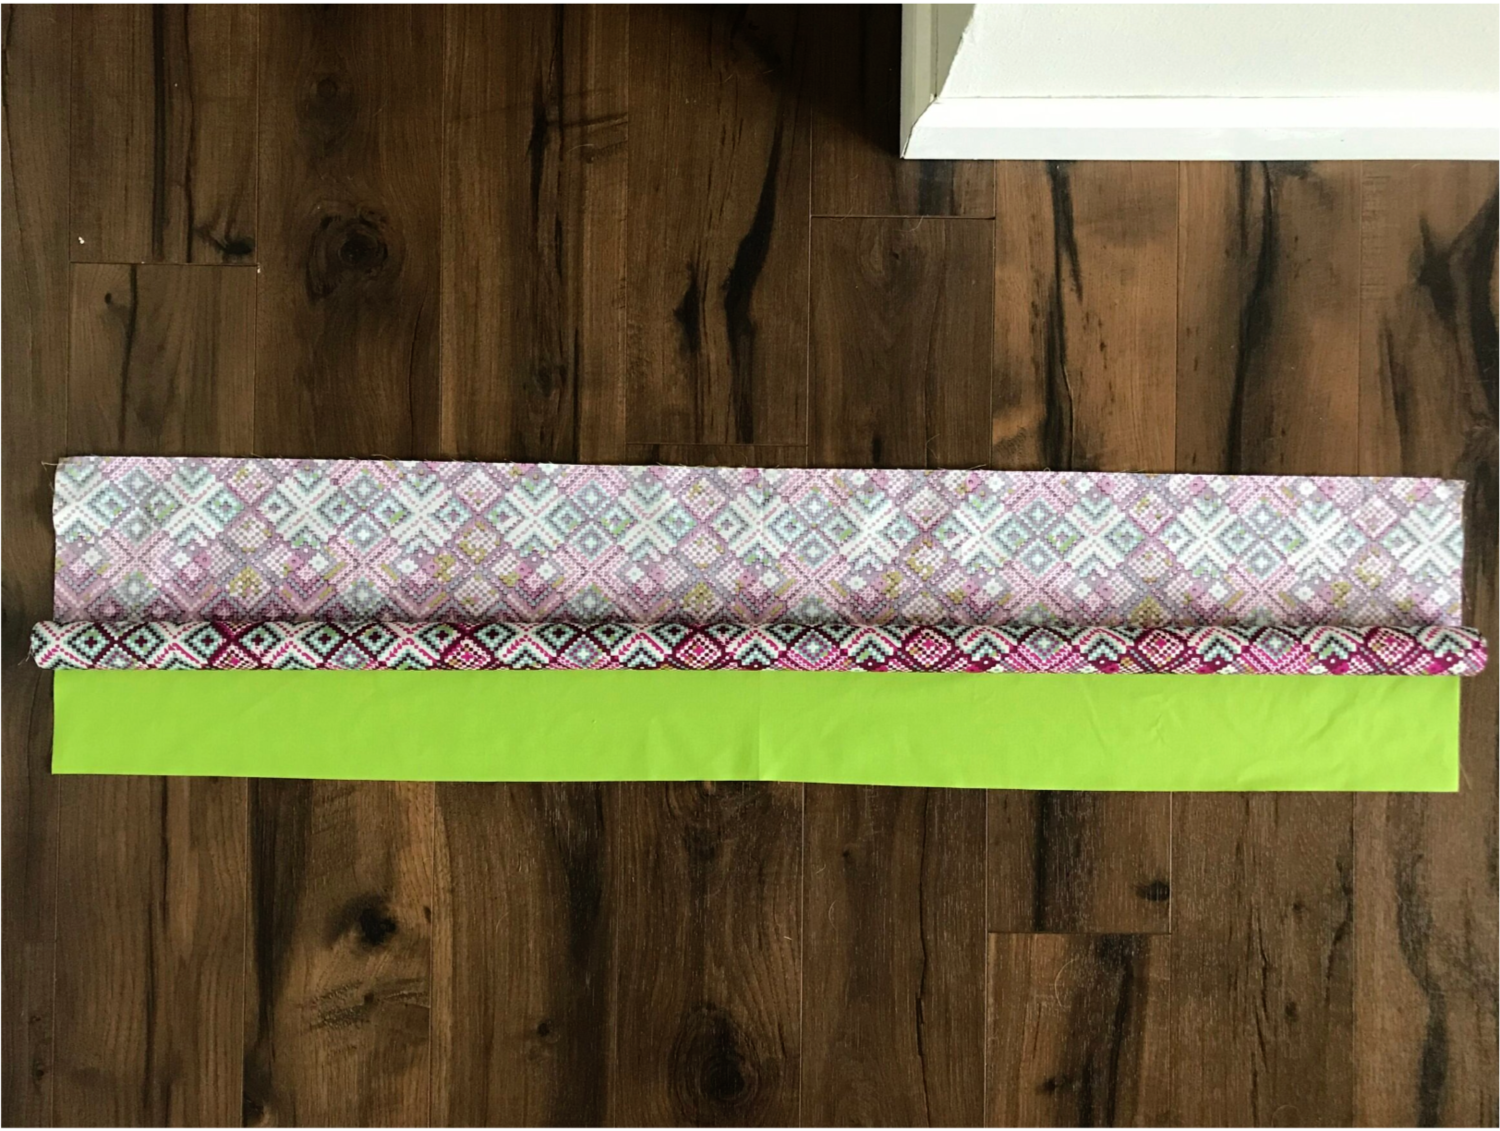
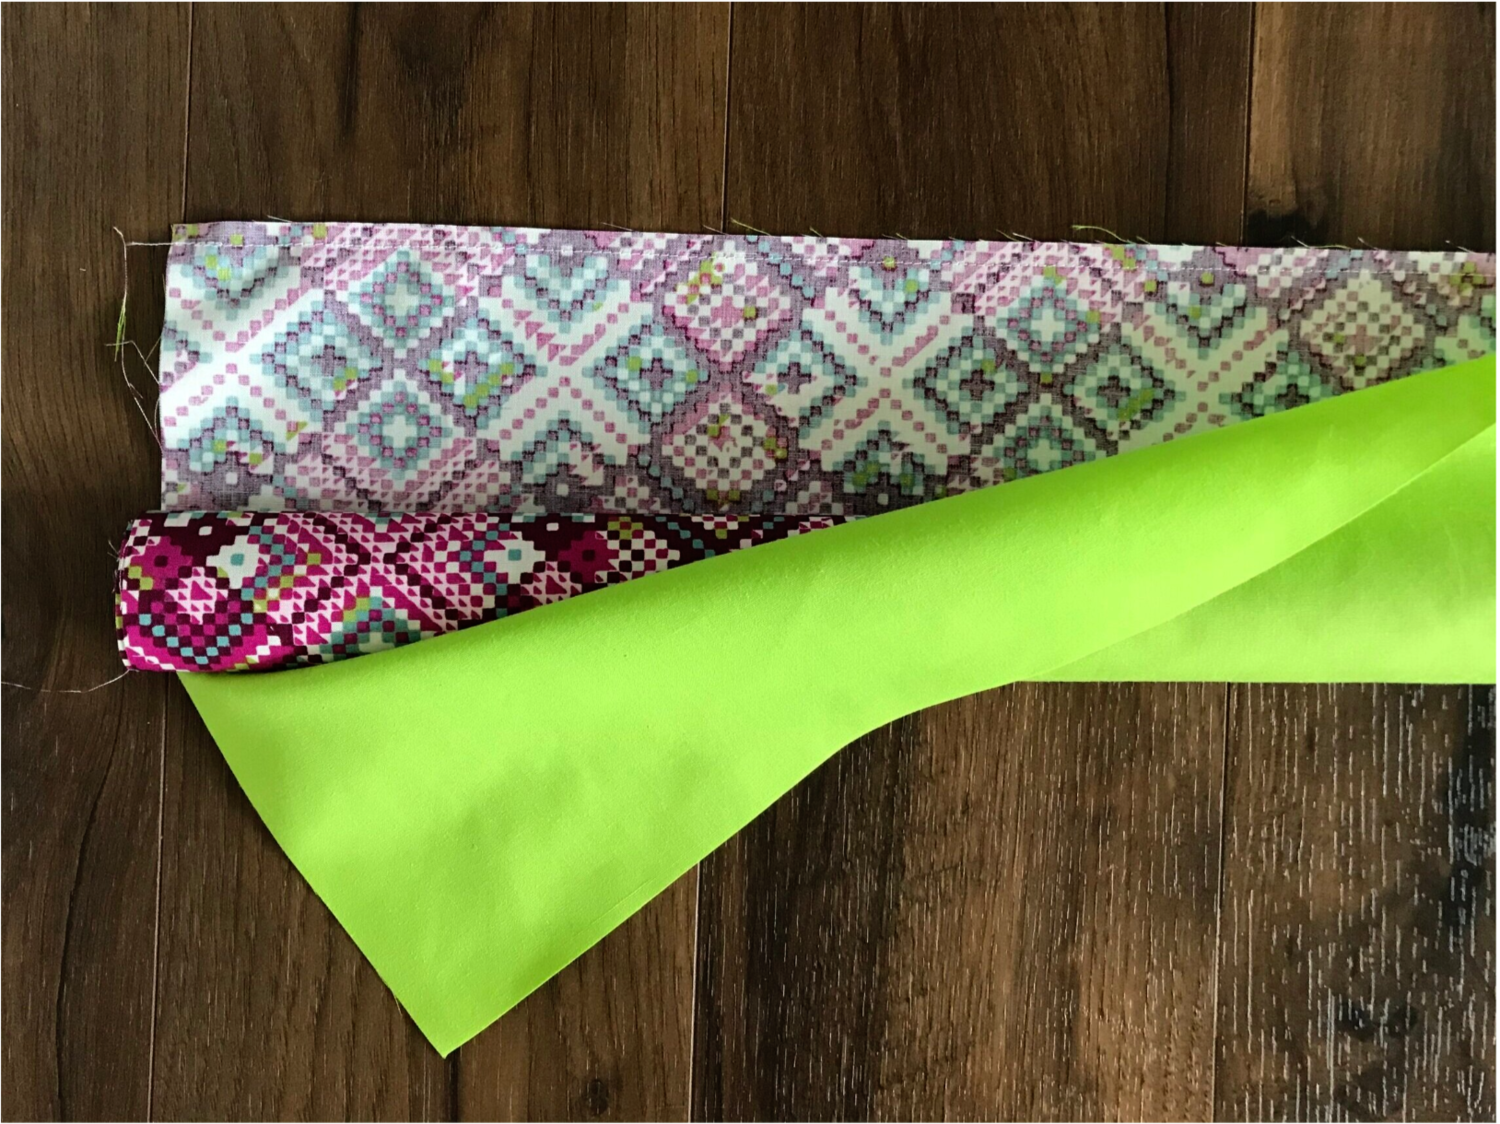
Step 5: Take the bottom edge of the cuff fabric and wrap it over the rolled-up pillowcase fabric. See how the cuff wraps over the pillowcase body, like a burrito. Grab your chips and salsa, you’re halfway done! Pin/clip through all layers of fabric. Using a 1/2” seam allowance, sew along the raw edge. Backstitch beginning and end as always.
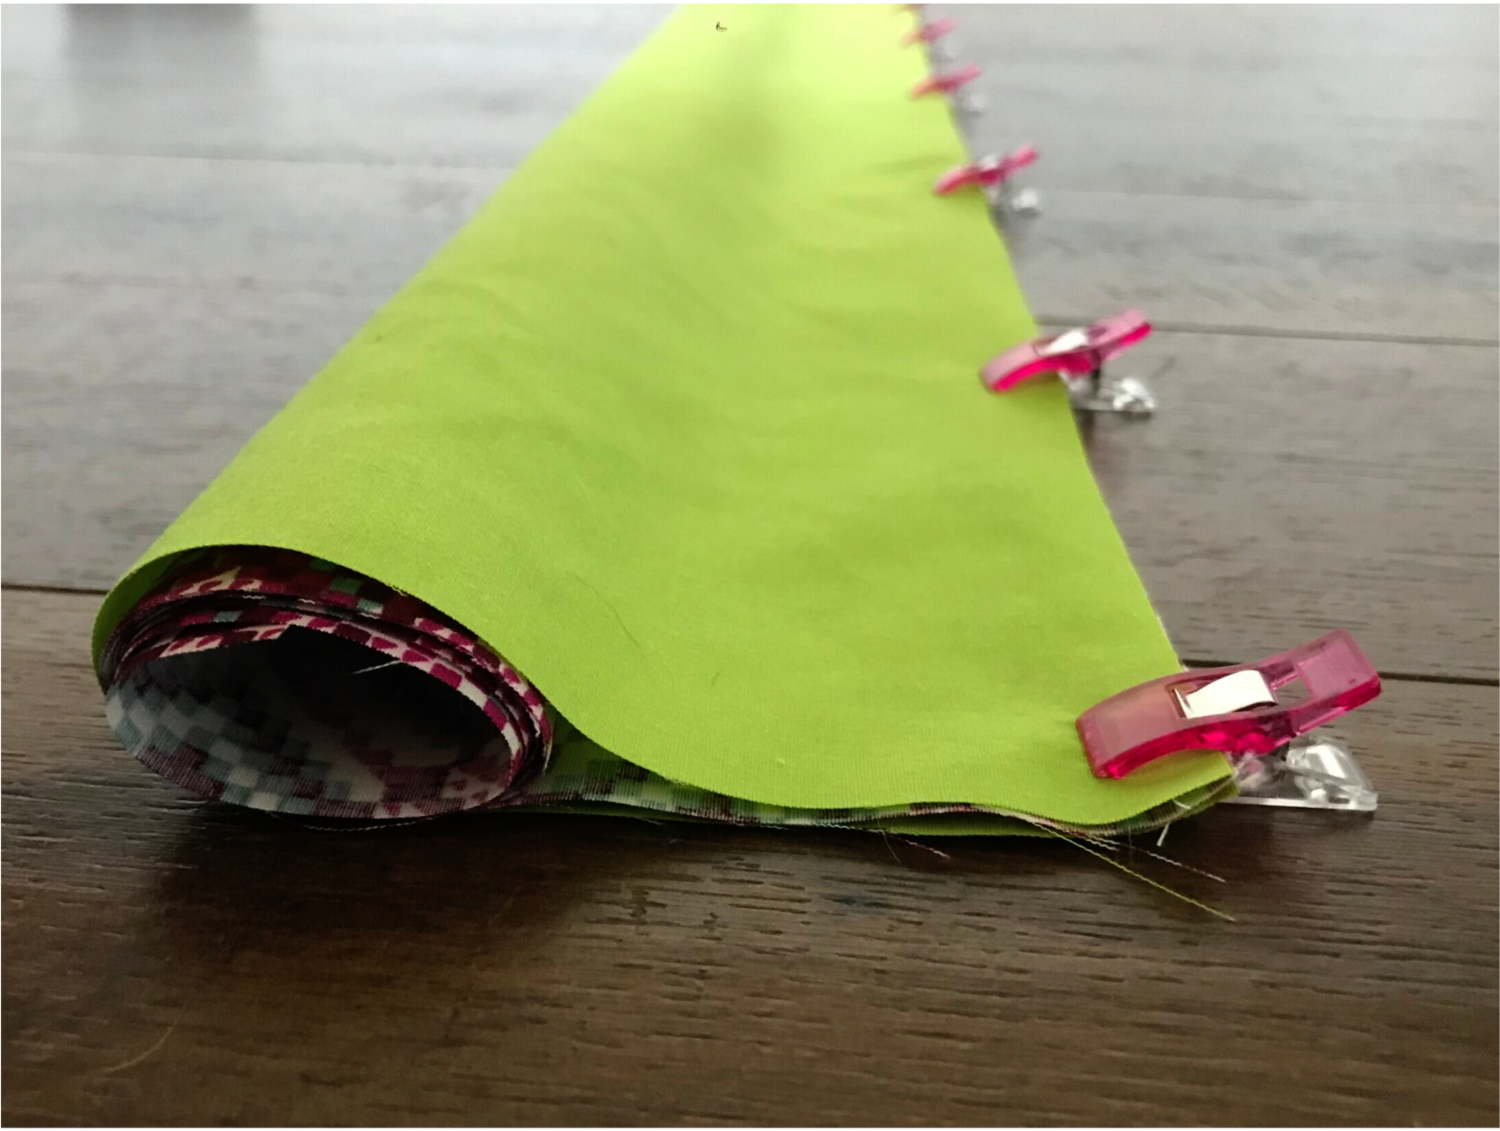
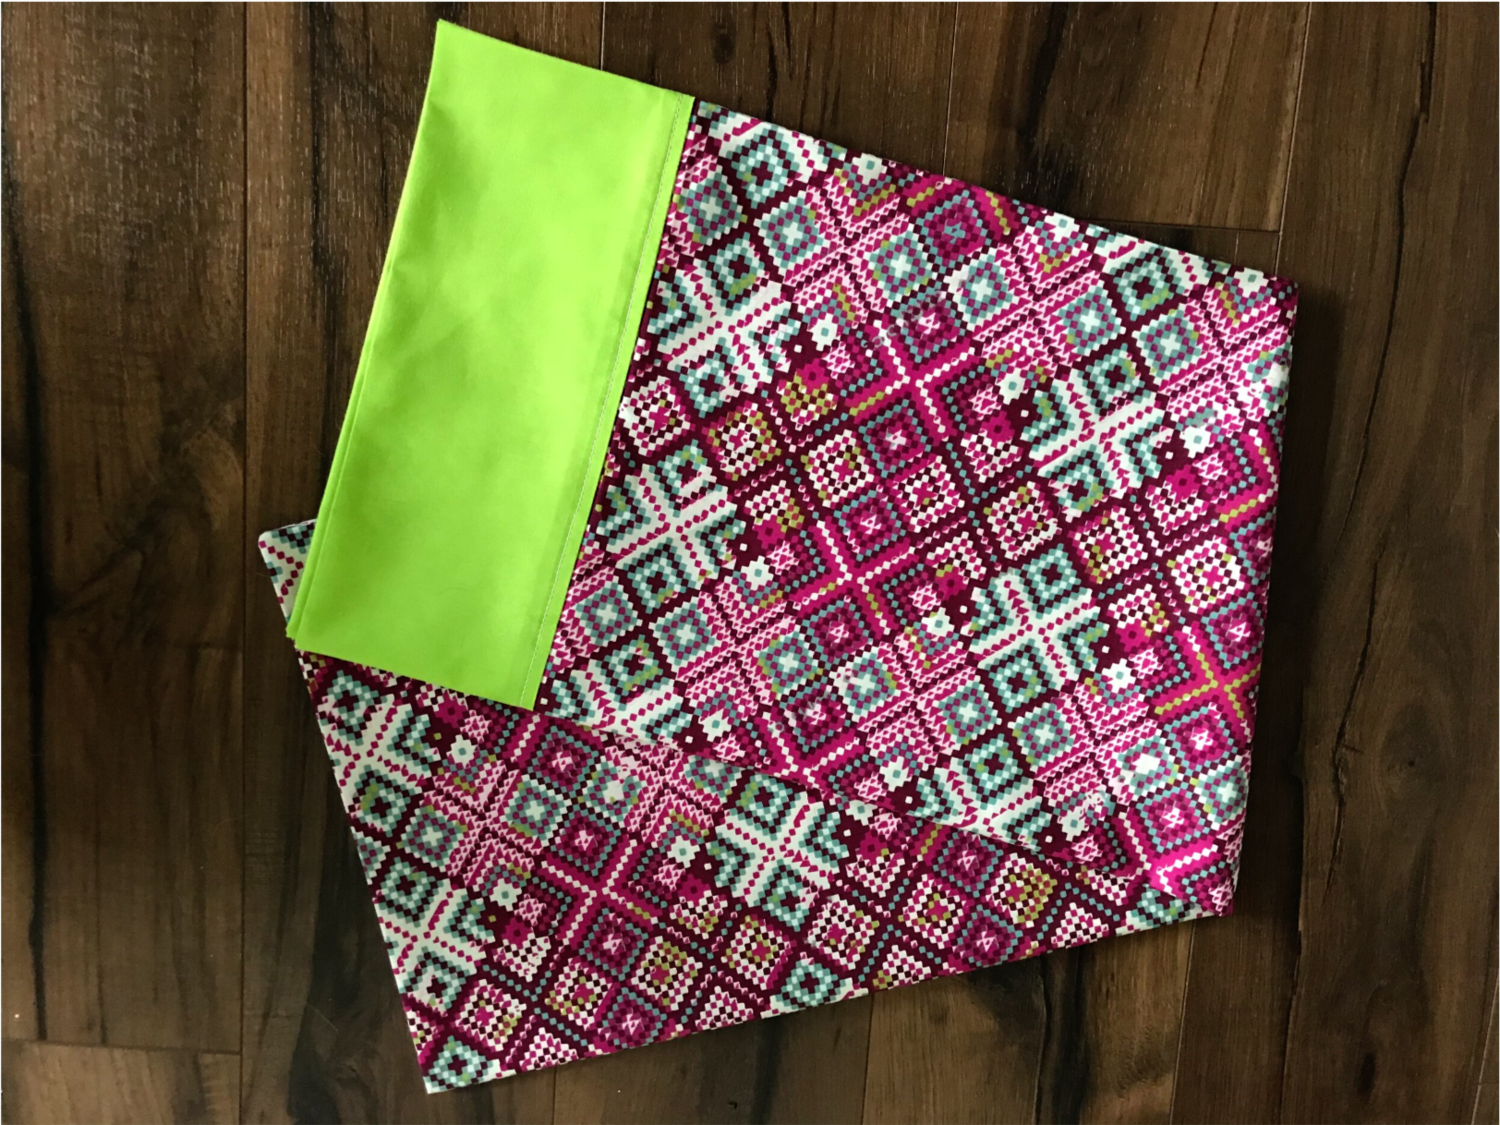
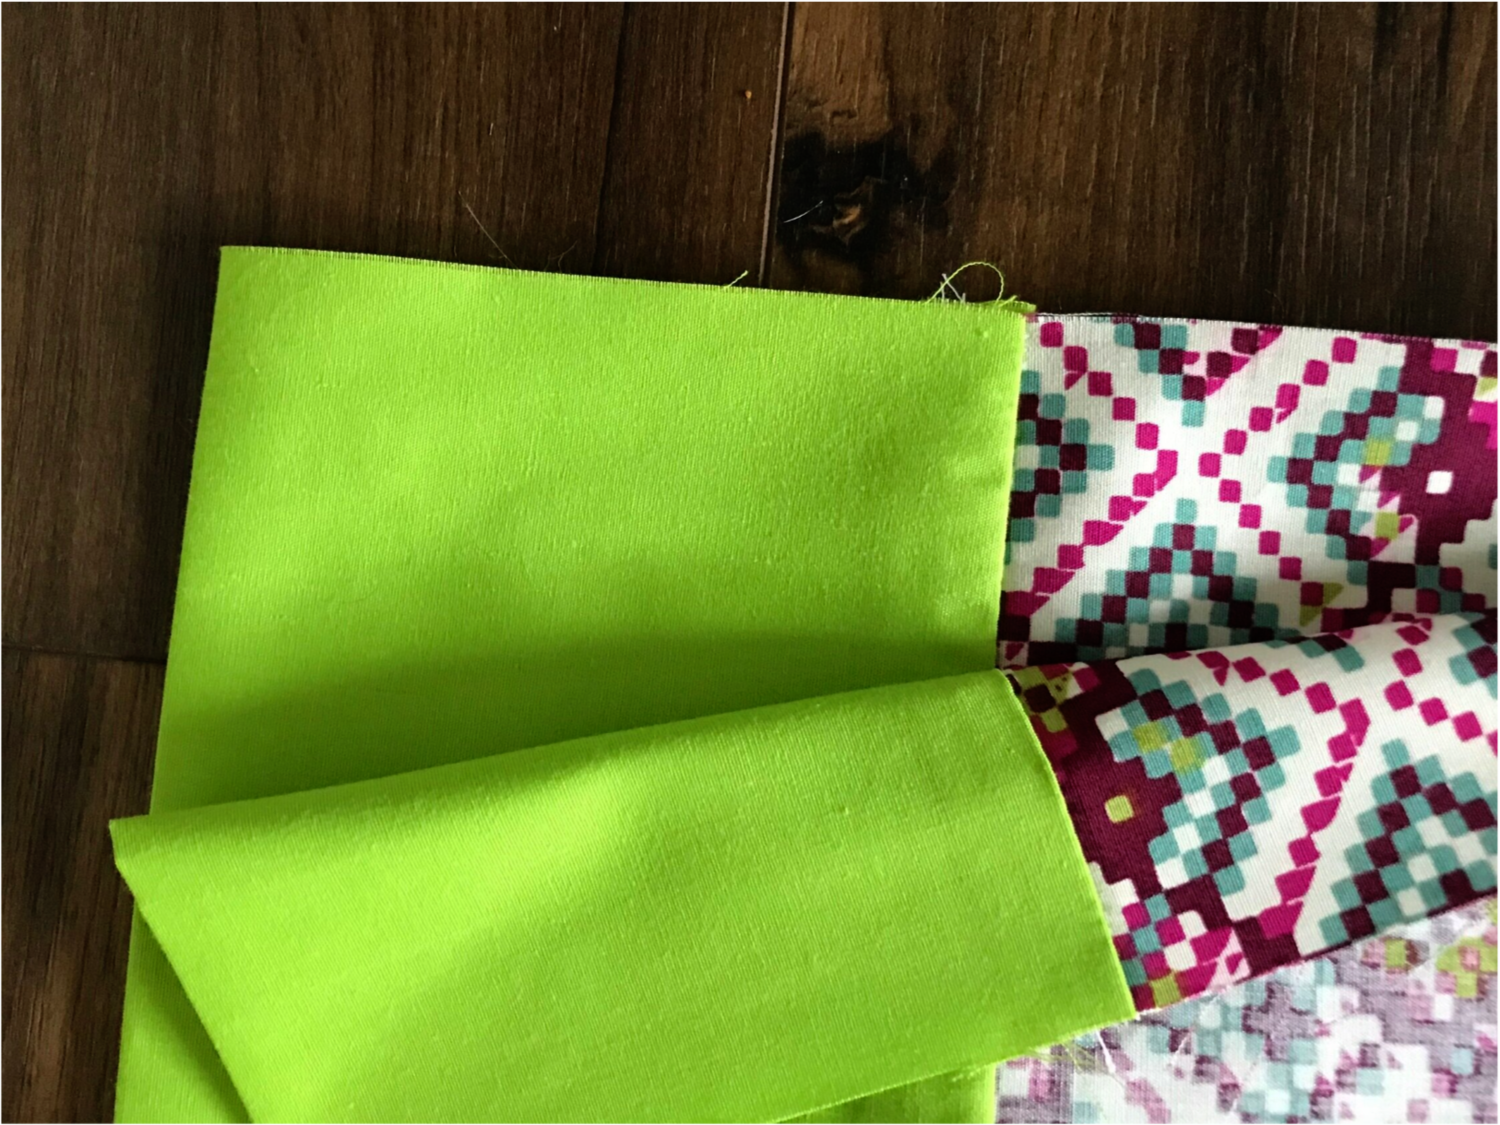
Step 6: Fold back the cuff and carefully pull out the pillowcase body. This step is a little tricky, but once you get it started, it gets easier. Once you have pulled the excess out, use your iron and press the cuff on both sides.
Step 7: Fold pillowcase in half width-wise with right sides together matching up the cuff fabric on the seam line. Pin/clip around the raw edges on the side and bottom of the pillowcase.
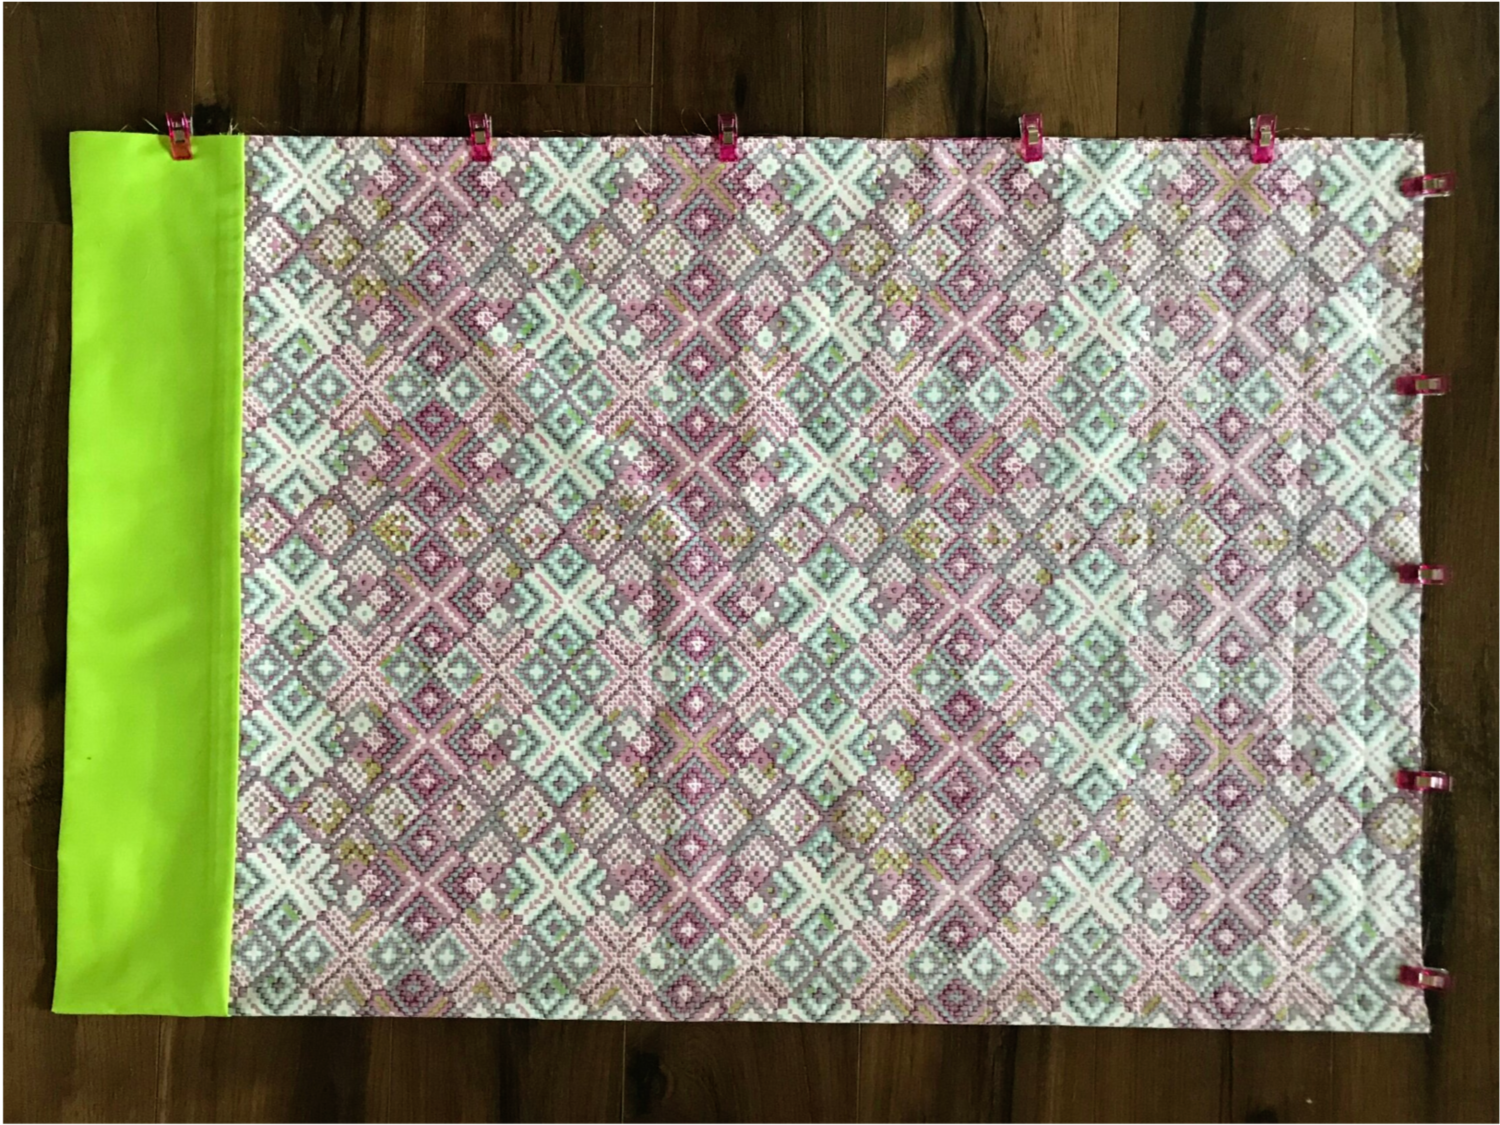
Step 8: Stitch along those raw edges using a 1/2” seam allowance. Be sure that the cuff seam is as even as possible.
Step 9: Clip the corner where the side and bottom seam meet. This will help with the bulk when you turn the pillowcase and help the corners to be nice and pointy.
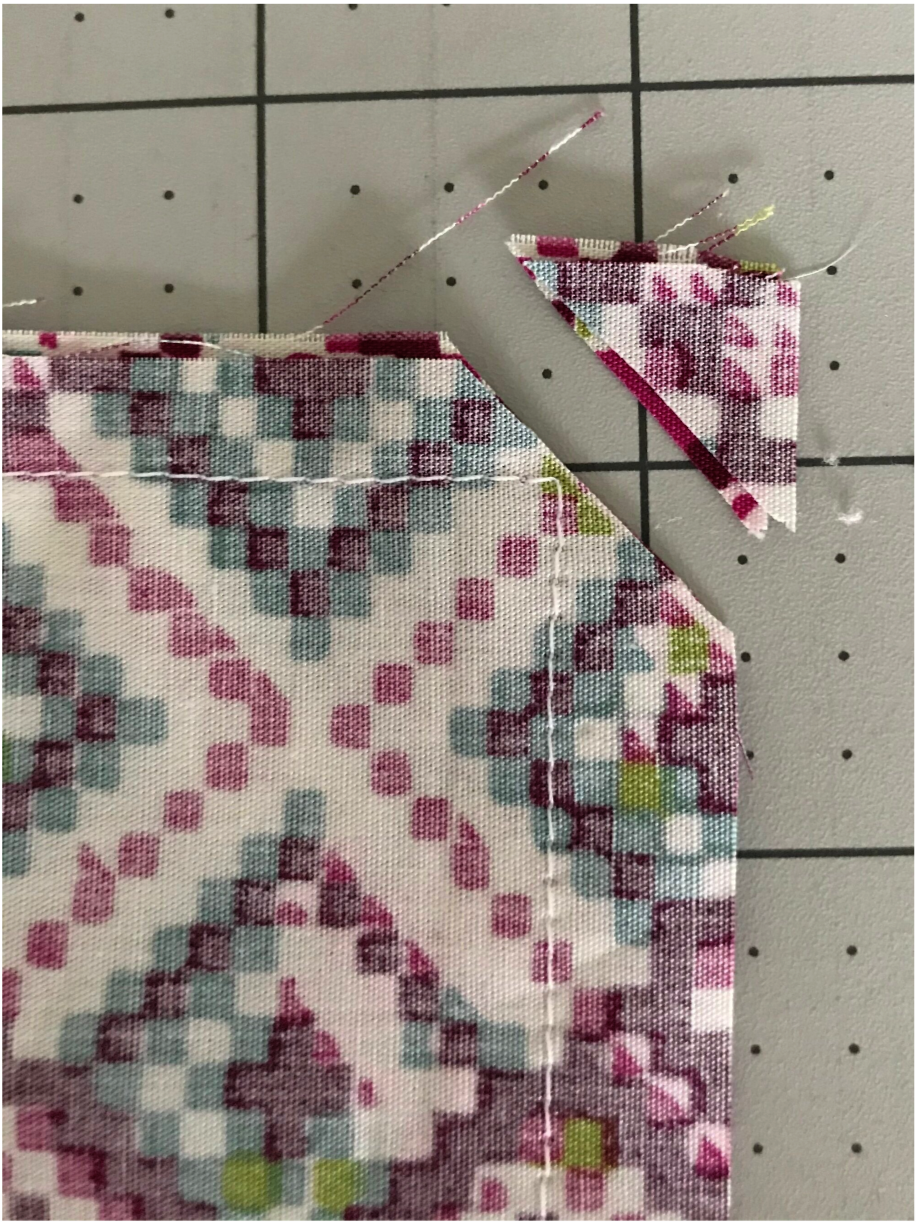
Step 10: An optional step if you happen to have a pair of pinking shears handy, trim the raw edges. By doing this, it helps the edges not to fray when the fabric goes through the wash. Turn the pillowcase right side out and press the seams flat. Another optional step that adds a little more of a finished look is to topstitch along the cuff next to your seam.

Voila! Finished size is about 30” x 20”. Thanks for joining me today! And sweet dreams on your fancy new pillowcase! Is anybody hungry? I’m going to go get a burrito.