Zipper Pouch
26th May 2020
Hello. It’s Joanne again. Today, I’m sharing another one of my favorite projects - a Zipper Pouch!
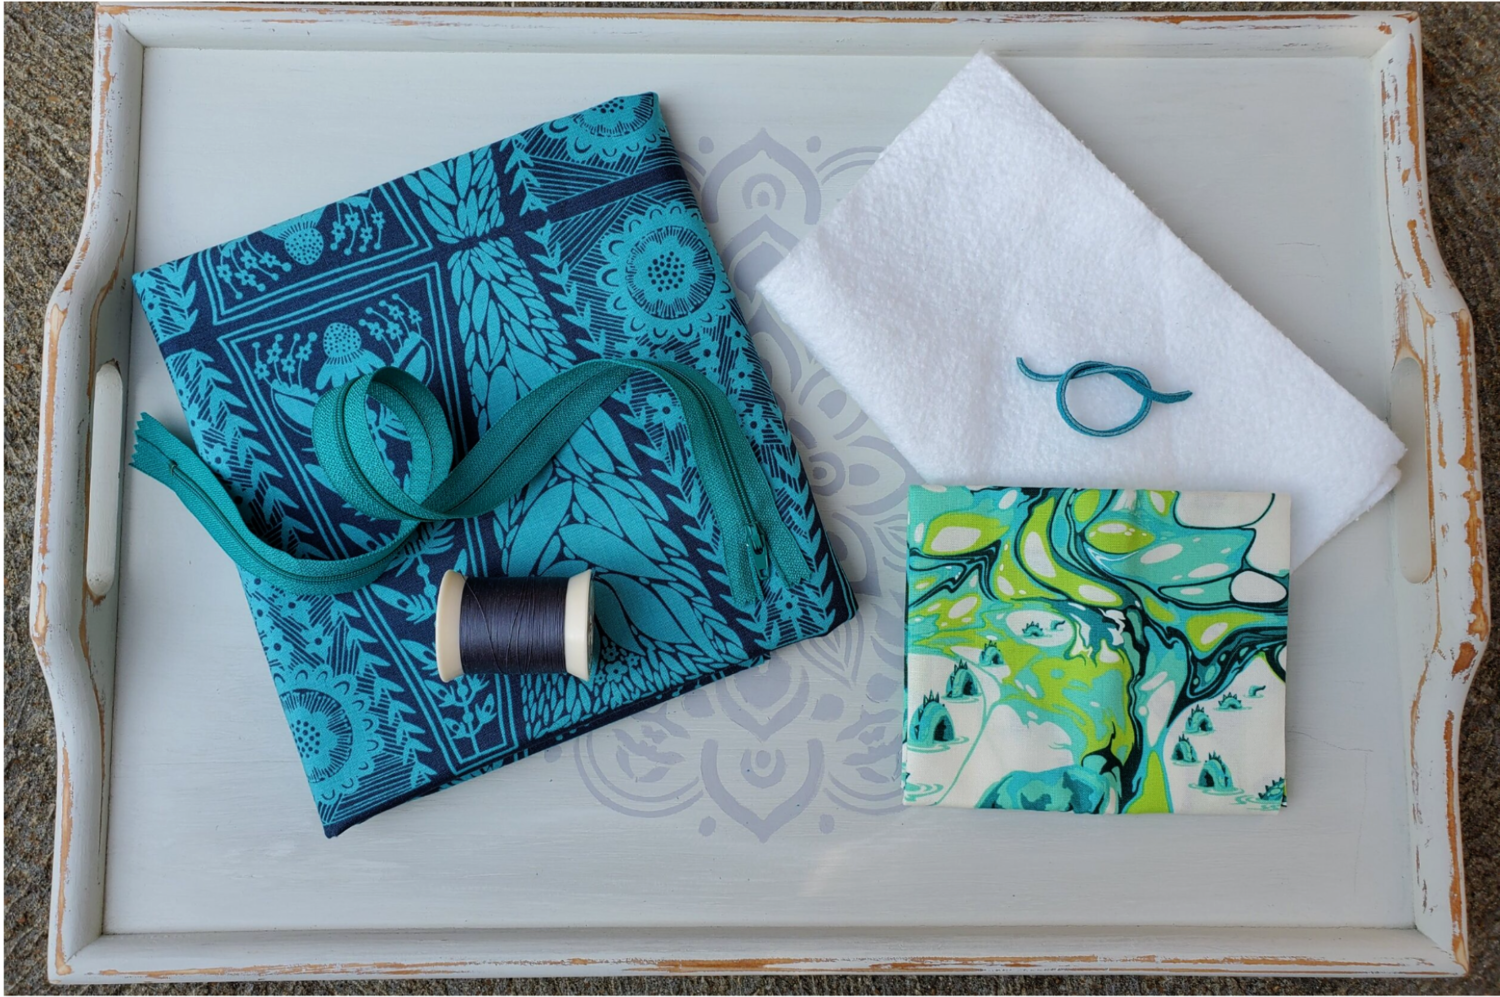
To make the pouch you will need:
2 outer fabric rectangles I made mine 8x12
2 lining fabric rectangles
2 batting rectangles (I used fusible)
One 2 ½ inch x 6-inch coordinating fabric for zipper stops
Color coordinating zipper at least 1” longer than fabric rectangle
All-purpose color coordinating thread
Decorative zipper pull
Fabric clips or straight pins
Scissors
Iron
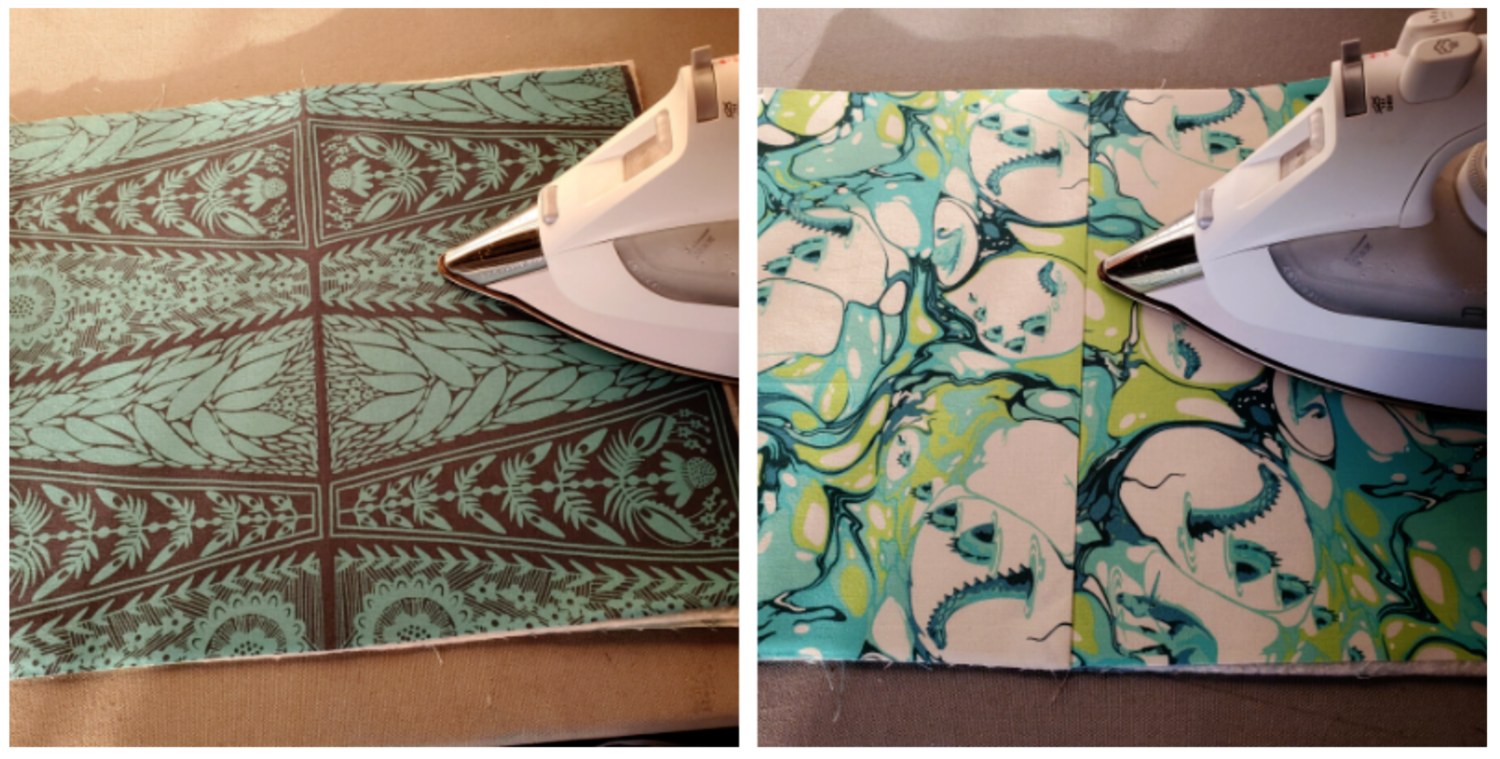
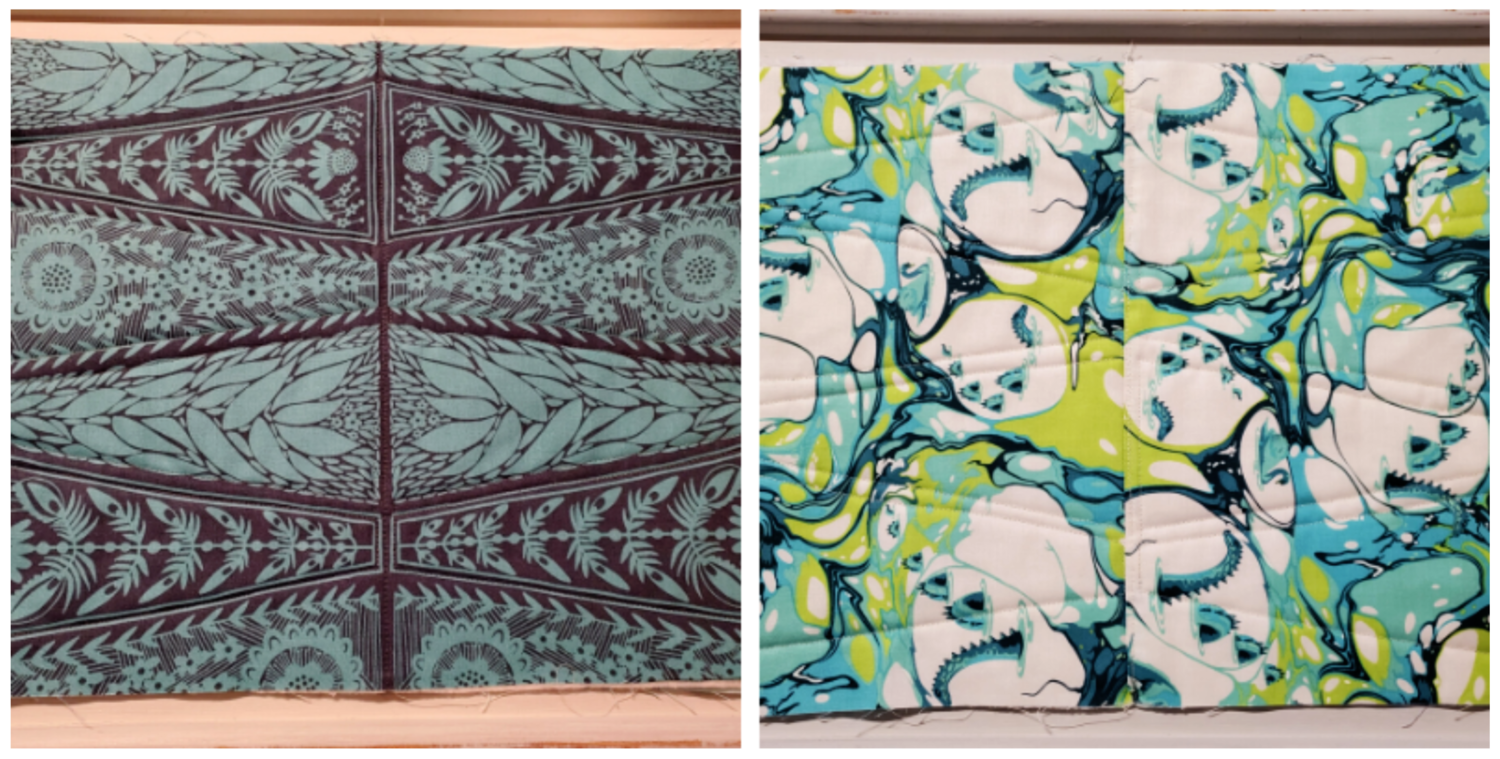
Because of the beautiful fabric design on my outer teal and gray fabric I decided to cut the fabric in one large 16x24 piece to showcase the floral feature. This step is optional. Since some fabrics are directional and it would only make sense to cut it in two pieces to keep it going the right way.
All seams will be ¼ inch to keep bulk to a minimum.
Step 1 - *This step is optional and use only if you have cut one large outer fabric as I have for this bag. Sew the lining pieces together along the long sides considering the direction of the fabric for the lining of the bag. Press the seam open.
Step 2 - Layer the lining right side down, then batting and outer bag fabric right side facing up. If you are using fusible batting it is quick and easy to just press in place using and up and down motion.
Step 3 - You now have a “quilt sandwich” ready to sew through the three layers.
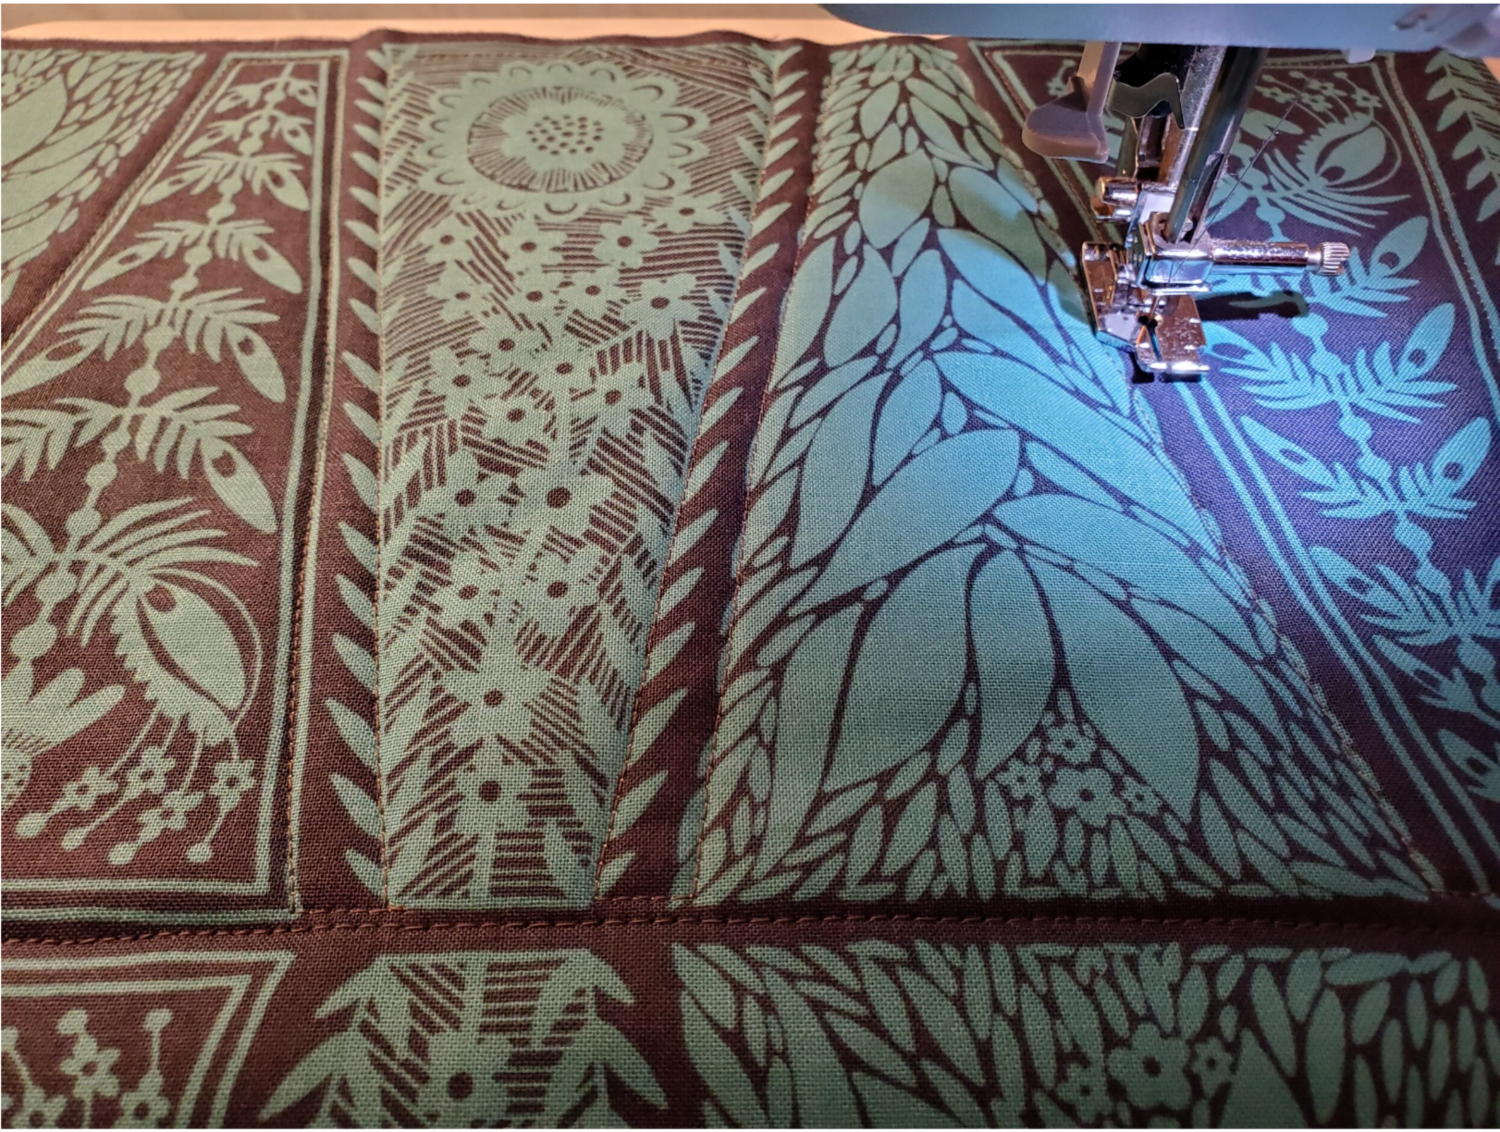
It was easy using this beautiful Cotton Cuts fabric to follow the floral fabric design lines stitching with a color coordinating thread. If you want, you can go from corner to corner stitching one inch away from the previous line of stitching creating a diamond shape quilt pattern over the bag.
Step 4 - Now we will add a fabric zipper stop to each end of the zipper. Take the 2 ½ inch x 6 piece of fabric and fold long sides evenly to the middle and press. Cut into two 3-inch pieces. Trim the zipper one half inch shorter than the width of the top of your bag. Be sure the zipper pull is in the middle, so you don’t cut it off. Fold one of the 3-inch pieced in half and place on one end of the zipper and stitch in place with raw edges on the seam side.
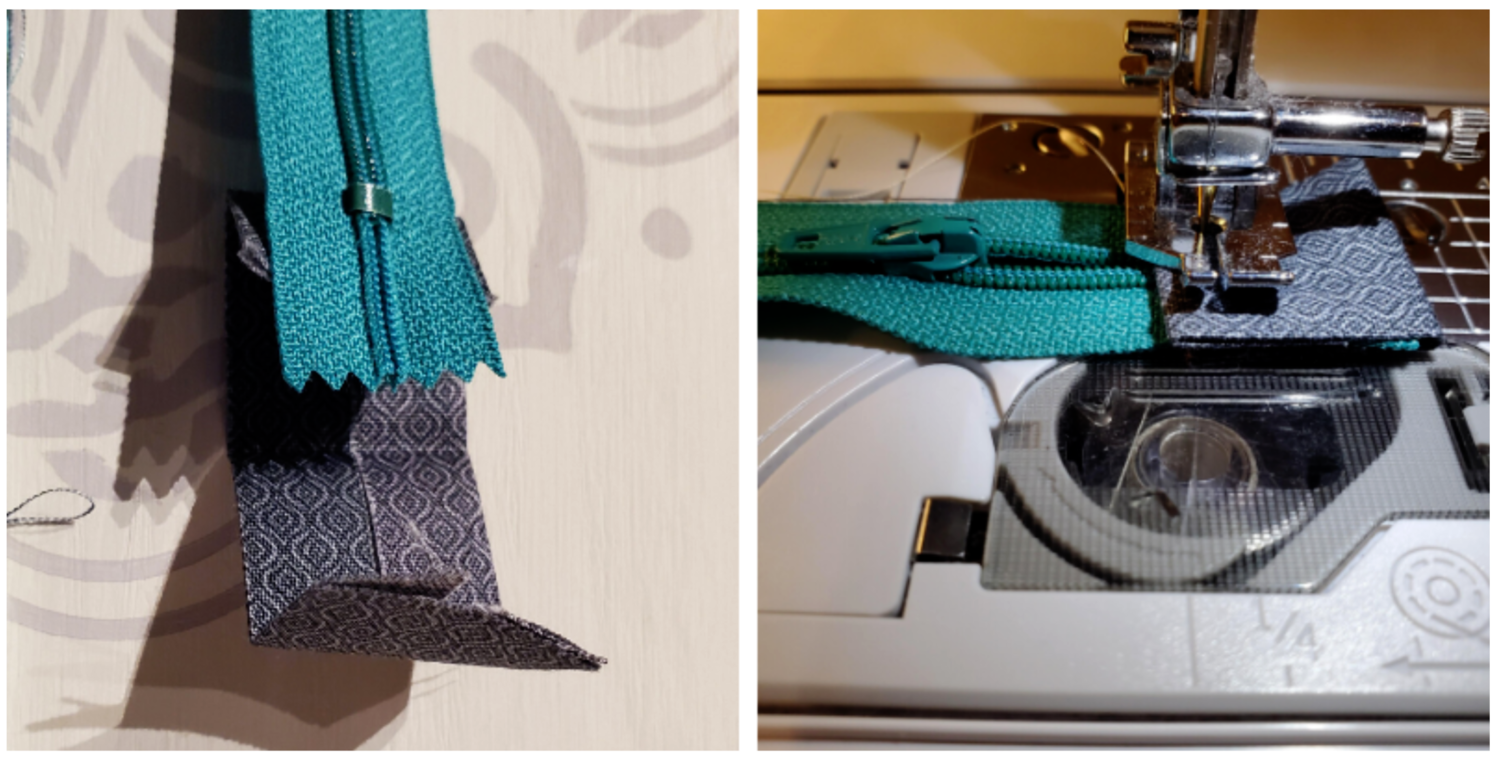
Do the same on the other end. The zipper should end up the same width of the top of the bag.
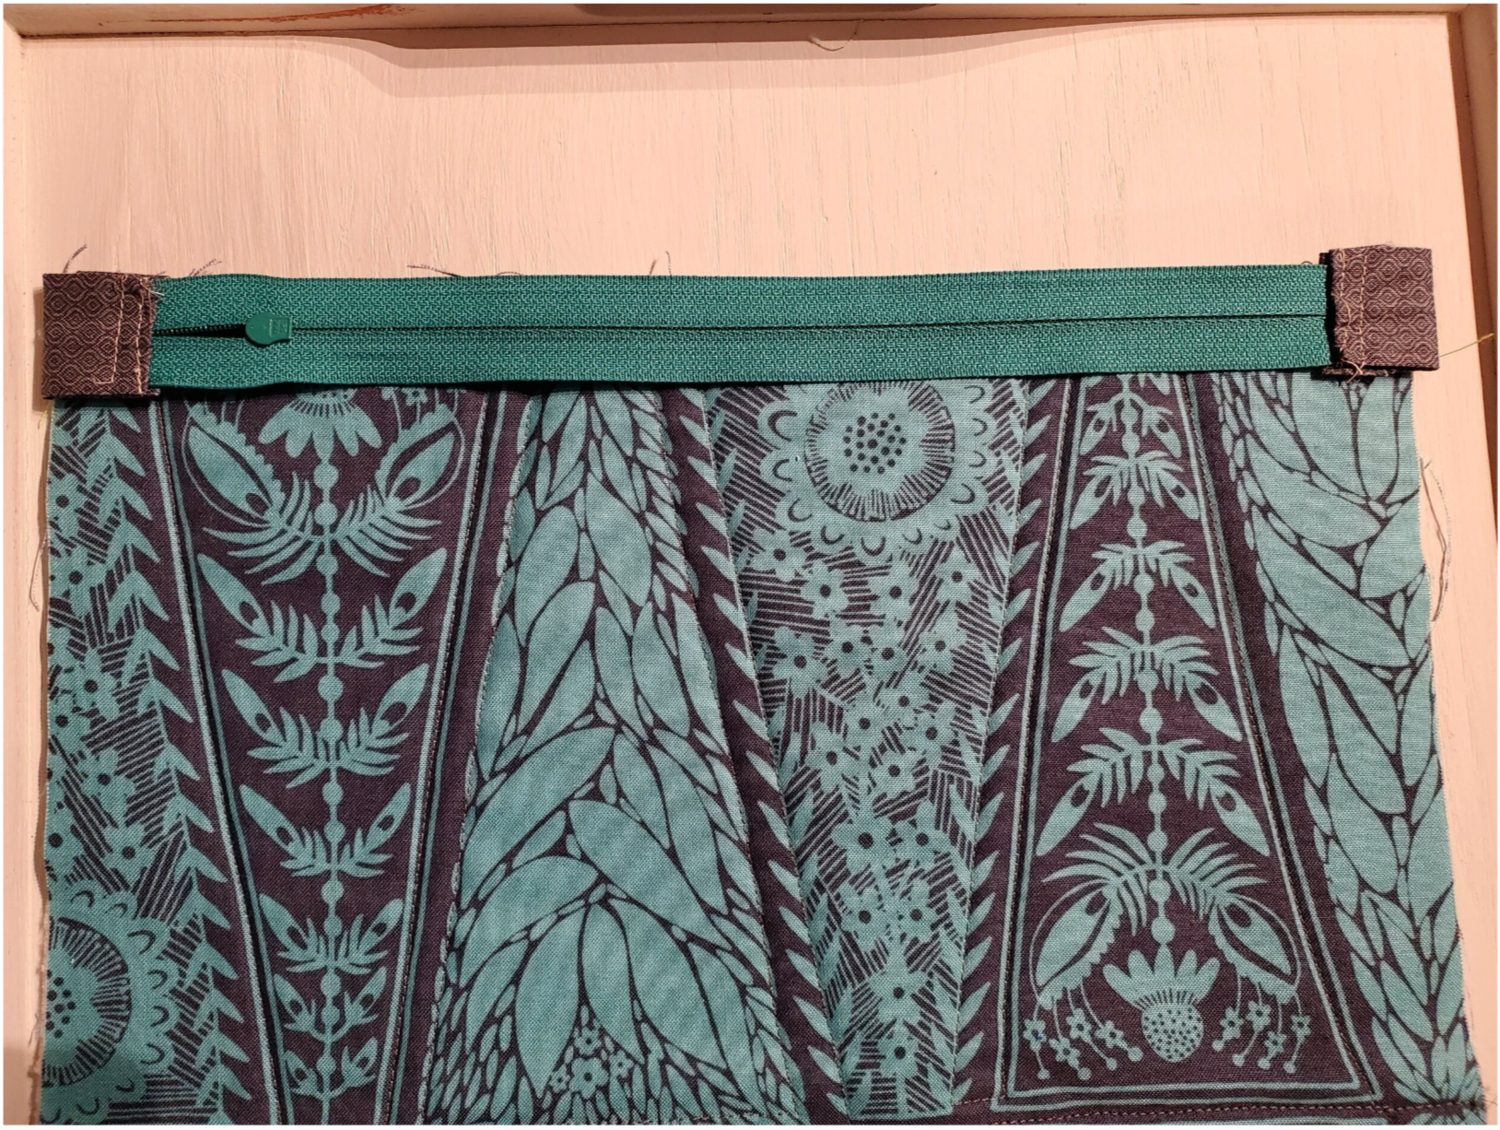
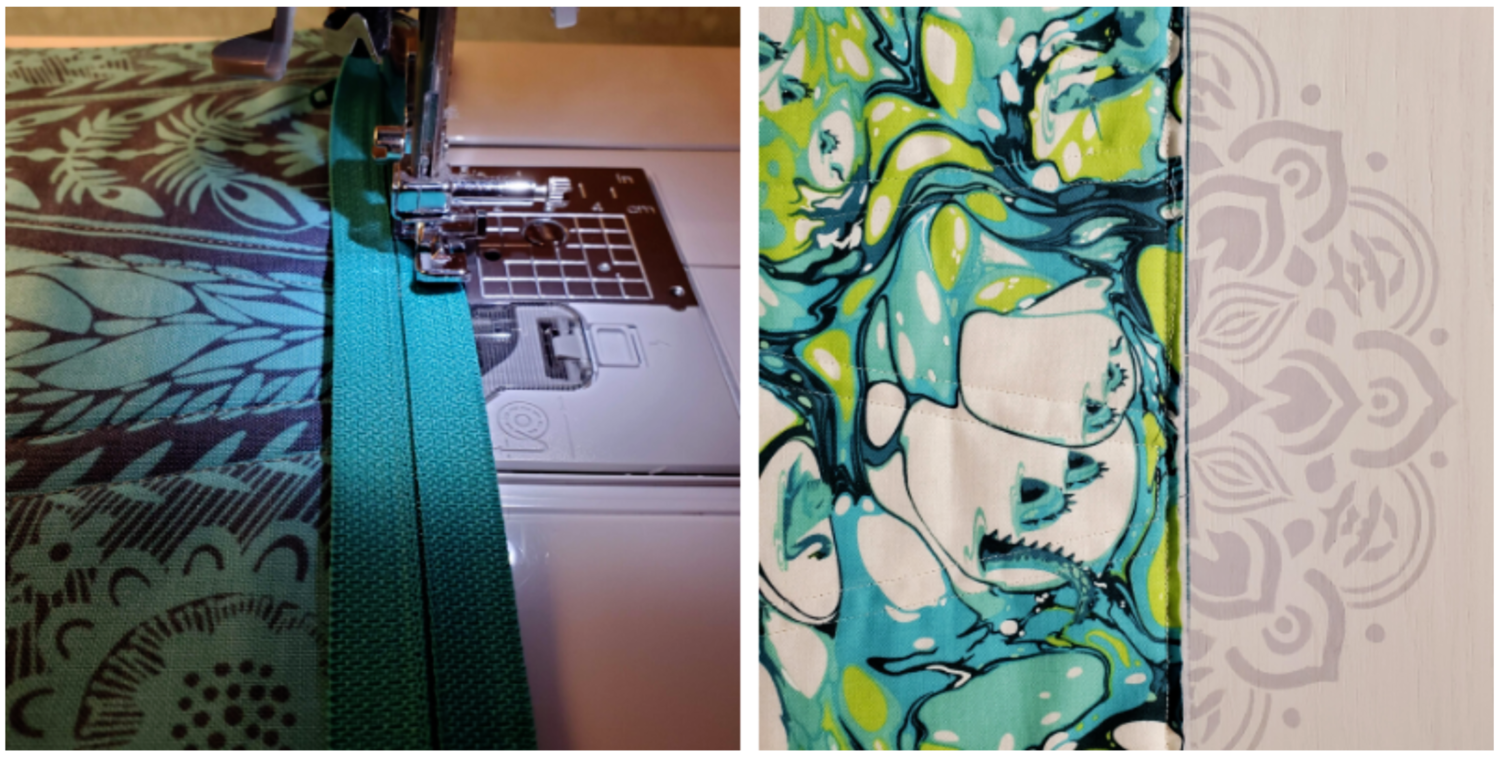
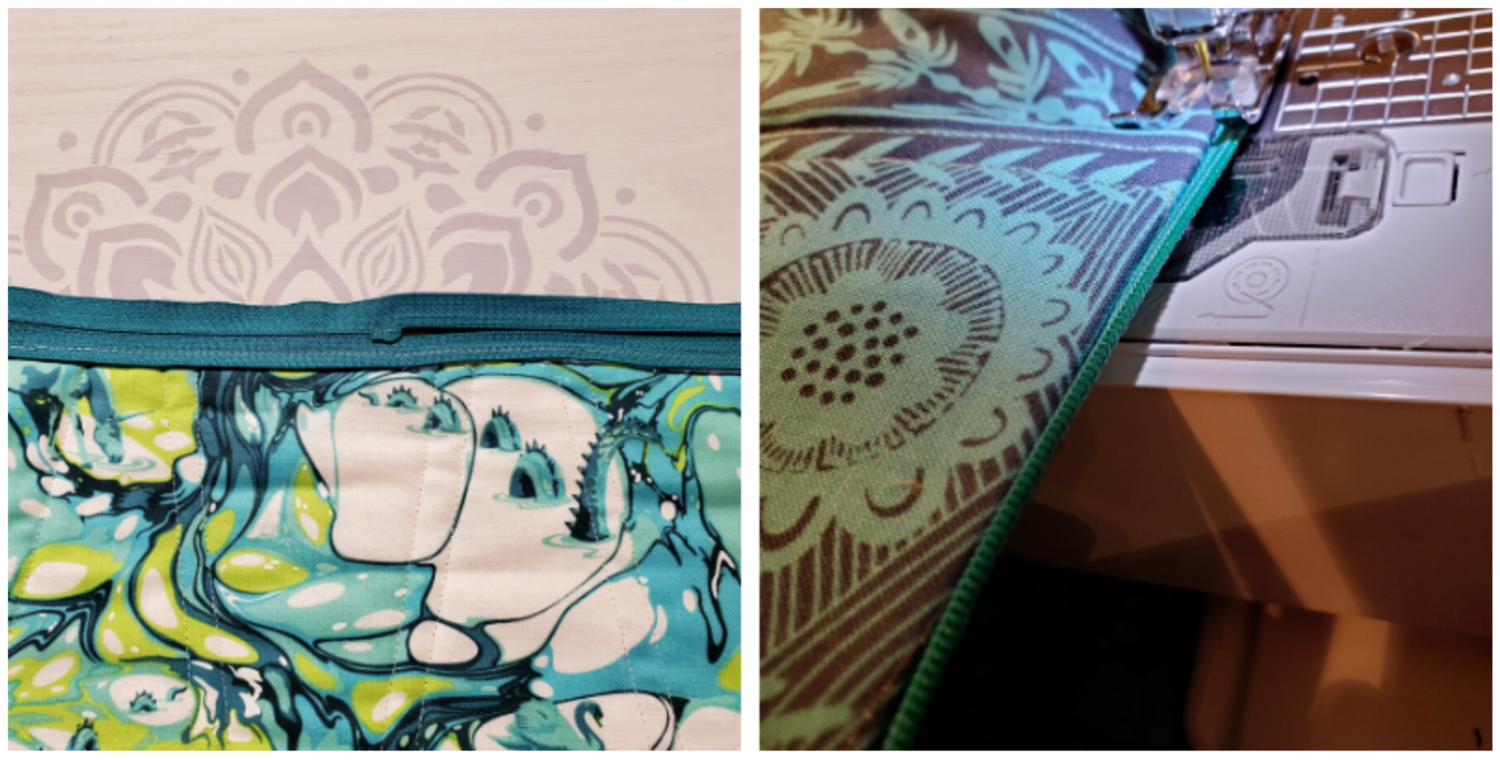
Step 5 - Place the right side of the zipper on the right side of the outer fabric.
When you place the zipper be sure to cover the raw edge of the top of the bag with slightly more of the zipper extended over the raw edge so when it is finished it will be hidden in the seam, as seen in the photo.
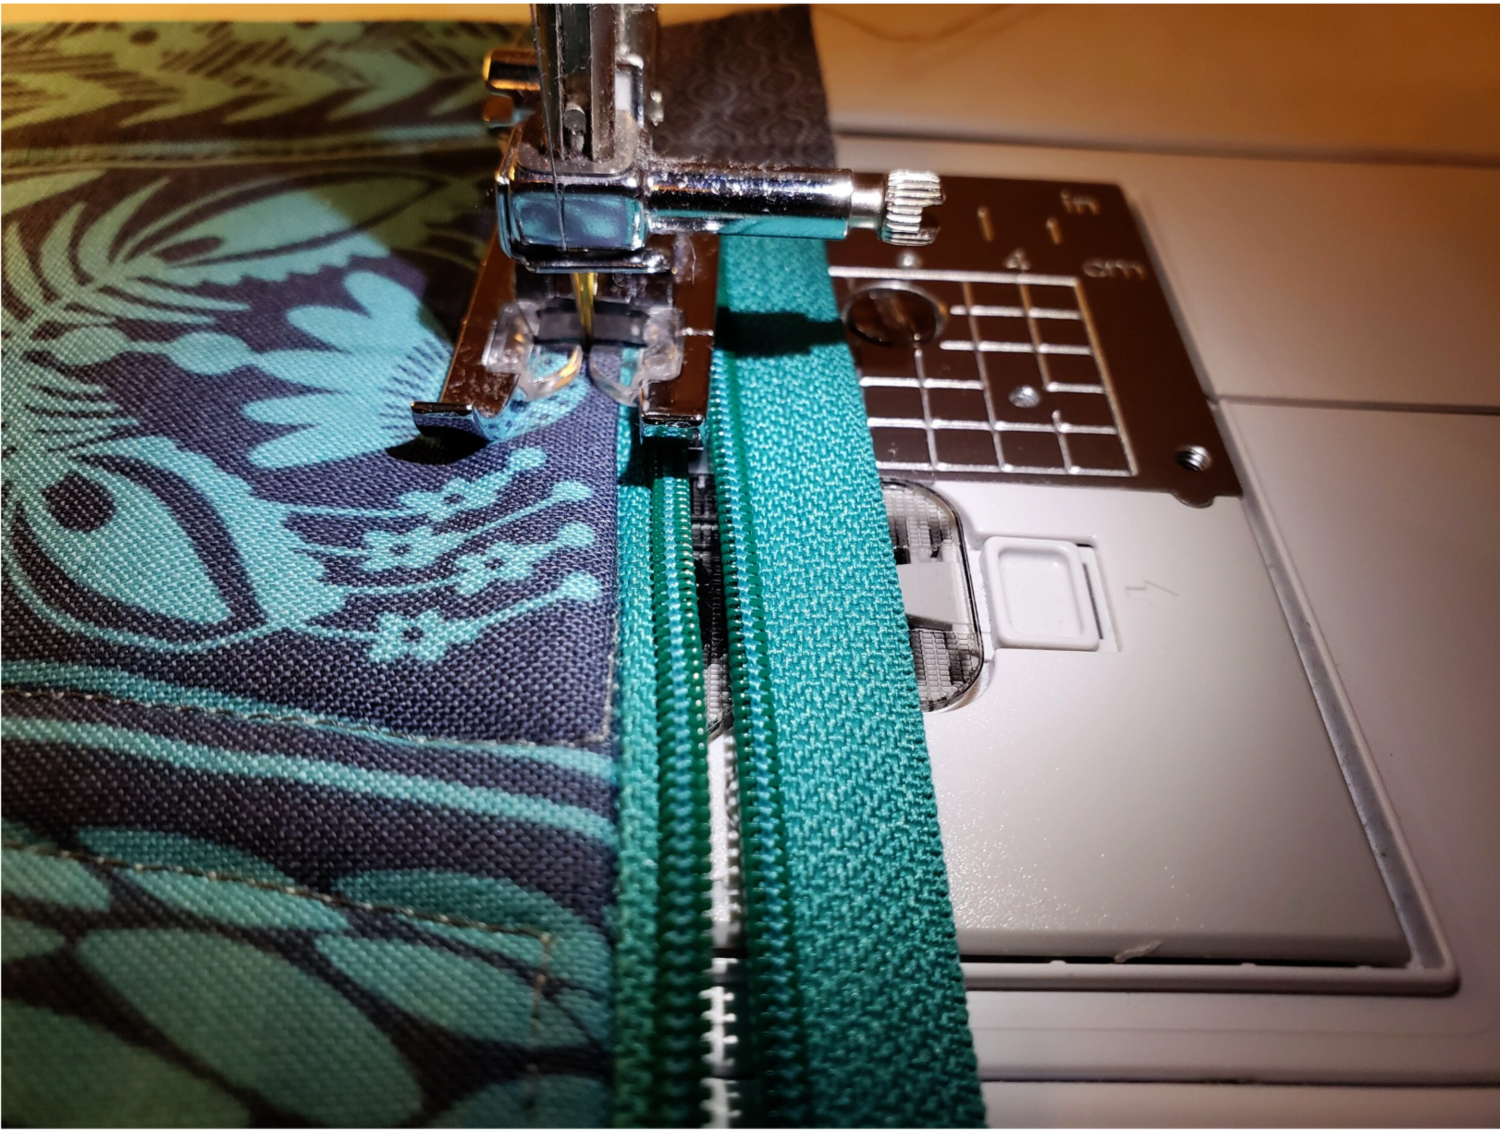
Be sure the zipper is properly aligned side to side on the bag and use a fabric clip to hold it in place. Using your zipper foot sew the zipper in place about 1/4th inch from the zipper teeth. After you sew this side of the zipper open out the fabric and give it a quick press.
Step 6 - You are now going to change to an open toe foot to top stitch about 1/8’ inch from the edge as seen in the photo. You will want to be sure you are catching the inside seam to catch the raw edges in the top stitching. I usually set the stitch length at 3.0 for a little longer stitch for a nicer look on the top stitching.
Step 7 - Now we will repeat the process on the other side of the zipper.
* Because I used one continuous piece of fabric for the outside of the pouch it makes it a litter trickier. I took the large detachable table off my sewing machine to fit the opening easier as I stitched the zipper in place and top stitched the second side in place.
If you have two cut pieces of outer fabric you should now have the zipper in the middle of the long sides of the fabric quilt sandwich. With right sides together using pins or fabric clips align the pieces to form a rectangle. Open the zipper pull to the middle to give yourself a way to turn right sides out after you sew the three seams with a ¼ inch seam allowance.
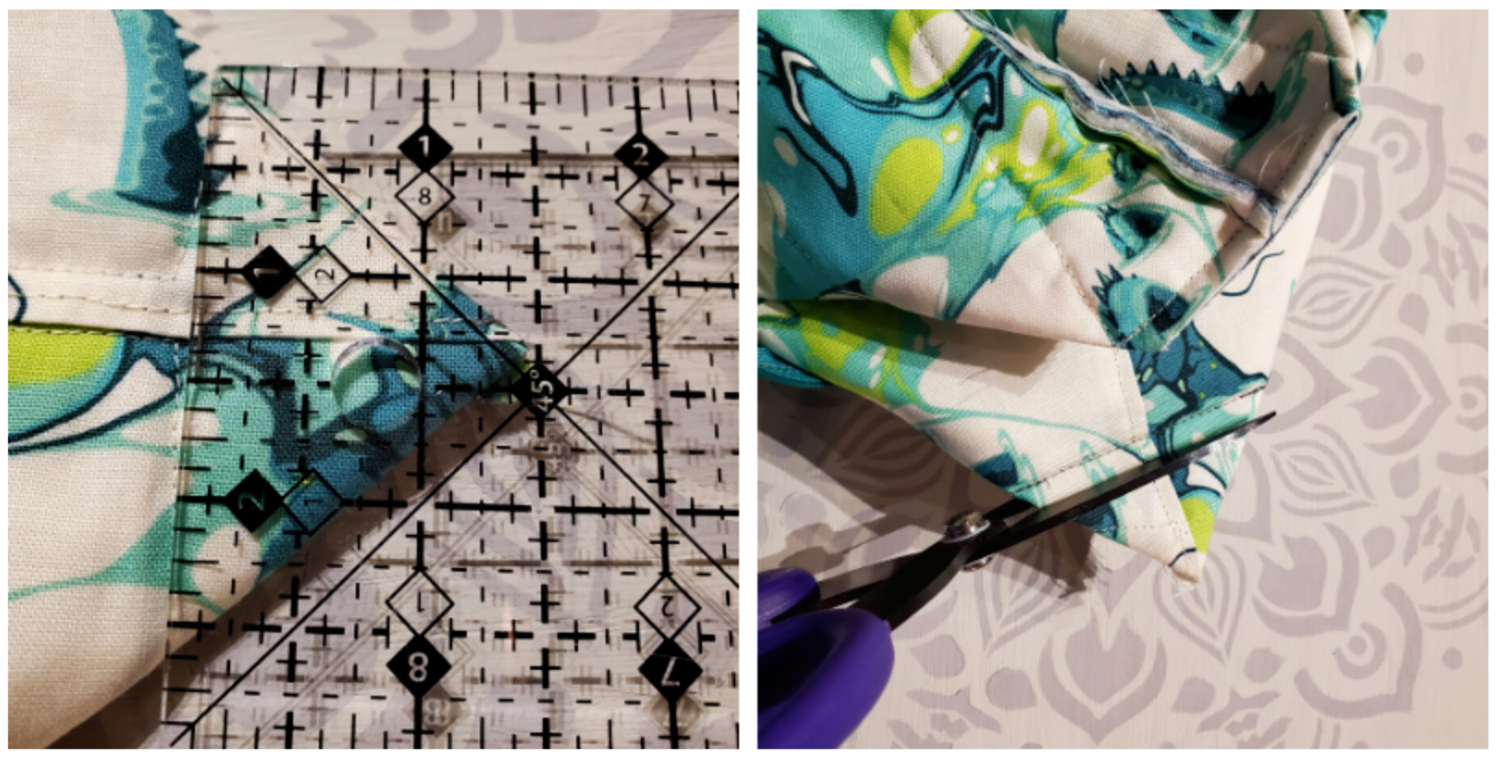
Step 8 - box the bottom corners. For this you will flatten and align the bottom and side seams. Using a ruler mark 1 ½ inches from the corner, this will be your stitching line.
It can be helpful to place a pin to hold it in place as you stitch. Repeat on the other side. Now with a sharp scissor trim excess fabric about ¼ inch from the seam.
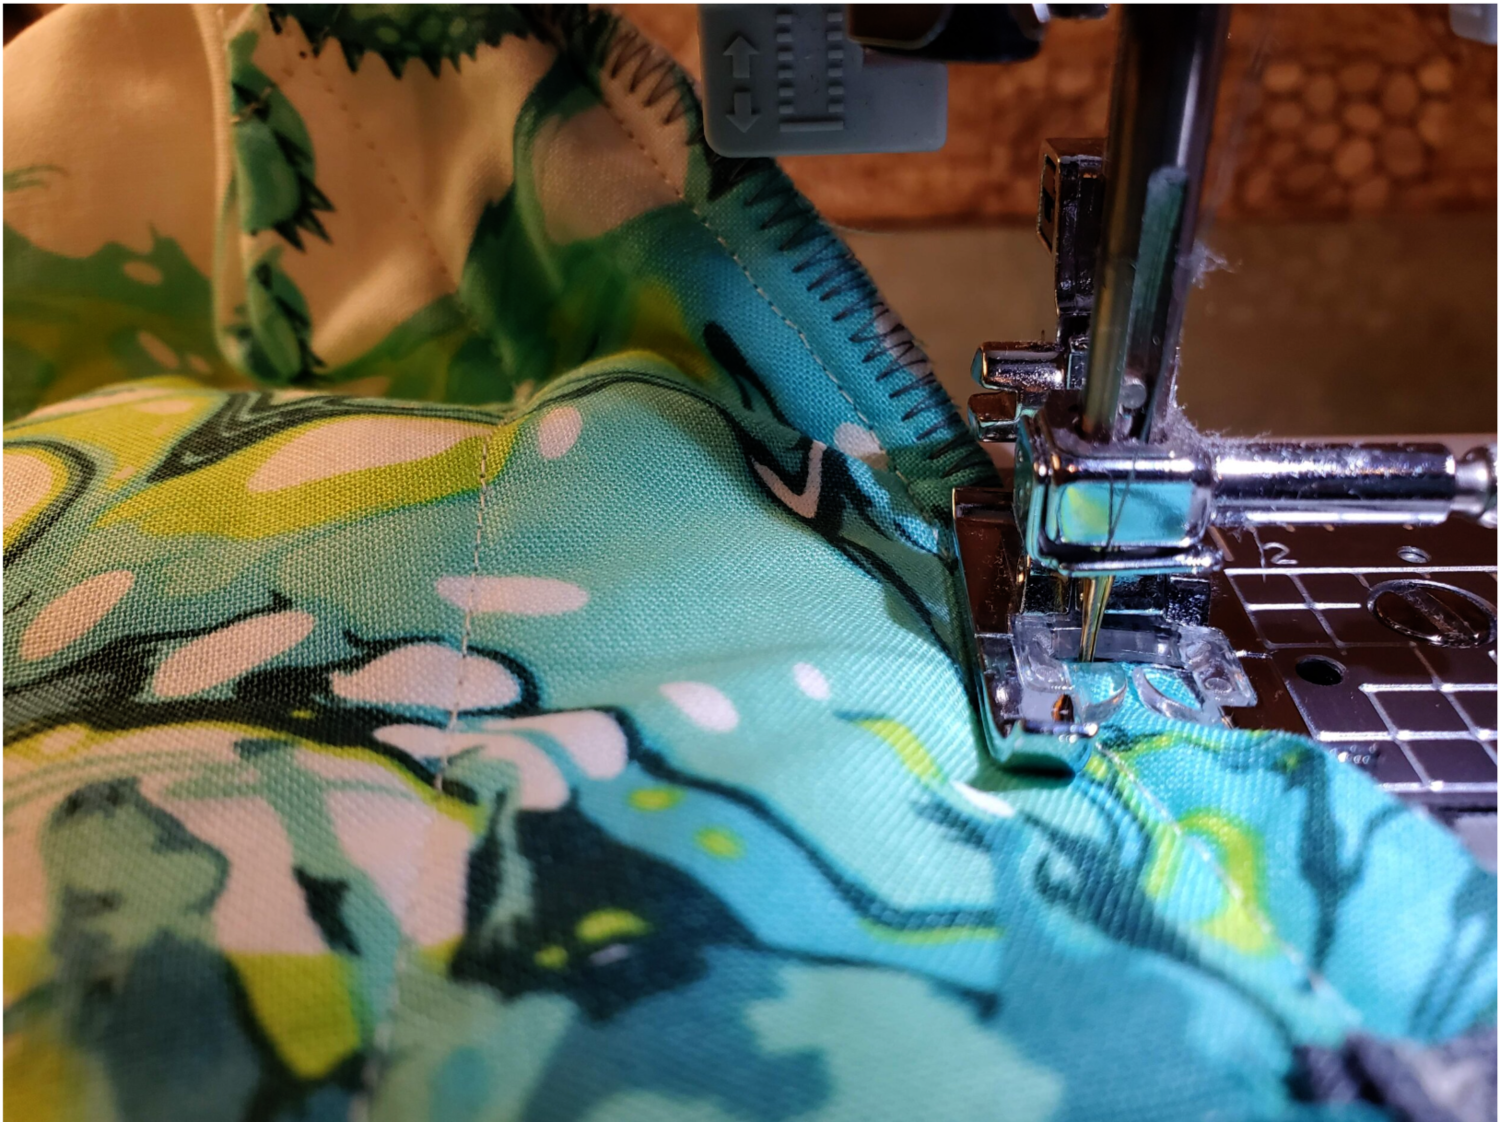
Step 9 - *This next step is optional, but it gives your pouch a more finished professional look on the inside. You can use a zig zag stitch or if your machine has an overlock stitch use it to finish the raw edges of the bottom and side seams in the lining of your pouch.
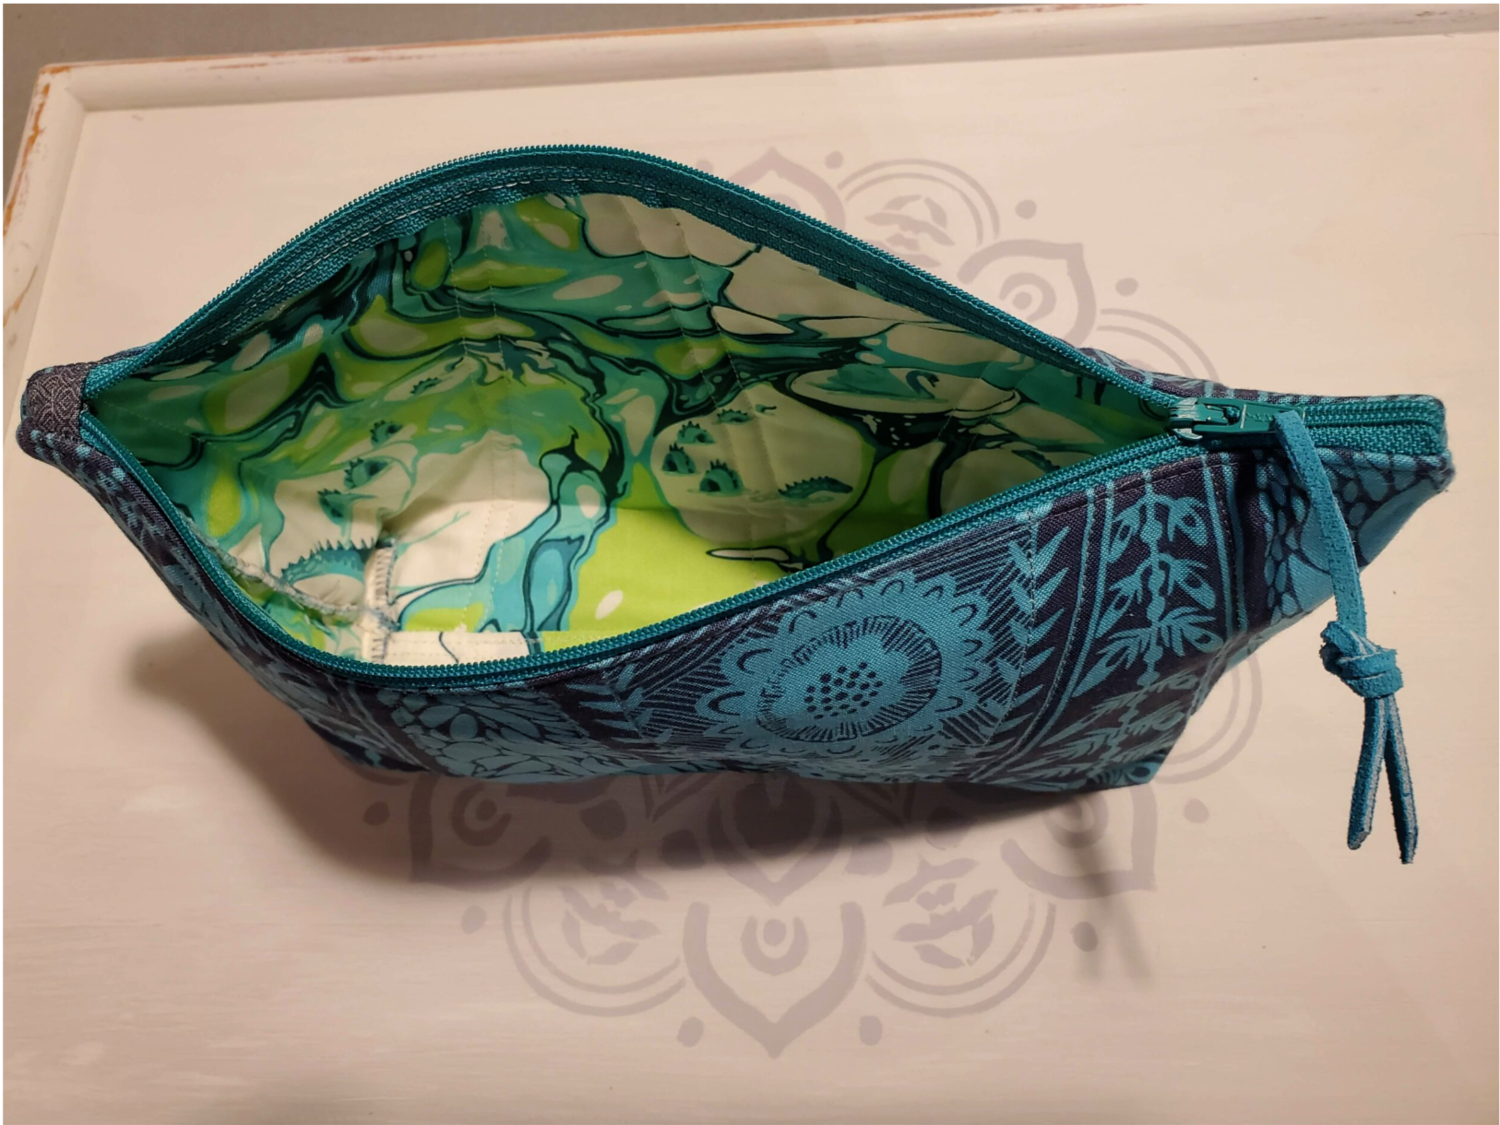
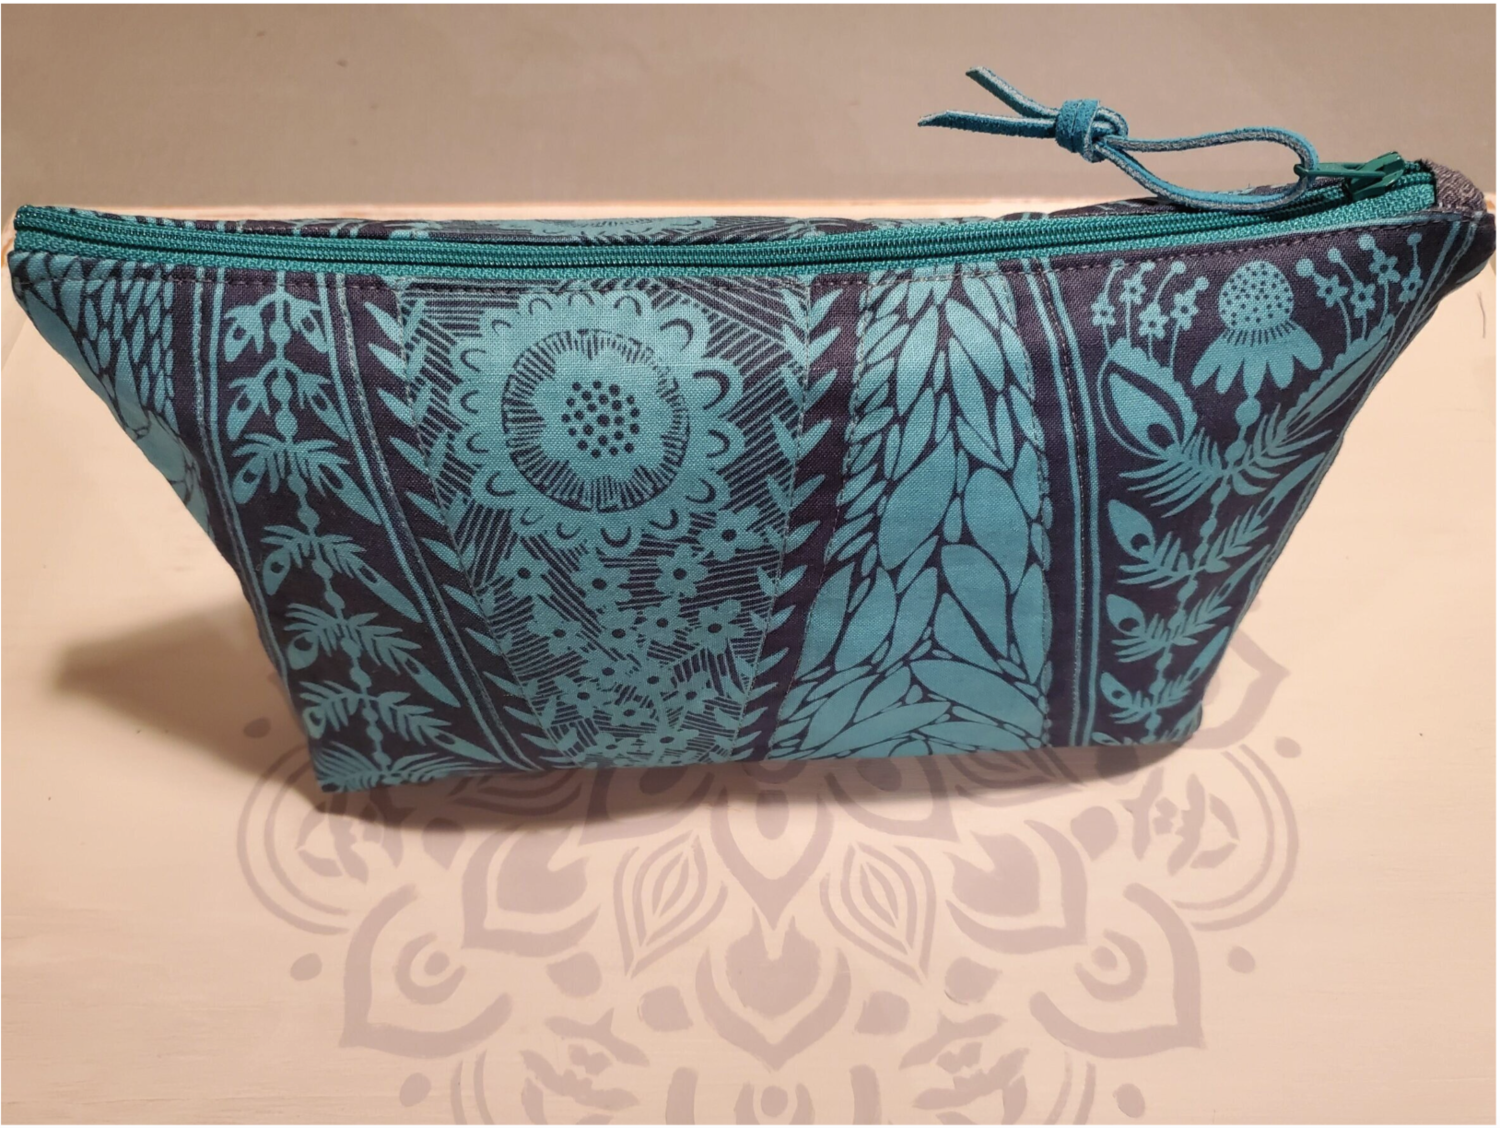
Step 10 - Now turn the bag right side out and using a tool push all the corners out. Give your pouch a press, it can be helpful to use a rolled-up hand towel or washcloth to keep the proper shape as you iron the seams and boxed corners.

As a final touch you can add a decorative zipper pull to personalize the pouch.
These bags have endless possibilities as you change the size, fabric and quilting details. These make wonderful gifts for just about anyone on your list!