Learn a New Skill - Thread Painted Bird
2nd Jul 2020
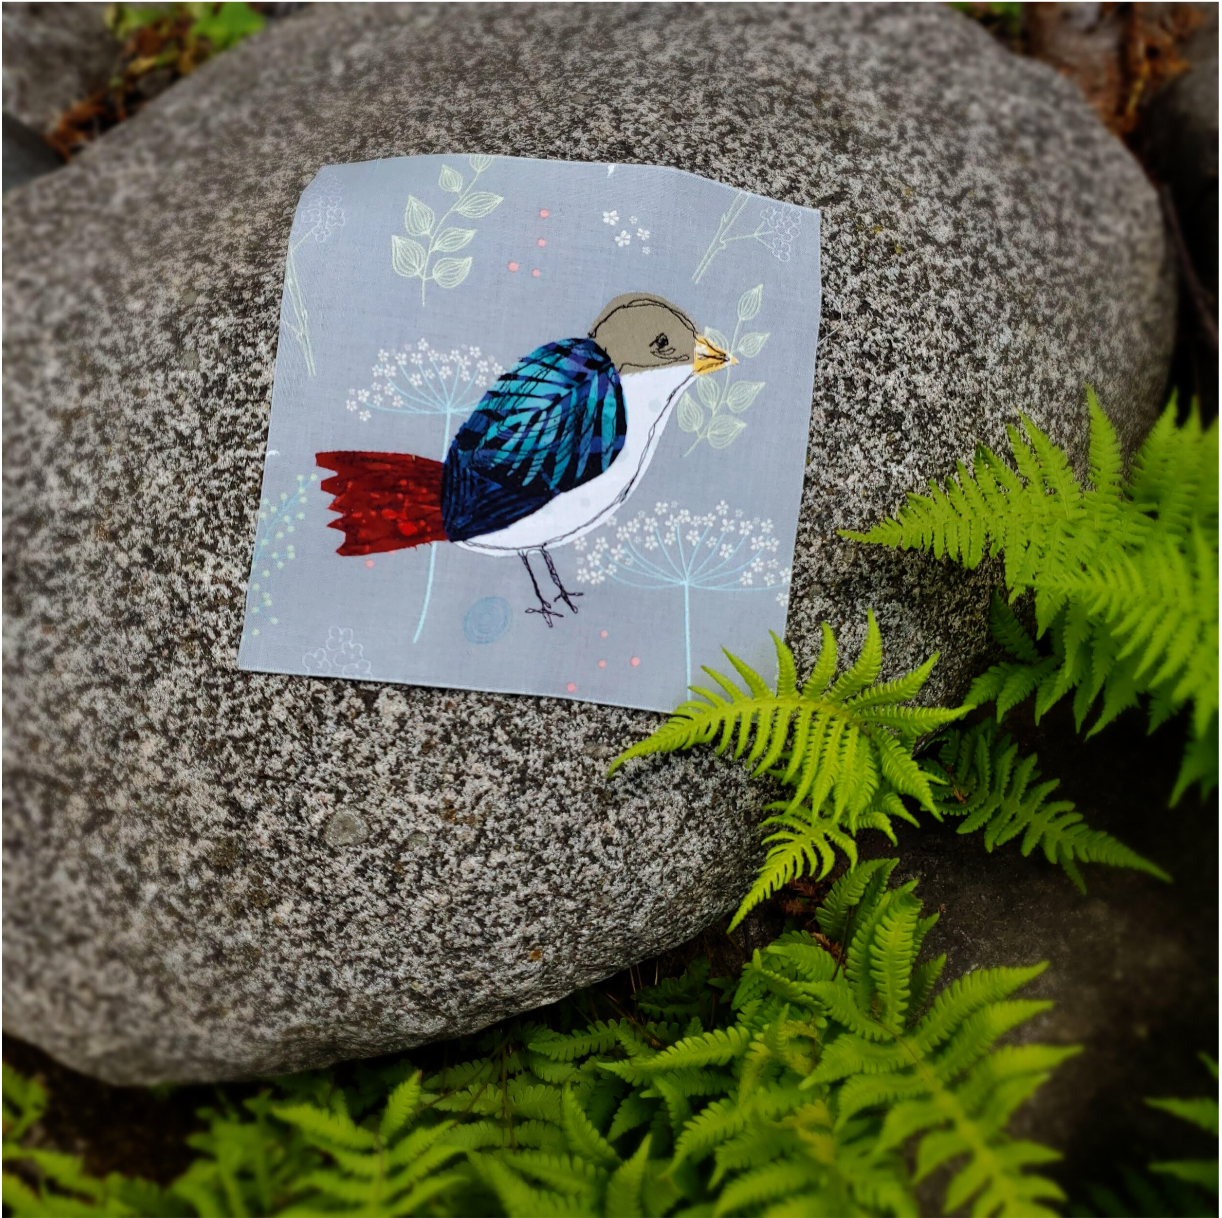
Hi! Joanne here sharing my new project this week inspired by my visit to the North shore of Lake Superior. Each morning I was awakened by the sweet song from the Forest Flutist the Veery. It has been so refreshing to sleep with the windows open to see the vast array of stars each night and smell the fresh forest air. The background fabric reflects the wildflowers that grow freely along the roads as a delightful welcome mat to the area.
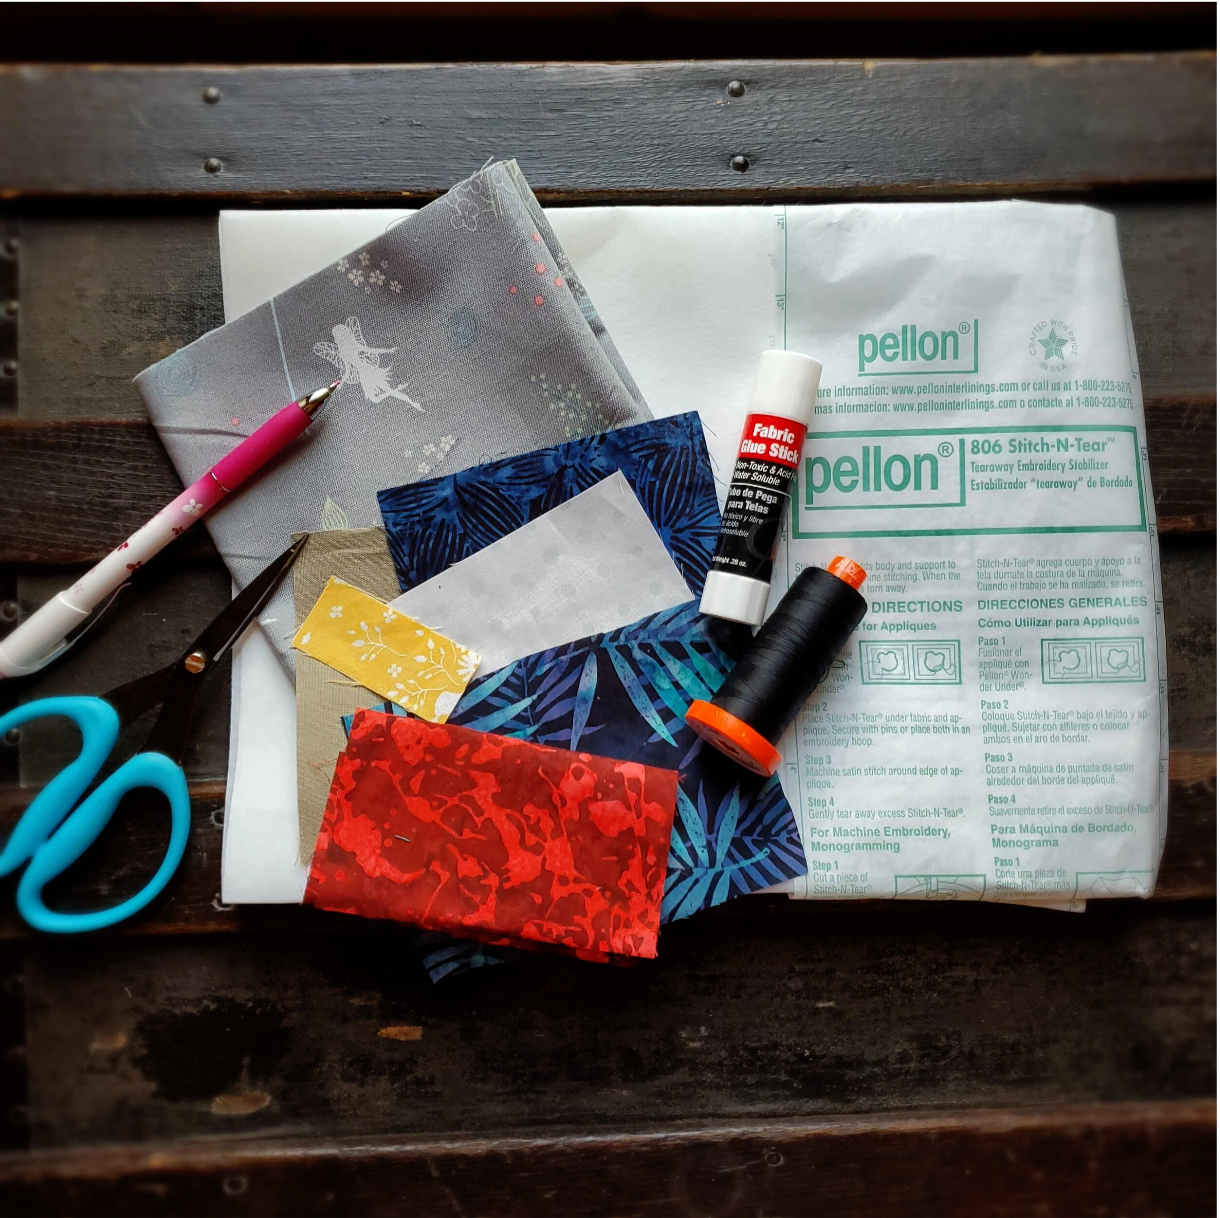
Supplies:
Scraps of assorted fabric. I used batiks from the July Java box and background fabric from a Calliope mix
Black thread
Marking pen
Fabric glue stick
Pellon stabilizer
Sharp scissors
I started by drawing my basic bird outline and made a paper pattern to cut my fabric pieces.
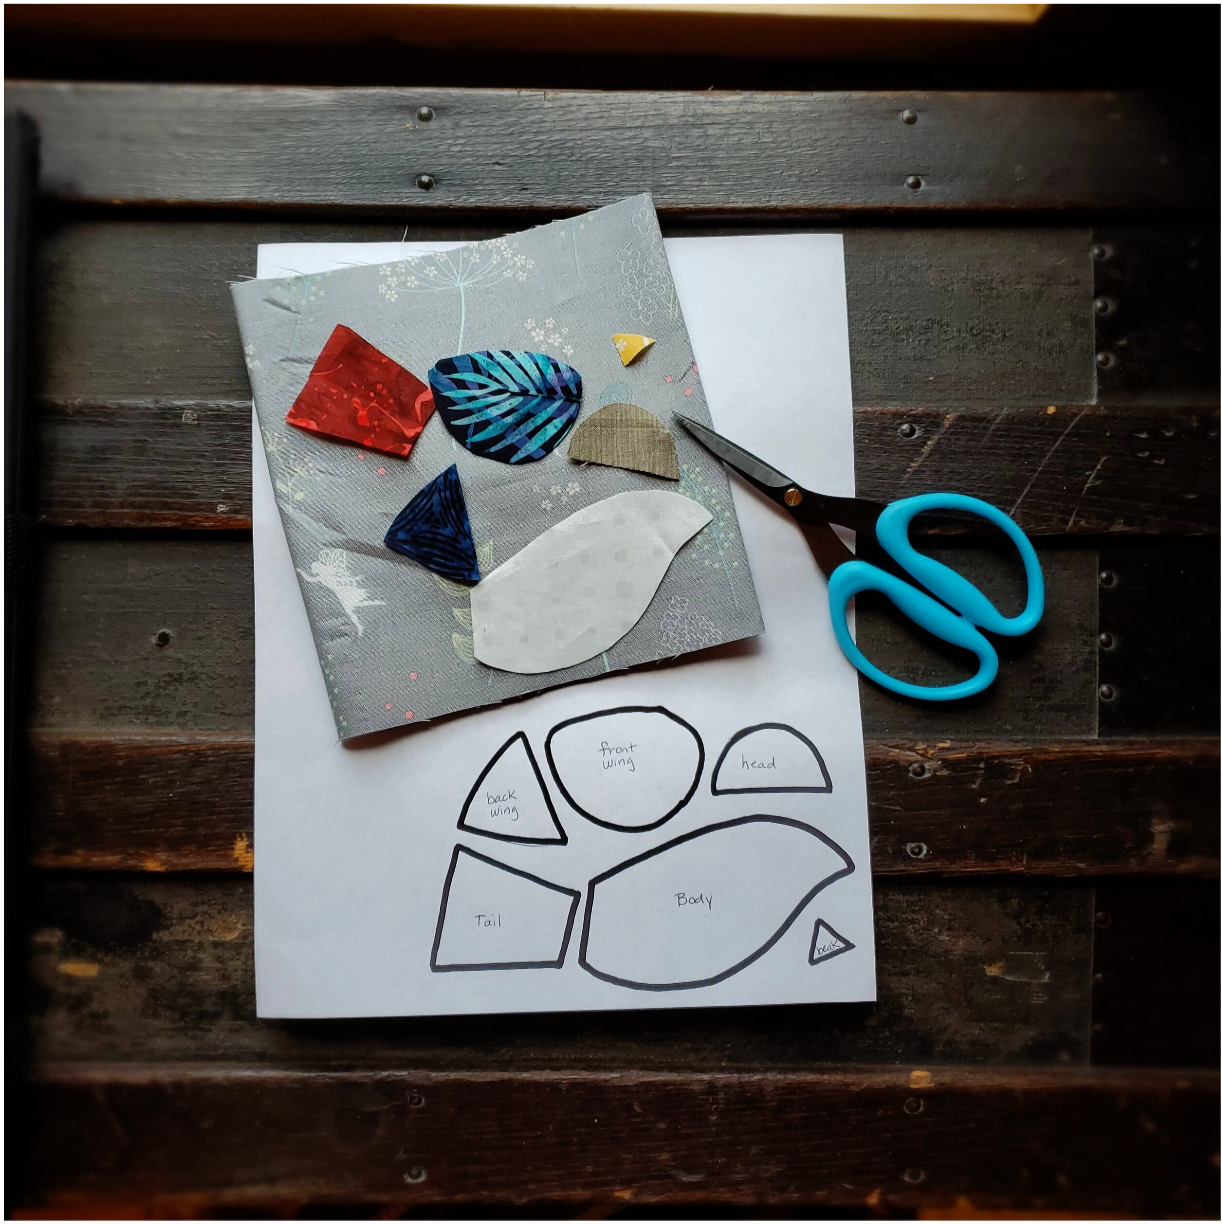
Next, I cut my background fabric piece and Pellon stabilizer into a 6 ½ inch square. I used my fabric glue stick to place the cut bird pieces on the background fabric with the stabilizer piece under the background fabric.
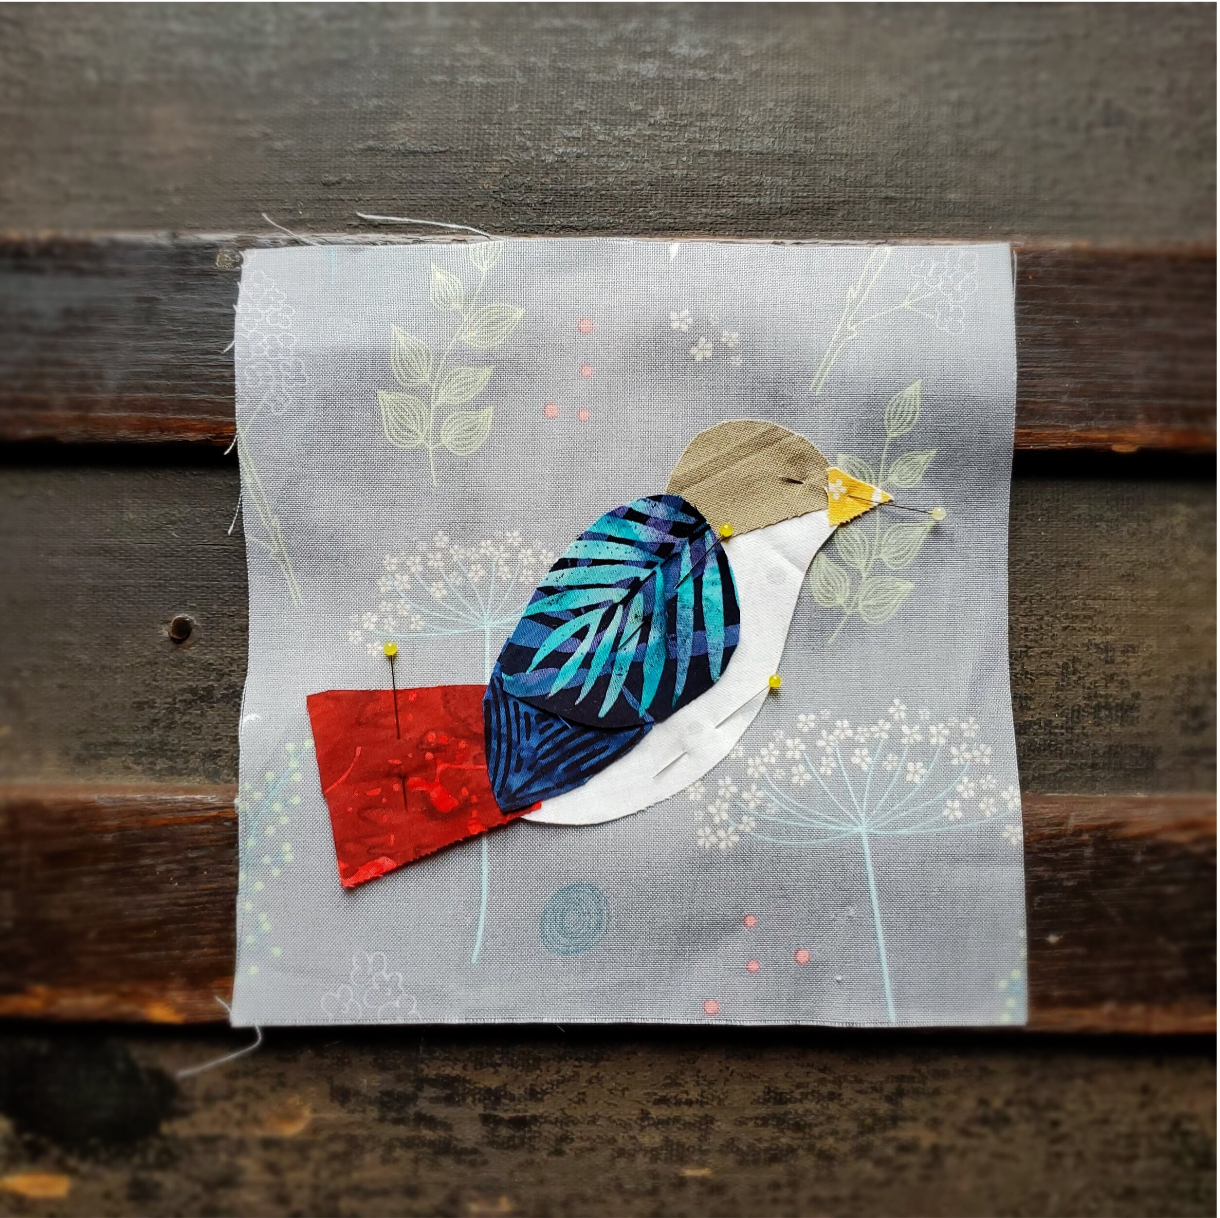
To prepare for the next step you will need to be familiar with how your sewing machine is set to do free motion quilting. For my machine I lower the feed dog teeth in the base plate so that I have control over the stitch length and direction I move. I attach the clear free motion foot or darning foot that allows me to see where I am stitching. I also adjust the presser foot pressure so I can move the fabric freely. The thread tension is lowered to about a #3. I always start with practicing on the same fabric and stabilizer I will be using for my project. This will let you get a feel for how the stitching will look before actually doing it on your project. You will need to make adjustments at this time referencing your machine manual for free motion set up.
I think It would be possible to do this starter project on your sewing machine using a clear or open toe foot with normal settings. As always, practice first to test the results using this method.
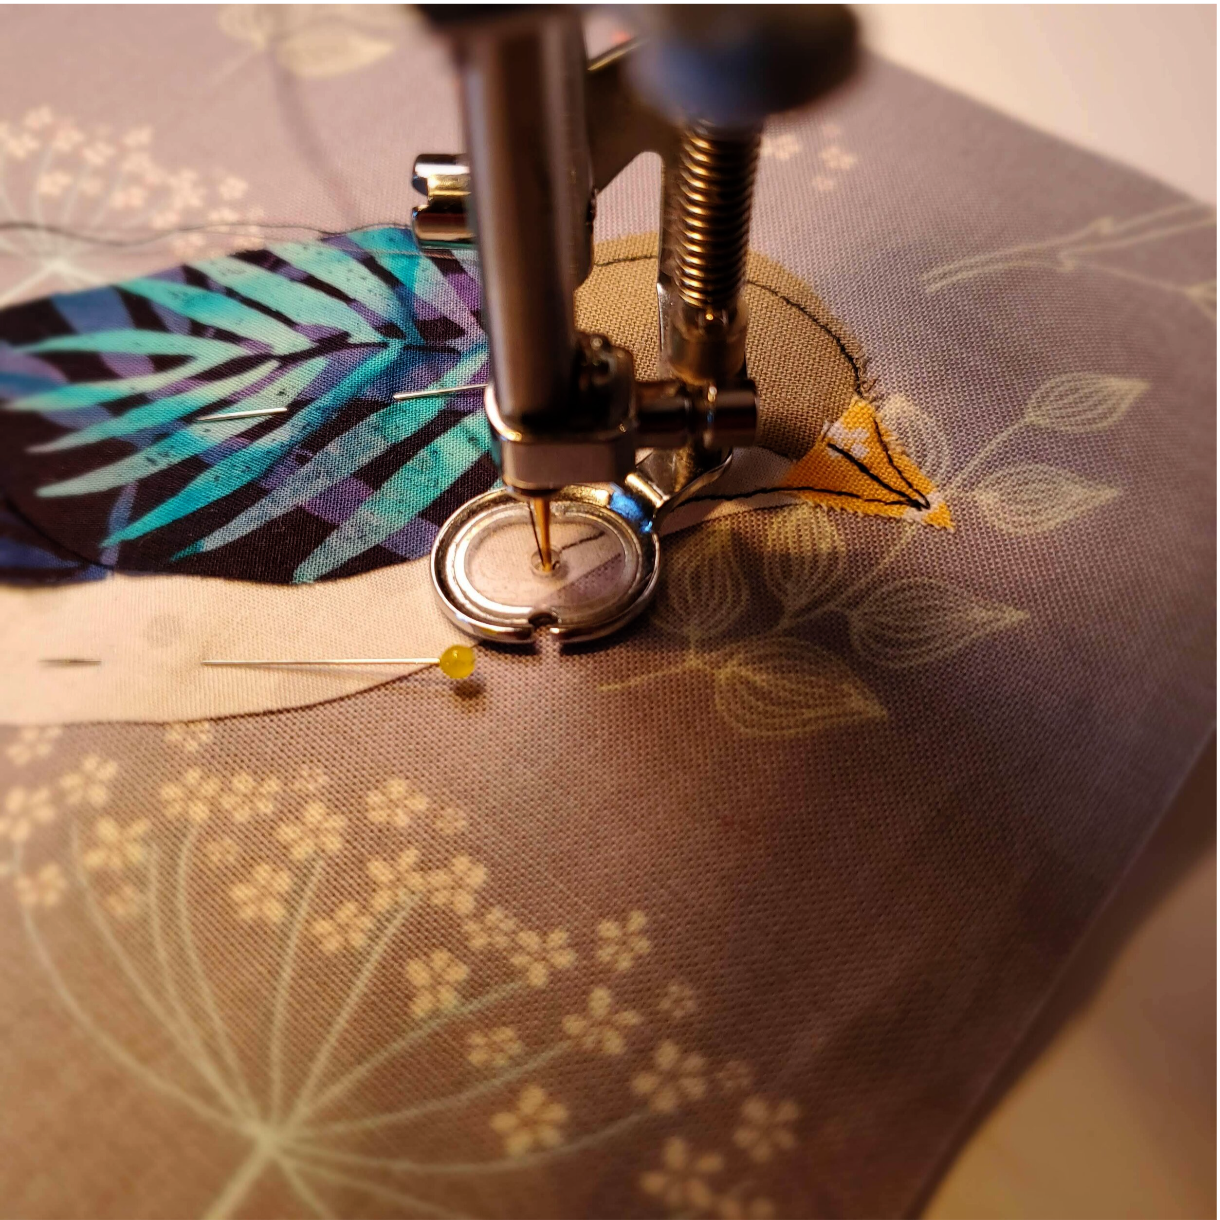
I started stitching abt the back of the head outlining about ⅛” from the raw edge. It doesn’t need to be neat and tidy as you stitch but look more like sketching. I went around outlining till I met the wing at the bottom and doubled back creating a shadow effect in some areas.

Next, I stitched some lines in the wings to look like feathers. Then moving on to the tail. I decided to cut a few “v” shapes out of the tail to give it a more interesting look.
I finished adding the finer details with the eye and legs and feet. I drew these in with a chalk pencil to be sure I liked the placement before sewing. If you wanted to take it up a notch you could change your thread colors to add highlights and shadows to the bird. This was my first attempt so I am learning along with you. I will definitely be trying more projects like this in the future, maybe some Minnesota wildflowers.