Learn a New Skill - Make An Apron
25th Jun 2020
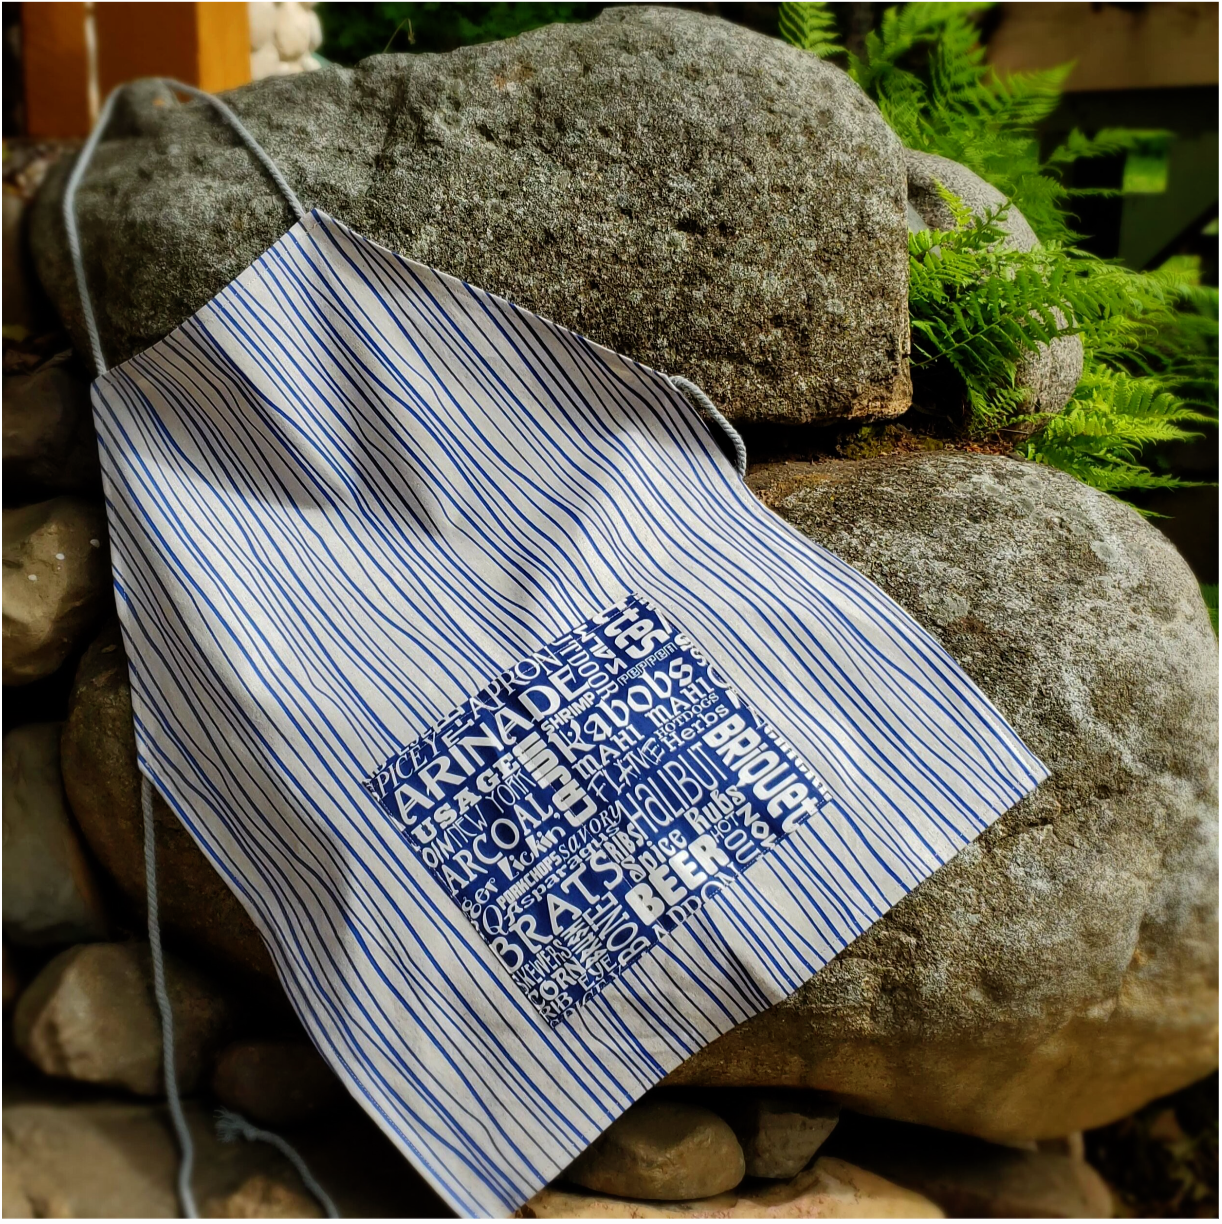
Hi! Joanne here! With the start of summer I have been thinking about all the fun outside activities to enjoy. I thought an apron for gardening or BBQing would be a fun and easy project. Let’s get started!
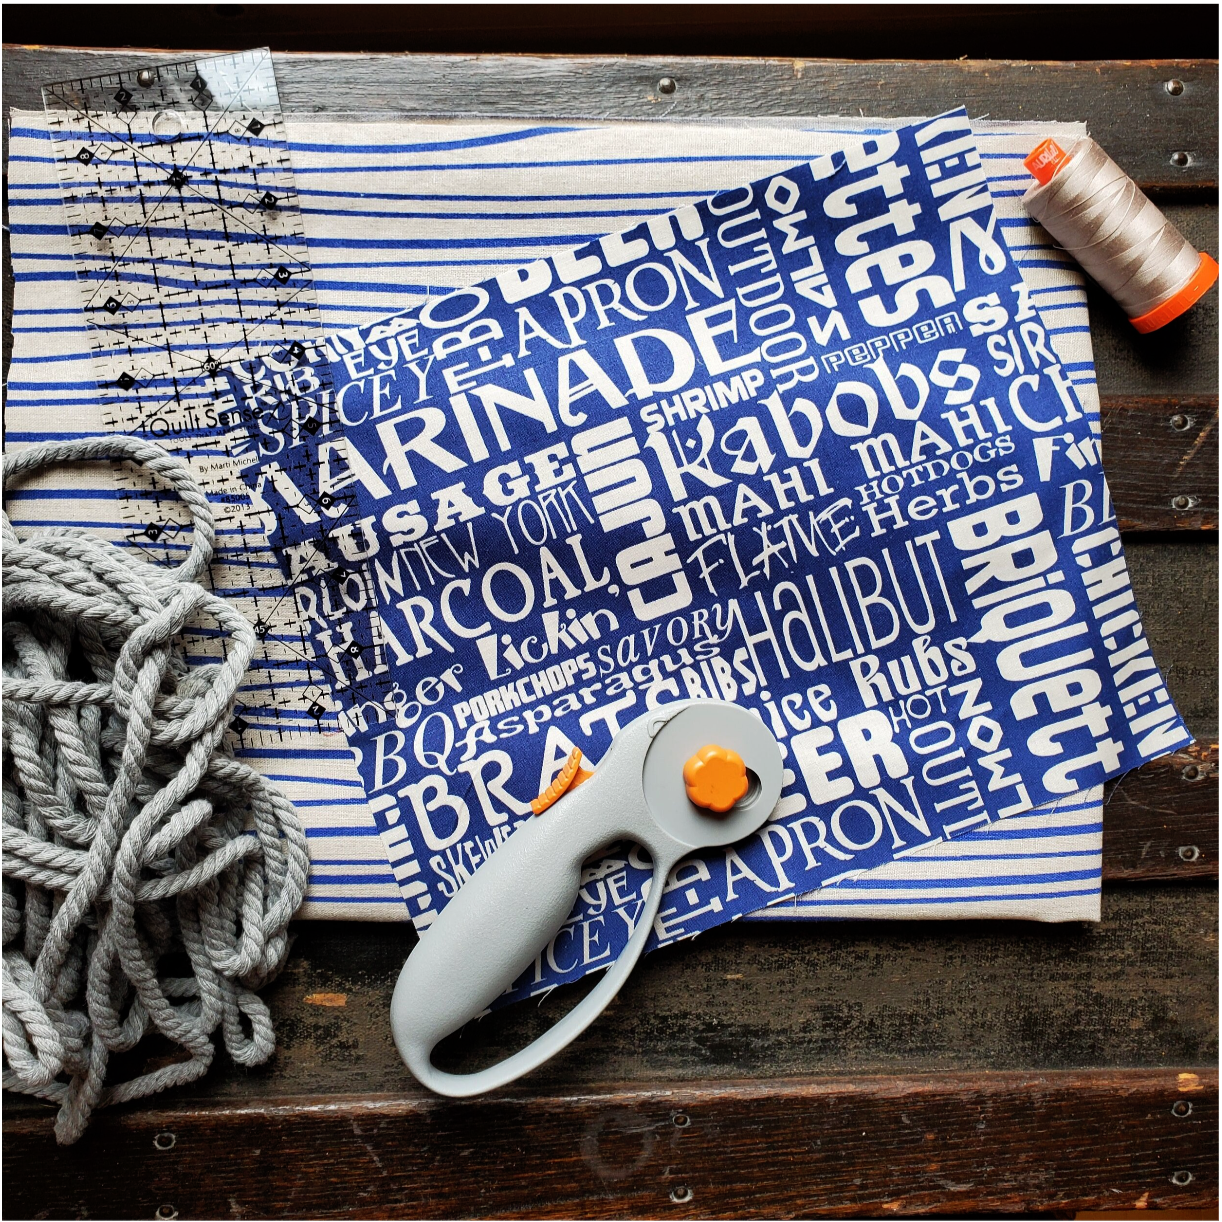
Materials needed:
29”x 22” piece of fabric. I used a piece of cotton fabric from the Cotton Cuts Classic box.
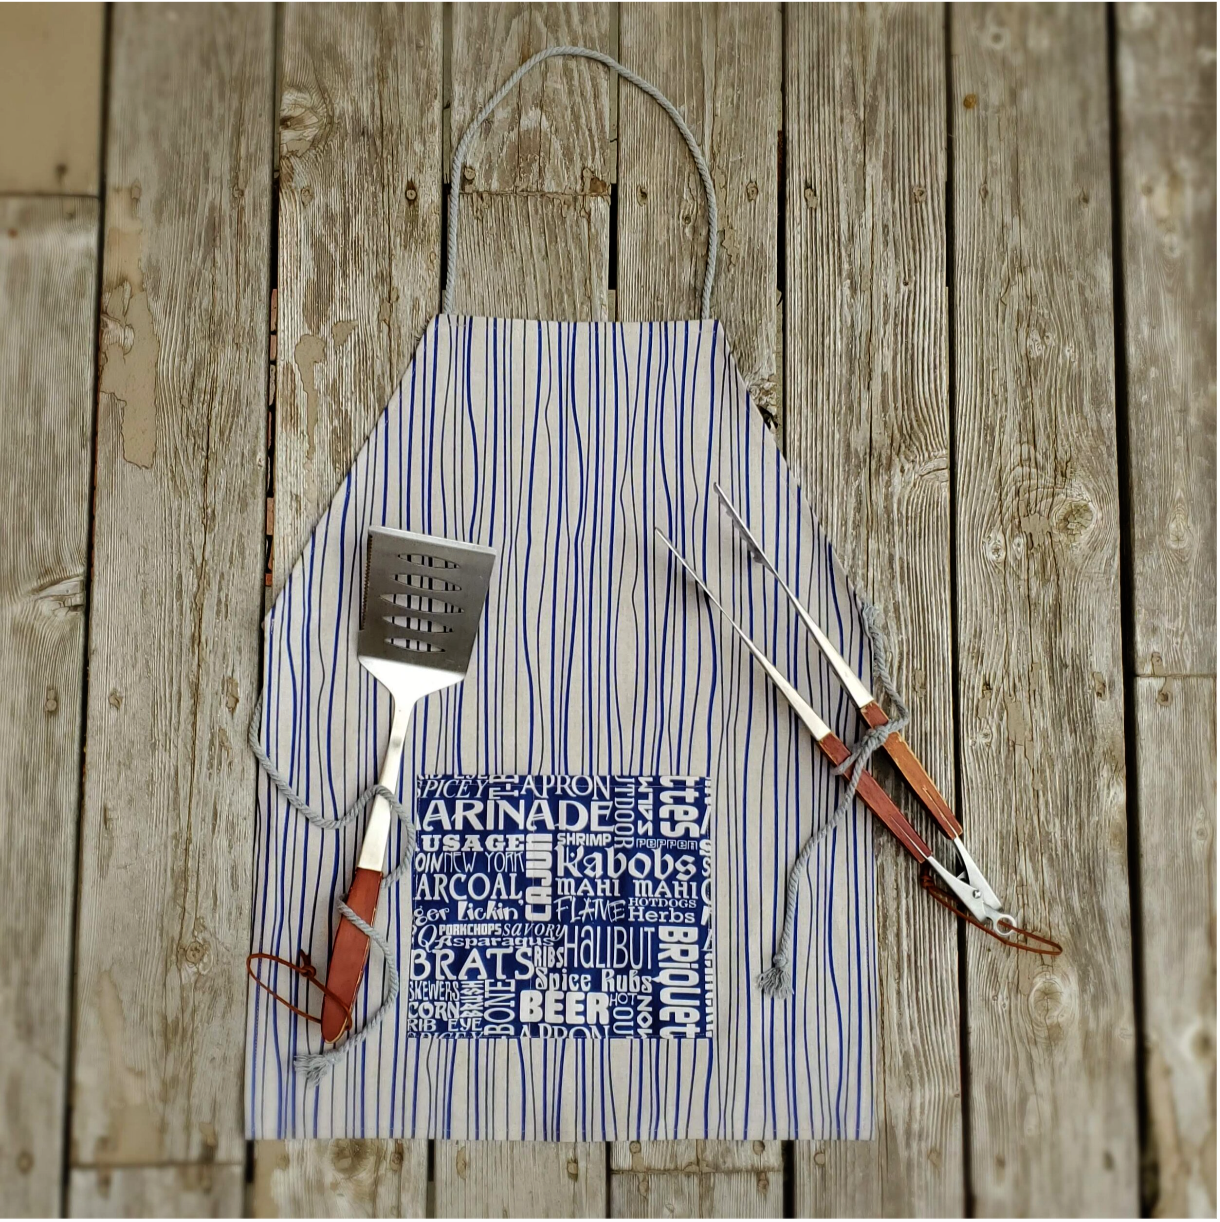
9” x 11” coordinating fabric for an optional pocket
3 pieces of 27” Cora cotton rope for the ties
Matching thread
Start by folding the apron piece in half long ways. Measuring 5 inches from the fold to mark the 12 inch angled cut line.
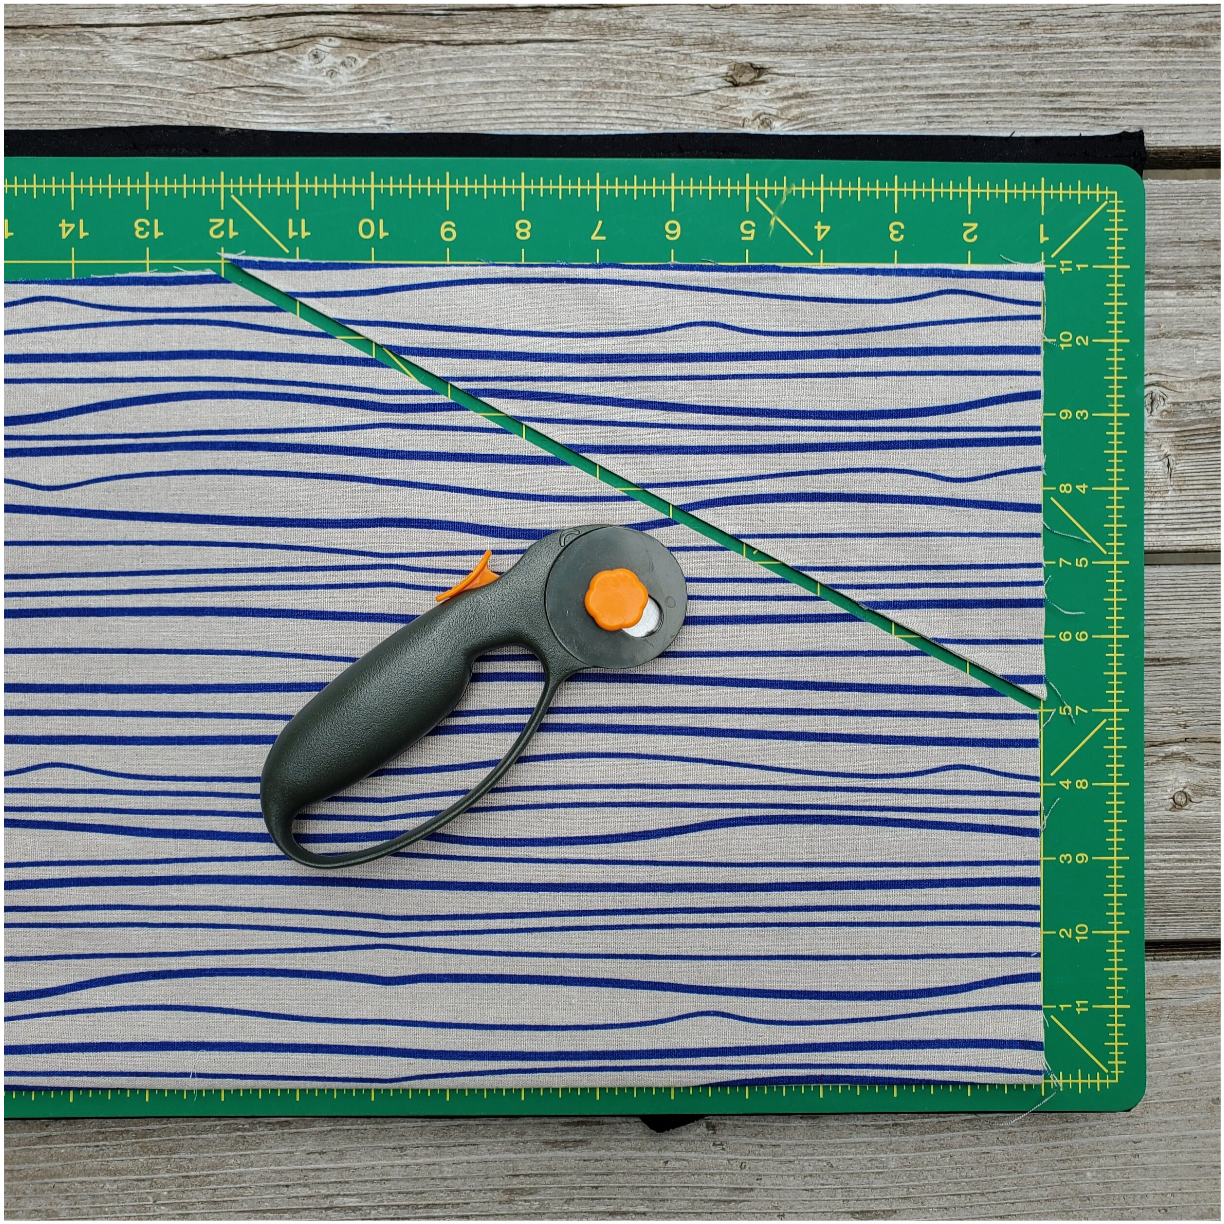
Cut through the two layers of fabric with your rotary cutter and a ruler. Be sure to cut on the opposite side of your fabric fold. When you open the folded fabric you will see this cut gives you the apron shape at the top.
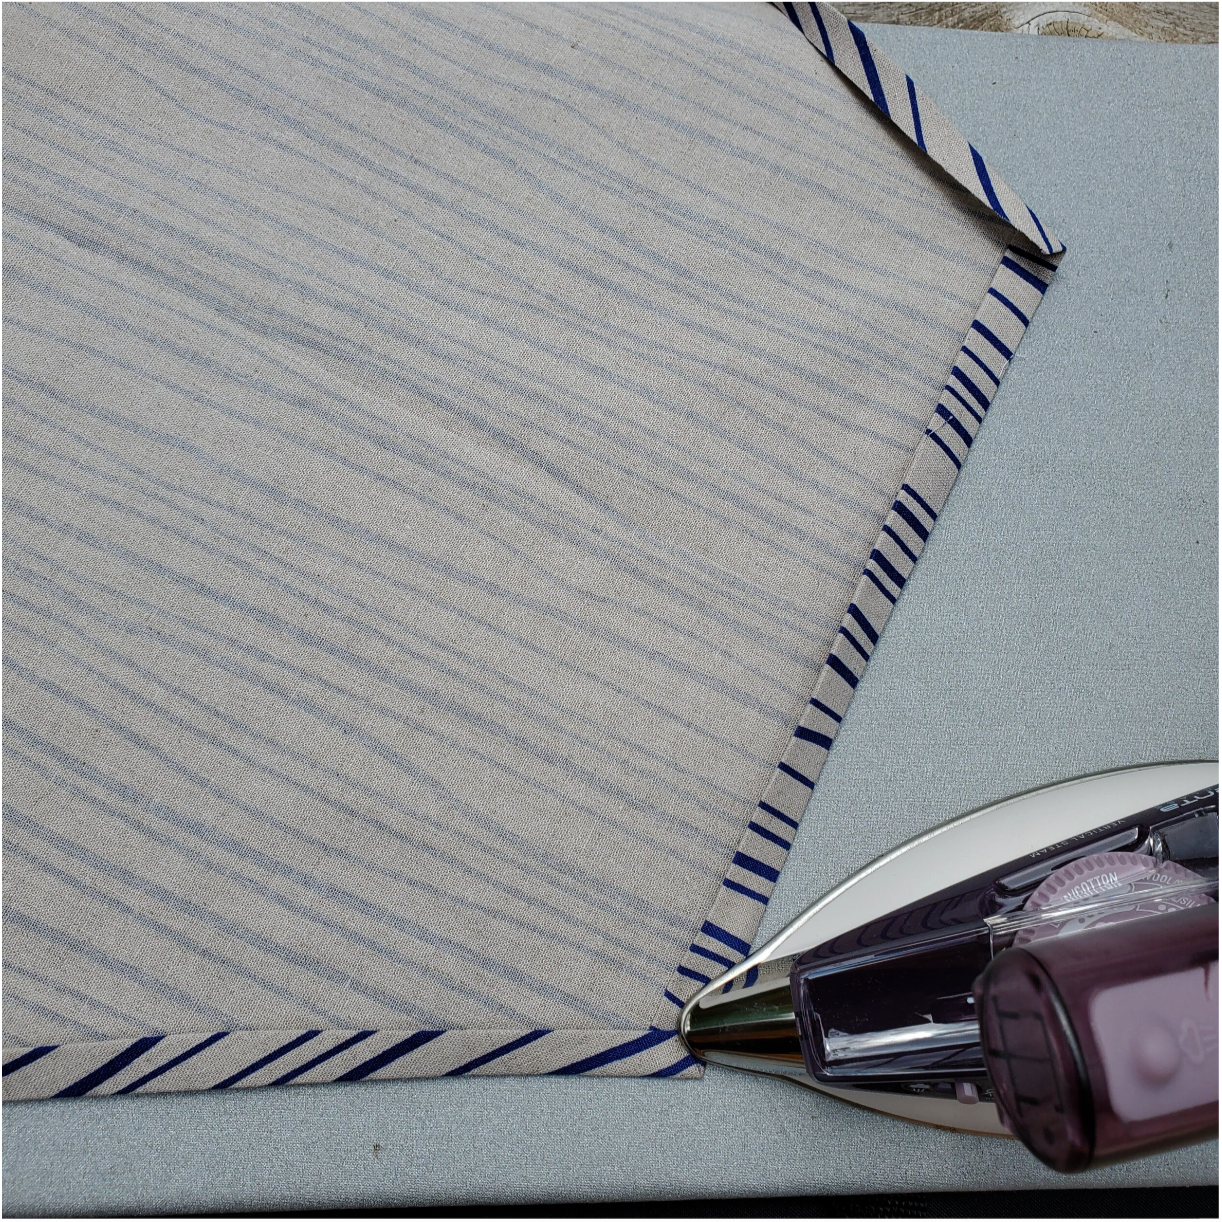
Next you will take it to the ironing board and press a ½ “ hem twice all the way around the apron to conceal the fabric edge for a clean finished hem.
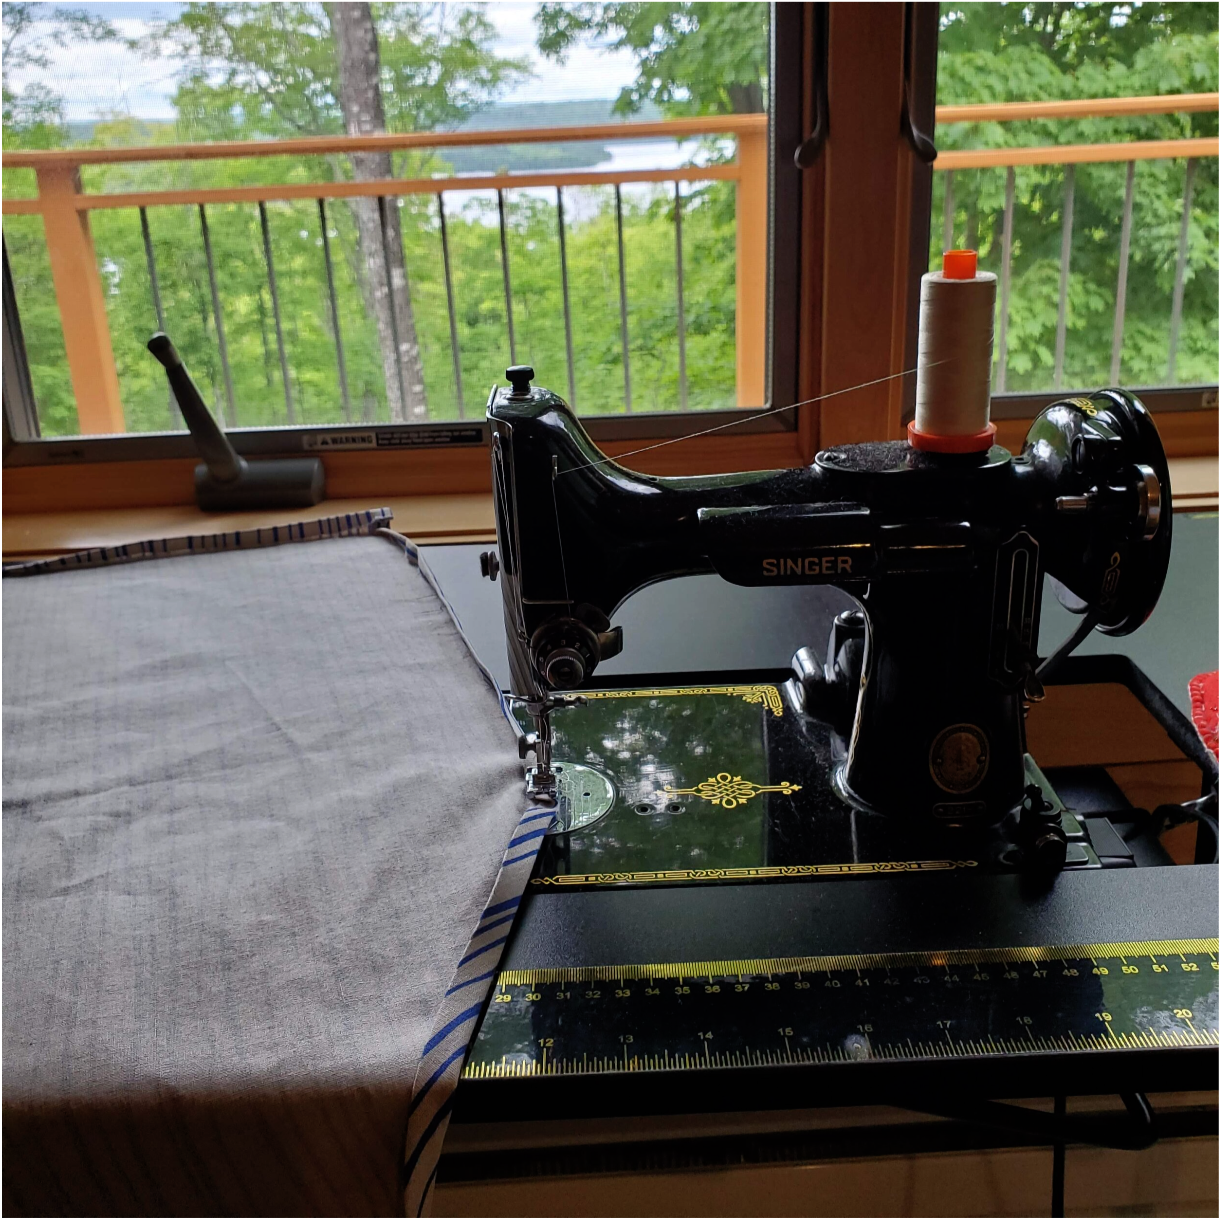
Now it is time to take it to the sewing machine. This week it is a special treat. I’m sitting at Grandma’s feather weight machine overlooking Caribou lake on Minnesota’s north shore as I work on my apron.
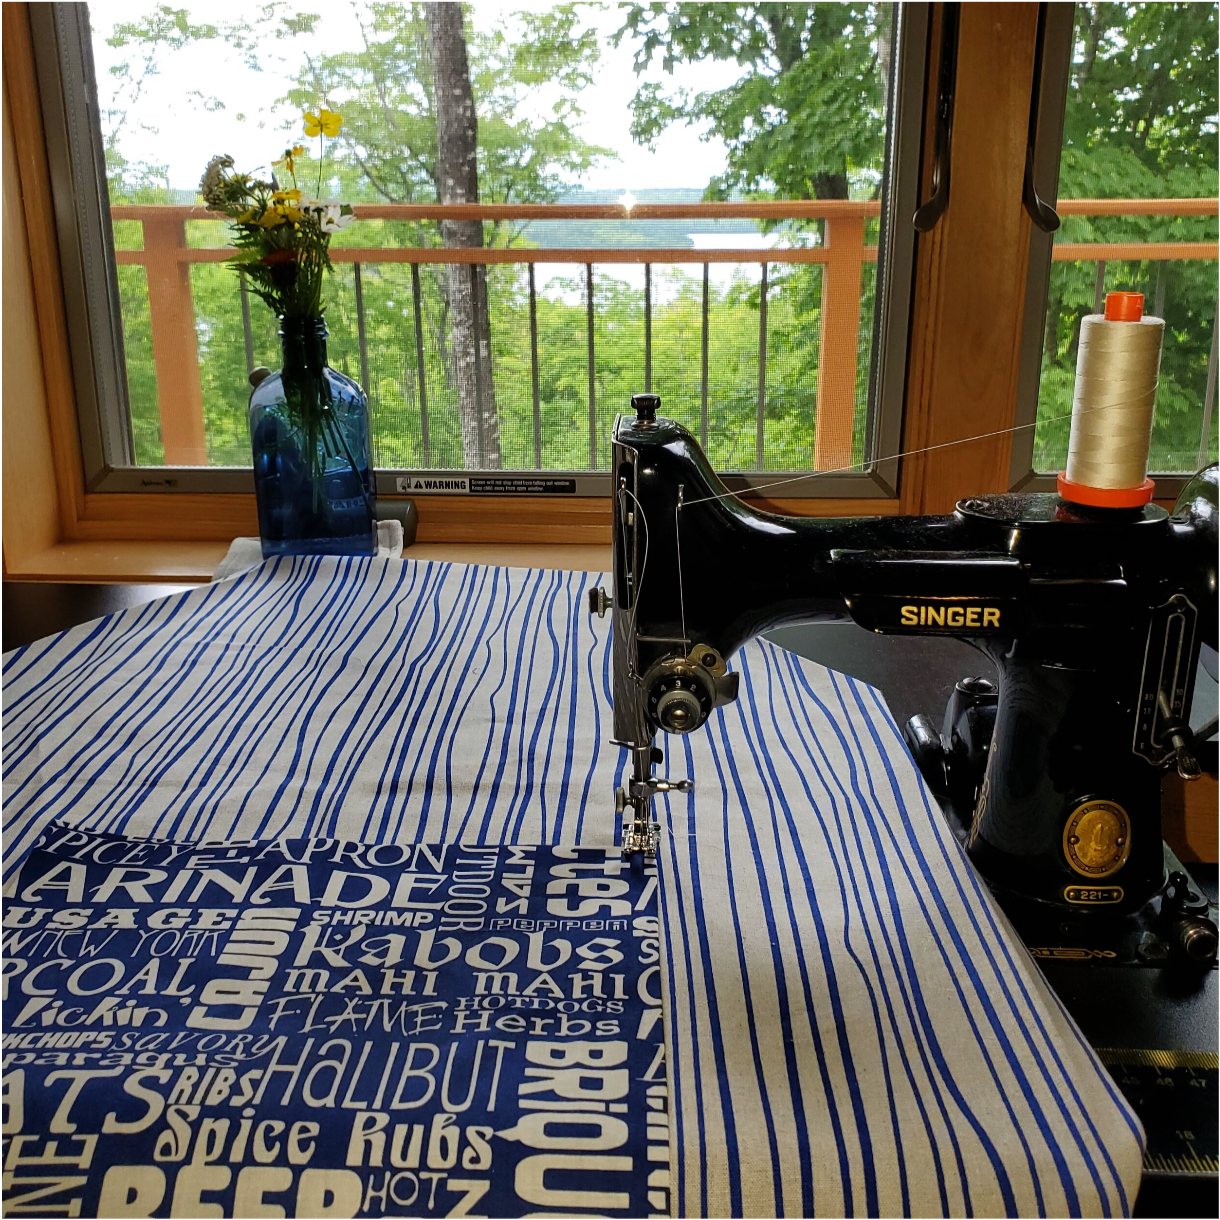
For the next step, stitch all the way around the apron about ⅛” from the edge with a #3 stitch length in a coordinating thread. Start and end stitching with a few back stitches to keep it secure.
After stitching all the way around, the apron is nearly finished. At this point, it is time to prepare the pocket.
Take the 9x11 piece of fabric and press the edges under ½ “ On the top edge only of the pocket stitch about ⅛” from the unfinished edge to create a nice hem. Determine your preference for pocket placement. The placement may change depending on the intended use and how tall your friend is. For this apron, the pocket is placed 3” from the bottom edge and centered with 5” on each side. Pin pocket in place. Take it to the machine and stitch ⅛” around the sides and bottom leaving the top edge open. Stitch a line down the middle to make the pocket into two sections to hold tools.
The last step is to add the cotton cord ties. You can sew the cotton cord in place or if you prefer, you can cut it in two pieces to make the neck tie adjustable. Place the cotton cord at the corners on the top edge of the apron and sew over it going back and forth a few times to keep it secure.
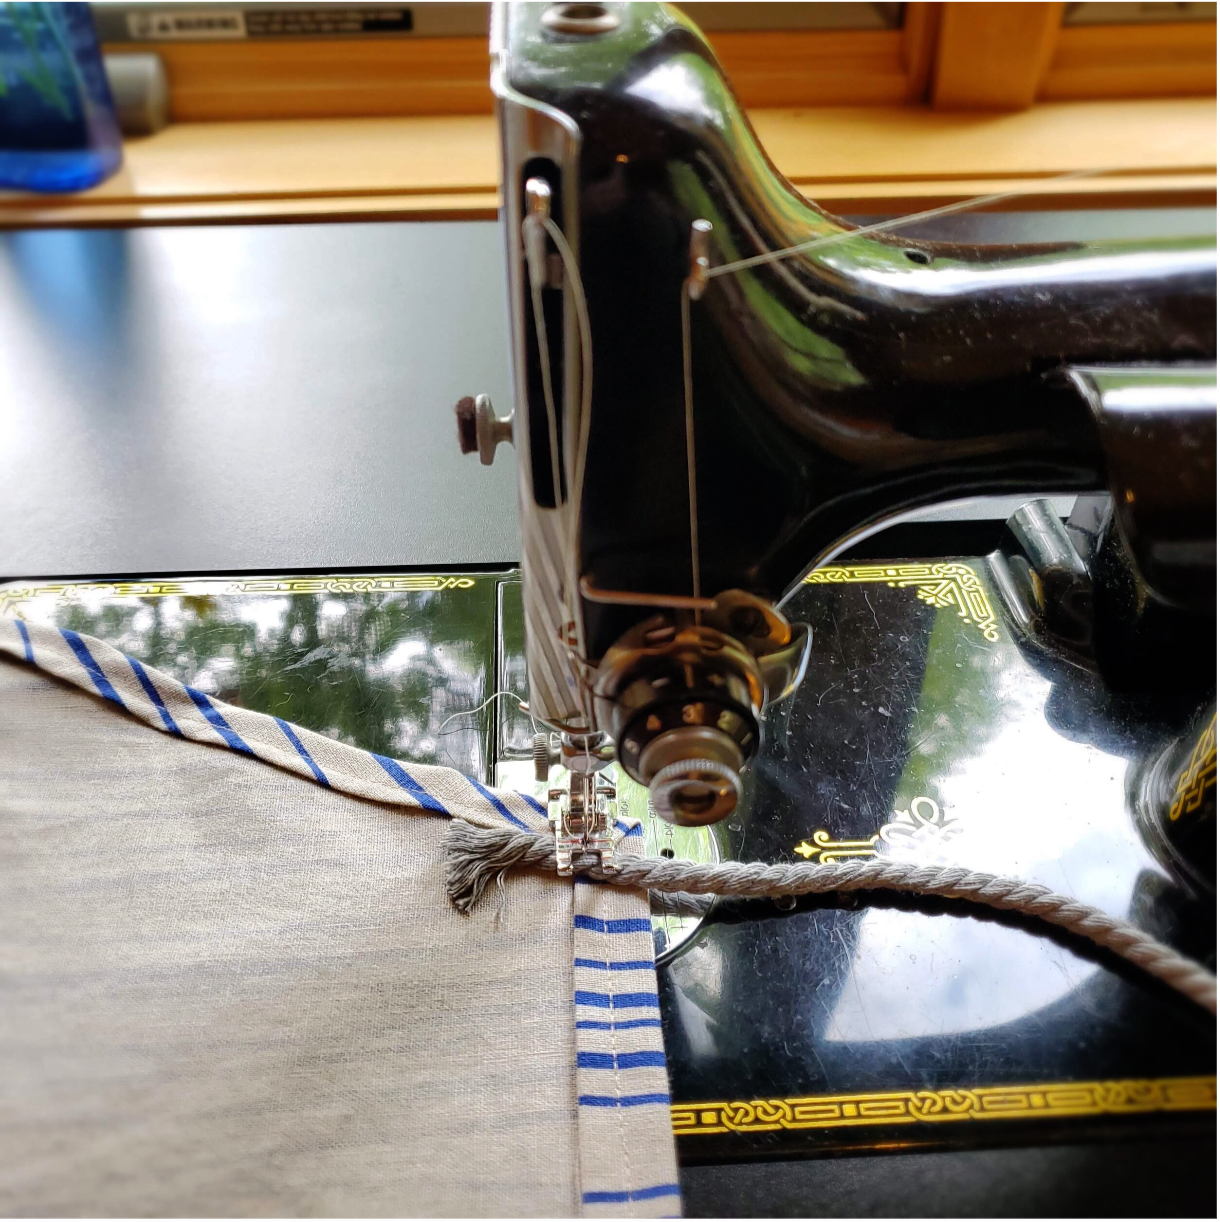
Use the same process for the waist ties. Tie a knot at the end to keep it from unraveling. Place the ties at the points of the apron. The ties can be adjusted for your preferred fit.