

Learn a New Skill - Dog Bow Ties
27th May 2020
Happy Wednesday! Hopefully everyone is staying safe at home and not going too stir crazy. I know this whole situation is less than ideal in most ways, but there is one good thing that has come of it. If you’ve got pets, you’ve probably been spending a lot more time with them, which is awesome, right?
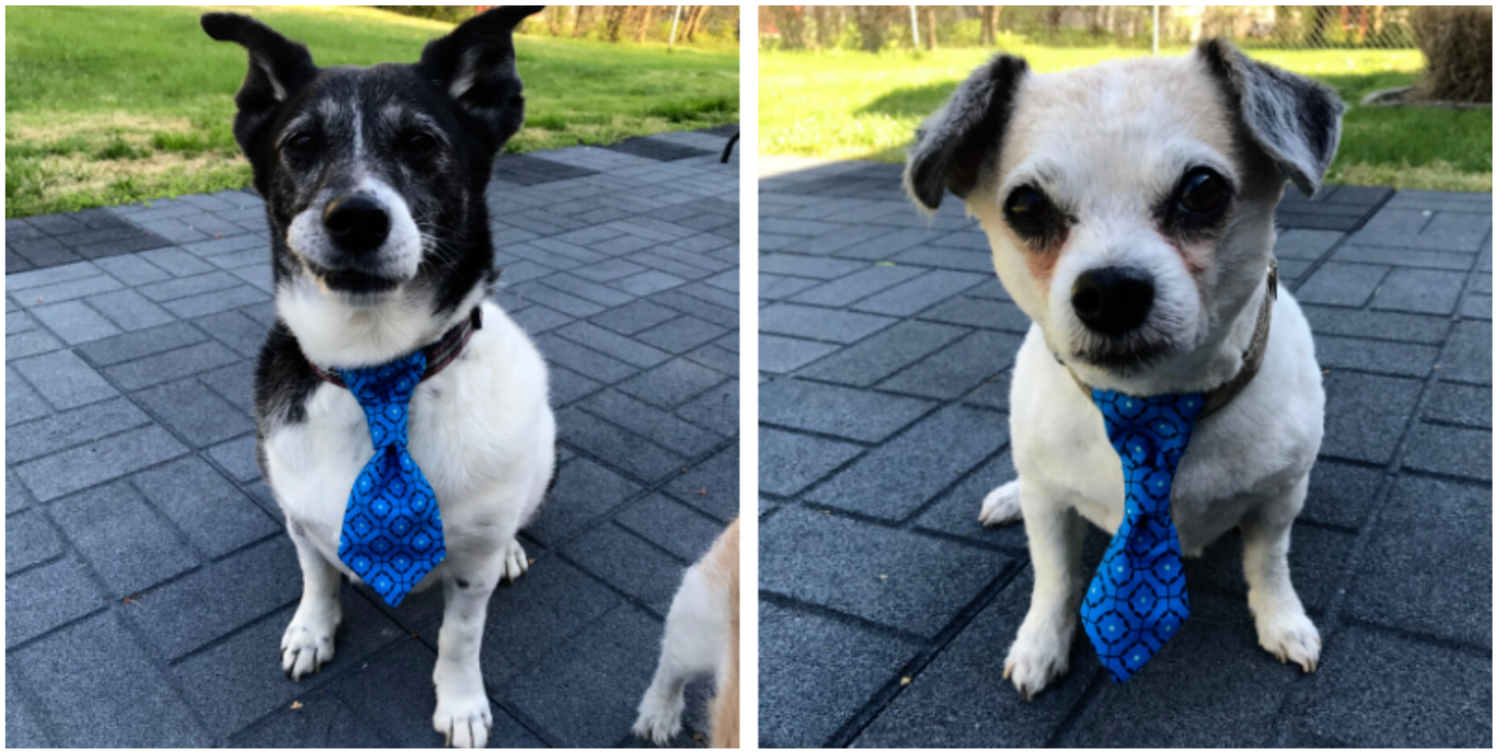
I love my dogs. They are my best furry friends and my constant shadows; so let me introduce you to them. These are my fur kids Max and Teddy. Max is 9 and he’s a Toy Fox Terrier mix. Teddy is 11 and he’s a Borgi (Border Collie/Corgi mix). They’re adopted and so spoiled. (Or as I like to say, overly-loved!) I love to make bandanas and other cute things for them to wear. Now that I’m a pro at making these cute little ties, they’re going to get one for every holiday. I had them model how cute these look, and it only took the majority of a bag of treats to get decent pictures. (Ha!) Lucky for me, they’ll do mostly anything for food.
You can be flexible with the measurements to accommodate for your dog’s size. The tie I’m making as my sample is for my bigger dog Teddy. He is about 28 pounds and 16 inches tall. My little guy Max is about 10 pounds and 11 inches tall. I’ve included measurements for both sizes. It may take some experimenting but the ties are pretty easy to make.
The fabrics I am using are from Cotton Cuts. These fabrics are perfect for boys because they’re masculine but also cute. You can find them on the Cotton Cuts Etsy page.
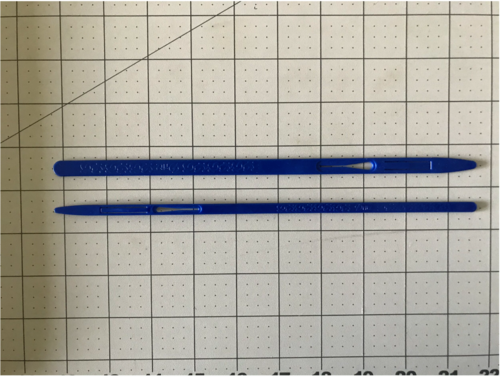
I am also using what is known as a loop turner. If you don’t know what that is, you are missing out! It makes turning narrow tubes right side out SO much easier! You can buy them here.
Please note, these are not affiliate links and we do not receive compensation if you visit the link, but we are providing it so you know exactly where to buy these items should you want to.
To make each tie you’ll need:
1/4 yard of fabric
All-purpose thread in a coordinating color
Scissors
Straight pins or fabric clips
Washable fabric pen
Ruler
Loop turner (optional)
Iron
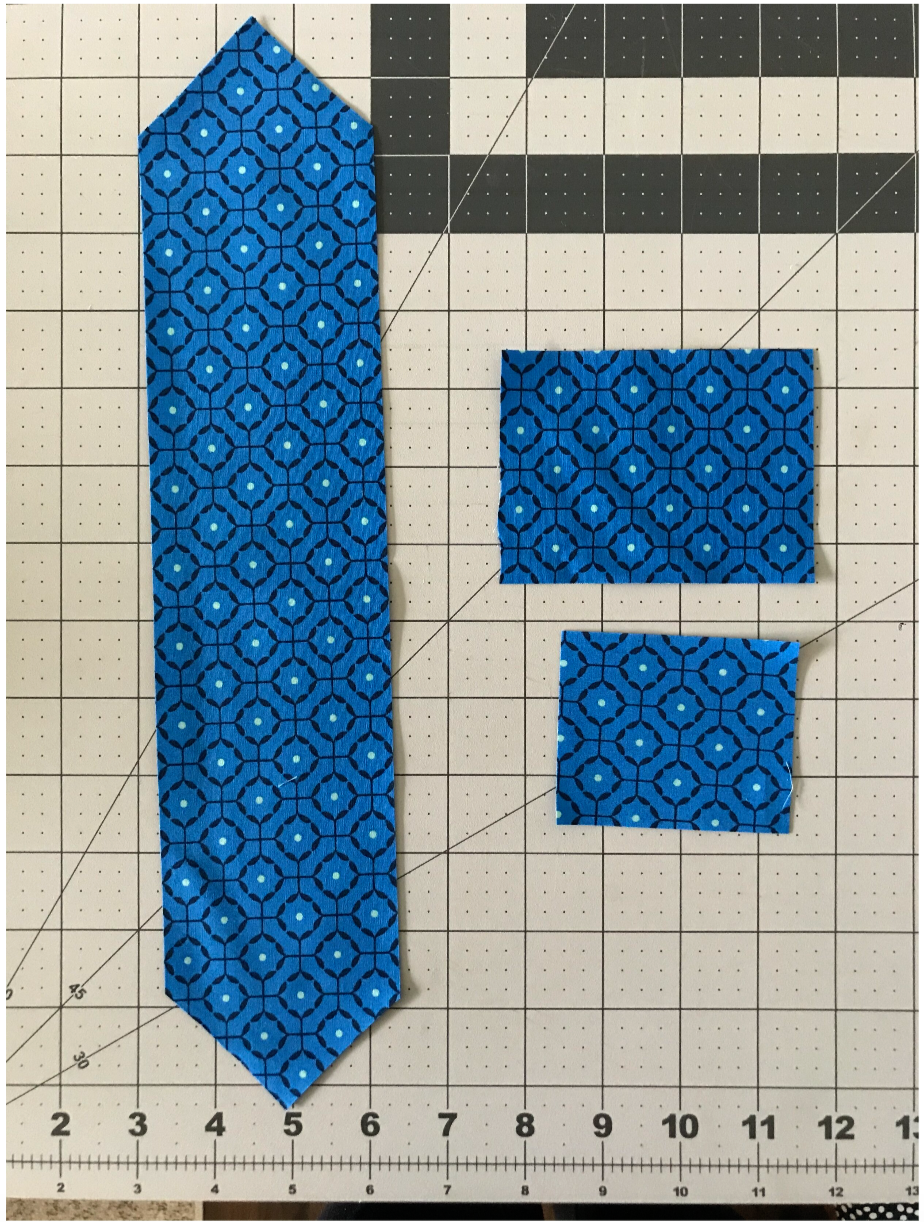
Step 1: You’re going to cut your fabric into 3 pieces as follows: One 14” x 3” piece of fabric with pointed ends -This piece makes the long tie piece. One 4” x 3” piece -This piece is what your dog’s collar will slide through. One 3” x 2.5” piece -This piece is that little portion that is wrapped around the long tie.
Before cutting your fabric, I’d like to share a note about directional fabrics with this pattern. Using a non-directional fabric is the easiest, but it does work with directional fabrics too. Just make sure that your tie piece has the direction going long ways and the wrap piece should have the direction going along the width. The middle collar piece will be on the inside, so that doesn’t matter which way it’s cut.
To make even pointed ends, I’ll share a little tip with you…Fold your fabric in half width-wise and measure about 1.5” from the non-folded edge on both sides and make a mark with a washable fabric pen. Now mark along the bottom in the center with a small mark. Using a ruler, connect the lines from the bottom up to the sides. Cut on these lines and you should have a pointed edge on both sides.
If you want to make the smaller tie, here’s the measurements for that: one 12” x 2.5” piece with pointed ends for the tie piece; one 3.5” x 2.5” piece for the collar piece; one 3” x 2” for the wrap piece.
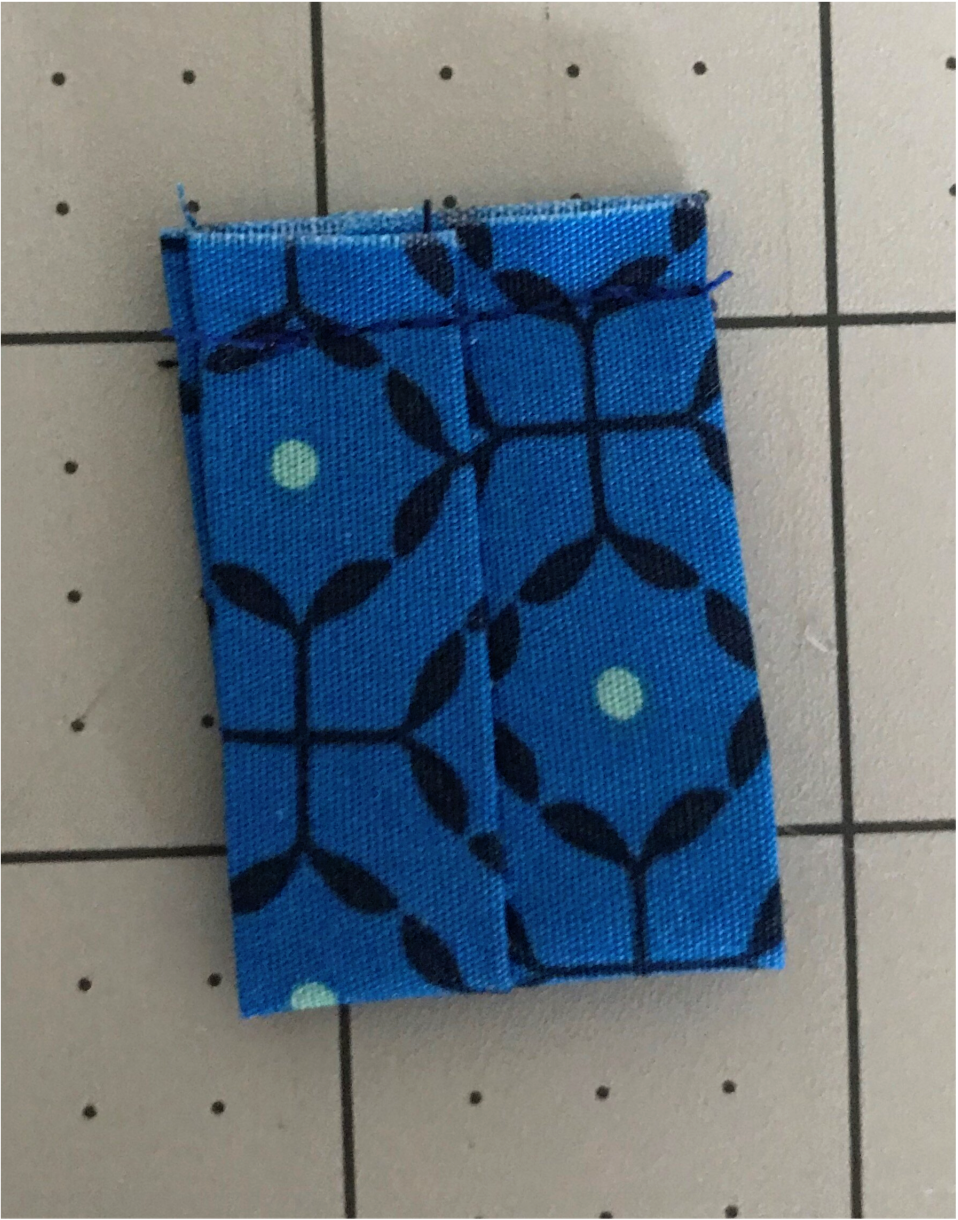
Step 2: Take your 3” x 2.5” piece and place the ends right side together. Sew with a 1/4” seam allowance.
Step 3: Turn this little tube right side out. I use my loop turner to assist me with this step. Press so the seam is in the middle.
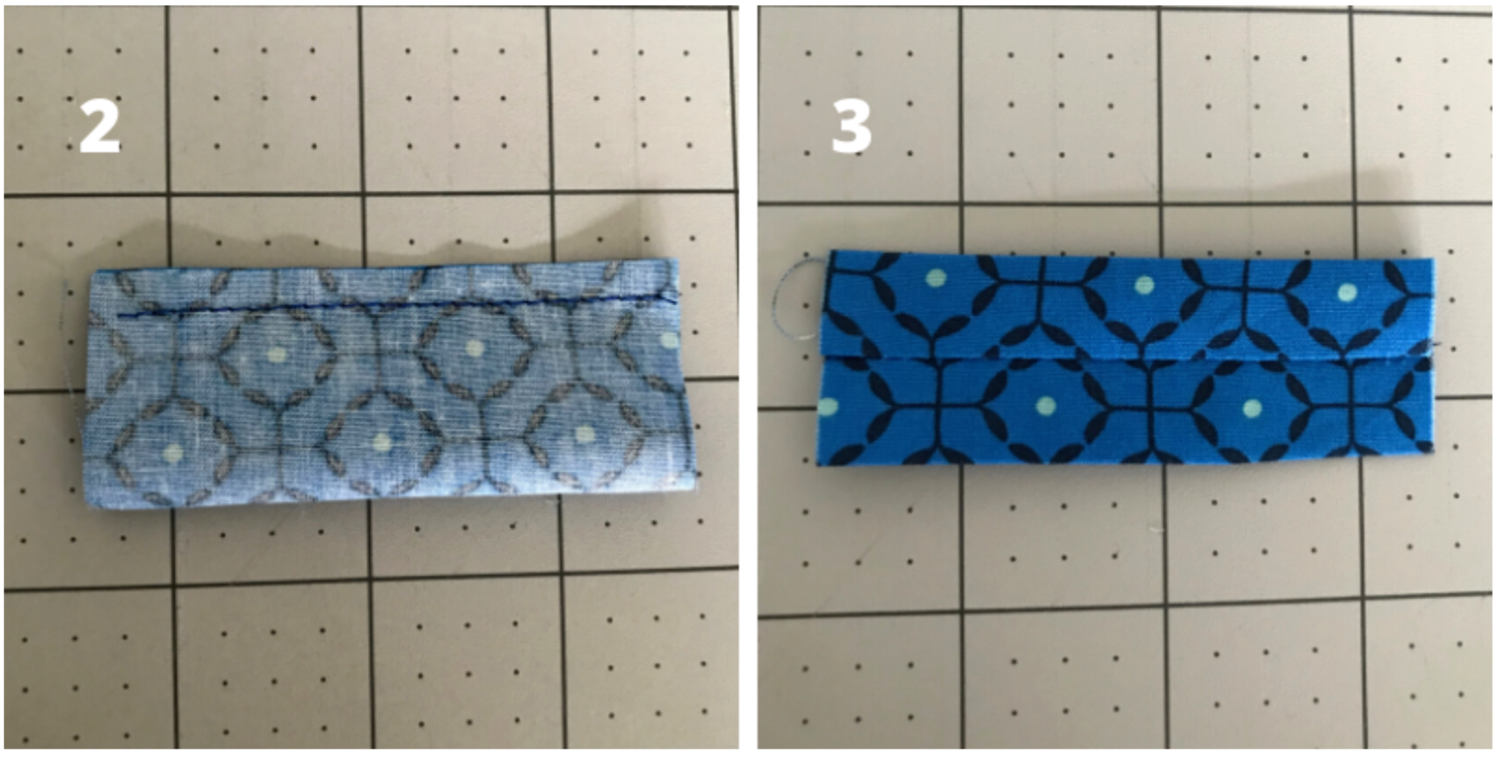
Step 4: Fold this piece right sides together, sew together, and turn right sides out. Set this piece aside for later.
Step 5: Take your other two pieces and place the 4” x 3” piece on top of the tie piece (centered). You will want the right sides (the pretty sides) together.
Step 6: Using a 1/4 inch seam, sew along the two edges of the 4” x 3” inch piece making sure to backstitch at beginning and end.
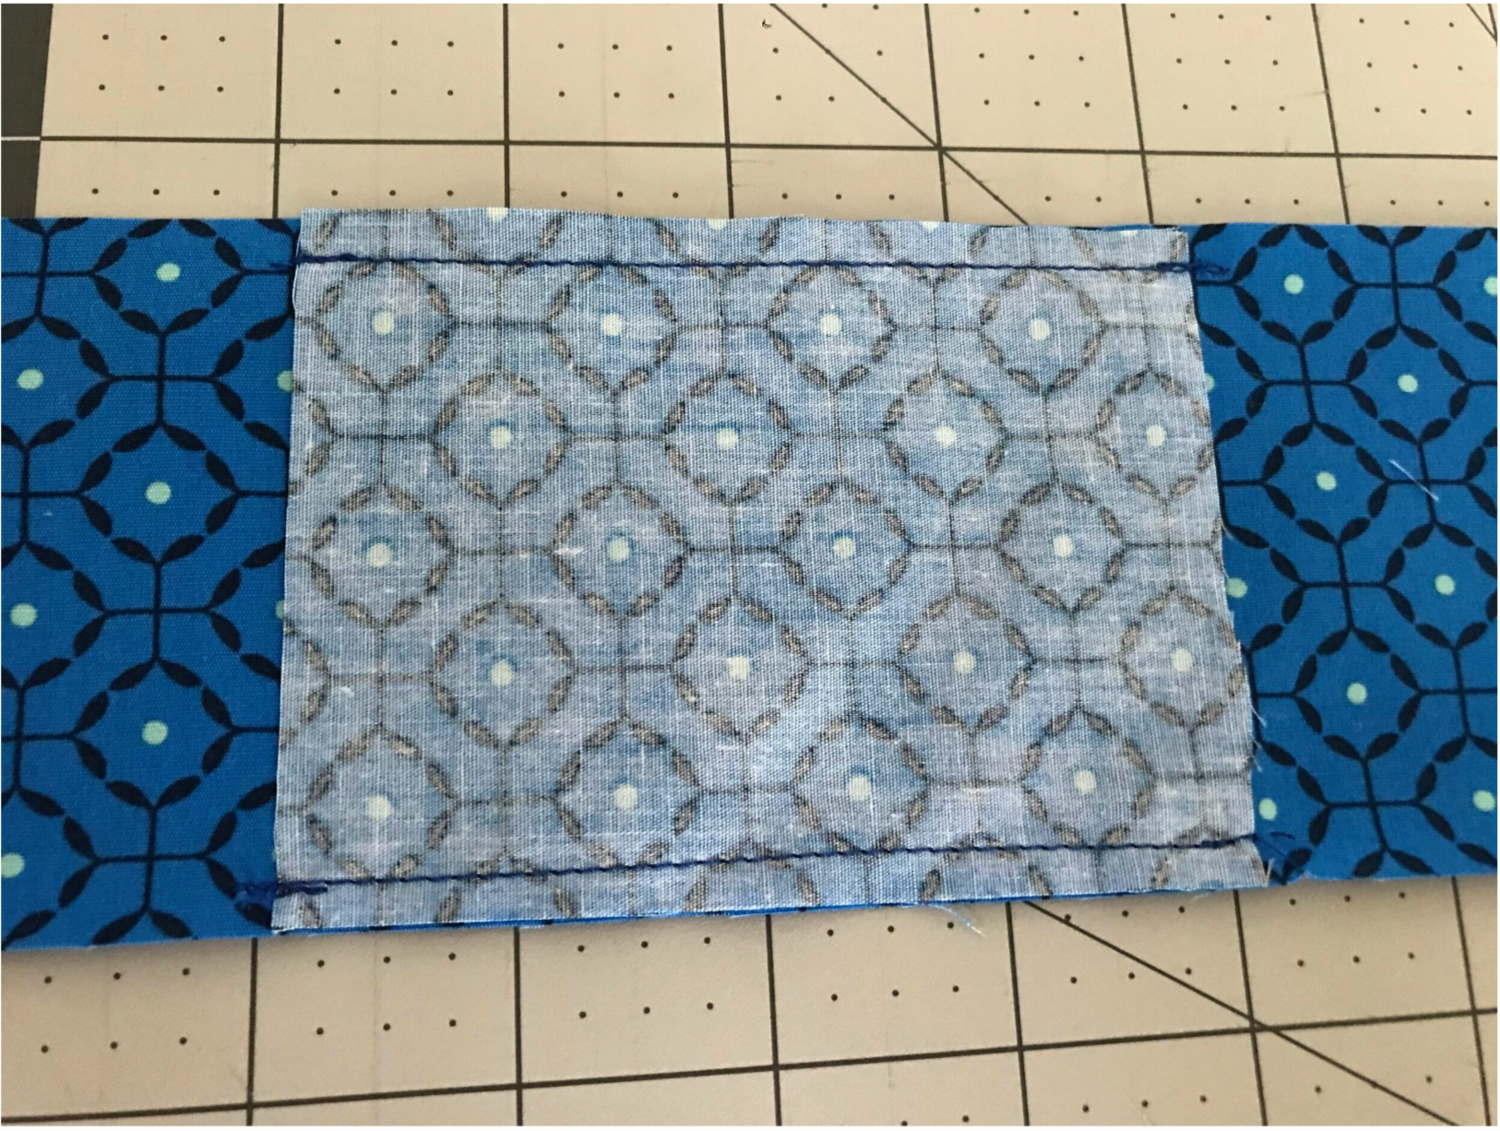
Step 7: Turn this right side out and press flat.
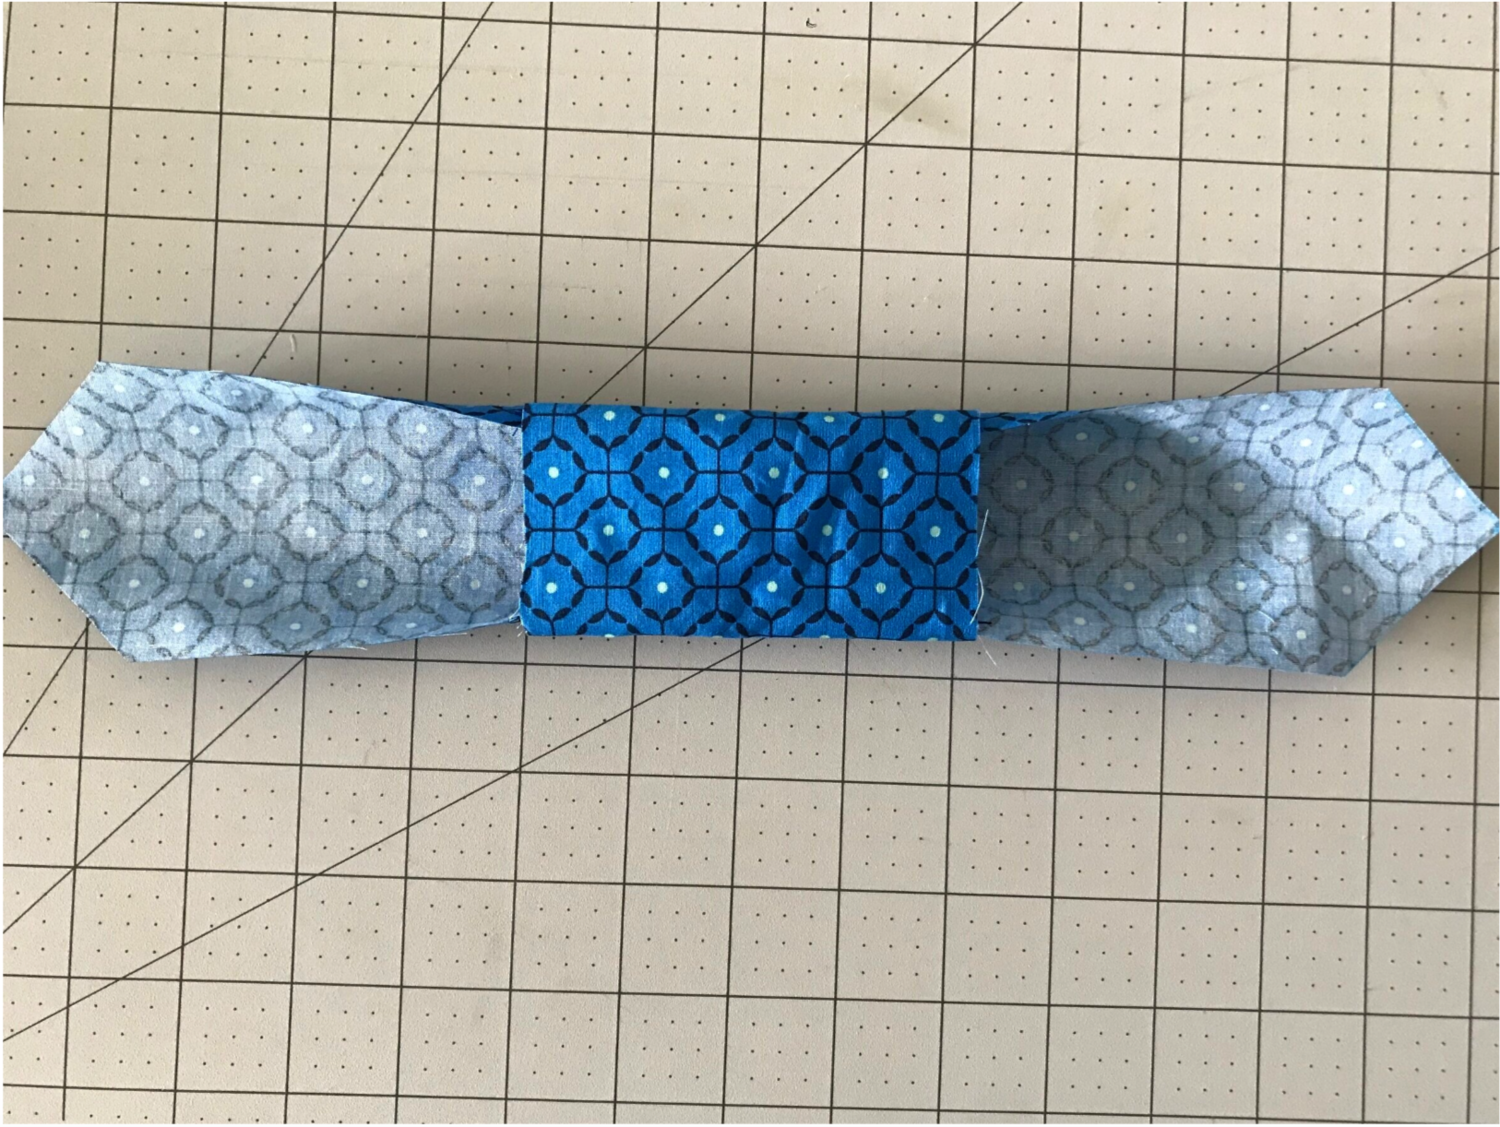
Step 8: Fold the pointed ends of the tie right sides together and sew with a 1/4”ish seam allowance around the edges. Try to get a few stitches up into the covered piece to help hold the tie together better.
Step 9: Trim the edges up to reduce bulk so you get a pointy tie.
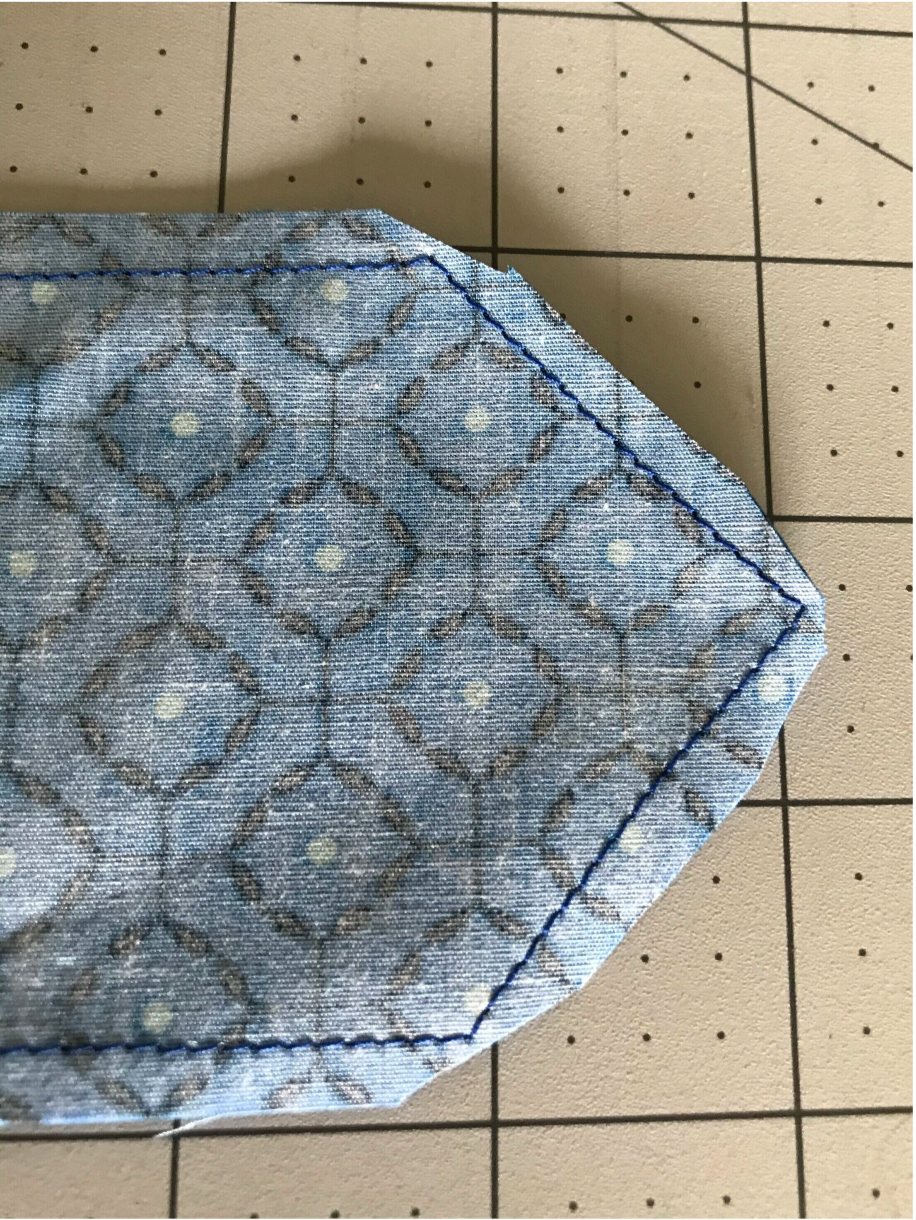
Step 10: Turn your tie right side out and give it a quick press. You will now have the tie piece and the little wrap piece.

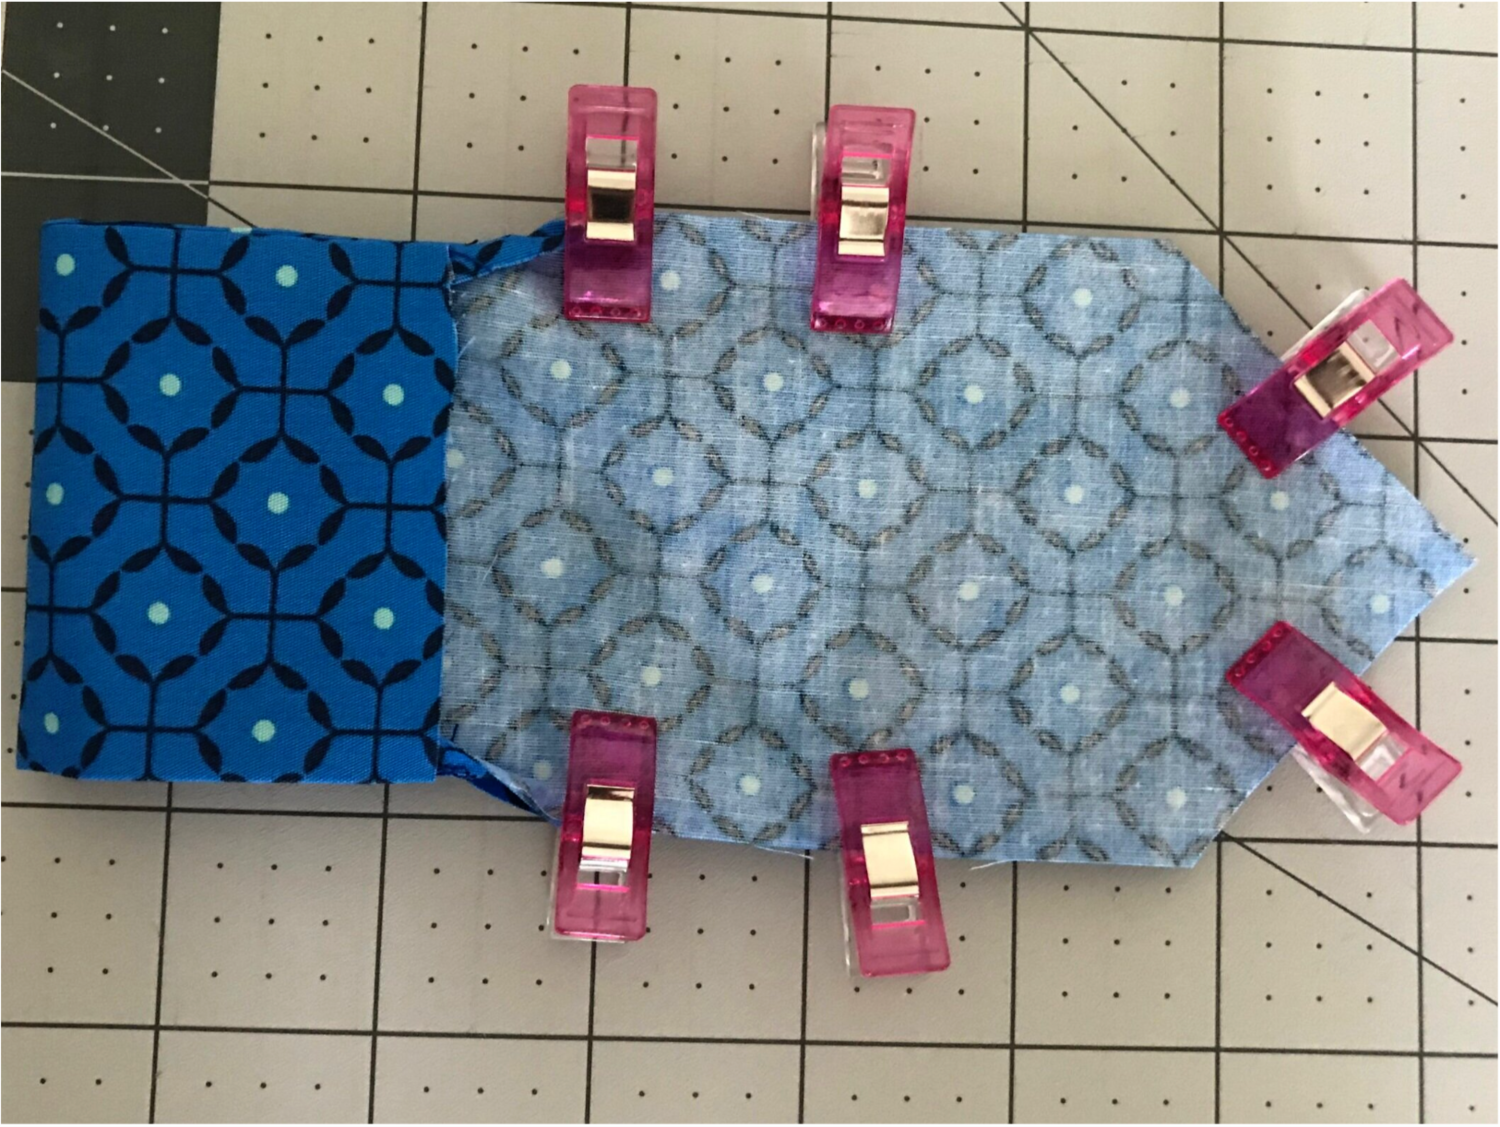
Step 11: Scrunch (yes, that’s the technical term) the tie at the top so it makes the letter “W”. Slide the wrap piece over the tie. An optional step is hand sewing a few stitches into the back of the wrap piece so that it holds in place. (But if you don’t feel like being that much of an overachiever, don’t worry, it will be fine without!)
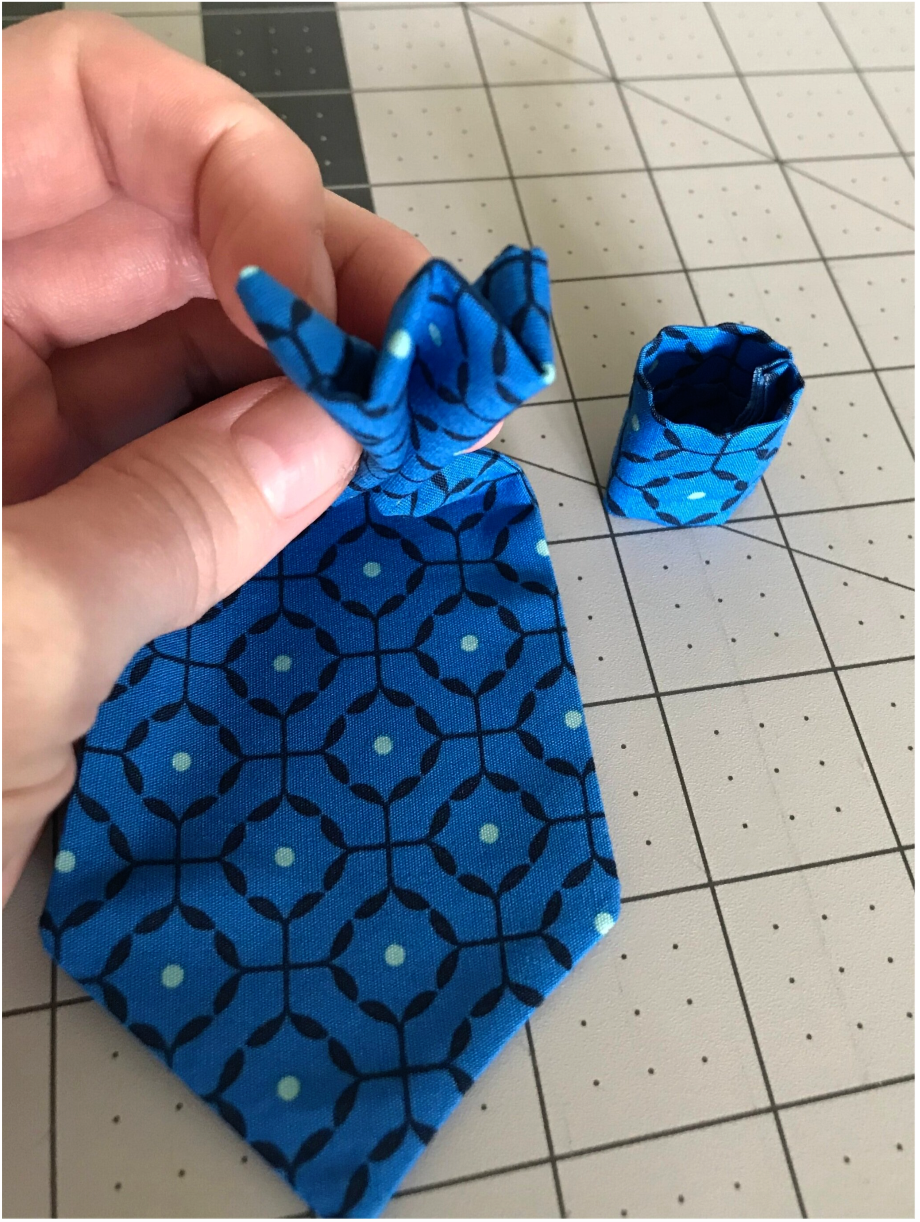
Step 12: Slide your dog’s collar through the hole at the top and prepare to be overcome with cuteness.

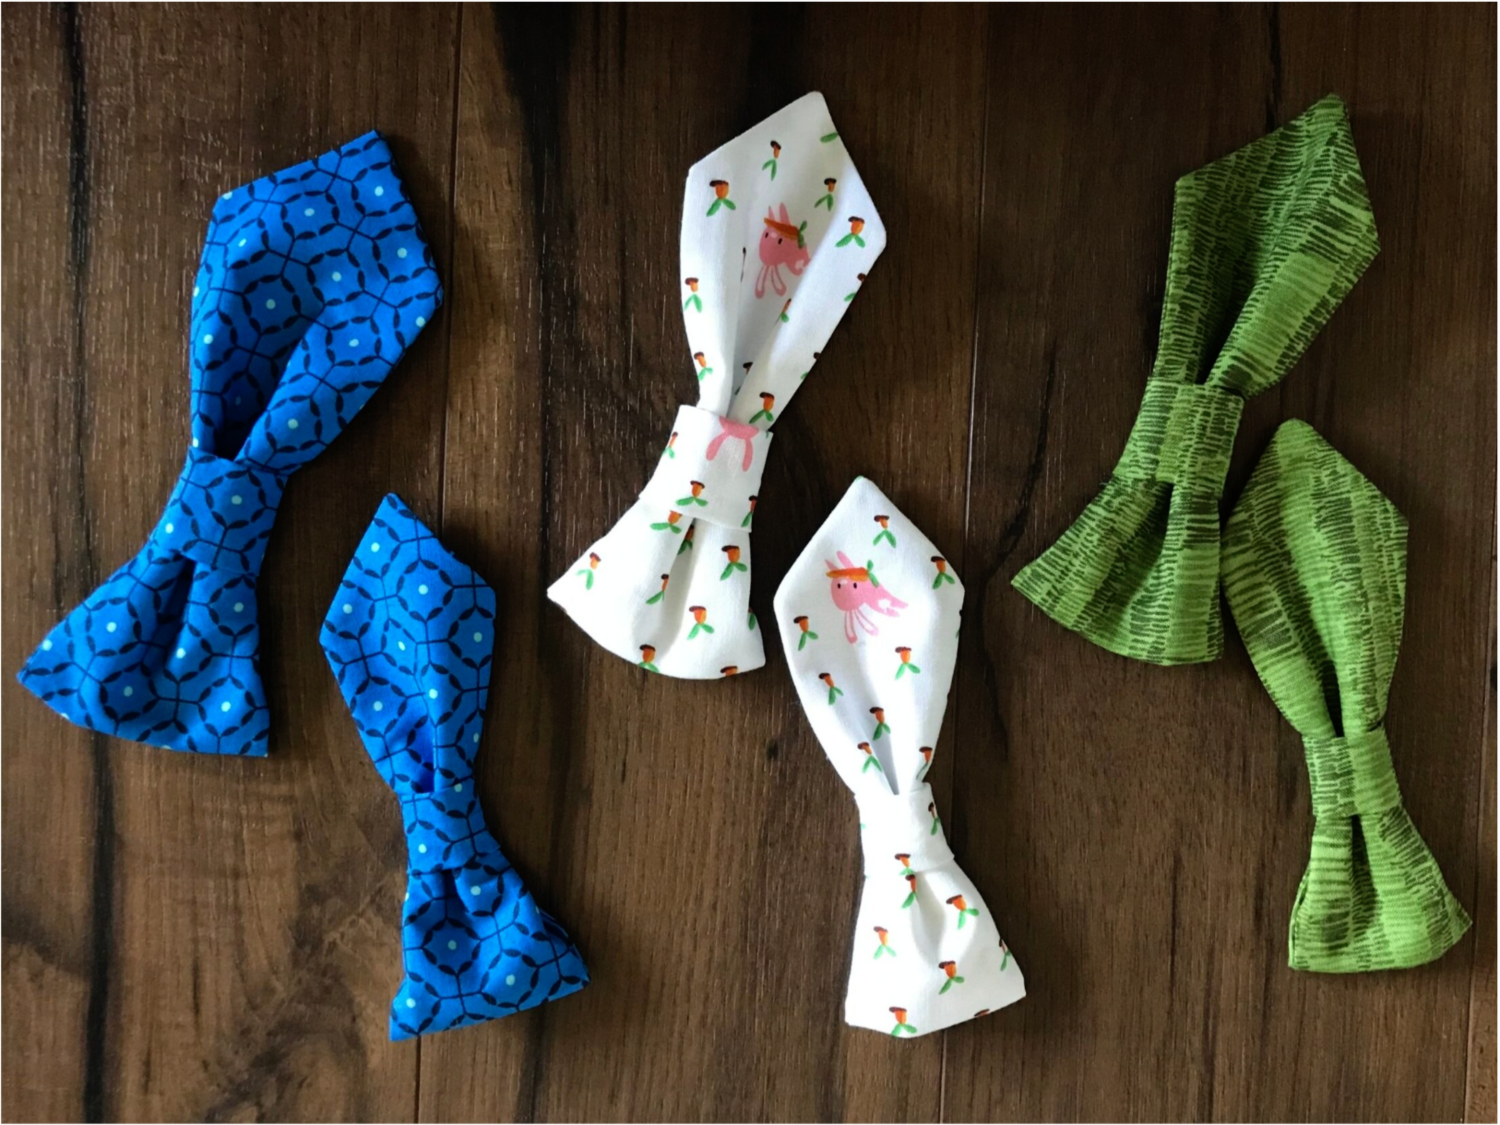
I used a few different fabrics to make several ties. What dog doesn’t need a tie? My favorite so far is the little rabbits with the carrots, they are so cute for Easter!
Now go forth, and dress up your pups!
