

Fall Decorating with Cotton Cuts Fabric
3rd Sep 2020
With the start of school, I always start thinking about fall and the cooler days ahead. Today we are going to sew a small wall quilt and some candy corn decorations. I was inspired by a post from Sweet Treasures Quilts.
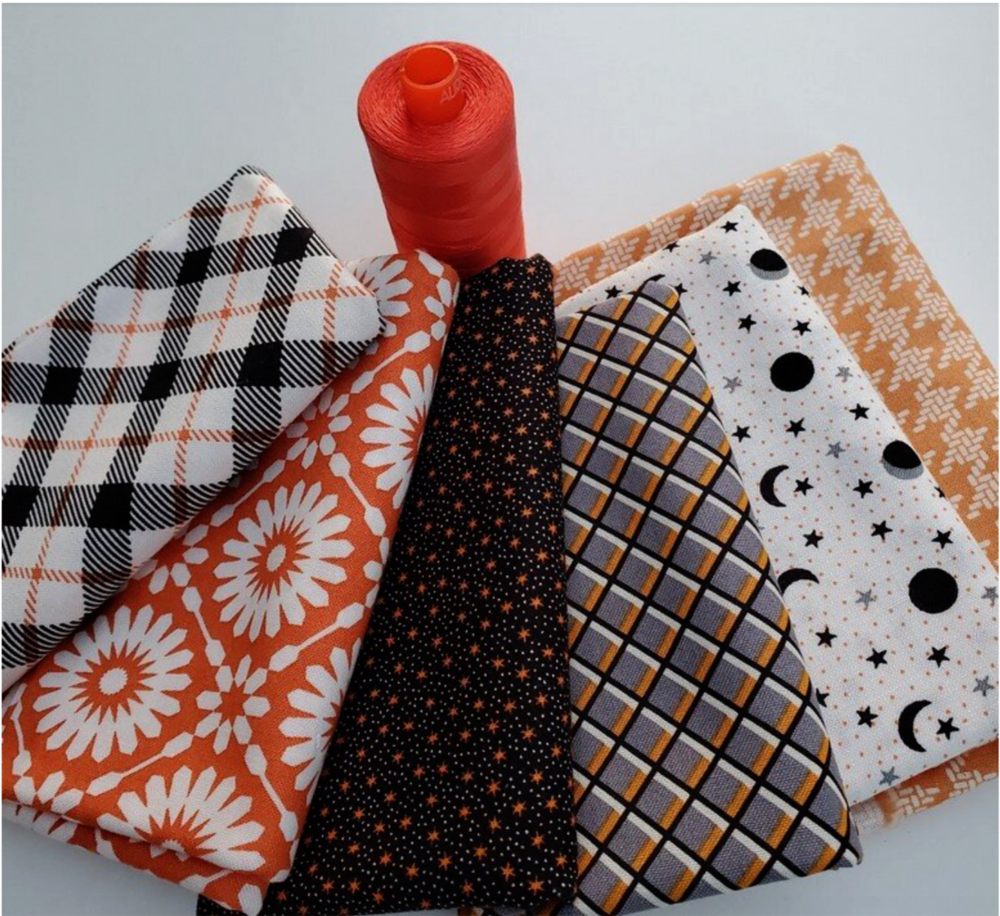
For materials, I started with a great selection of fat quarters from the Cotton Cuts Classic box. I would suggest about 8 different patterns for variety. This would also be a great scrap fabric project.
candy corn materials:
Orange, black and white fabric
Coordinating Aurifil thread
Poly-fil or sand for pincushions
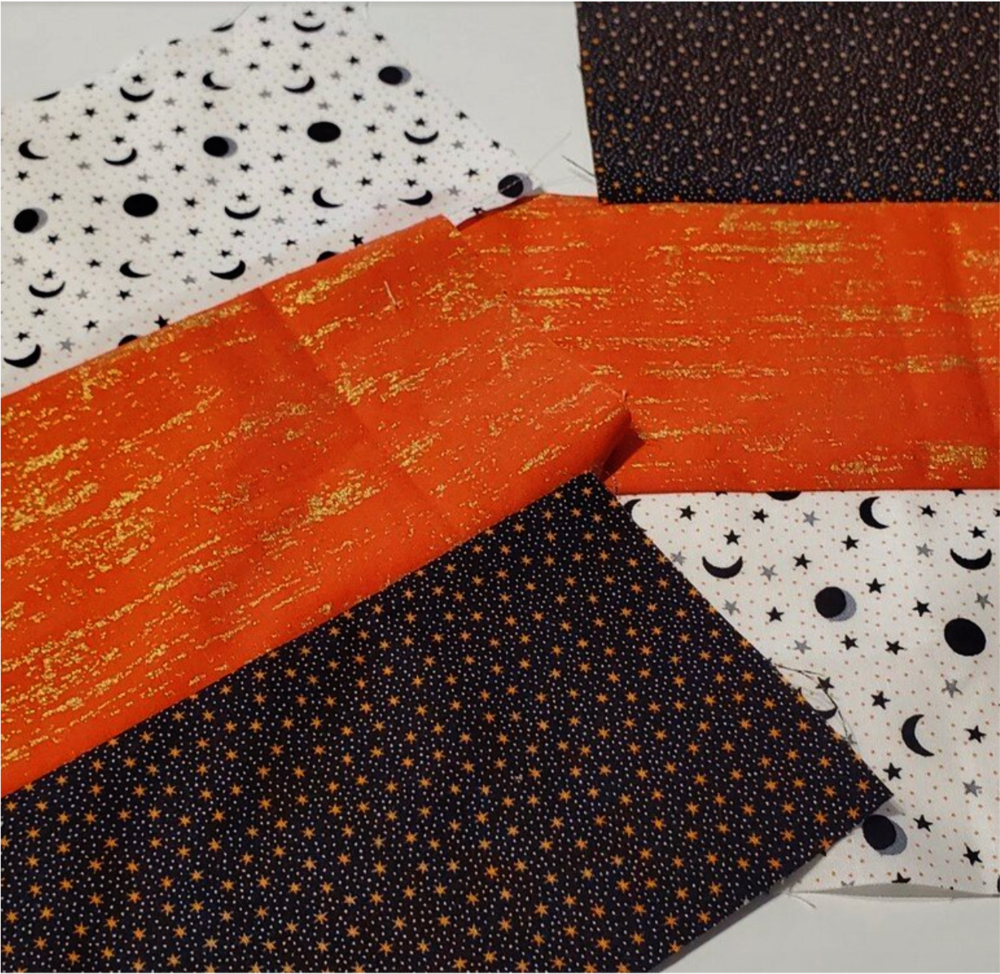
To start, cut two strips of each color fabric in 2.5 inch and 4 inch strips. I was able to use scraps for the 1.5 inch strips for the pincushion. I usually set my stitch length at 2.0 when sewing a dimensional object to accommodate the tightly stuffed poly-fill.
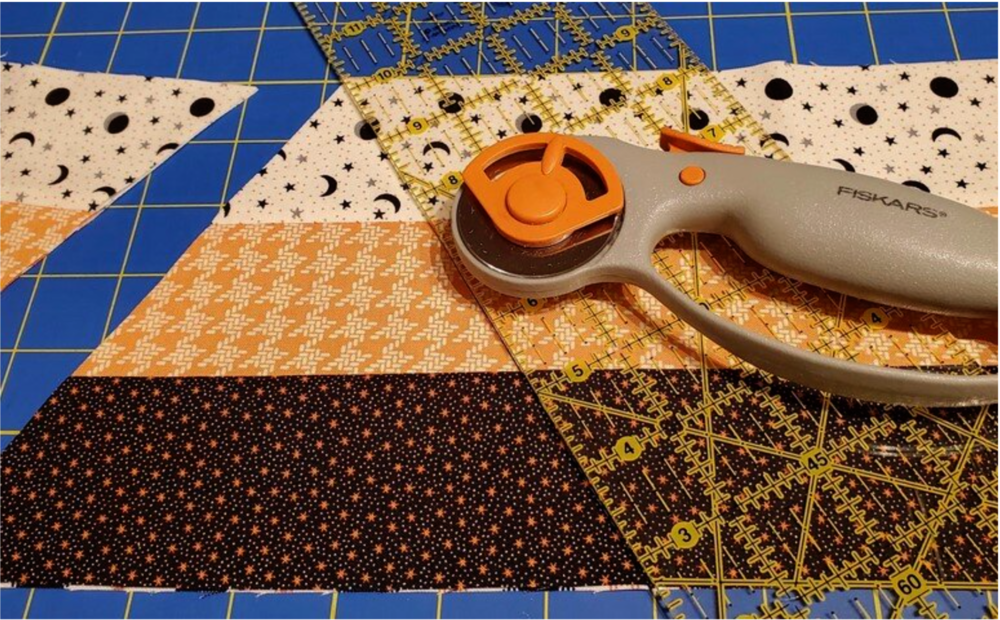
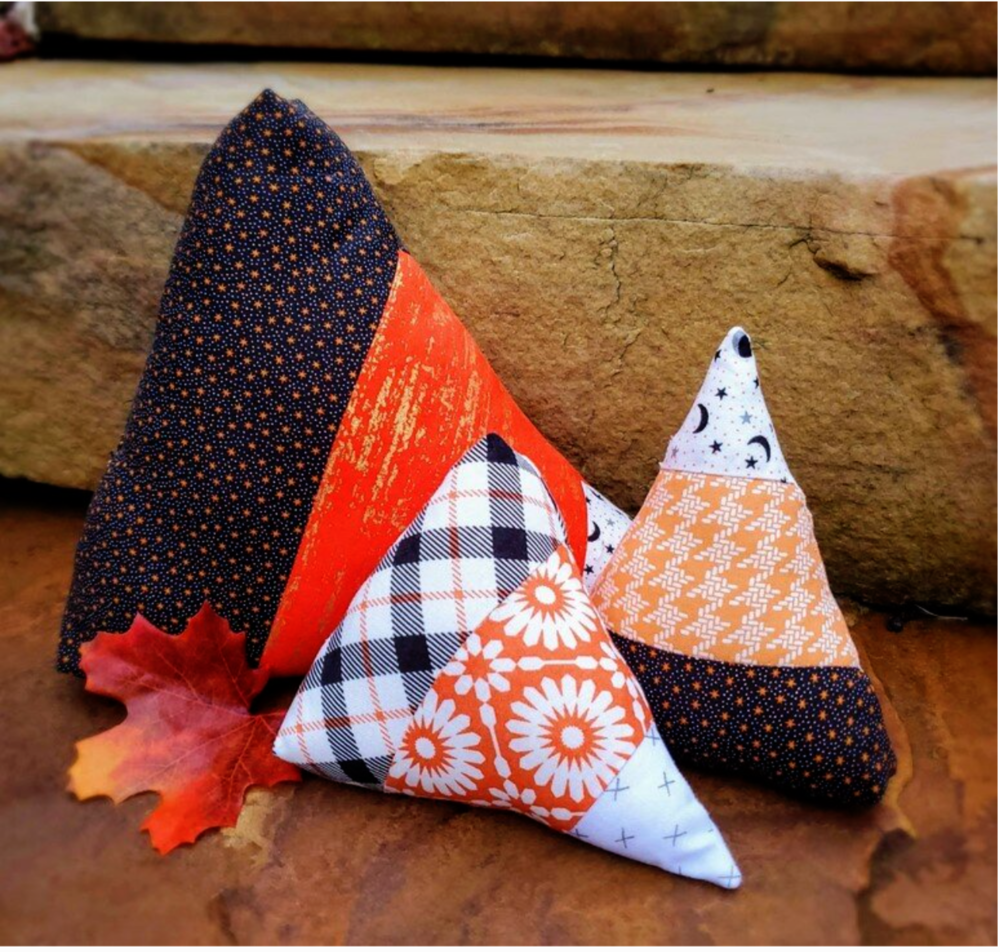
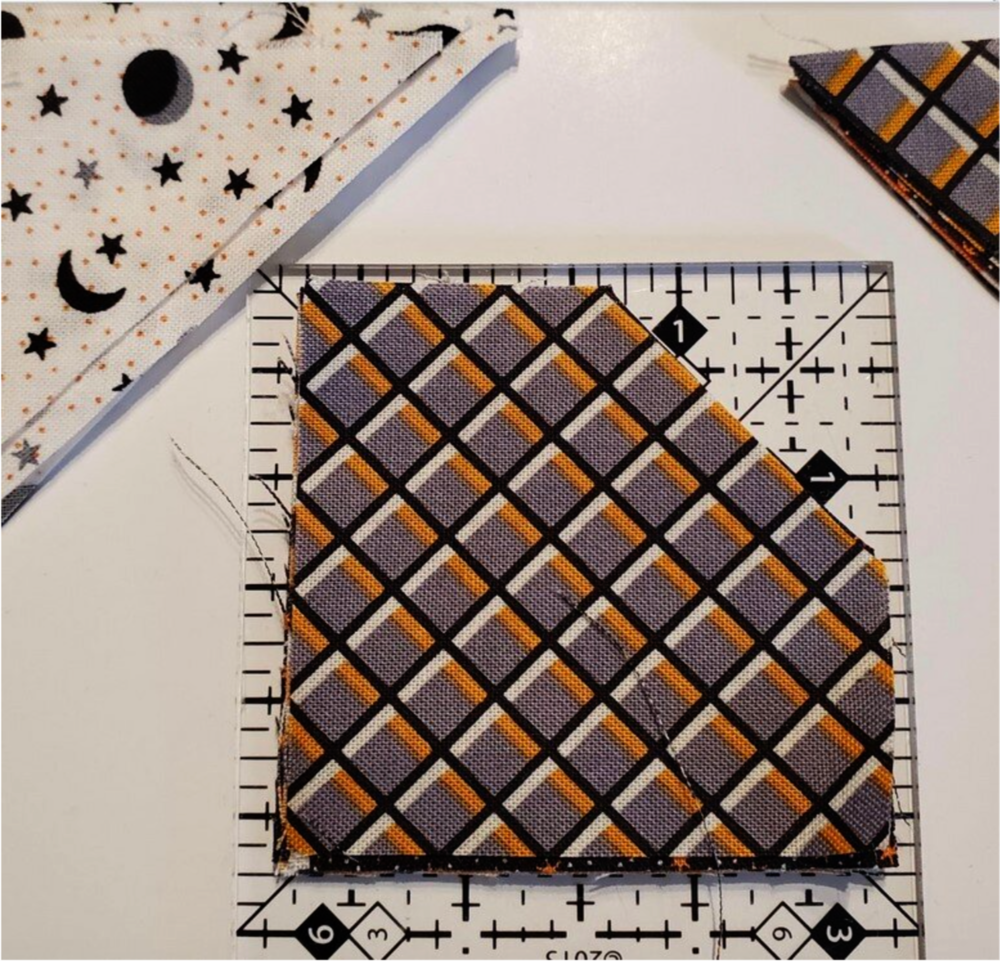
This is the first time I have used my ruler to cut at a 60 degree angle. I found it was helpful to stair step the strips as I sewed them together in rows of black, orange and white to get the most use of the fabric. Sew the 2.5 strips and then the 4 “ strip sets together. Press the seams to the dark side.
To cut the candy corn triangle shape, align the 60 degree line with the bottom of the black fabric and the tip of the white fabric. Cut the first angle and shift the ruler and re-align on the other 60 degree line to form a triangle with the black at the bottom. Cut two matching triangles.
With right sides together match the seams and sew a ¼” seam starting about a 1 ½” from the corner on the bottom edge of the black all the way around leaving about 2” opening to turn and stuff.
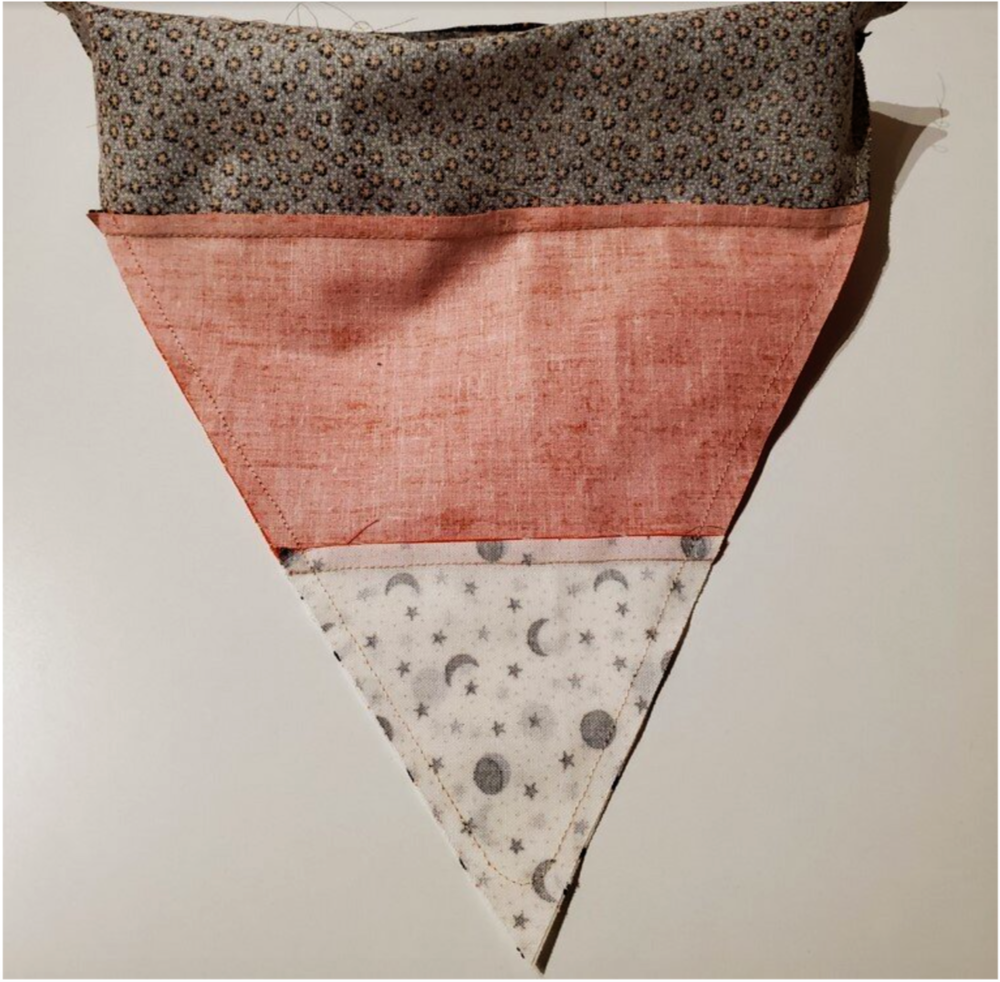
To make the candy corn stand up, you will need to box the bottom two corners. Align the bottom corner seams and sew ¾ “ across perpendicular to the original seam.
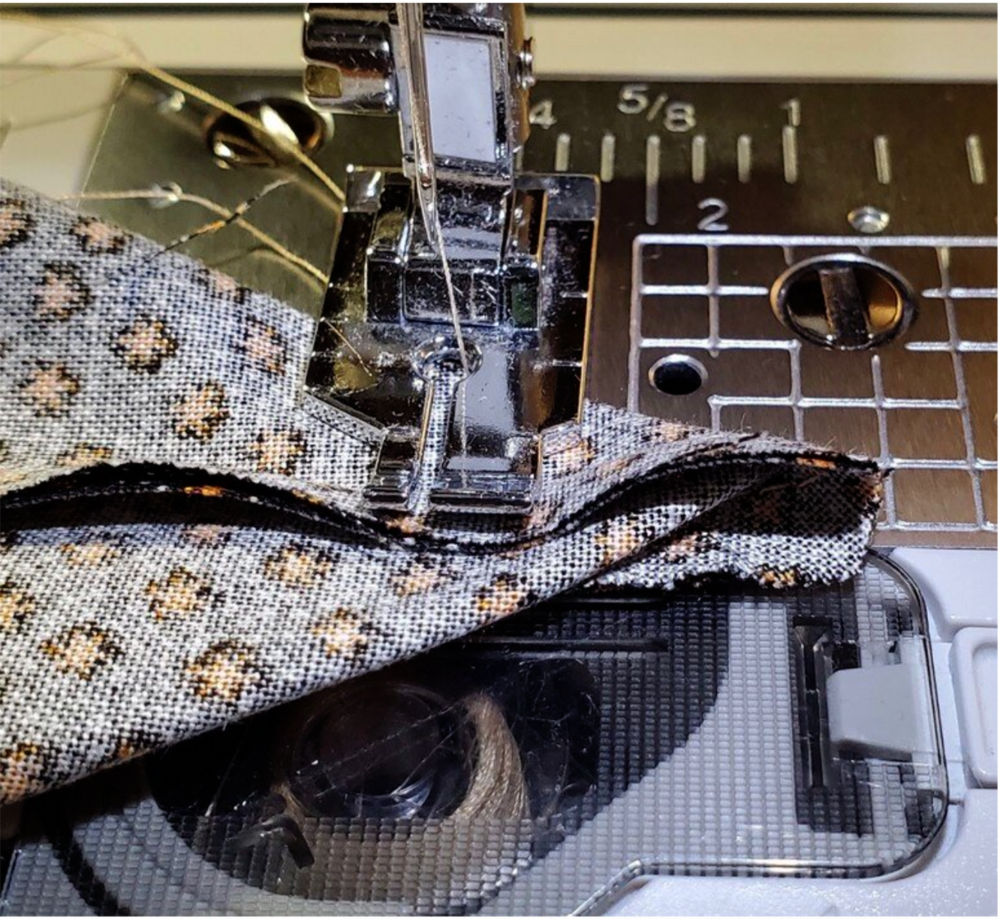
Trim the excess fabric about ¼” from the seam. Now turn the right side out and push the corners out with a tool.
Now you are ready to stuff and hand sew the opening closed.
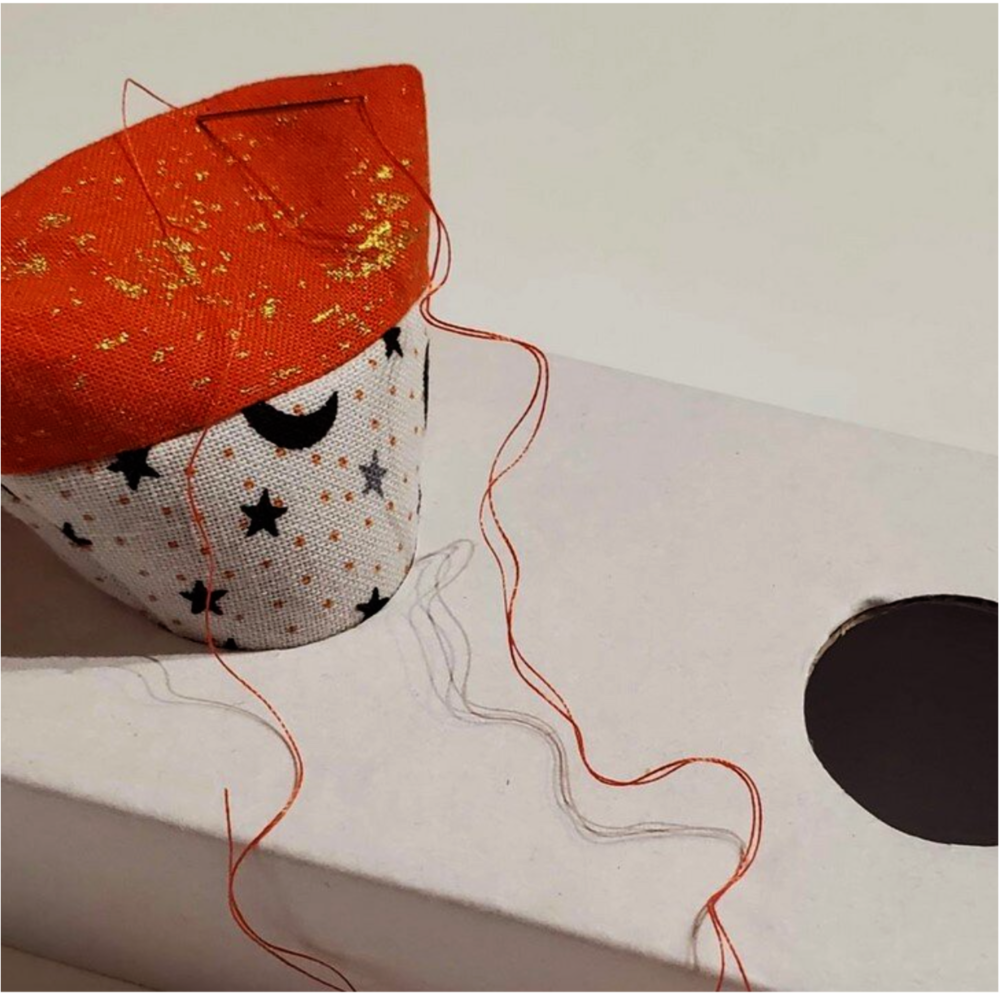
These could also be made into bean bags to use as a fun Halloween game. I used the same method to make the cute little pincushions. I decided to stuff the point of the triangle firmly with poly-fil and then added sand till it was very full. It was tricky to hold it and sew it closed so I used a light bulb box to hold it upright. This will be a cute addition to your sewing table as you sew for the little ghost and goblins in your life. It can also double as a fabric weight.
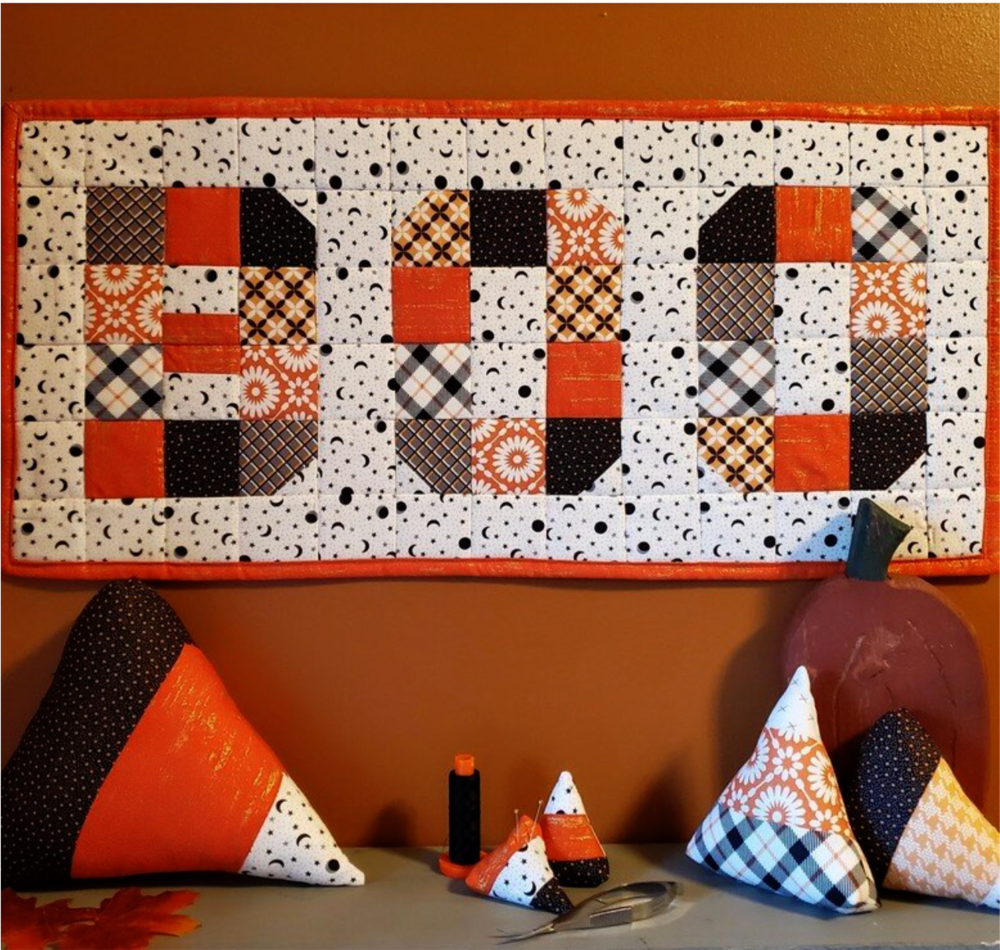
As I was cleaning up all the usable fabric scraps, I decided I needed to make a table runner/wall hanging. I had this great gridded fusible interfacing from tensisters.com and thought this would be the perfect use for the product. You will need 78 blocks all cut 2.5 inches. For the background, you will need 48 squares. The letters BOO are of assorted fall colors.
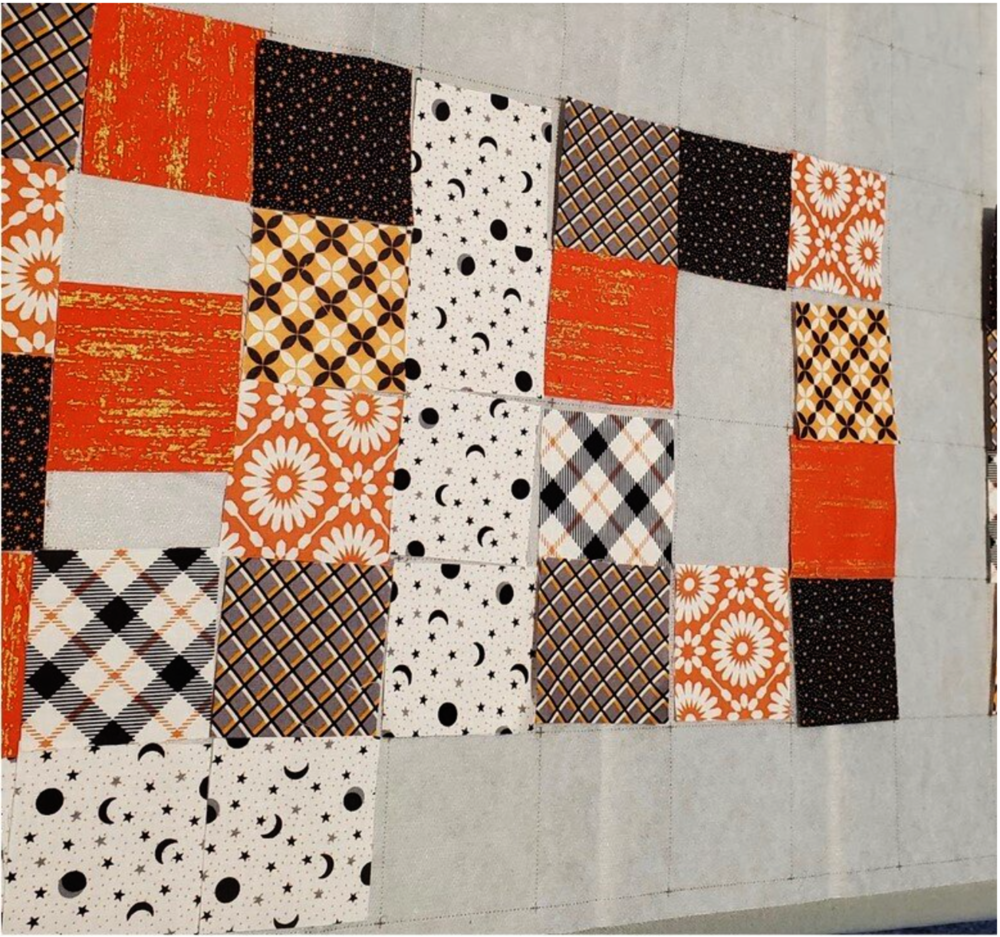
On 10 of the squares, you will need to snowball the corners to form the letters. I cut the corner off at a 45 degree angle and sewed a ½ square of background fabric to the corners. After you sew the triangle on you will need to square up to 2.5 inches.
To make the letter “B” middle, I cut ½” off two background pieces and cut the orange piece in half. I sewed the orange and white pieces into the squares. I laid out my design to fill the space and pressed with a Teflon sheet lifting the iron in an up and down pressing motion.
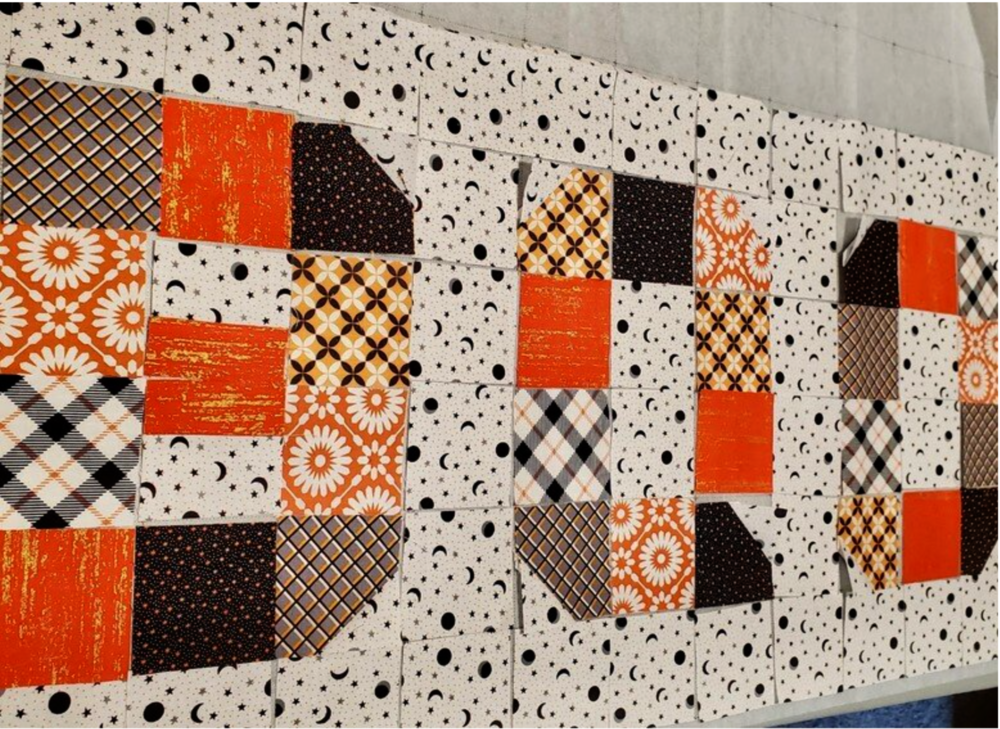
Luckily, I viewed my picture before going to the next step because you can see I had a snowball square going in the wrong direction. It was an easy fix at this point.
Next sew all the vertical seams with a ¼ “ seam folding on the dotted line. Here is what it looks like after sewing the seams.
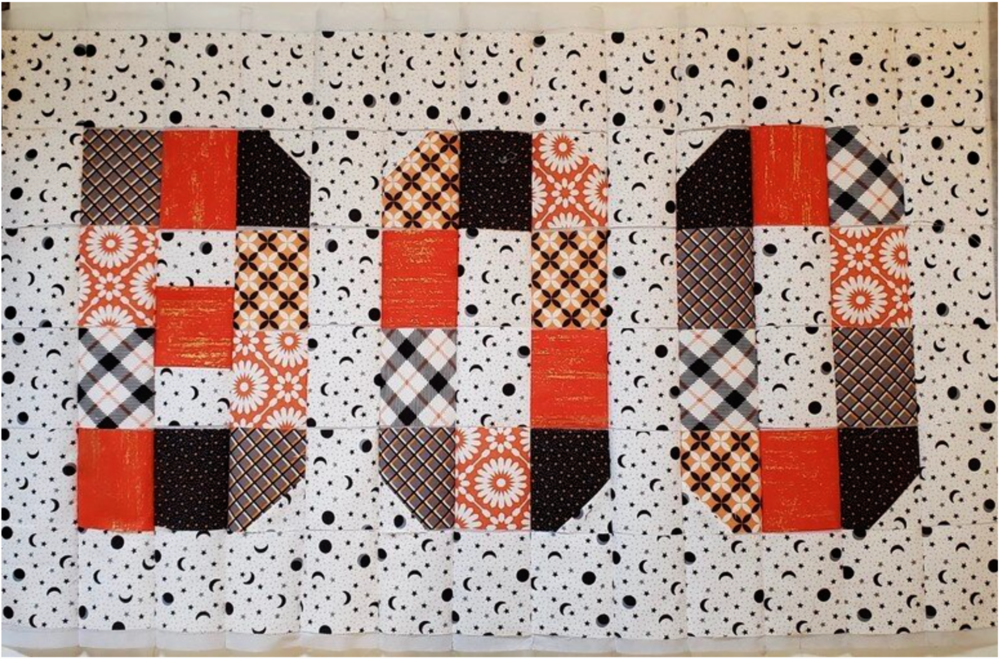
Using steam, press the seams in opposite directions for each row. Trim to the seam line at each intersection to allow for the seams to nest as you sew the horizontal seams. This method gives you perfectly matched blocks every time!
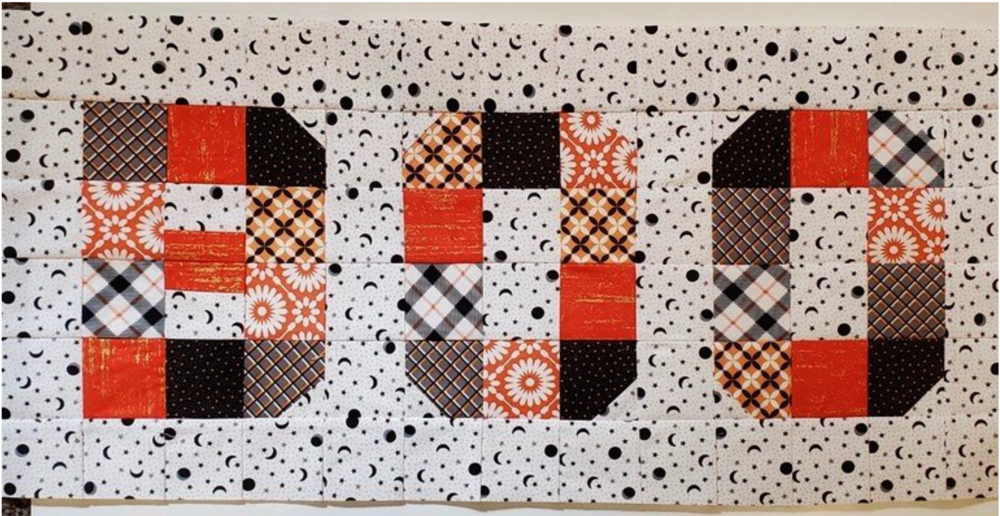
At this point, you can decide how you would like to finish with the quilting and binding. I used a spray baste and cotton batting with orange backing to prepare the quilt sandwich. I did in the ditch quilting and finished with a ½ “ self binding in orange to set it off. This turned out to be a great size for a wall hanging or a table runner for the fall season.
I hope you enjoyed these fun fall projects. Don’t forget to use the hashtag #ccfeaturefriday when you post pictures of your Cotton Cuts creations on Facebook and Instagram to enter to a win a free panel from our shop!