DIY Zippered Accessory Bag
10th Sep 2020
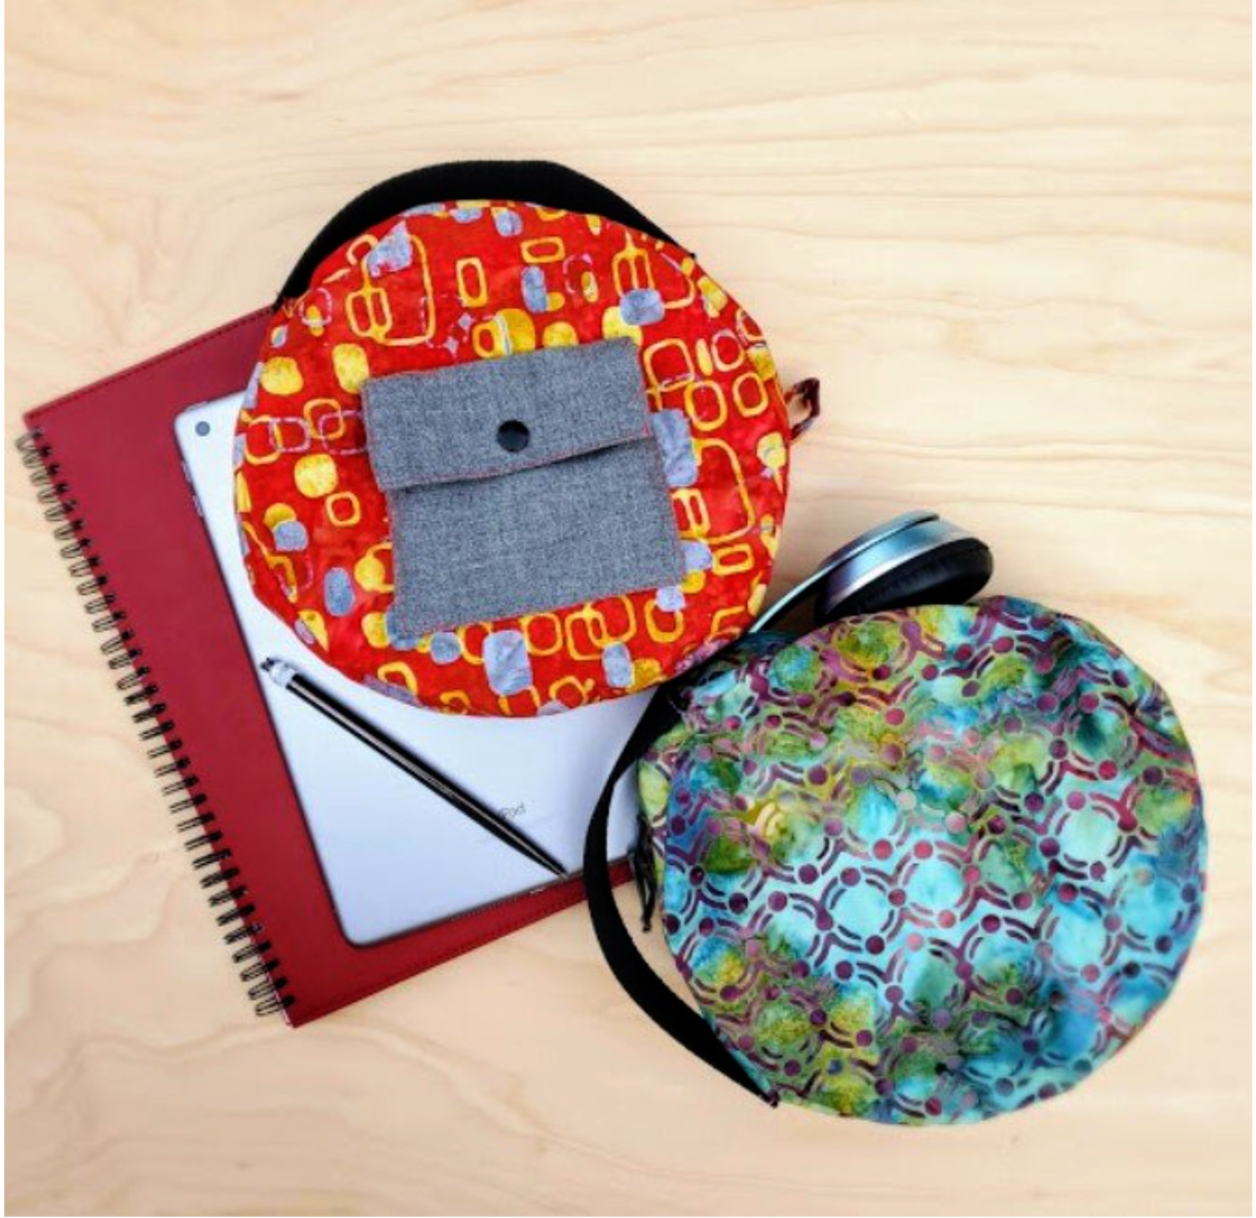
Hi, Joanne here to share how to make a round accessory bag for headphones.
With so many students learning from home in a shared space, noise canceling headphones are a popular choice. This storage bag is also perfect for travel and is a great gift idea. I found a free pattern for a circle shaped purse from Sallie Tomato. Follow along as I show you a few adjustments to the pattern to sew this case.
Materials needed
Fat quarter I used Cotton Cuts Java Batiks
Aurilfil coordinating thread
Webbed handle 8”
15” zipper
Coordinating fabric for pocket
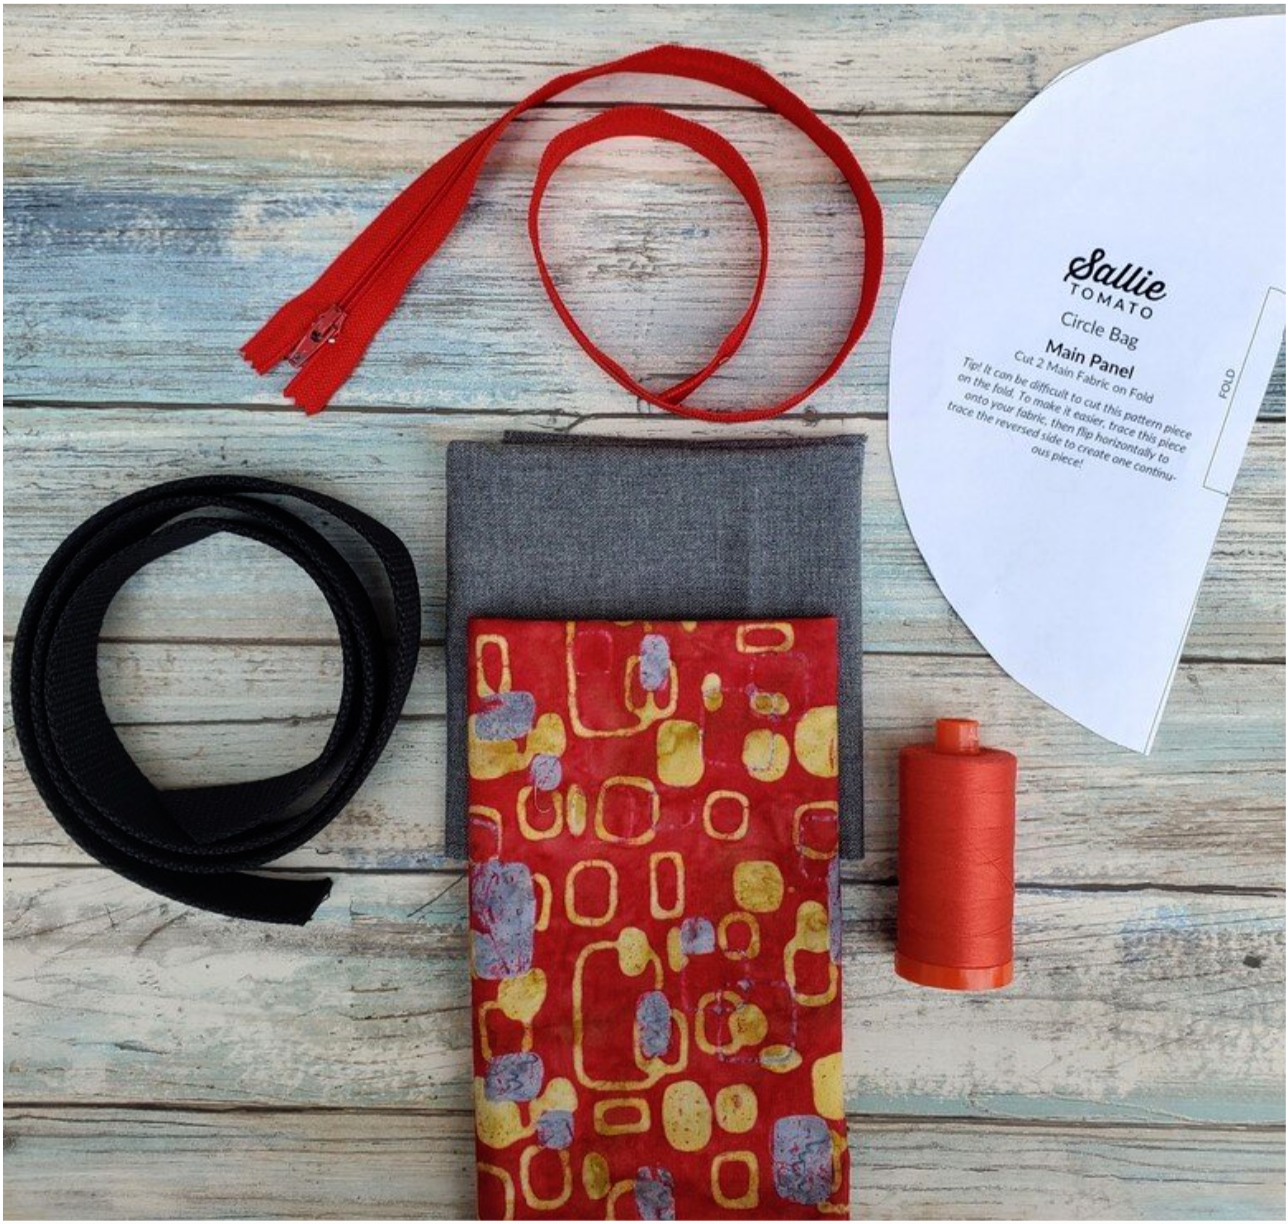
Start by downloading and printing the free pattern. It gives you the layout of how to cut the pattern from a fat quarter. You will not need the handle or strap piece.
Cut out your pattern pieces. One nice benefit of using a batik fabric is it looks the same on both sides of the fabric. Here is a great Youtube video to show the zipper process. https://youtu.be/MwIwPZkwLcY
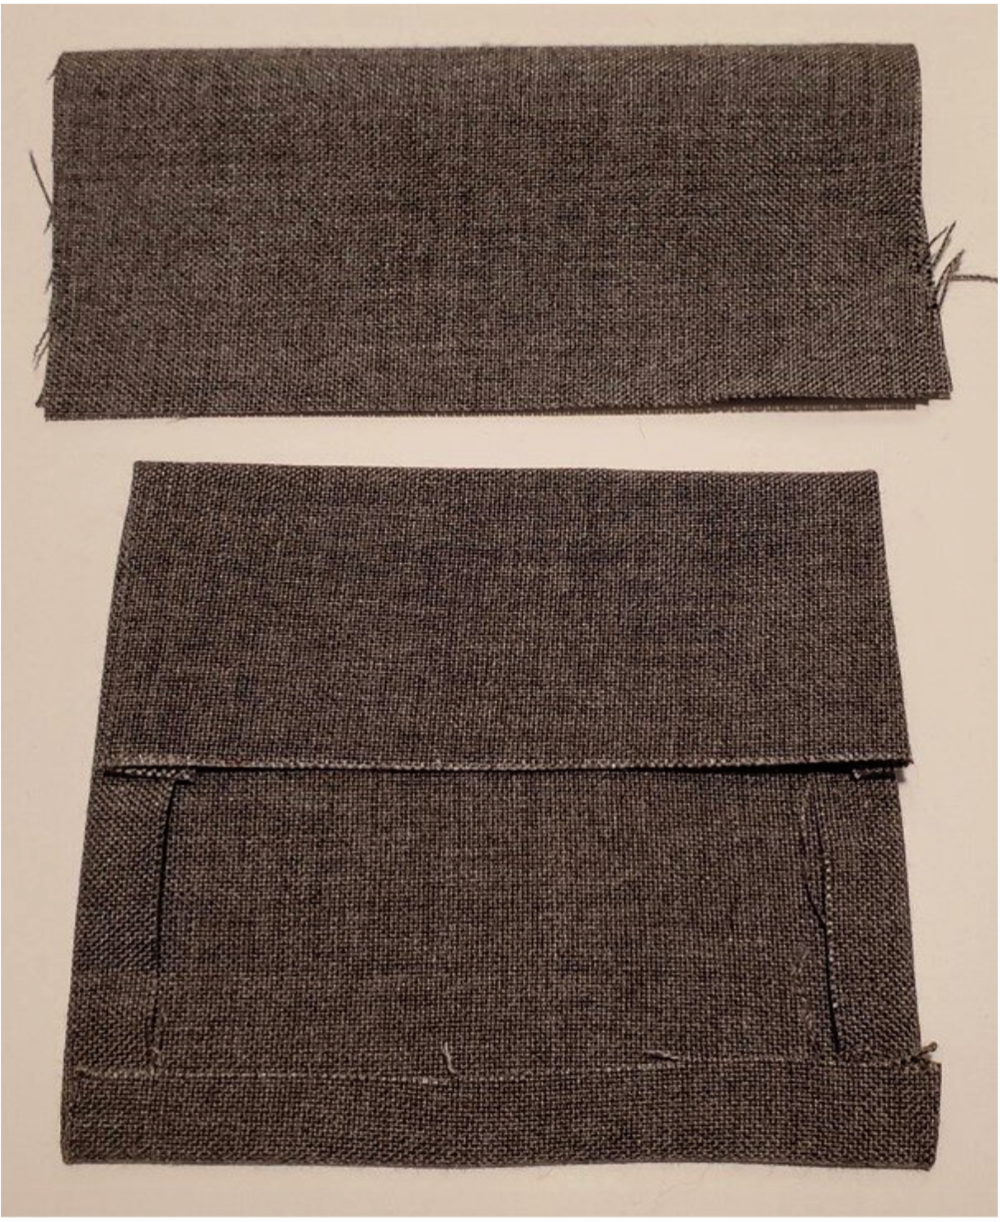
Lay the 1.5 inch front zipper gusset piece down and place the 15 inch zipper right side down. Using the zipper foot, sew along the zipper. Turn right side out and finger press edge to prepare for top stitching. I used a coordinating thread and set the stitch length to 3 to stitch about ⅛” from the edge. You will do the same process using the 2 ¼ “ back zipper gusset piece.
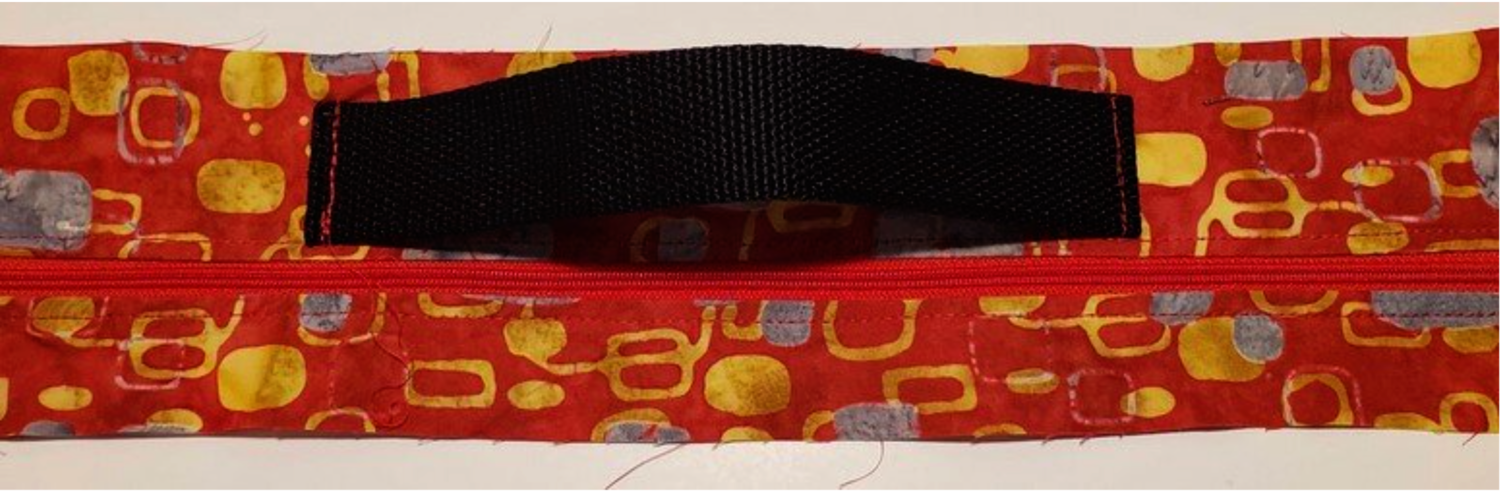
To add the handle cut a piece of the webbing 8” inches long. Use heat to seal the edges and keep them from fraying. I usually take it outside and light a match to quickly heat and seal the edge. Measure 4” from each side of the wider top gusset fabric piece and make a mark. Place the webbing on the line and using a small stitch go back and forth a few times. Do the same on the other end.
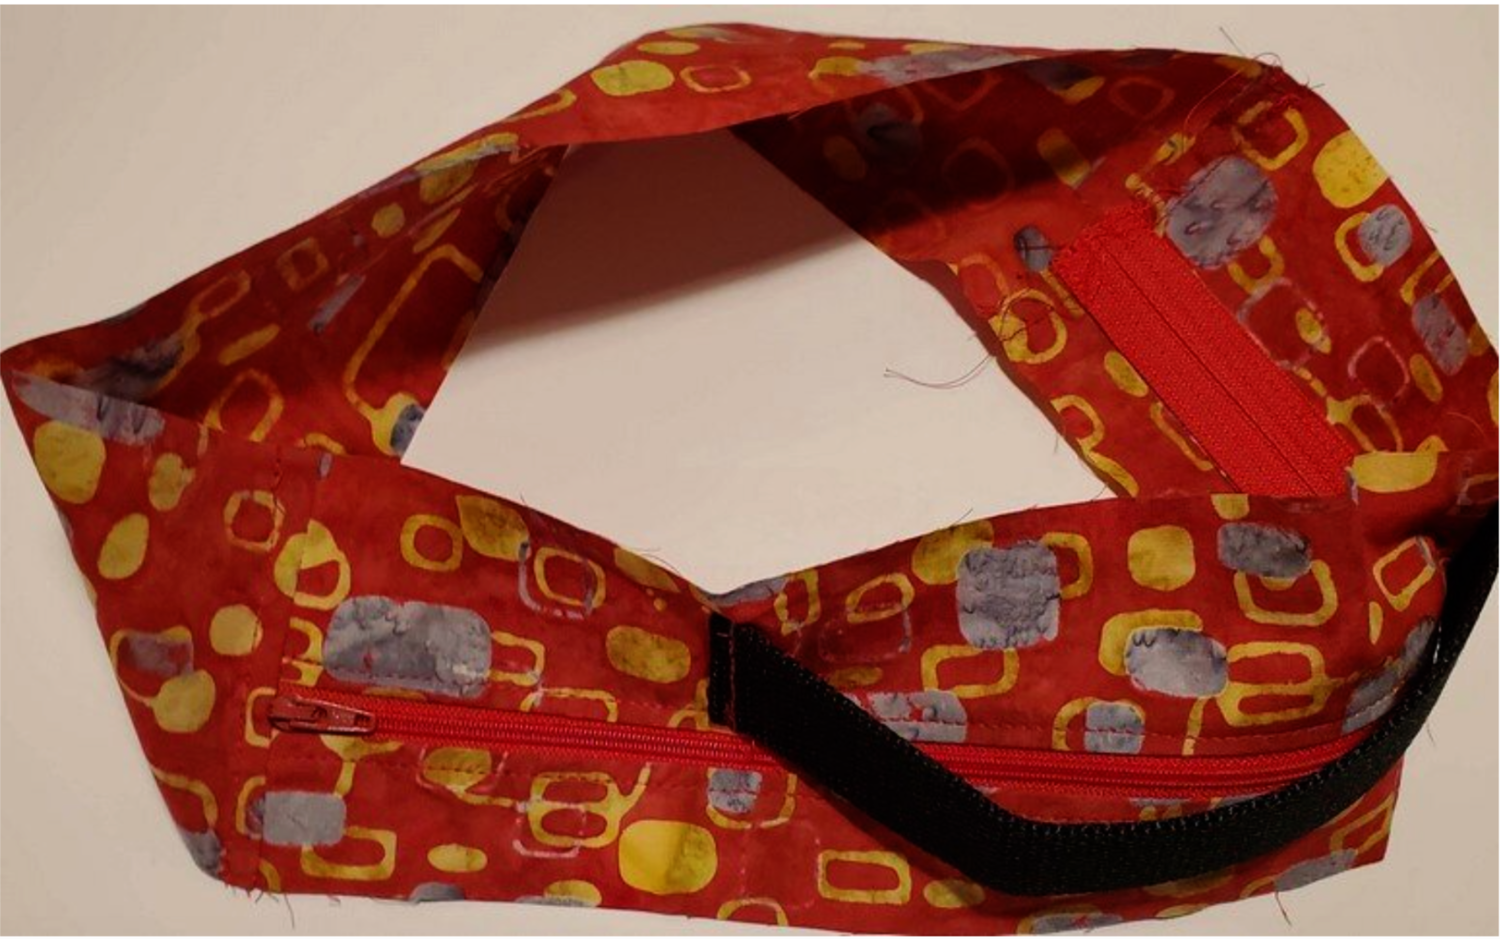
Next you will sew the bottom gusset. I found that I needed to cut my piece about an inch shorter than the pattern suggested to make the circle fit. Sew each side to the zipper gusset using a ⅜” seam. Finger press in place and top stitch.
This gives you an open circle ready to insert a front and back piece. Before adding the front piece I decided to construct a 4 inch pocket to hold a charger and cords. I used a coordinating grey fabric and cut a 5 inch square. I folded under ½” on three sides pressing in place. For the top edge I folded down 1 ½” and pressed. To make the flap 5” x 4”. Fold the edges ½” on the wider side and the fold in half to create a 4”x 2” flap.
Top stitch around the three edges of the flap with a contrasting thread. To keep the edge from fraying use an overlock stitch or fray check. Lay the pocket on the center of the circle and align the placement of the flap about ½” into the top edge of the pocket and pin the flap in place. Mark the corners of the pocket for placement on the circle, then set aside.
Top stitch the bottom edge of the flap in place securing with back tacking and the start and end of the seam.
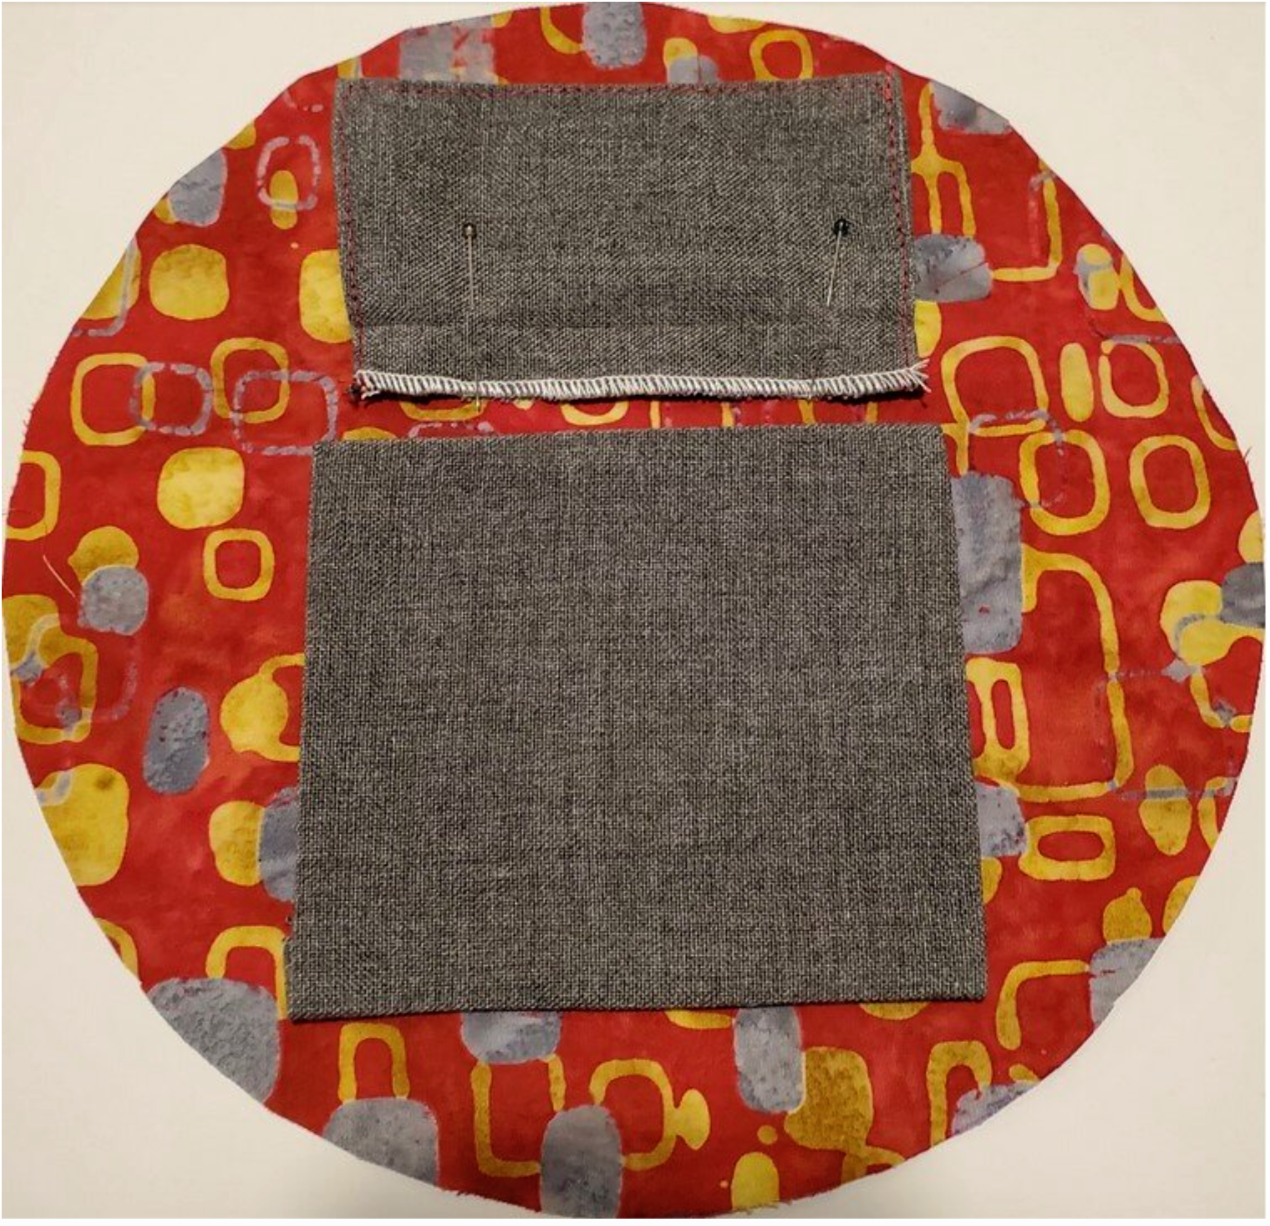
Now place the pocket on the circle, lining up the corner marks and topstitch in place leaving the top edge open to form the pocket. I added a plastic snap, but you could use Velcro or sew in snaps.
Now you are ready for the final assembly of the bag. This task is easily done by going slowly and using clips or pins. I folded my circle in half and made marks to align the top and bottom to keep the pocket straight during assembly. It is very important to leave the zipper open to be able to turn the bag right side out after sewing the front and back circle pieces in place.

Slowly go around the circle matching the edges and placing a clip about every inch. I started and ended on the bottom edge in case I needed to adjust the bottom gusset to fit the circle. I did that on both bags I sewed to get an exact fit. The seam will not be noticeable on the bottom.
Sew around the bag using a ¼” seam allowance. You may want to use an overlock stitch to hide the raw edge on the inside of the bag. The batik fabric is tightly woven and tends not to fray as easily and will hold up to regular use.
You are finished sewing and now it is time to turn the bag right side out through the open zipper. Press the bag carefully. To help set the shape, you can use a pressing ham or as I did use a rolled up towel on the inside to press the seams in place.
Ta-da! You made the perfect bag to store and carry headphones and accessories.