DIY Puff Quilt
24th Sep 2020
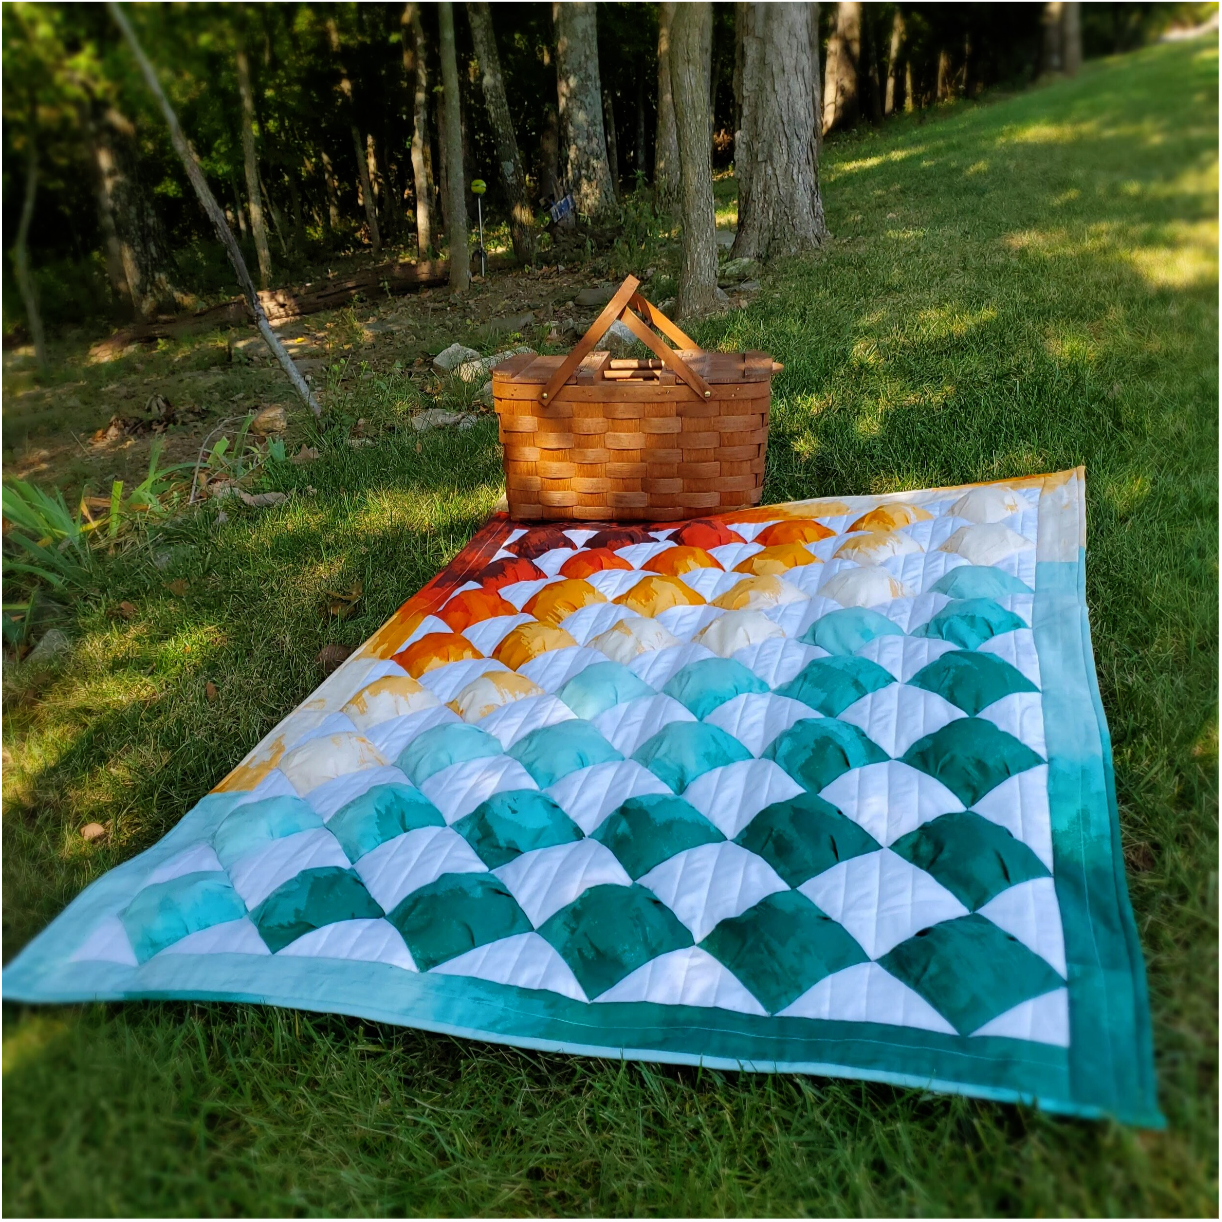
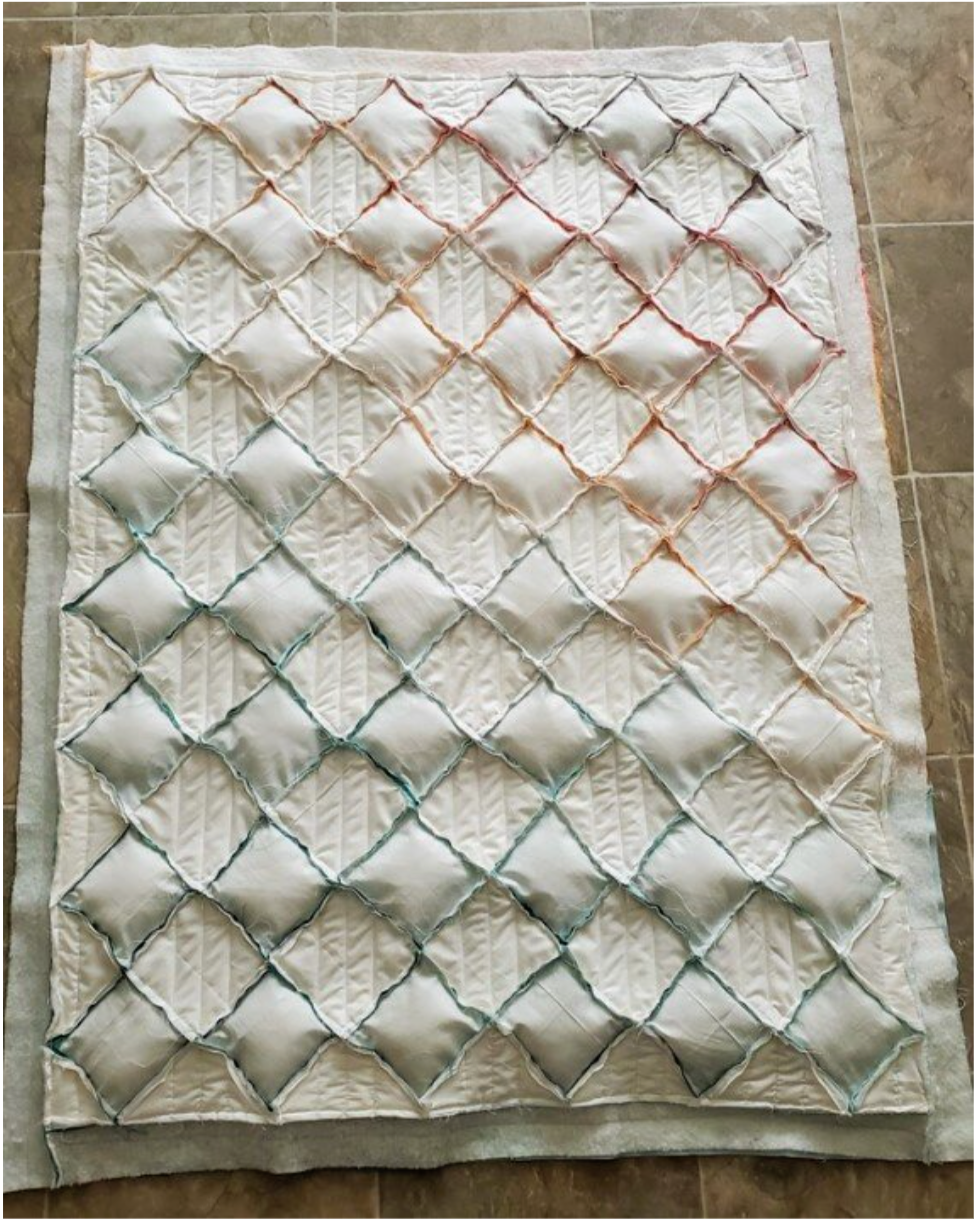
I have been quilting for two years and in that time I’ve completed seven lap size quilts using different methods of construction and quilting. For my next quilting adventure, I decided to sew a very different kind of quilt. This quilt checked several boxes on the quilter’s bucket list, quilt as you go, set on point, create ombré effect, machine tack and the star of the quilt...puff blocks!
I was curious about the origin of the puff quilt. The first pattern for this style quilt was published in 1882. Originally it was stuffed with cotton or wool and the squares were different fabrics like velvet and silk making the quilt very heavy. Could it have been the first kind of weighted blankets so popular today? In the 1970’s it gained popularity as a hand sewn quilt block stuffed with upcycled nylon pantyhose that ended up kind of lumpy. I think you will be pleased with the lightweight and washable features using cotton and poly-fil in this modern puff quilt.
To get started, I purchased the Puff Quilt pattern from Annie’s Craft Store. You’ll want this pattern to follow along and refer back to when you are making the quilt. I then printed the pattern and read it carefully making notes and figuring out the adjustments to use only two fabric colors instead of the rainbow of colors recommended.
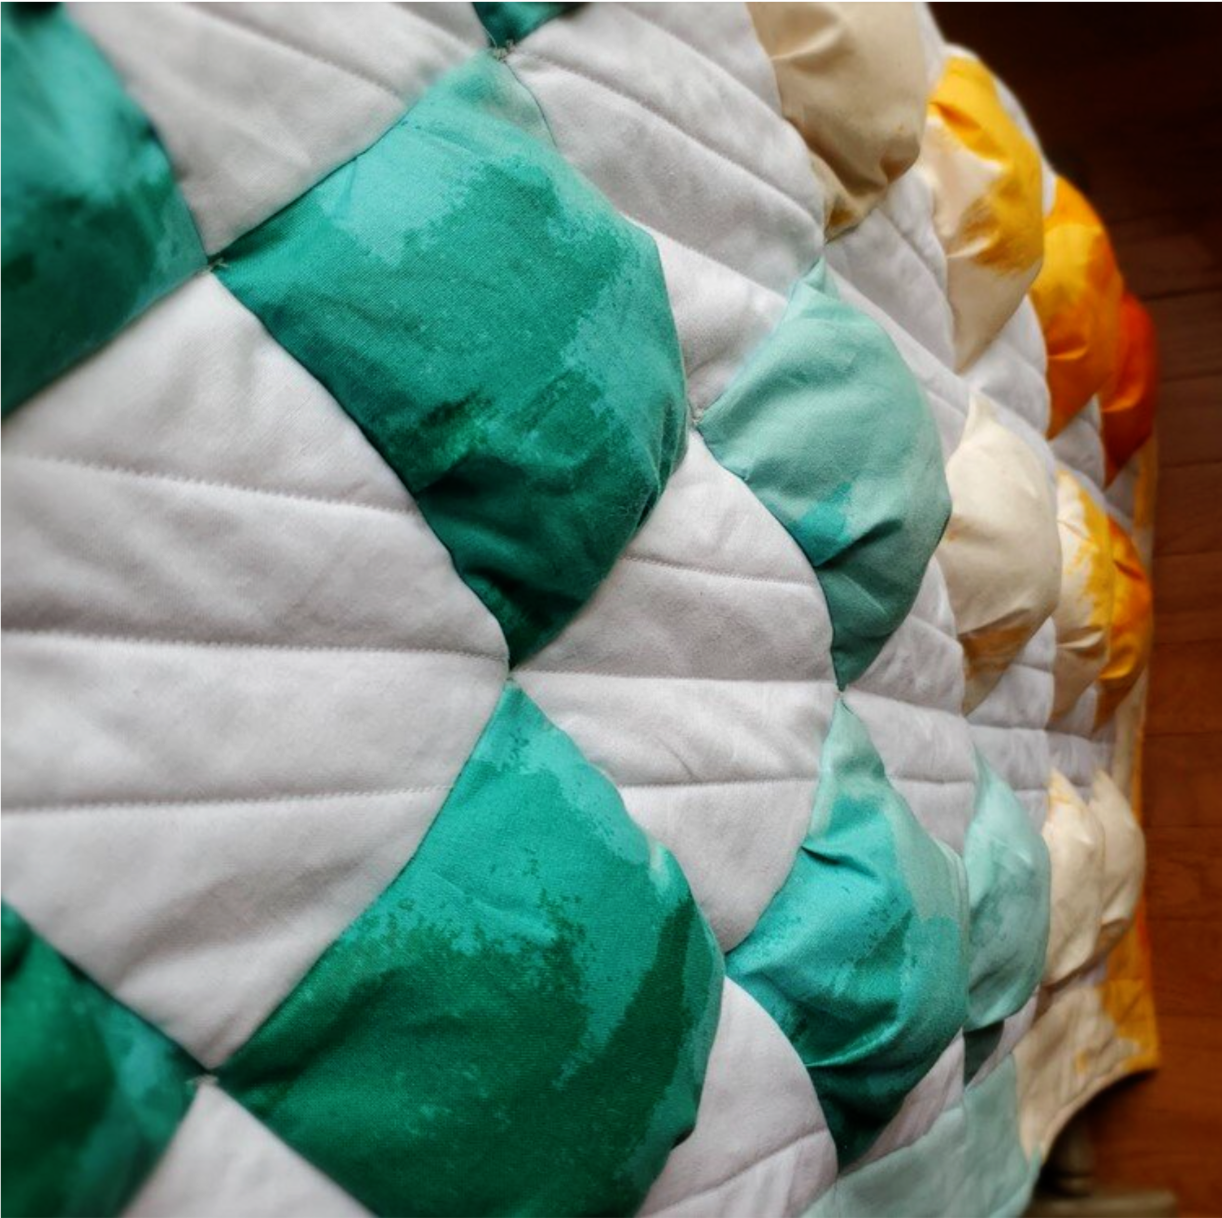
The new Guicy Guice fabric featured in the September Cotton Cuts Classic subscription box was ideal for this project. I used a Robert Kaufman solid white fabric for the alternating quilted blocks. You will also need fabric that will not be seen, an easy way to use up leftovers from a previous project or that “what was I thinking” fabric in your stash. I utilized scrap batting to use between the white fabric quilt as you go pieces.
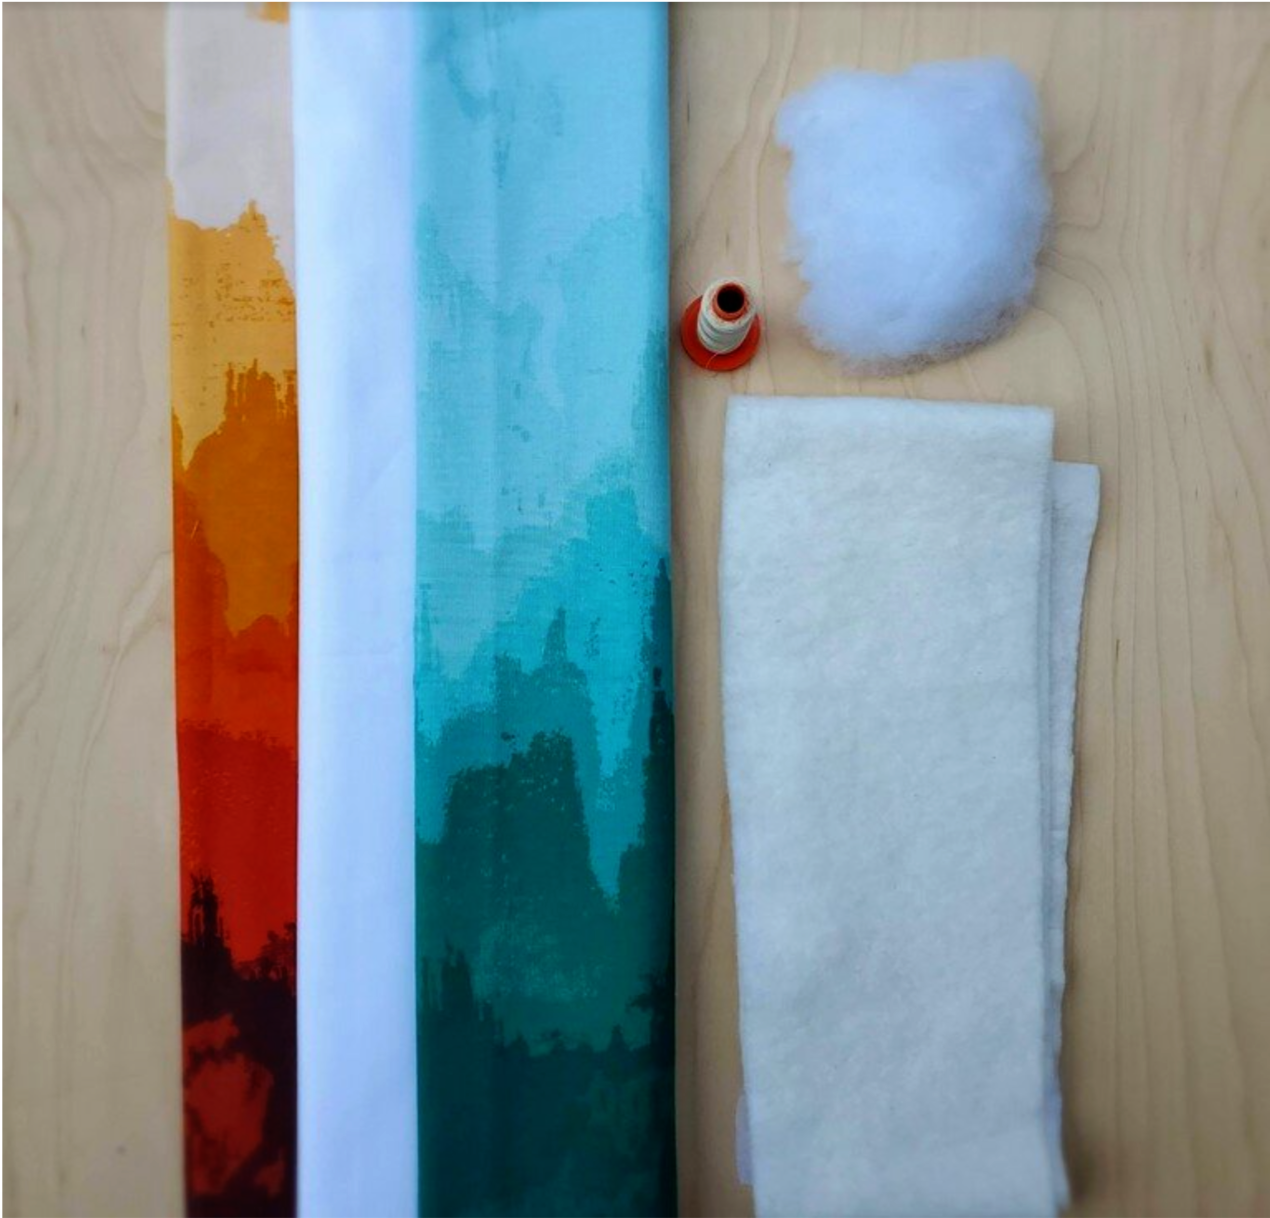
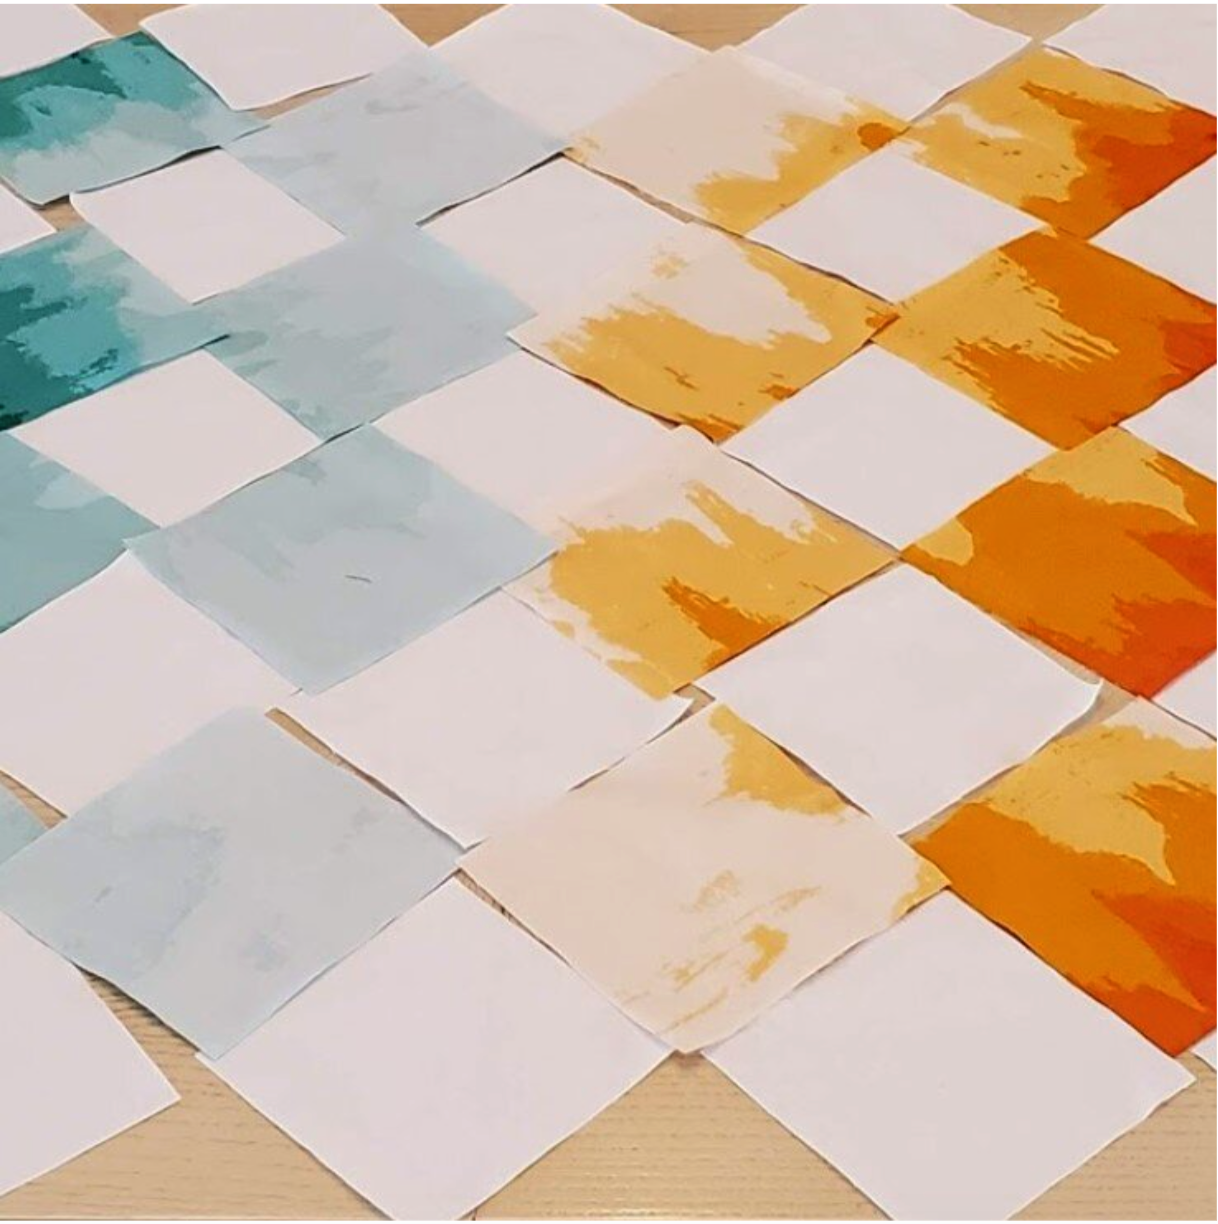
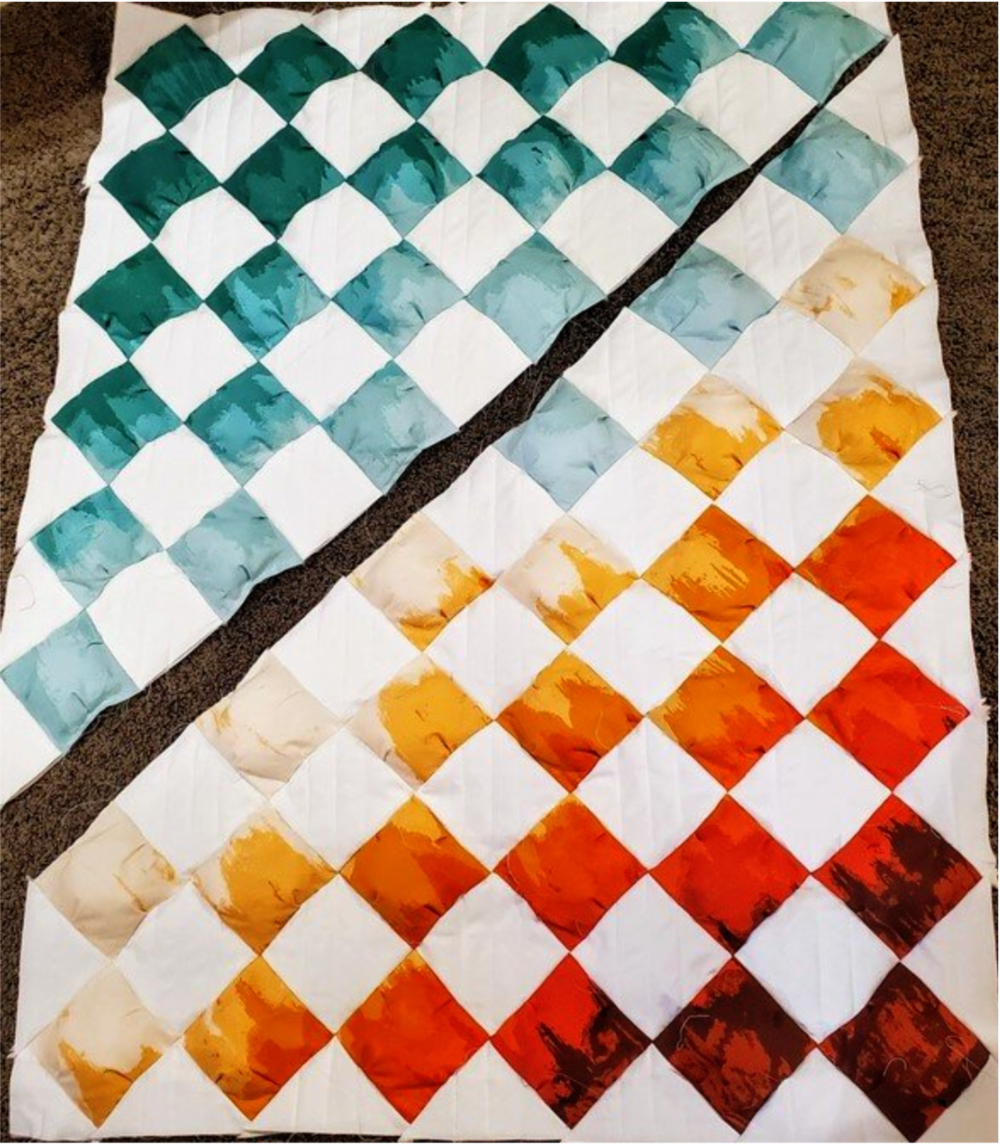
I pre-washed all of the fabric using a color catcher to absorb any extra dye from the fabric. Following the pattern I cut squares, an equal amount of each color. The hidden fabric squares are cut one inch smaller to create the space for the block to puff as you add poly-fil. Since I was wanting to create the ombré effect, I did a practice layout to determine if I had the right colors represented to see the gradual gradations of color. I then went back and cut more squares to make the final adjustments to the layout. I always do a few extra just in case I change my mind in the final round.
I decided to do chain sewing of the pieces to get into a rhythm to lessen the chance of making a mistake. I sewed a 3/16” seam so it would be hidden in the final construction of a ¼” seam. I put a mark on my sewing machine base to stop sewing and make a pleat in the middle of the square matching the corners and then continue sewing.
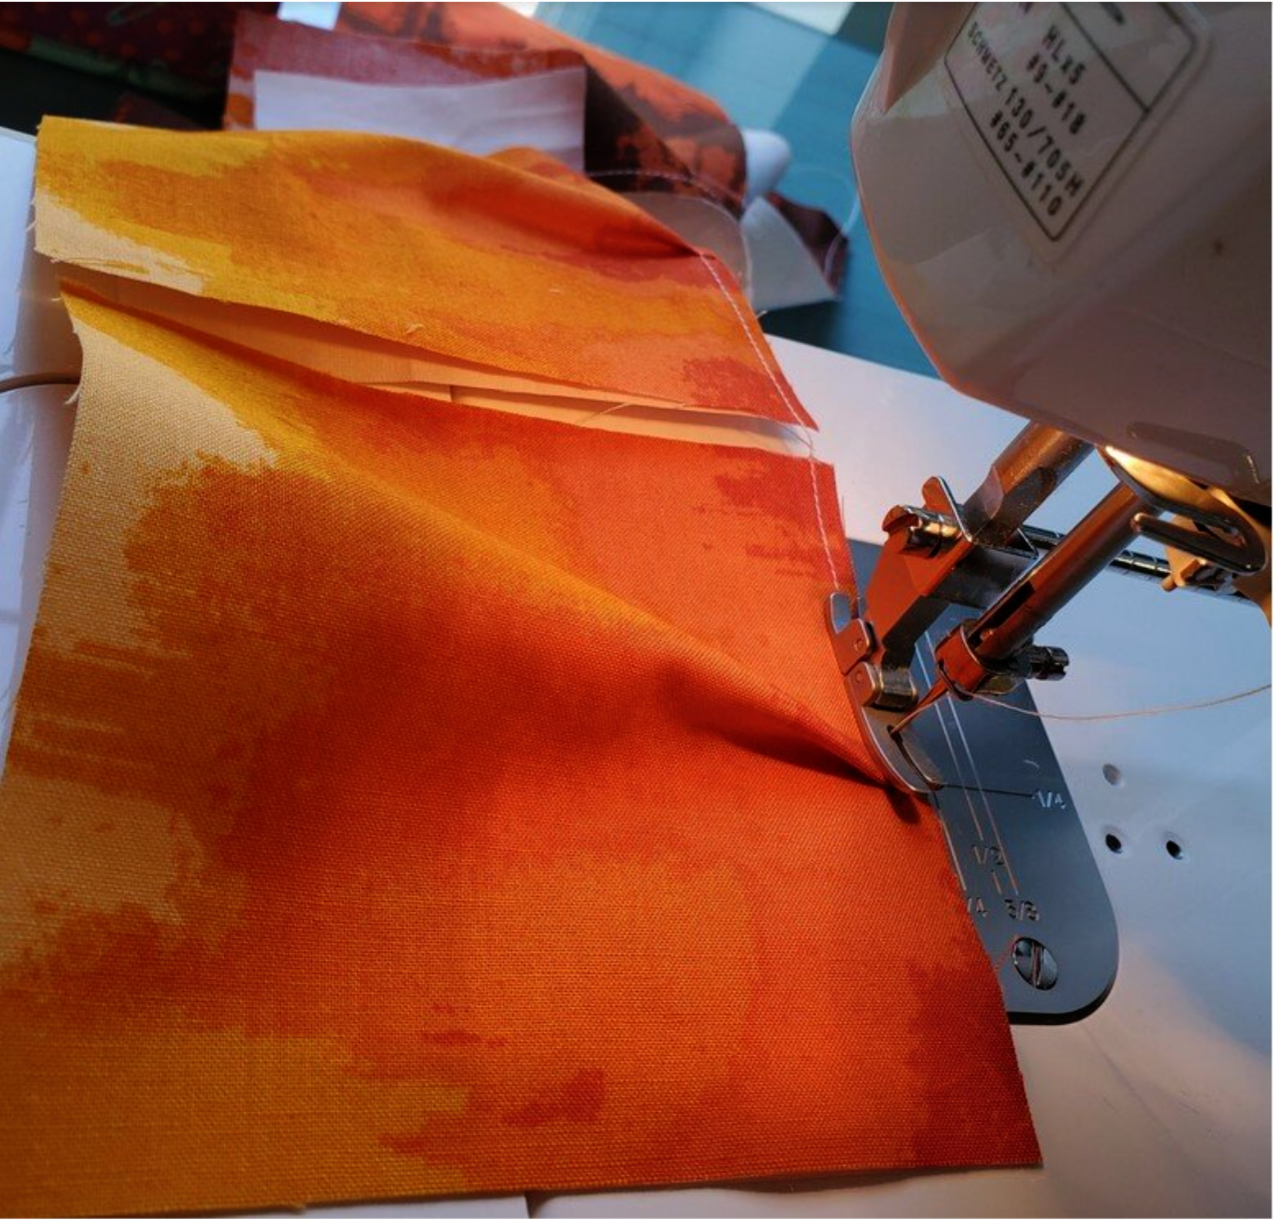
Sew the seams on three sides, leaving one side open to stuff. Clip the threads and separate the squares to add the poly-fil. It is a good idea not to overstuff because it will be difficult to sew the rows together. I did a small handful trying to keep them similar in size.
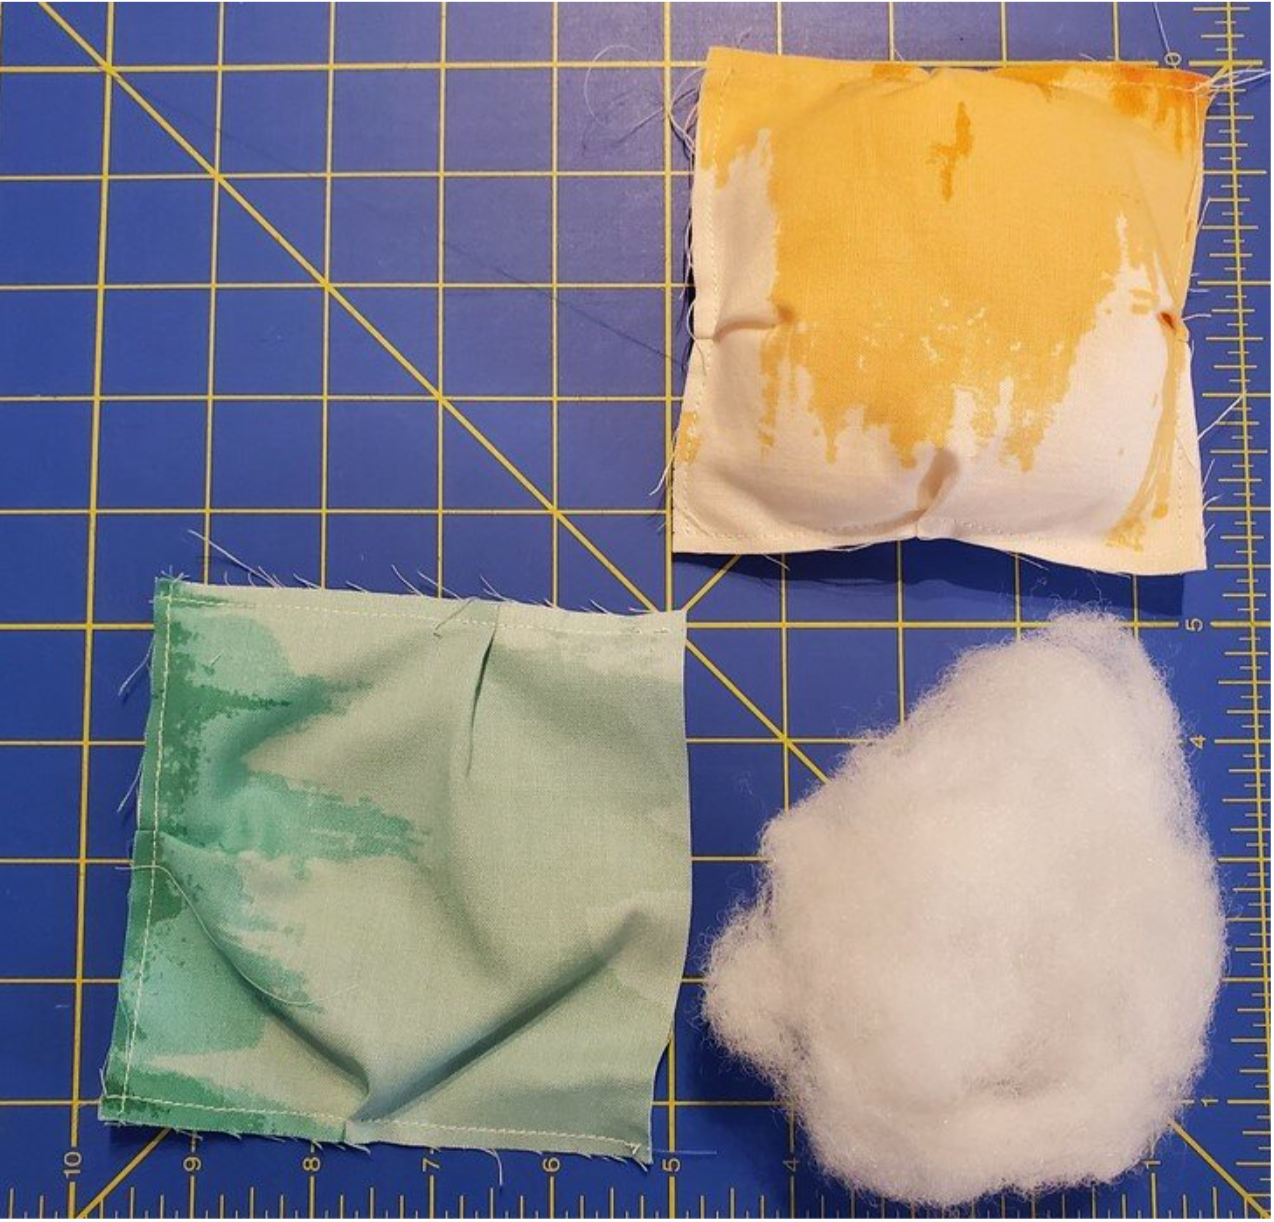
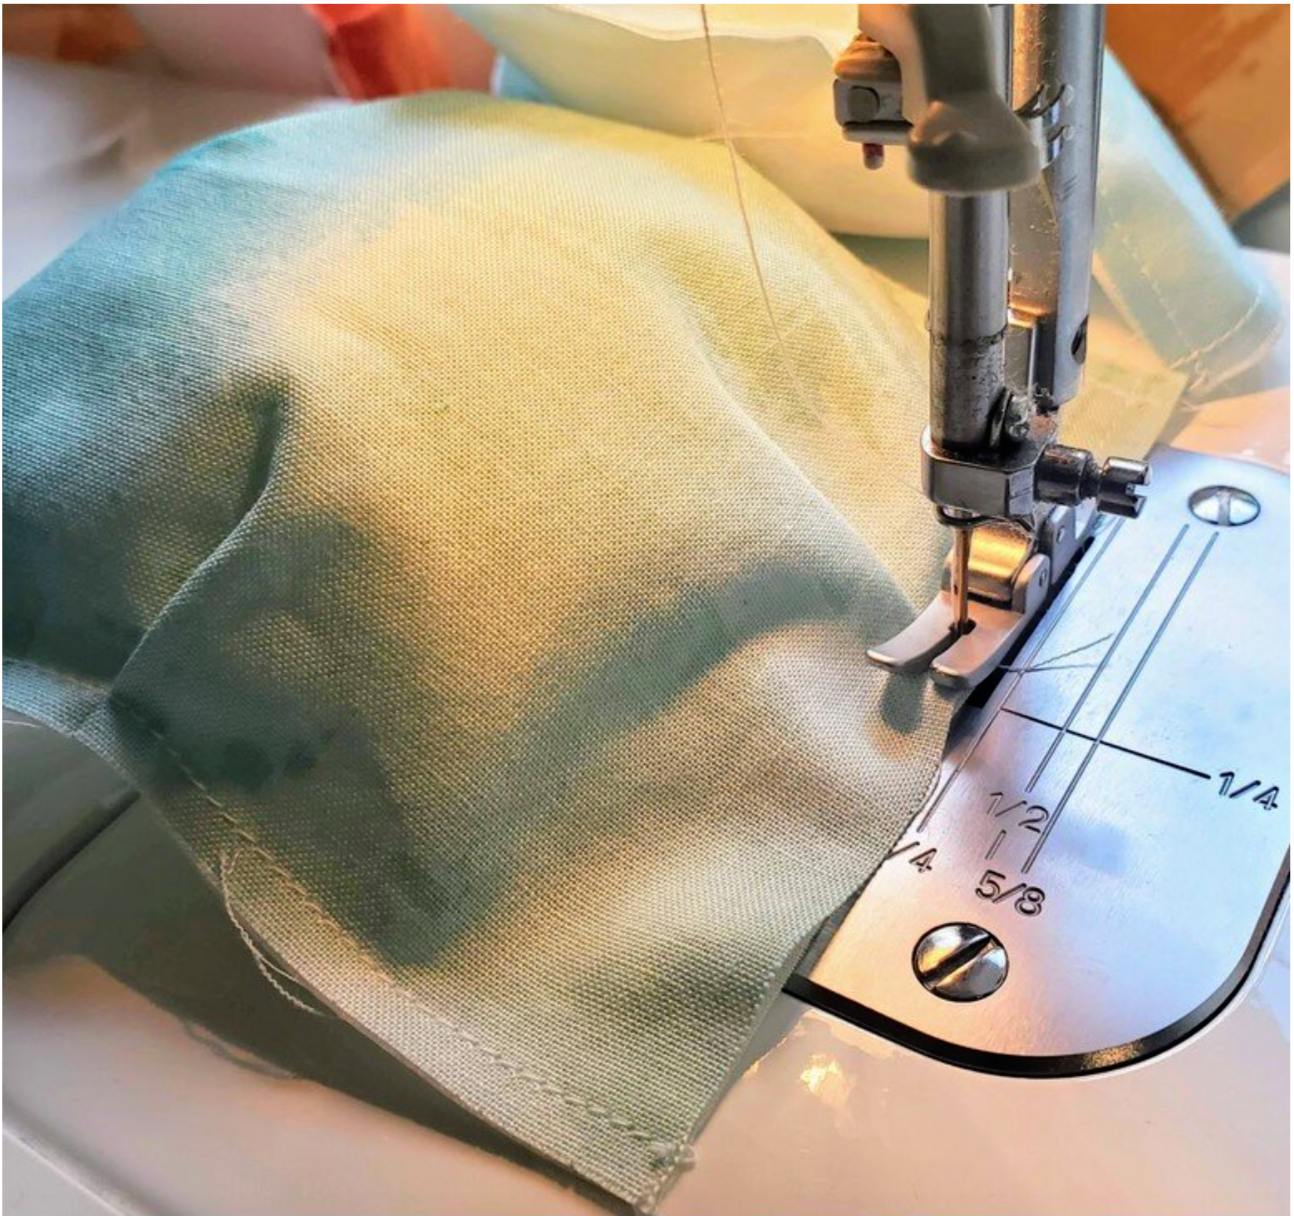
Now it’s time to sew the fourth side closed. I found this step a little tricky to press down the fluff while sewing a skinny seam and adding the pleat in the middle, but as I worked through the stack I got the hang of it.
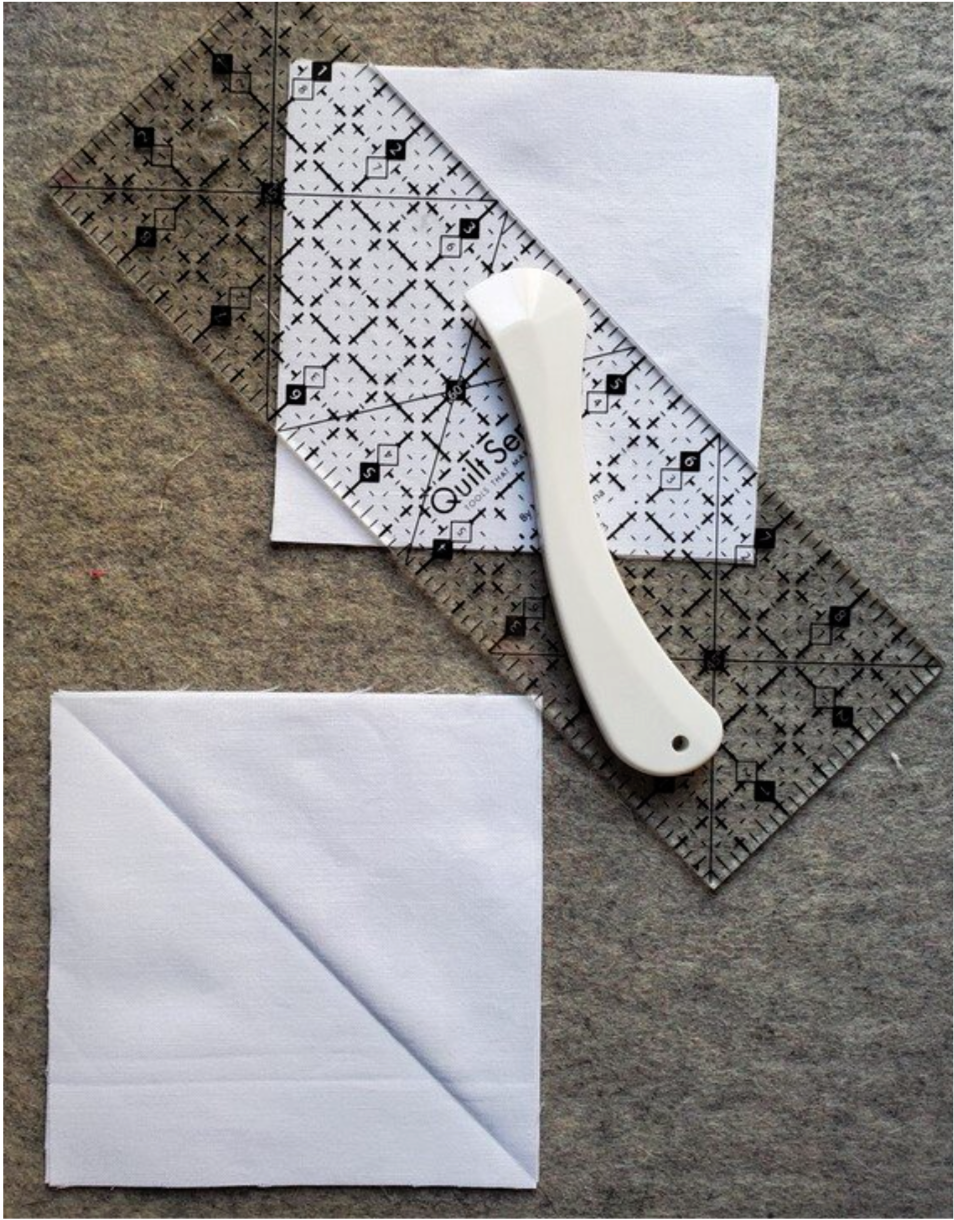
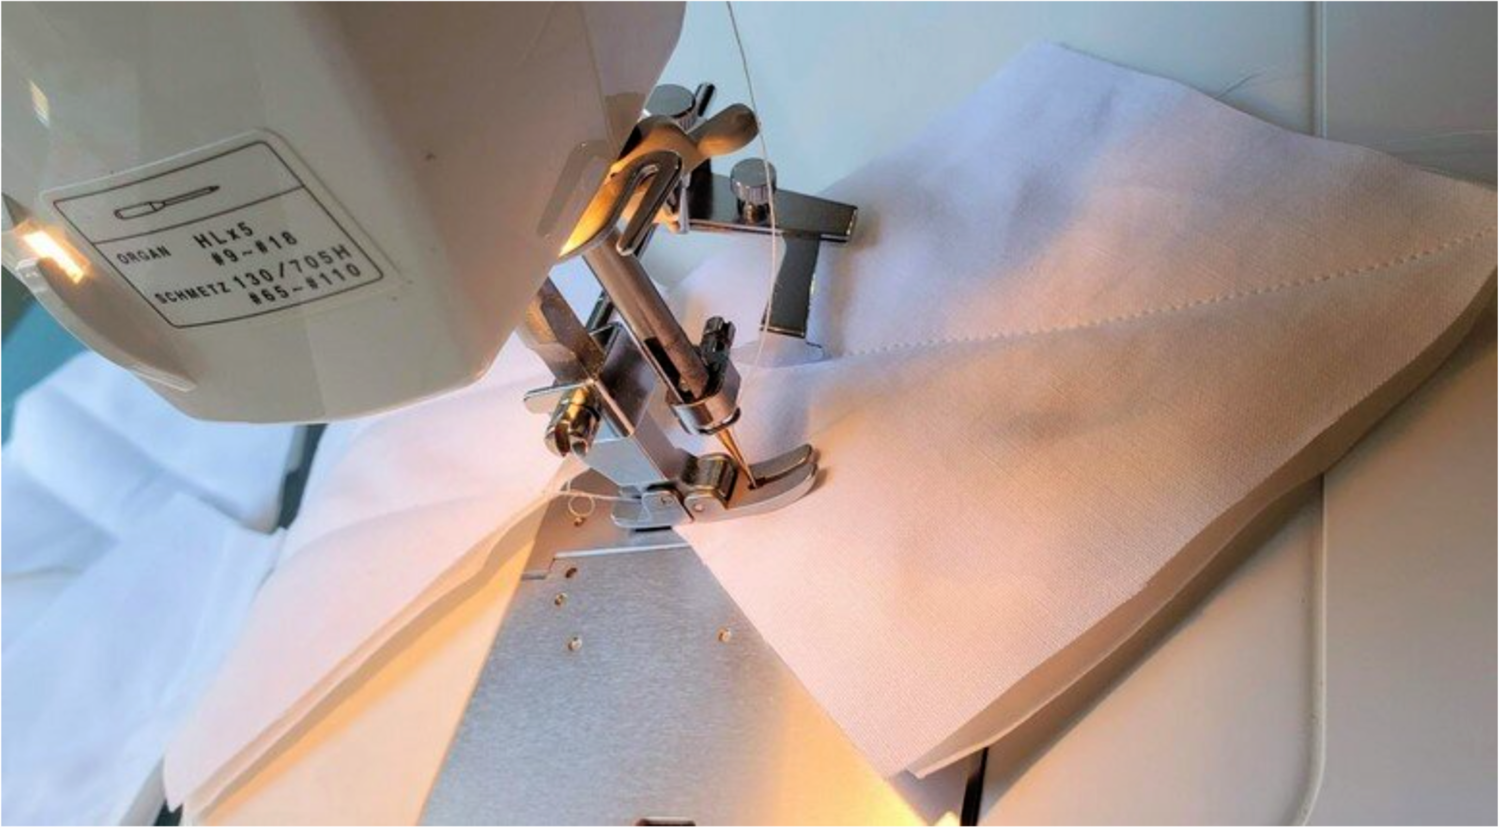
Next, I got to work on the white quilt as you go squares and triangles. For these, you layer a background fabric, batting and white square together. I like to use a hera marker and a ruler to prepare the lines for quilting.
I marked the centerline and used the attachment on the machine to sew the lines on each side of the centerline. I used the same method for the triangle pieces.
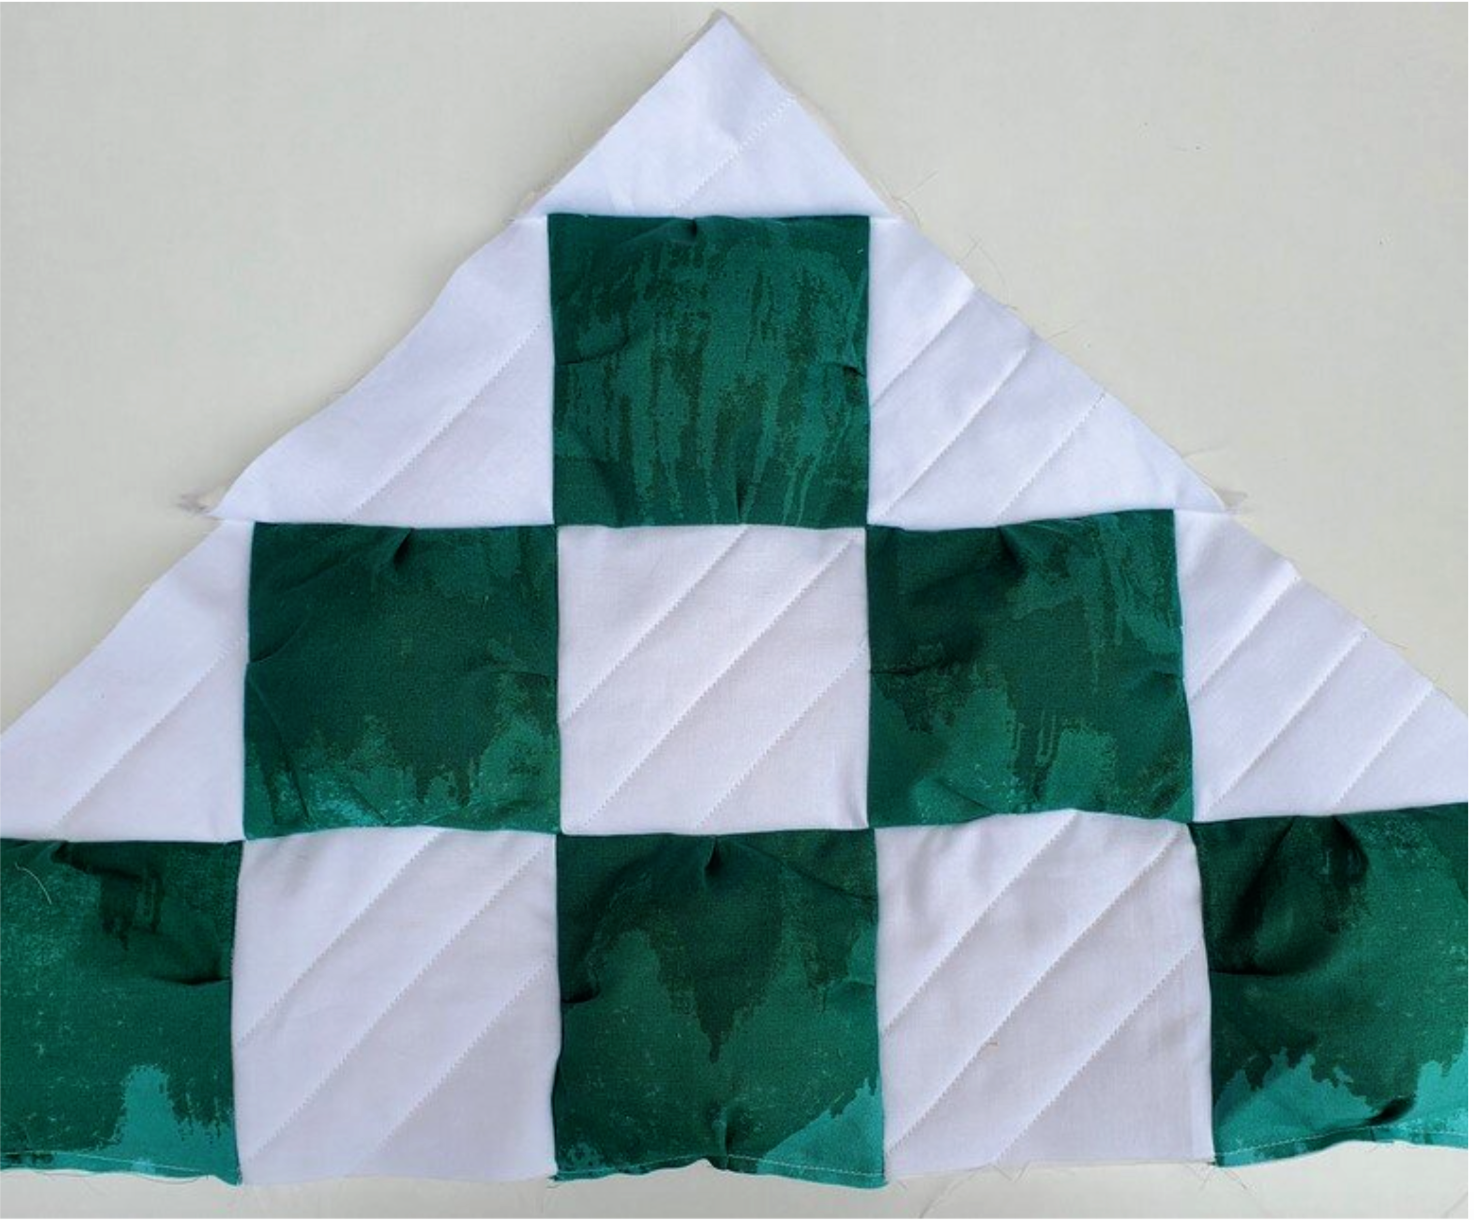
Now it is time to start assembling the rows. I laid all the pieces out on the floor making a final assessment of the color placement. Making sure I had the white quilted pieces all lined up in the right direction I started by picking up the rows and pinning the pieces together and then sewing in order.
Be sure to have the pattern close by to check the rows carefully as you work on this process.
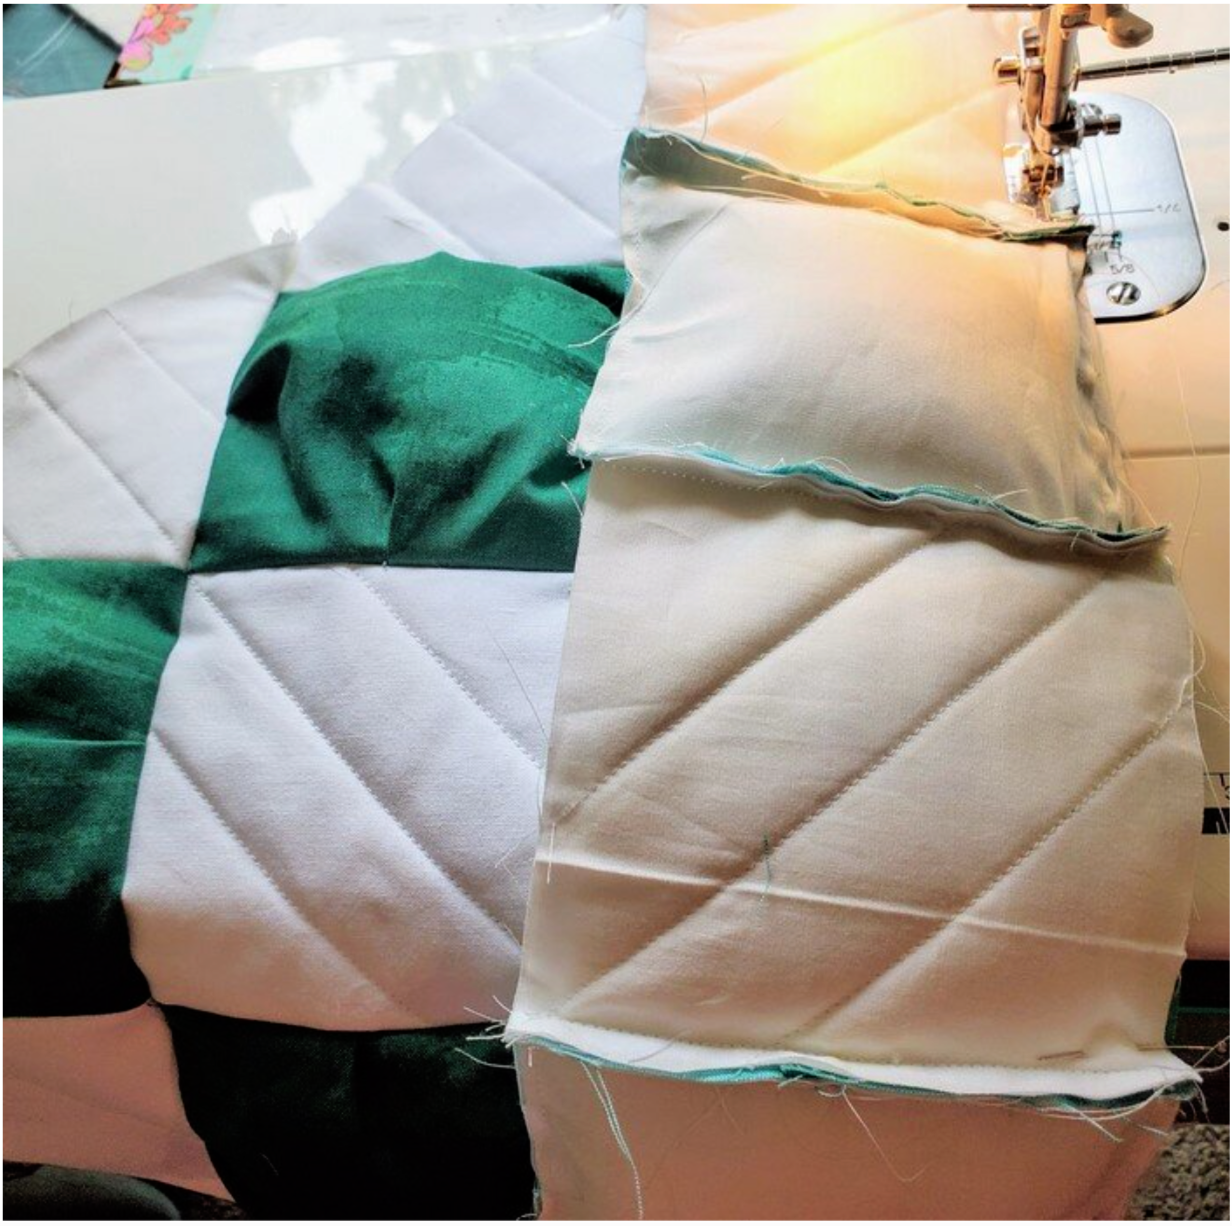
To keep the size manageable, I sewed the blue half and then the orange half. The final seam sewed them together into a rectangle.
At this point I took my clear ruler and lined up the ¼” mark and trimmed the extra fabric around all four sides. It was tricky. Because of the fluff, the ruler did not lay flat. The borders were also quilt as you go, the pattern called for white but I decided to emphasize the ombré look by using the same puff fabric. As I sewed the border on I made sure to pin the points of the squares so that they did not get lost in the seam.
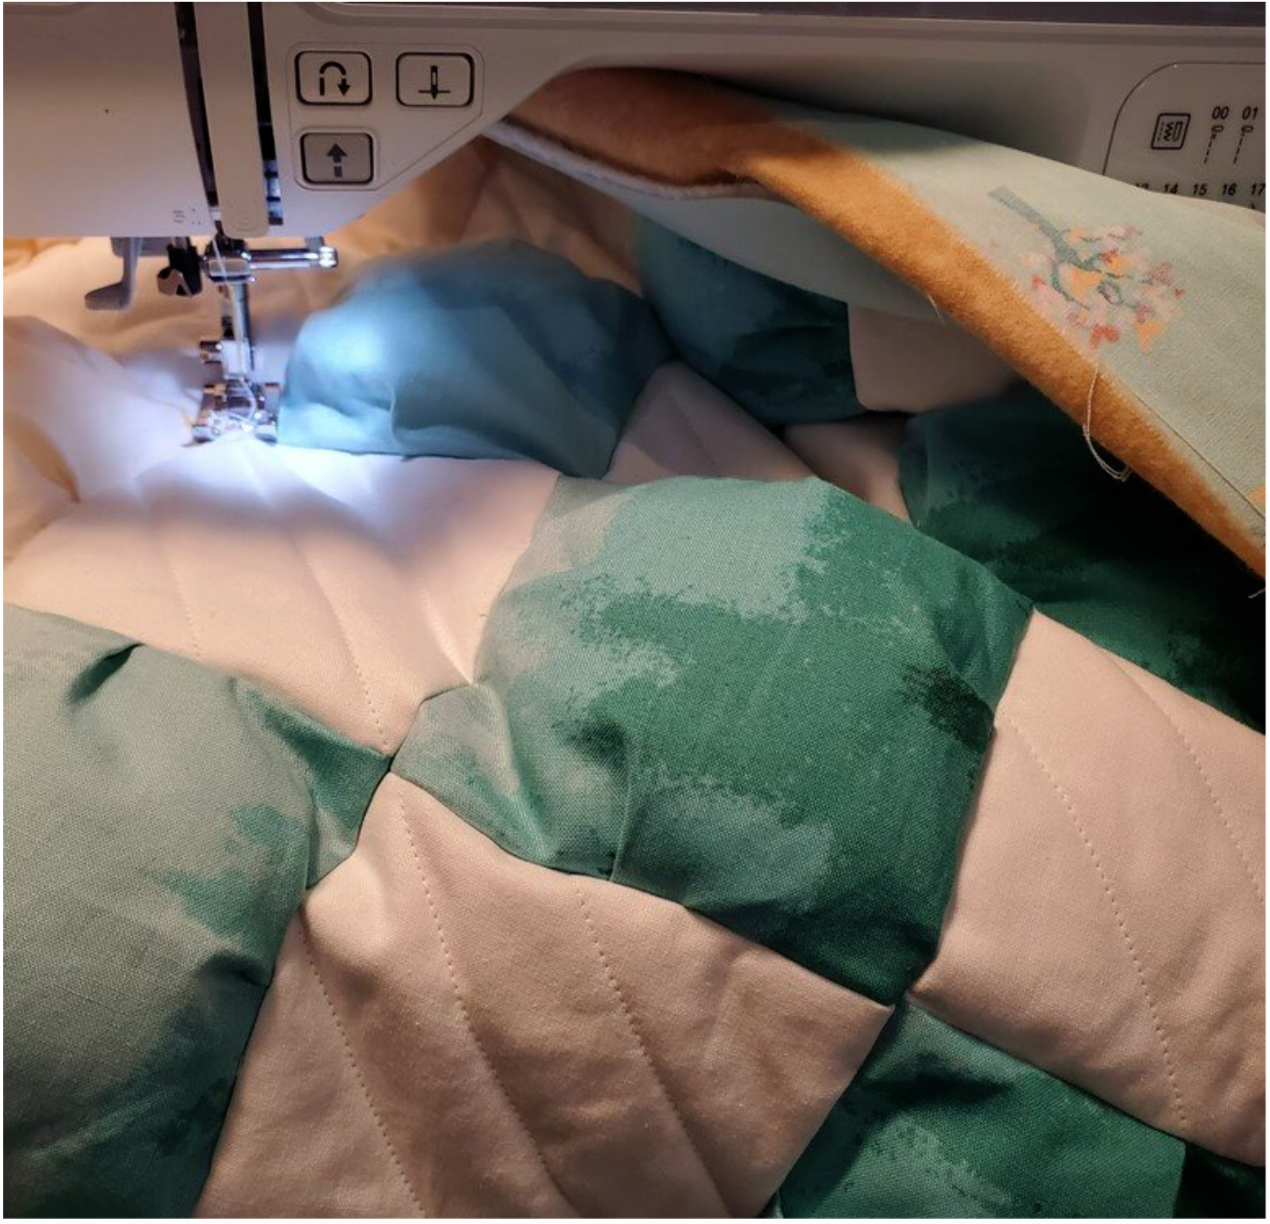
This shows the back of the quilt ready to add the backing fabric. I decided to add a layer of 100% cotton flannel between to help give a smooth appearance to the back. The puff quilt does not typically have a layer of batting because of the poly-fil in the squares in front. I used spray baste and pins to connect the layers to prepare to tack the quilt together. This step could be done by hand or machine.
I used a tack stitch on my machine and sewed at each intersection. It was tough to fit all the bulk under the machine opening and move from place to place. After sewing, I clipped all the threads and added a small drop of fray check to hold the stitching. Trim the edges and square up the corners to prepare for the final step of binding the quilt.
For the binding, I went with the matching fabric aligning the binding color change with the border. I like a narrow binding so I cut the pieces at 2 ¼” wide. I sewed the binding on the front and hand stitched on the back to complete my first modern puff quilt. A comfy picnic quilt with a little fluff to sit on the ground.