DIY Tablet Case
5th Aug 2021
Cotton cuts offers a variety of quilting opportunities each month through the many memberships offered. This week I am featuring Painterly Petals by Robert Kaufman fabrics from the July Classic box Membership and the July block of the month coloring card included in the box. This fun little perk is the perfect incentive to try a new block design. You can make just one or enough for a quilt or even make one each month to complete a sampler quilt by the end of the year.
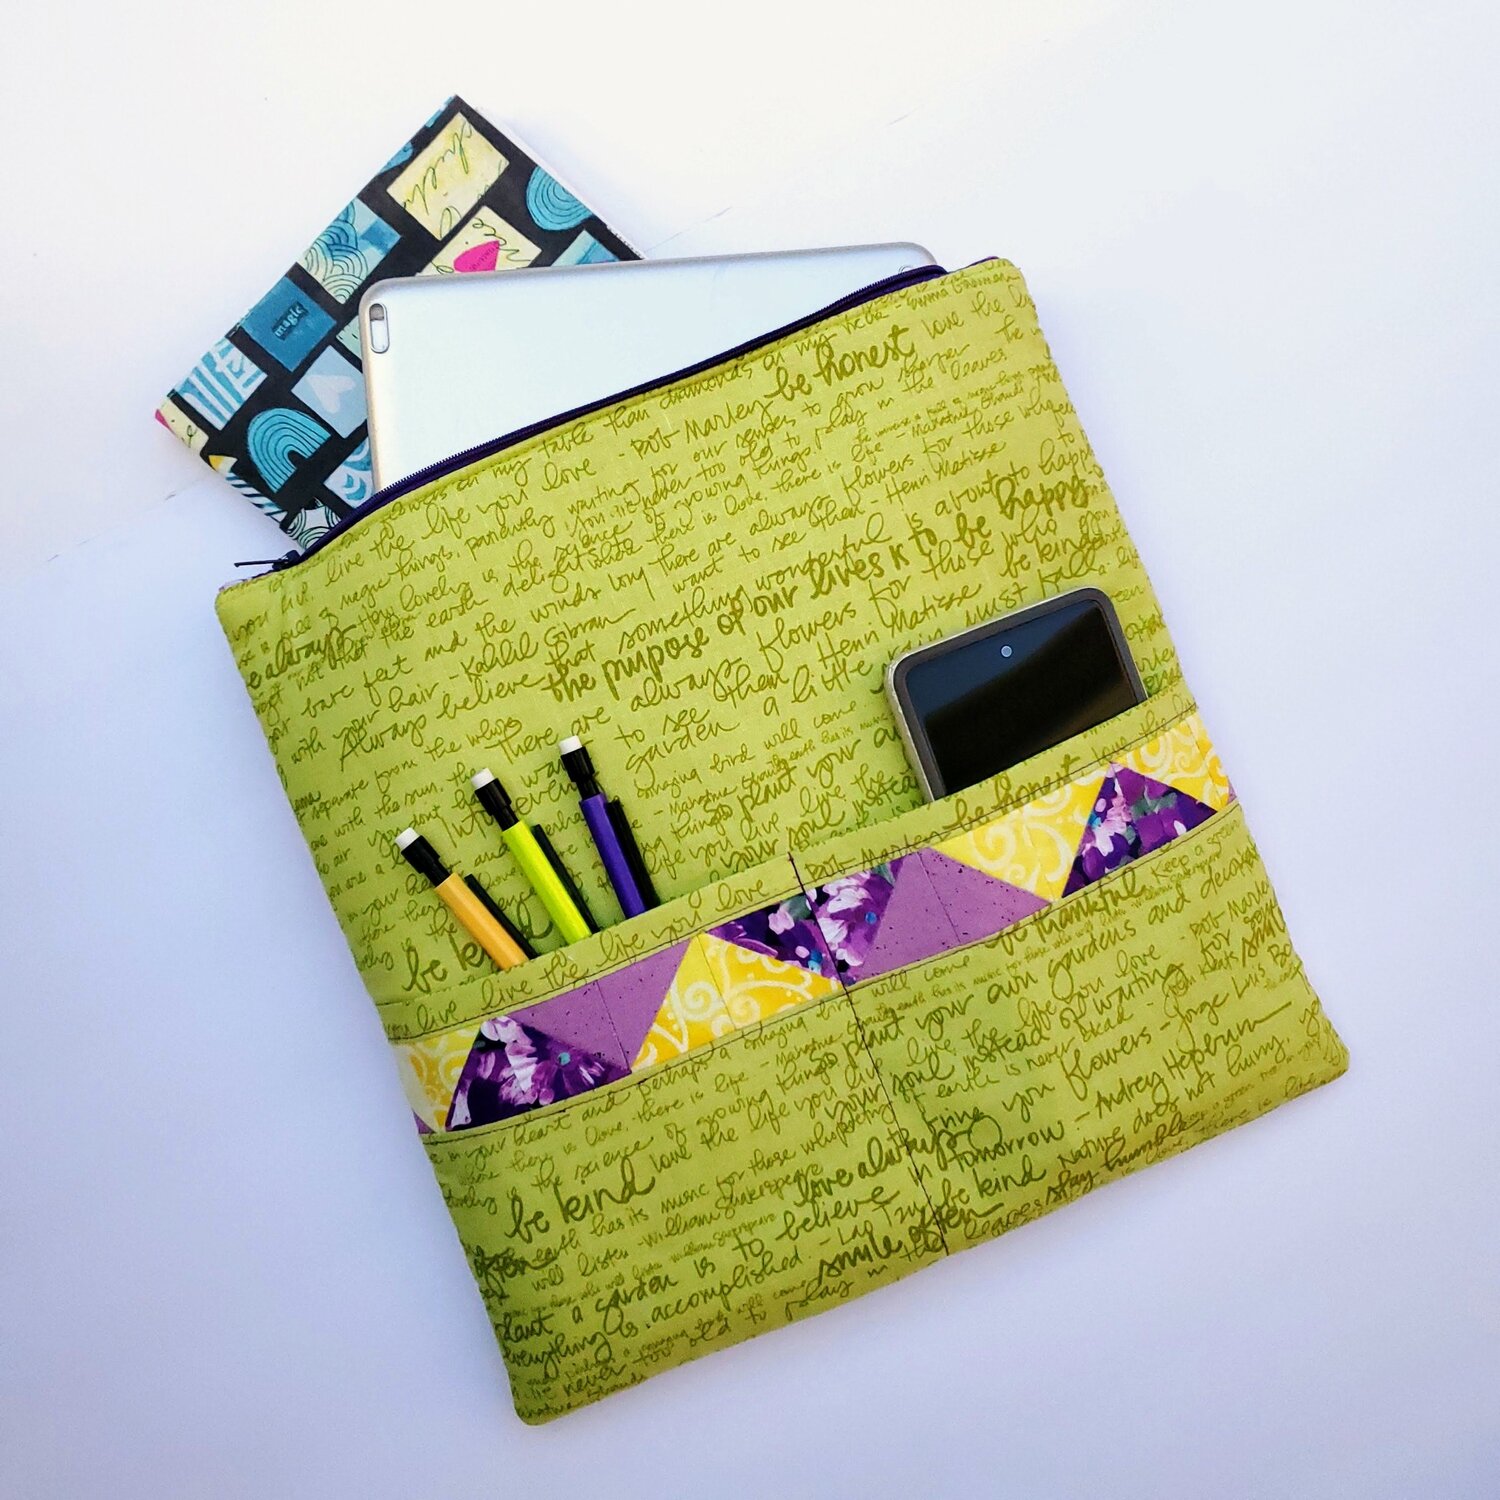
Today I will show you how I used a 12” square block to make this padded tablet case. Suzy Quilts has great information on how to measure and make a pattern for a specific laptop size in her tutorial Quilted Laptop Case. The covered notebook instructions can be found in the blog Fabric Junk Journal on the Cotton Cuts website.
Materials needed:
Four different fat quarters in coordinating fabrics for the front
⅓ yard of fabric for the lining
Fat quarter for the back and pocket from Mystery Bundles of Fat Quarters
12” or bigger zipper
Coordinating Aurifil thread from Chroma Membership
Soft and Stable by Annie or similar interfacing
Block of the Month card from Classic Membership
To start, I planned out the fabrics I wanted to use for the different sections of the block. I cut a small piece and taped it in place to be sure I was cutting and sewing the right fabrics.
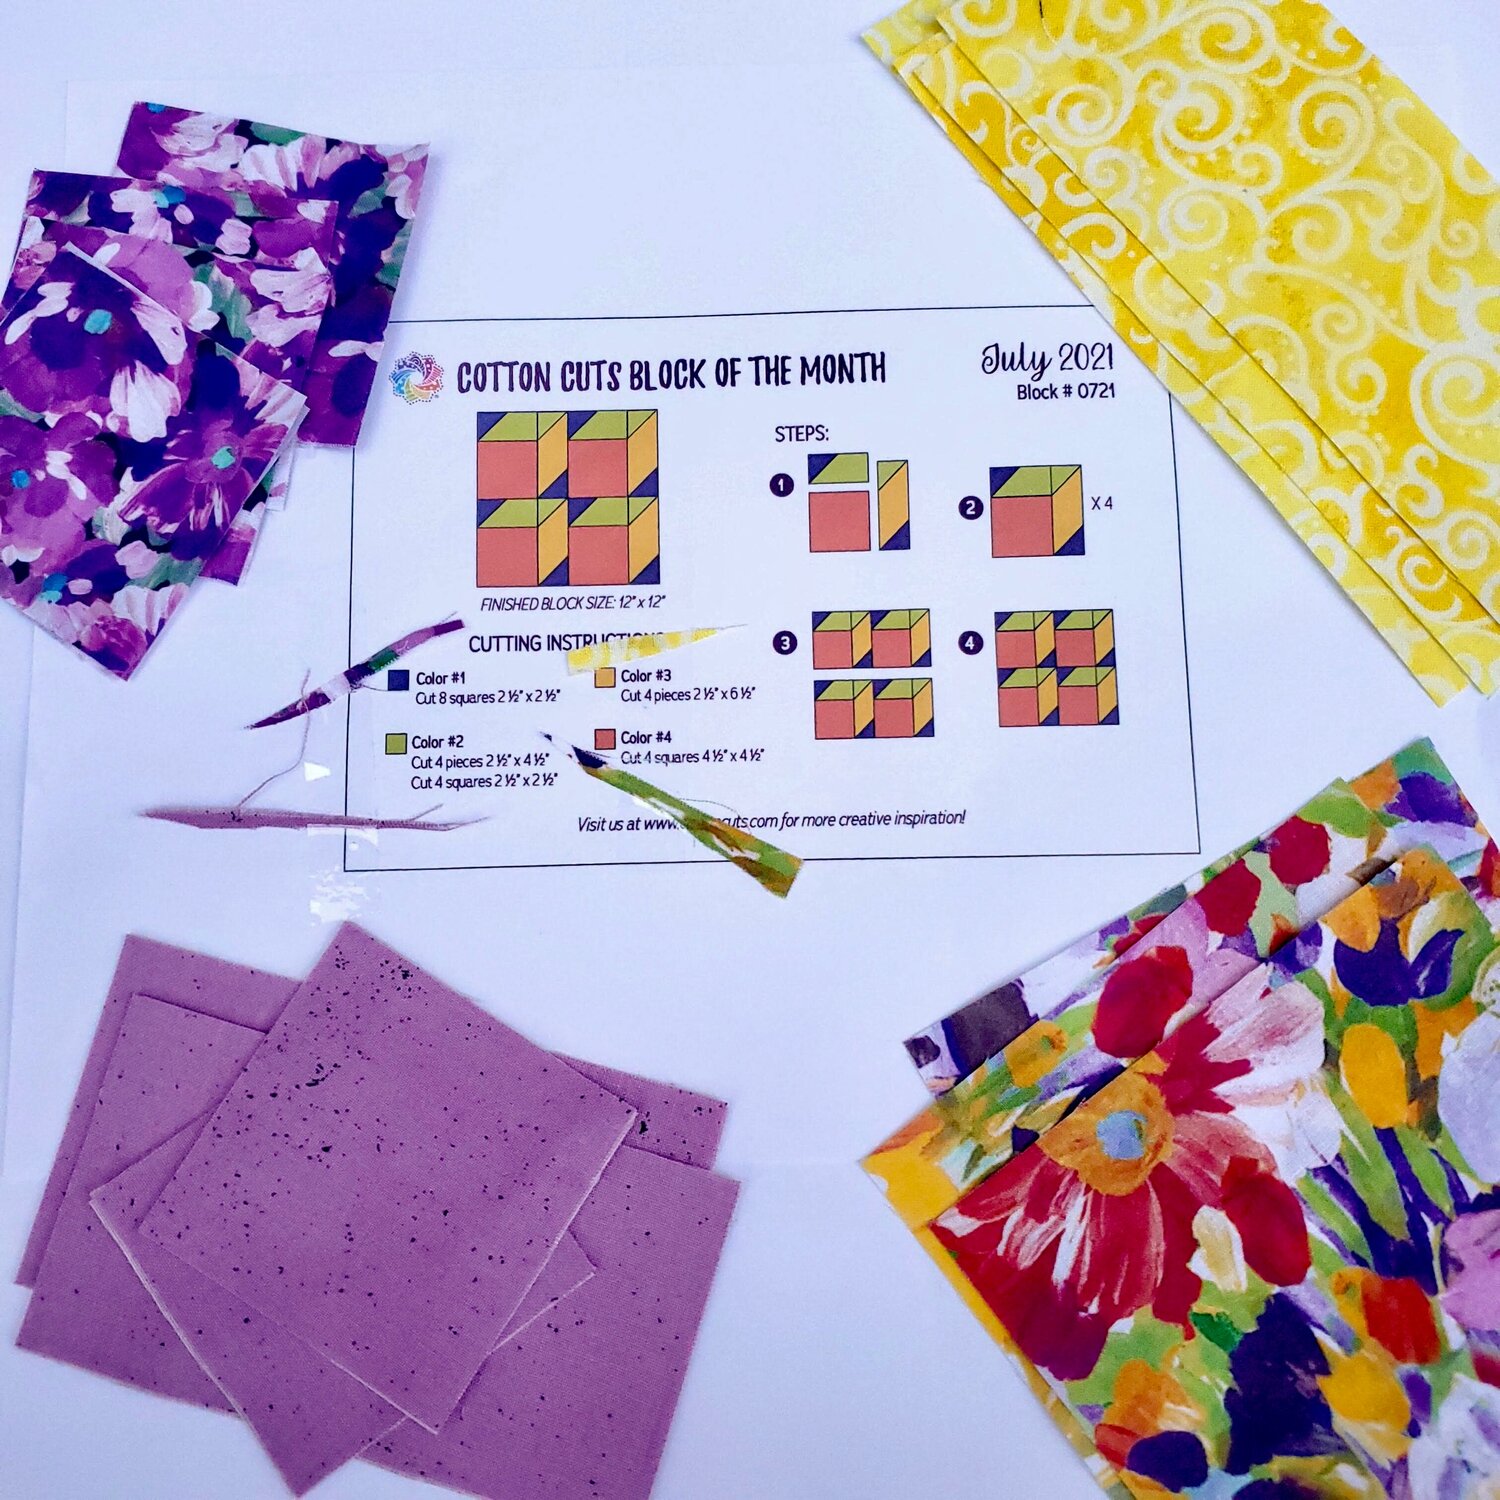
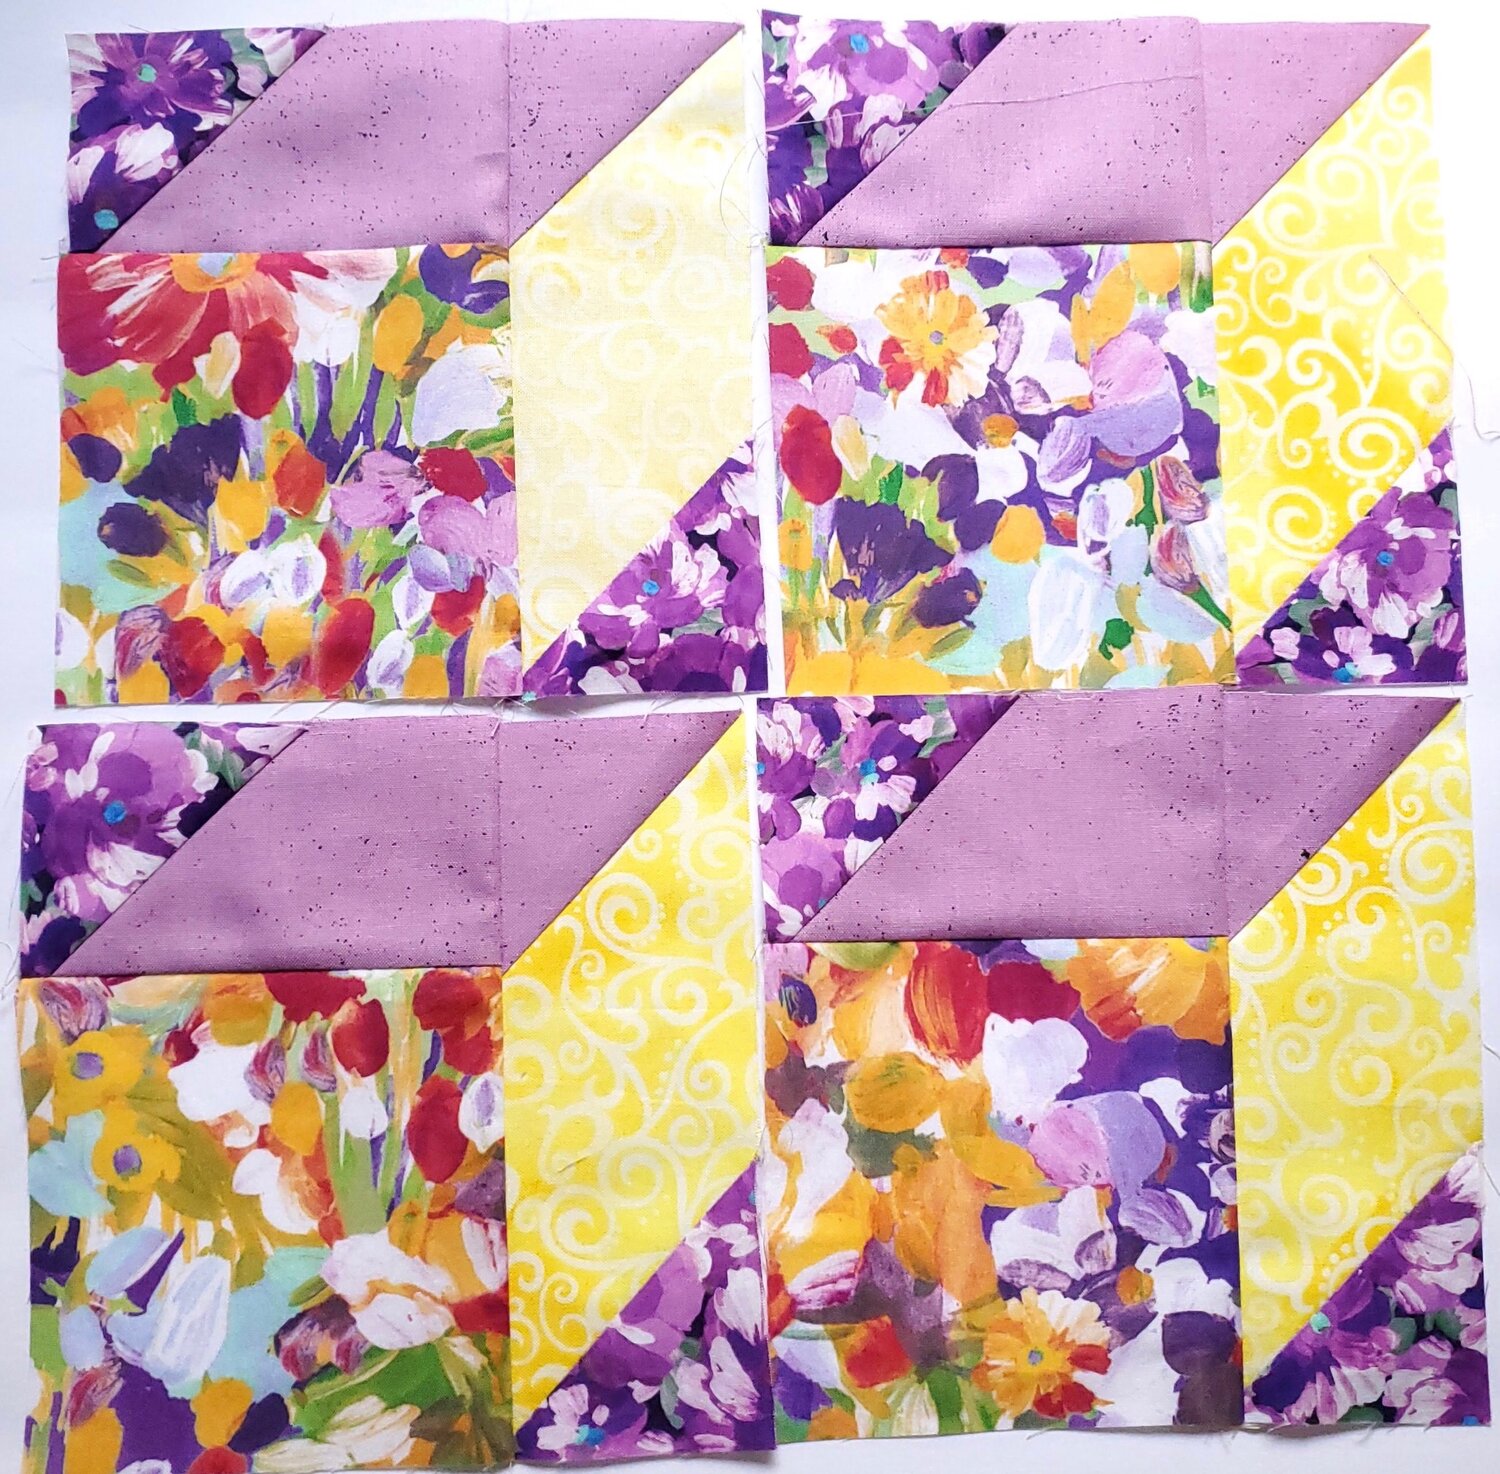
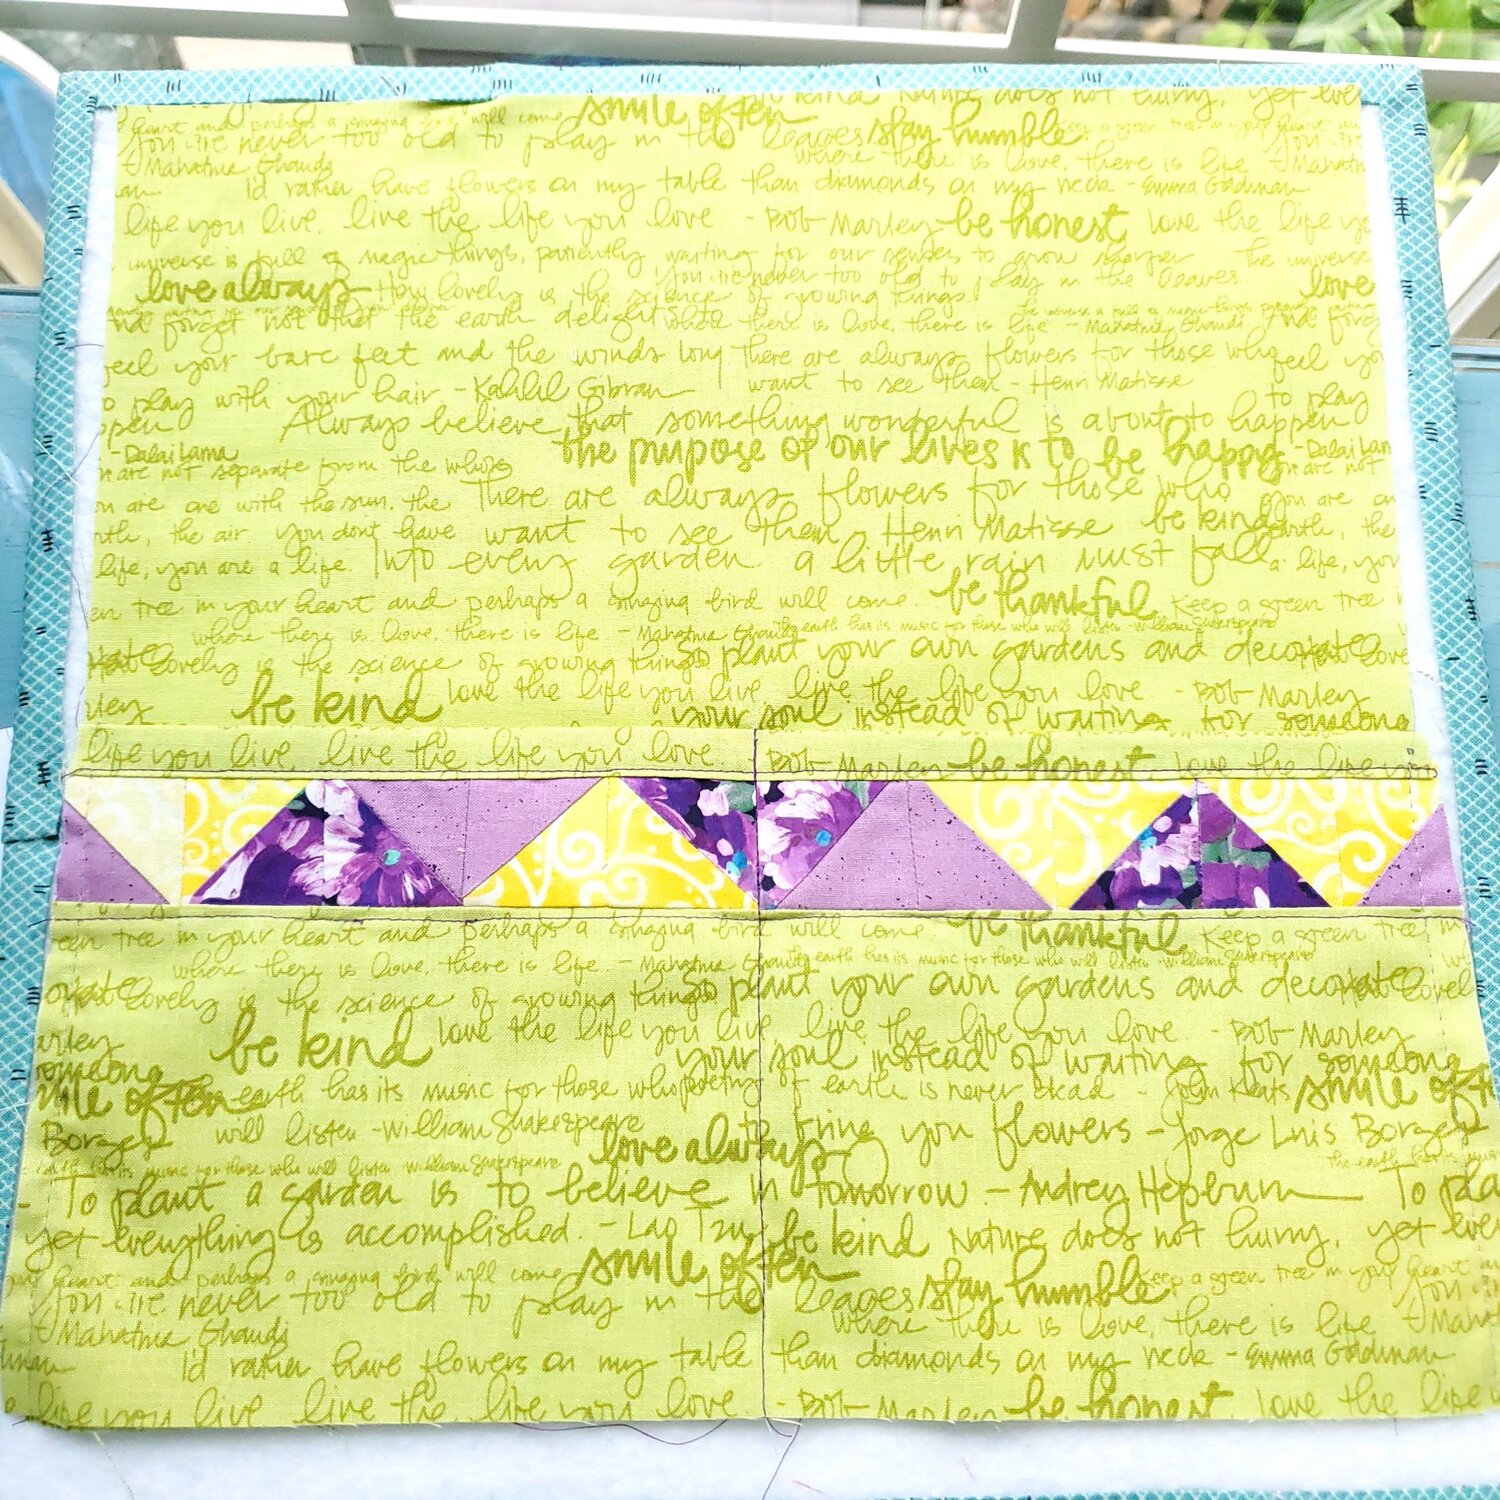
The Block of the Month cards are very easy to follow using a ¼” seam for all the blocks. I laid out the pieces and used a small ruler and fabric marker to draw the stitching lines to achieve straight seams. Sew on the lines and trim to ¼” seams using a ruler and rotary cutter.

Be sure to press the seams to the dark side. It is very clear from the card pictures to sew the two left pieces together, then add the piece to the right. Complete the four blocks and they are ready to sew together to make a 12” square.
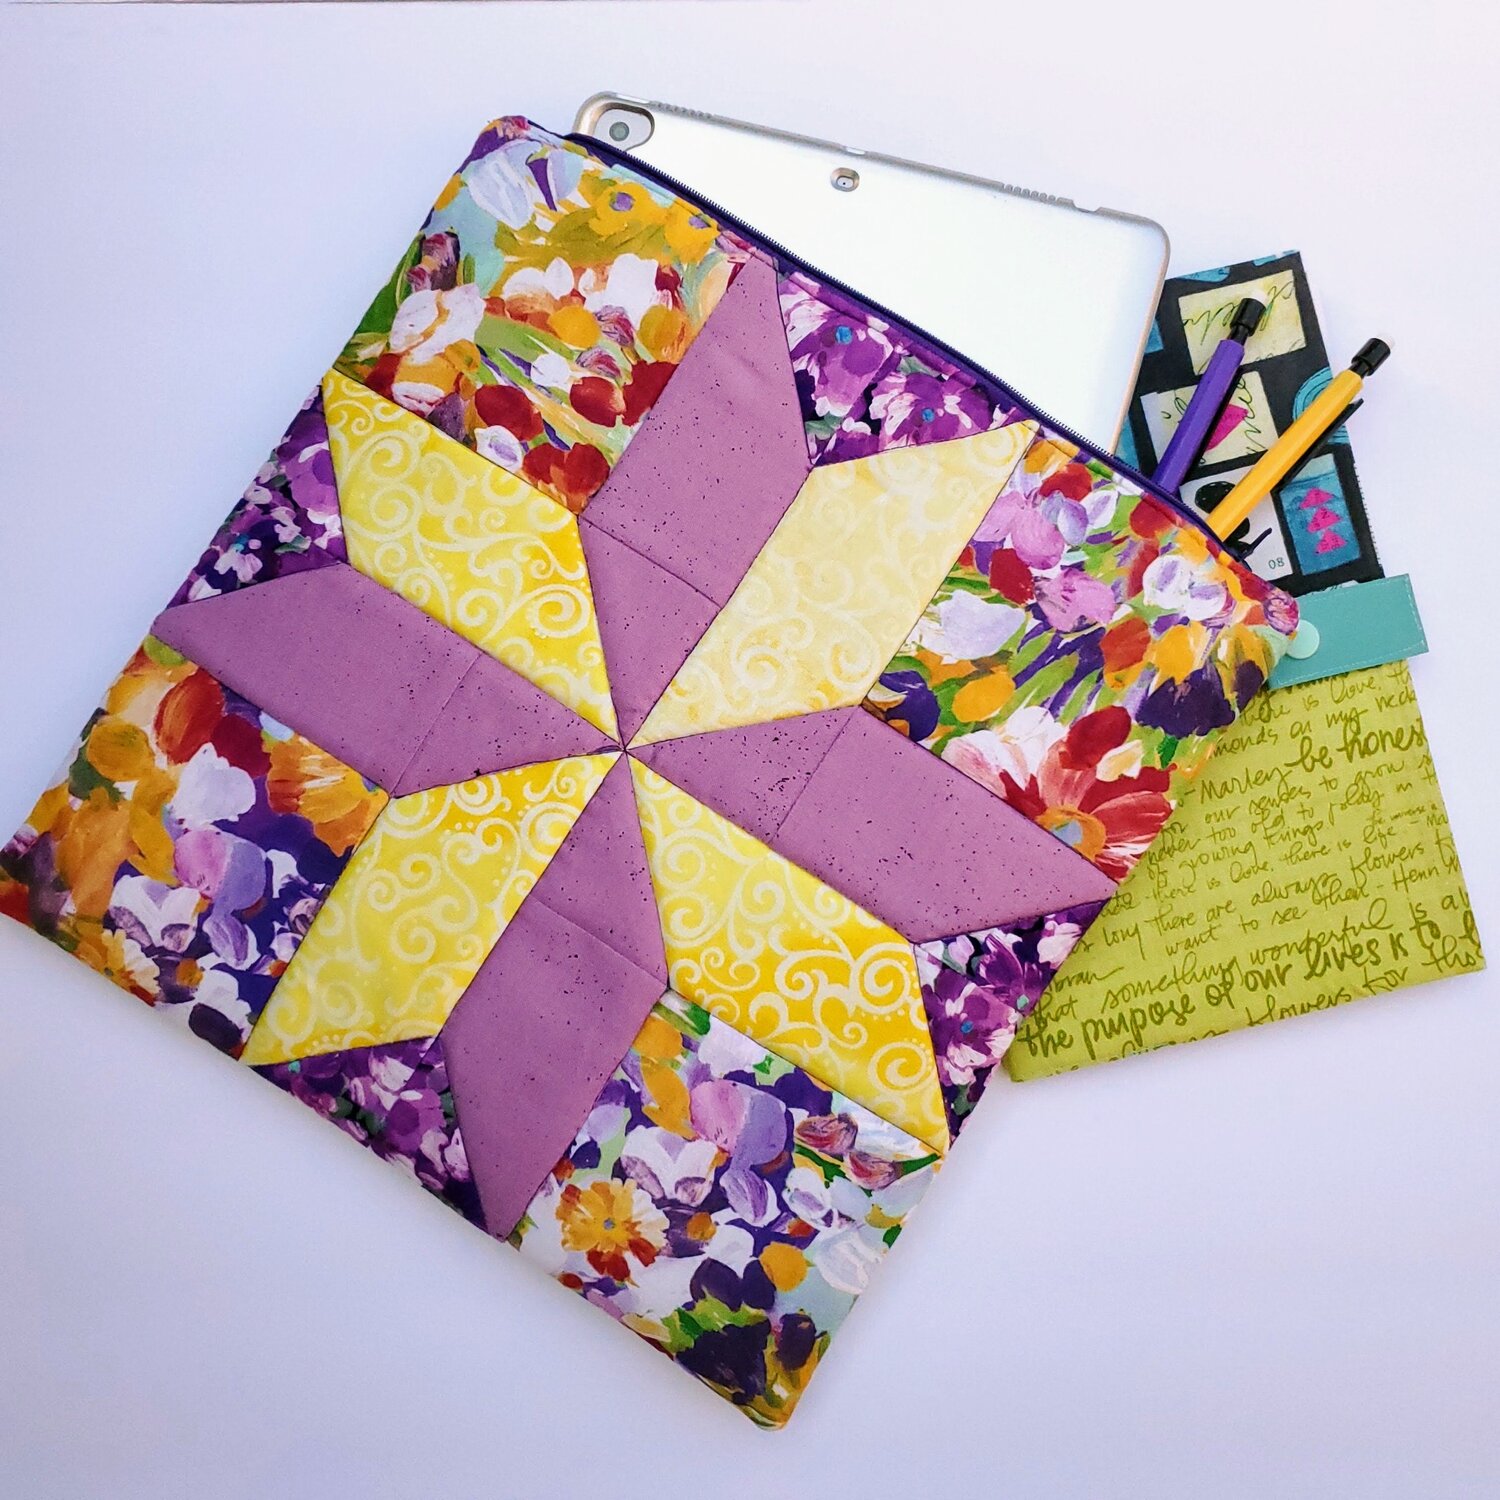
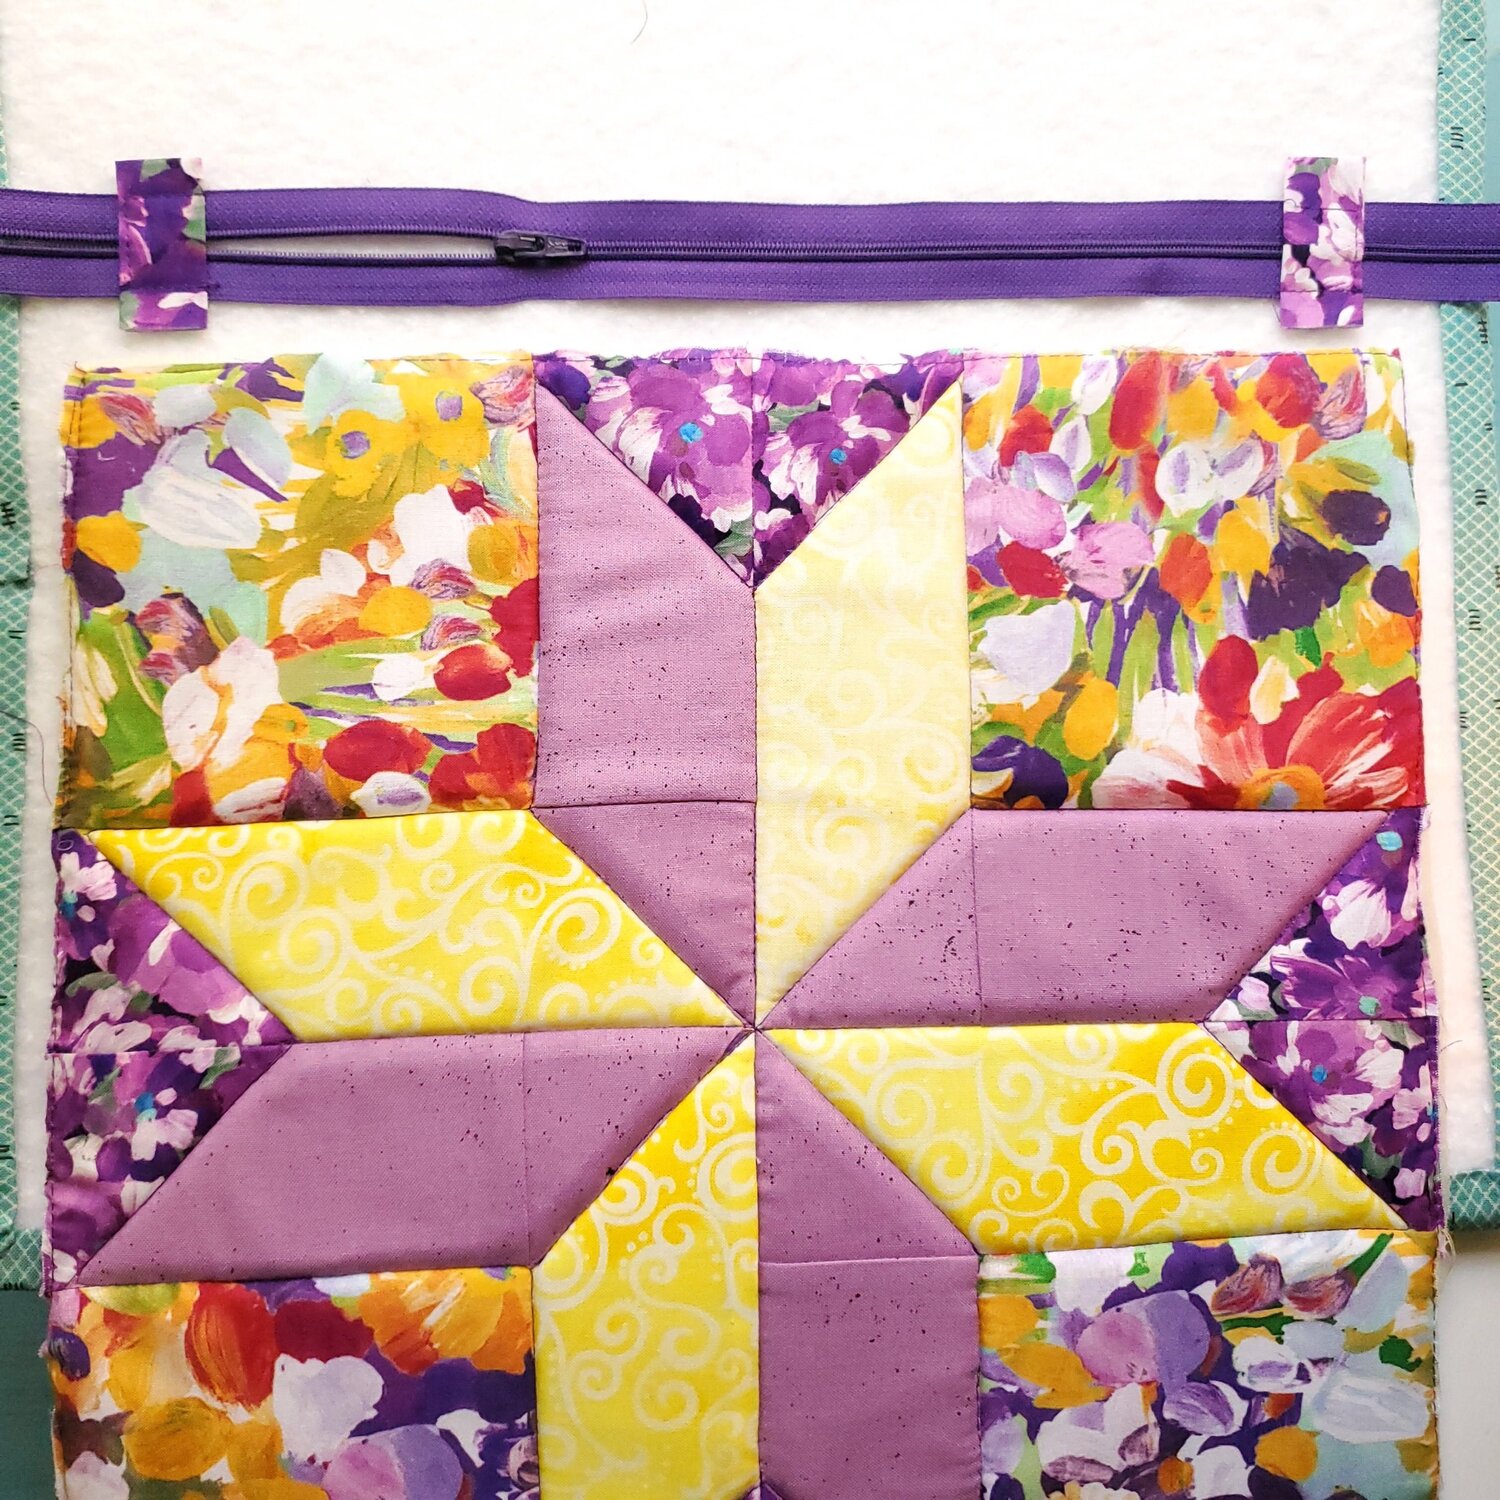
With square quilt blocks, it is fun to move around the pieces to create a different look. I like to take a picture and walk away for a short time and come back with fresh eyes to reevaluate. For this block, simply change the layout and it makes a star shape.
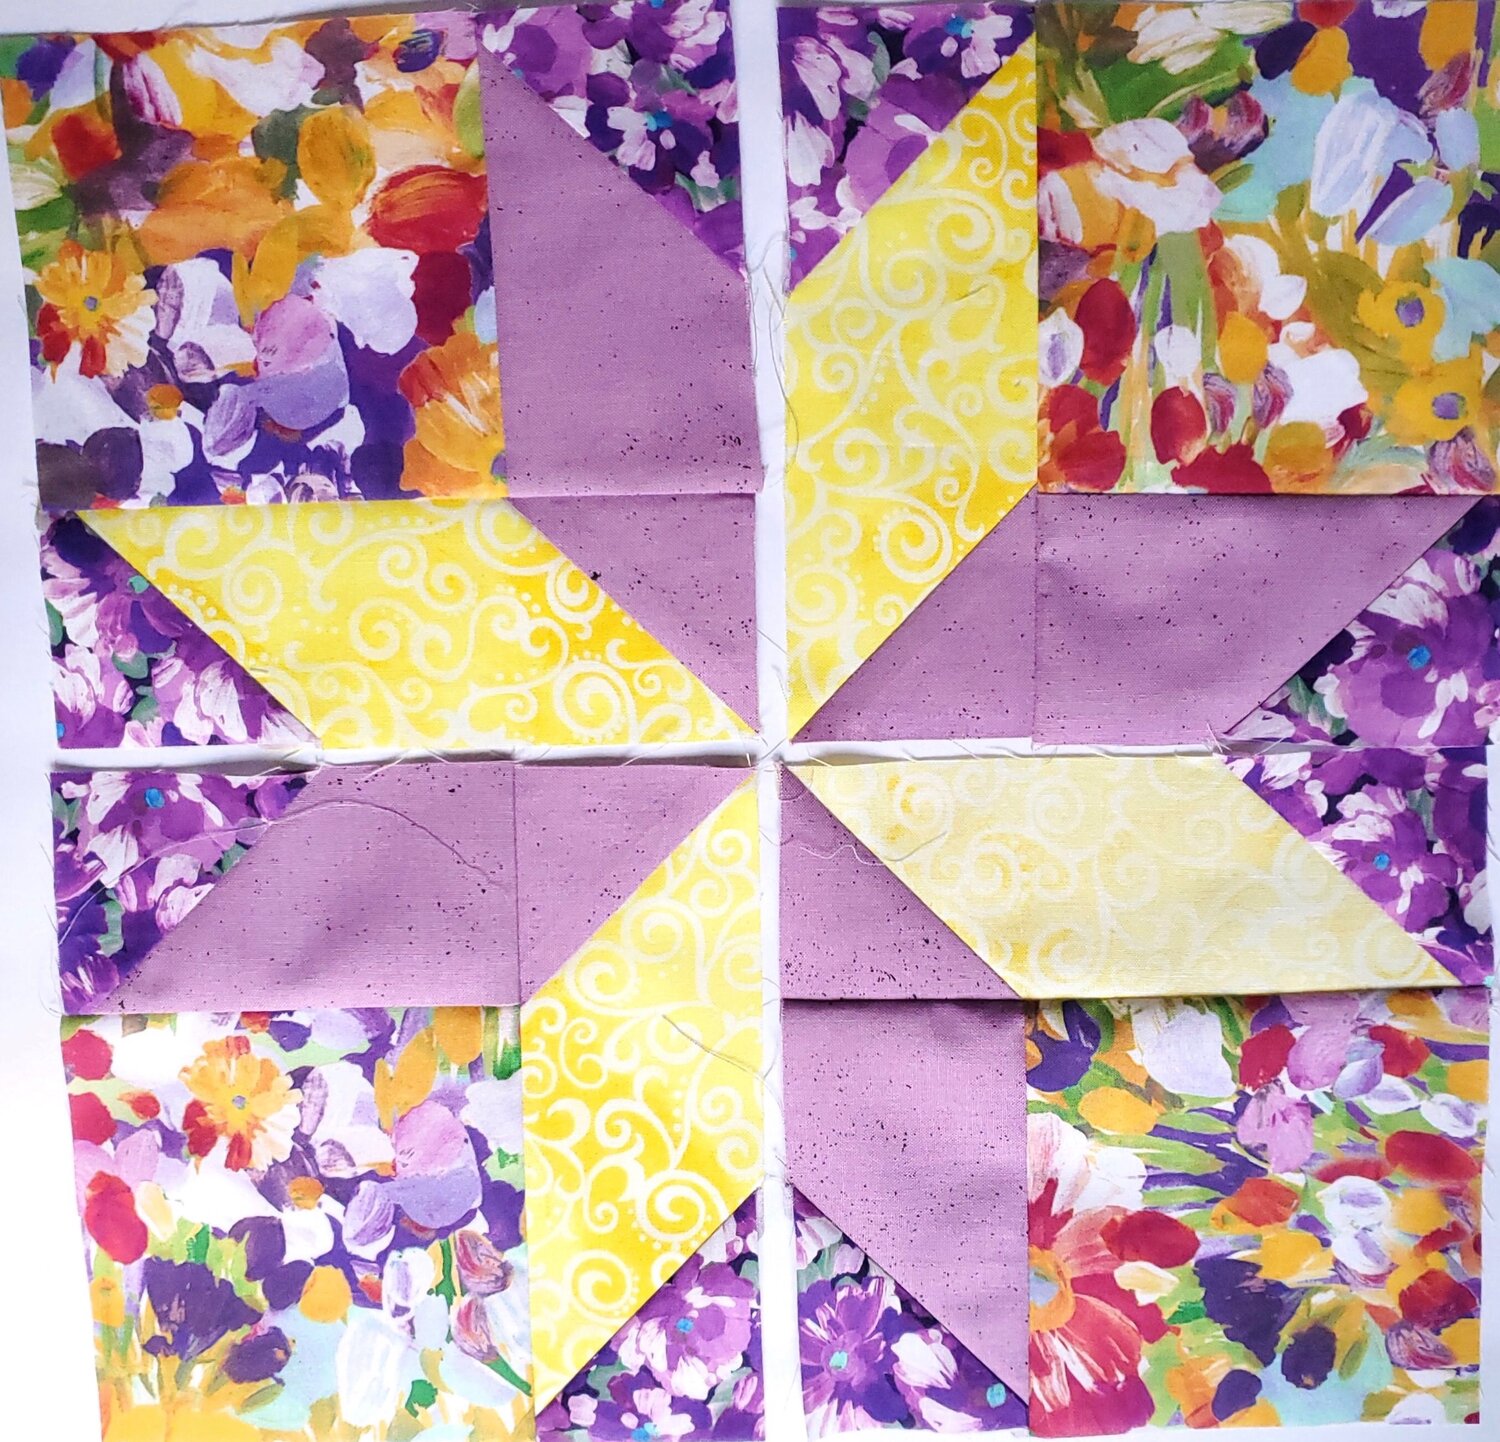
Sew the four blocks together and it is ready to pair with a 12” piece of soft and stable foam interfacing. Layer the pieces and press, it helps get the wrinkles out and it naturally adheres to the block. You can add a few safety pins to keep the layers together or use a long stitch to baste the outer edges in place. I recommend using the walking foot and coordinating thread to stitch in the ditch around the star points.
Set aside the top. For the back of the bag I used the small triangles I trimmed from the blocks during construction making small half square triangles. Chain piecing is the easiest way to get this done quickly.
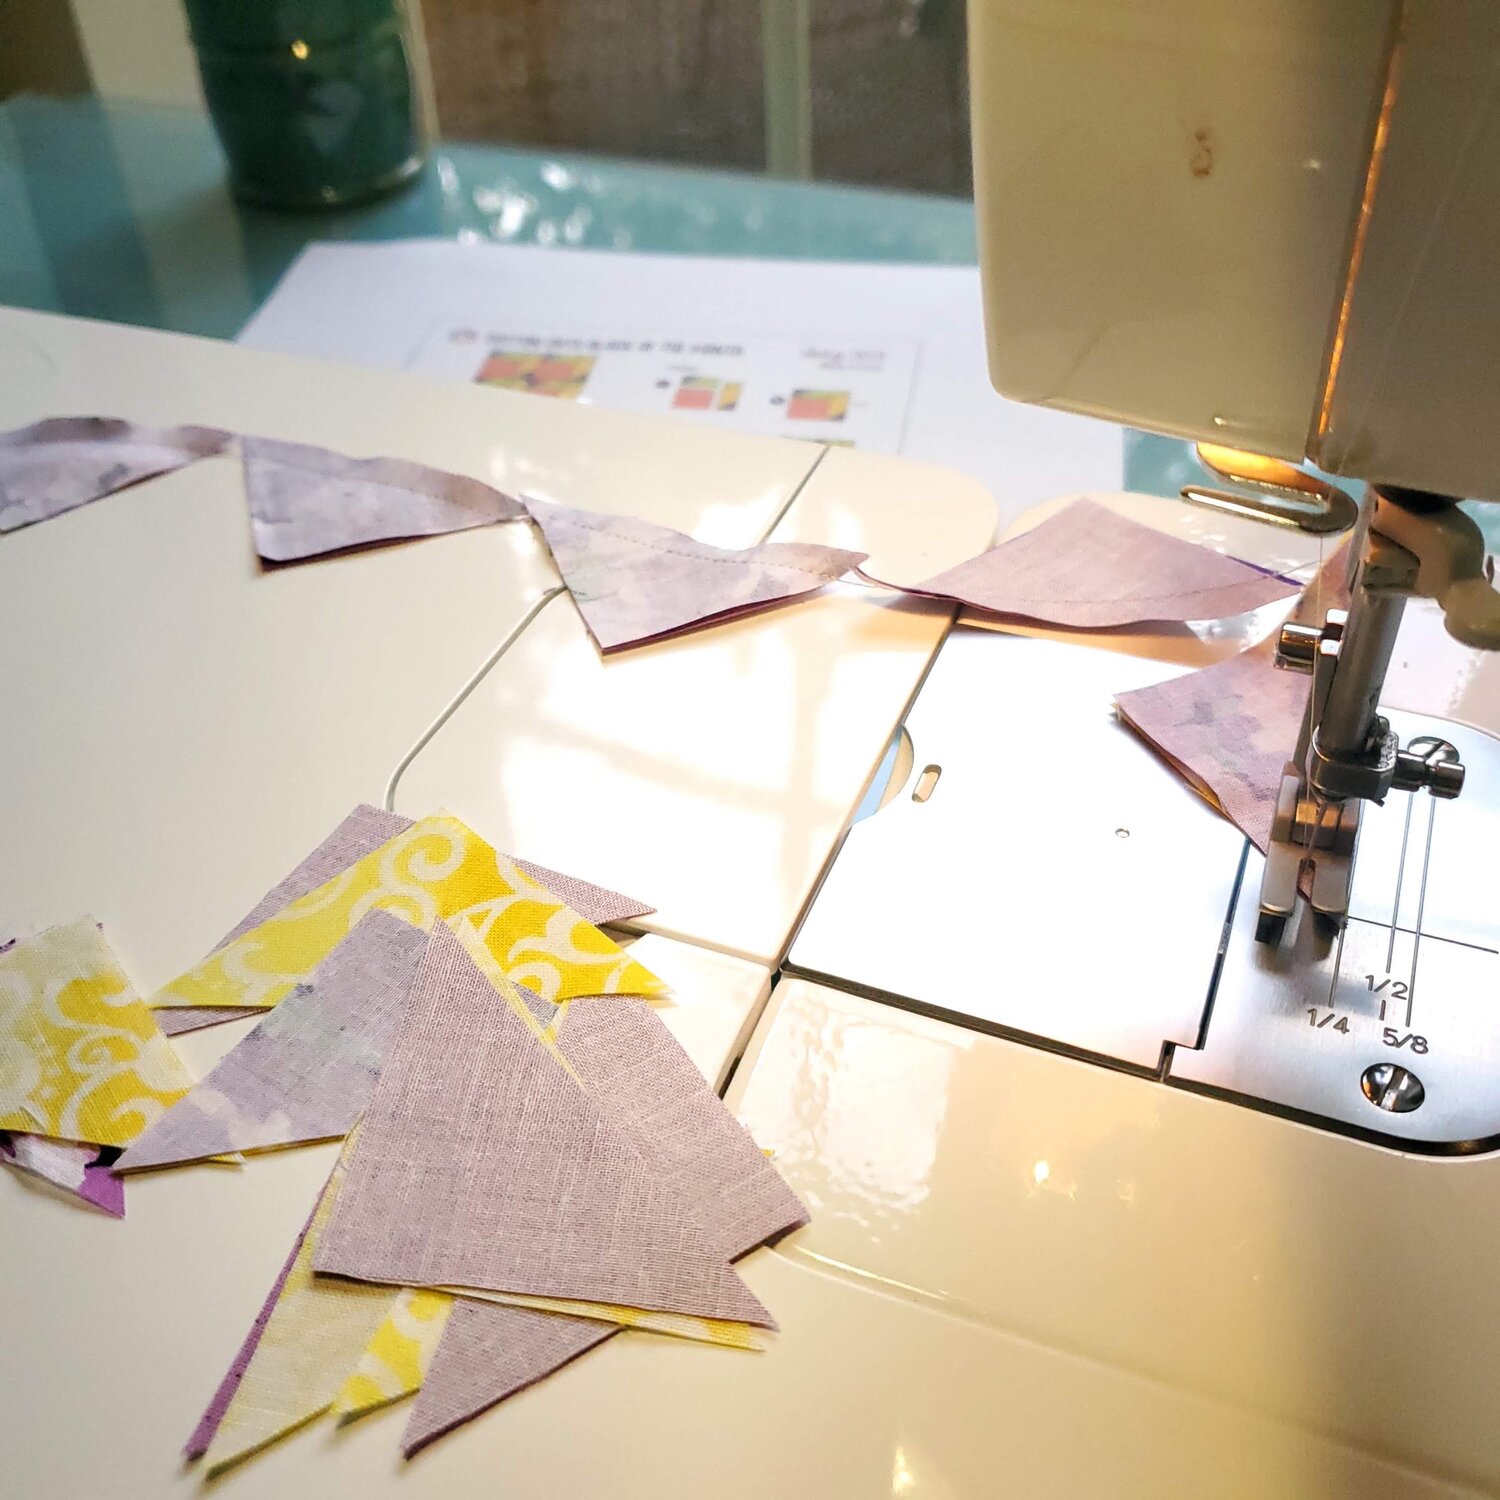
Press the half square triangles open and trim the “dog ears” off. Arrange in a pleasing design and sew the blocks together forming a strip at least 12” long. Press seams to the dark side. This strip will be used as the top edge of the pocket.
Cut a piece of the backing fabric 12 x 4 ½” and sew to the bottom edge of the half square triangle strip. Press seam towards the backing fabric.
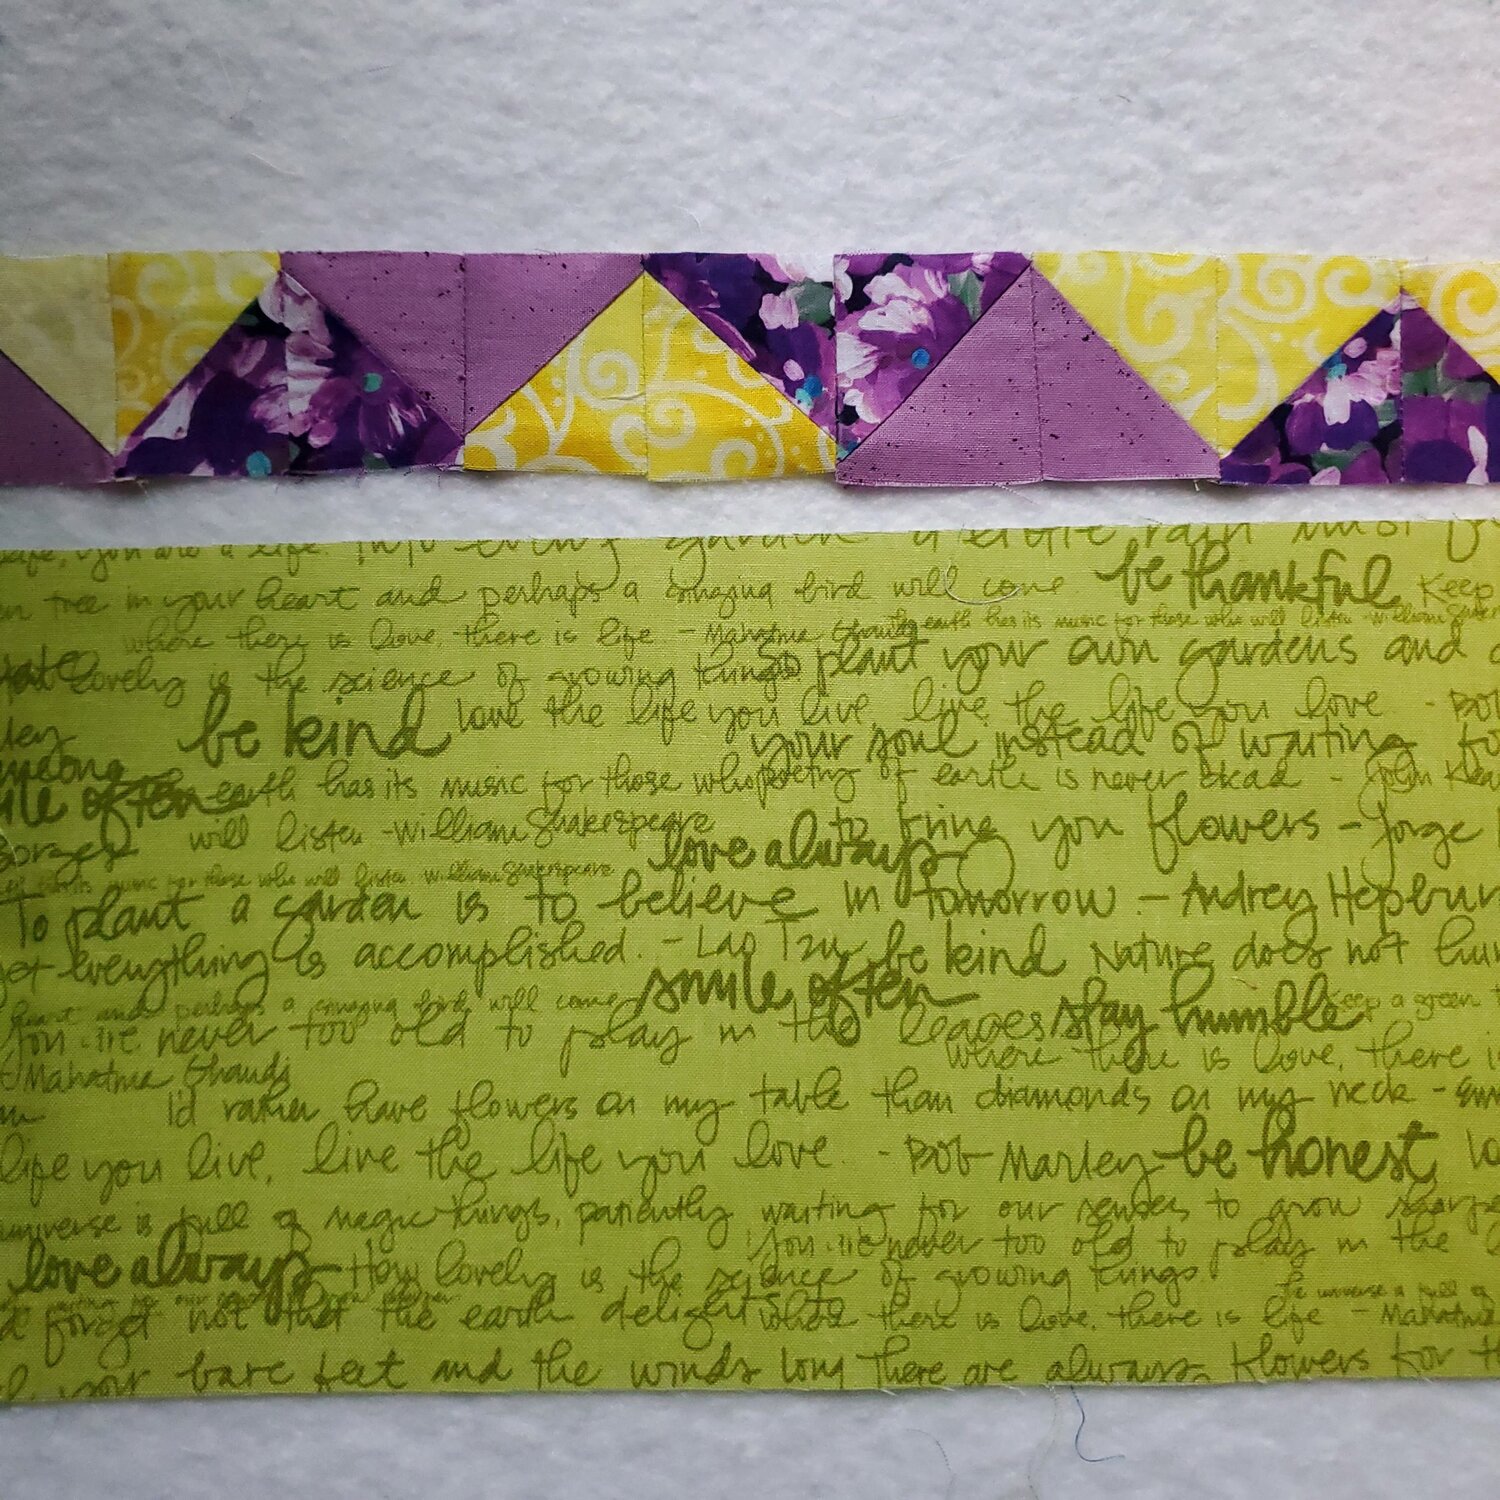
Cut a piece of fabric 12 x 6” for the inside of the pocket. Sew to the top edge of the strip. Press the seam towards the backing fabric. To create a faux binding on the top press the backing fabric to the wrong side about ½” above the seam you just sewed. Topstitch ⅛” from the edges of the trim piece with a contrasting thread and a longer stitch length.
Align the bottom edge of the pocket with a 12” square piece of backing fabric and 12” square of soft and stable. Baste along the outer three sides ⅛” from the edge to keep it smooth. You can add one or more seams to make pocket openings to fit your items like a phone or pens and pencils.
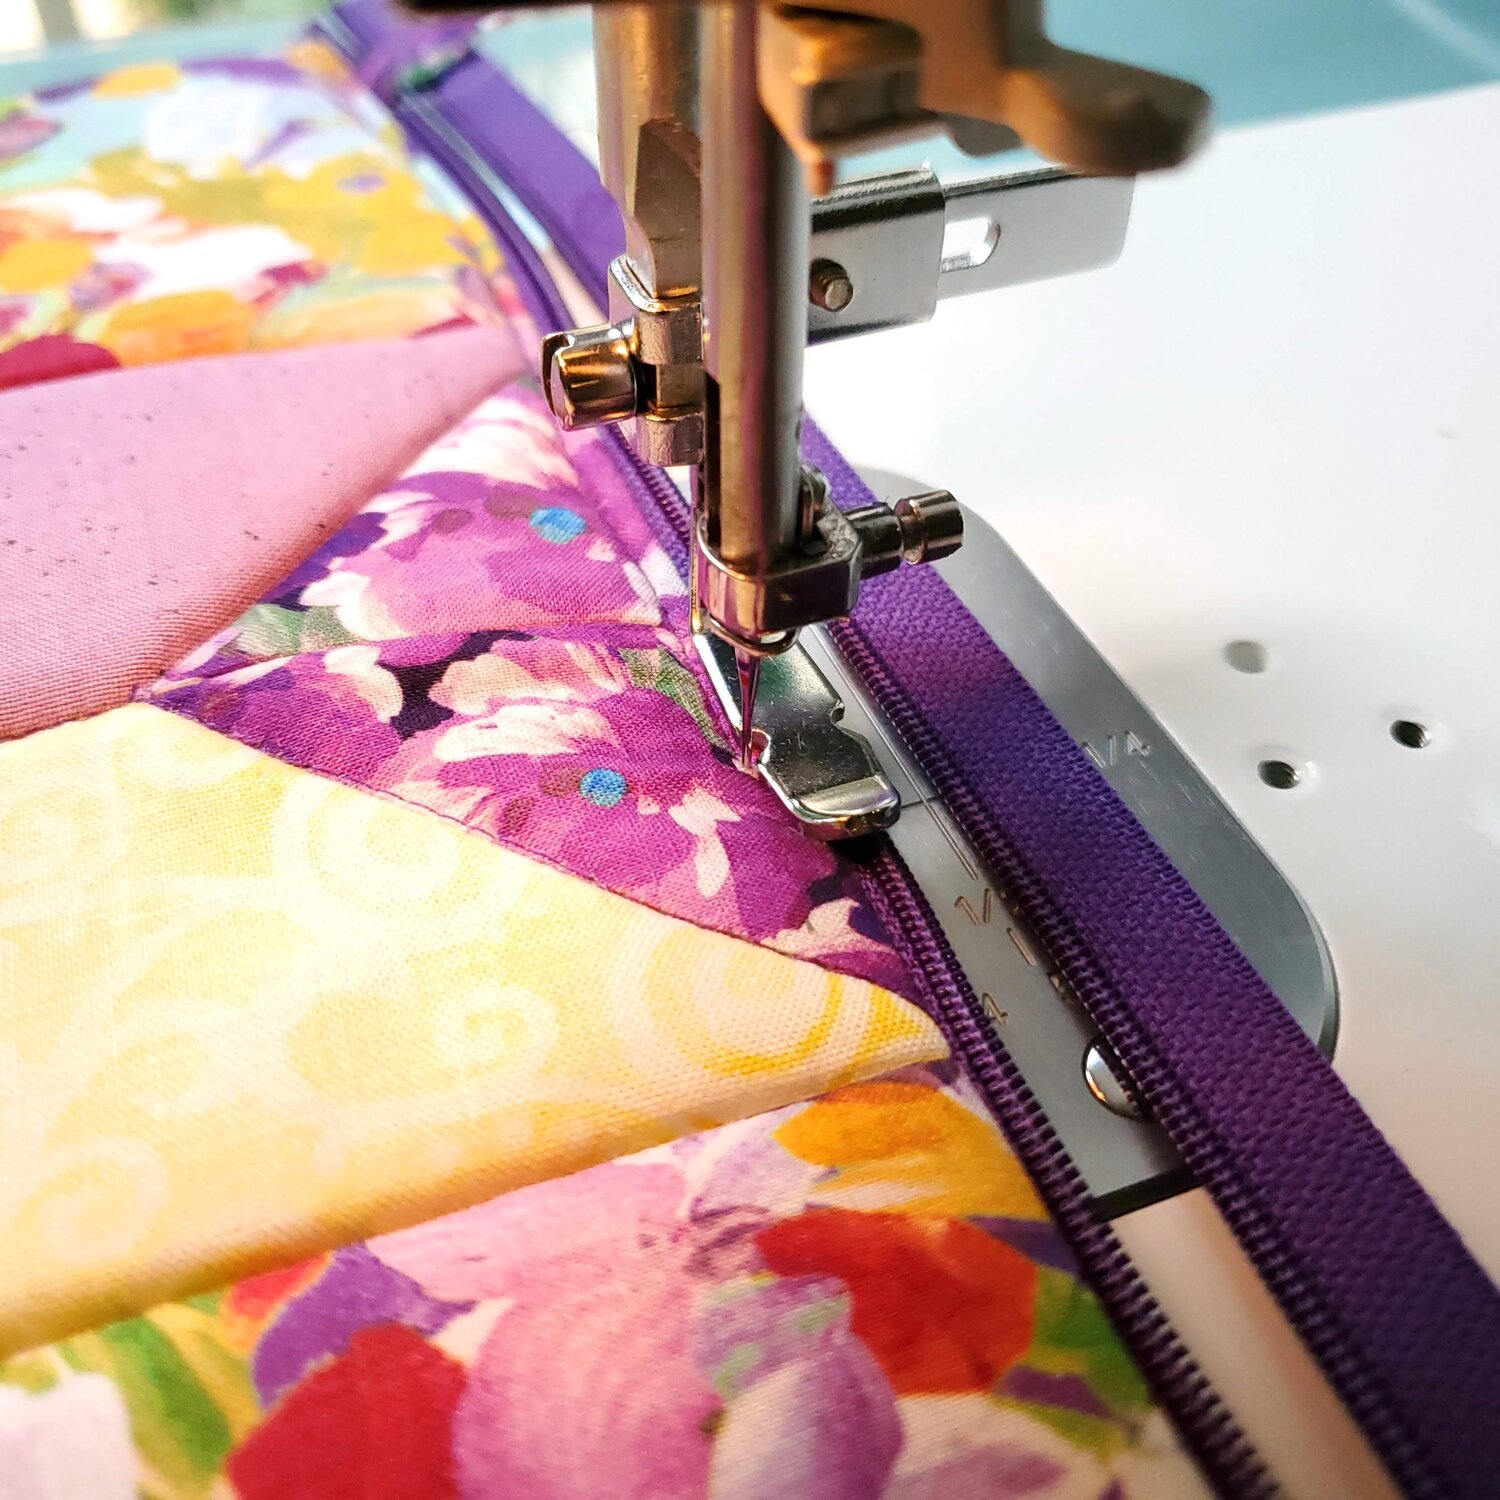
Now it is time to add the zipper. You will need to cut two 12” squares of lining fabric and two 3” squares for the zipper stops. Fold the 3” squares in half, press. Open the pressed square and fold the raw edges to the fold line and press. Measure about ⅜” in from the edges of the bag and pin or baste to the zipper to hold in place. Be sure the zipper pull is between the fabric stops.
Lay the front of the bag right side up with the zipper right side down then add the lining piece right side down. Clip in place keeping the edges even and the zipper stops aligned.
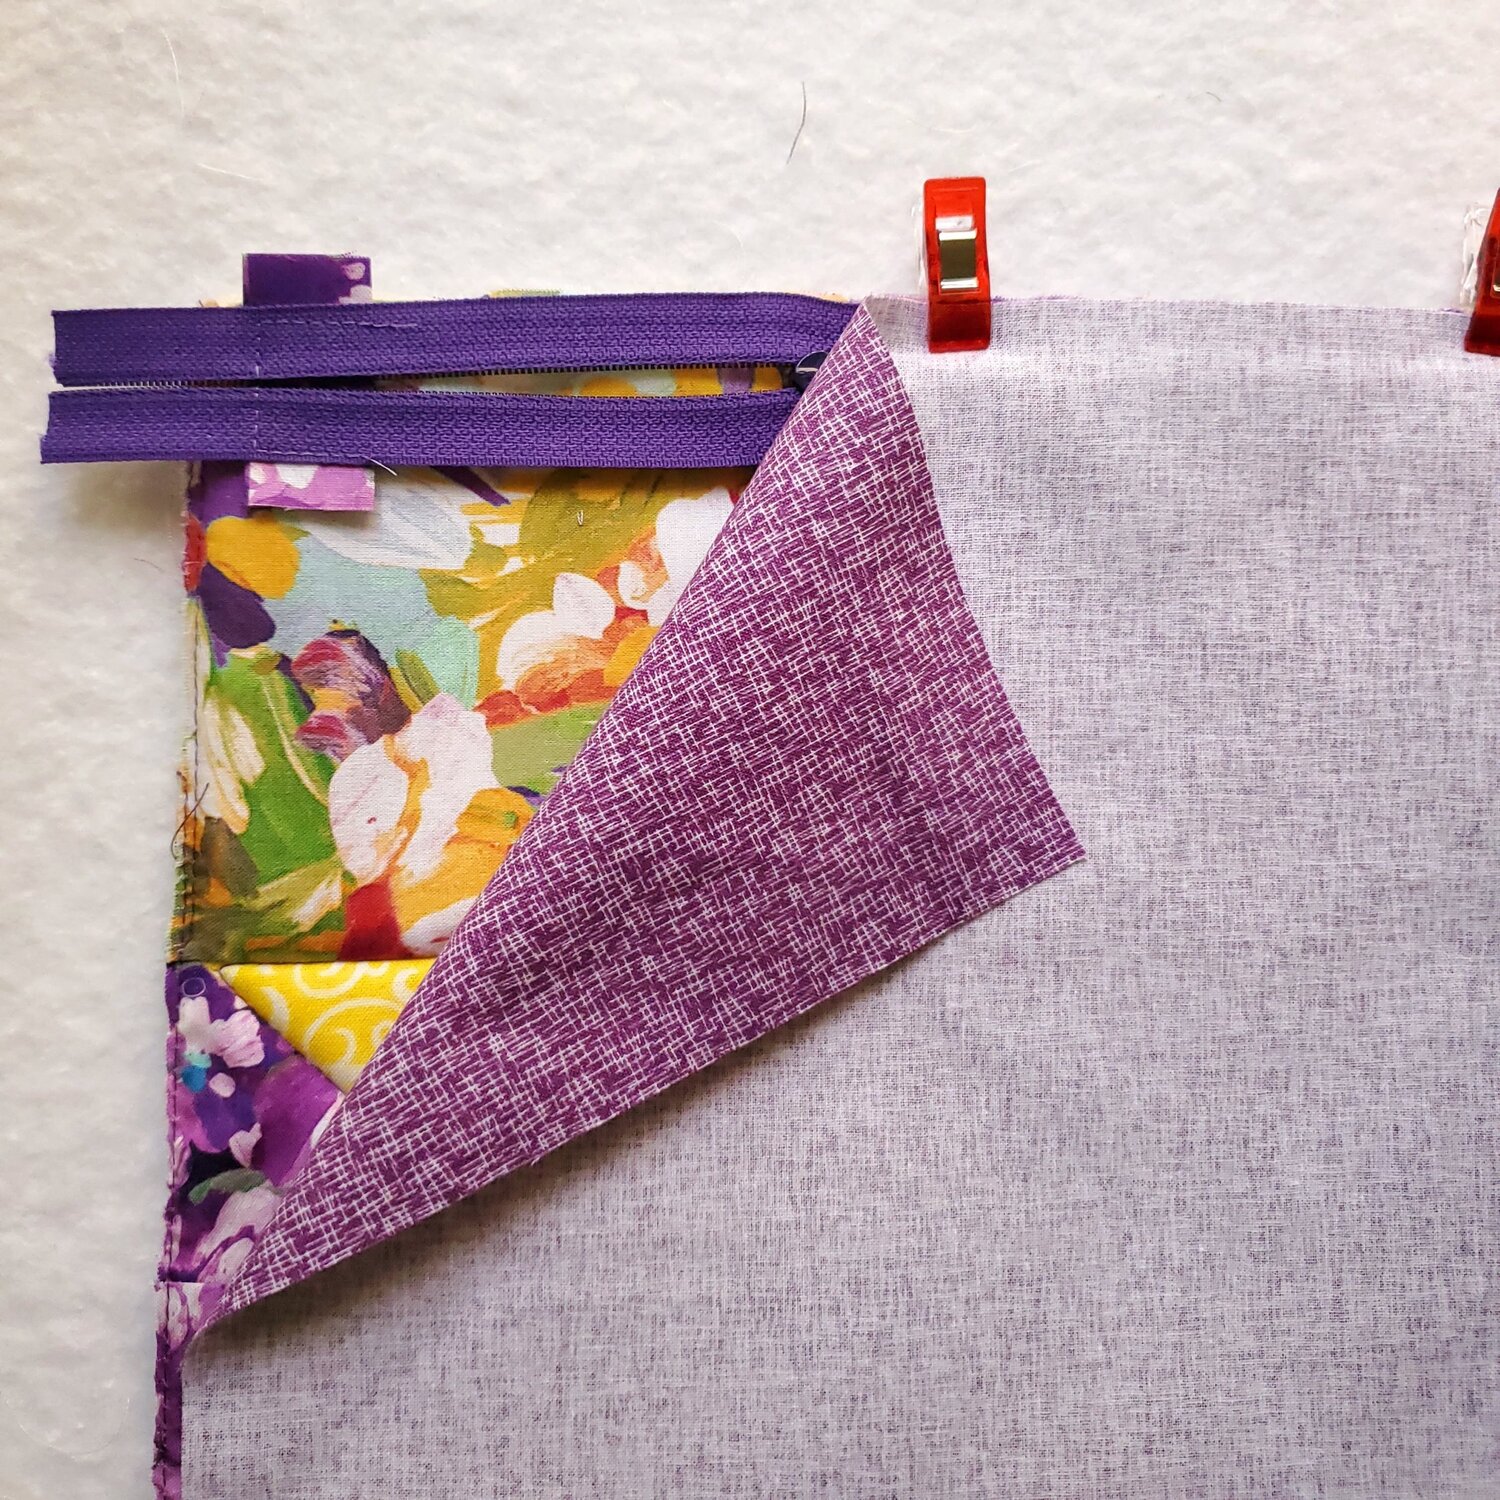
Sew with a zipper foot along the top edge. Press the seam so that the lining fabric is on the inside. Topstitch ⅛” from the zippers edge in a coordinating thread.

Do the same with the back side of the bag and the lining fabric. It is important to remember the right sides together when you line it up and use lots of clips.
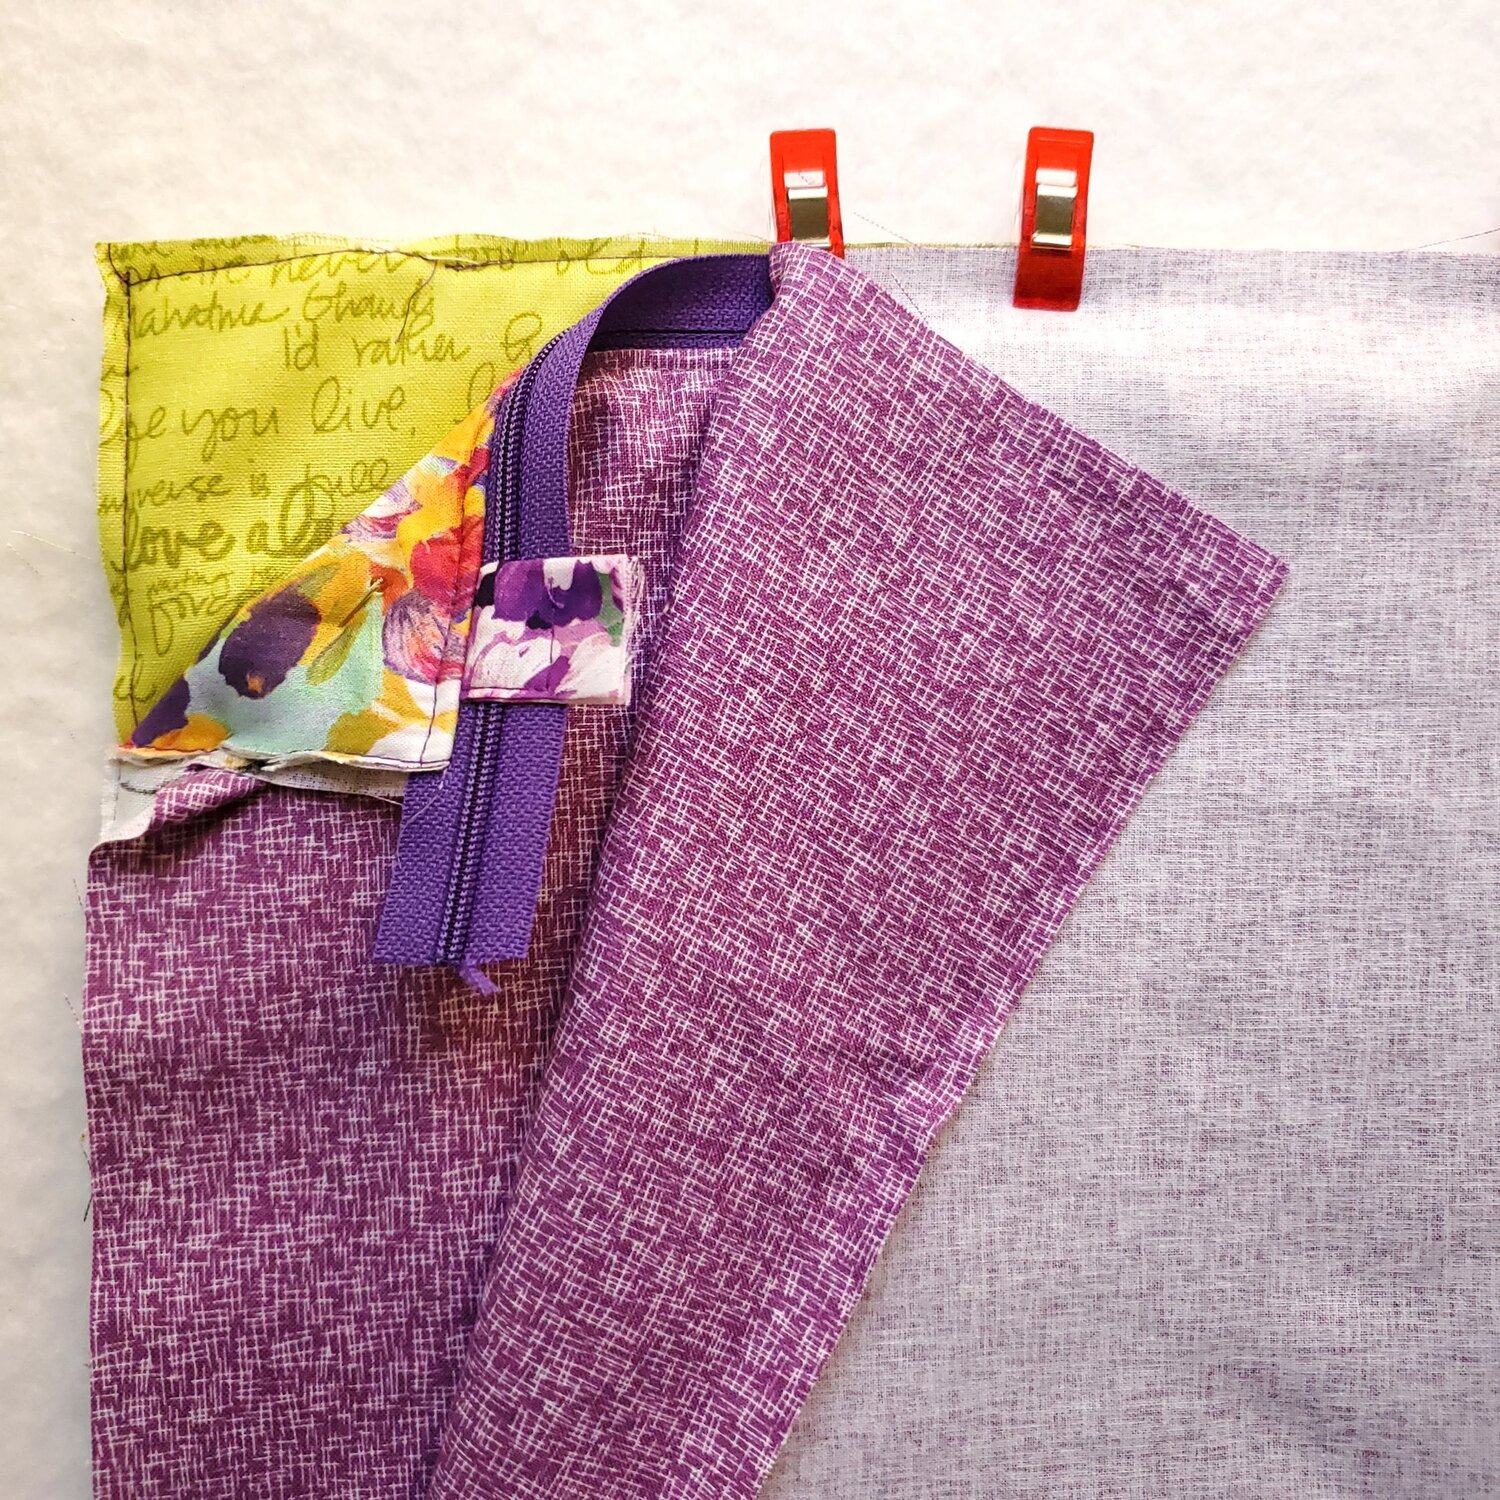
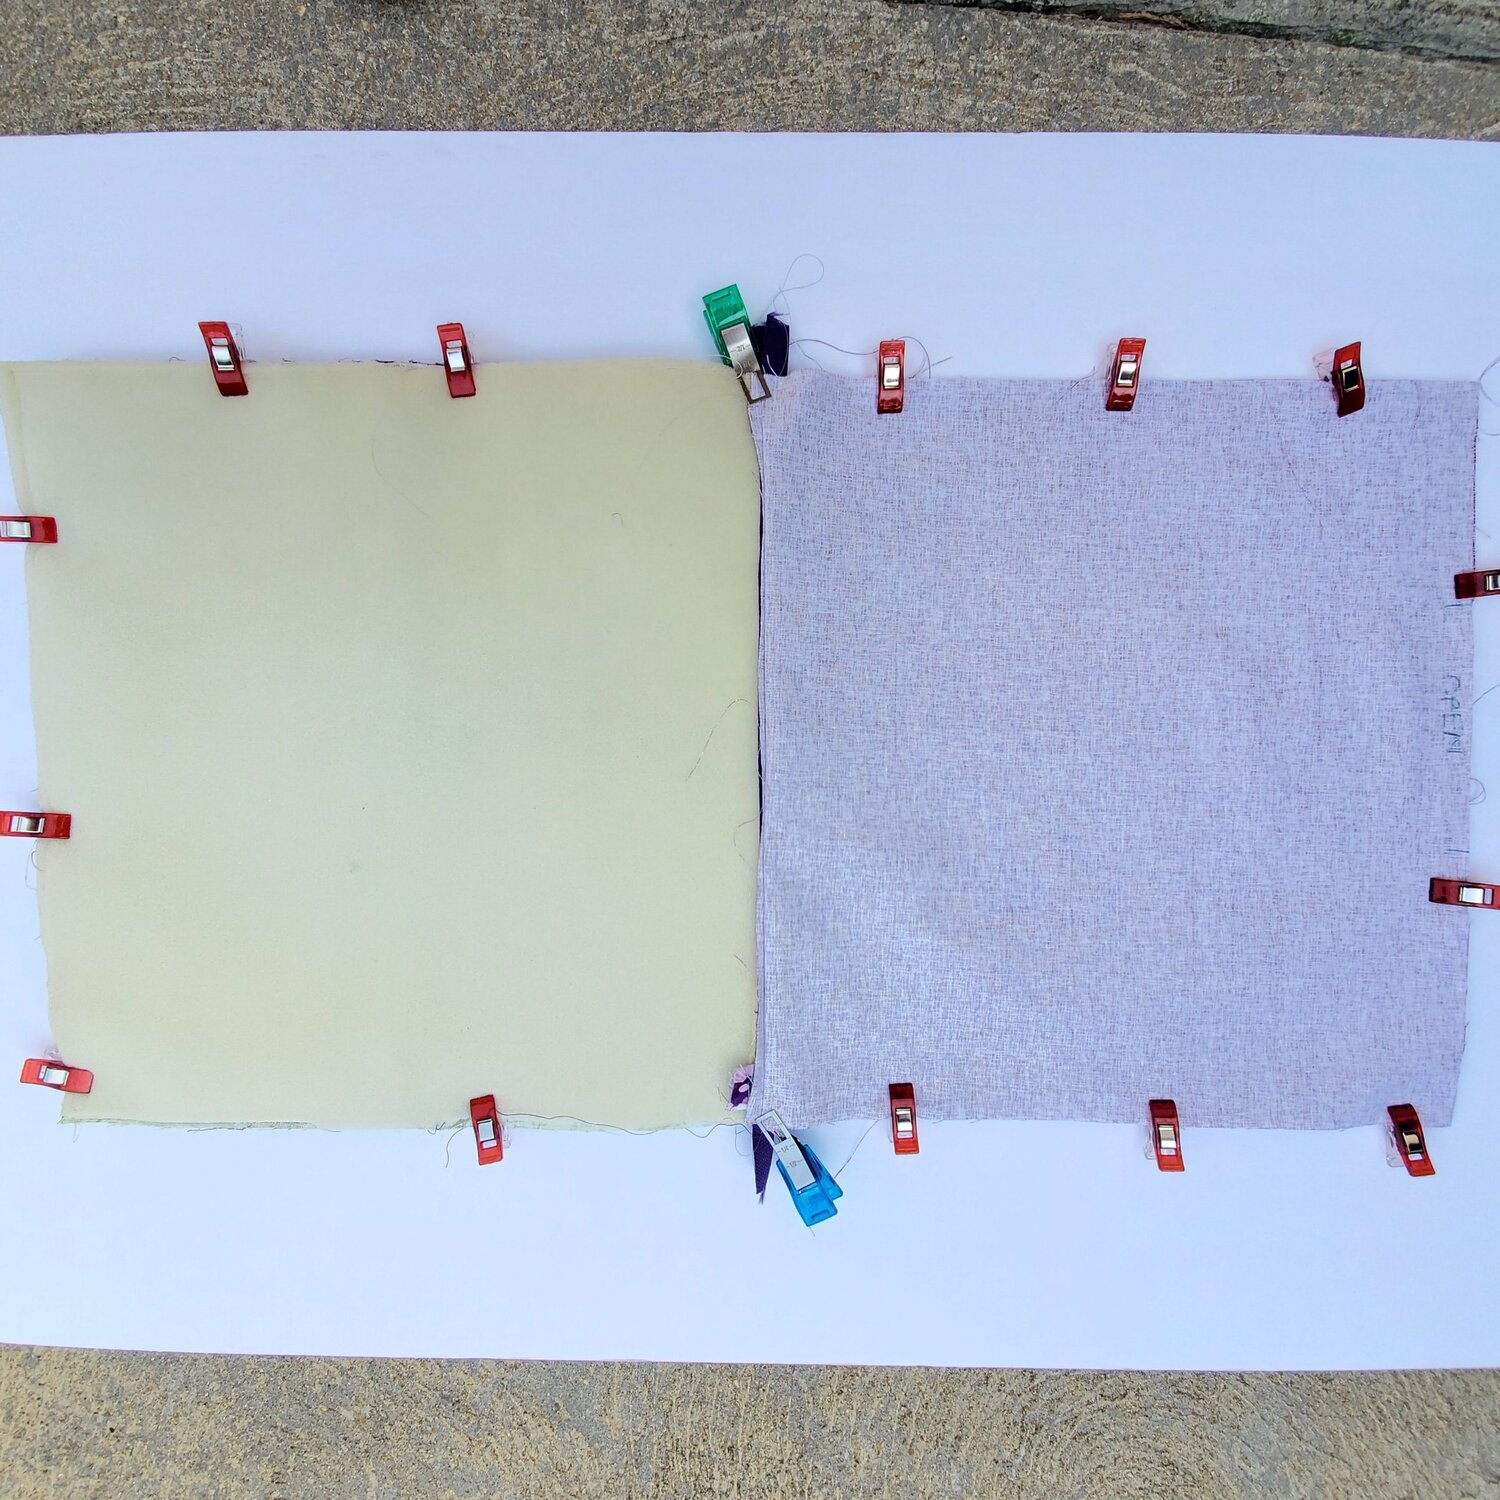
Topstitch ⅛” from the zipper's edge. Before the next step it is really important to be sure the zipper is fully OPEN. Lay the bag flat with the two lining pieces right sides together and the front and back of the bag right sides together and clip all the way around carefully aligning the edges. You will leave about a 4” opening at the bottom of the lining to turn the bag. The zipper is folded towards the outer bag.
Sew all the way around using the walking foot, leaving the opening. Trim the corners to reduce bulk and check your seams to be sure the fabric edge did not slip out due to the thickness of the soft and stable foam. Turn right sides out pushing out the corners fully for a crisp look. Topstitch the opening closed in the bottom of the lining fabric. Give the bag a good press with steam. For some added interest clip on a fun zipper pull.